Merry Christmas to ALL!
|
|
- guru
- Monday, 12/25/06 09:29:40 EST
|
Buzz Box Welder: Victoria, Generally speaking they are used almost exclusively for welding steel of various types including stainless steel using the proper electrodes. The advantage of electric arc welders is the wide range of available electrodes.
The question that is more significant is, "What can I make with a buzz box?" The answer is, almost anything. In the blacksmith shop you can build light and heavy benches, supports for vises and anvils, bending fixtures and machinery. In fact, with a grinder, a few files a drill press and an arc welder you can build almost any kind of machine.
Sculptural art work is often welded with a buzz box. This is because they are cheap and the artist's friend is cheap tools and materials. You can build finely finished or scrapyard art with a buzz box. Many modern craftsfolk use fine exposed welding in their work. Unless dog-do tecture is your goal then the welds should be first class.
The other thing you can do with a buzz box is LEARN TO WELD. The manipulation of the puddle with the arc is very similar in all electric welding and this is the least expensive way to learn.
A buzz box is a cheap and wonderful tool. Do not let anyone tell you otherwise.
What you cannot do with a buzz box is weld brass, copper or aluminium. For these you need other tools. For most non-ferrous work including jewelery and sculpture you need an oxy-acetylene outfit. This also has the advantage of a cutting torch for steel which when combined with an arc welder is an unbeatable productivity combination.
|
|
- guru
- Sunday, 12/31/06 23:17:20 EST
|
Rose Buds: Brian, the markings mean absolutely nothing except within the framework of a manufacturers part and size numbering system. There is NO STANDARD.
Generally rosebuds take a LOT of gas. For a small 1/2" diameter 6 port rosebud (the size that comes with most "standard" sets such as the Victor Journeyman set) you need a large two stage regulator.
Normally the oxygen pressure is fairly low as you need just enough to give a neutral flame. The acetylene should be from 10 to 15 (the max).
Popping back and blowing out is caused by too low of gas velocity. The gas must be leaving the tip at faster than the flame front velocity. Popping back can result in flame in the torch body which is very destructive and can burn out seals and mixers.
To prevent popping back you want to open a LITTLE oxygen then a LOT of fuel and then light. Crank up a big flame and then increase the oxygen to make a neutral flame. Even a small rosebud is like hanging onto a small rocket engine and you can actually FEEL the thrust. Do not be timid, the flame will pop back into the torch and then you will need to turn it off immediately! You cannot operate a rosebud gently.
Large rosebuds of 3/4" and larger generally cannot be run from a single full size welding cylinder. They require ganged cylinders and regulators in a manifolded system. The large diameter acetylene cylinder will run one of these but require a large regulator designed for 3/8" hoses. The best option for large rosebuds is a bulk propane tank.
Many acetylene tips are marked A for acetylene but just as many are unmarked. Those for propane and natural gas are marked NG. I am not sure why the same tips are used for these gases because there is a huge difference but that is how it works.
|
|
- guru
- Sunday, 12/31/06 23:35:11 EST
|
Brian K: I think You are running WAY TOO MUCH OXYGEN PRESSURE. Try using about 8 PSI on each. Ideally each valve would be open about a full turn with a neutral flame. This makes ajusting the flame less sensitive.
|
|
Dave Boyer
- Sunday, 12/31/06 23:42:11 EST
|
Rosebud: My cat hates the rosebud, and now goes away any time I uncoil the hoses on the torch sert.
|
|
Dave Boyer
- Sunday, 12/31/06 23:45:51 EST
|
brian kennedy-- The rosebud should run like any welding tip, equal acetylene and oxygen pressures, with a max around 7 or 8 for light duty equipment. NOT like a cutting torch with high oxygen pressure.
|
|
Miles Undercut
- Monday, 01/01/07 00:16:04 EST
|
A knife maker came to our guild meeting one time with an arbor press he used with his touchmark. There was a socket milled in the bottom of the ram to hold the stamp, and a set screw locked it in place. He put his work under the stamp and leaned on the lever.
Then he picked up a big hammer and whacked the top of the ram! I think everyone in the room cringed. But it did a good job with the stamp, and seemed to hold up pretty well under the blow. And arbor presses aren't exactly irreplacable.
|
|
Mike B
- Monday, 01/01/07 09:27:56 EST
|
Dave Boyer: Once heard a guy say his cat was also a blacksmith. One day it was curled up on the other side of the anvil. He dropped a piece of hot steel on it and it make a bolt for the door.
|
|
Ken Scharabok
- Monday, 01/01/07 11:00:49 EST
|
Hammering Arbor Presses: My big arbor press has a mushroomed ram that will not go all the way down. I suspect that whatever was being done with it was not successful. Before I set it up on a proper stand I will need to grind it back to shape then remove the ram to finish the job IF it will remove. . . abusing tools is abusing tools. Everyone has the right to use them as they see fit I guess. But many tools pass along to generation after generation of user and it is a shame to ruin something that under normal use will outlast you by many times.
|
|
- guru
- Monday, 01/01/07 11:42:57 EST
|
Ken, go to your room.
|
|
quenchcrack
- Monday, 01/01/07 12:24:41 EST
|
Guru, my best friend in college bought a new 914 in 1970 when we graduated. He still has it and it is in mint condition. He is also restoring a 1970(?) 911S. He has modified the engine slightly to put out over 350Hp so the power/weight ratio is fearsome. He said he has over $60K into it so far and is not done. This guy really needs a hobby. What could we do to our smithies with $60K?
|
|
quenchcrack
- Monday, 01/01/07 12:31:20 EST
|
Abused arbor press etc. We had a large compound action action arbor press in the tool room at the valve shop. Several times I saw a large sledge applied to the 4" square ram. It had a very large mushroom head. When I asked about the ram, the guys said that they had made that ram to replace a previous mushroomed ram, and could do so again. I guess they saw it as a consumable tool.
In the boiler pipe shop sat a forlorn large screw press. The wheel on top was perhaps 4', and had been lashed up to be motor driven, Both frame sides had huge brazed and scab plated repairs. It was cracked again and was scrappped not long after I noticed it. I would guess from the casting styling etc turn of the century or before.
|
|
ptree
- Monday, 01/01/07 12:44:45 EST
|
Ken, I like the blacksmith cat story, and may repeat it. You can come out of your room now. :)
|
|
ptree
- Monday, 01/01/07 12:45:38 EST
|
I am setting up an LG 100 and am having trouble with the foot pedal flexing. My foot pedal is a 3/8 by 1.5 ring. There is no slop in the pivot. Attached to the left side of the pedal there is in addition to the clutch linkage a shaft that acuates the brake. All is free but just the clutch return springs create too much resistance for the foot ring. Does anyone know how heavy the foot ring should be, or was? Also I am lubing the clutch blocks with 10/40 and am generating a fair amount of heat in an hours time. Not too hot to put your hand on but still can smell the hot oil. What should it be temperature wise?
Ben
|
|
Ben
- Monday, 01/01/07 12:47:55 EST
|
This looked the arbor press that goes on sale for $30 at Harbor Freight. Try to pass that on to the next generation, and they may pass it back (grin).
Actually, I do agree about abusing tools, even when they're cheap. On the other hand, he was using the press for the only purpose he bought it for, and at one hit per knife (for the touchmark) it will probably last a *long* time.
|
|
Mike B
- Monday, 01/01/07 13:38:10 EST
|
100# LG: The OEM treadle on mine was 1" to 1-1/8" solid round but that was an early model. Had nice forge welds to the flat bar at the back. The later on-edge treadles were a little flimsy. Yours sounds as heavy as the one on a 250# LG I had. They were not designed for after-market brakes. Bradleys used pipe so that it would be stiff and light weight. I would go with 1-1/4". I have also seen angle iron bent the hard way but it is not as stiff as it would seem.
|
|
- guru
- Monday, 01/01/07 14:01:16 EST
|
ok i got the "new edge of the anvil" and i says that each time you heat the metal it loses 1% its weight and it says thats a bad thing can you explain? cuz i would think the lighter the better???
|
|
thomas mayhugh
- Monday, 01/01/07 17:25:38 EST
|
1%,
I would say maybe an average of 1%.
It will depend alot on how hot the metal is heated how long its heated and the type of forge its heated in.
For example, Our blown gasser forge works a treat but we lose alot of steel as compared to a carefully managed coalfire.
Yes losing metal is usually a bad thing, If 1% goes away as scale at each heat. Ten heats loses 10% and so on. If the finished part needs to to be a given size, It needs to be appropriately larger piece to begin with which costs more for raw material and needs more fuel to heat the more material and so on.
|
|
- Mike
- Monday, 01/01/07 18:30:51 EST
|
o'ok i wasnt sure if the weght deminished or the metal thank you i understand now ^_^
|
|
thomas mayhugh
- Monday, 01/01/07 19:08:02 EST
|
Scale Loss Percentage: This has been reported to be as high as 2% but this value has been disputed by many. However, these values are the result of a soaking heat on an entire piece. In much of what we do in a small forge we do not let work scale that bad nor do we heat the entire piece at one time. You may heat a piece three times in a small forge but each heat may be in a different place. Many items are only heated enough to bend and often have no more scale after heating than when they started. Second heats may not produce as much total scale as the first if the part still has tight scale. So you may heat a piece many times in the process of producing a part but only lose 1 or 2% total. However, this does not diminish the fact that there ARE scale losses and they can be significant if one is not aware to the problem.
The worst thing that happens if you heat a piece too many times is a combination of decarburization and burning which leaves the metal weak and brittle. Thus it is good practice to make things in as few heats as possible. This is also where help in the form of strikers or a power hammer comes in to play. Although a single smith working alone may be capable of producing heavily forged work by using a sufficient number of heats the work may be metallurgically compromised compared to the same work being produced by many OR by a power hammer. It is common to take a large short billet and to shape it into a complex shape with details in one heat under a power hammer with the proper dies. The result has less scale and burning and is metallurgically superior than a piece repeatedly heated and worked by hand.
This truth flies directly in the face of those who preach a mysterious energy being imparted to steel that they have repeatedly worked over and over for many hours.
This is a case of not only is faster more efficient and cheaper it is also metallurgically better. Keep saving for that power hammer!
|
|
- guru
- Monday, 01/01/07 20:33:19 EST
|
Weight loss on Heating:
Under some circumstances 1% may be right, but it is not a universal truth. Actual loss depends on the composition of the steel, the atmosphere in the fire, and ther surface to volume ratio of the part among other things. Try to control the factors that contribute to the loss, and to make the most of each heat.
|
|
- John Odom
- Monday, 01/01/07 21:03:02 EST
|
I have to agree with the Guru. The less heats the less scaling/burning etc. I was the one who had to dispose of the scale from the forge shop that forged about 70,000,000# a year. We did all one heat forgeing, and most were only heated for a portion of the billet as were an upset shop mostly. We filled a 20 yard roll off to weight capacity about weekly. I have seen far too many roll off trucks with the bulldog barking at the sky! Ever see a tri-axle Mack stand up with 12 feet under the front axle from a severly overloaded hopper?
In production scale has to be considered. In production, with gas forges, scaling is far, far worse than induction, one of the reasons for changing. The induction does not produce near as bad a scale, holds the billet at temp for a shorter time, and has only a normal shop atmosphere. And we still filled those hoppers. Fine nasty stuff that turns to iron ore if it gets wet! We lined the hoppers with $50 dollar plastic liners to allow the brick to slide out when dumped. If it was forgotten, and the humidity was hig or ot rained it had to be jackhammered out.
|
|
ptree
- Monday, 01/01/07 21:03:49 EST
|
traditional japanese blacksmithing techniques? Yes, I'm gen-X. No, I don't have the slightest interest in swords, knives etc. However, I am interested in japanese cabinetry and it's associated hand-forged ironwork - latches, hinges etc plus the decorative work that makes japanese furniture so unique.
I was wondering if anybody could recommend some books, websites etc on this work? I have found several showing the finished product & the history of the craft, but nothing about the specific designs and techniques used.
thanks
|
|
andrew
- Monday, 01/01/07 21:24:37 EST
|
Andrew,
shibui.com is the site of a Santa Fe shop that deals in fine Japanese furniture and furnishings. The owners have put together a book, "Japanese Cabinetry The Art and Craft of Tansu". A friend in California has done both woodwork and ironwork in this genre. Where are you located?
|
|
Frank Turley
- Monday, 01/01/07 23:30:23 EST
|
Adelaide, Australia. I've seen the book & almost bought it, but it's definitely aimed at collectors. While it gives a great explanation of the style, it doesn't go far into the techniques used. I've also found a number of books on japanese woodworking/cabinetry, but these do not cover the incorporation of any kind of ironwork.
|
|
andrew
- Tuesday, 01/02/07 00:24:53 EST
|
I heard that 1045 and W1 is a good choice in steels for making your own dies for power hammers or a hydraulic forging press. Having trouble finding out where you can buy the steel in the block form, to build your own?
|
|
D Charlesworth
- Tuesday, 01/02/07 00:35:37 EST
|
Ptree, scale is a nice iron ore as it is: Magnetite just like the iron sands. Water and more O2 will just turn it into a different iron ore.
BTW I sweep the scale off the anvil into a can saving it up for a bloomery run. Some folks would allow that I'm cheap but they have not run a bloomery before, way too much work and charcoal for cheap metal!
Thomas
|
|
Thomas Powers
- Tuesday, 01/02/07 01:41:06 EST
|
Power Hammer Die Steel: You can make dies out of almost anything including mild steel if you want. Good hammer dies for large hammers are a top grade of 4150 or 4350. Small hammer dies are made from everything from 1040 (I don't recommend it) to H13 and S7.
When you use ANY tool steel from W1 to S7 the heat treatment is very critical for the best performance. A top grade piece of tool steel poorly heat treated is not as good as a much less expensive medium alloy steel heat treated properly.
Our online store carries A2 in stock large enough for a small power hammer (2" square). McMaster-Carr carries a wide range of steels in a variety of shapes.
Note that it is common to have to buy the steel you want in whatever form it is available in and then slab it out with a band saw. It is not unusual to start with a large diameter round and cut rectangles from it.
|
|
- guru
- Tuesday, 01/02/07 02:00:30 EST
|
Hardware: The best way to study many things is to obtain samples. But short of that there are many things in this world that there is no literature on and your only source is photos of hardware in use. From there on it is reverse engineering time.
|
|
- guru
- Tuesday, 01/02/07 02:03:37 EST
|
D Charlsworth: For hydraulic press forging dies that will see much use You should go with a hot work steel, preferably H13 or H21. H13 is a little tougher while H21 is a little more wear resistant. These steels stay hard at higher temps and resist heat checking better. Powerhammer dies generally don't get quite as hot as Hydraulic press dies.
|
|
Dave Boyer
- Tuesday, 01/02/07 03:00:35 EST
|
how do you draw out metal. i know this means lengthen it. i dont want to complety faltn it but how do i draw it out
|
|
- i
- Tuesday, 01/02/07 10:31:11 EST
|
Drawing Out:
By taking a red heat, using a cross peen hammer and placing the grooves perpendicular in the stock of the direction you want to go. Then, usually taking another heat, flipping your hammer over to the hammer side, begin flattening it down. Depending on how far you need to stetch it out and how much you want to flatten it will determine how many times you will need to repeat this process.
HTH
|
|
taylorforge
- Tuesday, 01/02/07 11:13:24 EST
|
Drawing Out:
Besides using the pien of your hammer you can also use the rounded edge of your anvil, the horn or a fuller (top, bottom or paired).
When using the pien of your hammer it needs to be smoothly rounded.
Many hammer piens are squarish and need rounding. It also helps to radius the side corners.
Smiths also draw directionally by using the corner of the face of the hammer.
When done with a fullering type surface the metal moves almost entirely in the direction perpendicular to the axis of the fuller.
How square you keep the fuller aligned and how equal the spacing of blows makes a difference in how straight and smooth the draw.
Different hammer faces act differently when forging.
Equally crowned or hemispherically dressed and flat faced hammers push the stock in all directions. Because there is more length in contact with the hammer long stock tends to move length wise more than width wise but the crowned hammer IS pushing it all directions.
Rocker or axially arced hammer faces act more like a fuller and move the metal more perpendicular to their axis. However, since they are closer to flat than a fuller they also spread the metal to the sides a small amount. However, they do move the stock a lot more in one direction than a crowned hammer.
The basic forging exercises are pointing, drawing and upsetting. It pays to practice these and to carefully think about what is happening as you do them. In time the metal will move easily in the direction you want it too without any thought.
|
|
- guru
- Tuesday, 01/02/07 12:32:53 EST
|
I only own a OA setup and can do most anything with it, including my JYH a couple of years ago. However, I've always been intrigued with arc welding and the discussion about the buzz box brings a question to mind. Assuming you own both OA and buzz box, which is cheaper to use for welding long runs as well as spots? Depending on the answers here I might have grounds to convince my wife I need to have both units ;-)!
|
|
Thumper
- Tuesday, 01/02/07 13:18:47 EST
|
Thumper, how much gas would you use for a 12" run ? How long would it take you plus prep time.
5 lb of 6011 1/8 costs less than $10.00. Just got a buzz box for a christmas gift. :) I still NEED a OA set. I really think you need to find or start a project that simply CAN'T be completed without one. good luck :)
|
|
daveb
- Tuesday, 01/02/07 13:49:05 EST
|
Don't forget auto spooling MIG type arc welding. In my opinion faster and cheaper. But SMAW lets you have more control... I liken it to driving an automatic vs. manual tranny.
|
|
- Nippulini
- Tuesday, 01/02/07 13:55:47 EST
|
Gas vs. Elec.: Never saw a cost comparison but that 12" 3/8" bead mentioned above could be arc welded in a minute or less and would take 20 minutes or so with gas. I would guess an 10:1 (or more) fuel cost difference.
OA is most efficient for cutting and arc welding is more efficient for building. OA is better for fine work that you would need TIG (much more expensive equipment) to do electrically. You need both.
MIG hardware is very expensive compared to a buzz box and the MIG consumables include tips, nozzels, wire AND gas. Average equipment life is much shorter with MIG. Where MIG excels is production fabrication of medium weight steel (it is difficult on very thin work and needs HD industrial harware for heavy work). But if you are not doing production work and just want to be the most efficient you can be for general work then a buzz box is the way to go.
Right now my MIG outfit has a rusted spool of wire which must be replaced and the CO2/Argon cylinder is probably empty. Mice also chewed up the unreinforced gas hose. A big pain to get back going if you do not keep it up all the time. The worse case with my old buzz box is I might have to dry out some rods OR run to the hardware store or auto supply and pick some up.
I love a MIG welder for what it is designed for. But a buzz box has a very long life without maintenance or extra consumable and does the job nearly as well.
|
|
- guru
- Tuesday, 01/02/07 14:54:21 EST
|
Since we're talking about the merits of buzz boxes, I've got a question along that line. I've read several times that a buzz box can be used for cutting when a DC rod is used with the welder set to run on AC. Has anyone ever tried this, and if so how well does it work?
I would expect that the degree of control would be nowhere near what you have using OA, but for quick rough cuts it might be an option. Any opinions?
|
|
Steven Galonska
- Tuesday, 01/02/07 15:20:47 EST
|
Steven, They make both solid arc gouging rods and hollow air-arc gouging rods for use with an AC buzz box. The result is as ugly or uglier than you can imagine. It works for cutting up scrap but not for fabrication. I've used any rod at hand and high amperage to cut sheet metal such as cutting up an auto body.
So. . it works but is VERY rough. I've never used it except when I was desperate.
|
|
- guru
- Tuesday, 01/02/07 15:52:14 EST
|
More on arc gouging.
In the welding business arc gouging is often used to make weld preps by chamfering edges or cutting out old welds. I suspect this is used primarily because the weldor has arc welding equipment on hand and not a full complement of equipment.
|
|
- guru
- Tuesday, 01/02/07 15:55:38 EST
|
Note that good reliable arc welders can often be found pretty cheaply used---my old lincoln tombstone was $40 and parts and accessories for it can be found new and used all over. (bought a new ground clamp for it at the fleamarket; the current one may outlast me but a brand new one for a couple of dollars was hard to resist.)
Now that I have a bandsaw and am working to get power to the shop my dreams of a treadle hammer to go along with my screwpress and triphammer are beginning to finalize...
(I've got the base, anvil and back beam waiting...)
Thomas
|
|
Thomas P
- Tuesday, 01/02/07 16:56:12 EST
|
Arc gouging IS nasty work. BUT it is fast, faster than the torch.I've only used it once myself and that was in fixing an arm on an 490D excavator...guy craked it like an egg by hitting too many trees and rocks with it. To add to what Guru said the hollow type is used with an air compressor. The rod heats it up and the compressed air blows chunks of metal out. Very fast, hot and nasty work, but useful when you have a lot of metal to be removed.
|
|
taylorforge
- Tuesday, 01/02/07 18:16:46 EST
|
Air-arc gouging is a little like an oxygen lance. The air helps the steel burn and creates more heat. The difference using air is that it is not self continuing, thus the arc is needed. I've not used an oxygen lance but they make tubes with coatings that act as flux and can be used to cut stone as well as cast iron.
|
|
- guru
- Tuesday, 01/02/07 20:54:40 EST
|
i, drawing out.
One thing that's sorta interesting about drawing out is that you are actually upsetting it in one dimension, then turning and upsetting it on the opposite dimension......or something like that, and upsetting in two directions actually draws it out.
|
|
- Tyler Murch
- Tuesday, 01/02/07 21:13:36 EST
|
Air arc gouging. I would take a small exception the the use of air arc in a welding shop because they may not have a full complement...
In the boiler shops, we used BIG air arc to gouge out welds that had X-rayed as bad. When you do a weld for a pressure vessel, it is a full penetration weld usually with a 55 degree prep. Think how much metal has to come out to get to the root of a weld in a 6" thick vessel wall. We used 3 or 4 Linchon motor generator sets linked to push a huge air arc. It used a 3/4" full port ball vale at the torch. We set up 1/4" plate shields about 30' downstream from the gouging to stop the flying molten metal. If it was closer the metal would eat it up from the velocity and heat. You have never heard a sound like that air arc in a huge high bay boiler shop. Very impressive at night. I had two safety glasses lens ruined from metal droplets hitting and melting in, and I was hundreds of feet away!
Than they ground the ragged edge and welded up the hole. And this was the industry practice. This shop had about every machine and weld and forge process you can imagine, but air arc served that purpose better.
|
|
ptree
- Tuesday, 01/02/07 22:14:24 EST
|
Buzbox cutting and AIR ARC: The process described By Ptree uses a carbon electrode and a jet of air that blows the melted material away [and all over the place] It is used for cutting gates off castings and cutting scrap cat iron as well. It is messy to do but in the hands of a skilled operator makes pretty nice weld preps. Smaller carbons, about 3/16 can be used with a typical 200 amp machine. The process using cutting solid electrodes and a smaller welder can be duplicated to a degree with a penetrating electrode like a 6010 or 6011 at about twice welding amperage. I have heard of soaking the electrodes in water to slow their melting rate, but by that time I had A/O and didn't need to try it. It is a messy as the others said, but it works.
|
|
Dave Boyer
- Tuesday, 01/02/07 22:58:05 EST
|
In defense of MIG welders: I have had much better luck with MIG welders than Jock has. However to get a really usefull one there is a MUCH greater financial investment than with stick. While I will always suggest to anybody who has no arc welding equipment at all to get an AC buzbox to start, it is an economicly based suggestion. I would rather drive an older auto and be able to weld with MIG than drive a slightly newer car and weld everything with stick. ESPECIALLY ALUMINUM. Yes You can weld aluminun with stick, but only with DC [and I don't recommend it, but have done it]. The 250 Amp @ 40% light industrial MIG machines will handle most of what us folks do. With the addition of a spool gun they will weld aluminum fast and easy.
|
|
Dave Boyer
- Tuesday, 01/02/07 23:12:56 EST
|
Tyler,
You're probably thinking of side spread, which is not really upsetting. When upsetting, you reduce length and increase section. When drawing, you increase length and reduce section.
|
|
Frank Turley
- Tuesday, 01/02/07 23:16:01 EST
|
I know that Frank, but when you hit down on a bar, the blow causes the section you hit to become shorter and fatter/wider. In a way, it is upsetting.
|
|
- Tyler Murch
- Tuesday, 01/02/07 23:27:05 EST
|
Tyler, Show me. I'm from Missouri.
|
|
Frank Turley
- Tuesday, 01/02/07 23:40:07 EST
|
Dear Guru,
I want to weld some 3/8 stainless round. I have a buzz box and OC torch. My buddy with the MIG and TIG expects a bottle of Irish every time. I'm cheap and to long a drive home! Can I use what I have!
Thanks, Steve
|
|
Steve Paullin
- Tuesday, 01/02/07 23:52:04 EST
|
Steve, You can do it easily with SS rod. However, a pound or a minimum purchase MAY cost as much as a bottle of Scotch.
|
|
- guru
- Tuesday, 01/02/07 23:57:52 EST
|
Tyler, upsetting makes more compact mass while spreading even though it makes a larger diameter is making a less compact mass. You will lose this argument.
|
|
- guru
- Tuesday, 01/02/07 23:59:17 EST
|
To me, upsetting is making something shorter and thicker. If you hammer down on one side of a bar, you are making it shorter and thicker. When hammering down on the bar, the metal spreads evenly in all directions, that is why you have to then turn the bar 90 degrees and hammer on that side. You are taking away the spread that occured in that direction and adding to the spread that occured in the direction that makes the bar longer. That is what causes the bar to be drawn out.
|
|
- Tyler Murch
- Wednesday, 01/03/07 00:28:48 EST
|
Nope, incorrect use of terms. Upsetting makes thicker in all directions. You are flattening and then flattening again. .
All the action in drawing out is the opposite of upsetting.
|
|
- guru
- Wednesday, 01/03/07 01:24:41 EST
|
where on the net can i see examples of pioneer ,canadian if possible, iron work design indoor ornamental pieces for a log cabin? we want to create a log holder, pot hanger suspended from the ceiling and a shelf for over our stove
|
|
cathygriggs
- Wednesday, 01/03/07 01:29:02 EST
|
Steve P: Yes You can. If You have an AC machine You use the rods with the -16 suffix. -15 is DC only. The torch will be less satisfactory, don't bother. Use 308 rods for 302 to 308 material, 316 rods for 316 material, and 309 for carbon steel to SS. 347 is good for any 300 series [non magnetic] stainless. Check the repair rod section of a welding supplier for small packages. TSC farm stores and ACE Hardware probably have or can get small packages of rods too. As Jock points out, prepare to be ripped.
|
|
Dave Boyer
- Wednesday, 01/03/07 01:29:50 EST
|
Welding rod is also readily available on eBay. Even stainless at a decent price.
|
|
Ken Scharabok
- Wednesday, 01/03/07 07:50:35 EST
|
Cathy; good luck on your search---"Pioneer" and "Ornamantal" don't usually intersect much in my experience. You need a generation or so past Pioneer to start gussying stuff up.
Thomas
|
|
Thomas P
- Wednesday, 01/03/07 11:28:34 EST
|
Thanks Thomas for pointing out my inconsistency in design putting pioneer and ornamental in the same boat.
|
|
cathy griggs
- Wednesday, 01/03/07 11:46:57 EST
|
Cathy Griggs,
The closest thing to pioneer/ornamental would be some of the Pennsylvania German derived ironwork, q.v. Don Plummer, "Colonial Wrought Iron". The best reference is probably Albert Sonn, "Early American Wrought Iron", although the big book is getting pricey. Sometimes you can get images from eBay sales or search engines, if you type in the right Search words. For example, "sawtooth trammel" or "chain trammel" might turn up an adjustable pot hook image.
|
|
Frank Turley
- Wednesday, 01/03/07 12:11:01 EST
|
The Sonn book is available on CD for about twenty bucks, I believe. Check eBay. If you can 't find it, let me know and I'll get the link off my home computer tonight.
|
|
vicopper
- Wednesday, 01/03/07 14:04:05 EST
|
Steel Identification:
I was going through some of the boxes I cleaned out of my grandfather's garage a while back and came across a large box of tool blanks for a very large lathe. Some of them are as large as 3/4" sq. x 8" long. Since they are far larger than anything I can use in my lathe, I was thinking they might be good material for chisels or punches.
Most of them seem to be labeled "Crucible Rex 95". Does anybody have an idea what the composition of this steel might be?
Thanks.
|
|
Steven Galonska
- Wednesday, 01/03/07 14:21:31 EST
|
Books on CD and digital copies:
Please be aware of where you obtain digital copies of various books. Currently there is a large black market and pirate market for illegal copies of various references. This applies to more than just old references that have ben around. Michael Porter was very upset and disheartened to find his book on forges and burners was scanned and copies being distributed on pirate sites operating out of Russia. This kind of operation is impossible to stop much less get legal satisfaction from. He will probably never write another book again due to this experience.
When there is no financial incentive to write or publish then there will be no new books.
Copyrights on old works are not public domain unless they were published before 1926. This means that any work that is reproduced without the permission of the copyright holder or their heirs is an illegal copy. And just because you cannot easily find an author's heirs or the current copyright holder does not make it fair game.
|
|
- guru
- Wednesday, 01/03/07 15:11:16 EST
|
Just curious if someone could give me an estimate of how much propane a 3/4 burner would burn in an hour.
|
|
- Boogerman
- Wednesday, 01/03/07 16:23:30 EST
|
Aspirated? Blown? How big an orifice? At what pressure? How hot you running the forge
In general my forges running at a good clip burn about 1 gallon of propane per hour.
Thomas
|
|
Thomas P
- Wednesday, 01/03/07 17:43:48 EST
|
Crucible tool steel: Go Here: www.crucibleservice.com/datasheets/index.cfm
I did not see a Rex 95 but there is a Rex 45. The stamp on the steel may be a 4, not a 9. It is some pretty potent stuff.
|
|
quenchcrack
- Wednesday, 01/03/07 18:15:32 EST
|
I seem to remember the REX 45 from the valve shop days. I believe we used it for shave tools in the screw machines. Tuff service.
|
|
ptree
- Wednesday, 01/03/07 18:58:12 EST
|
I recently made a custom order hatchet for a customer. It was made of 5160 steel w/ a wrap - around - a - drift construction. Apparently I should have maybe normalized it after the forge weld and before the quench. It split along the forge weld seam perfectly so that it now has two parallel cutting edges 1/8" apart. I would really like to repair it by forge welding, I just want to get in and out with a minimum of hammering and I really need to get it evenly fluxed inside. Jim hrisoulas says he makes a saturate solution of borax boiled in water and uses it as a liquid soak pre - flux. Has anyone else tried this? Any other suggestions for this weld? Otherwise I would just use anhydrous..... Oh, and has anyone had trouble reaching welding heats in a venturi forge in extremely cold (10 Farenheit) weather. And, what the hell, how can I preheat the (atmospheric) blast on a reil type venturi burner?
|
|
salem
- Wednesday, 01/03/07 19:07:14 EST
|
I think I see where Tyler's coming from on this. Let's say you start with 4" of 1" round. You start upsetting it, and it gets shorter and thicker. You keep pounding on it. Eventually, it's 1/4" tall and 4" in diamater. At some point, you stopped upsetting and starting spreading (or flattening). But where?
|
|
Mike B
- Wednesday, 01/03/07 20:07:26 EST
|
Good point Mike. I was thinking of that as well, but was going to just drop the topic.....whoops.
Good point. It is still upsetting...in a way.
|
|
- Tyler Murch
- Wednesday, 01/03/07 20:32:59 EST
|
salem: I would try using a heat gun - like you strip paint with. Based on the potential fuel savings I've read can be derived through pre-heating the air, I wouldn't mind betting it would easily offset the electricity cost. Even if it didn't, I suspect it might be the difference between a marginal forge reaching welding-temp or not - so you could just use it when you want to weld.
Has anybody tried this? I'm still building my gas forge, but am really interested in pre-heat options that are easier to implement than recuperating exhaust gasses.
|
|
andrew
- Wednesday, 01/03/07 21:01:09 EST
|
just to be clear, I'm talking about feeding pre-heated air into the back of your burner. I think it would work well on a side-burner. On a reil-type burner it would heat the propane injector. While it's good to burn pre-heated propane, I think hot pipework is not so good. I'd limit it to short bursts & keep an eye on the temperature of the fittings.
WARNING: You may blow up your entire county using this technique. Try it at your own risk.
|
|
andrew
- Wednesday, 01/03/07 21:10:17 EST
|
Andrew, I don't thick you will save much fuel by preheating the combustion air with a heat gun. Energy wise it is pretty nuetral as it take a fixed amount of BTU's to raise the air temp. The reason for recuperative preheating is that the amount of energy in the exhaust is high, and once in the exhaust no longer contributes to efficiency unles you recoup some energy by doing something like preheating combustion air.
|
|
ptree
- Wednesday, 01/03/07 21:29:39 EST
|
Steven Galonska: The toolbits are most likely high speed steel of one sort or another. If You are going to make "struck" tools [ones You hit with a hammer] You are going to have to ALWAYS remember to hit them with a soft hammer, as there is no really good reliable way to draw back the end You hit. You may be able to use some of them in a smaller lathe by holding them directly in the toolpost rather than in a toolholder. In any case You have a good supply of already hardened blanks for making tools.
|
|
Dave Boyer
- Wednesday, 01/03/07 21:44:57 EST
|
Burning a pound of propane per hour creates about 6000 watts of heat. I think my one-burner forge burns a few times that when cranked up to welding heat. Say 20,000 watts. A 1500 watt heat gun isn't going to make a huge temperature increase, but I guess it could make the difference between welding and not welding.
The problem I see is that blow a heat gun at the burner inlet is going to increase air flow. Unless you have some way to add more gas, you'll end up with an oxidizing atmosphere.
Also, a large amount of heat loss from a forge is due to th need to heat the intake air (that's why you're trying to preheat the air, of course). Even though the air from the heat gun is hot, it's a lot cooler than the inside of the forge. So if you're adding more air than is necessary to burn the gas you're introducing, you may cool the forge rather than heating it more. You might be figure out how to position the heat gun so that it heats the intake air without blowing more into the burner, but it would be tricky.
|
|
Mike B
- Wednesday, 01/03/07 21:51:42 EST
|
I'm sure this has been asked before but here goes. IS there a simple method of resurfacing the face of an anvil? I have recently acquired a servicable unit but the face is quite dimpled but relatively flat. I would prefer a smoother working area. Thanks.
|
|
TWEAVER
- Wednesday, 01/03/07 22:29:05 EST
|
I thought the aim or preheating was to improve the efficiency of the burn rather than simply pushing more heat energy directly into the forge - ie extract more energy from the fuel. Anyway, I guess it's an easy one to test.
|
|
andrew
- Wednesday, 01/03/07 23:13:54 EST
|
TWEAVER: A woodworking belt sander will do a nice job, clean out all the sawdust and get some of the blue zircona belts. Start out with coarser ones, about 40 grit and work up till Your happy.
|
|
Dave Boyer
- Thursday, 01/04/07 01:13:12 EST
|
Anvil surfaces: Sanding and light grinding is the way to go on an anvil face even if it results in a not perfectly flat surface. Severe divots can be worked around and are best left alone rather than welding to hardened tool steel and making hard and soft places that will end up wearing oddly and being as bad or worse than the original divot.
Machining and heavy grinding is NOT recommended. Folks often do this to dress out sway or chipped edges and end up with too thin a face or a soft anvil (the hardness drops of drastically with depth). The result is a ruined anvil.
So just dress as little as possible and then USE they anvil.
|
|
- guru
- Thursday, 01/04/07 02:07:01 EST
|
Re-forge welding alloy steel: Salem, the choice of an alloy steel for this design was not a good starting point. With forging heat you lose carbon and create a weaker interface which also has the problem of hard to dissolve non ferrous oxides in the joint. The old wrap around designs were from the wrought iron era where tools were steeled and the body weld was similar to the rest of the metal. In your case, instead of a solid steel edge you have the weak decarburized metal exactly at the edge. . .
To repair this I would start by mechanically cleaning the surface with sand paper if possible. Soaking in a descaller (either acid OR alkaline) would get into the non-accessible areas. Then when you go to heating and fluxing apply the flux as early as it will start to melt and flow on the surfaces. You may want a stronger flux with some flourite powder in it.
Cold Weather Forging: This has great effect on your forge temperature and I have known people to not be able to achieve a decent forge welding heat. A friend of mine built a recuperative heater for his coal forge so that he could get a welding heat with low air flow.
Preheating the incoming air in a forge can raise the forge temperature by roughly the difference between ambient heat and the preheat temperature in a marginal forge. Preheating the air is like heating ANY air. As suggested a hot air gun will provide hot air and there are fans made with internal heaters that would do the job.
In an atmospheric burner system you probably do not want forced air (unless there is a burner design problem). So what you do is build a hot air plennum across the intakes and leave the plennum open so that it is at atmospheric pressure. Air can be directly or indirectly heated in the plennum. This can be done with exhaust gases. Anything you do ends up requiring a lot of duct work even if the forge was designed for it.
Often letting the forge preheat for a LONG time helps get that little extra you might need. . .
DO NOT try to preheat the incoming fuel.
I've built atmospheric forges for simplicity but I prefer a blown burner. There are far too many advantages. . .
|
|
- guru
- Thursday, 01/04/07 02:32:02 EST
|
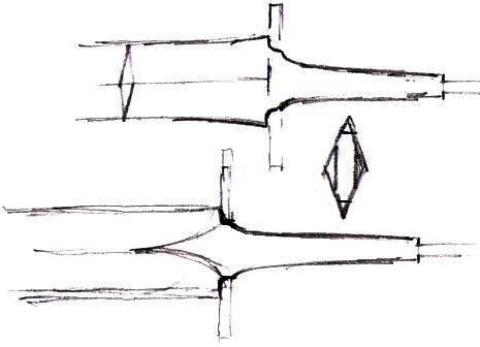
This is a rather technical bladesmithing question. I am getting ready to attempt a medieval longsword, but am having trouble figuring out the blade geometry. Specifically, how is the tang-to-blade transition accomplished on a blade without a riccasso? I have never seen a riccasso on this type of sword; the sharpened edge apparently extends all to way to the crossguard. If the cross section of the blade is a flattened diamond, and the cross section of the tang is rectangular, this would seem to present a problem. Thanks for any info.
|
|
Hunter Goldberg
- Thursday, 01/04/07 02:56:58 EST
|
Andrew: There are also other options you can look at, such as increasing the thickness of the insulation or internally coating with something like ITC. Also a significant difference can be made in decreasing the size of the opening.
|
|
Ken Scharabok
- Thursday, 01/04/07 05:25:01 EST
|
Transitions: Hunter, These type of things are done either very poorly or very well. Among other things most good hand forged blades have a "distal" taper. That means they taper when looking at them from the top. This is often not a straight line transition but a curve that is more progressive at the guard. Done well it should not be an obvious change. This gives you enough thickness for two things:
1) Flattening of the tang without great loss of strength
2) Room for a significant tang radius.
The error many blade makers make and many have trouble visualizing anything else is a square cornered tang. This is very bad design and can result in breaks or the least constant loosening of the guard.
When viewed from the side the tang should taper to where it almost breaks through the grip. The transition into the blade should have as large of radii as possible (1/2" or greater is good). On a diamond shaped blade there may be a short square step for the thickness of the blade that only reduces the width of the blade by about 30%. Even these shoulders should have significant radii. So you have four partial shoulders at the corners of the diamond that do not reduce the strength of the tang significantly. With a carefully fitted guard these disappear and the guard creates a clean shoulder for the grip. Lots of careful filing and fitting of parts.
There are other ways to approach this without a riccasso. The blade may have a triangular shaped flat on both sides at the guard making a rectangular section of about half the width of the blade. This increases the angle of the blade taper for a short distance but keeps the general straight lines of the blade.
You can also cut and fit out of a pure diamond section but it must be done delicately and it is not as strong as the above methods.
|
|
- guru
- Thursday, 01/04/07 09:45:53 EST
|
Shoulder Note: When I drew the above I drew sharp corners at the pommel shoulder. These are a drawing convention when drawing shoulders that should not be followed in real life. The problem is that in real life it is also easier to make square shoulders just as it is to draw them.
Leaving a fillet radius is tricky because it requires LEAVING material, never taking off more. Once it is taken off it is too late. Then when fitting the guard you are not making just a snug fitting rectangular hole. You are making a hole with matching radii. Same for the grip.
All this makes doing the job wrong very attractive.
|
|
- guru
- Thursday, 01/04/07 10:14:41 EST
|
Fitting Note: These delicate fits are one reason I recommend the inexperiance to do wood modeling of blades and blade parts. The same can also be done in non-ferrous or mild steel just for practice. It is much less expensive to make a mistake on a practice piece than one that has many hours of labor and possibly expensive materials in it.
|
|
- guru
- Thursday, 01/04/07 10:26:16 EST
|
i,am a begginer and i was make a knife for fun,but in indonesia not easy to get metal or steel to make knive. i usually make it from used bearing,automotive bearing.would you mind giving about metal sources?i am sorry about my poor english.thanks
|
|
agustinus dino febrianta
- Thursday, 01/04/07 10:31:59 EST
|
i just find this sites,would you mind to giving me information about steel or metal sources?i usually use a used bearing for my knife
|
|
- agustinus dino febrianta
- Thursday, 01/04/07 10:37:23 EST
|
agustinus, Generally springs, either coil (round) or leaf (flat) are good materials for knives. Springs vary from 60 to 95 points of carbon and are easier to heat treat than bearing steel. Many saw blades such as band saw and large circular saw blades are often made of good steel as well.
If you are looking for sellers of blade steels there are many on the web. However, most of these are based in the U.S. and I do not know which ones would ship internationally.
|
|
- guru
- Thursday, 01/04/07 10:42:37 EST
|
agustinus. Selemat Pagi! (about my limit of bahassan)
Car springs are generally suggested. In bearings while the balls/rollers are usually a high carbon steel on larger bearing the outer race will sometimes be case hardened steel and so will be fairly low in carbon except for the very surface of the bearing.
Note that the scale on auto springs is hard on files and so should be removed with a grinder or by soaking overnight in vinegar or by a *SHORT* immersion in a stronger acid and then washing and neutralizing.
I spent a month in Jakarta one on business and had a very nice time; feel free to e-mail me questions if you would like.
Thomas
|
|
Thomas P
- Thursday, 01/04/07 11:43:19 EST
|
Tyler and Mike B.,
Sorry I had to get in on this one. I suppose that it stops being upsetting and become spreading at the moment when the thickness becomes less than the diameter/ width. Of course this raises the question of when does length become thickness because you upset to shorten length and spread to thin out the thickness. So really it might all depend on the orientation of the workpiece to the hammer...there is a reason I only took one philosophy course in college.
-Aaron @ the SCF
|
|
thesandycreekforge
- Thursday, 01/04/07 13:51:23 EST
|
Hello,
Here is a dilema that will be coming up for me this spring. I have a customer that has a sunken patio that is seperated from the yard by a low retaining wall that has a gentle s-curve to it.
They want to further separate the patio from the yard and create and outdoor "room" by putting up a "screen" at the top of the wall. The design they want includes one inch box tubing for the frame. How do I create an s-curve in box tubing without collapsing or crinkling or crimping the walls of the tubing.
My Idea: My initial idea is to notch/slit the box tube through three sides at 1-2 inch intervals. This would leave one side wholly intact. Then I would bend the tube on a wooden frame, clamp it down, weld in the slits/notches and grind smooth. I am not sure whether it would be better to have the solid side on the inside or the outside of the curve, but my initial thought is to have the solid wall on the inside to avoid having to make large and awkward shaped notches.
Anybody ever done this? Any thoughts or observations that I have missed? I would try it out, but to get a good idea of the final curve of the product I need a fairly long piece, and I hate wasting a good chunk of steel when I can do some planning and info gathering first.
Thanks,
-Aaron @ the SCF
|
|
thesandycreekforge
- Thursday, 01/04/07 14:35:42 EST
|
If the curve is a gentle one then the tubing can be easily bent. Use wood forms for the bending. If you control the bending there should be no buckling or crinkling. I would allow for at LEAST one length for testing.
Note that the minimum bending radius is proportional to the wall thickness of the tubing. The thicker the wall the tighter the bend. Standard .050" wall 1" tubing can take a gentle bend of about a 5 foot radius with special compression compensation to get rid of extra material.
|
|
- guru
- Thursday, 01/04/07 15:19:47 EST
|
What is the best way to light a layout table? I have some problem seeing when I'm welding at night.
|
|
mike hill
- Thursday, 01/04/07 16:10:15 EST
|
I fell apon this site by accident
http://www.archive.org
and a search of blacksmith brings up several hits of early 1900's manuscripts and some fun images. All the books are scanned by national libraries. Searches on welding bring up even more fun...
|
|
Bob D.
- Thursday, 01/04/07 16:21:22 EST
|
Thanks for the advice, guys, the main reason that I use an atmospheric forge and can't use a heat gun to preheat blast is that I'm off the grid. I like the idea of using the forge exhaust because: a. it's already a byproduct of combustion and using it would be more efficient than relying on an added, separately fueled device, and b. it seems that not only is the exhaust really hot already but it would contain some gases that have further potential for cumbustion, thereby also improving the efficiency of the burn, as andrew says. Guru, you're right, not a good idea to have a long forge weld seam right along the cutting edge. I know that pattern welded blades usually have many layers crossing the edge, which is different in terms of strength and thought by some to provide a "saw toothed" cutting effect, but with the use of a good flux and correct welding technique, why would it be a bad idea to wrap 5160 back on itself? I've seen tomahawks and hatchets made of things like mosaic damascus in this way, and I've seen recommendations of this method in more than one smithing book. Froes are made this way all the time from leaf springs.... And I've thought about just setting a sheet metal box with an open top around the forge, keeping the heat away from the gas lines somehow.... I loved a forge I saw once, it was a blown ribbon (multi orifice) burner with a nautilus shaped intake manifold that wrapped around the outer shell of the forge. As soon as I get power I'm trying that!
|
|
salem
- Thursday, 01/04/07 17:30:35 EST
|
Mike, Lighting to work is like lighting to take photographs, it looks easier than it is. You want light from varied light sources preferably at a distance so that they do not create hard shadows.
Florescent light makes the most diffuse light and little heat. Two strips of 4 foot paired lights and several flood lights from the corners would probably be about right.
Good shop lighting is helped by light or white painted surfaces. There is a good reason most ceilings are painted white.
In my small machine shop that was about 15 x 15 feet with an 8 foot ceiling there were windows on three sides. For day and night use there were two strips of florescents with reflectors and four 100 watt bare incandescent bulbs. We supplemented that with a couple clamp on machine lights. That was back when my eyes were perfect. Today I would want several more lights.
For welding you should be able to read through the lens without a welding arc. Then you will be able to see while you strike the arc.
|
|
- guru
- Thursday, 01/04/07 17:41:15 EST
|
Salem, NEVER reintroduce exhaust gases back into the forge. You must use a heat exchanger (tube in tube) to heat the incoming fresh air. Yes, you can wrap a shell around the forge OR the exhaust and heat the intake air. Arranging the fuel lines takes planning. Note that a piece of sheet metal with an air gap on both sides will keep a LOT of heat off sensitive components.
Froes are normally made from mild steel. 90% of all old antique froes you see have broken welds. This is probably due to unskilled welding but they are not a good example.
I'm just saying that making an alloy steel ax by the wrapping method is not the best way. The weld zone WILL be significantly lower carbon and if true to the center it may become your edge. I would suggest making it a point to make one side shorter than the other so that the weld seam is not the edge. But the best way to make such things from modern alloy steels is to punch or slit and drift the eye.
|
|
- guru
- Thursday, 01/04/07 17:57:03 EST
|
ReRunning exhaust through a burner is a top way to optimize CO production! So you find a way to steal it's heat without letting any of it get sucked back in.
I've been thinking of putting in over large ports for the burners to enter the forge through and have a sheet metal plenum around the burner shaft with a chimney to duct the "back blast" away from the intake---which will also shield the fuel piping from excessive heat. I won't try to get all the waste heat but just a little more...Gotta scrounge some SS pipe for the burner shafts to make them last longer...
Thomas
|
|
Thomas P
- Thursday, 01/04/07 18:31:38 EST
|
thanks guru, Thomas, this is why it's probably a good idea to discuss things before I try them! That earlier post about sword tangs: I agree with the whole radiused shoulders at the tangs design. One thing I'm wondering is why it seems that the tangs on Japanese swords usually have square shoulders at the transition. They don't even have a buttcap / threaded tang arrangement to keep things snug! Just a bamboo pin in the hilt. They enjoy such a great reputation for battle worthy blades that I wonder how their swords don't often break at the guard area.... Or do they?
|
|
salem
- Thursday, 01/04/07 18:58:37 EST
|
hey y'all
i'm looking at the Blacksmiths depot catologe right now, looking at the 400# TFS anvil
what are y'alls opinion on it
thanks
Andrew B.
|
|
- Andrew B.
- Thursday, 01/04/07 19:35:45 EST
|
Salem remember that on a japanese sword they have an unusually thick cross sectiom and most of it is un-hardened. The width of the tang is not all that much less than that of ther blade too. Sometimes very little in the way of the shoulder for the habaki. If they get a severe impact they are probably more worried about the edge of the sword cracking and falling off---note the role of Ashi...
Thomas
|
|
Thomas P
- Thursday, 01/04/07 20:55:11 EST
|
Hi, I'm not a metal worker (other than soft for stained glass) but I have an everyday-trivia-question about ruining the temper on tempered steel. What does it take to ruin the temper on scissors or a knife? If there are too many ways to list, I'm most interested in what kind of heat situation(s) will ruin it. Could you also add whether the ruin will make the metal brittle or soft or what consequence it has? Thank you so much! Julie
|
|
Julie
- Thursday, 01/04/07 20:58:36 EST
|
Aaron: You could use one of Grant Sarver's tricks and use solid material for a tightly bent section welded in between tubing where the bends are less severe. Only the relatively small tight bend area is solid, so there is not a great increase in the weight of the whole project. And everybody will wonder how You made the tight bends.
|
|
Dave Boyer
- Thursday, 01/04/07 21:13:43 EST
|
Julie,
600�F to 700�F would most likely make the scissors or knife somewhat softer, assuming the tools are made of high carbon, plain carbon steel. Getting too much friction heat from a grinding wheel is a common way to ruin the original temper. It may help to use the Navigate Anvilfire menu on this page and click on FAQs. Scroll to Heat Treating.
|
|
Frank Turley
- Thursday, 01/04/07 21:17:03 EST
|
Julie: The heat to change the temper needs to be higher than the tempering temperature that the tool was tempered at. For a knife this might be as low as 400f but for scissors it would probably be above 500f. These temperatures will generally leave "temper colors" on the steel.This would be a faint pale yellow for 400f, going up through blue in the mid 500s. The steel will get softer from the temperature exposure EXCEPT that if heated enough [above red hot] and cooled fast enough [how fast depends on the type of steel] the steel will become brittle hard.
|
|
Dave Boyer
- Thursday, 01/04/07 21:24:59 EST
|
hiya,GURU!Learn how to build a fire yet? UH HU,I'm on line!so ILYAR (PATRICK) says howdee.
|
|
iylar
- Thursday, 01/04/07 22:06:01 EST
|
Hiya,GURU! Learn how to build a fire yet? Guess who's on line!Talk to ya soon.REGARDS,IYLAR (patrick[MASTER of all trades,JACK of NONE] McGhee).
|
|
- iylar
- Thursday, 01/04/07 22:13:25 EST
|
I have a large (6.5") post vise. On the Mounting plate it reads Indian Chief. I know that R. Postman does anvils, but does anyone '"do" post vices? I think they are beautiful old tools in their own right. Where can I find more info on this vice? Also, about the "soap quench," I heard from a smith that a certain kind of firefighting foam/ liquid can harden mild steel as well. True? And where can I get a pyrometer/ digital temp readout for my forge? Please and thank you....
|
|
salem
- Thursday, 01/04/07 23:19:46 EST
|
Salem, there are no definitive references on vises. Frank Turley knows quite a bit.
The problem is that of the millions of leg vises around there are only about a dozen styles and the vast majority of vises were unmarked. They were so similar in construction that they were sold by the pound without mention of the manufacturer. There was no serious hype or advertising in the vise business. So there is very little information to collect and not much to write. After a lot of research it would be a very thin book.
|
|
- guru
- Friday, 01/05/07 01:09:16 EST
|
Mr, McGeehee, welcome to the 21st century. Hope you didn't get whiplash in your jump from the 18th!
|
|
- guru
- Friday, 01/05/07 01:10:28 EST
|
The Indian Chief postvise was made by the Columbus (OH) Forge and Iron Company - the same one who made the Trenton brand anvil in the U.S. Vise might date from the late 1800s to the mid-1950s.
CF&I apparently purchased the rights to the Trenton anvil brand name. Had they not their anvils might have been the Buel (name of one of their owners), Indian Chief or their logo of FI within a large C within a circle.
|
|
Ken Scharabok
- Friday, 01/05/07 06:16:46 EST
|
Can you tell me the best way to remove mill scale from steel? Thanks.
|
|
gmoore
- Friday, 01/05/07 07:03:24 EST
|
Mike Hill,
My preference over my welding/layout table (mostly because they were at a steeply discounted price) are the hanging "work light" light fixtures that use the quartz bulbs. The ones I have are dual 250W bulb fixtures. Two fixtures makes 1000W. If I need any more than that I have two of the dual 500W work lights on a tripod. When all is said and done I can flood my welding/layout table with 3000W of quartz lighting...That's more than 4 times the watts of lighting in my whole house!
-Aaron @ the SCF
|
|
thesandycreekforge
- Friday, 01/05/07 10:16:42 EST
|
gmoore,
There are a variety of ways, none easy.
1) Power wire brushing. This is often the best small shop method but is high labor and has an element of risk as power wire brushes are dangerous.
2) Sand or grit blasting. This is the BEST method but is expensive and labor intensive. For large jobs it is usually best to have a sub contractor do it. You must be prepared to prime the clean surface immediately.
3) Tumbling or Vibratory Finishing. This is the best solution for the small shop that produces a lot of small work. However the machinery is limited to relatively small sizes. Vibratory finishers are easier to maintain than tumblers and will handle odd shaped pieces. They are rapidly replacing tumblers for most finishing processes.
4) Chemical etch. This has advantages and disadvantages. It is low labor but requires a large facility and then disposal of the killed acid.
5) Air needle descaler. This results in a very rough surface and is usually only used for weld preps or between weld passes.
Every situation is different and the "best" solution varies according to need.
|
|
- guru
- Friday, 01/05/07 10:22:48 EST
|
Guru,
Your post just made me think of something. You mention in number 3 about tumbling. I've done this to polish cartridge brass and it works amazingly well. Anybody have thoughts on building a tumbler using a 50 gallon drum (steel or plastic)? Thoughts on tumbling medium, construction of the tumbler, etc? I realize it would take a fairly decent sized motor and speed reduction system (maybe a gear motor?) For my shop, most things I make would fit in a 50 gallon drum, and it is probably safer than some of the other methods (especially the acid etching and power brushing. When not in use it could be broken down and stored. Any thoughts/ideas/random musings?
-Aaron @ the SCF
|
|
thesandycreekforge
- Friday, 01/05/07 11:29:38 EST
|
SCF: I would think an old 14 inch band saw would yield several useable parts.
|
|
ML
- Friday, 01/05/07 12:10:03 EST
|
Why not the drum and works from an old commercial dryer for a tumbler? Or an old cement mixer?
With a mechanical speed reduction system you will not need nealy as hefty motor as you might think as they increase torque as you decrease speed.
I have a geared down motor from a commercial roll up door I want to try and the local arroyo is chock full of "medium" with a variety of shapes and hardnesses.
Thomas
|
|
Thomas P
- Friday, 01/05/07 12:19:11 EST
|
I have a HF vibratory polisher. It uses dry medium only. I use 24 grit walnut shell. The manual that came with the machine also recommends corn cob, abrasives, etc. Then it even goes further to say experiment with more unconventional media that some shops use chopped up erasers, dry eggshell, etc. I haven't tried the erasers yet, but it makes sense... drag an eraser across a rough piece of steel... it WILL shine it up a bit. Your 55 gal drum idea sounds cool.
|
|
- Nippulini
- Friday, 01/05/07 12:19:52 EST
|
I have to install a forged railing onto granite steps. There will be 1/4" x 4" x 4" pads welded to the bottoms of the end posts. There need to be holes 1" in from the edge of the granite treads.
Any suggestions about drilling the holes and not splitting the corners off the granite.
Also any advice to what kind of hardware to use.
Thanks.
|
|
Steven Bronstein
- Friday, 01/05/07 12:43:49 EST
|
Thanks for the lighting info.
|
|
Mike Hill
- Friday, 01/05/07 12:58:08 EST
|
Aaron, I have some pictures of my homemade barrel tumbler made using a plastic barrel(20 gallon chemical barrel) tried to send them to you- mail was returned- email me and I will send to you-maybe you can steal some design ideas-
|
|
ptpiddler
- Friday, 01/05/07 13:23:12 EST
|
Sorry for a long-winded posting from a "newbie" .... but I'd really like to get your opinions on this safety issue.
I am going to be learning to do some Blacksmith work this year, and I am working at getting the right protective gear: Starting with protecting my vision. I have done a lot of surfing and researching on the web and in print, and have come up with the following summary of what I found. I'd like your comments on it, especially if you are an Opthamologist and a Blacksmith :-) (Gives a new meaning to "steel frames" ...)
The threats to the eyes from Blacksmithing are basically: Impact, UV, IR and Sodium Flare.
Impact:
Any powered equipment, such as a ginder, can generate some high speed threats to the eyes. (I read Paw-Paw's scary post on that, and I am going to treat these machines with the respect due an IED.) Hammering at the anvil and filing and such can generate somewhat lower speed impacts, so good Impact protection is a good idea. I plan to buy a good pair of impact safety glasses, with side shields, for machine work, and all non-forge/anvil activities. If they are perscription, I'll be more likely to wear them all the time I'm in the workshop.
UV:
It seems that UV is not much of a concern unless I was a glassworker working with borosilicate glass, or doing real welding with TIG or Oxy-Acetlyne gas. I'm not a glassworker, and in the case of welding, the traditional "robot head" welder's mask is the way to go for UV, IR and impacts too. Other than the above exceptions, Blacksmithing ordinary materials does not seem to have many UV threats. Most optical material blocks UV to some extent, so I don't think this is generally an issue for a Blacksmith who is wearing any sort of other eye protection.
Sodium Flare:
Depending on who I ask, Sodium Flare from the forge is either a great danger to the retinas, or just an annoyance. Either way, didymium glasses will block it, allow easier vision of the work, and don't block much other light. So it seems a pair of these puts something over my eyes (giving some Impact and UV protection) and blocks Sodium Flare. Besides, some of these really look cool ... ;-)
IR
This seems to be the thing that can do the most damage, long term. Damage from IR exposure is cumulative. Coal forges can get to 3500 F. To block IR it seems you need darker stuff (a number 3 or 5 lens) or stuff that absorbs the IR, warming in the process.
So, I think my best protection will be to get impact safety glasses for shop work, and a Pair of didymium glasses for the forge, with a clip-on, flip up #3 or #5 shade when looking into the forge fire. Croakies to keep them in place when sweating and hammering are a good add-on too.
Does this sound like sound reasoning and precautions to you folks ?
Tim C
Somerset NJ
|
|
Tim C
- Friday, 01/05/07 13:34:40 EST
|
The SCF - At the fab shop they used to de-burr (de-scale) small flame cut profiles in an old electric cement mixer, the 'medium' was all the old grinding dics from the angle grinders, although I susspect the metal parts hitting against each other did alot of the work !
When the mixer was running they lowered a large timber box, lined with insulation, over the top of it to keep the noise down a bit (it was noisy, even in a 20,000 sq ft heavy fabing bay!:)
|
|
- John N
- Friday, 01/05/07 14:16:50 EST
|
Impact: I learned why it is a bad idea to forge with anger. I made the mistake of taking my aggressions out on my work one day. I was P.O.'d at something, I forget now.. so I am wailing away with the hammer so hard that the toe of the face chipped and shot back into my hand, a nice chunk of steel had imbedded itself completely in my index finger. It happened so fast I didn't even know what happened. Didn't really hurt much, but removing the piece of shrapnel was one heck of an experience. People (not in the know) asked me why I wasn't wearing gloves. Well, I usually don't glove the hammering hand due to loss of feel for the hammering work. Ever since then I make sure that I am at peace and fully aware of my emotional state while working. If things get screwy or not working the way I want, I get steamed then take a breather. I kinda felt like I got what I deserved and will never give in to the dark side.
|
|
- Nippulini
- Friday, 01/05/07 14:18:20 EST
|
Tim C.
Sodium Flare: Normally there is no sodium flare from a coal or gas forge. There is a good bit from gas forges when running LOTS of flux as in making laminated steel but not at other times. Sodium flare is a glass worker's problem. Didyidium glasses are for sodium flare. Much cheaper glasses are suitable for forge usage.
UV: You get no UV from a forge. This is an arc welding problem requiring normal arc welding filters and full skin covering. Sun burn from arc welding is no different than from the sun and repeated exposures will likely cause skin cancer.
IR: This is a forge issue only when you stare into the center of a coal forge or work a lot in front of a gas forge. Ceramic chip forges are the worst. We sell #2 filter safety glasses for folks that worry about IR in the forge. For O-A use you start at #3 and work up depending on the size of the work and flame.
Other Issues: When using wire wheels and polishing setups or some stationary grinders a full face mask with safety glasses underneath is recommended. Flying work, shreading wheels and such require more than just simple eye protection. Something hitting you in the forehead, nose or mouth can do serious and expensive damage. Check out Paw-Paw's iForge safety demos.
Hearing protection is needed for some types of work in some shops and ocassionaly in ALL shops. I have been in shops where you had REAL pain from anvil noise. In others due to many variables it was not a problem. Some tools like angle grinders are very loud and harsh. Others just make a light pleasant hum.
Body Protection is needed the most when using a buffing or wire wheel. Work and wires fly off at high speed and can do serious damage. I wear my leather shop apron more when grinding than when doing anything else.
Respiratory Protection: Again is depends on the shop. Those working outdoors with infinite fresh air rarely need to wear a filter mask but this is not always true. When working indoors you cannot have enough forced ventilation. Although you rarely see it OSHA requires a spot exhaust fan at every welding station. When buffing or grinding the air can be full of fiberglass from reinforced wheels, cotton or other fibers from buffs, metal dust (most non-ferrous are toxic) and general swarf that is not good to breathe. The needs vary with the amount and type of airborn material. There is a difference between particulate and vapors or gases, each requiring a different type filter.
|
|
- guru
- Friday, 01/05/07 15:56:11 EST
|
TGN; I find forging rather meditative and if angry when I start I will be serene when I end---unless I goof up and then am upset with myself---my wife says it's good for "constipation of the soul" But my forging deals a lot with hammer control (having come into it from knifemaking) so when angry I don't express it with the hammer.
Thomas
|
|
Thomas P
- Friday, 01/05/07 19:12:10 EST
|
Thanks a bunch, Frank and Dave! I'm assuming both posts mean that quickly snipping the lit wick of a candle won't ruing the temper on our scissors. I had read a bit on case hardening and tempering, but couldn't discern a definitive answer from that bounty of information.
|
|
Julie
- Friday, 01/05/07 19:51:30 EST
|
Steve Bronstein,
Find a local stone mason and ask him as to the best method of anchoring a rail into granite..........better yet farm out that part of the job and let HIM take the responsibility .
Harley
|
|
Harley
- Friday, 01/05/07 20:45:35 EST
|
Tim C
The Guru has very good advice. I am a safety and environmental guy, and have been for quite a while. I have held that position in several large production forge shops, and a huge boiler fab shop. I will offer the following bits to supplement the Guru's very, very good suggestions.
When picking safety glasses and face shields, choose Polycarbonate lens.They have the best impact rating, and do not depend on a tempering operation to gain the impact resistance as do glass lens. Polycarbonate lens also tend to naturally block UV.
When welding, especially indoors, a N-95 or N-100 respirator is advised, if no oil mist is present. Change to a P-95 for Oil vapor, but the cost is much higher. Ventilation is the much better choice. The Guru states that local exhaust is required by OSHA. That is not precisely correct. OSHA says that you may not overexpose an employee, and that engineering controls are the first choice and only if engineering controls don't work should Personal Protection Equipment (PPE) be used. This means that proper ventalation, and this may include local exhaust, is the first choice. Often in large industrial fab shops doing large weldaments local exhaust is not a good choice, so one moves to general exhaust that pulls air from the shop as a whole, and if testing indicates, then PPE.
The suggestion for a leather apron is very valid. For welding, skin protection is needed, and several choices in fabrics are available. Chrome tanned leather is a traditional choice. It is expensive, hot, and may mildew in a moist shop. Well wearing and durable, good protection, if you wear it. There are some new aramid based fabrics on the market, but I have no experience with those. I do have experience with similar fabric for arc flash protection in electrical work. Cooler in the heat, lighter than leather, fair protection, and tends to be delicate compared to leather. There are flame resistant(FR) cottons that are traditionally green. Coolest, fair protection. not real durable,Cheapest of the bunch, and most likely of the bunch to be worn on a hot summer day. :)
Foot wear was not mentioned. A steel toe shoe or boot is a good idea. Knock a 4# hammer off the anvil onto you foot and you will be glad of that protection. Thick soles help to keep very hot things from melting thru the sole. You smell the burning rubber before you feel the heat. Meta-tarsel guards protect the area just behind the steel toe. This is a delicate bone structure and damages easily. The guards have the side benefits of keeping scale etc from burning you shoe laces, and perhaps the top of your foot, and also as Vicopper can attest these meta-tarsel boots are real chick magnets, being the sexyist shoes available:)
I wear hearing protection in my shop. I wear muffs that are a behind the neck style as I find these to be the most comfortable type. In the low profile version that I wear, they fit under a faceshield and a standard welding helmet.
In the end the best PPE is the PPE that is comfortable enough that you wear it every time you need it. Any other is a waste.
Good luck
|
|
ptree
- Friday, 01/05/07 20:49:29 EST
|
I would like to know about how to temper regular steel to make spring steel. I am 48 years old. I have a interest in making reproduction bear traps, as wall hangers, novelty items etc.. However I would like to know how the spring levers are tempered, from flat stock. thanking you in advance M.S.
|
|
Mark Self
- Friday, 01/05/07 20:54:49 EST
|
Polycarbonate lenses can not handle heat.
|
|
- Burnt Forge
- Friday, 01/05/07 22:11:01 EST
|
Mike one of the pro's will fill you in on tempering steel, but if you're trying to temper conventional mild steel (iron), I can fill you in....it won't work, period, not enough carbon. Now, here's my question, back to post vise's for a minute. I found one in a junk yard with a couple of missing part's that I'm refurbishing for a buddy of mine. In cleaning off the years of gunk, I'm seeing a lot of hand work on it. Lot's of huge and smaller hammer marks. Not overstrike from work usage, these were made in forming the yoke for the screw, putting slight tapers on the connecting panels on the part where the two large pieces are connected, and the yoke that attaches to the bench seems to be completely handmade with punched holes and forge welded out of 3 pieces. It is amazing to behold, hard to tell where the machine work ended and the hand work began. Is there any way to guess the age of this vise from my description?
|
|
Thumper
- Friday, 01/05/07 22:14:17 EST
|
Safety-- Carhartt makes flame resistant outerwear made with Indura. Finding a dealer who's heard of it is a chellenge. Indura's website sez it's better than Nomex because, it says, molten steel clings to Nomex, but not to Indura. Extensive testing here at Entropy Research reveals that steel toes get awfully damned cold in winter. (Ensolite liners help a lot.) Hot drops and slag can plummet through trouser legs and into open-top cowboy boots faster than you can say "sulfadiazene," and will instantly destroy exposed stitching on the welts of costly boots causing the soles to rapidly delaminate. Fix 'em with Barge cement-- and buy the next pair with another type of welt.
|
|
Miles Undercut
- Friday, 01/05/07 22:21:21 EST
|
More safety-- IR (heat) threats you can usually feel in time to back off from the source(s). UV is vastly more insidious/dangerous. I have yet to find an ophthalmologist/optometrist/oculist who knows or cares about UV hazards inherent in soldering, welding, brazing. Lincoln has a nifty website with lens shade reccs. Follow them or look at a welding textbook. Beware costly optical quacks and their exotic plated lenses. And, as it says on most every shop wall: don't watch the arc!!! (Without your helmet, that is.)
|
|
Miles Undercut
- Friday, 01/05/07 22:29:05 EST
|
Julie: You assume corectly. The scissors wont get hot enough in that short exposure.
|
|
Dave Boyer
- Friday, 01/05/07 23:04:56 EST
|
Im looking to buy a Gas Forge. Im willing to spend around 800.00 whats the best one to buy for the money? I need to be able to weld in it.
Thanks
Charles
|
|
Charles
- Saturday, 01/06/07 01:24:58 EST
|
Charles: It really depends what you want to do with it. You mentioned welding, is that all you plan to do with it? What kind of welding, straight smallish pattern weld billits or welding crossbars to make custom 4-way tire irons? Honestly, for that amount of money you could probably have one custom made to your needs.
|
|
AwP
- Saturday, 01/06/07 02:32:33 EST
|
Forge Welding in Gas Forges: Charles, Although it is done on a production basis by many using both common production and home built forges I do not think any of the gas forge manufacturers state that their forges will obtain a welding heat. This has to do with the vague deffenition or "welding heat" and the actual temperatures they run unless very finely tuned. They run considerably cooler than a coal or charcoal forge and generally will not produce a "sparkling" heat. This is good and bad. The good is that they will not burn your work to a crisp in an inattentive moment. The bad is that they are suitable for some types of welds and not others. Most bas forge welding is done with the pieces stacked or tied together so that they do not scale badly or oxidize. Although it can be done it is very difficult to do many of the traditional welds in a gas forge.
Most folks preferences in gas forges are based on:
1) Price
2) Door openings and ports
3) Size
The big factor in selection of a gas forge is the size work you will be doing. Unlike a coal forge which will handle a very wide range of work efficiently a gas forge is limited to the enclosure size and is only efficient when work that fits the forge is heated. You cannot adjust down a large gas forge for doing small work.
If you are doing production welding then the concern is the lining type. Most modern blacksmith forges are lined with lightweight refractory materials which dissolve like cotton candy when exposed to borax flux. Even many of the hard floor materials are susceptible to flux and scale damage.
In many shops running gas forges they have several types and sizes for different types of work. But it depends on the range of work you do.
So, as you can see there are many other considerations when selecting a gas forge.
|
|
- guru
- Saturday, 01/06/07 09:33:17 EST
|
Masonry Mounting: As Harley noted you may want to go to a mason unless you have a LOT of this to do. The best way is to use a diamond core drill to make a nice clean hole without impact. Then use either a non-shrinking cement like "Rockite" or industrial epoxy.
Rockite hardens to a light gray and most of the anchoring epoxy I have used was a dark slate gray or nearly black.
I prefer industrial epoxy as it is much stonger than Rockite but it is more expensive. Industrial epoxy anchoring systems usually require a special gun and consumable nozzels. You have to learn to work fast with epoxy and not make a mess. The end results are that the epoxy is as strong as the granite you have anchored the rail into.
The disadvantage is that the epoxy is very permanent where the Rockite is soft enough to chisel out. The Rockite requires no special tools and cleanup can be done with water.
Decisions, decisions. . .
|
|
- guru
- Saturday, 01/06/07 09:56:29 EST
|
Getting Angry. I got mad at a tangled group of small bungy cords that were in the car trunk. I wanted one particular one, but it was recalcitrant, so I gave it a hard tug. When it rapidly released itself from the other bungys, the small s-hook on the end gave me a bruised lip and chipped tooth. I said "Aw sugar."
|
|
Frank Turley
- Saturday, 01/06/07 10:04:16 EST
|
In Henry Magaziner's book 'The Golden Age of Ironwork', he shows examples of poor iron/stone/masonary joints. On pages 190 and 192 he shows railings that are set to close to the edge of the step and the leverage of people hanging onto the railing while making the step and turn, loosened the joint, let water in, rust expansion and the continued leverage of people's weight then cracked off the corner of the granite steps. Something I never thought of in my inexperience.
|
|
Owen w
- Saturday, 01/06/07 10:33:11 EST
|
I received an anvil and I know it is not the best, but I would like to know what to do to it.. It has a cast iron body but a steel face and it rings but when hitting it, the face dents, should I heat treat and temper the face or use as is and resurface it everyso often??
|
|
- Jarathorn
- Saturday, 01/06/07 11:36:14 EST
|
Jarathorn, How do you know it has a steel face? There were only a couple makers from the 19th century that made this type anvil.
Just because the face is larger than the body and is machined all over does not mean it is steel. If fact, all the anvils with this feature are 100% cast iron made to LOOK like they have a seperate plate. Those with steel faces are often difficult to tell from the body.
Anvil faces are hard but not so hard they cannot be dented. How hard did you strike it and with what shape? A common crowned face hammer can be gently bounced off the surface of a good anvil and it will bounce off without marking the anvil. But the same hammer striking the anvil with its corner or peen will mark all but the hardest anvils.
Generally if an anvil has a soft face there is nothing you can do outside of a large heat treating facility. That and if the face is not steel it cannot be hardened.
|
|
- guru
- Saturday, 01/06/07 12:10:37 EST
|
Burnt Forge,
Polycarbonate lens can handle any long term exposure that you face can handle. As far as a scale pop, or metal splash, they will be damaged but so will glass, or plastic. We used polycarbonate lens in all of the forge shops and welding shops I have every worked in, and have never had a heat issue, nor have I heard of an issue. Of course that only covers about an average of 250 persons working daily over my carrer of 24 years in these kinds of shops. I will continue to wear polycarbonate, and specify same for the people that I am responsible for protecting. After all they are also my friends.
|
|
ptree
- Saturday, 01/06/07 12:20:56 EST
|
Need value of following that are sitting out in the barn:
1 - Lancaster Champion Blower & Forge, P.A. U.S.A.
1 - Peter Wright Patent - Solid Wrought Anvil, 13 X 26
1 - Atlas 85 lb Anvil, 10 X 23
|
|
S. Riccobuono
- Saturday, 01/06/07 14:26:04 EST
|
Values: S.R., Everything depends on condition, then location. Your question is like asking "What is my 1950 Chevy worth?".
The first item you list is a manufacturer that made MANY things, forges, blowers, drill presses, tire benders. . .
Anvils are described by weight, not dimensions. Then by fine details that help determine age. The P.W. will be marked in English Hundred Weight. This is three to four numerals often separated by dots. See our FAQs page for an on-line English Hundred Weight calculator.
The Atlas I am not sure about but I suspect it is an American made anvil marked in pounds.
Anvil condition can vary from so beat up that they are barely worth scrap value to being in very good condition so that they are worth as much or more than new anvils. Some brands bring more than others and some types (cast iron) have almost no value what so ever.
|
|
- guru
- Saturday, 01/06/07 16:12:17 EST
|
i have a chance to get some tools,
he has tools specifically for wagon wheel rims, i dont think its like a tire shrinker or anything, i just think theyre hand tools, what tools are used for wagon wheels and forging of them, and, are any of these tools useable for general blacksmithing
|
|
Cameron
- Saturday, 01/06/07 16:59:47 EST
|
one more thing,
how would i sharpen the drill bits that came with my canadian forge and blower hand crank drill press?
i had a friend look at them,a nd he says theyre on a different angle than his drill bit re sharpener,
should i just grind them down untill theyre at the angle of his drill sharpener? or what ,
the are nice bits, but they dont do nothing when theyre not sharp, please help
|
|
Cameron
- Saturday, 01/06/07 18:00:19 EST
|
1/2" Shank Bits: Cameron, If these are the 1/2" shank types where the shanks are bigger than the bits then they are antiques and collectors items. They are no longer made so if you break one you are stuck. They are also not High Speed Steel. I suggest putting them away and putting a chuck on the drill.
If you insist on grinding them then the standard angle on modern twist drills is the way to go and what they probably had originally. The problem will be the oversize shanks that do not fit the sharpener.
There are two ways to put a chuck on these old drills. Scrounge an old one or buy new. New ones are a little pricey but worth it. From McMaster-Carr you can get a 1/2" Jacobs chuck for about $70-$80 and a 1/2" arbor to fit for $14 (USD). An investment of $120 will get a chuck, arbor and a few bits.
You can also scrounge a chuck off a defunct electric drill. You will need one off a big heavy duty drill. You want a 1/2" capacity chuck if possible but a 3/8" will do. Jacobs is the only brand worth having and came on many brands like Millwaukee for the past 50 years. So they ARE out there.
The trick is getting them off. On old hand drills they usually thread on to the spindle. You will need to get a very tight grip on the spindle to turn the chuck off. Use or make a pin spanner to turn the chuck by the body. Note that on reversable drills there is a small LEFT HAND socket head screw inside the bore of the chuck that must be removed first.
After getting a threaded chuck off you will need to make a 1/2" spindle arbor for it. I made one of these by finding a bolt to fit the chuck. Many chucks are 1/2"-20 (1/2" fine thread). In this case start with a long bolt, saw it off and grind a flat for the setscrew. For other sizes you will probably need the services of someone with a metal turning lathe.
|
|
- guru
- Saturday, 01/06/07 18:44:44 EST
|
i kinda want to be doing all my own stuff, not with electricity, or as little as possible,a nd i really like using the originals of stuff, is there any problem with grinding it down to standard angle? they should still cut right?
they cut really good, one of them is still pretty sharp,a nd the drill press is really fun to use, so , i dont have a problem with using old stuff, um, how much of an antique or collectors item is it? they say Dormer Carbon on the side, and some say Dominion they all have half inch shanks, and not all the shanks are bigger than the bits, 5 of the bits are smaller than the shanks, 1 is equal, and the other 4 are bigger bits than shanks, im not a collecter,and, i usually like to think that it should be used for what its made for, i would never use them in a regular drill, but, on my post drill they seem to work,
so, shoudl they be reground? or what?
thanks,
Cam
|
|
Cameron
- Saturday, 01/06/07 19:11:30 EST
|
I have heard from several sources that most automotive springs are 5160 steel. Is this correct? Are ball bearing races also 5160?
|
|
Hunter Goldberg
- Saturday, 01/06/07 19:12:14 EST
|
A trick for removing chucks from hand drills is to put the chuck key in the chuck, turn the chuck to the right place (so the key's on the left side if you're looking into the chuck) and whack the key down with a mallet or even a piece of 2X4. The inertia of the gears will try to keep the spindle from accelerating as fast as the chuck, and it should come loose. At least it has for me, the couple of times I've tried it.
|
|
Mike B
- Saturday, 01/06/07 19:46:12 EST
|
Hunter Goldberg, if you go to the pull down navigate menu, and go to the FAQ's you can visit the section on Junk yard steel. While many leaf springs are 5160, it is not a requirement. They can be any material that suits the maker.
When I first begain smithing, I heard at several hammer-ins from knowledgable demonstrators that truck axles are 4140. Then I begain working at an axle forge shop, and learned that for at least 15 years, and in many cases longer, a differnt material has been specified and used in the industry. It still behaves somewhat like 4140, but is heat treated differently. Unless you buy specified steel form a steel supplier, or obtain scrap from a source that specifies the material and can pass that info on, it is a guess.
|
|
ptree
- Saturday, 01/06/07 21:08:28 EST
|
Cameron,
Yes, by all means sharpen them. Use a standard 118� grind, and I suggest some extra heel relief on the larger bits (over 1/2"). Do not try to do a split point grind on those bits as the steel is possibly not capable of handling the heat generated by such a small contact face.
You should also consider getting a regular Jacobs geared chuck for that post drill. Check at flea markets and the like for a decent used one. When you ge tthe chuck, then you can work on making a 1/2" straight mandrel for it. After you break your first unreplaceable small post drill bit, you'll be glad you have a chuck thatwill accept regular bits. Also, a post drill with a Jacobs chuck makes a pretty fair tapping machine.
|
|
vicopper
- Saturday, 01/06/07 21:20:42 EST
|
Threaded chuck removal: Wacking the chuck key will work some of the time, but sometimes the chuck key tip will break off. I use an allen wrench as large as the chuck will allow, and preferably a long series allen wrench. Give it a really sharp wack with a light hammer, piece of pipe , etc. I have done this sucessfully many times.
|
|
Dave Boyer
- Saturday, 01/06/07 23:25:10 EST
|
I should have mentioned to tighten the chuch as tightly as possible on the allen wrench.
|
|
Dave Boyer
- Saturday, 01/06/07 23:26:20 EST
|
Many Jacobs chucks are excellent, But remember they do make many 'consumer' grade chucks that are crap, Best identified by a stamped sheetmetal body. Normally are OEM to crappy grade powertools.
Even with presision chucks Jacobs is not the only guys out there, R�hm comes to mind, ...
BTW, Many older Milwaulee Holeshooter drills have a tapered spindle and appropriately taper fit chuck, They are not the typical 1/2" or 3/8" threaded spindle that the chuck screws onto. These tapered chucks heed to removed with a pair of "U" or "V" shaped wedges.
|
|
- Sven
- Saturday, 01/06/07 23:32:10 EST
|
I screwed up. I welded together all the pipe for my 10 psi propane system with a new to me tig welder. Many of the joints I had problems with porosity. I have read that this is a somewhat common problem with black pipe but in either case my lack of tig skills did not help. I read an article somewhere on the net that I cant find that suggested using 7014 as a "topcoat" to float away inclusions and porosity. I would like any recommendations as to how to correct this problem as well as any recommendations for type of rod to use as well as polarity. The pipe is 3/4" schedule 80.
|
|
Ben
- Sunday, 01/07/07 01:16:03 EST
|
Guru, another Little giant question. My LG 100 clutch actuator ring (the ring that surrounds the cluth hub with the two ears)is worn badly. It is not parallel from one ear of the clutch fork pressing harder than the other. It is 3/32 thicker in the center than on the sides. The Kernbook says clearance should be 1/32 (mine at best is a lttle less than an 1/8) The book also references a zerk fitting which I do not have. So how would you reccomend repair? Brazing, Ni rod, fabricate new in bronze??? Whatever I do I will add a grease fitting.
Thanks, Ben Also thank you for providing a forum and a place to ask questions.
|
|
Ben
- Sunday, 01/07/07 01:24:54 EST
|
I learned the hard way that merely not looking at the arc might not help with avoiding
|
|
- Richard
- Sunday, 01/07/07 01:56:32 EST
|
I learned the hard way that merely not looking directly at the flash might not protect you from "arc-eye". I got it in an industrial marine environment from the reflection off the white walls in the shop. Very painful!
|
|
- Richard
- Sunday, 01/07/07 01:58:53 EST
|
Gas Pipe Welding: Ben, Unless you have proven yourself in this task by training and being certified then you should have never attempted it. Once welds have pin holes you should grind them out and reweld. Generally pin holes tend to generate more pin holes over the same place.
I am not familiar with any forge design where you would be welding 3/4" black pipe unless you are building a huge forge.
LG Clutch: There are several designs for these and I am not sure exactly which one and where you are talking about. Generally the LG clutch linkage was pretty sloppy. I would just clean it, oil it and let it go.
The zerk fitting replaced a grease cup that was in the center of the back of the shaft. The shaft is drilled to grease the clutch bearing. I THINK this is the same on both center and rear clutch models. Look for a hole in the center of the shaft. You may have mistaken it for a center drill or it may have a broken off fitting in it. My old 100 LG had a 3/8" pipe threaded hole in which I fitted a screw cap grease cup.
Note that this is the only place that was supposed to be greased on the LG. The guides and toggles all had oil holes and even the old style rams had small oil holes that led to the toggle pocket. These often got fitted with grease and or debris and were painted over. I found at least 6 painted over oil holes on my old model 100# LG which I had bought from a fellow that was fanatical about oiling the hammer. However, he did not know enough about old machinery to look for the oil holes. . .
|
|
- guru
- Sunday, 01/07/07 09:29:57 EST
|
Richard, Good point. That is why "flash glasses" are recommended for all workers in a welding zone as well as under the weldor's helmet.
|
|
- guru
- Sunday, 01/07/07 09:34:49 EST
|
Ben, A thought about your welded pipe joints. Did you use cast, black iron fittings? If so then you have a mess. Normally, when welding pipe, the fittings are steel of similar alloy to the pipe. Either Socket weld or buttweld fittings are normally used. If a threaded fitting is used, even in steel, with any oil or compound in the joint, it will bubble out and contaminate and blow out almost any weld.
As the Guru notes why weld this piping, and why so big. Normally forge feed piping is low pressure, and small diameter, unless an huge industrial forge.
|
|
ptree
- Sunday, 01/07/07 10:58:34 EST
|
In the past, I've noticed a big differnce in performance using Mapp gas vs propane when sweating copper, using the same torch head. The question is, has anyone tried running Mapp in a gasser? If so what have been the +/-.
|
|
brian robertson
- Sunday, 01/07/07 11:43:14 EST
|
I use MAPP in my micro forge for the main burner and a run propane as a standby burner. Your MAPP will run more efficiently if it is attached to a Bernz-O TZ8000 burner. MAPP burns hotter than propane, so that's why you notice the difference. I can acheive forge welding temps in my micro forge with MAPP that I couldn't get on propane alone. The down side about MAPP is it's price. On average a bottle goes for $8 to $10. I do about 1/2 hour of forging per day with my micro and one bottle of MAPP lasts me about a month. The trick is turning down the MAPP to a whisper while not using for a heat and letting the propane run as a standby to keep the forge warm.
|
|
- Nippulini
- Sunday, 01/07/07 12:20:33 EST
|
MAPP is a stabilized acetylene and does burn hotter than propane. If you used it in a one-brick forge, make sure you keep the burner tip about 1/8" OUTSIDE the block or you run the risk of melting the tip. Don't ask how I know this.
|
|
quenchcrack
- Sunday, 01/07/07 12:33:27 EST
|
MAPP From the Airgas website:
"MAPP� is a stabilized mixture of Methylacetylene and Propadiene. MAPP gas is a very versatile fuel gas with a flame temperature (5301� F) second only to acetylene."
This high temperature means it can melt refractories and seriously burn steel. In an inefficient open forge it may do well but if the forge was to reach maximum operating temperature the refractories and the shell would melt. . .
|
|
- guru
- Sunday, 01/07/07 12:54:43 EST
|
Do you suppose in would work to plumb it in like a nitros boost system in a hot rod? Does anybody sell Mapp in larger quantities than those small bottles? By the way, what's in Mapp?
|
|
brian robertson
- Sunday, 01/07/07 13:13:33 EST
|
Guru/Ptree I used black iron pipe with forged steel fittings, no threads. I requested 10 psi propane because I saw that several forges use that much. The propane company refused to put in 10 psi without welded fittings. I tig welded it cause I needed the practice. The outside diameter is a little over 3/4".
Guru, I do have a hole in the end of the crankshaft that supplies grease to the clutch bearing. When i got this machine the babbitt was shot and I rebushed with bronze. Was there a hloe drilled perpindicular to the shaft that would allow grease to flow to the slip ring?
Thanks Ben
Ben
|
|
Ben
- Sunday, 01/07/07 13:28:26 EST
|
Thanks for the input. Anymore info will be appreciated.
|
|
brian robertson
- Sunday, 01/07/07 13:45:57 EST
|
Cameron - reference your Canadian Forge and Blower drill press, where are you? The post drill manufacturers name suggests Canada or Northern U.S. I have an extra smaller Jacobs chuck No. 33B with a newly made (and unused/ untested) 1/2 inch shank on it. Cover the postage and it's yours. Contact me through my hotmail account and put Jacob's Chuck in the subject.
The shank was made in my workplace as a training job for the newest apprentice on the lathe, as a buckshee job (and at my request) solidly locked-in as 'absolute' last on the job priority list. The shop supervisor made that apprentice redo the job four times until it matched the sketch. Far better quality then I needed. Also since the new shank hasn't been used there isn't a flat spot ground into it for the locking screw/bolt.
Oh, the spec's for the 33B are: drill bits 5/64 to 1/2 inch; and tap threads to 5/8 - 16.
Overcast and unseasonably warm (5 Cel.) North of the Lake (Ontario.)
Don
|
|
Don
- Sunday, 01/07/07 14:10:36 EST
|
LG Clutch: Yes, there was supposed to be a hole under the babbitt of the pulley. It may be packed with babbitt. Opening should be radiused and polished.
Plumbing: If the gas company required welded piping then by code it must be done by a certified welder certified for this work in this locality.
MAPP: You can get it in refillable cylinders from some welding suppliers.
|
|
- guru
- Sunday, 01/07/07 14:54:06 EST
|
Could MAPP be used in combination with propane to get forge welding temperatures in a forge? Thinking is forge would normally run off propane. A MAPP line would be T-ed off of supply line. When forge needed to be bumped up for forge welding a bit of MAPP could be added to the air/propane mix.
|
|
- Ken Scharabok (Poor Boy)
- Sunday, 01/07/07 15:04:48 EST
|
Drill Chucks and Maintenance:
When scrounging used chucks you need to be familiar with the different chuck types and their problems. The primary problem is from folks hanging up bits and wearing the jaws. They almost always wear tapered and at some point will no longer grip will. You can open the jaws and look into the chuck to see if the flat on the gripping part of the jaws is tapered. If it is noticeably tapered then the jaws need to be repaired or replaced. In either case the chuck must be disassembled.
To disassemble a Jacobs chuck you press off the locking sleeve. It will push off the nose (front) of the chuck. You can do this in a large machinist's vise or arbor press. You will need a piece of pipe or a large socket to act as a pusher. Once off the nut will fall off in two pieces. Then the jaws slip out through the nose of the chuck.
A repair kit for a standard chuck consists of a new nut and jaws. The nut is actually broken in two so that it is virtually seemless when reassembled. To reassemble you put the jaws in first. They only fit in one order so some trial and error is necessary. Then you assemble the nut onto the jaws with some grease. Press the sleeve back on using a pusher tube that sets on the gear teeth. When seated properly the key fits well and the sleeve will rotate smoothly.
To repair jaws you can stone or grind the gripping surface to a straight line. Due to being on a V if the flat has parallel sides then it it right. Grinding a flat on jaws that were nearly pointed will increase the minimum size the chuck can grip but will save the chuck.
Often chucks that just seem not to work right can be disassembled and cleaned then reassembled and work much better. Often chips and gradue get in the chuck and interferes with its operation.
Tapered Chuck Mounts: These are difficult to match and I much prefer to buy new arbors to fit. . . I HAVE taken Morse taper arbors and remachined them to fit other things such as hand crank drills but left the Chuck taper alone.
Removing tapered arbors or shafts can be tricky and wedges do not always work well. In Jacobs chucks there is a small hole between the chuck opening and the taper. It is too small to use a punch through but it can easily be drilled out. I've drilled out this space to 7/16" on a 1/2" chuck then used a 3/8" punch to tap off the arbor.
Chuck maintenance does not seem like an important topic but it is easy to find yourself with several machines that are using the same chuck or a collection of worn chucks. I have two sizes of drill chucks for each of two lathes and two drill presses plus some others. Once you have a small collection like this it also pays to start obtaining Morse taper adaptor sleeves if more than one machine uses Morse tapers (all mine do). Adaptor sleeves go from size to size and often jump a size or two as well. In general you do not want to use adaptors but they are necessary to use Morse taper drills and to interchange chucks between machines.
Along with Morse taper arbors you also need the wedges to remove them from each other as well as from spindles. These are different than the wedges used to remove chucks from arbors. Morse taper wedges come in a variety of sizes to go with each taper and sleeve. You can make them if you know what they look like but you can also buy them cheap enough.
Although I have never seen one the hand crank drill folks offered tapered bore spindles as an option.
|
|
- guru
- Sunday, 01/07/07 15:33:04 EST
|
I have a fairly new Forgemaster two burner gas forge. One of the burners burns in the venturi only, the one on the left with the spark igniter. Any ideas on how to cure this? The other side works fine.
|
|
John Burrill
- Sunday, 01/07/07 19:13:16 EST
|
Ben;Tig welding is not an approved method [in Canada anyway]of welding pounds gas lines.O-A and arc are generally approved and mig when done indoors with gas shielding ,not flux core wire.The propane company may want to inspect the installation,best to get someone qualified to do the work
|
|
dimag
- Sunday, 01/07/07 22:51:13 EST
|
Ben, Note that Dimag is a professional gas line welder.
|
|
- guru
- Monday, 01/08/07 09:24:35 EST
|
John Burrill: I recommend contacting the vendor you purchased it from.
|
|
Ken Scharabok
- Monday, 01/08/07 09:26:12 EST
|
Forgemaster: John, This is a serious problem. Burning in the burner tubes will burn them out or worse. Any time this happens in ANY forge shut it off immediately!
Have you thought about calling Forgemaster OR one of their dealers? To cure this problem the first thing is they are going to ask questions.
Forgemaster has a very nice web page about how to light their forges and the difference between new and old forges. There is a retrofit air restrictor for early models to improve how they light.
|
|
- guru
- Monday, 01/08/07 09:35:57 EST
|
Dear Sir or Madam:
I have a BS in Applied Science and Technology and a K-12 science teacher.
This semester we are working on the them "If you could go back in time what would you need?". Naturaly, mining and metal working is a key item. The problem is, honestly, I have never mined, refined or molded any metal. I have no more than a vague idea that meteorites may have been used and that there is a historical tie-in with pottery firing.
As my audience is quite young I need to have a basic understanding and be able to present it in 30 minutes or less. They will not be required to produce usable tools at the end :)
Can you give me a quick run-down on what the most simple set up would be to get iron (or other metal) implement production started should one suddenly find themself in the stone age?
Many thanks in advance!
|
|
Yet Reader
- Monday, 01/08/07 15:27:56 EST
|
Dear Sir or Madam:
Seems typos R' me today...actually I don't have a K-12 science teacher. Rather, I am one. Secondly, we are not working on the them but instead a theme. Sorry, I better go back to the coffee pot. My cafine low light is on.
|
|
Yet Reader
- Monday, 01/08/07 15:31:39 EST
|
Hello,
I am a sound effects recordist for a film production company. As always we are out gathering fresh new sounds for movies we work on. Who would I talk to about getting a hold of a large bellows (renting or purchasing)? Something similar to the one pictured on this link would be wonderful:
http://www.anvilfire.com/21centbs/forges/50bellow.htm
Please note I am on the west coast of the U.S. Thank you so much for your time!
All the best,
Jeremy
|
|
Jeremy
- Monday, 01/08/07 15:44:06 EST
|
How metal started being used after the stone age (so I've been told, maybe it was just the aliens) is that "native" copper was just found pretty much lying around on the ground. It could have been formed just by hitting it with a rock (maybe they tried to knap it at first like the flint?). As you bang it into shape, it starts to work-harden and eventually will crack, heating it up and dunking in water will fix this, which is called "annealing". I couldn't guess on how they stumbled onto bronze. Once they actually starting messing with iron (some of which was unknowingly steel), they probably discovered the secret to hardening it fairly quickly, since the method to harden steel is pretty much identical to the method of annealing non-ferrus metals. Since copper is soft enough and doesn't need to be hammered hot, maybe you can even let the kids hammer a copper bar a little and make keychains in the shape of smashed copper.
|
|
AwP
- Monday, 01/08/07 15:44:33 EST
|
Hello,
I am a sound effects recordist for a film production company. As always we are out gathering fresh new sounds for movies we work on. Who would I talk to about getting a hold of a large bellows (renting or purchasing)? Something similar to the one picture on this link would be wonderful: http://www.anvilfire.com/21centbs/forges/50bellow.htm
Please note I am on the west coast of the U.S. Thank you so much for your time!
All the best,
Jeremy
|
|
Jeremy
- Monday, 01/08/07 15:54:49 EST
|
Yet Reader; in many ways bronze is a better metal for tools being easier to make and work with---being able to cast in simple clay or stone molds is a big help! Bronze is actually about the same hardness as plain iron as well. Why did they make the switch? *Tin* was hard to find to make bronze; even the phoenicians found it profitable to sail from the Mediterranian see all the way to Cornwall in England to get tin to make bronze. Iron ores can be found all over the place from the iron sands to bog iron.
I have smelted iron from ore using Y1K techniques and could do so given stone age technology support---However it would take a number of people supporting me while I did it: mining ore and clay, cutting wood and making charcoal; building the furnace, skinning and tanning animal skins for the pot bellows, etc---a lot more overhead than working native metals that will reduce and even melt in a common campfire under some conditions!
May I commend to your attention "The Mastery and Uses of Fire in Antiquity" for an overview of how biomass fueled furnaces were used for smelting.
Thomas
|
|
Thomas P
- Monday, 01/08/07 16:13:55 EST
|
Could you advise me how to repair a broken in two 75 kg anvil
bought from Euroanvils?
thanks
|
|
Riva
- Monday, 01/08/07 16:43:02 EST
|
Restarting Technology or the reality of the Connecticut Yankee in King Arthur's Court:
Yet R.
Fiction and fantasy often takes up the subject of what would happen IF someone with advanced knowledge landed in the past. . probably nothing. The reason I say this is that there have been individuals throughout history that solved technical problems well in advanced of their time and nothing came of it. Why? Because society was not ready. There was no infrastructure to support the knowledge and no driving need. Without the need of a better mousetrap (such as a plague of mice and rats) society would not buy nor support the manufacture of improved traps.
With THAT in mind you would first needs lots of charcoal. This assumes there is a bountiful supply of wood, workers to coal it and transportation from the forests to where the metal is to be smelted.
Second, you need the ore. The more primitive the operation the richer the ore. Very rich ores often have veins of native metal in them that are simply melted out. But this is a rarity almost as rare as meteoric metal. The ore must be mined and transported to the place where it is going to be smelted. This is usually close to the mine.
Then you need a flux. This is a compound that helps seperate the rock from the metal and makes the resulting slag fluid so that it can be poored or taped off. Flux is often sea shells or a lime rich limestone.
Last you will need a source of mechanical power to blow the air on the fire to make it very hot or to hammer the metal if you are making iron. This is more common in making iron than in smelting copper.
So you need, fuel, ore, flux, power and transportation. When you combine these needs it makes more sense of my statement about societies needs. It takes many people working cooperatively to make metal. It also dictates where you are making metal. Ore is heavier than normal rock and therefore hard to move. Transportation can be by people carrying the ore, or animals carrying the load or in a more advanced society by boat or wagon. In the most primitive society the transportation of goods is by people power. So that cooperation comes into play again. Your power source can also be the manpower, horse or animal power, wind or water power. Again you most primitive power source would be people. So you have people making charcoal, digging hard rock ore, providing transportation and mechanical energy.
Did I say that you needed LOTS of people to help you?
The ore is mined then crushed. It is then roasted in a bonfire and crushed again. Hard work. The charcoal is broken up into pieces about 1" in size.
Then the charcoal is put into a cylindrical shaped furnace made of brick and clay. The type of brick and clay is based on earlier technology of the potters making ceramics. The technology of making pottery comes first and leads to the discovery of smelting metals.
SMELTING: Air is blown into the bottom of the furnace using a bellows. In small operations this may be done by hand. As it may take all day and part of the night to smelt a load of metal it will take more than one person.
When the fire is hot more charcoal is added to fill up the furnace. On top of this is put some crushed ore and a little flux. The amounts must be carefully measured and recorded so that the copper smelter of iron master can repeatedly produce metal and improve the efficiency over time. This record keeping meant that the leader of the operation was usually the most well educated of the group.
As the fuel burns down more is added and more ore and flux as well. Each batch of fuel, ore and flux added in layers is called a "charge". Keeping track of and adjusting the charge as needed was the Master smelter's job.
It was also important to carefully control the amount of air entering the furnace. Most ores are a compound such as an oxide of a metal. To separate the oxygen from the metal the fire must have excess carbon and make hot carbon monoxide which would help strip (reduce) the oxygen from the metal.
After a number of charges were added to the furnace there would be a pool of liquid metal at the bottom of the furnace with a pool of molten slag on top of it. Occasionally the furnace would b "tapped" (a hole poked in a thin clay spot) and the molten lava like slag would run out. This would leave more room for metal at the bottom of the furnace.
When there was sufficient metal in the furnace it would be removed. The method of removal depends on the metal. Copper and cast iron would be drained out by tapping the bottom of the furnace and run into molds. Wrought iron would be removed with tongs as a semi-molten "bloom" and then hammered into shape. There is a big technological difference between these three metals but the basics given above are the same.
So, as you see, you start with a cooperative society with a knowledge base that allows measuring, counting and keeping notes. You also need the previous technological base of making pottery in high temperature kilns (ovens). AND you must have the NEED. Without a serious need for the metal most societies would not make it. Producing food would be more important. However, if a society was on a trade route where they could easily trade the metal for food and clothing and other good THEN it would be worthwhile for the whole village to be in the metal manufacturing business.
The act of extracting the metal is fairly simple once discovered. Convincing all your neighbors to help you is the hard part!
|
|
- guru
- Monday, 01/08/07 16:57:36 EST
|
I've seen Discovery channel "How It's Made" and they showed a method of crushing ore to a powder, then running it through a moving belt of magnets. The iron sticks, the rock falls out. Then the iron powder is rolled under heat into pellets. The pellets get refined further in other processes. I'm sure I'm oversimplifying it, but that's what it looked like. If this is right, shouldn't those pellets be mostly pure iron? Is there any way to get my hands on any of that?
|
|
- Nippulini
- Monday, 01/08/07 17:23:46 EST
|
Dear Guru
Could you advise me how to handle a broken anvil?
thanks in advance
Riva
|
|
Riva
- Monday, 01/08/07 17:36:20 EST
|
Nip, The iron oxide is still magnetic and what this does is separate the gross rock from the true ore. Then the oxygen must be separated from the iron. The process reduces the amount of or heated and fuel needed. When fuel is cheap you heat the rock and ore. . when fuel is expensive you try to reduce the amount of rock.
|
|
- guru
- Monday, 01/08/07 17:59:15 EST
|
Broken Anvil: Riva, You need to be more specific. Is the horn broken off? The heel? Broken at the waist or right through the center?
Arc welding will be the way to go. As this is a steel casting you will need to be prepared to preheat the parts brior to welding.
The first step will be to make weld preps. At the root they will want to be 45#&176; making a 90#&176; joint about 5/8 to 3/4" wide. Then the prep usually changes angle and tapers out gently to an inch or two depending on the depth of the weld.
The parts would then be aligned, waste bars used to hold them in place. Then the whole preheated to about 300#&176;F and welding started. If using stick welding then stop and clean the slag between each pass, peen and continue. Weld until flush with a common rod everywhere except the face. Stop about 1/2" short of the face. Use a SAE7024 to finish at the face with one pass of hard facing rod if you want.
Then lots of grinding.
|
|
- guru
- Monday, 01/08/07 18:14:54 EST
|
Riva:
I would suggest that you contact John at Blacksmith SUpply (an Anvilfire advertiser) and ask him about warranty. Unless you used plastic explosives on it, that about had to be a manufacturing defect to make a cast steel anvil break in two pieces.
|
|
vicopper
- Monday, 01/08/07 18:19:54 EST
|
More anvil repair: How deep the weld depends on where the break is. By the way, HOW did you break the anvil???
If the broken part is a heel or horn or a piece of such then the weld should be full penetration. If the waist is broken then you just need a good deep weld (about 1.5" all around).
If broken vertical through the center then I would question the quality of the casting seriously. Any place that breaks probably had sand or porosity that you may want to cut out and then build back up as part of the repair.
When done welding any thick body areas I would do a post heat with a large torch or rose bud while keeping the face below 350#&176;F. Then cool slowly while keeping the face cool (use a wet swab on a stick). You would want to use a Tempil stick and keep checking until the no part of the anvil is 350#&176;F and then it air cool over night.
Then grind. You will often find weld porosity in the face, edges, working sides or horn that needs to be cut out then rewelded.
|
|
- guru
- Monday, 01/08/07 18:29:19 EST
|
John Burrill-- have you checked to see that the balky burner tube is not simply clogged-- doesn't have a big fat chunky wasp nest in it? Wasps LOVE tubes.
|
|
Miles Undercut
- Monday, 01/08/07 19:44:49 EST
|
Yet R, a very good visual resource is the mini series, "Out of the firey furnace" It was on PBS a few years ago, and my local library has the 6 tapes. Goes into great detail on early metalurgy and how it is thought these things were discovered.
Nippilini, I believe that the process you describe is the Tacanite process that was used to concentrate ;low grade ore. It was mothballed for years, and a few years ago when the Chinese were buying any iron/steel they could get, they contracted to open that mill back up and to supply the pellets to China for 10 years I think.
|
|
ptree
- Monday, 01/08/07 20:07:30 EST
|
semi-enclosed coke forge? My forge is outside and doesn't have a hood. I burn coke. I've recently come across a stack of insulating furnace bricks - the light, soft ones - and am wondering about the pros and cons of making an arched roof for my forge. The intention is to reflect heat to improve efficiency so I can back off on the air-blast thus reducing scale etc. I've seen a few old, brick hooded forges, but never the kind of "tunnel forge" I'm thinking of. Is there a reason most people don't have reflective/insulating roofs on their forges? Obviously one needs to have easy access to the fire, but a high roof with large opening would allow this.
|
|
andrew
- Monday, 01/08/07 20:15:32 EST
|
andrew: I've seen that done alot with charcoal, the traditional Japanese forge has a tunnel, but I'm guessing that since coal is so much hotter that people rarely feel the need.
|
|
AwP
- Monday, 01/08/07 21:31:58 EST
|
Nippulini
Locate some ore docks and follow the train tracks leeding to them, you will find piles of iron ore laying around these areas. Last time I was in Michigan anyways this was the case.
|
|
- Leaf D
- Monday, 01/08/07 22:08:56 EST
|
Nip: The iron ore pellets are about the size of small marbels, fairly round, but not smooth. You might be able to find them along railroad tracks around Philly, not sure.
|
|
Dave Boyer
- Monday, 01/08/07 23:17:37 EST
|
Riva - I too would suggest asking the dealer about waranty, as a steel casting should be ductile and have bent before breaking. You havn't said anything about a BENT broken anvil. If You end up having to repair it Yourself, post a picture on Forgemagic.com if You can, then We could give more specific instructions. When repairing broken tool steel at the plant they used a preheat and postheat of 400f and 9018 rod with tool steel finish passes on the working surfaces, but that was on heat treateed tool steel parts at about 60-62 R"C".
|
|
Dave Boyer
- Monday, 01/08/07 23:44:47 EST
|
A good broken anvil story:
A few months back I came across a William Foster (~1849 as I recall) with a good face and over a hundreweight, but with the horn broken off. I picked it up for a young beginning blacksmith (Matt Brenzo) for about $50.00 and said not to worry too much about the horn, I'd keep my eye out for a stake or something similar. Last week, while I was visiting one of our folks from Camp Fenby and the Longship Company up in Pennsylvania, we trotted off to an antique shop where he pointed out an Old English style anvil, originally about 133#, with the heel broken off, but a well-shaped horn. It was marked down to $35. Master Brenzo now has one heeless and one hornless anvil for a complete, if somewhat flexible, unit. He's promised to send me pictures of the two sited together.
Turning cold on the banks of the lower Potomac.
Visit your National Parks: www.nps.gov
Go viking: www.longshipco.org
|
|
Bruce Blackistone (Atli)
- Tuesday, 01/09/07 00:25:50 EST
|
Coke Forge: Andrew, What you are describing was in the past a manufactured coke forge. Either Champion or Buffalo made them. The roof was held together in a slight arch by tension bolts and end plates. Coke forges run VERY hot and need a very heavy duty fire pot.
|
|
- guru
- Tuesday, 01/09/07 00:37:08 EST
|
Half Anvils: I've seen this situation as well. It is not perfect but it is very serviceable AND you have two basic forging surfaces so two people could work. I used to take an old un-horned Colonial anvil to work with Boy Scouts. Worked fine and they learned to turn a scroll over a rounded corner.
|
|
- guru
- Tuesday, 01/09/07 00:39:53 EST
|
Sounds like Riva and her friends should mebbe quit using C-4 at their anvil shoots.
|
|
- 3dogs
- Tuesday, 01/09/07 03:56:30 EST
|
we are brass casting unit , we are facing problem of iron in our scrap. how can we remove iron for melted brass
|
|
Neeraj
- Tuesday, 01/09/07 08:09:40 EST
|
Speaking of anvil shoots, a segment of Ripley's Believe it or Not yesterday included one. Two guys (perhaps brothers) were able to shoot a 100lb anvil over 500 feet in the air. For a base they used what sort of looked like a sawer's anvil with a hole in the top. When the anvil landed it buried itself about three feet into the dirt.
For the shot anvil to land on the base anvil would be extremely rare, but I have heard stories of it happening.
|
|
Ken Scharabok
- Tuesday, 01/09/07 09:34:00 EST
|
Iron in Brass: Neeraj, Normally iron floats on the brass and can be scraped off with the dross OR a bottom pouring crucible used. Normally the best automated method of iron removal is to grind the scrap as small as is economically possible then use magnetic separation prior to melting.
If the iron is dissolved in the brass then that is a different matter. The normal manner of reducing unwanted content in copper alloys is to dilute the contaminated material in good clean material until it has an acceptable trace metal level. Otherwise the purification of the metal is similar to that used to process pure copper and would be very expensive. This is done by chemical and electrolitic seperation.
|
|
- guru
- Tuesday, 01/09/07 10:38:24 EST
|
Raw Taconite is about 25 to 30% iron, It's also one of the hardest rocks in the world, after processing you end up with a pellet that is about 65% iron, the pellets come in four main types, acid or fluxed, and the iron can be magnetic or non-magnetic. The fluxed pellets include limestone in the pellet. If you really want some I will walk over to the tracks and see if NT400 had a leaking car lately, 125 100 ton cars 4 to 6 times a week, there might be some.
|
|
- Hudson
- Tuesday, 01/09/07 12:21:11 EST
|
Taconite pellets were our least favorite ore for our Y1K bloomery---way too much flux for our system; you got iron soup that was a pain to consolidate. You also had to crush the pellets to powder since the Y1K system was not as aggressive as a 100' high coke fired blast furnace.
Thomas
|
|
Thomas P
- Tuesday, 01/09/07 12:34:46 EST
|
"For the shot anvil to land on the base anvil would be extremely rare, but I have heard stories of it happening."
Ken Scharabok -
Which reminds me of the story about early scientists (or philosophers) tryin to demonstrate the earth's rotation by firing a cannon STRAIGHT up. A number of random influences caused the ball to land... in a somewhat unpredictable manner with little or no relation to the east-west rotation. Well, thank goodness for Foucault's pendulum! :-) www.si.edu/resource/faq/nmah/pendulum.htm
Expecting a touch of snow on the banks of the Potomac.
Visit your National Parks: www.nps.gov
Go viking: www.longshipco.org
|
|
Bruce Blackistone (Atli)
- Tuesday, 01/09/07 12:36:12 EST
|
Thanks Hudson... I live in the Philly area and the freight lines around here I have no idea their contents or destinations.
|
|
- Nippulini
- Tuesday, 01/09/07 13:52:47 EST
|
I am planning to make a scroll jig by inserting steel pins into wet concrete and letting it dry. Any one aware of any toxic fumes from concrete? I don't have a welder so I can't use a metal form.
|
|
- Robert Dean
- Tuesday, 01/09/07 15:16:04 EST
|
On the GA TV program, Anvil & Forge I believe, it had a segment on one of the Southern Regionals in Madison, GA. David Oliver shot an anvil. When it landed he went out and stray-painted a bullseye around it.
|
|
Ken Scharabok
- Tuesday, 01/09/07 15:17:20 EST
|
Hello,
I am a sound effects recordist for a film production company. As always we are out gathering fresh new sounds for movies we work on. Who would I talk to about getting a hold of a large bellows (renting or purchasing)? Something similar to the one picture on this link would be wonderful: http://www.anvilfire.com/21centbs/forges/50bellow.htm
Please note I am on the west coast of the U.S. Thank you so much for your time!
All the best,
Jeremy
|
|
Jeremy
- Tuesday, 01/09/07 15:36:10 EST
|
Robert, do you have a drill, if so drill some holes in a angle (so you can clamp in a vise) and heat the pins, insert and head the bottom side, I think concrete will break and the cost will be high. You do want to be able move this jig around don't you.
|
|
daveb
- Tuesday, 01/09/07 15:56:17 EST
|
Robert, why not drill holes for the pins in a block of wood if you can't drill holes for them in a chunk of steel? Concrete will be rather heavy and fragile. If you have long term exposure to hot metal you can make unslaked lime.
Before I bought a welder for $45 i used to bring the stuff I needed welded to a local welding company Friday around quitting time and they would do it for a sixpack.
Thomas
Thomas
|
|
Thomas P
- Tuesday, 01/09/07 15:58:53 EST
|
Concrete Scroll Jig ???????
I am not sure of the point. Are the scrolls that big?
Concrete is a relatively weak material, especially in small pieces. It is also NOT heat resistant. If you are going to be hot bending then the concrete will spall (explode in flakes from steam).
There are many ways to make bending jigs none of which I would recommend using concrete.
|
|
- guru
- Tuesday, 01/09/07 16:00:57 EST
|
Great Bellows: Jeremy, sorry for not addressing your question sooner. I would recommend you contact the California Blacksmiths Association at www.calsmith.org.
Great bellows used to be factory made for a brief time but no more. Most existing bellows are antiques that are no longer in working condition due to cracked and dry leather or rotten wood. Others are hand made and quite variable. Each bellows tends to make its own noises or none at all.
Bellows Sounds:
In some large antique bellows they had wooden check valves which would make a little wooden plop sound each time they closed. Most bellows however have leather or felt covered valves that make no sound. At the most these may make a light fffifing when overloaded.
Rushing air. Most of the rushing air sounds are made when the bellows is pumped too hard and there are leaks. You get some ffffifing of leaking air at the top of the stroke. This may be coming from gaps in the leather, hinges or boards and sometimes the valves.
The "breathing" sound is actually the fire being blown on in a rhythmic manner.
The most distinct sounds coming specifically from the bellows are the slackening and tightening of the leathers which is somewhat like the flapping of sails on a sailboat except at a more rhythmic rate.
The sounds of individual bellows are that of the linkages and boards. The squeak of a pivot, the creak of the wood rafters supporting the linkage and bellows, the rattle of the chain linkage. These sounds are only heard in a specific installation and would be different in every shop yet familiar enough with the other sounds that they would be recognizable to a blacksmith who has used a bellows.
To find these sounds you will need to travel to the shops with the installed bellows to record their sound. At the least you need the bellows, the linkage, handle and a stand. A forge would also be in order.
|
|
- guru
- Tuesday, 01/09/07 16:23:31 EST
|
maybe you could also make a wood - with nail type jig and face it with cement board or clay or something for heat resistance? laminate, drill holes thru, insert pins?
|
|
- vorpal
- Tuesday, 01/09/07 16:33:02 EST
|
Hey, does anyone know wehre you can buy cast iron tea kettles, the kind that can be hung over a fire from a tripod or something?
i dont even know where to start, i konw some camping stores carry cast iron fry pans, and sometimes thin enamaled coffee pots, but i need a old cast iron tea kettle,
also, has anyone here had water boiled in a properly seasoned cast iron pot or kettle? does the cast iron change the taste because you have to oil it to season it, if tea was made, would it taste bad?
thanks,
Cam
|
|
Cameron
- Tuesday, 01/09/07 16:36:42 EST
|
jeremy if you really want a bellows, they are on E - bay from time to time. Expensive shipping and possibly in disrepair, though. There are also plans to build them, I think maybe a link on this site...
|
|
- vorpal
- Tuesday, 01/09/07 16:37:30 EST
|
I recently purchased a cast - iron tea kettle at an asian grocery. These places often have them an different sizes but usually they a decorated with chinese or japanese motifs. The water tastes fine as the pot came already seasoned and ready to go but they did recommend boiling a couple pots first to rinse it. And always wipe it completely dry....
|
|
- vorpal
- Tuesday, 01/09/07 16:41:58 EST
|
What tool is used to get the "scoop" seen in the back of japanese chisels and plane irons?
|
|
JGJG
- Tuesday, 01/09/07 16:46:03 EST
|
Hello!
Thanks for your reply. And thanks so much for the leads.
As a side note: We are looking for a large bellows to use in conjunction with objects that we will construct to imitate a large animal�s trachea. (The bellows would be operating as lungs). The desired sound would be the respiratory system of a large ill beast. In our recordings we are hoping to capture how the air interacts with our artificial trachea. So, we would be avoiding sounds like leather and wood creaks� though, at some point on another project that would be great to record!
I also took a look at blowers for pipe organs. Yet, since we are interested in having very detailed control over the �breathing� and since we feared that a pipe organ blower would be too steady sounding for an ill animal, I�m exploring the idea of something that is hand operated.
Thank you for all of your guidance. I�m learning more every day!
All the best,
Jeremy
|
|
Jeremy
- Tuesday, 01/09/07 17:13:30 EST
|
Iron tea kettle:
Cameron, I've seen heavy iron tea kettle for setting on the stove for sale in wood stove stores.
|
|
- JohnW
- Tuesday, 01/09/07 18:29:38 EST
|
Cameron; you boil the water in the tea kettle---you make tea in the tea *POT* which is generally ceramic. One of the reasons to boil a few kettles of water before using is to line the tea kettle with a lime depost and so keep the water and the iron a bit further apart. I would suspect that Lodge still made a cast iron kettle and that Lehmans (sp?) hardware store in OH that supports the Amish comunity would sell them. Woodstove dealers sometimes sell them as humidifiers for wood stoves.
Bellows: Jeremy; when SWABA demo'd at the Festival of the Cranes in 2005 we had one smith who was using a double lunged bellows. It turned out that there was a group from a wolf sanctuary that was set up around the corner from the smiths and the wolf they had on display was very nervous due to the sounds of something *LARGE* breathing heavily right around the corner from him...
Thomas
|
|
Thomas P
- Tuesday, 01/09/07 19:25:43 EST
|
Thanks, so much,
yeah, i called some local hardware stores and camping places, and they have one, 2 Qt and it costs $19.95
thanks,
|
|
Cameron
- Tuesday, 01/09/07 19:48:47 EST
|
Wow! Is there any way I could get in contact with that smith? Thank you.
-Jeremy
|
|
Jeremy
- Tuesday, 01/09/07 19:50:49 EST
|
Thomas,
From what I see on an old post, you built one... Is this true?! :)
|
|
Jeremy
- Tuesday, 01/09/07 19:56:53 EST
|
Jeremy, Yes, I built that one and used it for many years. It was not quite "traditional" as I used flap valves of my own design and decorative hinges. I suspect that to replicate an animals lungs a bellows would do very well but would not want valves at all since you want the air moving in and out through the same opening (bellows blow continously in one direction). Lungs on their own make little noise when healthy but make (as my old GP used to describe when I had asthma) wheezes, rails, rattles and . . . forget the last term).
Click on my name and you should be able to e-mail me. If that does not work use our contact form.
|
|
- guru
- Tuesday, 01/09/07 20:05:10 EST
|
Japanese Metal Work: JGJG, I am not positive about this specific feature but Japanese blade smiths do a LOT of shaping with scrapers. Scrapers can be flat or curved and will make a considerable amount of chips in experienced hands. Hollows and grooves are also hand scraped by various smiths. They are also ground but scraping was preferred because it removes metal faster than natural abrasives operated at normal (for them) speeds.
A throughly modern smith (of any era) would use whatever tool he had on hand that would do the job the most efficiently and effectively. Hand scraping, grinding, milling. Results are what is important.
|
|
- guru
- Tuesday, 01/09/07 20:14:26 EST
|
Thanks for the replies about the scrolling jig. The concrete settled some and the pins shifted so that's out. Think I'll try the pins in a board thing.
|
|
- Robert Dean
- Tuesday, 01/09/07 20:22:23 EST
|
Pins in a board: If you are bending relative thin flat stock you could use and all wood bender with hardwoood dowels and a softwood base. Or a step up would be a hardwood base with precision drilled holes and press fit dowel pins.
For tube and light scroll bending you can saw a bending template from laminated plywood.
But if you would be a LITTLE more specific about what you are trying to achieve then we could be a lot more help.
When setting steel pins into concrete there are TWO methods. One it to weld the pins to rebar anchored in the form. The second is to support the pins from above the concrete with a board. To cast a loose concrete block with steel pins the block would be cast upside down with the pins set into 1) the soil 2) clay 3) a board as part of the bottom of the mold. There are all kinds of ways to do these things. . .
|
|
- guru
- Tuesday, 01/09/07 20:35:06 EST
|
GURU: That was a good tutorial and review on chucks. Nothing I hadn't heard before, but still a good review. Thanks!
|
|
- John Odom
- Tuesday, 01/09/07 22:05:02 EST
|
Hi again ,
i was just wondering, canadian tire and ribtor both sell kettles , for humidity on a wood stove, i have not seen the ribtor one, but the canadian tire one says not for boiling water for human consumption, why would this be? and is there anything you can do to it to make it drinkable from?
also, if the other one does not have a label saying not for drinking, is it safe to assume that as long as it is seasoned correctly, it is safe to use?
|
|
Cameron
- Tuesday, 01/09/07 22:05:47 EST
|
Cameron-- copper vessels need to be tinned inside to prevent poisoning.
|
|
Miles Undercut
- Tuesday, 01/09/07 22:33:40 EST
|
I mean Cast Iron Kettles
|
|
Cameron
- Tuesday, 01/09/07 22:48:27 EST
|
I'm looking for a few good brains to pick and I think you guys have some of the Best on the Net, so here it goes. I'm getting myself set up for doing armor, I've done some in the past and i've always worked with steel. I'm interested this time in doing something a bit more interesting and I'm leaning to bronze. This isn't really a forging questions but more of a what is the diffrence between all the diffrent bronzes out there and what should I look for? Aluma Bronze, Silicom Bronze, Phos Bronze. I'm mostly working in sheet metal, cold forming but I dont' know enough about what all the numbers mean to know what is what. Help!
Thanks
|
|
frostfly
- Tuesday, 01/09/07 22:50:35 EST
|
JGJG, The alpha guru is right about the scrapers or "shaves". The Japanese call the tool a sen. They come in different sizes. For the channel on the backs of chisels, a sen is used because the base of the channel is flat, not radiused. The sen is a push tool. I've made them, so I know the conformation of the tools and their heat treatment.
BRONZE INFO. You might google the Copper Development Association. They have online information and can send written information.
shibui.com sells Japanese cast iron tea kettles.
|
|
Frank Turley
- Tuesday, 01/09/07 23:48:56 EST
|
Bellows:
I believe there's a traditional blacksmith shop, with bellows, at Sutters Mill historic site in California. I know the national Park Service has a bunch of them scattered in surrounding states like Oregon and (a little more distant) Arizona and Colorado. (I can check the NPS sites tomorrow to confirm.)
Silicon Bronze:
I've done some fairly nice work sinkingf and raising with silicon bronze, but mostly in components such as spangenhelm quarters. (I used to pick some up whenever I visited Denver from Atlas Metal Sales, but the last time I was there they didn't want to be bothered; so I'm looking for other sources of late.)
|
|
Bruce Blackistone (Atli)
- Wednesday, 01/10/07 00:16:41 EST
|
Brass and Bronzes: Frostfly, Most of the good sheet brass is plenty workable and is often picked for color when doing armour. Some of the nicest looking armour is made using steel with brass components like decorative rivets, trim strips and such. This can be cold worked or cast. Many brass armour decorations are cast using a good yellow brass such as cartridge brass or brazing rod.
Technically bronze is a copper tin alloy and brass is copper and zinc. However, there is a lot of cross over in names of traditional alloys as well as alloys that are made with both tin and zinc that are called bronzes. So be aware that often someone will call a brass bronze (Naval Bronze is brass) and a bronze, brass. Don't get into arguments about it. Just note the alloy and go from there.
In the small shop all the same techniques that apply to steel are applied to copper alloys. Forging, raising, and repousse'. But as noted above brass is also cast in various quantities and is commonly part of the armourers craft. See our news articles covering the two West Virginia Armour-Ins we attended.
|
|
- guru
- Wednesday, 01/10/07 00:22:37 EST
|
Jeremy,
I would recomend maybe making your own bellows? Not really all that hard if you are wanting to make a set that would not require valves. And you could make it relitavely quite and less expensive by using vinyl for the side walls. Some plywood would work plenty well for the top and bottom along with some hardware store hinges a little pipe and such. here is a link that is fairly easy to understand http://www.emainc.com/radnor/bellows.htm
you can massively simplify these plans for what you are wanting to do with a creature breathing in and out the same tube.
Good Luck
|
|
James Rader
- Wednesday, 01/10/07 03:27:27 EST
|
Maybe this has been seen before,, http://www.youtube.com/watch?v=E7bnffUHYUI
|
|
- Mike
- Wednesday, 01/10/07 03:42:19 EST
|
I plan on using it for a color addition, and my day job is in Picture framing and the idea of doing anything with gold(aka brass) makes me want to gag. So I'm more interetested in Bronze and Copper to add some color to what is usually a very monochromatic craft.
A couple questions on tools. I'd like to pick up a bench throatless shear, and a Hole Punch. i'd like them both to work on at least 14 guage sheet steel if not a bit thicker. I've surfed the net a lot and seen a lot that claim to be able to cut a lot, for not a lot of cash. which makes me a triffle nervous. I know the Beverly is the standard, are any of the rest of them worth the price? I've been looking on Ebay and found Item number 280068696827 Any suggestions on Punches? Again on ebay i found Item number 200066704120
|
|
frostfly
- Wednesday, 01/10/07 03:53:34 EST
|
On bellows as lungs, the equivalent would be an animal with a valved hole in its chest to suck in air, then exhaled through the nose or mouth. I would think the entry valve on a bellows would have to be sealed and then the exit valve locked open to create the same intake/exhaust sound, with possibly some curves or obstructions in the end tube. For this a fireplace bellows might work just as well as a large forge bellows.
|
|
Ken Scharabok
- Wednesday, 01/10/07 05:22:55 EST
|
Aquatic mammals (whales and the like) have a valved breathing hole, but its not a valve that would make an audible clunk or clicking.
|
|
- Nippulini
- Wednesday, 01/10/07 09:49:14 EST
|
Frostfly,
I have used one of those punches before. My little brother had it when we were making modifications to his little bass boat (I think he borrowed the punch from where he works), and we used it for punching holes in some of the aluminum for pop rivets. IIRC we were punching holes for 3/16 rivets in 1/8 aluminum (maybe slightly thinner), and it worked pretty good. I don't know if it was that exact brand of punch, but it was very similar.
I've never used one of those types of shears, but just looking at it, it doesn't look like it would cut curves very well. It appears that the back of the frame is very narrow, allowing the steel, after it is cut, to pass STRAIGHT through the shear. If you tried cutting a curve, it might get hung up on the frame. But that is just what it looks like to me.
If you have the available funds, definitely splurge and get a Beverly, you wont ever regret it. With a little practice and a delicate touch you can cut a near perfect straight line. With the assistance of a couple roller stands you can cut down a 4X8 sheet into halves, thirds, whatever you want. Very handy indeed.
I also made a shorter handle for mine out of 1" conduit that is half as long as the original. I still get plenty of leverage when cutting 18 gauge and thinner, and it is a little easier on the shoulders not having to make that long arc swing needed with the longer handle.
If funds are a little short, get what you can afford, and then save up for a Beverly. Another good idea is to check auctions and such. I got my Beverly B1 at a farm auction for the grand total of 10 dollars (nobody there really knew what it was or what it was worth!) The deals are out there, ya just gotta look.
-Aaron @ the SCF
|
|
thesandycreekforge
- Wednesday, 01/10/07 10:21:32 EST
|
Sheet Metal Tools: Frosty, I paid $150 for a very old Beverly that needed blades (another $90) for a good reason. These are highly stressed tools that are made of top grade steel castings. Most of the clones are made of CI or poor quality steel castings and not finished well.
Your first item is not a throatless shear. This is an old and common design for a cheap straight line shear. They are a marginal tool at best and do not cut curves. There are only a couple designs that cut curves and the Beverly is the best. In fact they are the ONLY manufacturer to make their specific design until the Chinese cloners started copying theirs. . . Well, the Russians probably copied it for their own use during the Cold War.
The punch you pointed out is very light duty. Look at the C frame. Good ones are about 2" thick and SOLID not lightly ribbed. This one also clearly states it is only good for 20ga steel.
Another big difference between Beverly, Pexto and Whitney punches and the cheap imports is that the punches and dies for the US brand name stuff are made to cut stainless steel which is very hard and abrasive on dies. These high alloys dies and blades have a VERY long life on mild steel and almost infinite on non-ferrous.
 The tools above were part of a group I collected for doing armour type work. Some are tools I had and others were picked up in 2003 and 2004. They were cleaned and painted for this photo. The shear in the center is the Beverly #2 shear mentioned above. It had so much use the blades were worn to where they no longer could be adjusted to work. . new blades made it good as new. The punch in the foreground cost $14 at a fleamarket without dies. I bought an OEM set of 3 sizes for $60. NOte how heavy the C section of this punch is compared to the cheap ones. . . The beakhorn stake cost $85 used which was about half of normal. I've purchased several others since. The crimping pliers are very handy for crimping and bending. I inherited these from a very good friend that died in an accident in the 1970's. The pecking hammer is one I have had since I was 14. The tools above were part of a group I collected for doing armour type work. Some are tools I had and others were picked up in 2003 and 2004. They were cleaned and painted for this photo. The shear in the center is the Beverly #2 shear mentioned above. It had so much use the blades were worn to where they no longer could be adjusted to work. . new blades made it good as new. The punch in the foreground cost $14 at a fleamarket without dies. I bought an OEM set of 3 sizes for $60. NOte how heavy the C section of this punch is compared to the cheap ones. . . The beakhorn stake cost $85 used which was about half of normal. I've purchased several others since. The crimping pliers are very handy for crimping and bending. I inherited these from a very good friend that died in an accident in the 1970's. The pecking hammer is one I have had since I was 14.
Not shown and also collected during the same two year period was a set of mushroom stakes and steel balls that range from a little over an inch to 8" in diameter. They include old large ball bearing balls, stakes, a heavy duty grader body ball joint ball forging and numerous ball mill balls. All were picked up at various blacksmiths meets and from blacksmithing contacts. You do not need to spend but a few hours in an armourer's shop to realize how valuable these work surfaces are.
Since then I have been collecting various repousse' and sheet metal hammers. Good ones for armour work are both rare and expensive. I suspect those sold NEW by Blacksmiths Depot are a better deal than used. However, many patterns are no longer in production. I also came across a larger Whitney punch at about 10% of new.
My point above is that tool collections do not happen instantly unless you are willing to spend a lot of money. Those that outfit their shops with discount no-name equipment in a hurry are often sorry they did so. Some of these tools are actually good deals but a majority are junk designed specifically for the fleamarket and ebay where price is everything and there is no dealer responsibility, warrantee or replacement parts.
When you DO buy good old tools used at the fleamarket, ebay or hammer-in you are often buying tools that will actually appreciate in value while you are using them. Most of the Chinese junk sold on ebay is not worth the shipping and is worthless once used.
It is obvious from your questions about the tools above that you have little experience with what good tools look like or cost. Start with industrial catalogs from respected brands and study the specs. And until you know the difference between good and junk stay away from ALL the new stuff on ebay and PLEASE do not ask me about it. 99.99% of it is junk and I do not need to look. Often there are good used tools on ebay but you will have to risk paying auction prices on those which is often too much.
Take your time studying the industry, find folks doing it and see what tools they are using. If you MUST do it now then find work arounds and stick to the inexpensive processes. You can do a LOT with a ball pien hammer and a wood block.
|
|
- guru
- Wednesday, 01/10/07 11:26:12 EST
|
Jeremy; yes I built my own double lunger bellows using heavily treated canvas from a place that did work for oil well drilling rigs for the "leathers" I had it for about 20 years and left it with friends in OH when I moved to NM---to force myself to make one with the improvements I had thought up---still on the list.
The fellow whose bellows disturbed the wolf is the webmaster for SWABA and I believe he could be contacted through the SWABA web page that happens to be linked from the ABANA-Chapter.com link found on the "Navigate Anvilfire" drop down menue on the top right of this page...
To me most of the sound is generated when the air goes through the tuyer and charcoal or coal and not just the plain bellows which mainly has the valve flaping and perhaps creaking of the pole.
Kettles: I'd guess that kettles *not* for human consumption were made from cheap cast iron that does not have a "clean history" and so rather than worrying about someone suing them over possibly toxic contaminants in the iron they just rate them "not for human consumption" Since most of these are not used for cooking anyway it's cheaper than making sure that your metal is good to start with. A company that makes them specifically for cooking, like Lodge, probably uses better iron and charges for the extra care and cost!
Armour making: may I commend to your attention www.armourarchive.org An extensive forum on armour making. May I also comment that medieval/renaissance european armour was often painted, engraved, blued, gilt, enameled and covered by embroidered silk surcoats---not monochrome at all!
Thomas
|
|
Thomas P
- Wednesday, 01/10/07 11:49:37 EST
|
You are a veritable Font of Information. I'll wait til I can find the good stuff, Thanks for the info.
|
|
frostfly
- Wednesday, 01/10/07 12:02:58 EST
|
Cameron, FYI - Japanese style cast iron teapots are usually enameled on the interior and are meant to be used for steeping the tea leaves only, not to boil water. It sounds as though you're trying to use the teapot in a historical reenactment setting. I'm not certain what time period you're trying to emulate, but in a lot of them sheet metal vessels were used a lot more than heavy cast iron. For the French & Indian War and Revolutionary War periods, tinplate is probably the most accurate choice of material, with tin-lined copper sheet being a second. Most of the American Colonial period reenactors I know have switched to tin lined sheet copper cooking vessels - period correct, they don't wear out nearly as quickly as tinplate (most readily available tinplate is electrolytically plated, and the thickness of the tin layer and resulting durability do not match that of the older methods). Handmade copper ware is not cheap, but you do support an American craftsman and it will probably last your life & longer. The oldest piece I have is about 15 years old now, and the exterior has a great patina while the interior is still in great shape.
For a source, I can recommend Westminster Forge out of Connecticut they have a web prescence & will ship product to you. I've purchased from then, but have no other relation to them.
|
|
- Gavainh
- Wednesday, 01/10/07 13:32:48 EST
|
Tool Capacities: I find it interesting that the deep throat punch with the light weight frame listed on ebay is rated at 2,400 pounds. My little Whitney #5 Jr. is rated the same but only has a 2" throat. When punching at full capacity (3/16 through 1/16) the little #5 which is VERY stoutly made almost requires two handed operation and springs enough that you think (or are sure) it is overloaded. . . The springing C frame is a hint that you should not squeeze harder.
The 1.75" depth frame on the little #5 Jr. is made about the same proportions as the Whitney punch shown in the photo above. Doubling the the depth of the frame increases the strain by 4x. So how do you get away with a lighter frame? You don't. It will bend or break on the first slight overload or full capacity operation.
Compare what the ebay punch of supposedly the same rated capacity looks like compared to the original at Roper Whitney.
http://roperwhitney.com/punching/2-45.cfm
The price is 9x more but you get 5x the materials or more and the tool is the "real McCoy" not a cheap knock-off. It is designed for REAL use not once or twice by a homeowner and forgotten about. AND as Gavainh pointed out above you are supporting your fellow American workers.
NOTE: The new tonnage chart on the Roper Whitney site is a little optimistic or assumes everything is perfect (exact metal thickness, soft temper, sharp punches). My tonnage chart and calculator on our math page is based on the same company's figures from the 1960's when they were a little more conservative.
|
|
- guru
- Wednesday, 01/10/07 13:44:36 EST
|
JGJG on Donfoggknives.com there is information about the sen and a little photo demo of building one as well
|
|
- vorpal
- Wednesday, 01/10/07 15:24:50 EST
|
Jeremy's artificial lung:
I would think, since you want to create air movement for an animal breathing, you would want non-linear airflow, as opposed to the way a great bellows works. A great bellows draws air in through one hole (or two) and expels tit through the nozzle. No air is drawn back through the nozzle due to check valves. Your �trachea� powered by a great bellows would only exhale, never inhale.
I would suggest, rather than a leather bellows, you look into a modified version of the Japanese-style box bellows. These are made as a long rectangular or square cross-sectioned box, with a plunger that is pushed/pulled back and forth to move the air. A series of check valves controls the flow of air much like in the great bellows. If you built a box bellows without the check valves, then it would move the air in and out a single hole, the same way your diaphragm moves air in and out of your lungs. It would be dead simple to construct and quite effective. Just calculate the swept volume you need to get the air movement appropriate to you particular �trachea� , build to size, and you�re in business. Keep in mind that the volume of air moved in any given moment is a function of the square surface area of the piston, and the duration of the flow is a function of the length of the box tube.
For your purposes, I�d suggest constructing the box bellows from medium-density fibercore (MDF) board, as that would be very dimensionally stable and have a smooth surface for a low-friction movement of the piston. The piston in a Japanese box bellows is traditionally lined with fur to effect a seal, but I would use felt or synthetic chamois skin. Built using a table saw, your pieces should be true enough to require no more than several thousandths of an inch gasket allowance, so the synthetic fabrics would more than suffice.
I hope this helps you.
|
|
vicopper
- Wednesday, 01/10/07 15:48:25 EST
|
Frostly-- a Rotex punch will run you $10K undelivered.
|
|
Miles Undercut
- Wednesday, 01/10/07 18:04:37 EST
|
Welded ring video,
That videolink Mike directed us to is awesome. Whats the opinion, was the ring forged round, or machine rolled somehow before welding. Look in the background of the shop too, There is alot of sledgehammer work going on. Anazing what us mere humans can do.
|
|
- Sven
- Wednesday, 01/10/07 18:13:45 EST
|
Sven. Rings can be forged in one piece if the hammer has enough height. I suspect that this piece was forged to a curve on a drop hammer, then wrangled off, now welded.
The more amazing film is making a several ton wrought iron anchor by the build up process. The huge foot diameter anchor shank is built up from hundreds of rods that look like 1/2" rod. Starting with a large piece at welding heat more pieces are added on in a semi continous process largely welded by hand with sledges. This would probably be the same process used in India to make the great iron columns there.
Yes it is pretty amazing.
|
|
- guru
- Wednesday, 01/10/07 18:37:21 EST
|
To who ever can help..
Two years ago, I purchased a 160# hay- budden anvil.
The anvil is in very good condition and I only paid $70.oo
for it .I would like to know what the estimated value is and how to find out the age.Thank you for your help.
|
|
scott lent
- Wednesday, 01/10/07 21:02:45 EST
|
Scott Lent: Value depends on a lot of variables with condition of the anvil being a major one. On age, look on the front foot for a serial number. May or may not start with an A. Tell us what it is and we can tell you year of manufacture.
|
|
Ken Scharabok
- Wednesday, 01/10/07 21:11:45 EST
|
I am a collector of antique Black Forest clocks. i am currently restoring a antique clock with a automated scene above the dial. The automation is of two men working over an anvil. one of the figures arms are missing and need to be remade.. but i do not know what action he is preforming. i am hoping someone who understands the Black Smith trade here may help. This clock was made in Germany Cir 1850 so this is the time period of the shop.
There is a large anvil. The larger of the two men is holding a large hammer. On the hour when the clock strikes he hits the anvil square in the center to the sound of a Gong.
This is fully finctional and works perfectly.
The second man is the mystery.
He is about 3/4 size, and is missing his arms. As the clock ticks his arms move to do some "action". It would be a fast action. I dont think he is swinging a hammer as the one man is taking up almost the whole anvil with his large hammer.
My question is what would man number two be doing?
Is there a tradional for two men to work at the anvil?
Other than swinging a hammer what action could be being preformed.
I know this is a different question, but thought someone here may be able to help.
Please contact me at madeinfurtwangen@yahoo.com with suggestions.
Thanks,
Justin
|
|
Justin Miller
- Wednesday, 01/10/07 23:09:43 EST
|
Hello, I have a question about crown dies for my Ron Kinyon power hammer. I recently purchased the Uri Hofi video about free form forging. A very good video by the way. After watching the video I decided to make a set of crown dies. Would the shape of the dies best be made in the rectangular section of a sphere? Or should their convex shape be more of a compound curve? Thank you for your advice.
|
|
Dan
- Wednesday, 01/10/07 23:34:26 EST
|
Justin Miller: The other guy would have been holding the work with a pair of tongs.
|
|
Dave Boyer
- Thursday, 01/11/07 02:09:52 EST
|
Huge wrought anchor, Where does one see this video ?
Indian Columns,
The theory I heard was the column were welded by stacking a freshly made, but worked to shape bloom on top the other and so on.
I would guess it was done horiziontal, rolling the column end into and out of the fire as needed, then column tilted upright when finished.
I expect examining the iron fibers orientation would verify one method or the other.
|
|
- Sven
- Thursday, 01/11/07 04:44:47 EST
|
Justin Miller: I agree with Dave Boyer. The other one is likely the blacksmith who would have held the work being struck and a smaller hammer. The large hammer one would be the striker, hitting where, when and how hard the blacksmith indicated him to.
Essentially the striker is trained to hit where the blacksmith does as hard as the blacksmith does when the blacksmith tells him to. For example, at some point the blacksmith may have moved his hammer aside or tapped the anvil, telling the striker to take one more hit and stop. Blacksmith may then have done some touch-up work on their own.
Old joke: Blacksmith says to striker, when I nod my head, hit it.
|
|
Ken Scharabok
- Thursday, 01/11/07 05:21:17 EST
|
Crown Dies: Dan, These have been made a great variety of ways with differing results. Those on the Big BLU's were developed by Uri Hofi and Dean Curfman of Big BLU Manufacturing Co. They are two curves a long one and a short one hand dressed to blend together. The result is quite a sophisticated shape and much of it is in the skill of hand dressing. These dies are also striking each other quite often and must be made of very good properly heat treated steel.
Depending on what you want do do these dies are proportional to the hammer. They are easy to make too aggressive. Others using crown dies such as Dan Boone use nearly flat dies with a slight drop off. These allow for radical shaping but cannot make the kind of textures the more aggressive dies make.
The problem with the crown dies is they are one part of a system. You need regular combination dies for blocking, necking and flat forging and a way to change from one to the other fairly rapidly. Those making the best use of these dies use them setup on two hammers.
If you REALLY want the same shape dies used in the video then Big BLU sells them in the weld on style of their old hammers.
|
|
- guru
- Thursday, 01/11/07 09:27:44 EST
|
Iron column Sven, The method used by the smiths in the anchor video makes more sense. The bundles of small bars could be heated in several relatively small forges (they were pieces several feet long at full welding heat). The smaller pieces heat rapidly and have more surface at or near a liquid heat as is common in wrought iron welding. The large piece never returns to the forge as it is kept hot by its mass and constant addition of fresh hot iron. No crane is necessary except for the part being grown and that is mostly for rolling the piece over and to keep the end over the anvil. However, once a large mass is achieved that is long enough the work is its own anvil for the purpose of small sledges hitting it. Keeping the work floating in air also helps keep it hot. .
The method is quite ingenious and takes advantage of the thing that primitive societies have more than anything else, manpower. Besides the crew of strikers which would probably need to be rotated during the project there are also people tending the fires, hauling fuel, working the bellows, feeding stock to the fires, bringing hot stock to the work piece, hauling water to the workers, doing the hoisting. . . AND either everyone needed to know exactly what they were doing OR there was more than one person directing the different activities. The later is most likely as the more primitive a society the more guarded the knowledge.
So you have a master smith and two assistants, at least 20 strikers or experienced laborers. Then the support crew. In a technologically primitive society you are looking at maybe a total of 50 or more all involved in this one project at the same time. There would also be days of preparation collecting the fuel, iron, tools and planning the project.
It is a very expensive, large project and no wonder there are only three in India.
In the "modern" 19th century shop there are steam blown coal forges and a rectilinear overhead hoist. They also had a steam hammer for starting the work. A lot less people were needed but the process still made sense.
The wrought iron anchor video is one of several pirated copies of various qualities that are floating around. I have access to a legal copy in PAL format that we are looking to have converted to VHS or DVD.
|
|
- guru
- Thursday, 01/11/07 12:43:26 EST
|
Scott Lent: Interestingly enough, I see a 190# Hay Budden bid up over $800 on ebay (110077196867) and the reserve has not yet been met.
|
|
- JohnW
- Thursday, 01/11/07 13:30:13 EST
|
Scott; price is also dependent on location with the coasts running higher than the middle of the USA or the SW for that matter.
Thomas
|
|
Thomas P
- Thursday, 01/11/07 13:59:08 EST
|
Intresting looking anvil on (uk) ebay, well the anvils not anything special really, but ive not seen a stand like it before (the bay # 130067584806 )
On anchor making the 'traditional' way a Smith from scotland (Bruce Wilcox)has got a dvd out doing the rounds of him and a crew hand forging one (the 'traditional' way) of 5 cwt (if i remember the weight correctly) -
ive not had chance to see it yet but have heard good things - he posts ' across the street ' every now and again if anyone wants to track down a copy.
|
|
- John N
- Thursday, 01/11/07 14:57:48 EST
|
Hello Guru
Thanks a lot for your help and for the advises of the other blacksmith surfers as well , they will help me to handle that problem.
To make things more clear, I'll try to explain how we got to try to repair a broken anvil: in august 2004 we bought 18 units x 75 kg "euroanvils" from the European distributor, in order to open our blacksmith school in south France . When they arrived we discovered strange marks inside some of the round holes of some of them. Due to the need of receiving students we accepted to keep them with the specific written guarantee that they will be replaced in case of severe damage �
In may 2005 after 3 forging classes we noticed longs cracks all around the heel on one anvil . Two wooden hammer blows were enough to let the heel fall.
You can only imagine our feelings in that moment.
To make two years corespondance short , despite our polite requests the Czech partner of euroanvils didn't stand behind the guarantee he gave, nor did the American side of Euroanvils see fit to answered our emails.
You can see the pictures bellow to illustrate the situation and the type of people using our anvils . Maybe the way to repair is more obvious, or should we get into anvils shooting instead ?
You could also see that the cracks existed when they have painted in black the inside of the hole.
We have similar cracks on others anvils , and we wonder how to handle the repair , does one of you have heard about such defects in euroanvils at the American side ?
Thanks a lot for your help.
Riva
ps how could I paste a picture to the text?
|
|
Riva
- Thursday, 01/11/07 15:40:55 EST
|
Guru - for converting a PAL format video to NTSC (North American) format check with a few of the convenience stores in your area; I�ve seen many in the primarily South Asian (Indian) community areas (of Toronto) where conversion services are available for a fee. Usually it�s for converting family videos sent from or to relatives in the old country.
Don
|
|
- Don Shears
- Thursday, 01/11/07 15:49:59 EST
|
guru, what do you think about a hybrid venturi/ ribbon burner design? Could one or two large venturis supply fuel/air for a multi orifice burner head or would each orifice have to have a separate small venturi? I like the idea of very even heat plus atmoshperic air, but would the burner head style impede the vacuum of a venturi?
|
|
- vorpal
- Thursday, 01/11/07 16:00:23 EST
|
John, The Wilcox video is interesting but the forging was obviously a one off and they were not prepared for many situations. The power hammer used was just barely capable of the work and the space was quite cramped. While it is was a large forging for a small shop it was not that impressive. I suspect that the rumors of the big anchor forging film I mentioned (which IS very impressive) has had an effect on his sales.
On the big anchor the last scene is one where 15 strikers head a rivet. The last striker comes from another job and has to carefully pick his time to get into the melee. As the rivet is finished the extra strikers fall back and a group with hand hammers finish smoothing the head. That was pretty impressive. But the important thing was the build up method of making such a large piece.
|
|
- guru
- Thursday, 01/11/07 16:04:32 EST
|
Riva, you can e-mail them to me. Click on my name and the address should pop-up.
It sounds like you have been caught in the middle of some business problems. Euroanvils in the US has not had any such quality problems that I know of. However, castings are inspected and if bad, rejected and never reach the public.
However, the Czech "partner" is an agent that arranges with foundries (which have changed several times) and sells the product to Blacksmith Supply who technically owns the patterns and name but does not make anything off European sales.
It sounds to me like you were sold a bunch of seconds or rejects. I will call John tonight and find out what I can.
|
|
- guru
- Thursday, 01/11/07 16:28:56 EST
|
John N; a bunch of us are lobbying SOFA to get Bruce Wilcox over as a demonstrator for Quad-State. Feel free to dogpile on! Contact info on the SOFA website linked to here through the ABANA chapter link on Navigate Anvilfire.
Guru Bruce gets a crew together about once a year to do heavy work---just to keep the process alive I think---and is in a pretty remote location---the Shetland Islands IIRC. What do you think your shop would have been like in a place like that? I salute him for the ammount of such work he does.
Thomas
|
|
Thomas P
- Thursday, 01/11/07 16:46:13 EST
|
You are probably right , we've lost time money energy and a bit of reputation trying to resolve this embarasing situation, but it seems that only the technical issue will get us out of it !?
thanks a lot for your help
the pictures are on the way
|
|
- Riva
- Thursday, 01/11/07 16:46:14 EST
|
Sending an e-mail to any of the contact points on the SOF&A website does not guarantee anyone will see them. Their address is SOF&A Quad-State 07, P.O. Box 24308, Huber Heights, OH 45424-0308. Someone might read the mail.
Same situation with Centaur Forge. You can send them an e-mail inquiry about one of their products but don't expect an answer.
|
|
Ken Scharabok
- Thursday, 01/11/07 18:00:47 EST
|
I will heartily second what Thomas said about Bruce Wilcox. A kinder, more helpful soul would be harder to imagine, and he is a third, or possibly fourth, generation blacksmith. His business is primarily making and selling hammers these days, I believe, as he is no longer up to much if any farriery as he used to be. He has not, and does not, as far as I know, sell the video of the anchor making; he graciously offered to share it with a few friends, gratis.
|
|
vicopper
- Thursday, 01/11/07 19:56:41 EST
|
Is there a way you can tell how heavy a piece of metal will be without actually having the metal at hand? i'm making a pot rack about 4 feet long about 18 inches wide with 2 inch wall brackets, and 2 curved pieces as supports about 18inches long on top it's all gonig to be made from 3/16" by 2" flat bar. i need to find out how much it will weigh.
thanks
Andrew B.
|
|
- Andrew B.
- Thursday, 01/11/07 20:01:36 EST
|
Weight Calculation: Andrew, The density of mild steel is 0.2835 pounds per cubic inch. So, multiply length x height x width to get volume then by the density. The weight will be as accurate as the dimensions down to a small fraction of a pound.
|
|
- guru
- Thursday, 01/11/07 20:14:46 EST
|
Free Video: Well, in that case it is a very nice video. A friend shared a copy and from the case and disk I assumed it was a commercial product. My apologies.
|
|
- guru
- Thursday, 01/11/07 20:16:31 EST
|
Andrew B the Mass3j calculator on the navigate anvilfire menu will give some good numbers for piece parts of regular dimentsions, add up the bits and you're in the ballpark.
Thomas
|
|
Thomas P
- Thursday, 01/11/07 20:32:55 EST
|
Justin Miller, I would bet that the figure with no arms is the supervisor and NOBODY knows what he was doing!!!! :-)
|
|
quenchcrack
- Thursday, 01/11/07 20:48:55 EST
|
Andrew B.-- Don't forget to weigh the pots. They can really add up. Those cast iron Lodge frying pans and those fancy orange-enameled French stew pots weight a ton. If you put some kind of angled supports inside the curves it would help. And don't dare use screw anchors. Get lag bolts into the wall studs.
|
|
Miles Undercut
- Thursday, 01/11/07 20:51:12 EST
|
vorpal-- almost every home gas furnace has just a couple or maybe several Venturis supply multiple-outlet burners. Find Ransome out in California in Google and chat with them. That's all they do, is supply the goodies to solve heating problems.
|
|
Miles Undercut
- Thursday, 01/11/07 20:56:47 EST
|
On that 190 pound Hay-Budden, there be anvils and there be anvil sellers. This is a collector's quality anvil due to its rareness. Then there is the anvil seller. Matchlessantiques does an outstanding job of presentation and offers a money back guarantee. (I will admit though that he has driven up anvil prices in general and Steve jokes he can't find cheap anvils anymore.)
On the prices he gets, it is sort of like the grading system to where you throw out the high and low scores and then bell curve the rest. His is the one to get thrown out.
|
|
Ken Scharabok
- Friday, 01/12/07 04:11:03 EST
|
Steve understands two things, the auction mentality, and that there is always SOMEONE out there that will pay much much more than anyone else. He provides good quality and a guarantee AND is not in a hurry. He lists things with a high reserve and then waits and re-lists until that person with lots of money comes along. If you want to get the highest price you have to be willing to wait.
|
|
- guru
- Friday, 01/12/07 09:29:27 EST
|
AndrewB.,
You can also take weight off of a weight chart. The charts are sometimes furnished by steel suppliers, and charts are found in metalworking texts. In the U.S., the weight is given per foot run.
To add a little to what Ken has said. That company describes how they "clean" each anvil to look for flaws, so there is a labor cost that they want to cover. Looking at their other offerings, the Mouse Hole bickern [stake, as they call it] is good looking and may be rare, but the asking price appears outlandish.
|
|
Frank Turley
- Friday, 01/12/07 09:31:53 EST
|
Exorbitant Prices: Frank, This is a ploy used on various listings. Most lists can be sorted by price. If you are the lowest you are generally on the top of the list which is the best place to be. But if you are the highest you are at the bottom of the list which is the next best place to be. AND occasionally someone sorts in reverse order either by accident or on purpose and you are on top again. . . AND a price that is 100x out of line makes people look as well. . .
So why list an item at a price you are never going to sell it at? ADVERTISING. That bickern Steve listed had links to his other sales. He may even get some off-sale offers to give him a clue what people are willing to pay.
Even honest dealers play the game on ebay.
|
|
- guru
- Friday, 01/12/07 10:19:43 EST
|
If someones willing to pay the price its not to expensive !
a cheap watch will tell you the time for years, but it would be nice to have a Rolex oyster !
Like I said, ive not seen Bruces video, but i do think its a good thing that there are people who are out there, actually doing it, for no financal gain.
They hand forged an anvil one year, theres no sane reason for doing this, other than a love of what you do which is pretty commendable really, you can hypothosise all you like about these things but very few acutally make the effort to try.
Now if you need a bigger power hammer Bruce let me know !! :) (although I suspect that half of the lights on Shetland go out when the 5 cwt is running! )
|
|
- John N
- Friday, 01/12/07 12:31:19 EST
|
AndrewB
Weight Calculation: Get a copy of "Machinery's Handbook" it has tables for mass....thank you again guru, for recommending it!!!
Pot Rack: Make sure your anchor holes are 16" apart. This way, each bolt will be into a wall stud. Personally, I don't like making the ones that suspend from the ceiling unless they're over an island counter as they always look like an "afterthought" when the kitchen was designed.
|
|
Thumper
- Friday, 01/12/07 12:31:55 EST
|
Wilcock, not Wilcox - my mistake, apologies.
|
|
- John N
- Friday, 01/12/07 12:53:57 EST
|
Forging an Anvil: With ever rising prices and foundries becoming more and more difficult to do business with a forged and fabricated anvil (welded at waist) is becoming a more viable commercial venture.
Peddinghaus anvils are still selling quite well and 100 year old anvils of similar manufacture are now selling for as much or more. Peddinghaus is currently back in production but only at the whims of Ridge Tool Co. who did not want the anvil manufacturing in the first place (the wanted the forged vices). How long they will stay in production is unknown.
The entire world demand for anvils is not enough to get any one foundry really interested in making these hard to cast items. Manufacturers are constantly changing foundries and looking for new suppliers.
Eventually, the low production rate of building an anvil from heavy slabs by flame cutting, machining (and possibly some forging) and welding will be the most economical method to manufacture and anvil. At current prices and demand I am surprised that someone out there has not gone into producing a line of premium quality "hand made" anvils.
There is a variety of options according to the shop capabilities but it is no problem from a technical standpoint.
It is coming. . .
|
|
- guru
- Friday, 01/12/07 13:19:00 EST
|
Andrew B.
Alternately, try finding a copy of Pocket Ref by Thomas Glover
http://www.sequoiapublishing.com/pdt_pocketref3ed.htm
It includes many references I've found useful in the shop and everyday life. It isn't as mechanically focused as Machinery's but in it's own right it is a very valuable resource (as well as being a might bit less expensive AND more portable than Machinery's).
-Aaron @ The SCF
|
|
thesandycreekforge
- Friday, 01/12/07 14:26:45 EST
|
Oh yeh,
It DOES include the steel weight tables.
-Aaron @ the SCF
|
|
thesandycreekforge
- Friday, 01/12/07 14:30:30 EST
|
Machinery's Handbook not portable???? I carried one in my brief case along with all my drafting tools for 15 years. . .
I have the CD version which I need to install on my new laptop. . . that's pretty portable and goes with me everywhere I travel these days.
But remembering the density of steel in lbs/cuin (.2835) is the best and most portable.
|
|
- guru
- Friday, 01/12/07 15:32:53 EST
|
Thank you for the advice you gave me thursday regarding crown dies for my power hammer. I realize I made mine to aggressive. Today I have a new question. How do I best identify white metal and is it possible to weld? Thankyou
Dan
|
|
Dan
- Friday, 01/12/07 17:37:02 EST
|
In a 1957 newspaper article on Fisher & Norris it noted they were producing 70-80 anvils a week with a crew of 16 - and apparently still making decent money at it. I wonder how many of those 110 lb anvils Harbor Freight sells a week?
|
|
Ken Scharabok
- Friday, 01/12/07 18:58:53 EST
|
Portable,
I guess portability is subjective to some degree. It would take a bigger shirt pocket to fit Machinery's in though ;)
On the same subject, I just checked on Amazon and noticed that the price on Machinery's had dropped over 33 percent. Is there another edition coming out soon, or has the price just finally started coming down? Did a quick webcheck and didn't see anything about a new edition anywhere?
-Aaron @ the SCF
|
|
thesandycreekforge
- Friday, 01/12/07 19:13:37 EST
|
So I receieved a set of taps from McMaster & Carr the other day. Man they are incredible! I bought 3 Ti. Nitride coated and 3 Ti. Carbonitride coated. Haven't gotten to the carbonitride ones yet. They cut like butter and I am quite happy with their performance. My thought now is why the heck do the harware stores carry such crap? Is it like pantyhose where the manufacturer knows of the breakage and figures they make more money with purchases of replacement parts?
|
|
- Nippulini
- Friday, 01/12/07 19:28:58 EST
|
thesandycreekforge,
The Machinery's Handbook doesn't have to be new to be extremely helpful. I bought a 48' edition for $15.00 on ebay and for smithing it has all the necessary info as far as I can tell.
|
|
Thumper
- Friday, 01/12/07 20:01:15 EST
|
Taps and Dies: Nip, I don't understand it. I specifically warn people to NEVER buy hardware store drills OR taps. The bad thing is they are more expensive than industrial quality which you can usually find in any town.
What you cannot convince folks of is that ONE broken tap can cost you enough to buy a whole set of good drills and taps.
|
|
- guru
- Friday, 01/12/07 20:49:04 EST
|
Machinery's Handbook: They normally come out every 4 years so 2008 will be the new edition. Typically they drop the price of old editions in the last year depending on how overstocked they are.
I suspect the biggest market for Machinery's is engineering and trade schools where they have courses on how to use Machinery's Handbook and every student must have one. It is also why you find quite a few fairly late copies available on the used book market. But many are also copies that engineers bought, referred to a few times in a life time and put back on the shelf where they set until the day they died. That is why there are many mint old editions floating around.
The copy I grew up with is an 18th Edition and is on my desk at this very moment. But I also have the 27th on my bookshelf and occasionally refer to it. My Dad still uses his 13th edition.
FOR SALE - MACHINERY'S HANDBOOKS:
We have 5 copies of Machinery's Handbooks from Paw-Paw Wilson's collection. They all available for $25 each + $5 for priority mail shipping in the US and standard rate to Canada. There were others, his sons had first choice. All were bought in recent years from ebay and bookfinder for about what we are asking. See our comparative review linked above for details of editions. Note that most prices mentioned there are now 8 years old.
5th Edition, 10th printing (1919) Moderately rough condition, cover intact, spine split in middle but not separated. A few torn pages and the owners name, date and gift information written on the title page. This one would be worth much more in slightly better condition and I think Paw-Paw paid too much for it.
10th, 13th and 15th Editions, Good condition. slight wear on covers.
11th Edition, well used with old tape on cover edges.
Drop me an e-mail to reserve a copy, first come first serve. Give me a first and second choice unless you are dead set on a specific edition.
|
|
- guru
- Friday, 01/12/07 21:42:33 EST
|
Machinery's Handbook:
I usually consult the one at our library; or I can check it our if I have a long-term project.
|
|
Bruce Blackistone (Atli)
- Saturday, 01/13/07 00:43:54 EST
|
Forging an Anvil: I've been thinking that competing with collectors to buy anvils is a mugs game. I'm surprised there hasn't been more discussion on techniques for producing useful anvils. The few things I have read are more focused on re-creating the old designs rather than making the best use of what is available today and combining some older techniques. That's all fine, but given we have different equipment and heavy scrap steel in a variety of sizes it would make sense for anvil design to evolve to make the most of it. I'd like to see how people have used what they can find to make new, useful designs.
One of the first things I read that got me seriously interested in blacksmithing was the apprentices story about the making of an anvil on this very site. I know it probably isn't economically viable to forge an anvil, but neither is doing re-enactments or maintaining viking ships etc. That story is just an awesome piece of imagery & I'd like to see more of the real thing.
|
|
andrew
- Saturday, 01/13/07 07:21:06 EST
|
Andrew:
Jock (Guru) has noted in the past the Harbor Freight 110 pound anvil wouldn't be a bad starter anvil IF it were redesigned. For example, if they were to use say a 110 lb London pattern as a prototype. Same amount of metal, just a more practical shape. Importers probably either don't know or don't care what was the design of a classical anvil from about 1860-1970 (London pattern).
However, I feel you are basically correct. What if Fisher & Norris was still in business today? Would their top plate (which in their later production also included the top portion of the horn) be initially cut out by flame or water, then milled down for the curve of the horn? Would the rest of the body then be mild steel or ductile iron or rebar-grade material?
Where Mark Fisher apparently made his fortune (and place in history) was in how to consistently bond tool steel to cast iron*. I had a discussion with Richard Postman on this and he noted one member of SOF&A (Dave Sprenkle I believe) told him he had bandsaw cut off the end of a broken heeled Vulcan anvil to square it up. The cut came down through 'pegs' on the bottom of the top plate. Why couldn't pegs today simply be arc welded to the bottom of a top plate in an upside down mushroom shape to get that additional bond guarantee? Why couldn't the top plate be a shaped length of upside down scrap RR track? Here in one piece you may have scrap steel capable of being hardened to some degree and a T-shape bonding area between it and the cast material.
What is the anvil market today? Certainly judging from HF continuing to sell their version, and eBay/conference/personal sales, it is still out there. However, does demand justify the minimum price of a new U.S. made supply?
*I would need to clarify with Richard Postman but I believe Mark Fisher's basic technique was to bring the top plate (with a core in the hardy hole) up to forge welding temperature, place it in a mold, dump in flux and then pour cast iron in. If this was the process, I suspect from pulling out the top plate from its furnace to the start of pouring the cast iron may have been a matter of seconds. (Jock do you known Fisher's specific technique?)
|
|
Ken Scharabok
- Saturday, 01/13/07 08:51:51 EST
|
Having been around some very large drop forge hammers and presses, I can offer the following on forging an anvil in todays market.
To forge a decent size anvil, say 110 to 125#, in the solid, a drop hammer of say 8,000 to 15,000 could produce a nice ly shaper anvil with no joints. The anvil would need to be forged with the parting line from horn to heel and opposite on the base. Typical would also be a 7 degree draft. The flash could be torched or plasma'ed off, so no hot trim dies needed. Then the anvil would need the top and bottom machined to remove the draft and flash lines as would the horn. This would probably require two sets of die blocks, to get them busted, blocked and finished. Figure about $100,000 for the dies.
To forge in two parts with a weld joint anong the waist, would be simpler, but require die changes. Figure about $100,000 for the dies.
You would still need to pay for the hammer, the power source (boiler or compressor, heat treat, and machining)
Open die would require much less in tooling cost, but much more machining, and you still have that pesky heat treat. And this is going to be a large open die hammer.
Open die press. I think perhaps due to the large size of the billet, with inherent heat, open die press may make the most sense for a forge anvil. But you still have the machineing and heat treating.
If i were to look at making anvils from a mordern biz stanpoint, I personally would explore Precision investment casting. The patern costs are doable, the precision aspect gives you the ability to get a casting that would need minimal grinding, and a pretty finish that would be very appealing. There are several companies that precision investment cast in weight up to several thousand pounds per shot. They are used to making highly specified casting in high alloy matels and can heat treat. The only drawback is that they are mostly in the aerospace trade so $$$. Still, if I were doing this as abiz that is where I would first go. The biz case may not fly.
|
|
ptree
- Saturday, 01/13/07 11:30:34 EST
|
Fisher-Norris method: The problem with the Fisher-Norris method is that in today's world it would cost much more than a good cast steel anvil. The problem today is it is difficult to get foundries to do ANYTHING special much less something really odd-ball. Just getting holes cast in a swage block is difficult and raises the price of the block to more per-pound than a good anvil. . .
You have to remember that in Fisher's day labor was very cheap AND foundries had many highly skilled workers on the moulding floor. Today labor is expensive and most foundries have no skilled laborers on the moulding floor. The skilled labor is now in patternmaking, chemisrty, testing.
Steel and wrought iron were also much more expensive than cast iron in Fisher's day. Today the overhead in foundries have produced a situation where the difference in metal costs is almost nothing.
Recreating a method that was cost effective in the 19th century does not make it so today.
TODAY, It is cheaper in low production and even in some high production situations to make chips, to waste huge amounts of material rather than making a casting or a forging which waste much less metal.
TODAY, It is rapidly becoming more economical to avoid the foundry at all costs. Even shops that have the patterns on hand for replacement machine parts now make weldments and machine them to spec. Even in the 1980's when we were having castings made we had several parts machined from solid cast iron billets turning 85% of the billet to chips because it was cheaper than making ONE pattern and having two casting made.
Todays most economical methods of manufacturing anvils should be steel castings. They CAN be made very well but the foundry MUST be part of the anvil manufacturing business OR a very high quality foundry. However, there are less and less foundries and the total world's production of anvils is not a "good" order for any one of these large foundries.
We are rapidly approaching the point where making an anvil in a machine shop will be the best approach. We already have the best anvils being machined, drilled and broached in machine shops. The next step is to produce two piece fabrications from heavy plate. An anvil base of traditional or German shape can be made entirely by flame cutting with no loss in shape or style. The upper body is a little more difficult but it is no problem to setup and machine the conical horn of the German type anvil from a flame cut blank. Electric welding the two pieces together at the waist is a method that has been in use for nearly a century on two of the best anvils manufactured.
The result would be an all steel anvil with no casting defects that could be made of the highest quality steel. This would not be a cheap anvil. It would be priced with the other top quality anvils. Metallurgically it would be better than most cast anvils and possibly be superior to the only forged anvil, the Peddinghaus which may suddenly drop out of production at any time. .
All it will take is someone with the right shop that wants to go into anvil production. Besides the heavy milling machines currently used to face and drill anvils they will need a 30 to 36" turret lathe (vertical boring mill). Some or all of the heavy flame cutting would need to be done in-house as well.
CHEAP ANVILS: There has always been a market for cheap anvils. Even in the 19th century they sold chilled cast iron anvils as a bottom of the line tool. However, the difference THEN was that they clearly stated what they were. Today you have the low lifes on ebay claiming their cast iron junk is "top quality professional . . ." AND they often get prices equivalent to what good top quality used anvils are selling for. Even HF is wishy washy on them as they have no specs. However, they DO sell for an honest price.
|
|
- guru
- Saturday, 01/13/07 12:04:23 EST
|
If you were to machine shop a two-piece anvil why would the top and bottom halves need to both be steel? Couldn't the base be out of mild steel? Even then, does the base necessarily need to end at the middle or could it continue upward to where say only the top 1"-2" were high grade steel?
In reflection, such an adventure is something Emmert Studebaker might have tried.
|
|
Ken Scharabok
- Saturday, 01/13/07 13:09:08 EST
|
Mild steel is steel. . . The waist is the best place to weld as it is the smallest and most regular cross section of the anvil.
A mild steel base would be the rule. However, current heavy steel plate prices are such that there is often little difference in construction grade A36 and a medium carbon plate like 1045 or an alloy plate like 4140. I currently know of a large mass item being made of 1040 steel simply because THAT is what is available.
You also want the solid mass of the top of the anvil to be sufficient for the job. Plating of an anvil by arc welding around the edge does a very poor job. Hay-Budden and others who made two piece anvils welded at the waist figured this out a long time ago when there WAS significant materials savings. Today there is even less reason not to make the joint at the most convienient place.
A nearly perfect design for a fabricated anvil is the Hofi pattern. Flat blocks with no heavy chamfers or curves. The upper body parts can be nested to reduce waste in cutting. It does not result in a very pretty design but it is very fabricateable.
|
|
- guru
- Saturday, 01/13/07 13:47:19 EST
|
is there any reason an anvil needs to be one solid, contiguous mass? I realise stacking horizontal plates that don't have full penetration welds between them is bad - since energy doesn't transfer between layers. However, what about multiple vertical plates with a single, hard horizontal top plate? The laminations would be electric welded onto the back of the top plate one at a time, allowing full penetration welds. The result is a large vertical mass under the hammer, but without requiring such deep welds.
|
|
andrew
- Saturday, 01/13/07 17:18:31 EST
|
This works for a power hammer where a loss of mass efficiency is not too bad but with anvils you are talking about PERSONAL wear and tear on YOU, your body and how long you can work and how much of your life you are willing to put into inefficiency. You can hammer on a wood anvil (YES IT WORKS until the anvil is all flames), a rock, even a gravel pile. But they are all highly inefficient.
Solid mass is too cheap not to use it.
|
|
- guru
- Saturday, 01/13/07 17:52:37 EST
|
Would the gurus care to comment on the proper use of a file. I am working on a blade and keep getting deep scratches (grinners) either from the file being scarred or I am not cleaning off the file and work surfaces more than about every 5 strokes. Chalk didnt seem to make much difference. A new file helped and I have resolve to keep it in the plastic wrap it came in when I is not being used. I am sure that all of the other neophytes metal workers lurking here would appreciate some pointers on use of such a basic tool.
|
|
JLW
- Saturday, 01/13/07 19:27:40 EST
|
JLW.
Keep using chalk. Talc and soapstone also help in the same way. Try using a file card that has not only wire "teeth", but a brush on the reverse. The card is pushed, not pulled. Pulling on it screws up the shape of the wires. A sharpened brass rod can help clean visible pins from the file. I use a brazing rod. Draw filing is helpful on plane surfaces.
You won't get a mirror finish with a file. There is polishing to be done beyond the file finish.
|
|
Frank Turley
- Saturday, 01/13/07 21:47:52 EST
|
Hand Finishing: Filing only goes so far. Keeping chips out of the file is a constant task. I wipe the file with my fingers to remove swarf and prevent chips from building up. When I feel a chip OR see a track in the work, remove it. Same with fine sandpaper.
After filing you can use hand scraping to reduce and smooth the surface further thus keeping flat sharp features. After filing and scraping then you follow with various grits of sand paper.
In the era before finishing primarily with grinding hand scraping was used a great deal.
|
|
- guru
- Saturday, 01/13/07 22:58:15 EST
|
Hi I'm a grade 12 student from Alberta Canada. I relise you probably get questions from newbies a lot but I figured I'd ask anyway. I have taken a begginers smithing course at SAIT and have built a forge (with my dad's help). I have made a few things like fire pokers and wall hooks but I was wondering if you had any suggestions on things that I could make that would be challenging but not overly difficult so I can hone my skills. I would also appreciant suggestions on types of metals that are the best to work with and anything else you think could be helpful to me. Thank-you very much for your time.
Sincerly,
Jennifer A
|
|
Jennifer
- Saturday, 01/13/07 23:29:15 EST
|
Hello...can someone tell me the height of the bottom die on a Big Blu Max 110?...I would like to set a platen table at level height with a desire to purchase a Max 110 in the furture...I have e-mailed Big Blu with this request but no responce...
|
|
- Platte River Forge
- Saturday, 01/13/07 23:47:34 EST
|
Jennifer on the upper right corner of this page is a menu marked "NAVIGATE anvilfire" on it you will see iForge How To, there you will find over 150 projects most fairly simple to replicate.
Enjoy!
Thomas
|
|
ThomasP
- Sunday, 01/14/07 00:27:52 EST
|
Atli; I have a 23rd edition that my wife bought for me for US$5 at the library bookstore in *pristine* condition---nobody checked it out so they got rid of it---not a single grimy fingerprint in it---when I got it.
Thomas
|
|
ThomasP
- Sunday, 01/14/07 00:39:32 EST
|
Tell me more about scrapers.
|
|
JLW
- Sunday, 01/14/07 00:46:13 EST
|
Karen Lewis, wife of Wayne (Coalforge) Lewis passed away in her sleep Saturday morning, after a long fight with cancer. They had been married 37 years this past July, and have 2 kids and 7 grandchildren.
Funeral arrangements are incomplete at this time. Additional information will be posted on the IForgeIron.com prayer list as it becomes available.
|
|
- IForgeIron
- Sunday, 01/14/07 01:33:26 EST
|
JLW, See our iForge Demo #86 Scrapers and Burnishers. Metal Working By Paul N. Hasluck has a good section on scraping. Then look up the Japanese Sen.
|
|
- guru
- Sunday, 01/14/07 09:46:35 EST
|
Jennifer,
Our iForge demos vary in difficulty you will need to pick and chose but eventually you should be able to do most of them.
Blacksmiths work primarily in mild steel in the form of bars and sheet. But they often make their own tools using tool steel. The modern artist blacksmith works in a variety of metals often making mixed metals pieces such as putting copper or brass highlights on their ironwork. Polished brass collars and finials look very nice on black iron work. Of course you can also paint your work to appear to be such and it has been common to gild parts of painted ironwork.
Copper is one of the softest of metals and is great for repousse'. However, you must be careful about using mixed metals outdoors. The different metals cause rapid corrosion of each other.
Stainless steel can also be forged the same as steel then filed, buffed and polished to a bright finish and with no need to be painted to prevent rust. Stainless handles arc welded to mild steel makes nice work with a contrast. If you make welded mixed metal pieces it is best to weld the blank pieces together then finish the weld along with forging the work. This way the weld disapears without any grinding. You can also rivet on stainless steel blades for kitchen spatulas.
Let your imagination be your guide. There are still many new things to do. You will find them as you find your own personal style.
|
|
- guru
- Sunday, 01/14/07 10:18:46 EST
|
Thanks guru. I should have searched first. Thought I knew the contents of the demo's better.
|
|
JLW
- Sunday, 01/14/07 12:02:23 EST
|
ThimasP and Guru
Thanks very much for the adivce. Im sure I be here a lot more looking for advice.
Sincerly,
Jennifer A
|
|
Jennifer
- Sunday, 01/14/07 13:23:46 EST
|
I have a Hay Budden 125# antique anvil in excellent condition. I am interested in selling it and wonder what a ballpark figure would be?
|
|
fred
- Sunday, 01/14/07 13:43:15 EST
|
Fred, Hay-Buddens, while they were last manufactured in 1927-28 are not considered an antique. While exceptional examples are considered by some to be collector's items they are for the most part a modern working anvil. Anvils in the 200 year old range are "antique".
PRICE for the most part is strictly a matter of condition as these are working tools. Severely broken corners, repairs, abuse (chisel marks, broken down edges, bent and misshappened horns, torch cuts and arc beads, severe rust) all reduce the value of the anvil.
Top condition Hay-Buddens have been selling for $4 to $5/lb. while those in rough condition can sell for less than $1/lb. The current average seem's to be around $3/lb.
A lot also depends on your location. In Ohio, most of New England and the Mid-Atlantic old anvils are fairly plentiful. Generally from the Mississippi or Great Plains the farther West you go the least plentiful and the higher the price.
AND a lot depends on how big a hurry you are in. There ARE a few people out there that may pay a lot more than others.
|
|
- guru
- Sunday, 01/14/07 14:34:02 EST
|
Across the Street, Uri Hofi writes that he is just back from China, and will soon be importing lost wax cast 6150 anvils, in a 120 kg size (265lbs).
There is no reason the chinese cant make good anvils, cheaper than almost anybody else. Just because the Harbor Freight anvils are crummy, doesnt mean Hofi's will be. After all, the chinese are making spacecraft- they can do quality if somebody pays them.
While milling an anvil from a solid block is certainly possible, I think its going to be a while yet before its cost competitive with casting. Its true that Jesse James mills custom motorcycle wheels from 2 foot x 2 foot x 1 foot blocks of aluminum, but then he sells em for $2000 and up each.
If anvils could sell for 2 grand, then you could make money milling em from a block. But a machine capable of doing that is well over a hundred grand, plus as mentioned, heat treating costs, so you would have to be running a LOT of anvils, full time, to justify the expense.
The market seems to be buying plenty of new anvils, probably more than any time since WW2, at current prices of $5 and up per pound.
A two piece cast/alloy steel anvil, made today, would probably cost at least double what a nice one piece cast steel anvil costs- like a Nimba. Definitely double what the euroanvils go for. There is just too much that can go wrong, and cost more, for a material cost savings of at most ten or twenty bucks.
Now if we could find an entire factory that worked as cheap as Ken does, then maybe it would work, but once you start to add in all those annoying costs of doing business in the modern world, like rent, taxes, paying employees, insurance, paying off industrial equipment, buying materials at current market prices, and so on, your overhead quickly goes up.
I think that the Euroanvils are an incredible deal at their current cost, and if you try to make any type of anvil in the USA, no matter what your manufacturing technique, you could not come close to that cost.
Kris Ketchum here in the Northwest, is making what he calls the "ultimate anvil" called the BlackJack and it is indeed very nice- with lots of very well thought out features- and it runs very close to three grand.
Reality, and the modern world, is often just no fun at all, especially when it comes to how much it costs.
|
|
- Ries
- Sunday, 01/14/07 15:09:22 EST
|
Ries, I am not talking about milling the entire anvil from a solid block. I am talking about adding one machining operation, a conical horn and replacing forging the halves with flame cutting. Flame cutting has long been more economical than forging OR casting in low to medium quantities for a number of years.
So except for machining the horn you would have the same number of machining operations as Nimba, Peddinghaus and other quality modern anvils. Welding the waist joint would be the same as on Peddinghaus.
I'm sure the Chinese can make a first class anvil but the money is in the numbers and the numbers are just not there. That is why we are getting poorly cast cheap un-heattreated CI anvils from China and relatively poor quality castings from Eastern Europe. There is not enough market for a top quality product made using high production methods. People complain about pattern costs for simple loose patterns, wait until the price comes in for large precision wax casting dies. The only possible advantage is if the resulting casting was so clean that no machining was required afterward (which IS possible).
I still think we are at a place in time where it is ALMOST economical. Peddinghaus shut down production for 18 months and was considering a permanent shut down. However, there was still a demand for this quality of anvil. If they drop out of the market and foundry costs continue to rise then a first class fabricated anvil becomes a definite possibility. It MAY be today. When I look at the cost per pound of many low production tools it should be possible to manufacture a first class anvil at a sellable price.
|
|
- guru
- Sunday, 01/14/07 16:22:00 EST
|
Any idea of what price Uri is envisioning?
One problem I see is that a sizeable portion of the potential market simply doesn't need a 265 pound anvil. I suspect he would sell a whole lot more anvils at 75 kg (165 pounds) than 265.
Second problem is what hardy hole size he chooses to use. The CI anvils Grizzly Industry sells have 1 5/8" in their 200 lb and 2" in their 300 lb. None have pritchel holes.
Concern is he may be designing what he, and not necessarily the U.S. market, wants.
|
|
Ken Scharabok
- Sunday, 01/14/07 16:34:34 EST
|
I have some experience with precision cast, lost wax parts. We made Gates for valves with the tee slot used as cast, and the seating surfaces got a super finish skim and a lap to get the 4 microinch finish and the flatness needed. We made solid Stellite dics for valve that had the disc nut with a bayonet joint, and the only operations on those was to skim the seat and lap. The bayonet joint fit as cast, and was locked with a pressed in pin. The pin hole was cast in place. The tolerenceing available was very nice. We bought perhaps 600,000 gates a year, in several materials, including solid stellite. I could see a lost wax cast anvil that need only to cut off the gate, and perhaps a light grind on the table.
Odd that a couple of days ago I suggested that this was the process I would pursue. Everything I have seen from HOFI has been first rate. I expect no less in this effort. I hope the price is nice as I have been wanting a double horn anvil of about this size.
|
|
ptree
- Sunday, 01/14/07 17:35:42 EST
|
Ken, Those are the world's ugliest ASO's, they do not count as real anvils.
|
|
- guru
- Sunday, 01/14/07 17:58:10 EST
|
JLW -- FILING
JLW (and all). Are you 'draw-filing'? If not, investigate this technique sometimes as it is helpful when trying to get a better finish.
All previous comments on cleaning, chalk, etc., are also very important.
Also, try and keep you files sorted as to material being filed. Some for only steel, some for only aluminum, etc.,.
|
|
- Tom H
- Sunday, 01/14/07 18:03:08 EST
|
Hardy (hardie) hole sizes: The world of quality manufactured anvils with broached holes has pretty much standardized on a standard 1" hardy hole. However, in the recent past almost every size anvil had a hole proportionate to the anvil size. I have and have had anvils with 1/2" and 5/8" hardy holes (typical of Colonial anvils). My first anvil had a 7/8" hole and I have a lot of tooling to fit. Both my current anvils have holes over 1" (1-1/8 and 1-3/16). I have a collection of hardy tools with shanks ranging from 7/8" to 1-3/4".
Tooling with smaller shanks get dropped into the anvil and used loose. Tooling with oversize shanks get used in the swage block or vise. The only tool I have that fits is the hardy for my Hay-Budden.
In 1883 Atha Tool listed hardies with shanks from 5/8" to 1-1/8" in 1/8" increments. Brooks jumped from 3/4" to 1-1/4" in their cast anvils. Kohlswa printed tables in the nearest inches but had metric hardy holes.
|
|
- guru
- Sunday, 01/14/07 18:18:13 EST
|
Last comment on CI anvils. . Many of us have been to flea markets and sales and seen over the years and seen many hundreds of anvils. But how many were OLD cast iron anvils? I have yet to see ONE even though they have been made and sold in the millions since the 1800's.
Think about it. . .
|
|
- guru
- Sunday, 01/14/07 18:21:32 EST
|
Ken, my first girlfriend used to tell me-
"wanting isnt getting"
What the US market "wants" is a $50 anvil, a $1000 half ton pickup, and 25 cent beer.
What we will get from Hofi is a fairly priced, high quality professional tool that will outlive us, and be a joy to behold.
He will not sell 100,000 a year.
But I doubt anybody who buys one will be sorry they did.
He seemed to indicate that this is a solid thing, and that you should expect to see these within a few months, along with the possibility of Chinese made Uri Hofi hammers.
|
|
- Ries
- Sunday, 01/14/07 19:03:55 EST
|
History note.
Hofi going to China for his anvils reminded me of Dick Cropper of Chatsworth, CA, going to Japan to get his Multi-Products anvils cast. I met Dick in 1963, me being a fledgling farrier. He may have been the first to go abroad to get "modern" farriers' tools made. In addition, the Multi-Products hoof nippers were drop forged and finished in Japan, and marked "MP". The nippers were of high quality, although the anvil was an attenuated version of a Hay-Bud farrier's anvil, and the final product was freaky looking: skinny waist; oversized horn; too thin heel. Cropper also sold horseshoes which were manufactured in Japan.
Multi-Products was in business from 1955 to 1985.
|
|
Frank Turley
- Sunday, 01/14/07 20:45:53 EST
|
Ries,
Where is Kris Ketchum located? I'm here in Idaho outside of Boise.
|
|
Thumper
- Sunday, 01/14/07 21:58:43 EST
|
Hey,
i went to a antique faire thingy with my friend, and , we saw an anvil, ,a nd it says i think ,
PETER
WRIGHT
PATENT
ENGLAND
then
Solid,
and theres an O to the side,
it is apparently around 262 lbs, or so, it has a step on the side you see if you look at the anvil, and the horn is on the right, and it is attached to thevery base of the horn,
what would be the closest weight to it that was manufactured?
my friend is very well known among old blacksmiths in alberta, and apparently many have heard about me or something,a nd anywyas,
i got it for 325 bucks canadian, on a large stump, i ihave to take about 4 inches off the bottom of the stump so that the anvil is at the right height,
it has a 1 inch by 1 inch haryd, and 2 pritchels one big , one small,
the edges are pretty beat up on the holes and on the anvil face itself, but the actual face is in really good condition, he decided to buy it for me as a christmas gift,
how much would something of this size and condition be worth?
guru, can i sedn you ppictures in a couple days , of my setup and shop area, im trying to figure out the best way to set up my shop ,
thanks<
Cam
|
|
Cameron
- Sunday, 01/14/07 23:17:51 EST
|
Ken,
ONe thing to consider is that HOfi is probably not all that concerned about pleasing American tastes. If so, his current anvil pattern would be a wasp-waisted, thin-heeled, under-massed mess like most of the currently popular American anvils, particularly the farriery-oriented ones. No, I think Hofi will stick with a double-horn, solid, heavy-waisted style like he always has, and that is what the Europeans, his primary market, definitely desire. Actually, more and more American smiths are discovering the value of that style; witness the sales of Euroanvils, Old Worlde Anvils, Habermann, anvils, etc. It really is a better design. In fact, I just bought a Nimba Gladiator, as I've learned to like the two-horn style much better myself.
|
|
vicopper
- Sunday, 01/14/07 23:33:39 EST
|
Cameron, It might sell for a bit more than that properly advertised.
"Nearest weight?" All the hand made anvils came in at what they came in at and were marked after manufacture +/- 1 lb. The only "even weight" anvils are cast anvils where the pattern is carefully adjusted to result in the finished weight. This also has to assume an exact amount of machining allowance (usualy 1/4") to clean up the face.
Hardy holes tend to get chipped from being used for heavy punching OR using tools that fit too tightly. Hardy tools should drop in and pull out smoothly when turned any direction. Sometimes this means being a little looser than one would like in other directions as the holes are often not square or not perpendicular to the face of the anvil. Tools made to fit only one way will pop a piece of the face right off if struck while wedged in the wrong way. . so don't make them that way!
|
|
- guru
- Monday, 01/15/07 00:13:37 EST
|
Heavy Waisted Anvils / Anvil Design: The Old English or original London pattern supported nearly the entire face with a body that tapered from the face outward in all directions to the base with the exception of the short heel. It has taken a long time for many smiths used to the waspy American pattern anvils to realize that this was a much better design from a working standpoint.
The other pattern that is very good is the original Austrian pattern which started as a large rectangular slab with the horns and base extended from it (similar to but more gracefully than the Hofi). This was one of the best of the regional designs and was botched by those making the modern cast versions. The advantage of the originals was the hardy hole immediately adjacent to the body of the anvil where it has the most possible support.
Of course the waistless French and Italian pattern anvils have none of the springyness of the waisted anvils. However, they must use width to get the mass and many folks do not like the wide face. However, I have found that with time you get used to whatever you have and make the best use of it.
All these little nuances of good anvil design are unknown to most modern pattern makers who know nothing of blacksmithing or the development and design criteria of a good anvil. Thus you have the Grizzly, the Duck billed Russian, diagonal hardy holes and the botched Austrian. . . The real shame of which is that a beautiful shape can be cast for the same cost as an ugly poorly designed shape. It is made worse when "artists" buy these tools from the artless.
|
|
- guru
- Monday, 01/15/07 00:37:00 EST
|
Do you think i got a good deal on it?
and, is it likely a good anvil?
|
|
cameron
- Monday, 01/15/07 01:12:45 EST
|
Yes, and Yes.
|
|
- guru
- Monday, 01/15/07 01:28:12 EST
|
Cameron: The ENGLAND indicates the anvil was made after 1910, but likely no later than the early 30s. For the logo to be in that good of condition surely the weight stamps are also there. Look at the waist under logo. Should be a number on left, center and right. If 262 pounds (w/o stump) number should be something like 2 1 10, although with the anvil damage you described last number is likely higher than 10.
|
|
Ken Scharabok
- Monday, 01/15/07 01:47:54 EST
|
Keep in mind there aren't that many professional or even extremely active blacksmiths in the U.S. Essentially it is a hobby market. JMHO, but 265 pounds is about 100 higher than needed for that market.
Is it worth going after? How many 265 anvils is he likely to sell? A smaller, more saleable model, would have the advantage of the economics of volume.
Much like the old tiered U.S. auto industry with compact, mid-size and full-sized vehicle. Each had a different market.
Actually, were it me, weight would be just under 150 pounds so shipment to buyer can be via a non-freight delivery service, such as UPS, FedEx or DHL.
In my business I don't try to compete with Centaur, Pieh or Blacksmiths Depot for the professional or high value market. I do quite well giving the rest what they either want or can afford.
|
|
Ken Scharabok (Poor Boy)
- Monday, 01/15/07 01:57:32 EST
|
Is there a reason many anvil patterns have a narrow waist? I've seen the hofi pattern is more like a rectangular slab with horns, which means more mass vertically under the hammer over a larger area. Something was mentioned about springiness resulting from the waist size. Could somebody elaborate on that a bit more? I understand that farriers anvils have a very narrow waste, which I presume is to make them portable & I can see why it's a compromise, but why have any waste at all?
|
|
andrew
- Monday, 01/15/07 02:03:05 EST
|
Andrew,
Farriers are generally working with pretty small stock, like 5/16" or 3/8" thick by 3/4" wide to make shoes, or they're shaping keg shoes, narrowing or spreading them. They aren't doing heavy forging, and some of them are actually doing most of their work cold.
For that sort of work, they need a horn they can work pretty much all around and a heel that is thin enough to let them get a shoe around it, too. Some of the modern fariers anvils have a heel with turning cams cut out of it to speed up that sort of work. So, they need something they can easily hump in and out of a truck and that will facilitate the type of work they do. BTW, if it had no waist, what would keep it up high enough to get the shoe around it?
Me, I need something that will sit there and take blows when I'm forging down 1-1/2" or 2" stock with a 12# hammer, and not flex or bounce. The only way to get that is lots of mass directly under the hammer. Thus, my rationale for buying the big Nimba. Well, that and I couldn't pass up a half-price deal on a nearly new one, when the shipping is going to flatten my wallet as it is. At least this one is almost 1500 miles closer to me than a new one from Washington, so only 3000 more miles or so to go. (grin)
|
|
vicopper
- Monday, 01/15/07 03:15:24 EST
|
Cameron: P.S. You appear to have a farrier anvil.
|
|
Ken Scharabok (Poor Boy)
- Monday, 01/15/07 03:17:36 EST
|
Essentially what I am saying on new anvil availability is there is the low end (HF 110) and the high end (European imports). The middle (sedan) market is being overlooked.
|
|
Ken Scharabok (Poor Boy)
- Monday, 01/15/07 12:01:04 EST
|
I found some more info on Kris Ketchums BlackJack anvil-
Its a 500lb anvil, cast from 8630 steel.
It has both square and hex hardy holes, so you can make hardy tools from hex shafted jackhammer bits. It comes with round holes for using as a bending jig, by inserting round pins in it, not just pritchel holes for punching.
Kris is advertising his phone number in magazines, so I would guess its okay to post it here- 360-658-0803.
I believe he is in the Everett Washington area.
But he does have a custom trailer for his Harley, that holds one 500lb anvil- so I think he might even deliver to Idaho.
My latest info indicates 15,000 to 20,000 blacksmiths in america.
But that doesnt really include all the fab shops that have been coming back to forging after 40 years away.
Every issue of Fabricator, the Nomma magazine, now has an article or two about forging, and its full of blacksmithing equipment ads. These guys have money- I have seen Nomma members drop 35,000$ on CNC bending equipment without blinking- and they are all buying anvils too these days.
I would be interested to know what the sales figures for new, over 200lb anvils are- my guess is that in the last 5 years or so, between Nimba, RatHole, EuroAnvil, Old World Anvil, Tom Clark and Hofi, and the others, at least a couple thousand have been sold.
I know at the last few Abana conferences I have been at, virtually every demo anvil has a sold sign on it by the end of the show.
If americans can routinely spend $35,000 on a new pickup, then a grand for an anvil is not something that is impossible to forsee.
I bet Hofi sells a steady stream of 265lb anvils in the USA- but I guess we will see.
Me, I just get frustrated with inadequate tools- I have never lost a job because I had too much tool, but there has been a lot of money I have had to leave on the table because I didnt have enough tool.
|
|
- Ries
- Monday, 01/15/07 12:21:33 EST
|
As far as the middle of the anvil market goes- both Euroanvil and Old world have several models for sale between $300 and $500- these are in the range of 70 to 175lbs.
Realistically, nobody is going to get prices any lower than this for a new anvil, made of steel, no matter where its made.
|
|
- Ries
- Monday, 01/15/07 12:25:55 EST
|
Guru, Remember when you had your rant a few years ago about telemarketers and when I said they weren't much problem you had a fit? Well, at that time I only got 2 or 3 calls a month, but at 5 or 6 a day I got a privacy line and caller ID. For those that slip through I ask, What is your credit card #? "What?" "I charge $5 per minute for my time. Soon as you give me your credit card # we can talk all day." Never hear from them again.
|
|
Ron Childers
- Monday, 01/15/07 12:31:19 EST
|
Ron, Once we got on the Federal no-call list they all disappeared except the few charities and legal political campainers. We get less than 1 call a month from either. So the no-call list really works. However, you must still be diligent and let folks know that call that you want off their list. You also need to be careful about registering products, especially on-line. The forms often hide and ALWAYS have the "yes add me to your list" prechecked ON. This is a slimy business practice.
I also do not register any product that does not require it so that it will work (like MS windirt XP and up). Once you register a product the company can claim they have a "business relationship" with you making it legal to call.
The only illegal telemarketer I repeatedly get calls from is from a "search engine submitter". These are almost always flim-flams and a waste of money. I've always been too busy to confront this one but have them on my list. I'll need to find out who they are the next time they call so that I can turn them in. They have been told not to call back at least 4 times. It figures that the illegal calls I get are internet related.
Now SPAM FAX's are another thing. My FAX uses roll paper and the spammers were using up a roll a month. I finally gave up the seperate fax line. Most of the calls originated from travel and realestate sales companies. I spent a great deal of time on the phone with several asking that they stop sending me FAX's to no avail. Since there is no Federal no-call list for FAX's several states have enacted laws.
|
|
- guru
- Monday, 01/15/07 14:38:41 EST
|
guru, I was looking at the JYH stuff, I love it, very much the kind of thing that smithing is all about for me at least, but I was wondering, it looks like you have the hammer running off of the motor(s) continuously when the switch is flipped, and the brake on the drum allows control and stopping the stroke. Does the belt drive slip on the pulleys when the brake is applied? Or does it hold the motor still? Will that be bad for the motor? It looks like the reverse of the use of the foot bail on LGs, etc...
|
|
- vorpal
- Monday, 01/15/07 16:29:30 EST
|
JYH with Differential Clutching: Vorpal, You have to understand how the automobile differential works. They are designed to divide the motion going to the wheels either equally OR unequally so that power is transmitted smoothly when going around curves. This is also what causes one wheel to spin when it is on a slick surface and the other not move.
You can stop one wheel while the other turns. In this case we let the side with the brake drum run free until we need the hammer to run then we stop the brake side. This transfers the motion to the other side where the hammer is connected.
It works well but the overall mechanism is huge.
This hammer was a proof of concept on three different ideas. The clutching, the shock absorber linkage and using a pair of motors. The clutching worked great but as I noted the machine is quite large. The shock absorber linkage worked but is very inefficient. The first blow is very hard then they taper off. If run too fast the shocks let the ram float (holding still) while the machine runs on. The dual motors worked perfectly. However, we had to slow the machine down by letting the belt slip and the dual motors had too much grip on the belt so we disconnected one. I plan on using dual motors again on another machine that has a wide range of needed power. With a 1/2 and a 3/4 HP motor you have available, 1/2HP, 3/4HP and 1-1/4HP. You could also use other combinations.
One change I would like to make is to try a leaf spring between the shocks. This would let the shocks act as self adjusting links and the spring would provide that over center travel that lets Dupont style mechanical hammers hit so hard. I'm sure the hammer would run much better but I am not sure how the shocks would behave in this arrangement.
However, for now my R&D days are over and I will probably left the EC-JYH go to someone with more time to play than I.
The whole point of building a Junk Yard Hammer is to collect what junk you have and build a hammer (or other machine) as cheaply as possible. In most of the developed world we are surrounded by junk pieces of automobiles, machinery and scrap metal. Often for no cost all a machine can be built that does a good job. But the trick is figuring out how to use what you have on hand OR can obtain cheaply.
|
|
- guru
- Monday, 01/15/07 17:11:12 EST
|
Trying to size a blower for a pan forge and am wondering how much cfm I should be looking for? Does anyone have a source for these (looking for 120v) Thanks. JW
|
|
Jim Warren
- Monday, 01/15/07 17:27:58 EST
|
Some people mentioned me my visit to CHAINA and my anvil from several point of view and i want with my poor english to reffer to some of them from my point of view.
and feirst of all CHAINA.
This is my FOURTH visit to CHAINA, the first one was just a touring fun to CHINA and MONGOLIA mainly in MONGOLIA this was the time that i took my tools with me and i forged in allan battor in big factories and in very remote places that my forge was a pit in the ground the air came from anold rusuien jeep blower conected to my car battery and the fule was dried sheep horses and cow dungs spent 6 weeks going around just for the fun of it and again i learend a lot!!!
the second time was on bussines i went to visit the ''striker'' air hammer company which is called in CHAINA ''SHANX'I'' AND MANY OTHER PLACES.
THE THIRED ONE WAS TO THE ''ANYANG ''AIR HAMMER AND HUGE HYDROULIC PRESSES AS AN ADVISSER TO JOHANNES ANGELE FROM GERMANY.ON MY FOURTH ONE I WAS INVITED BY THE ''ANYANG'' TO ATTEND A INTERNATIONAL MEETTING AT THEIR FACTORY TO SEE THEI NEW LINE OF PRESSES.I USED THIS OPPORTUNITY TO VISIT A VERY INTERESTING FORGING FACTORY THAT FORGES OVER 100 TYPES OF ASSORTED HAMMERS MAINLY FOR THE LEADIND TOOL MAKETTING COMPANIES .THEY ARE AQUIPED WIT THE MOST SOPHITICATED PRESSES AIR HAMMERS QUENCING GRINDING AND THE MOST IMPORTENT QUALITY CONTROL LABORATORY.THEY WORK TO THE GERMAN MARKET SPCIFICATION.
WENT TO VISIT THE LOST WAX CASTING FACTORY NEAR SHANGHAI THAT IS ALSO A VERY MODERN FACTORY WENT THROUGH THE QUANCING AND MILING AN GRINDING COMPANIES THAT ARE AROUND THE CASTING BUT ONLY SUPPORTING THE NEEDS OF THE CASTING.ALL WITH THE ATMOST MODERN SYSTEMS AND QUALITY CONTROL.ON THE END I VISITED A BLOWER FACTORY TO BUY SOME BLOWERS FOR MY COKE FORGES AND FOUND THAT THEY PRODUCE A VERY INTERESTING GAS BURNER THAT IN ANOTHER VERSION CAN BE USE IN GAS FORGES. IN SHORT I SAW A LOT AND LEAREND MUCH MORE.
WHEN I FIRST CAME TO CHAINA VERY LITTLE PEOPLE SPOKE ENGLISH on the last visit english was not a problam.within the last 10 years 300 ooo ooo chainies learend english ,
how many american learend chainies?. made in chaina some how in the western countries is a nam for bad or male product like japan in the 20th of the past century,some times i see it olso on the site that people are underestimating chaina, i just want to remied that ''boing'' i producing to day most of the spearparts in chaina the same with volks wagen and many other companies in the world. the ''bad '' name was created by the big companies around the world that want to sel chip and make a lot of mony fast! in x'ian the old capetal of chaina 10 000 000 population 1000000 students are learning in 80 universities most of them will be the futuer computer engeneers of chaina because ''x'ian'' is the capital of the computer reserch in the world.
this in very short about chaina but i offer every one to read the book of ted.c.fishmann ''chaina ltd'' it is a new book a very interesting one that was written by an amercan expert for chaina it maks you understand the relation and the influence of chaina on the world today.
and now to the anvil
always my idia with toolsevery tool is 1 simplicity and 2 the mor you can do with one tool the better tool it is! the same with tongs ,chisles hand hammer ,punching tools,and the air hammer dies and system too. in shot all the forging eqipment.if the tool is good and efficiet he is also beutifull IT COMES TOGETHER. i am not locking for the ''grace '' i am looking for the right use and for the multyple use and the comfort and the efficiency!
the anvil that i have desigend that you can forge bend upset punch more than on any other anvil and belive me i forged and demonstrated on almost all of them.on this site there is no possiblity to send fotos or drowings and it is very hard to explain werbaly .it is costacted to puport the hand hammer and the striker blowes the hardie hole is 1 1/8" there are rour prichel holes 1 1/8 1 3/4 1/2 " holes the hole are open all the way dowen to the floor you can upset all around the anvil is 4" across you do not have to bend when forging and there are two bays that you can go with the steel all the way to the groundthere is an upper sharp stage perpendicular to the anvil opposit to the hardie hole.al this is going together with the three leged base and the anvile is seatting on a 1 3/4 steel plate the plate is cut to the exact dimention of the base of the anvil in the bottom of the base thre are two 9/16" 1"deep holes and two pins are lockated so that the anvile holes are on the pins and that privent from the anvilto move ,the anvilis glued to the base with sika flex 11 fc which is a pu very stabel and tough and prevent complitly the anvil ringing.
i think that 120 kg or 265 # is the right waight for proffetionals and amatuers.i never aimed to a mrket i allways aimed for a ggod tool !! a good tool will sel.
thank every one that showed interes
HOFI
|
|
hofi
- Monday, 01/15/07 17:47:27 EST
|
HOFI, A picture can be posted at Forgemagic. I for one would be very interested in seeing your design.
|
|
ptree
- Monday, 01/15/07 19:28:00 EST
|
There is an exception to every rule, of course, but in my experience, by and large, Made in China means you are buying cheap sure-to-fail shit.
|
|
Miles Undercut
- Monday, 01/15/07 19:42:59 EST
|
Anvils: I wanted a traditional London Pattern or American Pattern anvil. Well, I couldn't find one and settled for the Russian, which I have since sold. I still use, and appreciate, my German Pattern Cast Steel anvil which I bought for $365 several years ago. I have come to appreciate the design advantages of the double horn and thick waist.
China: Mr. Hofi, my company makes welded pipe for oil and gas wells. We are the largest manufacturer of this product in North America. The second largest in North America is foreign owned and is actually the largest pipe manufacturer in the world. We are less concerned about competing with each other than the effect China will have on our market. It is not a question of Chinese Quality. They are catching up rapidly. It is a question of adherance to the order of international trade laws. Chinese innovation has thousands of years of history. Rule of law does not. I was also amazed that most signs in Shanghai were in Chinese and English and many people spoke good English.
|
|
quenchcrack
- Monday, 01/15/07 19:56:20 EST
|
i heard that Austin Community Collage in Texas had a faily decent blacksmtihing program. How do y'all think it ranks?
thanks y'all
Andrew B.
|
|
- andrew B.
- Monday, 01/15/07 20:42:52 EST
|
"It is a question of adherence to the order of international trade laws"???My Granny used to say"People who live in glass houses should never throw stones".
|
|
dimag
- Monday, 01/15/07 20:43:55 EST
|
Miles: Most of the goods You see from China are built for the lowest possible cost, as specified by the retailer. Stuff at that cost would be shit nomatter where it is made. Damn near all Your electronics are made in China from Chinese tooling made with Chinese machine tools. Take something apart and look at the injection molded, die cast and stamped parts. Think what the tooling to make them is like. There are companies in China that will build practically any thing You would want at any quality level You are willing to pay for. In the end, quality levels are set by the seller who has a particular market in mind.
|
|
Dave Boyer
- Monday, 01/15/07 20:48:51 EST
|
good point dimag! Thanks guru, the two motor idea gives me a "1 hp" motor out of nowhere to run the 2x72 grinder I'm building. 1/2 was really underpowered.... Only, how do you keep both sides of the differential from rotating in the first place? Maybe I just need to try it and find out, but does it just work this way w/ no modification?
|
|
- vorpal
- Monday, 01/15/07 21:04:02 EST
|
I was just gifted two large pieces of steel. The guy who gave them to me said something like "truck steering pins" but I didnt realy understand at the time. Theyre 9 1/8 tall solid cylinders (sp?) with a diameter of about 1 3/4 inches. Weight is around 6.8 lbs a peice. It also has what looks like a 1 inch key slot milled into the side perpendicular to the length. No helpfull marks to speak of unless "14259H" or a "M" in a box with a line between the peaks means anything to you guys. Thanks a bunch.
|
|
- Sebastian B.
- Monday, 01/15/07 21:25:59 EST
|
Differential Drive: No modification needed. However, "limited slip" axels will not work. They have a clutch between the two sides so torque is always provided to both sides even if one is slipping.
A differential is a fairly complex piece of gearing known as a planetary gear train. The planet drives either one side or both and can be reversed as well. If you turn the right side forward and the left side backwards the input (middle) will hold still. . .
The reason two motors will work together is that induction motors operate at a slip rate slower than synchronous (1800 RPM). At no load that is the speed they turn but when loaded they turn about 1725 to 1750 or "slip" from synchronous. It is best to have two motors that are rated at the same slip speed and always use the same pulley size.
So what happens is when you apply a load it slows both motors. BOTH pull on the belt because both are TRYING to go faster. One may pull harder than the other (more HP) but both will pull.
Before putting the belt on be sure both motors are turning the same direction! Of course this means you can install one motor on one side of the belt and the other opposite!
|
|
- guru
- Monday, 01/15/07 22:18:21 EST
|
Sebastion, Junk Yard Steel is Junk Yard Steel. See our FAW on the subject. I think what you have are known as "king pins".
|
|
- guru
- Monday, 01/15/07 22:19:26 EST
|
that's great, on a belt grinder you could lock a second motor into place with a lever for hogging out or disengage it for finishing work! thanks guru
|
|
- vorpal
- Monday, 01/15/07 22:54:02 EST
|
In building a power hammer on the car spring "rusty" model, is a railroad rail a good choice for a hammer/anvil just for rough hammering? What sort of reduction is necessary for the motor. 1300rpm down to 200 or so?
|
|
JLW
- Monday, 01/15/07 23:19:05 EST
|
Dave-- I have heard that. I have a friend, international maritime lawyer, who says the Koreans build marvelous tankers, too. I suspect we are at the stage where the Land of the Rising Sun was when stuff from there was stamped "Made in Occupied Japan." Just the same, I said it and I stand by it. If i can possibly avoid it-- which is becoming more and more difficult with everything from tools to shoes (even Sorels are now made in China!)-- I don't buy it.
|
|
Miles Undercut
- Monday, 01/15/07 23:31:50 EST
|
Anvils and Shipping Weights:
One of the reasons that the ~70# farrier�s anvils were popular (and thus common) was that UPS would only handle up to 70# back then. And "back" was the problem; they had to limit the weight to what their delivery men could hand carry. Their "hundredweight" service is a relatively new innovation; I guess they had to train and supply all of their drivers with stevedores.
Warm, in the 60s, on the banks of the lower Potomac. More forging for the MarsCon art show in Williamsburg next weekend. ( www.marscon.net )
Visit your National Parks: www.nps.gov
Go viking: www.longshipco.org
|
|
Bruce Blackistone (Atli)
- Tuesday, 01/16/07 00:04:50 EST
|
Yes, UPS, FedEx and DHL all will take up to 150 pounds now. I guess they issued their drivers hand carts.
I have received anvils through UPS and DHL which weren't boxed or crated up. One had the shipping label taped to the top and covered with clear tape around the heel. Other the seller had put duct tape completely around the anvil and then put on the label. UPS has a $5.00 special handling surcharge for the service though.
When USPS came out with their Priority Mail flat rate boxes I redesigned a couple of my products so they would fit into one or the other of the boxes.
|
|
Ken Scharabok (Poor Boy)
- Tuesday, 01/16/07 03:55:03 EST
|
Rusty Speeds: JLW, The exact reduction is a factor of the spring dynamics. A long whippy spring must run slow and a heavy stiff spring can run fast. Often there is some R&D involved. However, we are speaking of the maximum operating speed. The hammer should be able to be run slower than full speed by riding the clutch.
There are two type of clutch, the belt type and the tire and wheel type. The belt type should be a flat belt but this requires special pulleys. Folks have built them with V-belts and varied the speed by tilting the motor. However, V-belts are made to NOT slip and they wear rapidly. That leaves the spare tire clutch like the NC-JYH. These work very well and are very controlable. They also give you your reduction easily.
|
|
- guru
- Tuesday, 01/16/07 09:49:56 EST
|
What are the benefits/disadvantages of quenching in a block of ice? I have my "beer" fridge in my cellar where my workshop is. I use the freezer for keeping ice packs for medicinal purposes and ice pops for the kiddies during summer. If ice quenching does have advantage, how? Should I use a solid giant block?
|
|
- Nippulini
- Tuesday, 01/16/07 10:02:09 EST
|
South Korea is a completely different story from China. Due to help from the US and technology exchange agreements South Korea has the most Nuclear power per capita of ANY nation AND they have built the last plants on their own as part of technology exchange with Westinghouse. Not only did they build the plants but also most of the components many of which the US no longer has the capacity to make. This includes the casting AND machining of the stainless steel pressure vessel that holds the reactor core for large 500 Megawatt and up units. Only France is second to South Korea in nuclear power.
As part of a staged process where they built their first Nuclear plants using U.S. parts, engineering and skilled labor and Korean labor for everything else as they trained Koreans for many of the jobs they progressed to a 100% content Korean plant. It took about 7 plants. During that time Three Mile Island occurred and we quit building Nuclear plants and sold off much of the specialized machinery required to build the large plants. It is also why many of the workers of Bechtel, the worlds largest general contractor of projects such as Nuclear plants are Korean.
THIS is the other half of the Nuclear story on the Korean Peninsula that you do not hear in the news and is not mentioned by our government when speaking publicly about issues of nuclear development in North Korea. While the South Koreans do not have nuclear weapons (by treaty) the North Koreans can SEE all those Nuclear plants and are sure South Korea MUST have Nuclear weapons.
This capacity also made them one of Asia's larger steel producers. . something necessary to build large ships.
How do you think the Koreans suddenly had the capacity and workforce capable of building automobiles for sale to the U.S.?
This has also created a gigantic disparity in the standards of living in the two countries. While the South has as high or higher standard of living as the U.S. the North has severe shortages of power, food, jobs. . .
|
|
- guru
- Tuesday, 01/16/07 10:20:04 EST
|
"...and are sure South Korea MUST have Nuclear weapons."
Everything makes DPRK paranoid. To reduce tension the U.S. abandoned bases near the DMZ and relocated them farther south. NPRK said it was proof U.S. had intentions to nuke them.
It isn't a government as much as a hero worship cult.
One of Former Deputy Sec. of Defense Rumsfeld's favorite photograph was a satellite one of both the north and south taken at night. South is largely lit up. The north only has a noticeable speck of light at the capital. Rest of country is almost completely black.
|
|
Ken Scharabok (Poor Boy)
- Tuesday, 01/16/07 10:33:33 EST
|
Ice Quench: Nip, generally this would be a bad practice. The only times I know that it is done is when very large pieces of steel are quenched and the water does not cool the block fast enough. This is a situation you are unlikely to come across in the one man blacksmith shop.
Cryogenic quenching is a completely different thing.
More Ice: An interesting use of ice in the shop has been for setting power hammer anvils in pits. Often there is not a crane large enough or enough overhead space. So the anvil pit is packed with crushed ice and the anvil rolled and slid into place. Then you just wait for the ice to melt. . .
|
|
- guru
- Tuesday, 01/16/07 10:46:31 EST
|
Platte River Forge
Josh at Big BLU Hammers says he did not receive mail from you and searched again when I asked.
On the 110 the die height is 36" and on the 155 the dies height is 34".
|
|
- guru
- Tuesday, 01/16/07 10:48:47 EST
|
It would also be a good idea to have clean water ice on hand for those "oops" situations where you may need to quench a hand.
|
|
- Nippulini
- Tuesday, 01/16/07 11:24:57 EST
|
China: The problem many companies are having doing business in China is that there is no loyalty and non-compete agreements, patents and copyrights mean nothing. If you give the Chinese the ability to make your product they will out sell you with product sold via other channels with the product YOU set them up to manufacture. Many company's greed is paid back by short term gains and long term losses.
And like Miles I have seen far too many cheap tools and machines that never worked that were labeled CHINA but were in fact made in Taiwan. . And I saw a lathe made in Brazil that there was no possible way to put a belt on it other than to let it rub on the housing. . . Bad products have been made almost everywhere.
|
|
- guru
- Tuesday, 01/16/07 11:55:06 EST
|
Hey guys, been while since I've checked in around here, I am still looking for an anvil. One I can shoe on, but also do some light blacksmithing on too. the only thin that has chanded is my price range. It is now $265- poss. $310. If anybody knows of some good ones, PPLLLEEEAASSEEE let me know. Thanks a lot in advance.
|
|
- Andrew Marlin
- Tuesday, 01/16/07 12:16:33 EST
|
Korea and autos.
When I was briefly in Costa Rica, I couldn't recognize most of the cars on the road. I found out that many were Korean (Hyundai & Kia?). I didn't see any pickups. I asked my student, Johan Cubillos, what if a guy drove up in a big American pickup. He said, "We would know he was rich."
|
|
Frank Turley
- Tuesday, 01/16/07 12:37:02 EST
|
The Daihatsu Terios we rent in Costa Rica is a nice little car that is popular world wide but not sold in the US. An illegal copy is manufactured in China called the Zotye 2008. Daihatsu of Japan like other manufacturers made the mistake of having the Terios for China made there. Production was just started when the Zotye 2008 came out. . .
The world market for small trucks is completely dominated by the Japanese. While Toyota is now #1 in US sales they are so far ahead in world wide sales that it is unbelievable. Meanwhile the US manufacturers make NO small trucks specifically for the world market where small and efficient are the rule. In fact, the U.S. automakers were the first to import small Japanese trucks instead of building their own. Perhaps they deserve to go out of business. . .
Of course if the Japanese get greedy and send their small truck manufacturing to China then it will be China dominating the world market.
In Central America they buy two types of farm tractors, Japanese and Chinese. The Chinese tractors are known to have a short engine life so anyone that can afford one buys Japanese. Where is the US in this? Another non-player. And THIS is in a region where they PREFER U.S. made products if they can get them. . .
While Congress and Bush worry about fighting a war for oil we are losing the global trade battle. . . simply by not being in the market.
|
|
- guru
- Tuesday, 01/16/07 13:20:02 EST
|
not to mention selling the war debt to china
|
|
- vorpal
- Tuesday, 01/16/07 14:05:17 EST
|
And when I was in Australia briefly, I saw that they have quite an auto assortment, most of them of small scale. They have large gatherings called ute musters, a ute being a utility vehicle, what we call a pickup. Their ute are smaller than the big U.S. pickups. Some have flat beds and some have low sides and low tailgates. At a muster, those gathered show off their utes. There can be judging: the best looking; the worst looking; the most dents; the most beat up; the most colorful; most "tricked out", etc. I don't think the U.S. is much into that market. GM may still have a financial interest in the Holden auto in Australia.
If you're interested, you can google Australian ute "IMAGES".
|
|
Frank Turley
- Tuesday, 01/16/07 14:44:32 EST
|
Andrew Marlin:
On the NAVAIAGE anvilfire drop-down find the one for ABANA Chapters. Find the group(s) in your general area and contact them. Often they have one or two members who dabble in used blacksmithing tools.
Continue to watch eBay. I am pretty sure there are one or two farrier anvils on their now. Also newly listed is a 120 LB Trenton or Hay-Budden (ACME) with half the front plate missing. If you can find someone to build it back up via arc welding likely it would suit your needs. Located in the San Antonio area and listed as buyer pick up or buyer makes all shipping arrangments. If you know someone with a UPS account they can arrange for UPS to pick it up and deliver it, with the costs charged to their account.
|
|
Ken Scharabok (Poor Boy)
- Tuesday, 01/16/07 16:09:02 EST
|
hey any of you all know anything about building a small 1 cylender engine or any websites for me to get information i guess you would have to machine most of it wouldnt you
|
|
- newbiesmith
- Tuesday, 01/16/07 16:50:25 EST
|
HOLDEN in Australia is 100% Gm.
And Ford has a pretty strong presence in Australia as well.
And the number 2 market for pickup trucks, worldwide, after Texas, is Thailand- Ford makes a LOT of pickups in Thailand. They have had a factory there since 1961. GM also sells a lot of pickups there- They also have a truck factory in Thailand.
|
|
- Ries
- Tuesday, 01/16/07 16:52:46 EST
|
I was also surprised to know that Kiwi is four wheeling in a Jeep. . . But when you look at the world's roads US manufactured vehicles are very slim. Even in mountainous Costa Rica you see full size American tractor trailers but they are surrounded by swarms of Japanese mini-trucks. Yes Ford and others have factories World Wide and Chrysler-Benz is trying to act like one one big happy family while many of its "American" made vehicles have Japanese (not German) engines. . .
Thai made trucks don't feed US workers. . .
|
|
- guru
- Tuesday, 01/16/07 18:11:42 EST
|
Hello y'all, I'm back again for another project of mine. Well, I recently tried making my own bow out of a piece of red oak. Well, it only pulled 45 pounds, plus one limb cracked. My new plan is to make a recurve bow out of a piece of steel. I've got leaf springs 1/4" thick, one of which I am going to cut in half and draw out. I have one major question: The over-all length of the bow is going to be from 45-50 inches, so and advice on how thick to make the limbs to get a 60 pound draw on it? Many thanks for any advice!
Rob
|
|
- Rob
- Tuesday, 01/16/07 18:17:49 EST
|
Engine Building: Newbie, Some of the machinist sites might have plans. Years ago there was an outfit that sold kits of parts, castings and plans to make steam engines and various machines. A small lathe like the old 6" Craftsman (Atlas) lathe was the minimum machinery needed. It helped to have a small mill or shaper but the kits COULD be made on a lathe and by hand.
Depending on the size of the engine there are a variety of skills needed. Most of the guys with small machinery start with aluminium castings that they make the patterns for and cast as well. Then they start machining. Those with larger machines often make parts from blocks of material doing all the machining on lathes and mills. A few engines have been designed to make most of the parts on a lathe.
Besides the machines you need a few precision measuring tools and whole batch of odd skills. It can be great fun.
Way, way back, in the early 1800's a teenage James Nasmyth made a working steam engine to power a light wagon or buggy. He made most of the parts from brass as brass casting is much easier than iron, machined the parts on a primitive foot powered lathe and hand worked the rest. Of course he was to become one of the great geniuses of the Industrial Revolution. On the other hand we have all his inventions to help us do the job today. . .
|
|
- guru
- Tuesday, 01/16/07 18:26:20 EST
|
Another interesting early engine was the Wright flyer engine. Made with a cast aluminum crankcase, and the remainder steel. Made completly ona lather and a drill press, in the bicycle shop by Charlie taylor, other than the casting. Made a whopping 16 Hp from 200 cubic inches until the heads begain to overheat, and then about 12 Hp.
If you are determined, and have a lathe and a drill press, I suspect a 1 cylinder would be doable, if you can use the equipment. If you can scrounge, a lot of fine parts are available off the shelf such as a piston and cylinder off an air cooled VW, modify the head, use the rod. Then all that is left is the case, crank, cam and ignition etc:)
|
|
ptree
- Tuesday, 01/16/07 19:10:28 EST
|
Daihatsu Terios: I looked this one up when you mentioned it a while back. I want one. I am annoyed that I can't buy one in the US. It looks to be just about ideal for folks like me who have to drive significant distances (500+ miles/week) that end in miles of dirt road. My current Subaru probably handles better, but the ground clearance is marginal and the Daihatsu gets better mileage.
Tractors: John Deere has a program where they check out trade-in tractors and export them to South America. Of course, most of the trade-ins John Deere is getting these days are a tad large for most third world farms. In my neighborhood my 54hp tractor is one of the smallest still in regular use. Of course, when you buy an American brand tractor nowadays, there is no telling were it was actually made. (Short of looking at the ID plate.) IIRC Deere sells tractors made in Japan, Italy, France and England as well as the US. Tractor companies were some of the first to go multinational.
BTW: Jymm Hoffman is having nice little 105# "colonial" style anvils cast in H-13 steel. Heat-treated to Rc52 IIRC. It looks like a great anvil for demoing. . . Sort of the antithesis of the farrier's anvil. Not much horn or heel, but a nice solidly supported face.
|
|
John Lowther
- Tuesday, 01/16/07 19:34:27 EST
|
i have a question about tongs. i jsut got my new tongs from Kayne and son, i got the 1/4" v bit 16" what steel is it made of it feels very springy. also if i were gonig to hold something larger than 1/4" in them could i heat them up and ajust them without harming the paint of temper on them?
thanks y'all
Andrew B.
|
|
- andrew B.
- Tuesday, 01/16/07 20:06:53 EST
|
Sir, I recently found a Stewart Blast Furnace, size 28, type-oven, serial # 12090, fuel MFD. The unit needs some repair on the sheet metal around the cast components. I want to use it and do NOT know what "MFD" fuel is. The unit has a supplimental electric blower that feeds into the main fuel line. Is this propane, natural gas or neither? He unit is intact with the original cast stand, gas intake manifolds and blower on the base plate. Thanks, Reid
|
|
Reid Crosby
- Tuesday, 01/16/07 20:35:52 EST
|
Amazing website-thanks. Every anvil or photo of an anvil I see has the anvil resting on a large piece of wood. Any reason for this? is it a matter of physics, or would it matter if the anvil rested on a steel or concrete base. Thanks in advance for your help.
|
|
Steve
- Tuesday, 01/16/07 20:37:59 EST
|
 Steel Bow: Rob, To determine your actual spring rate would take a lot of calculations. The best thing to do is build a bow where you can change arms easily.
The design to the left is a new sketch of a design from my high school days when I was quite an archer. The drawing is a poor representation of the long buried originals but should get the point across.
The arms are held on by bolts screwed into brass or aluminium cylindrical nuts. I would put a rubber gasket under the steel.
I would try a 1-1/2" by 1/8" spring to start tapering in width while thickening slightly to the end.
Note that mild steel is just as springy as spring steel. IF the spring travel is such that it doe not reach the bending point then the soft steel spring will work. If the spring bends then you need a higher strength steel which will deflect more before yielding. The spring rate will be the same.
The only metal armed bow I built was one with aluminium and it was heavy and slow.
|
|
- guru
- Tuesday, 01/16/07 20:44:49 EST
|
|
|
[
CSI - anvilfire MEMBERS Group |
Getting Started in Blacksmithing ]
|