Anvils and Shipping Weights:
One of the reasons that the ~70# farrier’s anvils were popular (and thus common) was that UPS would only handle up to 70# back then. And "back" was the problem; they had to limit the weight to what their delivery men could hand carry. Their "hundredweight" service is a relatively new innovation; I guess they had to train and supply all of their drivers with stevedores.
Warm, in the 60s, on the banks of the lower Potomac. More forging for the MarsCon art show in Williamsburg next weekend. ( www.marscon.net )
Visit your National Parks: www.nps.gov
Go viking: www.longshipco.org
|
|
Bruce Blackistone (Atli)
- Tuesday, 01/16/07 00:04:50 EST
|
Yes, UPS, FedEx and DHL all will take up to 150 pounds now. I guess they issued their drivers hand carts.
I have received anvils through UPS and DHL which weren't boxed or crated up. One had the shipping label taped to the top and covered with clear tape around the heel. Other the seller had put duct tape completely around the anvil and then put on the label. UPS has a $5.00 special handling surcharge for the service though.
When USPS came out with their Priority Mail flat rate boxes I redesigned a couple of my products so they would fit into one or the other of the boxes.
|
|
Ken Scharabok (Poor Boy)
- Tuesday, 01/16/07 03:55:03 EST
|
Rusty Speeds: JLW, The exact reduction is a factor of the spring dynamics. A long whippy spring must run slow and a heavy stiff spring can run fast. Often there is some R&D involved. However, we are speaking of the maximum operating speed. The hammer should be able to be run slower than full speed by riding the clutch.
There are two type of clutch, the belt type and the tire and wheel type. The belt type should be a flat belt but this requires special pulleys. Folks have built them with V-belts and varied the speed by tilting the motor. However, V-belts are made to NOT slip and they wear rapidly. That leaves the spare tire clutch like the NC-JYH. These work very well and are very controlable. They also give you your reduction easily.
|
|
- guru
- Tuesday, 01/16/07 09:49:56 EST
|
What are the benefits/disadvantages of quenching in a block of ice? I have my "beer" fridge in my cellar where my workshop is. I use the freezer for keeping ice packs for medicinal purposes and ice pops for the kiddies during summer. If ice quenching does have advantage, how? Should I use a solid giant block?
|
|
- Nippulini
- Tuesday, 01/16/07 10:02:09 EST
|
South Korea is a completely different story from China. Due to help from the US and technology exchange agreements South Korea has the most Nuclear power per capita of ANY nation AND they have built the last plants on their own as part of technology exchange with Westinghouse. Not only did they build the plants but also most of the components many of which the US no longer has the capacity to make. This includes the casting AND machining of the stainless steel pressure vessel that holds the reactor core for large 500 Megawatt and up units. Only France is second to South Korea in nuclear power.
As part of a staged process where they built their first Nuclear plants using U.S. parts, engineering and skilled labor and Korean labor for everything else as they trained Koreans for many of the jobs they progressed to a 100% content Korean plant. It took about 7 plants. During that time Three Mile Island occurred and we quit building Nuclear plants and sold off much of the specialized machinery required to build the large plants. It is also why many of the workers of Bechtel, the worlds largest general contractor of projects such as Nuclear plants are Korean.
THIS is the other half of the Nuclear story on the Korean Peninsula that you do not hear in the news and is not mentioned by our government when speaking publicly about issues of nuclear development in North Korea. While the South Koreans do not have nuclear weapons (by treaty) the North Koreans can SEE all those Nuclear plants and are sure South Korea MUST have Nuclear weapons.
This capacity also made them one of Asia's larger steel producers. . something necessary to build large ships.
How do you think the Koreans suddenly had the capacity and workforce capable of building automobiles for sale to the U.S.?
This has also created a gigantic disparity in the standards of living in the two countries. While the South has as high or higher standard of living as the U.S. the North has severe shortages of power, food, jobs. . .
|
|
- guru
- Tuesday, 01/16/07 10:20:04 EST
|
"...and are sure South Korea MUST have Nuclear weapons."
Everything makes DPRK paranoid. To reduce tension the U.S. abandoned bases near the DMZ and relocated them farther south. NPRK said it was proof U.S. had intentions to nuke them.
It isn't a government as much as a hero worship cult.
One of Former Deputy Sec. of Defense Rumsfeld's favorite photograph was a satellite one of both the north and south taken at night. South is largely lit up. The north only has a noticeable speck of light at the capital. Rest of country is almost completely black.
|
|
Ken Scharabok (Poor Boy)
- Tuesday, 01/16/07 10:33:33 EST
|
Ice Quench: Nip, generally this would be a bad practice. The only times I know that it is done is when very large pieces of steel are quenched and the water does not cool the block fast enough. This is a situation you are unlikely to come across in the one man blacksmith shop.
Cryogenic quenching is a completely different thing.
More Ice: An interesting use of ice in the shop has been for setting power hammer anvils in pits. Often there is not a crane large enough or enough overhead space. So the anvil pit is packed with crushed ice and the anvil rolled and slid into place. Then you just wait for the ice to melt. . .
|
|
- guru
- Tuesday, 01/16/07 10:46:31 EST
|
Platte River Forge
Josh at Big BLU Hammers says he did not receive mail from you and searched again when I asked.
On the 110 the die height is 36" and on the 155 the dies height is 34".
|
|
- guru
- Tuesday, 01/16/07 10:48:47 EST
|
It would also be a good idea to have clean water ice on hand for those "oops" situations where you may need to quench a hand.
|
|
- Nippulini
- Tuesday, 01/16/07 11:24:57 EST
|
China: The problem many companies are having doing business in China is that there is no loyalty and non-compete agreements, patents and copyrights mean nothing. If you give the Chinese the ability to make your product they will out sell you with product sold via other channels with the product YOU set them up to manufacture. Many company's greed is paid back by short term gains and long term losses.
And like Miles I have seen far too many cheap tools and machines that never worked that were labeled CHINA but were in fact made in Taiwan. . And I saw a lathe made in Brazil that there was no possible way to put a belt on it other than to let it rub on the housing. . . Bad products have been made almost everywhere.
|
|
- guru
- Tuesday, 01/16/07 11:55:06 EST
|
Hey guys, been while since I've checked in around here, I am still looking for an anvil. One I can shoe on, but also do some light blacksmithing on too. the only thin that has chanded is my price range. It is now $265- poss. $310. If anybody knows of some good ones, PPLLLEEEAASSEEE let me know. Thanks a lot in advance.
|
|
- Andrew Marlin
- Tuesday, 01/16/07 12:16:33 EST
|
Korea and autos.
When I was briefly in Costa Rica, I couldn't recognize most of the cars on the road. I found out that many were Korean (Hyundai & Kia?). I didn't see any pickups. I asked my student, Johan Cubillos, what if a guy drove up in a big American pickup. He said, "We would know he was rich."
|
|
Frank Turley
- Tuesday, 01/16/07 12:37:02 EST
|
The Daihatsu Terios we rent in Costa Rica is a nice little car that is popular world wide but not sold in the US. An illegal copy is manufactured in China called the Zotye 2008. Daihatsu of Japan like other manufacturers made the mistake of having the Terios for China made there. Production was just started when the Zotye 2008 came out. . .
The world market for small trucks is completely dominated by the Japanese. While Toyota is now #1 in US sales they are so far ahead in world wide sales that it is unbelievable. Meanwhile the US manufacturers make NO small trucks specifically for the world market where small and efficient are the rule. In fact, the U.S. automakers were the first to import small Japanese trucks instead of building their own. Perhaps they deserve to go out of business. . .
Of course if the Japanese get greedy and send their small truck manufacturing to China then it will be China dominating the world market.
In Central America they buy two types of farm tractors, Japanese and Chinese. The Chinese tractors are known to have a short engine life so anyone that can afford one buys Japanese. Where is the US in this? Another non-player. And THIS is in a region where they PREFER U.S. made products if they can get them. . .
While Congress and Bush worry about fighting a war for oil we are losing the global trade battle. . . simply by not being in the market.
|
|
- guru
- Tuesday, 01/16/07 13:20:02 EST
|
not to mention selling the war debt to china
|
|
- vorpal
- Tuesday, 01/16/07 14:05:17 EST
|
And when I was in Australia briefly, I saw that they have quite an auto assortment, most of them of small scale. They have large gatherings called ute musters, a ute being a utility vehicle, what we call a pickup. Their ute are smaller than the big U.S. pickups. Some have flat beds and some have low sides and low tailgates. At a muster, those gathered show off their utes. There can be judging: the best looking; the worst looking; the most dents; the most beat up; the most colorful; most "tricked out", etc. I don't think the U.S. is much into that market. GM may still have a financial interest in the Holden auto in Australia.
If you're interested, you can google Australian ute "IMAGES".
|
|
Frank Turley
- Tuesday, 01/16/07 14:44:32 EST
|
Andrew Marlin:
On the NAVAIAGE anvilfire drop-down find the one for ABANA Chapters. Find the group(s) in your general area and contact them. Often they have one or two members who dabble in used blacksmithing tools.
Continue to watch eBay. I am pretty sure there are one or two farrier anvils on their now. Also newly listed is a 120 LB Trenton or Hay-Budden (ACME) with half the front plate missing. If you can find someone to build it back up via arc welding likely it would suit your needs. Located in the San Antonio area and listed as buyer pick up or buyer makes all shipping arrangments. If you know someone with a UPS account they can arrange for UPS to pick it up and deliver it, with the costs charged to their account.
|
|
Ken Scharabok (Poor Boy)
- Tuesday, 01/16/07 16:09:02 EST
|
hey any of you all know anything about building a small 1 cylender engine or any websites for me to get information i guess you would have to machine most of it wouldnt you
|
|
- newbiesmith
- Tuesday, 01/16/07 16:50:25 EST
|
HOLDEN in Australia is 100% Gm.
And Ford has a pretty strong presence in Australia as well.
And the number 2 market for pickup trucks, worldwide, after Texas, is Thailand- Ford makes a LOT of pickups in Thailand. They have had a factory there since 1961. GM also sells a lot of pickups there- They also have a truck factory in Thailand.
|
|
- Ries
- Tuesday, 01/16/07 16:52:46 EST
|
I was also surprised to know that Kiwi is four wheeling in a Jeep. . . But when you look at the world's roads US manufactured vehicles are very slim. Even in mountainous Costa Rica you see full size American tractor trailers but they are surrounded by swarms of Japanese mini-trucks. Yes Ford and others have factories World Wide and Chrysler-Benz is trying to act like one one big happy family while many of its "American" made vehicles have Japanese (not German) engines. . .
Thai made trucks don't feed US workers. . .
|
|
- guru
- Tuesday, 01/16/07 18:11:42 EST
|
Hello y'all, I'm back again for another project of mine. Well, I recently tried making my own bow out of a piece of red oak. Well, it only pulled 45 pounds, plus one limb cracked. My new plan is to make a recurve bow out of a piece of steel. I've got leaf springs 1/4" thick, one of which I am going to cut in half and draw out. I have one major question: The over-all length of the bow is going to be from 45-50 inches, so and advice on how thick to make the limbs to get a 60 pound draw on it? Many thanks for any advice!
Rob
|
|
- Rob
- Tuesday, 01/16/07 18:17:49 EST
|
Engine Building: Newbie, Some of the machinist sites might have plans. Years ago there was an outfit that sold kits of parts, castings and plans to make steam engines and various machines. A small lathe like the old 6" Craftsman (Atlas) lathe was the minimum machinery needed. It helped to have a small mill or shaper but the kits COULD be made on a lathe and by hand.
Depending on the size of the engine there are a variety of skills needed. Most of the guys with small machinery start with aluminium castings that they make the patterns for and cast as well. Then they start machining. Those with larger machines often make parts from blocks of material doing all the machining on lathes and mills. A few engines have been designed to make most of the parts on a lathe.
Besides the machines you need a few precision measuring tools and whole batch of odd skills. It can be great fun.
Way, way back, in the early 1800's a teenage James Nasmyth made a working steam engine to power a light wagon or buggy. He made most of the parts from brass as brass casting is much easier than iron, machined the parts on a primitive foot powered lathe and hand worked the rest. Of course he was to become one of the great geniuses of the Industrial Revolution. On the other hand we have all his inventions to help us do the job today. . .
|
|
- guru
- Tuesday, 01/16/07 18:26:20 EST
|
Another interesting early engine was the Wright flyer engine. Made with a cast aluminum crankcase, and the remainder steel. Made completly ona lather and a drill press, in the bicycle shop by Charlie taylor, other than the casting. Made a whopping 16 Hp from 200 cubic inches until the heads begain to overheat, and then about 12 Hp.
If you are determined, and have a lathe and a drill press, I suspect a 1 cylinder would be doable, if you can use the equipment. If you can scrounge, a lot of fine parts are available off the shelf such as a piston and cylinder off an air cooled VW, modify the head, use the rod. Then all that is left is the case, crank, cam and ignition etc:)
|
|
ptree
- Tuesday, 01/16/07 19:10:28 EST
|
Daihatsu Terios: I looked this one up when you mentioned it a while back. I want one. I am annoyed that I can't buy one in the US. It looks to be just about ideal for folks like me who have to drive significant distances (500+ miles/week) that end in miles of dirt road. My current Subaru probably handles better, but the ground clearance is marginal and the Daihatsu gets better mileage.
Tractors: John Deere has a program where they check out trade-in tractors and export them to South America. Of course, most of the trade-ins John Deere is getting these days are a tad large for most third world farms. In my neighborhood my 54hp tractor is one of the smallest still in regular use. Of course, when you buy an American brand tractor nowadays, there is no telling were it was actually made. (Short of looking at the ID plate.) IIRC Deere sells tractors made in Japan, Italy, France and England as well as the US. Tractor companies were some of the first to go multinational.
BTW: Jymm Hoffman is having nice little 105# "colonial" style anvils cast in H-13 steel. Heat-treated to Rc52 IIRC. It looks like a great anvil for demoing. . . Sort of the antithesis of the farrier's anvil. Not much horn or heel, but a nice solidly supported face.
|
|
John Lowther
- Tuesday, 01/16/07 19:34:27 EST
|
i have a question about tongs. i jsut got my new tongs from Kayne and son, i got the 1/4" v bit 16" what steel is it made of it feels very springy. also if i were gonig to hold something larger than 1/4" in them could i heat them up and ajust them without harming the paint of temper on them?
thanks y'all
Andrew B.
|
|
- andrew B.
- Tuesday, 01/16/07 20:06:53 EST
|
Sir, I recently found a Stewart Blast Furnace, size 28, type-oven, serial # 12090, fuel MFD. The unit needs some repair on the sheet metal around the cast components. I want to use it and do NOT know what "MFD" fuel is. The unit has a supplimental electric blower that feeds into the main fuel line. Is this propane, natural gas or neither? He unit is intact with the original cast stand, gas intake manifolds and blower on the base plate. Thanks, Reid
|
|
Reid Crosby
- Tuesday, 01/16/07 20:35:52 EST
|
Amazing website-thanks. Every anvil or photo of an anvil I see has the anvil resting on a large piece of wood. Any reason for this? is it a matter of physics, or would it matter if the anvil rested on a steel or concrete base. Thanks in advance for your help.
|
|
Steve
- Tuesday, 01/16/07 20:37:59 EST
|
 Steel Bow: Rob, To determine your actual spring rate would take a lot of calculations. The best thing to do is build a bow where you can change arms easily. Steel Bow: Rob, To determine your actual spring rate would take a lot of calculations. The best thing to do is build a bow where you can change arms easily.
The design to the left is a new sketch of a design from my high school days when I was quite an archer. The drawing is a poor representation of the long buried originals but should get the point across.
The arms are held on by bolts screwed into brass or aluminium cylindrical nuts. I would put a rubber gasket under the steel.
I would try a 1-1/2" by 1/8" spring to start tapering in width while thickening slightly to the end.
Note that mild steel is just as springy as spring steel. IF the spring travel is such that it doe not reach the bending point then the soft steel spring will work. If the spring bends then you need a higher strength steel which will deflect more before yielding. The spring rate will be the same.
The only metal armed bow I built was one with aluminium and it was heavy and slow.
|
|
- guru
- Tuesday, 01/16/07 20:44:49 EST
|
Andrew,
If those are the Off Center tongs, don't mess with trying to reshape then until you know a bit more. They're made from something on the order of 1045 medium carbon alloy and could crack if water quenched from a forging/bending heat. The best thing is to get some mild steel and learn to make your own tongs. There is more than one iForge demo on tongs.
|
|
vicopper
- Tuesday, 01/16/07 20:49:25 EST
|
Tongs: Andrew, I believe Grants tongs are 40 point carbon. Yes, you can reshape them but DO NOT quench them. All paint burns off at forging temperature. A little DeRusto BBQ black will keep them nice if you want.
On these particular tongs I do not recommend modifying them. Buy more sizes. If you want to play with tong shapes buy old tongs or make your own.
|
|
- guru
- Tuesday, 01/16/07 20:52:37 EST
|
Anvil Stands: Steve, Anvil stands were traditionally wood because it was available and economical. Modern stands have been cast iron, fabricated steel and various designs as well as wood. See our iForge demo #144 on Anvil Stands. There is just about every type of stand shown except the commercial cast iron stands.
Every smith has a preference.
|
|
- guru
- Tuesday, 01/16/07 20:58:04 EST
|
Dunno why they can't just make the anvil tall enough to start with. Would add some good mass, too!. (grin)
|
|
vicopper
- Tuesday, 01/16/07 21:42:49 EST
|
Newby smith: If You can get Yourself to York Pa. next weekend You can go to "Cabin Fever Expo" This is one of the 2 biggest model engeneering shows in the US. There are lots of folks showing engines like You are interested in, some selling plans, some selling casting kits. There is some really amazing work there, and I don't impress easily.
|
|
Dave Boyer
- Tuesday, 01/16/07 22:38:25 EST
|
Cabin Fever- Jan 20-21. make that THIS WEEKEND.
|
|
Dave Boyer
- Tuesday, 01/16/07 22:39:39 EST
|
John Deer : My cousin has a 1978 model, about 50 HP that was made in Germany. The little ones 650-1050 are built by Yanmar in japan. All the little diesel tractors in the past 30 years were Japanese,... except fot the Chinese ones.
|
|
Dave Boyer
- Tuesday, 01/16/07 22:45:36 EST
|
Junk Tools: As long as You shop at places that sell only the lowest cost goods [HF in particular] You are going to see junk tools. Some are usable, others are not. In '84 I got a Chinese made rotary table from MSC, Phase II brand. It is OK., certainly not the best ever built, but as good as a medium quality domestic made one. Even the Chinese, with rock bottom labor rates can't make good stuff for next to nothing. Read the tag on a recently made Black&Decker/Dewalt power tool? I bet they are not the only ones gambling a reputation on a better grade Chinese product. I like American Made stuff as much as the rest of You, but I am not niaeve to the ways of the worold.
|
|
Dave Boyer
- Tuesday, 01/16/07 23:04:39 EST
|
Black and Decker: At one time they had several levels of quality. They had happy homeowner and industrial duty. The happy homeowner stuff was more or less the same quality as most department store brands. When they merged with DeWalt the industrial stuff went to DeWalt and B&D remained the happy homeowner stuff. So the general line dropped in quality and DeWalt was built up.
My heavy duty B&D Wildcat grinders from the 198's are the best I have ever used. In the 90's DeWalt was making the Wildcat grinders.
Change is constant so there is no telling who makes what now. . .
|
|
- guru
- Wednesday, 01/17/07 00:07:31 EST
|
I recently purchased a 100# Beaudry Power Hammer with a date of 1898 at a auction in Pennsylvania. My wife and I have a shop in Montana. In the process of getting it across country, a couple of ambitious men (father-in-law and retired iron worker)took it apart.The bolt that holds the anvil to the frame had some kind of graphite looking material incasing it. Do you know what this is? If so where would I go about finding it?
|
|
Ira Cuelho
- Wednesday, 01/17/07 00:15:24 EST
|
Ira, I think it is just packed with scale.
Note that the Beaudry Champion with the round anvil has room to adjust then lock the anvil in position. Centering it to the ram is part of the setup process.
|
|
- guru
- Wednesday, 01/17/07 00:48:44 EST
|
Guru, You may be right about the scale getting packed in there, it just seemed to so hard to get out, I thought Beaudry might of put something in there to buffer impact, The anvil is square with a v-shape on one side that fits in line with the base. It took about three hours to get the bolt out,which measures 1 1/2" * 20" long ,and had a good 1/2" around it with packed in scale. There was also a type of paper with some kind of shock resistant tar that was in between the anvil and the base. Would you know what this material might be? and is it nessesary?
|
|
Ira Cuelho
- Wednesday, 01/17/07 02:48:01 EST
|
Black&Decker: I think they still [or at least recently] offer the industrial line, but sell it throuhg industrial supply houses. The Firestorm line is homeowner grade junk. Dewalt is marketed to the construction industry. I have a B&D chopsaw that has a motor that looks just like a Wildcat,and the cary handle is like the one on the 1/2" "D" handle drill, that machine was built in Italy.
|
|
Dave Boyer
- Wednesday, 01/17/07 03:10:53 EST
|
Speaking of anvils, those with Anvils in America, take at look at the Fisher display photograph on page 155. Were the round anvils shown there for large power hammers?
Also note the Rail Joints. Apparently those are where Clark Fisher made his fortune as a mile of RR track would need about 530 of them if the rails were 20'.
|
|
Ken Scharabok (Poor Boy)
- Wednesday, 01/17/07 04:11:44 EST
|
Beaudry: Ira, This is a different model than I described but the gray powder is definitely scale. It gets everywhere in power hamers, packs tight and makes it very difficult to remove dies and such.
The gasketing material is a different thing. It is there for a bunch of reasons.
1) To cushion as cast surfaces
2) Possibly to shim the anvil in place (if not there was an allowance for the material thickness)
3) To prevent scale from filling the space and possibly wedging the machine apart.
Yes it needs to be replaced. No I do not know what it is and I'm sure it is not available. Several layers of roofing felt (tar paper) may work to replace it. But there may have also been a plastic fill.
This is the problem with taking apart things that are old and you do not fully understand. On old machines bearings are often shimmed with .001" shims that tear like paper but are made of fine steel. You may think you are scraping off a gasket or dried oil but I losing a fit that took an expert hours to set up. Oilers are often packed with cotton or felt to control oil flow and prevent dirt from reaching bearings. Machines often have very small oil holes without caps that get painted over. Some parts are aligned by small dowels that get broken off because the disassembler does not know they exist. Every old machine is a mystery that must be studied carefully as it is taken apart and often there are places you do not take apart.
|
|
- guru
- Wednesday, 01/17/07 09:07:31 EST
|
Hello Guru...Thank you for taking time to answer my question...The countless hours you and the other gurus spend "giving back" by sharing your knowledge and maintaining this site is greatly appreciated by the blacksmithing community.
sincerely...
|
|
Platte River Forge
- Wednesday, 01/17/07 09:29:21 EST
|
Power Hammer Repairs: For some reason people equate a power hammer with a sledge hammer and think the maintenance and construction is as primitive as a stone club. They are not. They are a machine tool like any other. They have precision fits and critically aligned parts. Due to dirt scale and lack of lubrication they DO wear and they DO break. But they must be repaired properly not sledge hammered and arc welded into submission. Repairs often require use of micrometers, dial indicators and precision machine tools.
Old machines had a lot more hand fitting than most modern machines. Parts were blued and hand scraped to fit. Bearings were shimmed and tested with plasti-gage, final fits were doweled, bushings were reamed to fit. Matched parts were often used.
These were the art of the "mechanic" or "mill wright". These man usually had the skills of a machinist plus the knowledge of what the engineer wanted and how to achieve it.
Even today on low production machines there are many places where bushings and spacers call for "grind or machine to fit" meaning using a surface grinder, lathe or tool post grinder to set the dimension in assembly. This means trial fits, precision measurements and precision grinding on expensive machines. I have built many one-off gear boxes this way.
Old machines often had bearings cast in place but they were often cast around an undersized arbor and then line bored or reamed to fit. Even the bronze king pin bushings on modern trucks and old cars are step reamed in place.
Study that old machine before taking it apart. Respect the men that built them in the first place. They probably had skills and knowledge you do not have.
|
|
- guru
- Wednesday, 01/17/07 10:00:06 EST
|
Round Anvils: Ken, Those are just more anvils. Some sawyers anvils are still made that are round. Another specialty anvil that was custom made for the plant was file cutter's anvils. Ever see one? Neither have I. There may have been only a few hundred in existence in the U.S. Many minor trades and industries had quite specialized anvils made that never show up in catalogs or are easily identifiable.
The two large round anvils to the left with the very large "stake" or shank are the same general shape as the smaller round anvils on the shelf to the right of them that are setting with the top facing out. These round anvils were used in plate shops where large pans and vessels were still made by hand. Today the small versions are considered silversmiths' or coppersmiths' anvils.
Quite a number of the items in the Fisher display were specialty items made for industry to spec. so that they could show their range of capabilities. Like the RR parts and the odd cylindrical item to the upper right.
The only known Fisher power hammer anvils were those like on in our Fisher article.
|
|
- guru
- Wednesday, 01/17/07 10:23:37 EST
|
Black and Decker didn't merge with DeWalt they owned the brand name and used it to market a new line of tools to boost there declining market share in construction and serious homeowner sales.I was one of the first tool buyers that they pitched to. I ended up purchasing about $200,000.00 worth for that they took me on a float fishing trip.It actually was a good campaign I sold alot of tools.
|
|
chris makin
- Wednesday, 01/17/07 11:28:56 EST
|
DeWalt had a strange (to me) promotion a few years ago through Frank's Supply in Albuquerque (not one of my enterprises). Frank's had an open house where they specialized in inviting bull riders to the party. Frank's gave me a commission to make a DEWALT branding iron as part of the decor. Since it wasn't a real iron, I used the techniques of forging, arc welding, oxy welding, and forge welding to get it done. I never fully understood the bull rider connection, but an order is an order. www.franks-supply.com
|
|
Frank Turley
- Wednesday, 01/17/07 11:52:39 EST
|
RE: building a 1 cylinder engine
Get thee over to Harrys Old Engine (Google search, "I'm feeling lucky" will take you there). Lots of info and lots of links. You should see what some of those guys do with an engine that has been buried for 50 years, what with restoration and repair and reverse engineering.
Still frozen in N California. Invest in oranges, they are going up.
|
|
- David Hughes
- Wednesday, 01/17/07 12:46:57 EST
|
Black and Decker has not made their "industrial" line of tools for quite a while- no more Wildcat grinders, no more magnetic drill presses, or big D handle drills. Its all orange plastic homeowner stuff.
They have been making Dewalt tools since 1992. None of them qualify as "industrial" in my mind either.
They have owned Porter Cable and Delta since 2004- and of all of them, Porter Cable still makes some of the heaviest duty stuff, but it still doesnt match Bosch, Milwaukee, Fein, or Metabo metalworking tools for toughness or durability, in my opinion. Porter Cable makes some decent industrial woodworking tools still.
All in all, all 4 brandnames are a shadow of their former selves.
|
|
- Ries
- Wednesday, 01/17/07 13:05:26 EST
|
I know that their ASOs really suck, and most of their stuff is built in China, but what experience have you all had with any machinery supplied by Grizzly industrial. What do they mean, built in an ISO 9001 certified factory? It's only on some of their stuff...
|
|
- vorpal
- Wednesday, 01/17/07 13:32:57 EST
|
ISO 9001 certified means they paid a lot of money to join the club and documented how something is going to be manufactured, if it's junk and they document how they make it, it will still be junk and they can say "built in a ISO certified factory and not be lying. The company my brothers work for paid 10 grand. They were told if the inspectors asked how they knew the right setup and specs for a product, just say by the book, point to the manual and don’t say another word. They get inspected about every 6 months.
|
|
- daveb
- Wednesday, 01/17/07 14:24:04 EST
|
I was working when our Company went iso-9001 and as one of the first computer software organizations to do so. What DaveB says is true. You can make absolute junk; but as long as you are following the documented process you are OK with ISO!
For example if your documented process for dealing with customer complaints is to send two burly riggers with baseball bats to break the complainers' kneecaps and you can show that not one of your complainers is not on crutches you have a perfect score for that process. Doesn't matter if it's a good one or a bad one just that it is followed.
Of course the *FIRST* step in increasing quality is to have a stable process so you can tell what results any changes you make have on the system---control of the variables.
There were other quality systems that actually cared about whether your processes were any *good* or not---but they didn't catch on. I wonder why?
Thomas
|
|
Thomas P
- Wednesday, 01/17/07 14:59:56 EST
|
Grizzly imports some pretty decent woodworking machines, at good prices.
But their metalworking stuff is just a step or two up from Harbor Freight. Especially the cheap stuff.
With any chinese or taiwan machine tools, the ONLY ones worth buying are the best ones the company sells- so Grizzly sells the same crummy $1000 mill drill as everybody else- but when you get up to their $10,000 milling machines- they are decent. Not Bridgeports, but a similarly equipped Bridgeport, new, is now going for about $16,000, new.
So if you buy a cheap Grizzly tool, its kinda dicey- you could get a decent one, or you could get a crummy one. Depends on the tool.
I prefer Jet, when it comes to cheap imports, but really, I prefer real tools, no matter where they are made- for instance, you can buy a $500 Grizzly bandsaw, or a $3,000 Ellis bandsaw- and the difference is night and day.
There is no magic bullet that makes one $300 chinese tool better than another $300 chinese tool, unfortunately.
If you tell us which machine you are looking at, we can tell you more.
|
|
- Ries
- Wednesday, 01/17/07 15:11:08 EST
|
QC and ISO XXXX:
A couple decades ago every company had their own QC system which ammounted to a pile of paper work. If company A wanted subcontractor B to meet their QC system they often sent a copy of their paperwork to company B and company B would change the name on the paper and state that they met the following. . .
When a QC auditor came in to check their process they looked at the paper and asked, do you follow this, and the answer was always "YES SIR". Pickier companies would want to see gauge control records which were more paper work that was often rubber staped each month. . . IF they were serious they would actually audit the QC department and do their own gauge test sampling as well as visit the shop floor and observe. . But THIS was very very rare and over time degraded to just flipping through the paperwork.
ISO is an international version of this and is nothing but a paper tiger. Systems of this type are only as good as the auditors and the amount of money you can spend on auditors.
AND in the end even if EVERYTHING was done perfectly it does not insure quality.
Quality starts with engineering. IF something is engineered to be a crappy piece of junk and is made absolutely perfectly then you have a PERFECT PIECE OF JUNK.
It started with what was known as "planed obsolescence". Different ways to limit the life of a product. In the early part of the 20th century manufacturers and engineers realized they could make some products that lasted virtually forever. This may be great for the consumer but was not good for the manufacturer. So "planed obsolescence" became the catch phrase of engineering. Over the years engineers got better and better about determining life cycles and often there were parts on cars that failed within hours of the 12,000 mile warranty. . . They got too good so they had to increase vehicle warranties and engineer to those. . . When the US government stepped in and said that emission controls must last the life of the car all of a sudden owning a car became much nicer. . . But that is another subject.
Today it is very rare that a part fails before it is supposed to. THAT is quality! The problem is when the fail date is only a few hours as it is on many junk products. They will pass a cursory inspection. Flip the switch, it runs, sounds OK, it passes.
The biggest planed obsolescence rip off is light bulbs. Any manufacturer of light bulbs can make a bulb with almost infinite life. The typical house bulb is rated for something like 8000 hours but last MUCH less. But the typical traffic signal bulb is rated 250,000 hours and is almost identical in manufacture AND sees rough duty. They also exceed their rated life.
If you want to quadruple the life of bulbs in your home go to an industrial supplier and purchase 130 volt bulbs. Most bulbs are rated 115v (used to be 110) but most U.S. households have 120 to 125 volts. Too high a voltage and the life of the bulb plummets. Go to a slightly higher rated bulb and it will meet or exceed its rated life.
Often the cost of a part that lasts nearly forever, or is on the "infinite" part of the life curve, is only pennies different than a part with a specific (short) life. Most bearings in automobiles are engineered to last the useful life of the car (about double the warranty) . When they go bad sooner there was either an engineering mistake, a quality control error OR some extreame abuse of the vehicle. Engineering is most often the culprit. . someone slipped a digit. Then you have a commonly replaced part.
Many products have "lifetime" warranties. Sounds good until you read the fine print. "Life time" is defined as the average product life. . this means there is NO warranty. The life is the engineered life which is very short. So if the product lasts 4 hours then THAT is the lifetime it was engineered and warranted for. .
NOOOOO I am not a pessimist.
You want quality? Buy from companies that take pride in their product and want to make the BEST. There are a few and they are not necessarily the most expensive.
|
|
- guru
- Wednesday, 01/17/07 16:16:57 EST
|
I screwed up. . bulbs USED to be rated for 4,000 hours, now they are only rated 1,000 hours and last less. . . that is 100 ten hour days. The 250,000 hours of traffic light bulbs last 10,416, 24hr days or 28 years.
|
|
- guru
- Wednesday, 01/17/07 16:32:23 EST
|
thanks everyone for there info i think i will buy a messed up lawnmower and use it as a pattern or something
ha ha ha the casting part will be terrible im sure though
|
|
- newbiesmith
- Wednesday, 01/17/07 18:52:09 EST
|
Newby, One place to start on this kind of project is to build a lathe first if you don't have one. . There are a variety of plans around including one in the book Metalworking by Hasluck.
I would also look a SMALL engines like model airplane, weedwacker, small chainsaw. . .
BUY? a junk lawnmower! These are haul away's. Many can be found on the street during spring and fall clean up here in the states. People often throw away mowers that just need clean fuel, a clean carb and a spark plug. Real junkers have lots of aluminium that can be melted down and re-cast as something else. .
|
|
- guru
- Wednesday, 01/17/07 19:00:11 EST
|
thanks, it's really disgusting to think about the sheer waste generated by the greed of corporations and individuals. They apparently have no concern for future generations of the human race, or for anyone but themselves for that matter. That's one good reason to be a smith: the ability to recycle and reuse perfectly good junk. Does anyone recommend a bandsaw brand that will work well and last without costing appendages?
|
|
- vorpal
- Wednesday, 01/17/07 19:27:02 EST
|
The previous comments are 100% true, they even told me so in the class I was required to take as part of ISO. I could sleep through the entire class if I wanted to as long as I sign the attendence sheet at the begining. I will say that it's often not the companies fault that they buy into the scam though, sometimes their customers will require that they be ISO certified in order to continue doing buisness with them. That was the case with my last job, they joined ISO because their biggest customer at the time (Lucent technologies, sucks for them, heh) made them do it.
|
|
AwP
- Wednesday, 01/17/07 23:12:27 EST
|
Guru, Miles, and the other person who chimed in on my rosebud question of a little while back; thanks a lot! Got it going successfully with your advices. Saved the day, again.
Also, to the lady who asked about the buzz box, whether it was a good tool, I wanted to reccommend that she first of all be patient, because she won't necessarily find it easy to get control of the process of "striking an arc" and then maintaining the right arc length and then learning how to see the puddle and manipulate it. I had the humbling experience of being perhaps last in the class thirty years ago, and I persisted until I got fairly proficient, but really not very good compared to most. (After two years of practice, when I went to the shipyards they hired me as a "tacker," not a welder.) Anyway, I strongly reccommend getting an "auto-darkening" welding helmet, preferably with a big window for best visibility. That will make it FAR easier on you to learn and work. If you can get someone who knows how to actually demonstrate that will be a huge help too. The teacher used to hold our hand as we moved the electrode to help us get the timing of the "whip" motion and of course demonstrate the importance of the relationship between how "hot" the voltage is and how fast to move the rod. And little things, like if you don't have enough heat you can't help but stick the electrode to the work.I hope that you make it easy on yourself and don't get frustrated and quit.
|
|
brian kennedy
- Wednesday, 01/17/07 23:26:37 EST
|
Oh, and one more thing, I recommend using 1/8 6011 type rod, because it is a very good all purpose, all position rod to get used to. You can use it for vertical, overhead, as well as horizontal position and it works pretty well even when the steel has rust or paint or galvanizing on it. But you must, of course, protect yourself from fume inhalation very carefully.
|
|
brian kennedy
- Wednesday, 01/17/07 23:33:47 EST
|
And one more thing, as a total novice you may not be aware that MIG welding is far, far, easier and therefore far quicker to learn to get some kind of usable results with.
Of course to get a good sound weld it is never a good idea to weld on anything but clean, bare metal....
|
|
brian kennedy
- Wednesday, 01/17/07 23:38:23 EST
|
verpal: If you just want a small bandsaw for occasional use I have been happy with my vertical/horizon 1/2" x 64 1/2" model from Northern Tools. When I am cutting out parts it might run 4-6 hours a day.
Northern Tools products seem to be of a better quality than Harbor Freight and the U.S. based customer service center is 100+% helpful.
PawPal Wilson apparently had the same model as I have and same problem as I did, the blade coming off one of the rollers and riding on the side. Fixed it easily by putting thin washers on each side of the guide to center it.
With any bandsaw double check alignment of vise to blade. Just make a perfect 90 degree mark on say a board, clamp in vise, align with blade (centered on Zero degrees) and then VERY tightly bold down vise. Double-check alignment afterwards.
I made a small deep tray which hangs on the input saw of the table. About 4" wide by 4" deep and length of table. Nice for holding tools, accessories and gigs.
I've found if I leave about 3/4" of push-in slack on one side of the blade they last longer. Seems like if blade is over-tightened they will snap before becoming dulled.
|
|
Ken Scharabok (Poor Boy)
- Thursday, 01/18/07 03:21:24 EST
|
Shielded Metal Arc Welding SMAW,"Stick Welding" vs. MIG: While the initial learning curve with MIG is shorter, the results are not always what you think. I have laid down beads with MIG that LOOKED like a fine weld and found that the bead was just laying on top of the scale. MIG will also not weld over or NEAR paint. If the paint to the sides of the bead is close enough to burn or gas off the fumes often mix with the shield gas and cause problems. If you try to weld over even thin paint it causes obvious porosity in the weld bead.
MIG has a lot of problems for a lot of extra cost. Its a production tool that every busy shop should have. But a buzz bax will do 99% of what a smith needs and the extra money should go into oxy-acetylene equipment. You need both oxy-acetylene and arc welding. The buzz box does it cheaply until you can afford or need MIG.
|
|
- guru
- Thursday, 01/18/07 11:14:50 EST
|
I have a welding table sitting outside next to one of the shop doors. When I first got my MIG, I was getting really wormy, crappy results, until DUH, I realized that my shielding gas was blowing away.
|
|
Frank Turley
- Thursday, 01/18/07 12:00:57 EST
|
And, if you purchase a HEBRON head for your oxy/ace unit you have the equivalent of a plasma cutter. These heads can also be used for anything a brazing unit can do - including welding aluminum. I understand they are becoming popular with farriers for that purpose.
|
|
Ken Scharabok (Poor Boy)
- Thursday, 01/18/07 13:50:58 EST
|
My father is restoring a toy fire engine. I believe it is made of cast aluminum. I have never learned what pot metal is but my father thinks that is what it is made of. The kid that owned it back in the '40's apparently liked to ram it into things and bent the front end. The fenders ar slightly buckled and my father wants to bend them back in. I think he should use a propane tourch to anneal the fenders but he wants to try to heat the metal and work it hot. Can you give me a recomendation on how to reshape this safely?
Thanks
Will
|
|
Will
- Thursday, 01/18/07 15:41:29 EST
|
Ken - did you mean Henrob?
I've heard great things about it's cutting ability, but I went back to my Victor. . .
I have an old, nearly unused "Dillon 2000" version. It seemed to only work well for straight cuts on thin metal. It even came with "training wheels" to help you go straight. OTOH, maybe I didn't give it enough of a chance. . .
|
|
John Lowther
- Thursday, 01/18/07 15:46:11 EST
|
Henrob torches are cute little things, and they have their uses- but they sure arent a plasma cutter. They are good for some thin sheet cutting. A lot of guys never get used to the way they fit in your hand, though, and they put your hand pretty close to the heat- there are times when you need to wear pretty hefty gloves to use one.
As far as welding aluminum goes- I have gas welded aluminum with a Henrob, and it is no walk in the park. The guy who taught me does it when he welds 3003 sheet for replacement parts on half million dollar automobiles, because the weld doesnt get hard at all, and can be hammer formed and english wheel shaped. And for that application, gas welding 16g aluminum sheet, a Henrob, with proper flux, does a nice job.
For any average shop aluminum job though, a tig welder, or even a spoolgun running aluminum mig wire, is a much better choice.
They sell those Henrobs like they were "kitchen magicians" but, like most products they have to work so hard to talk you into, they arent all they are cracked up to be.
|
|
- Ries
- Thursday, 01/18/07 15:58:05 EST
|
Will - If it's pot metal, also known as Zamac (which is a zinc-aluminum alloy, sometimes with a bit of copper or magnesium) I would be extremely leery of applying heat: One of the reasons it is used for die casting is it's low melting point - under 1000 degrees F, and some alloys melt down in the 700s. Some pot metal alloys can approach the strength of cast iron, but like cast iron, it is pretty brittle.
|
|
John Lowther
- Thursday, 01/18/07 16:05:50 EST
|
Pot Metal: Will, This is normally zinc or a zinc alloy with a small amount of aluminum to make it harder. It melts at 800°F. Working it hot is NOT recommend. A slight anneal MIGHT help but it would be very easy to melt the piece. I would carefully support the part on a fitted mandrel and work it that way.
Almost all the Matchbox and similar metal toys are zinc.
|
|
- guru
- Thursday, 01/18/07 16:09:17 EST
|
Colors on tool steel: Not being a machinest or using "bought" high carbon or tool steel, I was curious about the colors I've seen painted on the ends of bars of what I think are tool steel. Are there standard color designations for different steels? I've got a 3 1/2" sq. about 16" long and wondered what it would be good for.
|
|
David Bernard
- Thursday, 01/18/07 17:37:13 EST
|
Colors on tool steel:
Ooops! I forgot to mention that the color on the piece I have is yellow.
|
|
David Bernard
- Thursday, 01/18/07 17:38:45 EST
|
David, Sorry, no these are not standard. Each warehouse or manufacturer has their own system. At one time Joseph T. Ryerson and Sons published a poster of their color codes. . . As long as you bought steel just from them everything was fine.
|
|
- guru
- Thursday, 01/18/07 18:02:12 EST
|
Colors on tool steel:
Thanks Guru. I guess I'll just use the spark test and take my chances - need to make some new flat dies for my K-style power hammer if the stuff sparks right.
|
|
David Bernard
- Thursday, 01/18/07 19:11:48 EST
|
Looks like I'll be getting a job doing some reproduction work for a Museum and I've got a question about how something was done. I'll be making a whaling harpoon with the shaft enclosure (feurrel) being of 1/8th sheet and then the shaft coming out will be 1/2" stock. I'm looking at using OA to do the welding, but wonder if they used to forge weld these pieces together. If so, I figure it must have taken a 3 man team. Anyone know for sure how it was done?
|
|
Thumper
- Thursday, 01/18/07 19:49:54 EST
|
Thumper
Whalecraft (harpoons and such)
http://www.whalecraft.net/index.html
lots of detail and examples
|
|
habu
- Thursday, 01/18/07 21:39:43 EST
|
Aluminum & spoolgun: I us a spoolgun for aluminum alot. Mind Frank's coment about wind blowing away the shielding gas for outdoor work however. The learning curve with a spoolgun on aluminum is fairly easy. This is at least in my opinion the easiest way to weld aluminum, but not the prettiest.
|
|
Dave Boyer
- Thursday, 01/18/07 23:47:42 EST
|
Thumper, These type sockets were forge welded. There are two methods. In one the socket is made separately the weld made on a slender mandrel or bicken horn. The edges of the stock are tapered slightly, welded, then thinned at the weld. Then the socket is welded to the shank. The first weld is a little tricky but the second weld goes fairly well. It is all one-man work.
In the second older method the shank and socket is one piece of wrought iron. The socket is forged flat out of a piece slightly larger than the shank, forge welded and then the shank drawn out (with help for the drawing out) OR the socket is formed from a short piece and then forge welded to the shank stock.
Generally this relatively light work was all done by one smith. At the peak of the industry these were made in factories that simply employed many smiths. Later they may have had steam and power hammers but by the time these were common in small factories whaling was on the wain.
Forge welding is quite a bit more difficult in mild steel than in wrought iron so we tend to shy away from it. In the wrought iron era it was common to piece things together from many pieces as was most convenient.
There is only one "special" tool needed, the proper shaped bickern or stake anvil. This is a small enough tool for this purpose that you should be able to make your own.
|
|
- guru
- Friday, 01/19/07 00:21:09 EST
|
Thumper, note the numbers of harpoons made by "Mr. James Durfee, the veteran harpoon-maker of New Bedford". He made an average of 1450 harpoons a year. That is about 5 a day taking off Sundays. Sounds like a lot but it is a very achievable number for an experienced smith making all the pieces.
|
|
- guru
- Friday, 01/19/07 00:31:40 EST
|
Sockets about half way down on this page
http://www.whalecraft.net/Non_Whaling.html
|
|
habu
- Friday, 01/19/07 00:57:36 EST
|
Another note on making a pattern for a socket: it is a truncated cone, Try to make it out of molding clay first , cutting and trimming it to shape, then cut open the cone for your pattern. I found this a lot quicker than to deal with the math or trial and error method. Works for candle cups too.
|
|
habu
- Friday, 01/19/07 01:15:37 EST
|
charcoal chimney to lite coke? I normally start my coke forge with a wood fire but the wood throws out sparks once it's charcoaled & the blower kicks in. To reduce the sparks, I tried a charcoal-chimney - paper on the bottom, coke on top. It lit the coke quickly & didn't throw any sparks at all. However, it surely did smoke!
Anybody used these for lighting coke? Suggestions for cutting out some of the smoke? Throwing coke on a hot wood fire makes almost none, but I suspect I can't have the best of both....
|
|
garry
- Friday, 01/19/07 07:01:25 EST
|
Gary, not sure what you are doing the second time, still using charcoal? Note that real charcoal smokes very little and briquetts are designed to smoke.
|
|
- guru
- Friday, 01/19/07 09:08:16 EST
|
On imports the U.S. require they be marked with county of origin, but it need not be permanent. A decal will be sufficient, such as those on the 110LB anvils while they are still at HF.
At one time a brand of pottery (Rosewood) was highly collectible. Imitations become coming in from China with a small "Made in China" sticker on bottom. Folks just took off the sticker and sold them as Rosewood. An experienced collector could tell difference in that the Chinese ones didn't quite have the luster of the original because they were using a different clay. China then perfected their clay mixing to where even authorities in the field are reduced to a judgement call. The value of original Rosewood has dropped as a result. A local antique shop refuses to not only handle it, but to give appraisals.
|
|
Ken Scharabok (Poor Boy)
- Friday, 01/19/07 09:09:36 EST
|
A while back I posted about the dangers of getting your hand web caught in the vise handle. Found another vise handle danger: the down swing nut catch. I won't do THAT again!
|
|
- Nippulini
- Friday, 01/19/07 09:11:16 EST
|
Harpoon: The note that the harpoon socket came to a point and the entire shank was forged to size indicates the first method I described. Rather than upsetting it is more common to start with a large lump and draw out the small diameter. This is most practical when you have a striker or power hammer but can be done by hand. Short heavy pieces are also easier to heat in their entirety. Example, a 1" square bar draws out to 1/2" bar 4 times the original length. 3/4" round bar draws out to 1/2" 2.25 times longer. For a 1.5" socket slightly thiner than 1/8" at the edge a 3/4" round will work. To make the full 1/8" the end will need to be upset to about 7/8".
No need to trial and error a cone or truncated cone. See our mathematics FAQ. Once you understand the method you can do it with rough layout and little math. Use the side of the cone to determine how long it is from the edge to the point. This is your layout diameter. Then you mark the circumference of the cone's base on the arc. You can measure with string, roll the part on the line or do the math (PI*d).
ADD one material thickness to the circumference for a bending allowance. The scarfs are forged after and should cancel out.
When forging the cone blank from the larger stock it should not be reduced in cross section too much at the point. The walls of the socket will be thicker there to blend into the shank. This takes hands on practice.
|
|
- guru
- Friday, 01/19/07 09:44:12 EST
|
Nip, I have two large vises with very heavy handles (about 6 to 8 pounds). You quickly learn where not to stand when opening and closing such a vise.
|
|
- guru
- Friday, 01/19/07 09:49:36 EST
|
Made-In Stickers: I was a little surprised the last time I rented an "American" made car (a mid sized GM) that there were bright orange "Made in China" stickers all over it. There is less and less US made content in "American" cars so I have little sympathy for their demise.
I recently watched all three of the "Back to the Future" movies. Remember the scene where Marty tells Doc, "All the best stuff is made in Japan". It was a little bit of a reality check in 1984. Today it is all over. . we lost.
|
|
- guru
- Friday, 01/19/07 10:21:13 EST
|
TLC show "Made In America" shows a lot of stuff made in America using foreign tools and imported materials.
|
|
- Nippulini
- Friday, 01/19/07 11:36:41 EST
|
I thought the idea was to use *their* materials and do the "value added" work here?
Thomas
|
|
Thomas P
- Friday, 01/19/07 11:57:51 EST
|
Trade Balance: The top dog in the trade wars is the one that imports raw materials and exports more finished goods.
Currently the US exports coal and scrap steel (which has already paid its blood cost) to Japan, Europe and China. That material was then reprocessed and dumped on our market as finished goods and reprocessed steel. Apparently global transportation costs do not add enough to make this uneconomical. And it also highlights that we have a serious problem.
We are paying off our trade imbalance with raw materials. This is a bankrupt policy that keeps third world countries from investing in industry and infrastructure.
|
|
- guru
- Friday, 01/19/07 13:49:50 EST
|
My proposal is to add a 'wage difference' tax on imports. Essentially research would determine what is the average hourly manufacturing wage in each country and the U.S. Each product imported would then be assigned a factor for the labor/manhours hours in it. That times the wage difference would be the tax. For simplicity say average manufacturing wage was $10 in U.S. and $1 in China. Product is coded as having ten labor/manhours in it. Tax would then be $90.00 per unit. Other countries are free to use the same technique for U.S. exports.
|
|
Ken Scharabok (Poor Boy)
- Friday, 01/19/07 14:14:12 EST
|
Garry, I used to light my coke forge with a handful of real, natural charcoal, often out of the wood stove or firepit. The hardest, most dense chunks seem to make little in the way of sparks. I just used a propane torch briefly to get the charcoal glowing, add blast bit by bit, add coke bit by bit, then it's a fire!
|
|
- vorpal
- Friday, 01/19/07 14:41:29 EST
|
no smoke at all
|
|
- vorpal
- Friday, 01/19/07 14:44:30 EST
|
The label "Made in the U.S.A." is virtually meaningless. The steel tape in a tape measure that was "Made in the U.S" may come from Germany. Needle bearings in a "Made in the U.S." tool, offshore. Etc. Item was perhaps assembled here. Perhaps. But made? Uh huh. Hoowhaw! We are, as the one they call 3dogs describes such a situation, "circling the bowl." We do make a lot of other stuff. Movies, CDs, DVDs, entertainment is a major, maybe the major, export.
|
|
Miles Undercut
- Friday, 01/19/07 15:19:40 EST
|
On Chinese labor, they may be the only country in the world with the ability to regulate the size and composition of their population. They current have a one child policy, but there are exceptions, such as if a child dies (normally its a girl as boys are strongly favored) or in rural area where children are needed for farm labor. If they want more factory workers they can ease off on the one-child restriction in additional rural areas. If they want technicians and such the limit on children might be determined by educational level, such as one for a bachelor's, two for a masters and three for a PhD or highly skilled technician.
Preference for boys is leading to a situation where males may eventually considerably outnumber females.
Then there is the 'spoiled brat' aspect from a pampered single child. Believe their terms for them is 'Little Emperors'.
|
|
Ken Scharabok (Poor Boy)
- Friday, 01/19/07 16:06:11 EST
|
One may have little sympathy for the American carmakers, but remember we are in the same boat as GM and Ford. Sympathy or not, if they fail it will be a major blow to America and all Americans. If I buy a Toyota or other foreign car, even one assembled in America, the profits go overseas. That is like harvesting timber without reforestation. The profits are what the industry needs to refurbish and save American industry and America itself. We may be too late.
We have given away more than we ever fought to save.
I saw an article in a US car magazine that described a US car, basicaly saying that it was fine and functional and would last a long time. At the conclusion he did NOT recommend its purchase because according to him, the appearance "lacked excitement." How important will that exciting appearance be when we are all working for the Chinese? (And that at Chinese wages and standard of living.)
|
|
- John Odom
- Friday, 01/19/07 16:37:07 EST
|
Now, I don't want to be inflammatory, but no country has championed free trade and a free market economy more than the US. Let the market decide is the mantra. It's a dog eat dog world....
Well, the US is being eaten. Deal with it.
|
|
andrew
- Friday, 01/19/07 17:27:04 EST
|
My grandma always said people in glass houses shouldn't throw stones. I live in Australia. We have lots of really big farms & we're really good at it. We can sell food to china or anywhere else the wages are low. We're highly mechanised and very efficient.
What we can't compete with is the massive government welfare (subsidies) given to US farmers to compete in our markets.
|
|
andrew
- Friday, 01/19/07 17:30:20 EST
|
I strongly believe in the free market. I just wish AMERICANS
would consider the broader impact of each purchase. If a foreign product is really better, I might buy it. But for "Excitement"?. We need to reduce farm subsidies too, agreed.
|
|
- John Odom
- Friday, 01/19/07 17:53:47 EST
|
Freemarkets are only free to International corperations. can we get off the Politics and go back to talking about metal working? please please?
|
|
- Frostfly
- Friday, 01/19/07 18:54:48 EST
|
I made a swell knife from a chunk of a coil spring I found on the highway for my dad for his birthday next week. I cut a 3" piece of the spring, straightened it, then fullered it to a nice length. Hammered it into shape, cut off excess, filed it, heated to an orange-yellow, quenched in oil. I tempered it to a dark straw and sharpened then honed it. My dad is into woodworking, so I left the tang with holes for him to attach scales of his liking.
Hows THAT for metal talk?
|
|
- Nippulini
- Friday, 01/19/07 19:04:29 EST
|
Frosty: Yes, but... If all you are is a hobby blacksmith then the world economy and marketplace isn't necessarily of a concern. For those who do it with the anticipation of a profit, it is helpful to know what your competition might be. For example, you have a unique, and possibly patented, product and receive an order from China or India for one. Armed with the knowledge there is a strong possibility you will see that same (reversed engineered) product in the U.S. market marked as being from another country might you think twice about filling that order?
|
|
Ken Scharabok (Poor Boy)
- Friday, 01/19/07 20:02:09 EST
|
Nippulini, if you like springs for knives, I can make you a gift of some especially nice ones for hand forge work. All you have to do is pick them up at Quad State. :) Or the IBA hammer-in at Tipton IN.
|
|
ptreeforge
- Friday, 01/19/07 21:05:55 EST
|
Or likely at the 2007 Anvilfire.com Hammer-in at my farm near Waverly, TN on April 20-22.
|
|
Ken Scharabok (Poor Boy)
- Friday, 01/19/07 22:08:10 EST
|
If you don't think international trade has anything to do with smithing, you must have inherited a blacksmith shop. or married a smith's daughter.
|
|
Miles Undercut
- Friday, 01/19/07 22:37:02 EST
|
Thanks all for the post's on the harpoon project. I was going to cheat the piece using tubing for the socket and OA for the welding, but I think doing it the traditional way is going to be a learning experience I just can't pass up!!!
Garry, light your coke with an OA (or propane and oxygen), rosebud or cutting torch, in less than 10min you will have a useable bed of glowing coals with no, I repeat, no smoke!! Plenty of carbon monoxide, but no smoke. If you don't have OA, bust up some Kingsford briquette's into 3 pieces each, soak in gasoline and use that for your base fire. Make sure your blower is on when you put the charcoal in place, before you light it, otherwise you'll get a nice loud bang in your blower pipe from the gas fumes drifting down when you add the match!!
|
|
Thumper
- Friday, 01/19/07 22:40:54 EST
|
Hello all. I've got a steel question if anyone here can answer it for me. I was looking for some tool steel to forge some blades out of, and found a Fastenal store near me and picked up a 3' bar of 3/4" round O1 drill rod. However after trying to forge it down to size for a bit, the stuff is hardly moving. I sort of assumed that it would come in an anealed state, was this assumption wrong? Is O1 like some of the other tool steels that need to be anealed very slowly after having been hardened before you forge it again? I had always been told that O1 is a good forging tool steel, but this stuff is being much more difficult to move around than i thought it would.
|
|
jmercier
- Friday, 01/19/07 22:56:03 EST
|
3/4"O1,
When the steel is at a forging temperature, Anealing is a moot point. Hardenening, tempering etc. have long vanished.
But still high carbon steel will always be tougher to forge than low carbon.
|
|
- Mike
- Friday, 01/19/07 23:36:12 EST
|
jmercier: Heat it to 1900F and hit it. Tool steel doesn't move easily.
|
|
Dave Boyer
- Friday, 01/19/07 23:36:54 EST
|
jmercier: Like Mike and Dave said, O1 just doesn't move as well under the hammer as some steels, but it's pretty easy to HT and makes a great blade when it's done.
|
|
AwP
- Saturday, 01/20/07 03:07:50 EST
|
Oh, forgot to mention... I don't get my O1 any thicker then 1/2" because of that.
|
|
AwP
- Saturday, 01/20/07 03:08:52 EST
|
what is the best tree stump to use that absorbs anvil ring and is sound reduced more by leaving the bark intact. Does wrapping the anvil with innertube and attaching magnets really do anything to reduce sound? Is there an anvil stand that works better for this than a tree stump besides a bucket of dirt or sand.
Thanks,Dave
|
|
dave
- Saturday, 01/20/07 03:14:05 EST
|
Anvils and Noise: Dave, Tree stumps do not deaden anvil noise. If anything they accentuate it. Why? An American pattern anvil is a self reinforcing vibrator like a turning fork (two large masses connected by a narrow section) and it needs to be free to move to make noise. The best way to give is freedom to move is to balance it on a high point OR support it on several small points such as an uneven resisiliant (wood) surface.
There are several methods for reducing noise. Anchoring snuggly to a heavy stand helps. A rubber or roofing felt gasket (tar paper) then bolting the anvil down. Some have holes for this, other require you make clamps.
Bonding the anvil to the stand helps. The modern method is to glue the anvil down with a silicon rubber caulk. Almost any type will do but the ones for use with concrete are the best for this purpose. A combination of bonding and bolting is often used. The bed of caulk should be continuous under the anvil.
An old European method of deadening the noise was to set the anvil in a container of dirt and coal ash (or coarse sand). Although it helps some under certain conditions it does not help much.
Speaker magnets with the case and elastic mount help if they are big enough for the size of the anvil. You must experiment with placement. I could not tell a lot of difference.
See our Stands iForge demo for different stands.
|
|
- guru
- Saturday, 01/20/07 09:17:51 EST
|
Stumps and Bark: Depending on the tree type and your location you should debark your stump as soon as possible. Loose bark is where many insects get a start in wood and once started are difficult to get rid of. These can then transfer to other wood in the surrounding area (tool chests, wood handles, floors, building framing). As soon as the wood surface is dry enough to absorb water you can then treat the wood with a borax water solution. As the wood dries you can slow checking with anti-freeze. Do not leave it lying around as it is toxic and pets like to drink it.
Although kiln dried lumber is insect free the borax treatment will also help keep insects out of it. This is recommended for any wood stand used outdoor or on an earthen floor. Sealing the surfaces in contact with the Earth is a good idea, however this will wear off.
|
|
- guru
- Saturday, 01/20/07 09:30:03 EST
|
Forging Tool Steel: I have used annealed tool steel bar in applications where I needed moderately high strength without heat treatment. Annealed O1 is roughly the same hardness as fully quenched mild steel (which DOES harden but is brittle at full hardness).
Two things hurt when forging tool steel, the lower maximum forging temperature (1950°F) and the higher strength at that temperature. In mild steel you can get a 50% reduction at 20,000 PSI and 1800°F but you only get a 5% reduction at the same in A6 tool steel. To get the same reduction in tool steel requires two to four times as much force. It helps a LOT to work at the forging limit of the steel. - Examples from the Heat Treaters Guide (ASM).
As noted by AwP you can get a very nice blade (Bowie and sword width) from a 1/2" round. This requires a LOT less forging than the 3/4". The problem you will have with the larger stock is that it will take many heats and each time you are decarburizing the steel deeper and deeper. You can easily end up needing to grind 1/16" off the entire surface which will narrow an edge by 1/4". So the larger stock is costing you time forging AND time grinding.
Several years ago I needed to flatten some 5/8" coil spring steel for a fellow. Luckily I was in someone's shop with several power hammers. We started with the 100 pound hammer. This did a good job until the stock flattened and cooling and friction became a problem. The 100 pound hammer hit it and just bounced off. . . SO, I went to the 300 pound hammer. Now THIS moved the steel even though the dies were over twice as wide. . . BIG difference!
|
|
- guru
- Saturday, 01/20/07 10:15:37 EST
|
Thanks, guess I should buy smaller bars. I got the 3/4" just assuming I could reduce it down yet leave large collars for an integral bolster if I watned, but I'm thinking it was a mistake now. I've worked 1084 before, and 1095 and while those werent the easiest metals to move, they at least moved. This 3/4" O1 I'm whaling on with a sledge and the hammer just bounces, hardly moving the metal at all.
Will running my propane forge with a reducing flame help reduce the amount of decarbing of the steel?
Maybe it's time for me to invest in a treadle hammer =)
|
|
jmercier
- Saturday, 01/20/07 11:08:28 EST
|
On the forge, no. It will help a little but gas forges are generally difficult to create a true reducing atmosphere in.
Please note that a treadle hammmer is NOT a power hammer. While it can be use to hit several blows harder than you can by hand it is STILL human powered. YOU still have to move the weight. And even though the springs lift the weight YOU must overcome those same springs to strike a blow.
For the money I would build a McDonald Mill for this purpose. You can turn all that O1 into nice flat bar WITH shoulders if you like. See our book review page for plans.
|
|
- guru
- Saturday, 01/20/07 11:36:45 EST
|
I'm aware that a treadle hammer isnt a power hammer, I just dont think my neighbors would be too keen on the noise from a power hammer, they already complain when my air compressor is in use =(. I live on the outskirts of a small city in a neighborhood with houses packed around me. I've got the biggest yard in my neighborhood and my shop in my detached 2 car garage.
While I'd prefer a power hammer, my compressor is far too small for something like a KA75, and i've not got the money for an old beaudry or LG or something. A treadle hammer would be better than nothing. A rolling mill would be nice for flattening stock, but doesnt have the versitility of a treadle hammer. I could shape cable damascus billets and such with a treadle hammer, and still be able to use it as a striker for punching or chisle work , which i couldnt do with a press or mill.
Maybe I'll wait on forging this bar out till I can get to a friend's place who has a pneumatic press.
On the treadle hammer side, would you recomend the extra work (or money if I decide it's worth my time to purchase one outright) for an inline treadle hammer vs a normal one?
|
|
jmercier
- Saturday, 01/20/07 12:07:22 EST
|
On the reducing atmosphere in a gas forge, if you put a piece of wood or charcoal in the forge, and replace it when it gets burnt, that'll help keep it more reducing. You'll still get some decarb whenever you take it out of the forge and hammer it though.
|
|
AwP
- Saturday, 01/20/07 13:11:03 EST
|
While it is not the most modern, effective solution, it can be fun and a good learning experience to draw out or forge tough items the old way, with a striker.... I usually try to get a friend all stoked to learn smithing, and as soon as he gets through the door, hand him a 10# sledge! Take a lesson from Tom Sawyer. That's what friends are for.... and if he still wants to smith after his hands blister up a couple times, maybe you have an "apprentice" as well.
|
|
- vorpal
- Saturday, 01/20/07 14:40:50 EST
|
One of the last times I helped Paw-Paw forge something he had a piece of 1" square. . We took turns with a short handled 6 pound sledge. I wouldn't want to use it often but it moved the steel.
|
|
- guru
- Saturday, 01/20/07 15:35:01 EST
|
I recently found a katana blade at a second hand shop. The blade is hira-zukuri, meaning that it is basically flat ground with a rolled edge. I found that this type of blade was usual in tantos, but very uncommon in long swords. The finish is all scuffed up, so no grain discernable, it could well be plain steel but no real rust except for on the tang, which bears no marks. Very hard to identify, but it is a really solid blade wih some good weight to it and quite restorable I think. Do you think based on this info that $35.00 is reasonable to pay? It would take me a lot more than that in time to make it....
|
|
- vorpal
- Saturday, 01/20/07 21:25:48 EST
|
just as a practice blade, possibly for resale after restoration.
|
|
- vorpal
- Saturday, 01/20/07 21:27:39 EST
|
What's a blister? Heh heh, I stopped getting those when I was 19 as a carpenters helper.
|
|
- Nippulini
- Saturday, 01/20/07 21:52:19 EST
|
We charge $35.00 just to fire up the forge. When you restore the sword, try to make it go "snicker-snack".
|
|
- Vorpal
- Saturday, 01/20/07 22:06:32 EST
|
Sorry Vorpal. Name mix-up
|
|
Frank Turley
- Saturday, 01/20/07 22:07:51 EST
|
Hey Turley, as you may have guessed, that's my life ambition! Kick ass!
|
|
- vorpal
- Saturday, 01/20/07 23:14:37 EST
|
I am interested in becoming a swordsmith, I take Battojutsu, I own 6 katanas (the real thing, carbon steel) and have done research and still am, on that of the japanese blade and its history, and am going to join the JSSUS, I was wondering, do you have to take some type of class in college or do you contact a special person?
|
|
Joseph
- Sunday, 01/21/07 07:04:43 EST
|
Joseph,
Contact barry@jssus.org for answers. For serious study, I would recommend purchasing the book, "Nippon-To Art Swords of Japan", Japan Society, Inc.
|
|
Frank Turley
- Sunday, 01/21/07 09:11:40 EST
|
Joseph, you might also go to www.dfoggknives.com . Talk to the members there about swordmithing. Many of them are master smiths and incredible artists.
|
|
quenchcrack
- Sunday, 01/21/07 09:40:29 EST
|
Joseph, See our Sword Making References list.. These references are more general but they all apply to the subject. Part of the process of becoming self educated in any field is to obtain the proper books. In metal working there are also standard references to modern steels and heat treating that are tools of the trade. As many tools are, they are not cheap. But obtaining them is an important part of the business.
Although you are currently looking at a very narrow set of traditional skills you will need to know what is going on in the world at large as we are all in a global economy.
|
|
- guru
- Sunday, 01/21/07 09:52:30 EST
|
how much do swordsmiths generally make?
|
|
ray
- Sunday, 01/21/07 11:34:57 EST
|
ray: If you are a master swordsmith, perhaps several thousand per blade. If you are anything less then it is whatever the market will bear based on your quality (and to a much lesser degree, reputation).
|
|
Ken Scharabok (Poor Boy)
- Sunday, 01/21/07 14:07:03 EST
|
Ray, The only answer is that in today's world a swordsmith is an artist-craftsperson. Ever hear the term "starving artist". That is what most artists are that follow their dream. A few make a living and a very very rare few make good money no matter what their art sells for.
Believe me. I am from a family of fantastic artists who are all either starving or working at another trade.
|
|
- guru
- Sunday, 01/21/07 14:23:06 EST
|
Ray; that "several thousand dollars per blade" sounds pretty good until you figure out what the time involved is. I knew a top swordmaker in the 1980's that with blades selling for over a thousand dollars apiece (I recall one that went for $13K) and a two year backlog of orders, he could still qualify for food stamps a lot of the time.
Don't forget the cost of equipment, taxes, HEALTH INSURANCE---if you become a maker you *WILL* end up visiting the ER someday---social secutity, materials, selling, etc.
And remember until you establish a reputation you will be selling at a considerable discount---the reputation of the maker can be responsible for over 50% of the cost of the blade!
Thomas
|
|
Thomas P
- Sunday, 01/21/07 15:35:08 EST
|
The link below is to the website of a photographer who has recently recorded images of bladesmiths (little mesters) in Sheffield, England. See if you can find the spring hammer, rolling mill and toolmaker's anvils amongst the photos.
http://www.martin-pick.co.uk/index.html
|
|
Bob G
- Sunday, 01/21/07 18:11:48 EST
|
Nice photos, A little small to see. If there a grinder in ANY of those photos less than 5HP?
|
|
- guru
- Sunday, 01/21/07 19:15:07 EST
|
Small pictures:
I use Firefox for a browser, and there are a bunch of extensions available for it. ONe of my favorites is Image Zoom. You right-click on an image of interest and you can zoom in or out as far as you'd like. If the image has enough resolution, you can usually get a few zooms in until it doesn't make sense.
--Marc
|
|
- Marc
- Sunday, 01/21/07 21:05:06 EST
|
Hello,
I have been working with metal for well over the last two years out of a home forge. Recently I have become interested in metal casting. I was curious if anyone had a good direction to look as far as constructing and operating a home foundry capable of casting iron. A few books have caught my atention but I haven't been able to find reviews of them and most deal with alunimum casting.
Thank you in advance, this is a great place with great people.
|
|
- Michael A.
- Sunday, 01/21/07 22:00:09 EST
|
Michael:
You need to get good with aluminum, then bronze before tackling iron. There are amatuers that do cast iron, but it is vastly more diffficult and dangerous that aluminum. To do it you need space, either rural or industrial.
Chastain's book is the bible for amatuer iron casting. Google it.
|
|
- John Odom
- Sunday, 01/21/07 22:08:15 EST
|
John,
Thank you, I thought that might be the case. I've done some light aluminum casting in college but I can't say I'm good at it. Well that is a place to start, is there a book you might recomend?
|
|
- Michael A.
- Sunday, 01/21/07 22:37:16 EST
|
John,
I'm sorry, my browser didn't seem to show the last line of your post. Thank you for the book recomendation.
|
|
- Michael A.
- Sunday, 01/21/07 22:38:03 EST
|
I've been boning up on this harpoon project and I want it to be museum quality so I intend to do it in real wrought iron. I have an old busted up farm wagon (oak and metal), in my yard and I want to know how to tell if the metal is wrought or mild steel, is the spark test the most reliable way?
|
|
Thumper
- Monday, 01/22/07 00:13:03 EST
|
Thumper, The spark test is highly dependent on the grinder and grade of wheel. You need to be long clear sparks to accurately determine steels.
Old rusted wrought clearly shows grain and it should flow with the object. Wrought also may have numerous forge welds which is also no so common in mild steel.
The break test is also good. If you have a smallish piece, saw it half way through then bend it at the break. Good wrought will show grains pulling out near the cut and should not break. Under this test most mild steel will break.
When you make reproductions in wrought be SURE to clearly mark the date of manufacture with modern stamps.
|
|
- guru
- Monday, 01/22/07 00:24:09 EST
|
Casting Iron: While it CAN be done in a back yard foundry to do so in any significant size requires helpers. Small coupla operations are the most efficient but take at least three people to operate or more. Since you can repeatedly charge and tap a coupla you can cast over and over in small lots. No only do you need a crew but you need backups.
Cast iron has also been cast using propane and oil fired furnaces (very similar to those used for aluminium and bronze). The big difference is the crucibles and handling them. Not only are they heavy but when glowing red they are very hot to be near. . .
|
|
- guru
- Monday, 01/22/07 00:30:28 EST
|
Casting: I still prefer the books of C.W. Ammen on the subjects of casting. However, if you are going to get into this you want to read them ALL.
|
|
- guru
- Monday, 01/22/07 00:35:41 EST
|
Guru, good idea on the date marking, I have no intention of making a counterfit!! If the wagon isn't wrought, is there anywhere to buy it new or should I just spend an afternoon or 2 junk yarding?
|
|
Thumper
- Monday, 01/22/07 01:04:59 EST
|
Thumper
Wrought Iron:
This is for when you find your pure wrought iron to work with. I have forged much wrought iron. This is what I found works for me. It may save you frustrations. I cut of any split/frayed ends before using. I forge it very hot/yellow/almost welding temp. I never hit it red and black. It will just split/fray/break. It forge welds very easy. If you work it like mild steel you will be frustrated.
Not sure on wagons and wrought iron. Many wagon parts are high carbon. The best fella to ask is Jymm Hoffman across the street. He makes wagons and is familiar with wagons. He should be able to answer your question for that.
|
|
- Iron Balls
- Monday, 01/22/07 01:52:41 EST
|
Thumper: Try to contact Keith Sommer, 3097A Road Q, Pandora, OH 45877. He typically brings wrought iron to sell at the Quad-States.
|
|
Ken Scharabok (Poor Boy)
- Monday, 01/22/07 04:37:05 EST
|
I've read that circular-saw blades are L6, does this apply to consumer blades? I presume not for cheap, or TC tipped blades - how about older blades?
What's the best method of cutting old blades? Right now I need a scraper, so am concerned with avoiding heat & loosing temper. Or do people just cut with an abrasive wheel & re-treat later? Less immediate, I'm interested in use in a laminate, so heat is less of an issue. thanks
|
|
andrew
- Monday, 01/22/07 06:37:36 EST
|
The book I meant was Marshal's, not Chastain's, although both are good.
See: http://www.rockisland.com/~marshall/foundry.html
Guru is correct that this has to be a team effort. I have worked as part of a cupolette crew, but have never owned the cupola.
Safety is much more dificult with Iron, than with lower melting metals, and all are dangerous.
Try to join a group Iron melt somewhere. Take your patterns and work with a club. Check with local university art departments to find such events.
|
|
- John Odom
- Monday, 01/22/07 08:34:27 EST
|
Andrew,
I made a straight edge wood scraper once out of a circular blade (just to see how it worked). I used a cold chisel to make a straight score line in the blade and then clamped it in the vise and snapped it. A little bit of grinding on the low speed wheel, then sanded flat and true on a belt sander.
Carbide tipped blades do not a good scraper make (the steel seems fairly soft.) I used a high tooth count panel/plywood blade, but I would think that any blade that is all steel would work just as well.
-Aaron @ the SCF
|
|
thesandycreekforge
- Monday, 01/22/07 10:26:00 EST
|
I have an old anvil I want to trade for a smaller one. Mine is approx. 150lbs. It is an old farm anvil indecent shape. It is flat on top but shows signs of use.
http://www.putfile.com/pic.php?img=4574175
http://www.putfile.com/pic.php?img=4574176
http://www.putfile.com/pic.php?img=4574174
I was just wondering what it is worth. I have no idea. Thank you.
|
|
Ross MI
- Monday, 01/22/07 10:55:05 EST
|
Is it better to use Coke or Coal? I've heard a few different opinions on this, so i guess its an opinionated thing. I'm just starting out and I would like to know yalls opinion.
thanks
|
|
Jarrod
- Monday, 01/22/07 11:51:14 EST
|
Saw Blade Steel: Andrew, Every manufacturer uses whatever steel they choose and may change as they want. See our FAQ on Junk Jard Steel.
Cutting with the edge of a grinder worked for me. The heating did not seem to effect whatever type of steel it was. Many high carbon tool steels are air hardening and tempering temperatures are very high.
I got better, thinner scrapers from bandsaw blade.
|
|
- guru
- Monday, 01/22/07 12:16:05 EST
|
Anvil Value: Ross, I would say $300 or so. More cleaned up. Some things you cannot tell from a photo, especially under paint. The wear and tear is not serious and could easily be cleaned up.
If you trade down to a very clean 75 pound anvil you might have an equivalent value. Small anvils tend to sell for more per pound and REALLY small anvils in the 50 pound range sell very high.
Unless you need a much smaller anvil for bench work or daily portability then this is a very good size anvil for blacksmithing. Even "portable" class anvils are only a little smaller, usually 100 to 125 pounds.
|
|
- guru
- Monday, 01/22/07 12:24:28 EST
|
Ross MI: Style looks to be British from mid-to-late 1800s. Use a wire brush and try to removed crud from side with horn to right. Any letters or numbers there? See if there are numbers such as 1 1 10 or 1 . 1 . 10 at waist. Once down to bare materal a trick is to dust with flour and brush off excess. Flour left in depressions sometimes make letters and jumps stand out.
|
|
Ken Scharabok (Poor Boy)
- Monday, 01/22/07 12:30:21 EST
|
Coke vs. Coal: Jarrod, it depends on what you are doing and your shop.
1) Coke is more difficult to light
2) Coke requires a constant blast of air to keep burning and often goes out and must be restarted otherwise.
3) Coke burns cleaner than coal
4) Coke burns hotter than coal right away but coal cokes down and burns very hot as well.
5) Coal sticks together so you can form a beehive fire. Coke does not.
Most coke is top grade fuel while coal can vary greatly. Most smiths would prefer top grade smithing coal over coke but would rather use coke than a bad grade of coal.
|
|
- guru
- Monday, 01/22/07 12:31:34 EST
|
Iron Balls, thanks for the heads up. I've never had any grnuinr wrought iron to work with so I'll take your tips to heart.
Ken, I'll try to get intouch with Keith this week.
|
|
Thumper
- Monday, 01/22/07 13:16:04 EST
|
Guru,
ive seen the article on sword making, which ive never the need for swords, but ive had many come to me and ask to make a scabard for their personal blades. any knowledge on making a sword sheith?
thanks
spud
|
|
spud
- Monday, 01/22/07 18:04:18 EST
|
Spud; what kind? Medieval european sword sheaths were traditionally made from wood and lined with cloth or fleece, the outside can be covered with cloth, metal (thin and usually embossed/chased) or leather.
Woods used were generally fairly soft and light. In the USA tulip popular is a good wood to use.
James Hrisoulas' "The Complete Bladesmith" covers making sword sheaths.
Thomas
|
|
Thomas P
- Monday, 01/22/07 19:44:14 EST
|
Three bucks a pound rock bottom minimum unless you could possibly suggest to a buyer that it might have been used to forge something really historic. You know those awful moments on Antique Roadshow where the ponce dealer says the jelly cabinet woulda been worth $25 K if she'd just left the paint on it, only now that it's been spruced up, $200 tops?
|
|
Miles Undercut
- Monday, 01/22/07 20:14:24 EST
|
Spud, their construction varies greatly. The Japanese carve theirs from two pieces of wood, glue them together then lacquer and decorate. Leather types should have fibre linings that protect the user and the leather. These are obviously leather working products. Millitary types are often sheet metal sheaths with leatherette covering.
The book The Craft of the Japanese Sword goes into some detail about Japanese sheaths. However, it stops short of the fine art of the lacquering. In Japan each step may be a specialty, carving and fitting, lacquering, fitting the furniture. . .
|
|
- guru
- Monday, 01/22/07 20:35:06 EST
|
Andrew - A word about published tool steel use recomendations: There are many tables that suggest particular types of tool or alloy steel for making a particular parts or tools. Thes tables really only work in one direction. They list steels that will work well for the item listed, but trying to identify the type of steel used to make any part from these tables is usless, as MANY different grades of steel with vastly different heat treat requirements could have been used sucessfully. In the case of a specific tool steel grade being used for a mass produced part where the material is not specified it is highly unlikely as tool steels are overly expensive due to tighter tolerences in composition. Mass produced parts are made out of the cheapest material that will do the job as a matter of economic necessity.
|
|
Dave Boyer
- Monday, 01/22/07 22:37:18 EST
|
I have an exceptionally nice Champion #400 Blower but the largest gear which is brass, has most of the teath worn off. What would you suggest in reparing this gear?
|
|
Floyd
- Monday, 01/22/07 22:37:23 EST
|
Floyd, I have and exceptionally average Champion blower with the same problem. It's run well for 3 years now and I'm pretty sure I'll get another 10 out of it as I see no brass fines in the oil. Chances are your's will do the same. The only person I know who fixed his, brazed new teeth on by building up brazing rod and spent quite some time filing them down. By the way, in my earlier post, I meant "genuine", not "grnuinr", which actually means "check's in the mail", in Cleyon.
|
|
Thumper
- Monday, 01/22/07 23:09:49 EST
|
(OT) Advice on handling an anvil :)-
A biker stopped by the local Harley Shop to have his bike fixed. They couldn't do it while he waited, so he said he didn't live far and would just walk home. On the way home he stopped at the hardware store and bought a bucket and anvil. He then stopped by the feed store and picked up a couple of chickens and a goose. However, struggling outside the store, he now had a problem -- how to carry all of his purchases home.
While he was scratching his head he was approached by a little old lady who told him she was lost. She asked, "Can you tell me how to get to 1603 Mockingbird Lane?" The biker said, "Well, as a matter of fact, I live at 1616 Mockingbird Lane. I would walk you home but I can't carry this lot."
The old lady suggested, "Why don't you put the anvil in the bucket, carry the bucket in one hand, put a chicken under each arm and carry the goose in your other hand?" "Why thank you very much," he said and proceeded to walk the old girl home.
On the way he says "Let's take my short cut and go down this alley. We'll be there in no time." The little old lady looked him over cautiously then said, "I am a lonely widow without a husband to defend me. How do I know that when we get in the alley you won't hold me up against the wall, pull up my skirt, and have your way with me?"
The biker said, "Holy smokes lady! I am carrying a bucket, an anvil, two chickens, and a goose. How in the world could I possibly hold you up against the wall and do that?"
The lady replied, "Set the goose down, cover him with the bucket, put the anvil on top of the bucket, and I'll hold the chickens."
|
|
Bob Johnsob
- Tuesday, 01/23/07 01:29:04 EST
|
And here I would have just hung it from my nips.
|
|
- Nippulini
- Tuesday, 01/23/07 08:58:36 EST
|
Nippulini, you crack me up.
But seriously, I have a JYH question. I'm very slowly gathering parts to make one, and am wondering about the bearing surface for the ram. My choices would seem to be either brass (plus a lot of drippy oil); HDPE; or oil-impregnated nylon. I suppose I could pour babbit too, but I'm not sure if it works on vertical surfaces. So, what would be the pluses and minuses of each of these options? Is there a clear best choice?
Thanks,
Michael
|
|
mstu
- Tuesday, 01/23/07 13:18:29 EST
|
Ram Guides: The absolute best material is HDPE or graphite impregnated HDPE. However, in all guide systems what is important is STRAIGHTNESS and rigidity. Plastic guides also need heavy support bars behind them for the adjusting screws to bear on.
For straightness you can often get away with stock material if it is cold drawn or factory ground. Rigidity is a matter of design and material thickness. Lots of bolts helps.
For rigidity the best arrangement is CI and steel or CI and CI with lots of oil. Both require precision machining and heavy parts.
Babbit is merely a soft easy to handle material to run on soft shafts. However, it does have some self repairing qualities. Bronze has its plus and minuses. It is good for ridgid systems but needs constant oil and is more expensive than the others.
|
|
- guru
- Tuesday, 01/23/07 13:38:40 EST
|
Michael, We used a pliable plastic and shimmed it. Shims are held by tabs. Clay Spencer recommended a silicon spray for lube, but one of the guys in the workshop uses bar & chain oil & 30 weight motor oil for lube.
|
|
- Ron Childers
- Tuesday, 01/23/07 15:24:24 EST
|
Hello, I was wondering, just on average what the melting point of a mild steel, lets just say 1020 for this. I was told it was 1600, but for some reason I had in my head it was around 3100?
|
|
- Boogerman
- Tuesday, 01/23/07 16:27:52 EST
|
Melting Temp, F or C?
Pure iron or mild steel melts at about 2,800°F (1538°C). As the carbon increases the melting point drops to as much as 180°F lower (100°C)
Coal fires reach 3,200°F (1760°C). More than emough to melt steel.
|
|
- guru
- Tuesday, 01/23/07 16:35:28 EST
|
RE: Champion 400 bronze gear
Floyd--I am cleaning up and rebuilding a #400 blower. The bronze gear, the side that drives the spiral blower shaft, looks like the teeth are worn off. That is how they come. It depends on the mesh with the spiral shaft--the spiral shaft teeth fit into the bronze gear, not the bronze teeth fitting into the spiral shaft. Wear is probably better assessed by what the crud in the bottom is, and the conditions of the bearings in the spiral shaft. The ball bearings in mine were rusted and out of round, but the races were in fine shape, and the only thing in the crud was old grease crud. Therefore, should be fine when I replace the ball bearings, packages of 1/4" ball bearings available without much searching on the internet, the shipping cost more than the ball bearings. Hope this helps
|
|
- David Hughes
- Tuesday, 01/23/07 18:22:57 EST
|
I was wondering if there is anything other than a tomahawk drift for slitting the hole in an axe,
i dont know where i can get a tomahawk drift, so im looking for an alternative
thanks
Cam
|
|
Cameron
- Tuesday, 01/23/07 19:22:10 EST
|
There was along discussion about plastic tup guides across the street not long ago. The consensus seemed to be to use UHMWPE. I'm not sure anyone mentioned HDPE, but I don't think it's the same thing.
|
|
Mike B
- Tuesday, 01/23/07 19:33:53 EST
|
I'm looking for a small, used / refurbished powered rolling mill, or for plans to build one, in order to somplete my suite of tools for mokume gane. Plans for heated rollers (quartz heating tubes?)
I am looking for a small used / refurbished powered rolling mill or for plans to build one. Heated rollers would be nice (quartz tube heaters?). This piece of equipment will complete my suite of tools for making mokume gane. International Rolling Mills in Pawtucket, RI are the only commercial source of small, used / refurbished mills but they are NOTTT(!)CHEAP. Regular mills can be used for mokume gane but the best ones take larger stock than usual (up to 1/2 inch at least) and the very best ones are extra-wide. Plans? Sources? Suggestions?
International Rolling Mills in Pawtucket, RI, is the only
|
|
William Greenough
- Tuesday, 01/23/07 19:37:17 EST
|
There are several grades of polyethylene. Low density, medium density, high density, and Ultra high Molecular Weight PolyEthylene, Low density is what milk jugs are made from. The engineering grade that maeks very nice slide and wear material is the UHMWPE. All of the PE's start out as parafin wax in petroleum, and are cross linked to gain the different properties. The material is reasonably priced, drills,taps, and saws well with wood tools. It usually is a milky white with an oily surface feel.
|
|
ptree
- Tuesday, 01/23/07 19:41:37 EST
|
Thanks for the info. Guru.
|
|
Rashaan B.
- Tuesday, 01/23/07 20:10:00 EST
|
Cameron: traditionally axes were made by wrapping a piece of wrought iron around a mandrel and forge welding the ends together with a piece of steel for the cutting edge or "bit".
You can still do it this way. I forged a kindling hatched from a farrier's rasp this way skipping the inserted bit as the steel was quite good enough for the purpose---I checked it before using it.
If you are smithing *forge* a drift to meet the specs you need. A bullpin (used in aligning structural steel) for a buck or two at the fleamarket should work fine.
Thomas
|
|
Thomas P
- Tuesday, 01/23/07 20:15:32 EST
|
Those big rolling mills like International carries are pretty exclusive to jewelry manufacturing. And Rhode Island was the captial of american jewelry manufacturing, so International, and Gold Machinery, also in R.I. are two of the only places in the USA that regularly carry used ones. They are both well known for asking top dollar, and sitting on machines til they get it.
However, if you spend some time looking, they do come up used from time to time.
EBAY, of course, but also check www.machinetools.com and www.locatoronline.com regularly.
If you want cheap, you are gonna have to work for it- doing a lot of looking, and waiting.
I know of another mokeme-gane maker who recently picked one up for under 2 grand on ebay- which, I am sure, is a fraction of what those Rhode Island guys want.
|
|
- ries
- Tuesday, 01/23/07 20:25:11 EST
|
Rolling Mill: I do not know if anyone has used the McDonald Mill on Mokume' Gane but I suspect it would work with annealed stock in small steps OR for appropriately sized material. Some of the jewelery mills are no heavier and have no more horse power.
McDonald Rolling Mill
|
|
- guru
- Tuesday, 01/23/07 21:14:55 EST
|
Actually, milk jugs are HDPE (leastwise, laundry detergent jugs are -- my wife and I can't finish a gallon of milk before it spoils). I think sandwich bags may be LDPE.
|
|
Mike B
- Tuesday, 01/23/07 21:19:28 EST
|
I was wondering if anyone could tell me what a good college/ art college would be to get a degree in metalworking or ironworking?
|
|
- Boogerman
- Tuesday, 01/23/07 21:30:58 EST
|
William Greenough-- try posting this same SOS on the jewelry-making website www.ganoksin.com It has a broad, helpful, audience. Also, Metalliferrous is an outfit in the jewelry district in NYC that deals in everything connected to the trade/craft, and sells used equipment.
|
|
Miles Undercut
- Tuesday, 01/23/07 21:49:11 EST
|
mstu: I would beg to differ with the Great Guru. HDPE is way down on My list. A lot of people are using UHMWPE sucessfully, but in a plastic I would use the Molly filled Nylon, as it has 5 times the compressive strength of UHMWPE or Turcite, a filled, reinforced pollyester material gaining use in machine tool ways which has even better compressive properties. Aluminum bronze or cast iron are great choices, but only if You have the capacity to machine acuratly. The softer materials need greatly increased contact areas. As for HDPE, that is what milk jugs are made of, squeze some in a vise or hit with a hammer and see what You think.
|
|
Dave Boyer
- Tuesday, 01/23/07 22:23:53 EST
|
I must disagree with Ptree too, as crosslinking is only to be had in cross linked pollyethelene, a different animal altogether. He is corect in saying that the pollyethelene family is a really long chain in the parifin family, the family that starts with methane ethane, propane and butane, then goes to liquids for the next 10 compounds before getting into solids. They all share the basic formula where the Hydrogen atoms are equal to the number of carbonn atoms times 2 plus 2. Ex. Methane is CH4, propane is C3H8 etc. You can heat weld the LDPE, MDPE & HDPE plastics, but not the cross linked ones.
|
|
Dave Boyer
- Tuesday, 01/23/07 22:36:13 EST
|
Cameron, A felling axe is shown in Henry Mercer's book, "Ancient Carpenters' Tools", page 9. It is made of two slabs of wrought iron, eye depressions fullered on each slab, so only the poll and blade are welded. A bit of high carbon steel is cleft welded in. This was an old timey method still being used in Pennsylvania in 1925. If you can forge an axe, the drift should be a snap.
|
|
Frank Turley
- Tuesday, 01/23/07 23:10:14 EST
|
Boogerman,
Check out Southern Illinois University at Carbondale. They have a program in metalsmithing that is pretty well thought of.
|
|
vicopper
- Wednesday, 01/24/07 02:43:03 EST
|
Cameron,
The hole is made by slitting or punching, unless you're making a wrapped eye. Slitting is done with a slitting chisel, and holes are punched with tapered punches. Punches may be round, square, rectangular or oval in shape. Drifts, on the other hand, are used for forming or stretching holes, not for punching or slitting.
If you want to slit/drift the hole in an axe, use a good slitting chisel, preferably one made from a good hot work alloy like H13, then drift to size and shape with an appropriate drift. A drift for a hawk would be considerable different than the drift for an axe, and a single bit axe would use a different drift than a double bit. The drift you can make yourself from mild steel, though a better alloy will last more uses before it deforms too much.
Lately, I've been making all my own slitting chisels from some used Nascar race car axles I got from Paul Garrett at Quad State a couple years ago. They work like a dream and are easy to forge under the power hammer and work fine just normalized. I've no idea what the actual alloy is, but I sure do wish I'd gotten a few more of those axles when he had them.
|
|
vicopper
- Wednesday, 01/24/07 02:55:49 EST
|
Cameron: Tomahawk drifts are offered on a regular basic on eBay by a guy in Lancaster, OH (I believe) who has a number of tools cast in ductile iron. Just do a search on tomahawk drift.
|
|
Ken Scharabok (Poor Boy)
- Wednesday, 01/24/07 04:09:45 EST
|
Sheaths and scabbards,,
This is the type I make,for what its worth. (I make the knives too)
Its not my website,
Just someone who has done a pictorial of their processes
http://web.telia.com/~u91004430/wshop.htm
|
|
- Hĺkan
- Wednesday, 01/24/07 07:48:33 EST
|
Thanks everyone. I'm very limited on machining abilities, so cast iron is probably out for now. I like the ease of working the polymer-based materials, and in fact, I have a book on my shelf that has more than most people want to know about them. It's "Polymer Chemistry: Introduction to an Indispensable Science" by D. Teegarden, NSTA Press, 2004. ISBN: 0-87355-221-0.
Anyway, beyond the choice of material itself, the way it is processed seems to have a lot to do with the final properties. HDPE is used in diverse applications that require widely different properties, so some forms might be more suitable than others for my use. However, according to Wikipedia, UHMWPE is actually slightly less dense than HDPE, but apparently it has greater toughness and wear resistance. The Wikipedia article mentions that UHMWPE is commonly used for bearings and other moving parts on machinery.
The oil-filled nylons are also looking good. I can't seem to locate an online comparison of either form of polyethylene to nylon, but it sounds like the nylon may be a bit superior. I can find a 1/4 x 12 x 12 sheet of the nylon material for around $25, which doesn't seem too unreasonable. Can anyone who has worked with both the PE and nylon materials offer a comparison of their ease of use? I'll have a table saw, bandsaw, and drill press available to machine this stuff.
Thanks,
Michael
|
|
mstu
- Wednesday, 01/24/07 09:34:36 EST
|
Hawk Drifts
I baught one from Kayne and Sons (Blacksmith Depo?)
I've made hawks by a couple of different methods. One is just wraping and either using a high carbon steel or welding a bit in.
The other is using two seperate pieces, fullering a drift depression in either ide and welding together. One side gets forged into the blade and the other into a spike or pole.
there is a good tutorial in the iforge and there are several on dfoggknives.com
|
|
Mike Ferrara
- Wednesday, 01/24/07 10:09:31 EST
|
Note with the ductile iron drifts. I tend to do mosat of my drifting with a bullpin and only use the drift for the finishing runs to preserve the softer material.
Thomas
|
|
Thomas P
- Wednesday, 01/24/07 11:31:01 EST
|
Rolling mills- What most jewelers use, and places like Metaliferous sell, are little hand crank rolls for reducing thin, relatively soft precious metals- these weigh maybe a hundred pounds, and cost $500 to $1000 new. 1" diameter rolls, simple hand cranks and a couple of gears.
What Mr. Greenough is looking at, and what the heavy hitters of the Mokeme world use, are larger and heavier duty by an order of magnitude.
The rolls I have seen are more like 5hp to 7 1/2hp 3 phase machines, often weighing a ton or more, with 5" diameter rolls, driven by gear reduction systems that put out extreme amounts of torque.
Picture something roughly 5 times the Mcdonald mill in terms of weight, rigidity, horsepower, torque, and, unfortunately, cost.
When building real machine tools, be they rolls, twisting machines, or lathes, there is no substitute for weight, mass, power, and rigidity- and all of these things cost money. Bearings, gears, big motors, and the machining needed to hold them all together when forces get really "herky" to use an engineering term- this means big, expensive machines.
Go to the International website, and check out some of the used rolls they have for sale- most of them are bigger than any single tool in most blacksmiths shops. They look like something Grant would own.
I have been in the top secret underground lairs of a couple of the kings of the Mokeme world, and the scale of tools and skills required is a bit larger than mere wire reducing.
|
|
- ries
- Wednesday, 01/24/07 11:44:02 EST
|
The McDonald Mill is just a step half way between hand crank and an industrial roll. It just depends on what you want. In the Mokume' Gane business a LOT of it is plate or sheet type work and this is out of the realm of the typical DIY type. Width is a real design killer on rolls requiring massive parts (deflection goes up by the cube of the increase in width and I think stress by the fourth power). However, a McDonald Mill can do a LOT that you cannot do by hand AND is very similar in power to some of the expensive powered jeweler's mills with the same size rolls.
|
|
- guru
- Wednesday, 01/24/07 11:57:27 EST
|
what is oxidation of grinding swarf
|
|
kiran
- Wednesday, 01/24/07 12:05:52 EST
|
So, a family friend has a fence shop I usually visit to pick up scrap and used tools and such. Last week he showed me this room with lots of cool stuff. Got a few nice old tongs and stuff like that. In this room is a box with about two dozen 8 pound sledge heads. He wanted to know what the value of the lot would be. So... should I check eBay or make a deal with anyone here?
|
|
Nippulini
- Wednesday, 01/24/07 12:07:48 EST
|
Scale of Tools: In every field their is a scale that is appropriate or efficient. Today we have thousands of blacksmiths with power hammers of 150 pounds or less while most engineering references ignore anything less than a 1000 pound or UP drop hammer. Yet commercially many little 15 to 30 pound hammers were used in cutlery factories at one time and some major manufacturers had hammers no larger than 500 pounds. It is a matter of scale, production rates and methods.
In the machine tool business the Bridgeport size machine has become tremendously popular because of its HUMAN scale. A man can reach the top of the draw bar without a ladder, can generally lift the vises and attachments without help. It is flexible and convenient to use. But despite its popularity it is limited in capacity.
In our shop we had a number of lathes but the smallest old clunker often got used more than the larger more precision machines simply because it was more human scale and easy to use. When you can change chucks alone without fear rather than needing two men or a hoist you choose the easier machine. . .
But as small as this little 6" lathe was it is a monster compared to jewelers' lathes. The lathe I prefer is a 12 to 16" toolroom lathe. Most of these are human scale and can do most small shop jobs. However, they are often limited in length as well as HP. On the other hand, we were recently discussing machine the horn of an anvil. To do this as a one piece design requires a machine that weighs more than a few tons and often requires a ladder to operate it.
Many of our small or one-man shop tools are an odd inbetween size that are not made for large or very small industry. But just because they are not commonly manufactured does not mean they are not the right size for US.
|
|
- guru
- Wednesday, 01/24/07 12:38:55 EST
|
how do i stop a shield from spliting in the middle when forging. What is the recomended color because that might be my problem as well. THANK YOU
|
|
Jacob Ballard
- Wednesday, 01/24/07 12:42:39 EST
|
Unhandled Sledges: Nip, generally old sledges sell for $10 or $15 at flea markets and about half without handles. As a lot I would say between $1 and $2/lb. is fair.
I much prefer old hammers without handles. Most flea marketers do a poor job of installing handles and getting them off often destroys the handle. I have found that many old hammers need the edges of the eye radiused to keep from cutting the handle as it is installed.
Look at them closely. Often old sledges are retired due to mushrooming, cracks or rough/worn faces. Rough and worn faces can be cleaned up with a good heavy grinder but need to be done so with a good eye. Cracks at edges can sometimes be ground out but if you cannot remove all of it then scrap the hammer.
It is nice to have several hammers this size for strikers. For this work the handles are shorter than for demolition. It is also handy to have one with a standard hand hammer length handle for those times when a three pounder will just NOT quite cut it. . .
I recently suggested to someone using sledge hammers as large handled dies for use under a forging hammer. They are good steel and could be shaped cold by grinding.
|
|
- guru
- Wednesday, 01/24/07 12:51:13 EST
|
Jacob, you need to be a little more specific. What type of metal? Working hot or cold? Size and shape?
Generally when making a dish shape you start at the edges and work in. If you start at the center you will be trying to stretch the material too much and this often causes splits.
When raising a shape you start with a center dish but only slight and not so much as to stretch the metal too thin. Even when raising a small dish in the center of a plate you start with a series of blows in a circle around the edge of the area then work in.
Working hot or cold depends on the material and thickness. You can work good quality 16ga plate cold for quite a ways.
|
|
- guru
- Wednesday, 01/24/07 12:59:31 EST
|
Swarf: Kiran, grinding swarf is the debris that comes off a grinding wheel. It is a mixture of grinding wheel grit, burnt metal and unburnt metal (usually steel but could also be any other grindable metal). The steel can slowly oxidize or rust. This usually results in a hard lump of rust and grit. The steel powder can also burn rapidly if distributed in the air and there is a high enough ignition source. However, ignitable fines usually burn coming off the grinding operation unless it is water cooled.
The grinding grit itself is usually some kind of mineral or metal oxide that cannot further oxidize. So it is the metal powder that is of concern.
|
|
- guru
- Wednesday, 01/24/07 13:29:39 EST
|
Powerhammer guide materials:
HDPE and/or UHMWPE are both commonly used for the bearing surfaces in home-built powerhammers. This does NOT mean that it is the right material, however. Both of these materials have far too little compressive strength to stand up wel to the loads applied by a powerhammer tup in use. Unless you are only striking exactly dead center on the axis of the guides, the side loading forces can be considerable, and more than polyethylene is rated for, regardless of its density.
In addition to the coompressive loading forces, there is abrasion to deal with, both rom the sliding surfaces of the tup/guides and from the scale, grinding swarf, grit and other mung and drool that invariably fill blacksmith's shops. Then there is the matter of the heat. Under cntinuous use, the tup on my powerhammer can get pretty warm after six or seven hours. Some of the polymers out there are great at room temperature, but fail rapidly as the temperature rises. And with those temperature changes comes coefficients of thermal expansion. If you have two materials with dramatically different COEs, it becomes difficult to get a fit that works at all temperatures.
The big plus of the polymers is that they can mostly be worked with standard woodworking tools. The ones that don't work well with woodworking tools usually are a problem because they get gummy with heat, which is something you don't want anyway. Nylon is notorious for this issue, and I would stay clear of most of the nylon materials. What works for light loads, low temps and clean environments will not necessarily work form ore than a few minutes on even a small powerhammer.
Treadle hammers, on the other hand, are a piece of equipment where the HDPE would work fine for guides. Low speed, low side loading, intermittent use, and not much need for really tight clearances.
I would look into the polymers that are designed for the sort of conditions under which a powerhammer operates. One of the graphite-filled or molybdenum disulfide-filled high temperature polymers might do really well for powerhammer guides. They're not nearly as cheap or commonly available as UHMW or HDPE, but the big industrial suppliers carry them and the small amount needed for a powerhammer shouldn't be prohibitively expensive. Check with one of the major fluid power companies and see what they recommend/use for hydraulic cylinder wear rings. That's what I'm using in my hammer, and it is performing very well.
One final note. Be more than just somewhat chary about the "facts" propagated on Wikipedia. I've seen far too many outrageously incorrect statements in Wiki entries to have much faith in it for technical information.
|
|
vicopper
- Wednesday, 01/24/07 14:41:31 EST
|
I found a roling machine on eBay that met the criteria that ries listed: 7.5 hp, 2000 pounds, 4 in dia by 6 in wide rolls, and in the lowest of 4 gears, turned 24 rpm. Reportedly it was used to flatten coiled sheet metal stock before it went into a punch press. Still to fast, so I put a VFD on it and ran it at half speed. I wanted to use it to roll out a pile of old wrought iron ties bars taken from an wooden barge that had been beached and burned. It worked great; got roughly 1 inch diameter bar down to .25 in 5-6 passes, heating between most passes. I really needed a tunnel forge to properly heat the bar. What started as 6 inches long quickly grew to several feet. Then I decided I needed a power hammer and I sold the rolls to finance the new hammer.
It is now in the secret underground fortress happily rolling out precious metal mokeme. I miss it, but I find more use for the power hammer, and I'm sure it is more happy rolling with gold, silver, etc.
I got the mill from http://stores.ebay.com/1-MACHINERY-SALES. Good folks to work with; let them know what you are looking for.
|
|
Bob Johnson
- Wednesday, 01/24/07 14:44:10 EST
|
Hammers vs. Rolling Mills: For flexibility you cannot beat a hammer but rolling mills have their place. With a tunnel forge you probably could have reduced that in one pass on that machine unless you were going square or round which takes several passes. For occasional use a power hammer can do a lot of stock resizing. Often in plants that do have rolling mills they start by forging to where the rolls can take over. You can do most of what rolls do with a hammer but cannot do with rolls what a hammer does. . .
|
|
- guru
- Wednesday, 01/24/07 15:15:57 EST
|
open die forging on youtube: really worth a look
www.youtube.com/watch?v=8V_J4WvwLmg&NR
the free dancing anvil
then spikes welded to base and driven in stump.
glad it isn't my anvil.
www.youtube.com/watch?v=VYjyL3a5M30&mode=related&search=
|
|
- Iron Balls
- Wednesday, 01/24/07 15:31:15 EST
|
industrial huge forging
industrial ring forging: Firth Rixon
www.youtube.com/watch?v=t6oxqQ-2Ve8&mode=related&search=
Industrial Screw Press Forging: Firth Rixon
www.youtube.com/watch?v=9j88gfNso6I&mode=related&search=
The above post is open die forging is Firth Rixon as well
|
|
- Iron Balls
- Wednesday, 01/24/07 15:45:03 EST
|
I am a sculptural student with no previous experience in metalwork
our visual arts school has a fantastic metalwork shop with a wide range of tools machines and welding equipment..
I have just started to use hand hammering as method, using an anvil and a ball peen hammer. Im working with 0.8m steel and wish to hammer a domed shape into the metal i am having trouble making the steel circlular. do you have any advice on hand hammering - there seems to be no information on the internet regarding this...
many thanks
matthew.
|
|
matthew douglas
- Wednesday, 01/24/07 16:32:43 EST
|
Matthew, I assume that when you say circular you mean dome as the way you make it circular is to cut a circle from the sheetmetal
If you mean dome did you look under "dishing" and "raising" they two processes most used to produce a dome out of sheetmetal?
BTW the armour making websites often discuss this at great length armourarchive.org is a well know one.
A couple of quick pointers though you need a raising stake or a dishing form to pound the metal in and almost *every* ballpeen hammer is *not* the proper shape to use to dish or raise. To dish the hammer needs to have a smooth fairly shallow curve to the face with no sharp edges---you don't want to leave dents that have to be removed later!.
For fairly soft, thin sheetmetal people often use hammers made of wood or plastic (working the metal cold of course) so as to not ding the metal.
If you could actually give some details to your question we could help better---what type of metal, how thick, how large a piece, are you working hot or cold, etc...
Thomas
|
|
Thomas P
- Wednesday, 01/24/07 17:12:13 EST
|
Jeremy & great bellows
There is a blacksmith at the Koroneburg European Fesitval who has a great bellows. They will be starting back up In may, but the setup will begin in March or April. You can contact the faire promoter through their website at http://www.renaissanceinfo.com/riverview/ The faire is held in Corona CA, less than an hour from LA.
If your interested I have a small bellows that functions well. but is only about 2ft long. I have never paid attention to the sound, but they blow well. Contact me by email if you are interested in using them. I am also in So Cal.
good luck with it
FredlyFX
http://fredlyfx.com
|
|
FredlyFX
- Wednesday, 01/24/07 17:55:29 EST
|
Matthew Douglas-- Dona Meilach's first book on blacksmiths has an excellent section on raising, as does what many regard as the best book on silversmithing, called-- surprise!-- Silversmithing, by Rupert Finegold and William Seitz. Different material from what you are hammering, but same basic process. Beware-- it is essential to anneal the metal frequently, and that is different for steel than for silver, brass and copper.
|
|
Miles Undercut
- Wednesday, 01/24/07 18:09:36 EST
|
Bob Johnson: Have you thought of reducing hot rolled stock down to 1/4" square as it is not commercially available?
Small power hammers: Perhaps 15 years ago Hans Peot (of SOF&A) built a 5-pound Little Giant knock-off for a woman who made jewelry. Beautiful little machine.
A couple of weeks ago I was asking for practical ways to cut off the point of old handled hot cuts. Purchased a cut off disk for my 7" angle grinder. Did a FINE job, but you don't want to stand in front of the spark stream. Burn hole in my denim shop apron as proof.
Don't know dates but have learned the 2008 ABANA Conference will be at New York University branch at New Platz, NY.
|
|
Ken Scharabok (Poor Boy)
- Wednesday, 01/24/07 18:12:17 EST
|
Dave Boyer, I mispoke is saying cross linked in reference to the UHMWPE. I should have said polymerized to great lenght.
The big difference in the UHMWPE and the harder plastics in MY experience is that the UHMWPE is very tolerent to abrasion, abrasives and no lube. Nylon, and Nylatron DS, the moly disulfide filled nylon is that while harder, in abrasive service, the UHMWPE lasted longer. Yes the compressive strenght is less. You have to use more surface area.
Having worked around Erie Steam drop hammers with wonderfully machined slides, of the best metals, they also wore out. And these were in well maintained, excellently oiled service. Be aware, that most any forge shop equipment, used heavily, will wear heavily. The service is hot, heavy, and abrasive.
My JYH hammer has 3 axis CNC machined slides, and due to being undersized to the service since I upped the ram, will be rebuilt with UHMWPE. Lots of surface area, and probably no lube. I don"t run for 6 hours at a crack. I do have combo dies, and therefore lots of off center die work. I plan to make the UHMWPE easy to replace, as I expect to do so, as I understand the service I will give it. I also don't have a machine shop available any longer, so the UHMWPE is easy for me to fab YMMV
|
|
ptree
- Wednesday, 01/24/07 19:53:10 EST
|
Ken, Bob sold those rolls, to his and my mutual friend, the mokeme-gane manufacturer, who is currently using them for exactly the purpose the original questioner wants to use them for.
It seems to me that if you cold rolled a piece of hot rolled square bar, you would end up with 1/4" cold rolled- which, of course, is already available commercially- it just costs more, because it has been cold rolled.
So I fail to see how cold rolling hot rolled in a small shop is going to produce a cheaper product than cold rolled that is produced by the ton in a modern factory- got you confused? I sure am.
The reason there is no 1/4" hot rolled is because the mills have not found there to be sufficient demand for it.
And since Bob doesnt have the rolls anymore, he cant make it for us.
And Phil, who does have em, is busy making Mokeme that retails for $42 per INCH, for 3/8" square. So I kinda doubt he will be taking the time to make any 1/4" mild steel. Just no profit in it.
|
|
- ries
- Wednesday, 01/24/07 20:03:48 EST
|
About two years ago while cleaning out some sheds at my grandparents farm I found my great-great grandfathers forge, anvil and other tools. Since then I have been trying to teach myself. I am currently 16 years old and live in Canada. My skill level is preety much none - the only things I can make are spoons :).
The only fuel I had avaliable was charcol briquettes (the variety used to cook with). Since I am operating on a low budjet I am considering switching to homemade charcole. The only wood I have avaliable to do this is young poplar trees no more than 1/4 foot in diameter. Could this wood be used to make charcole or should I try to find a coal supplier?
Thanks
|
|
Andrew
- Wednesday, 01/24/07 20:28:05 EST
|
Andrew, You can try to coal the poplar but I THINK it is one of the few woods that do not coal. Most other hardwoods (oak, hickory, maple, fruit woods) and coniferous woods (pines and cedars) charcoal well.
Real wood charcoal is a LOT different than the stuff made for the barbeque which is mostly sawdust and glue. It will make a much better forge fuel. Good blacksmithing coal is better but bad coal is REALLY bad. Charcoal is almost always good.
Some of the big-box stores carry "real-wood lump charcoal". It is not cheap but it is usually competitive with other fuels.
Look for other blacksmiths in your area. I know Canada is big with lots of empty spaces but there are many smiths there. Let folks know a little more than "Canada" and you may get some fuel help.
|
|
- guru
- Wednesday, 01/24/07 20:55:59 EST
|
For raising, I recommend "Metalsmithing for the Artist-Craftsman" by Richard Thomas. abebooks.com has it reasonably priced.
|
|
Frank Turley
- Wednesday, 01/24/07 21:23:20 EST
|
A short time back I read a post or two concerning Grizzly Metal Lathes and Mills.
The posts were interesting, though short of being a good representation for the smaller machines. I myself own the smallest lathe and mill they offer. These two particular machines have a large cult following. Many tooling/parts and websites dedicated specifically to those machines. Certainly they have limitations.
The small lathe will perform as well as any industrial small lathe. The mill is not quite up to the capability of the lathe, but still very functional piece.
These machines are produced by Sieg in China. They make the Grizzly, Central Machinery, Micro-mark, Cummins among many others. Each company has their slight varations in drive gears or shaft tapers etc.
They have produced hundreds of thousands of each style machine just for the US market among others. Some highly repected Engineers, inventors, designers, tool makers and machinists have devoted much time to the use, specially designed tooling, fixtures and educational websites relating to these machines. These websites are similar to anvilfire.
I just didn't think they got proper press for the good tools they are in the previous posts I read. Obviously if you want the performance of a 300,000 machine then that is what should be purchased.
Just for thoughts
|
|
- Iron Balls
- Wednesday, 01/24/07 22:50:38 EST
|
Hammer Guides: In the photo section on Forgemagic.com Ralph Sproul shows pictures of a large square tube with UHMWPE wear surfaces shimmed to proper fit. This is a generally good idea for someone with little machining capability. However I would not use a continuous strip from top to bottom due to expansion and contraction over this great distance. The load and resulting wear is gonig to occur only in the top and bottom few inches anyway. I havn't built a hammer yet but I think I would look into providing low volume low pressure dryed and oiled air to each wear plate. These plastics need little lubricant, but the oiled air flow should give some flushing action to help with the contamination issues. I built a lot of slide assemblies in the tool&die industry, they used aluminum bronze wear plates against hardened and ground steel. These had to operate with esentially no play. Percision machining and grinding were absolutly needed for these. A power hammer ram is not nearly as critical, however.
|
|
Dave Boyer
- Wednesday, 01/24/07 23:14:16 EST
|
These are a few of my favorite websites concerning the Sieg Micro/Mini Lathes and Mills.
www.mini-lathe.com
-Site by Frank Hoose
-Seig Machine Too Factory Shanghai-China photos and information
-Pretty much everything you want to know about these lathes/mills-uses, operation, setup, accesories and modifications.
www.littlemachineshop.com
-site devoted to parts and accesories for all brands of Sieg mini/micro
www.varmintal.com
-left list look under Engineering
-mini lathe
-my father
-rc hardness fea
|
|
- Iron Balls
- Wednesday, 01/24/07 23:14:49 EST
|
Forgot one
www.micromark.com
-lathe/mill and tooling
-micro tools for delicate hobbies
www.grizzly.com
-lathes/mills and tooling
sidebar
I still don't think many companies realize how much free advertising they get from anvilfire. I hope some more donate to the cause.
|
|
- Iron Balls
- Wednesday, 01/24/07 23:22:04 EST
|
Itty Bitty Machine Tools: Last weekend I went to Cabin Fever Expo in York, Pa. This is a model engineering show. There were several venders of small machine tools and toling there. Much of what was being exhibited could have been done with these little machines. However if You have the floor space smaller industrial or school shop size machine tools can be had used for about the same money if You shop arround. As Jock mentioned the Bridgport and its copies are popular and will do small work as well as any tiny machine and can do fairly large work as well. Lathes in the 10" to 14" range are capable of small work but large enough for most home shop projects. I would recommend machines of this size to anybody who can fit them in their shop. I think most of the ill will towards Chinese tools is generated by the bottom dollar junk without consideration to the better products they make as well.
|
|
Dave Boyer
- Thursday, 01/25/07 00:48:32 EST
|
Regarding 1/4 inch square hot rolled, I briefly considered using my former rolls to cold roll annealed 1/4 down to 1/8th square for barbeque skewers. I bought a set of skewers years ago at a craft fair and would relay like to make more, but I have no idea where the stock came from. There are more efficient shapes and styles; a diamond cross section is better in keeping the food on the skewer from twisting when turned over, but the design just looks nice. Actually the bifurcated (split into to tow legs) works best, but looks wrong.
The new owner of the rolls is glad I didn’t try to do it. He has granted me visitation privileges, but I think that would be for non ferrous metals only.
|
|
Bob Johnson
- Thursday, 01/25/07 02:35:43 EST
|
Oops, make that bifucated - split into two legs
|
|
Bob Johnson
- Thursday, 01/25/07 02:38:48 EST
|
On 1/4" sqaure hot rolled, at time time folks who forged for the arts & crafts show market (S-hooks, etc.) were fustrated in having problems in drawing out cold rolled to a fine point without splitting. SOF&A looked at making a long pipe forge and rollers to be set up at Quad-States. Hot rolled of sufficient size would be heated in short lengths in the pipe forge and then rolled down to 1/4" x 1/4". Never got past the paper sketching stage.
|
|
Ken Scharabok (Poor Boy)
- Thursday, 01/25/07 04:25:04 EST
|
Ken, were they drawing out cold? I have a whole bunch of 1/4" squre cold rolled and it works just fine for me. I also work at the highest heat possible and 1/2" stock is the highest I go.
BTW how do I get my irons to glow purple like in that youtube? Hehheh.
|
|
Nippulini
- Thursday, 01/25/07 10:00:52 EST
|
Charcoal:
Jock, Andrew,
In my experience, yellow poplar does about as well as oak for making charcoal. In the direct burn by barrel method, split any wood small, about 1" or 1.5" square, by 12" or 18".
|
|
- JohnW
- Thursday, 01/25/07 10:07:14 EST
|
John, Thanks. We used to get some odd wood from the wood lot that I could not identify other than by its bark which looked like poplar but when it burned, if you could call it burning, it left a block of yellow ashes as big as the original wood. Not good stuff. Luckily there was never much of it in the mixed firewood.
|
|
- guru
- Thursday, 01/25/07 10:56:00 EST
|
The CEO here at Entropy Research uses a Hegner scroll saw, a Sherline mill and a Sherline lathe in making her miniature (1/12-scale) furniture and other dollhouse items. Top shelf tools in her opinion. Mine, too, not that that has any bearing on anything.
|
|
Miles Undercut
- Thursday, 01/25/07 10:58:34 EST
|
1/4" Hot Roll: I've often thought about rolling 1/4" stock. 5/16" round is almost identical in cross section as 1/4" square. Just enough larger (23%) that it would be a good tight fit in the rolls and fill them as well as increasing in length.
5/16" round = 0.0767 sqin.
1/4" square = 0.0625 sqin.
The object would be not to just make 1/4" hot roll but to make it with nice crisp (small) chamfers on the corners. This requires two pairs of rolls OR complicated cross head rolls (4 way).
Without some added value the cost would be more than its worth. Doing it for yourself might provide some satisfaction but I doubt that it could be resold.
|
|
- guru
- Thursday, 01/25/07 11:11:12 EST
|
Andrew, are there ant farmers near you? I would think they would like to have their fence rows cut. We use charcoal in the shop and it's easy to make, Cut the wood in chunks about 3", light some kinling, dump the wood in a 55 gal barrel. When it looks like charcoal it probably is. Hose it and dump it out. A 55 gal bbl of wood chunks makes abt 3 5gal buckets full. Forging with charcoal produces sparks so be careful. We have a screen at the top of the stack.
|
|
- Ron Childers
- Thursday, 01/25/07 11:11:22 EST
|
Charcoal:
Yellow ashes? I wonder if that could be a red bud tree? I've heard it does a terrible job burning.
A couple other things to observe in charcoal making (if using direct burn in the barrel method) is (1) you must have a way to stop the fire - a tight lid, water, whatever - or else you will get ashes only, (2) you've got to have a way to sift out the ashes and small particles.
Beyond that I would point out that charcoal is expensive to produce, laborwize, unless you have a lot of grandkids or something. But then maybe other men are crafter than I am.
|
|
- JohnW
- Thursday, 01/25/07 11:11:59 EST
|
Make that "any farmers"
|
|
- Ron Childers
- Thursday, 01/25/07 11:12:49 EST
|
Andrew: There are a fair number of blacksmithing groups in Canada. Click on the down button on NAVAGATE anvilfire in upper right and scroll down to ABANA Chapter link. Then scroll through listings for those in Canada. If a group is within a reasonable distance from you contact them. Ask where they purchase their blacksmithing coal and if there are any members in your area.
If there a business in your area which generates scrap shipping pallets? Wood in them would likely make reasonable charcoal, but you would have to deal with the staples or nails in it.
On charcoal I understand it was, at one time, a fairly stardard barter item for a blacksmithing shop. When settlers/farmers were clearing fields they would make the cuttings into charcoal. Then the blacksmith would probably take so much per bushel off of their account.
|
|
Ken Scharabok (Poor Boy)
- Thursday, 01/25/07 12:37:10 EST
|
Alanthus (sp?) a nasty wood to burn, useless as charcoal and bad to have around the yard too---grows very fast and likes to drop 6" diameter limbs on a whim. Stinks when cut, cannot be used for building or burning---but it does grow in Brooklyn!
Thomas
|
|
Thomas P
- Thursday, 01/25/07 12:44:36 EST
|
Drawing a point.
Harry Jensen, originally from Denmark, was an early student of mine, but he had served one year of his apprenticeship in Denmark. The Nazi troops took over Denmark during WW II, and Harry was taken as a prisoner of war to Germany, where they had him dressing mining tools for the war's duration. When the war ended, he was in the British sector of West Germany, so despite his protests, he was conscripted into the British army. He was discharged a few months later in England. He was at a loss, not speaking the language. As he learned English, little by little, new friends encouraged him to immigrate to the U.S. "You could make a fortune over there." He applied and was refused. He then applied to go to Canada, and was accepted and wound up in Toronto. He got a job at, of all places, a slaughter house. He was forging ornamental work on the side, but was having trouble forge welding.
When he took my class, he corrected my striking methods, and helped us with our striking and signaling.
He said that during his forging time in Denmark, one apprentice was literally kicked in the butt for incorrectly drawing a point on a wrought iron bar. The apprentice was starting behind the end of the bar and working toward the end. He should have started on the end with the MIDDLE of the hammer face on the end of the bar. That helps prevent the splitting at the point.
They were using wrought iron, but this also happens with mild steel, cold or hot finished. The same principle applies. Start at the end and work backwards. This also will control the length of the taper.
Since Harry was pretty handy at the forge, I asked him why he signed up for my class. He said that he was having trouble forge welding. Apparently, he was overheating everything to a too bright sparking heat.
|
|
Frank Turley
- Thursday, 01/25/07 13:04:01 EST
|
Alanthus (sp?), we call "China Tree". Brought to CA by the Chinese during the Gold Rush, any old town in the foothills is surrounded and permeated by China Tree. Useless weed tree, invasive, agressive, suckers and spreads from roots, displaces the locals. The worthless State Park system of CA (sorry Rudy) makes a big deal over them, calls them the "Tree Of Heaven" (horse exhaust) and plants them in their "Gold Rush Units" (State Park idiots, any local fool knows they plant themselves)
|
|
- David Hughes
- Thursday, 01/25/07 13:34:05 EST
|
Frank's right (as usual), work the tip first. For those occassions where working or re-working the tip last or in the middle of a project, I've develped a method of 10-10. Starting with the tip bright red, work it for 10 seconds, then back into the forge for 10 seconds and always strike lightly. You'll find your own timing as each forge is different, but the principle is sound.
|
|
Thumper
- Thursday, 01/25/07 13:44:22 EST
|
Thanks Rich, ptree, Dave, and guru of course. Dave, an air curtain sounds like a good idea, but I don't really have an air supply available, unless you count a box fan and the bellows and forge blower. Just one more JYH-related question, then I'll go back to lurking and searching for parts. I think I've decided to go with the spare tire drive/reduction, but I can't decide whether it should be the kind with the tire above and a little giant-type linkage, or one where the tire is mounted low and drives the far end of a flat leaf spring mounted up above. My impression is that the little giant linkage might have more control, especially for single blows, but is this right? How would the two designs compare in terms of ease of construction and use? I'm aiming for about a 35lb ram here, and I have a 23 x 47 inch baseplate that weighs about 400 lbs to mount everything on. My goal is to use bolts as much as possible rather than welding, because I have more confidence in my ability to bolt things together and have them stay that way than in my welding skills. Being in hurricane country, a secondary goal is to make it so massive that it will stay put even if the garage blows away around it :)
Michael
|
|
mstu
- Thursday, 01/25/07 13:50:23 EST
|
Identification of an anvil that I want to make an offer on. Has a very destinct anchor on the foot, right rear, on the left waist numbers 334 where the name usualy would be at only can make out 3 letters "For" all this from standing at the back. the anvil is supper clean no face dammage or on any part. Looks to be a 300lb.+ from this can you give me any info. Wish there we more to offer. F. Street
|
|
Floyd Street
- Thursday, 01/25/07 14:20:31 EST
|
I am a metal fabricator, designing and building furniture. I want to blacken the metal without painting it. I have discovered a good clear coat product but no stain. Any ideas?
|
|
Tammy Williams
- Thursday, 01/25/07 14:46:35 EST
|
Tammy, in one of the older "FABRICATOR magazines , August 2005, there is an artical called - get the cool look of blackened steel- they recommend using Burchwood Casey's
Tru- Temp system a cold process- Burchwood Laboratories Inc
800-328-6156
|
|
- ptpiddler
- Thursday, 01/25/07 14:59:33 EST
|
Floyd Street: Only anvil make I know to stamp in a small anchor on a foot would be Peter Wright. May have been an inspector stamp or perhaps indicate one for export. Is it 334 or 3 3 4 or possibly 3 . 3 . 4? If so, weight would be more like 424 pounds. Are there small flat areas on top of the front and back feet? FOR might be part of FORGE (e.g., MOUSEHOLE FORGE) or perhaps part of PATENT.
|
|
Ken Scharabok (Poor Boy)
- Thursday, 01/25/07 15:19:47 EST
|
Mstu- the pivoting leaf spring design does not have the "throw" of the hammer like the dupont linkage on the tire hammer design- rsilver just posted 3 pictures of the very first tire hammer built on Forgemagic- I don't think you would have any trouble bolting most of the hammer together or having someone weld up the main frame for you-
where are you located? The best idea would be to sign up for one of Clay Spencers' tire hammer workshop then you would have a well built hammer and you would have help building it and it would not be considered homemade and would have good value if you wanted to sell it as Clays'
hammers are in demand
|
|
- ptpiddler
- Thursday, 01/25/07 15:49:04 EST
|
LG, "DuPont Patent" Linkage:
This linkage in one form or the other is THE most efficient form of power hammer linkage available. Almost every successful mechanical hammer used this geometry.
It does not matter if you use leaf or coil springs in this kind of linkage (or rubber as Bradley used). The key is the horizontal toggle arms that compress the spring. When horizontal (in a straight line) they provide infinite leverage against the spring. This means the ram has very little preventing it from moving.
On the UP stroke the ram flies past the horizontal point compressing the spring. As the toggle angle becomes more acute the leverage against the spring lessens until the spring force equals the upward inertial force of the ram and gracefully stops its movement.
On the DOWN stroke the spring and toggles helps push the ram faster than it would drop via gravity OR the operating speed of the hammer. This great increase in velocity combined with the stored (not lost) energy in the spring is what makes a mechanical hammer hit so hard and require less HP than other designs.
People have called the "snap" or "thow" as PtPiddler just did (he's the inventor of the NC_JYH "tire" hammer), without understanding the dynamics. Once you understand the dynamics clearly it makes a big difference.
Two critical things:
ONE the spring must be heavy enough to stop the upward movement without the linkage bottoming out.
TWO the die height must be high enough that the toggle angle is not much below level (about 20 degrees) so that the spring is not softening the blows. This is a mistake that many JYH builders make. Their dies are too low and the spring is reducing the force of the blows. This also means that you cannot run the hammer slow. It has to run fast enough to overcome the spring which then makes the hammer hard to control. Many builders (including some selling kits) do not understand this very important aspect of the Dupont linkage.
If you REALLY want to see and understand the LG linkage order a copy of the Dave Manzer LG tune up DVD we sell. It is an inexpensive education and the best work ever done on the Dupont linkage.
|
|
- guru
- Thursday, 01/25/07 16:19:22 EST
|
Small Anchor Marks: The U.S. Navy used to mark many of its machines and tools with a small anchor (1/2 to 3/4") and a number. We have an OLD Southbend toolroom lathe that has the little anchor stamp and US clearly marked on the ways just as square and pretty as the manufacturer might have marked it.
It is a possibility.
|
|
- guru
- Thursday, 01/25/07 16:24:05 EST
|
mstu,
I built a leaf pivoting spring type hammer. I would say the pros are;
1. easy to build and to scrounge the parts for.
2. I get a definete, "snap" if you will, from the spring, as it takes an "S" shape when running, storing energy in the spring and delivering it just as the dies close.
3. I set mine to run slower than a LG, and I feel it is more controllable. I can go from light to hard blows without adjustment, and can get nice single, but only medium blows.
4. the machine is shorter in height than a spare tire dupont style.
I think an effective spring and moving parts guard is easy to fab for this style.
Cons;
1. The machine is longer than a dupont style.
2. The blows are slower than a dupont, at least on mine.
3. I have been told that the dupont is more efficient.
Having only very limited experience on several different dupont style hammers of differnt weights, and much experience on my machine, and limited experience on a much lighter pivoting spring type I would offer the following.
Building the ram and tup should be about equal for both. The frame for both will be about an equal task. Both can use a spare tire and car spindle for the clutch, again equal. Your space requirements may make a difference. Both designs need to be tuned. The dupont as the GURU notes to utilize the stored energy, and on the pivoting spring also to use the stored energy.
On the pivoting spring, the stored energy comes from the spring deflecting into a "S" shape on the upstroke just near the change over to down, and the spring trying to return to straight adding to the downward energy. The tuning as best I can describe it is to find the right daylight on the dies at rest, to let the machine and dies get just ahead of the spring on the down stroke. I think the adjustment on the pivot spring types is quite easy, as I have a turn buckle in the pitman arm.
I have not run a dupont style spare tire hammer, and they do indeed intrigue, In fact if I had some extra spare time, and the head room in my shop to accomadate one, I would love to have one of each.
But most important, plan for any hammer you build to need maintenance. This is tuff service, and stuff wears out fast. If in hobby to lite service, you may go a couple of years or more till major work, but it will need work. I ould only bolt together a frame ETC, if I used pinned nuts. Otherwise it WILL shake stuff loose. In this service if a 1/2" looks good try to use an 1". But build and enjoy, and when you learn stuff, just change it. I am and probably will continue to change and tweak as long as I have the thing.
|
|
ptree
- Thursday, 01/25/07 19:29:21 EST
|
Every single reference book I own demonstrates drawing a point from the end, I've never heard of any other way. One way I've incorporated into my work is chamfering a bevel on the tip of the rod before forging. I figure if that process helps with upsets it should work for drawing. In fact, I only get splits with working at too low heat or by not chamfering.
|
|
Nippulini
- Thursday, 01/25/07 19:59:18 EST
|
There are actually 2 styles of tire hammers being built
The hammer in a tube style is taller as the Dupont linkage is above the tube that the hammer slides in- so the top of the tire is approx 7 feet high
The earlier hammers had the slide BEHIND the hammer - so the Dupont linkage is in FRONT of the slide and the top of the tire can be approx 6 feet high- The pictures that Rsilver posted on Forgemagic show the earlier style with the slide behind the linkage- The hammer shown costs less than $50 to build and is powered by a well pump motor- probably 1/2 HP- also note the drive roller- a 3/4 drive
socket- about 2" in dia- these early hammers were truly
made from materials from the scrap pile
|
|
- ptpiddler
- Thursday, 01/25/07 20:18:43 EST
|
The unwanted tree must be the ailanthus. At first I was thinking of a corruption of "acanthus," but that would have been entirely too ironic.
|
|
Mike B
- Thursday, 01/25/07 21:44:31 EST
|
Tammy-- watch out for Birchwood-Casey's Presto Black. It has to be rinsed immediately and even then it will leave a tough residue of ugly yellow crud in recesses that is all but impossible to remove. Used right, on simple flat surfaces, it gives a gorgeous rich black finish. I have not used it outdoors, but a friend has, on gates, says it works great. Expensive. Choice Steel in Albuquerque sells patinating chemicals they get from somebody in Arizona, and their pewter gives a nice dark finish,
|
|
Miles Undercut
- Friday, 01/26/07 00:31:31 EST
|
Forging from Behind the Point:
This is a method taught to conserve heat. You leave a significant lump at the tip after initial forging and then draw it out last. The conservation of the heat lets you draw a longer point. When you forge the lump you work from the tip back.
Uri Hofi and others have been teaching this method for years. However, you need to be sure that tip is still hot when you forge it.
Splitting: I have had different batches of steel behave quite differently in this matter. I've had cold drawn mild steel that I could forge to a point cold and similar steel that would split when worked hot. I think a lot has to do with chemistry and steel quality.
There is also the question of small bursts or tears inside the steel that when rolled out become quite small and barely effect the steel except when you forge it. Any kind of cold shut or inclusion in the billet could cause a similar problem. I suspect that much of the steel that splits unexpectedly has this type of flaw.
|
|
- guru
- Friday, 01/26/07 02:03:41 EST
|
Steel Blackener: I have a bottle of "Tool-Black" sold by Precision Brand, Dowers Grove, Il. 60515 (312)969-7200 I havn't used any of it yet, so I can't really say how it works, but it may be worthwhile to check out.
|
|
Dave Boyer
- Friday, 01/26/07 02:37:16 EST
|
after a few years of searching I've finally found it... a free anvil! It's a decent size (pretty near the limit of what two guys can lift) & in great condition - mostly. The edges are great, but the steel plate has broken off around the hardy. So there is still a heel on the anvil, but the steel plate has broken offs from the hardy to the back of the heel. Now I only handed over a (particularly nice) bottle of scotch for said anvil (it was the least I could do) so I'm happy, but I was wondering if there is anything I can do about this. As it is, I couldn't use the hardy - since one side is 1/2" lower than the other.
It's funny that I'd just given up on buying an anvil & then one appears....
|
|
andrew
- Friday, 01/26/07 07:42:09 EST
|
Broken heel: Andrew, This is a common break and serious repair. A lot depends on the type of anvil you have. There are two possibilities. The two anvils are:
1) An old wrought iron steel faced anvil (most likely an English anvil like a Mousehole Forge).
2) A cast iron steel faced anvil like a Fisher Norris.
The first anvil is repairable, the second one not, or not recommended lest you loosen the rest of plate and ruin the anvil.
This is a serious weld up repair tha can be done two ways. 100% weld build up (good practice id you are not a pro) and welding in a fitted piece. Both repairs have their pros and cons and are probably a toss up as to quality and durability. The fitted piece is probably the easiest but needs some explanation.
In either case you will be welding to medium to high carbon plate AND wrought iron. The first needs care welding and the second does not like to be arc welded. The weld zone at the steel plate should be preheated to about 300°F (~150°C) before welding. The wrought will just be a pain as the slag melts out and leaves holes that will have to be cleaned and filled.
Step one of fitting a plate is finding a piece about the right thickness and cutting it to shape. The original plates were forge welded on, re-forged to shape with the body then hand ground on a huge wheel. The result is the plate thicknesses vary greatly on each anvil and the break surface will be uneven as well as worn. I would use a piece of structural grade mild steel but SAE 4140 be very good as well. The most critical part of the fit-up will be having the piece mate well to the surface so there are no or few gaps. The better the fit, the better the job.
The edges of the break and the plate should both be V'ed out to 45°. On the sides I would V out the plate for about 3/4 of its thickness and about the same on the anvil heal. You may want to V out the steel plate more than the wrought to preserve material that is going to be difficult to weld. I would not try to weld inside the hardy hole so that should be an area that is well fitted and let go at that.
I would start by clamping the plate tightly (maybe a bolt through the hardy hole) and running a single root pass around the edges. Then preheat that top plate (the residual heat from the side welds will help). Then weld the top cleaning and peening between passes. While it is cooling weld the sides and heel.
Then there will be lots of grinding and touch up welding. I would drill the pritchel hole from the bottm slightly undersized. Do not skimp on radiusing the hardy hole.
When done you might want to grind a flat on the base of the anvil and stamp "R mm-dd-yyyy" and your initials. The "R" is for repaired. This is the honest thing to do.
|
|
- guru
- Friday, 01/26/07 10:23:07 EST
|
I am looking for someone to make a set of 8 English Longswords for dancing. See www.CDSS.org They recomend a guy in England - the swords do not have an edge. Our current ones are aluminum and were made by someone in Baltimore (they belong to a team member who is leaving). The wooden ones are available from CDSS to give a sense of size. Our team in is Gaithersburg, MD.
|
|
Laura
- Friday, 01/26/07 12:56:00 EST
|
I'm not up to Laura's request, but for anyone who wants to address it, would suggest a spring type steel - mild steel will take a set from the actions of the long dance fairly quickly. Also, there is no edge for these "swords" the ones I've seen over the years either have mill edge or a slightly rounded edge to make grasping them bare-handed safer. The actions of long sword dances do not require that the swords go though the violent gyrations typical of rapper sword dances, which require a ball bearing swivel handle on one end, a thin thickness - from memory 1/16" or less, and a true spring temper. Some of the rapper moves have the swords gyrating overhead moving on each other, basically imitating an egg beater.
Long sword dances typically end with the dancers forming a multipoint "star" with the interlaced long swords, called a "nut" by the dancers. Rapper sword dancing also typically end with a nut as well. Most of the long sword dances I'm familiar with were for teams of 6 or 8 dancers. Rapper typpically had 5 with extras thrown in for excitement - Tommys (typically someone dressed in fancy/dress clothes) and Bettys (typically a man dressed as a woman) were the most common.
Good luck to anyone who wants to try - should be fairly simple - I just don't have the set-up to quench and temper a fairly long piece of steel currently.
|
|
- Gavainh
- Friday, 01/26/07 13:28:06 EST
|
Andrew: If you have someone built up with weld try to find a piece of aluminum slightly larger than your hardy hole. Forge down to a slight taper and then tap into hardy hole. Weld material will not stick to aluminum. You can do the same with the pritchel or use a length of mild steel. You can drill out the plug afterwards from the bottom. If the round plug extends below the anvil it can serve as a grounding point.
|
|
Ken Scharabok (Poor Boy)
- Friday, 01/26/07 13:49:32 EST
|
Hello,
My name is Tony and I have a kerosene fired portable forge. The refractory needs repairing in the fire box. There seemed to be a coating over the refractory and it is peeling off. It is approx. 1/8" thick. Can anyone tell me what material I should use to coat the refractory with. Thank you for your help. I live in Tennessee and have metal working experience.
|
|
Tony
- Friday, 01/26/07 16:40:12 EST
|
Tony, The coating is probably a previous repair. We sell ITC products for refractory repair and coating. ITC-200 is used to repair broken brick and worn areas. It is applied over and thinned with ITC-100. The ITC-100 is used in many forges and furnaces to seal the refractory and to improve efficiency.
You will want to scrape off the loose top coating. If it is firmly attached then leave it. Vacuum the loose particles and then dampen with a spray bottle of water. Apply the thinned (per instructions) ITC-100 with a brush and let dry until it is no longer smearable. Then trowel on ITC-200 to smooth out and fill holes. If large pieces of brick are missing I would use some broken up refractory brick to fill the bulk. Let the whole dry for a few days then apply a top coat of ITC-100 over the entire refractory interior. Let dry.
Post repair and construction drying of refractories is tedious. Most of us cannot wait. If you can wait a week in hot dry weather and two in cold damp weather it is best. Then fire for a few minutes and then shut down to cool and let cool while moisture escapes. Do this several times getting it hotter each time. Then when you cannot stand it any longer fire away. .
|
|
- guru
- Friday, 01/26/07 17:34:38 EST
|
I'm one of those strange machinists who like to build scaled down steam equiptment. I am interested in building a working Nazel power hammer only in a small scale, so I thought this would be the right place to start looking for info. If anyone could help out I need to get a detailed set of blueprints and maybe some pictures of some working machines. any help would be appreciated, thanks Johnny Nailz
|
|
Johnny Nail
- Friday, 01/26/07 17:28:16 EST
|
NAZEL PLANS: Johnny, The Nazel is one of the most complicated of the self contained air hammers made. These are not a steam hammer but a direct coupled compressor and ram system. The valving is quite complicated and the casting hides all the air passages. You start with a low speed electric motor, couple that to the compressor via a small composite pinion running on a large dameter flywheel. This shaft has a crank that powers the compressor piston via a long connecting rod. Air from the compressor passes through a pair of rotary valves fitted into the casting. Air goes from the valves into and out of the cylinder. There is also a check valve and some other devices. The control valves are rotary and connected together by links.
The ram piston on the Nazel has a snubber feature that others do not. There is a bronze bushing in the piston and a large diameter piece that is part of or bolted to the cylinder cap. When the piston rises it engages the snubber which compresses air in the piston thus creating an air spring that slow the piston and helps start it back down.
In all it is a surprisingly complex machine. There are no complete drawings of the machine extant that I know of. Bruce Wallace (Nazel.com) might have a set but he is not letting them go.
Standard steam hammers as invented by James Nasmyth and made by Erie, Champersburg and others are much simpler machines. At one time there used to be kits for making them. These have a steam throttle, reversing valve and feed back lever. The original design raised the ram and then dropped it, the exhust being pushed out by the weight of the ram alone. Almost immediately the design was changed to admit steam into the top increasing the downward speed of the ram.
Over nearly two hundred years the only significat improvement to the Nasmyth design was the Chambersburg safety cap. This replaces the cylinder cap and has a short rod attached to a piston in the pressurized cap. If the ram over travels and hits the rod it must overcome the pressure in the cap which slows it down. This is to prevent the piston from going through the cap which was not an uncommon occurence.
|
|
- guru
- Friday, 01/26/07 18:16:11 EST
|
Does anyone know a good place to buy a used buzz box? This would be a low use, probably only need about 100 amps, or there abouts, just for something like 7018s. Mainly what I've found has been new, which I would prefer to buy a used one.
|
|
- Boogerman
- Friday, 01/26/07 20:40:47 EST
|
Looking at the Pawloski design for a ram guide linkage on forgematic.com (http://www.forgemagic.com/bsgview.php?photo=179&cat=M&by=), what sort of spring would work? It looks too small to be an automotive suspension. Wouldnt the support rod take an awful lot of stress? The engineering on that looks very difficult to keep the spring from breaking off the bottom of its support rod and turning projectile.
|
|
JLW
- Friday, 01/26/07 20:55:11 EST
|
cheers, I'm interested in making a treadle hammer. but I want one that is capable of giving steel a right good thumping. whats the best possible design for a really heavyweight treadlehammer thanks j
|
|
- jeff
- Friday, 01/26/07 20:56:01 EST
|
thanks for the very detailed repair description. I'm certainly not a professional metal smith but I can make things stick together reasonably neatly. Lots of grinding will be a good distraction from writing my PhD thesis....
I'm not certain where it was made. I am in Australia, so english would have to be a first guess - though it does come from an area settled by Germans. It's a standard London pattern design though. It seems to have a large X stamped on the side with "Queen Dudley" underneath and NO 58 written vertically upwards on the right of the X (posibly NOS8). It's all stamped, so I'm assuming it's not cast? There are 3 porters holes - below the horn, the heel & another on the bottom. Now I'm no monarchist, but I've never heard of a Queen Dudley, so I'm a little skeptical on that one....
After I've welded on said plate, do I need to heat treat it? Do I need to use hard-facing rod? Also, if I do weld around the hardy, will this take the abuse from hardy tools?
|
|
andrew
- Friday, 01/26/07 21:25:09 EST
|
DE-CARB vs ATMOSPHERE
My old Carpeter Technology Tool Steel Handbook claims that to reduce (not prevent) de-carburizing the steel that a slightly OXIDIZING atmosphere should be used as the scale helps to protect the steel from de-carurizing. Go figure.
|
|
- grant
- Friday, 01/26/07 21:33:01 EST
|
Andrew, Thats "Queens Cross" (as in road crossing), Dudley England, The image is the road crossing. Some have described it as looking like two hot dogs. The maker was Joseph Wilkinson, it is a late 19th Century English wrought anvil. Richard Postman says the big market was in Australia.
On your anvil heel repair I would not try to heat treat it. Just use it.
|
|
- guru
- Friday, 01/26/07 21:41:19 EST
|
I'm looking to set up my forge in my garage. I was considering lining the garage with concrete board but I'm not sure how far up the wall to go with the board and if I should line the whole garage or just the area around the anvil/forge.
|
|
mconrad
- Friday, 01/26/07 22:37:34 EST
|
JLW, With odd ball untested designs you had better ask the designer. Yes, the statement that he didn't like the Dupont linkage and then providing something possibly just as bad as an alternative is questionable. This is an old idea that people have come up with over and over and there are many reasons it does not work.
Look at the DuPont linkage on a Fairbanks hammer. They used much shorter toggle links that were securely attached, not the long flailing things like Little Giant used. Part of the reason Little Giant did what they did was to get around DuPont's patent, which they did by really screwing up the design. They couldn't use pins through the arms (like they did after DuPpont's patent ran out) so they hooked T shaped toggles into a rough cast pocket in the ram. . .
There have been dozens of mechanical arrangements for mechanical hammers and only a couple worked well enough to be commercially successful. There are many hammers that were built then just disappeared from the market AND existence. If they had worked they would still be with us in one form or another.
With the EC-JYH we proved that you could put a shock absorber in a power hammer linkage and it worked. But it was very inefficient and had a strange dynamic. Yes it worked but there are better ways to build a hammer.
The DuPont linkage can also be built with a bow spring like the Champion hammers (See the SA-JYH). In this arrangement the spring is also the upper arms. There are less parts and you get the same geometric effect. There is also a way to do it with stationary arms and rubber bands. This is similar to how the Bradley strap hammers worked. In this case the resilient member is also the lower arms. . . In each case you have the weight suspended between horizontal supports that change angle and thus leverage. They provide little resistance at the right time and greater resistance at the right time.
As to the problem of flying parts you should see what a power hammer does to a piece of steel set at an angle to the die surface. It is going to fly OR you are going to be hurt OR both. The machine mechanism can have guards put around it, the working area cannot.
|
|
- guru
- Friday, 01/26/07 22:54:34 EST
|
Garage lining,
Citing legal and insurance issues, Building codes should dictate.
But that aside, Importantly be sure all the crevices cracks etc. within the hot work area are sealed up, You dont want any hot bits flying off into a crevice to smoulder on unnoticed.
|
|
- Mike
- Friday, 01/26/07 23:01:42 EST
|
umm im new to the whole blacksmithing thing im 16 but i relly came here to know what metal to use into makeing a strong sword i use them to train.etc with so im wondering if any of you whould know any good metal sorry if this post botheres you
|
|
volcan
- Friday, 01/26/07 23:13:58 EST
|
Does the No 58 indicate weight? Is there some other weight markers I should be looking for? Not that it really matters since it won't change anything.
|
|
andrew
- Friday, 01/26/07 23:14:53 EST
|
Fireproofing: Mconrad, It depends on what you are going to be doing, how old the building, how clean/dirty. . .
Generally the sparks and light scale that would fly far enough to be a problem cannot set fresh lumber on fire. However, dirt, debris, stowed junk. . . Just about everything else is more of a fire hazard.
On the other hand I have an old 1806 Grist mill that you could set the wood on fire with the slightest spark. NO grinders or welders in the mill!
Many a blacksmith shop has been in a dirty old wood building often with wood floors. The most protection the floors saw was a layer of tin or some sand. HOWEVER, this was mostly before the era of the angle grinder, cutting torch and arc welder. All three throw sparks 10 feet or more (including straight UP) that are possible fire starters. Forging is actually much tamer unless you like to over-rev with welding overheated stock. . .
I would worry about the welding and grinding areas the most. Protecting the forge area walls up the first 4 feet will do a lot of good but grinding sparks will fly all the way to the roof. If you have a forge with a sheet metal stack then you should have protection behind and above it. There are specifics in fire codes.
The thing about fire safety is it is more common sense than anything. You can have a completely fire-proof structure then bring in 30 gallons of oil for heat treating and flash it with something too big. . . Or have a shelf loaded with paint and solvents along with the necessary rags to go with them. . .
I would finish ALL the surfaces in a small wood frame building with concrete board or sheet rock if I could afford it. You get a lot of fire resistance AND you can paint it white for better visibility. If there is paper backed (even when foil covered) fiber glass insulation then it should ALL be covered.
|
|
- guru
- Friday, 01/26/07 23:17:28 EST
|
Boogerman: Ebay and Craigs list are good places to start, along with fleamarkets & auctions. I would stay away from the 110volt units, as I never heard of anybody that had much sucess with one. The 180 to 225 amp "Farm Welders" and Lincoln toombstones work pretty well and usually sell pretty cheap.
|
|
Dave Boyer
- Friday, 01/26/07 23:22:44 EST
|
Is there any mathematical model for the movement in the EC-JYH linkage? I wonder if any description of the tuning was included in the original patents?
|
|
andrew
- Friday, 01/26/07 23:24:11 EST
|
58: Andrew, I think this is a miss read marking. English anvils were marked in hundred weights. There is no number larger than 27 in the pounds place and no number larger than 3 in the 1/4's place. Normally the numbers are marked horizontally like so.
# . #. ##
See our FAQ's page, Shop Mathematics, Hundred Weight Calculator.
|
|
- guru
- Friday, 01/26/07 23:24:17 EST
|
may i ask what metal should i use for a sword mainly a 2 handed firm grip and has to be relly sharp thank you for your time
|
|
volcan
- Friday, 01/26/07 23:37:12 EST
|
Math and Patents: First, The fellow that took the time to understand the LG linkage the best mathematically, Dave Manzer, passed away last year without passing on the work. I asked him about a couple times and I think he felt that it was too hard to explain and that as an amateur mathematician he had no business trying to explain it to others.
Using vector vector mechanics you can calculate the conditions at specific points than graph them. However when you add the inertial dynamics it gets to be very interesting to keep up with. A good custom computer program would do the job well and then you could trial and error all kinds of design variations. I could probably write it in couple months if I had nothing else to do.
Patents are a public document that is designed to protect the invention without giving away any unnecessary details. Mathematics is almost only needed for proof of concept and design but NOT for a patent. Patent drawings are often distorted and out of scale so that nothing not needed for that legal protection is given away. You can have a patent and still have trade secrets that make the patent worth having. . . No, there is no math.
The Dupont linkage would be a good project for an engineering student.
|
|
- guru
- Friday, 01/26/07 23:38:51 EST
|
Swords: Volcan, Swords are made from steel. The type of sword and its purpose determine the type of steel. Practice, play, theatrical, "live steel" and movie prop swords are all relatively soft steel with dull edges. They range from common 304 Stainless steel to SAE 4140 hardened and then tempered soft. This makes the toughest possible blade that will not break and dings less than a soft steel sword. Stainless is often used for theatrical swords and wall hangers because it does not rust, therefore there is much less maintenance.
Very hard, very sharp swords are made for cutting demonstrations and that is about it. These are made of tool steel, hand made "Damascus" steel or hand made "Wootz". All require a great deal of skill to work and to finish.
You have a long path ahead of you. Here is the begining:
Sword making Resources.
|
|
- guru
- Friday, 01/26/07 23:50:03 EST
|
well i guse ill look on anothere website bye
|
|
volcan
- Friday, 01/26/07 23:51:02 EST
|
He couldn't wait for half an hour to get an answer he could have easily found if he had spent that time poking around here. . .
|
|
- guru
- Saturday, 01/27/07 00:36:23 EST
|
Volcan- With such an attitude I predict a very brief career in bladesmithing (or any other endeavor). 8-0
Oh well, it take all types, and sooner or later most ofthem drop in here.
|
|
Bruce Blackistone (Atli)
- Saturday, 01/27/07 00:42:43 EST
|
Andrew: Do you have access to bathroom scales? In recent years their weighing capability has been expanded to allow for an increasingly heavier population. If you max out them, check around for any place which has a commercial, weight bar/platform scale.
What size is the hardy hole compared to the size shank you will be using? Say it is 1 1/4" and your shanks are 1". You might make a sleeve then to go into the hardy hole, supported underneath were the plate is missing.
If you weld back by build-up, I have had very good success in just using 7018 welding rod, hard peening down each bead immediately after it is laid. This seems to somewhat work harden the mild steel rod. I tried to e-mail you my procedures but your e-mail addy rejected.
|
|
Ken Scharabok (Poor Boy)
- Saturday, 01/27/07 00:50:51 EST
|
Does anyone have a link to a table which simply gives arc welding electrodes by number and then whether they are AC or DC rods? Looking for something I can print out and put in my rod drawer.
|
|
Ken Scharabok (Poor Boy)
- Saturday, 01/27/07 02:24:08 EST
|
sorry about that - I typed it in wrong. The one is this message should work better. thanks
|
|
- andrew
- Saturday, 01/27/07 03:03:10 EST
|
uiyu
|
|
- yit
- Saturday, 01/27/07 03:12:30 EST
|
Andrew: That one doesn't work at all.
|
|
Ken Scharabok (Poor Boy)
- Saturday, 01/27/07 07:17:05 EST
|
this is a question for Ken. Your forges, can they get wet. i just had a big windy rain down here and my shop fell. it got little bit wet the insulation is damp.
thanks y'all
Andrew B.
|
|
- andrew B.
- Saturday, 01/27/07 09:33:15 EST
|
Andrew, Water is not good for the kaowool. If it stays in place just let it dry out before firing. If it is just damp it will self dry, but if it is soaked then give it time before firing.
|
|
- guru
- Saturday, 01/27/07 10:19:59 EST
|
This may sound stupid, but why?
|
|
- Nippulini
- Saturday, 01/27/07 10:42:37 EST
|
Nippulini,
No refractory likes going from wet to hot. The water becomes steam and if trapped, it blows out chunks. Some refractories also have chemical changes from wet to dry that make them fail if fired wet.
|
|
ptree
- Saturday, 01/27/07 11:02:27 EST
|
A little example from the past on the power of water turning to steam.
We had a valve fail, in a closed position. The lawsuit followed lead to some testing in my lab. We set up a similar situation, and it was very instructional. The valve in question had been condensate (water) filled, as had a short lenght of pipe to another valve. The valves were both closed, and a radiant heat source had been located next to the pipe. Poor design! In my lab we set up the same conditions, with a pressure gauge, and a vent valve for safety. I had a 10,000 psi gauge, remote to and protected from the test. A few hundred degrees F and bingo, The pressure rise was so quick that the gauge failed before I could open the vent! In the actual case the pipe threads failed, as the pipe was Schedule XXH, threaded into the valve. Also bad design, as it should have been welded.
The power of water in phase change is awesome. In any change, from any phase to any phase. The first steam engines used steam introduced into the cylinder and then condensed by a water spray to cause a vaccumn! with a big cylinder made tremendous power. Not efficient by still powerful.
|
|
ptree
- Saturday, 01/27/07 11:10:33 EST
|
Ken-- Miller will send you-- absolutely free-- several heavy cardboard slide-charts that give the amp ranges for every rod known to man. Also they have similar slide charts for MIG, TIG. For a quickie, go to http://www.bae.ncsu.edu/courses/bae201/welding/electrodeamps.html Harris will send similar charts for oxy-acetylene welding and cutting pressures, tips. Smith has hilarious safety posters showing vartious disasters that can ensue when safety rules are ignored..Free.
|
|
Miles Undercut
- Saturday, 01/27/07 11:11:55 EST
|
When I've coated my gas forge with ITC-100, I've used a 60W or 100W bulb inside to dry it out. Still takes overnight (at least), but seems a lot faster than just air drying.
|
|
Mike B
- Saturday, 01/27/07 12:08:35 EST
|
Andrew B: Assuming you didn't coat the inside with ITC then, as noted above, just let it dry out on its own. A 100 watt bulb inside the chamber certainly wouldn't hurt.
When you do fire it off again run it on as low of temperature as possible for a bit.
|
|
Ken Scharabok (Poor Boy)
- Saturday, 01/27/07 15:29:01 EST
|
hi ,I think you may have missed this question earlier, but I'm looking into building a treadle hammer. Does anyone here know what the best possible instructions are for a really heavyweight treadle (if there is such a thing) I'm not in a position to buy a powerhammer yet or hire a striker for that matter. But I want to get into forging much heavier stock...say 2inch ms or more. So far all the instructions i've found are for sale only , which is fine but the adds just dont seem to tell you exactly what your going to get. If you could give me some imput on this it would be much appreciated thanks jeff
|
|
jeff
- Saturday, 01/27/07 20:00:18 EST
|
Jeff- you need to build a "tire hammer", you will work yourself to death trying to forge with a treadle hammer- for the same amount of time and money you put in the treadle hammer, you could build a tire hammer- 50# hitting at the rate of over 200 times a minute- try doing that with your foot- look at anvil fire-user built hammers for the concept or sign up for one of Clay Spencers tire hammer building workshops-clayms@brmemc.net
|
|
- ptpiddler
- Saturday, 01/27/07 20:32:05 EST
|
I've seen a few hammer designs using shock absorbers. What's the thinking behind that decision? I understand springs - it's a handy place to keep energy so you can get it back later. Energy is a handy thing for a hammer & not to be wasted. However shocks are a dampener. A handy place to put energy if you never want to see it again (besides heating the room), but it certainly won't be available to the ram.
Obviously they work because quite a few people have built them, but I don't understand the thinking. Can anybody explain it to a simpleton such as me?
|
|
andrew
- Saturday, 01/27/07 20:47:33 EST
|
Ken for welding rod info try this
http://www.lincolnelectric.com/knowledge/articles/content/awsclassification.asp
|
|
Mark P
- Saturday, 01/27/07 22:12:18 EST
|
Shock Absorber JYH: It was an old idea and I think I was the first to actually build it. It was a simple easy thing to do. If it had worked a little better it would be a great idea. Some things you have to try. The problem with the shock is that the faster it cycles the less the ram moves. AND all modern shocks are pressurized. . . something I was not expecting.
If there was a good in-line mechanism for hammers it would be a nifty item.
|
|
- guru
- Saturday, 01/27/07 22:25:59 EST
|
Currently, I am using a brake drum forge outside, that I built. I am interested in building an indoor coal forge. Can you suggest a place that I can find some plans?
|
|
Michael McShane
- Saturday, 01/27/07 22:33:38 EST
|
Heavy Weight Treadle: The problem is simple biology. YOU cannot personally produce but so much energy. All the energy in a treadle hammer eventually comes from you. A force multiplier increases force by reducing stroke. It does not multiply energy. Raising your leg and half your body then transferring all your weight to that side and then back repeatedly is no easier than using a sledge hammer.
Treadles with about a 100 pound ram have been found to be about the best. However, they will not help draw out 2" bar any more effectively than using a sledge hammer and rigging tongs on a pivot to hold the work on an anvil.
|
|
- guru
- Saturday, 01/27/07 22:33:44 EST
|
What steel is a saw mill blade made of? I looked on JunkYard steels and didnt see it. I have a good source of them to make knife blades from.
|
|
JLW
- Saturday, 01/27/07 22:42:12 EST
|
i figured that would be the case. thanks for clearing that up for me. jeff
|
|
jeff
- Saturday, 01/27/07 23:22:27 EST
|
Coal forge plans: Michael, A simple word description (specification).
A table made of 1/4" or 3/8" plate set at a convenient height (about 28") about 2 x 3 feet OR 3 x 3 with an edge about 2" to 3" tall, a firepot set into a hole to fit centered from the sides and the same distance from one end.
The size of the forge has a lot to do with coal reserve as well as room for stock. See our FAQ on coal fire management.
Legs made of 1-1/2" pipe or 2" angle. The firepot, blower and valve can be purchased from any one of our major advertisers. It is best to mount the blower behind the forge rather than under it as it will get very hot under the forge.
The legs may need diagonals. I like to build a shelf about 8" off the floor using bar gratting. You have to be careful what you store there. Its a good place for firebricks, cut steel, tongs. . .
Some smiths like to add a pull out or hinged stock rack to help support long stock. These are made from 1/2" round bar.
A side draft hood made per the drawings shown on our planfile page.
This is what USED to be called a "portable" forge but today is a permanent shop forge. You can make your own fire pot but they need to be heavy. AND if you fail in the design/execution the forge may not work very well.
The above and a glance at any similar or factory forge and the description above should be enough for anyone.
|
|
- guru
- Saturday, 01/27/07 23:29:42 EST
|
JLW: If it is a circular saw with inserted teeth it is probably some sort of medium carbon OR LOWER. Best advice I can give is to cut out a chunk and try heat treat methods and see if You can get the results You are looking for. This advice is what You need to do to ANY unknown steel.
|
|
Dave Boyer
- Saturday, 01/27/07 23:29:54 EST
|
Michael: For a really easy side draft hood get an old rusty 30 or 40# propane tank and cut both ends out so You have a 12"diameter cilinder. Cut an opening about 10"wide by 10" high for the smoke to enter. Stand it up next to the firepot and put 12" stove pipe on top.
|
|
Dave Boyer
- Saturday, 01/27/07 23:35:28 EST
|
Hello. I have a question. How are railroad spikes made? are they drop forged? Are they made in one machine or are there dies for a press or power hammer to make them? I ask because, as funny as it sounds, I wouuld like to find one of the machines or whatever that makes them, and make them out of different steels. Thanks alot!
Sam
|
|
Sam Salvati
- Sunday, 01/28/07 00:10:08 EST
|
Michael: May I interject my own opinion here. The Guru's advice about firepots is very true. They must be relatively heavy if you expect them to last. If you have the choice between building one out of 3/4 inch or 1 inch plate, and buying a cast iron one, buy the cast iron one (providing you can afford it). Allow me to elaborate:
I built mine out of 1 inch plate that came from the shanks of a scrapped out field ripper. In retrospect the fourty dollars for the two shanks wasn't a bad deal (something like 200 pounds or so). Plus the ten dollars for a box of heavy electrodes. Plus two 7 inch grinder disks, and two 4.5 inch grinder disks. Plus an undetermined amount of oxy/acetylene and electricity to the welder. Plus about three or four hours shop time. Plus the time required to cut the bottom back off and weld back on from the inside because the original design was too deep (if four inches is good, six inches is not always better!)...for a grand total of somewhere around 70 dollars (if shop time is worth $15 dollars an hour then it would be somewhere around $110-$130 dollars.)
The cast firepots that distributors sell are a thought out design. After all I spent on mine, I came pretty close to the price of a new swap meet priced fire pot, and mine doesn't work as well as a cast one (i believe) because the inside corners are too anglular and not really at all smooth . It does work, just not as efficiently as I'd like sometimes. And remember this is just my personal advice.
-Aaron @ the SCF
|
|
sandycreekforge
- Sunday, 01/28/07 00:20:29 EST
|
Water pump holding tanks in the 10 to 30 gal. size make good side draft and stacks too. I use a bi-metal blade in my saws-all and cut just inside of the welds at the ends. Most of the time there is double thickness but the ring usually slides out if I keep out of the weld. Well drilling company here has oold ones when I need them.
|
|
Jerry
- Sunday, 01/28/07 00:26:33 EST
|
Railway spikes,
I expect they are made like regular nails, But to a larger scale.
The material is a bar or most likely a coil of 5/8" square stock thats fed through a machine, That heats then forges its head, feeds out to the overall length then pinched off to create the chisel type point.
|
|
- Mike
- Sunday, 01/28/07 01:20:10 EST
|
Sam: The machinery that Mike is describing is HUGE, way beyond something You want in a home shop. You could tool up a powerfull and fast hydraulic press to make them on a small scale, but unless You have a pretty well equipped shop even that would be a major undertaking. I think hand forging them would get old really fast.
|
|
Dave Boyer
- Sunday, 01/28/07 03:26:11 EST
|
Railroad spikes: My understanding is that they are made from bars lang enough to make two, each end is upset to form both heads, then it's cut in half to form the pointy ends of both.
|
|
AwP
- Sunday, 01/28/07 03:38:11 EST
|
In the past I have seen double-headed RR spikes as AwP describes. For whatever reason they weren't cut in half to form two spikes.
Thank you to those who sent me a link to arc welding rod currents. Been a while since I took a welding class. I thought they were pretty well AC or DC. Was surprised to see most can be run on either, depending on performance desired.
First welding class I took instructor used 6010, then 7018. Said if you can learn to weld with 6010 you can weld with anything else. Might be, but I also saw fustrated students who likely gave up on arc welding because of the 6010.
I do most of my welding with 312-16 as it is most either tack or very short welds. However, my sources of cheap 312 rod have dried up. I suspect I will hoard what I have left and switch to 6011 for most work and 7018 for long and strong welds.
|
|
Ken Scharabok (Poor Boy)
- Sunday, 01/28/07 04:36:48 EST
|
Take a look at eBay listing #250077830941. What a collection of tongs. However, likely the smiths there only used a dozen or so on a regular basis.
|
|
Ken Scharabok (Poor Boy)
- Sunday, 01/28/07 04:45:20 EST
|
Ken, could you send the anvil repair info to emily.zpam@gmail.com. I'll sift through the spam to find it. I'm not sure why my normal address isn't working on this forum... cheers
|
|
andrew
- Sunday, 01/28/07 04:57:30 EST
|
andrew: Information sent. Put it in text this time rather than as an attachment.
Keep in mind opinions vary greatly on anvil repair. However, I have rebuilt about 15 anvils using my techniques and reports from some owners are they are holding up very well.
You have an advantage in the area of the missing plate is not in one widely used by other than possibly a farrier.
|
|
Ken Scharabok (Poor Boy)
- Sunday, 01/28/07 10:08:53 EST
|
Railroad spikes are from what I have seen, upset forged. From the sizing, I would suspect that a nice 1" Atlas or National upsetter would do a nice job, especially in small lots. I would do singles rather than the double ended. the point could then be forged in a relatively small press.
The 1" upsetter is what is know in the upsetter trade as a "forklift machine" I.E. move the 30 to 40,000# machine in, set it on the floor, hook up the electricity and air, and coolant, and bingo, right to work. That is of course assuming you have the dies and tool holders. I suspect that the tooling to make spike heads would be cheap as these things go, say about $10,000 for the grip slide tooling and another $10,00 to $30,000 for the tool slide dies. If tool holder is needed add perhaps $40,000. You could then run about 2000 spikes a shift or more, assuming you have the means to heat them that fast. Probably need an induction heater system for that.
That said, if I was needing small lots of special material spikes say to make knives from, I would consider a pnuematic upsetter of the homemade type. I suspect that even if the dies had to be made out, a jackhammer system, with compressor and all would be possible for under $5000, and if needing onlt the shank and head to make "RR spike" items from, in most cases the point is not needed anyway.
|
|
ptree
- Sunday, 01/28/07 11:45:55 EST
|
As an aside, McMaster-Carr sells new RR spikes at a quite reasonable cost. Shipping will be significant though due to weight. Used spikes are often available on eBay, with unused ones there on occasion.
|
|
Ken Scharabok (Poor Boy)
- Sunday, 01/28/07 12:13:09 EST
|
Rail Road Spikes: I have been in the Richmond. VA Tredagar spike mill (when it was still operating) and here is what I saw.
A very large OLD rusty machine of maybe 10 to 20 tons (weight). It was in a dark building but from what I could see it was probably some kind of big mechanical upsetter that was automated (mechanically). There were rotary feed rolls and the point was simply pinched in the middle of a double headed pre-spike. As mentioned, it was probably just an oversized wire nail making machine.
To feed the mill there was a 20 foot tunnel furnace that was fired with natural gas. It was between 16' and 18" square.
In the same shop there was a rolling mill where they rolled old RR components (I saw axels) into the 5/8" square that the spikes wer made from.
On the same site there was an old A-frame steam hammer of a couple ton ram weight laying on its side in the brush. I did not see the plant in operation and at the time I had little interest in the details of the operation.
But the machinery was fed 20' lengths of hot bar, headed it, pointed it and spit them out into a large size steel tote all in one continuous operation.
|
|
- guru
- Sunday, 01/28/07 12:18:54 EST
|
Spike machine,
I can see the double head a better way that the bar heading could happen together reducing the need for such serious clamping over the spikes being headed singly.
Nails, much smaller need so little heading force by comparison they are headed then sheared off the parent stock one each. One can see just behind the nailhead serrations from the clamp that holds the wire during the heading. The points are put on by a pinching operation that leaves tiny two triangular bits as scrap.
|
|
- Mike
- Sunday, 01/28/07 14:08:29 EST
|
Spike machine,
I can see the double head a better way that the bar heading could happen together reducing the need for such serious clamping over the spikes being headed singly.
Nails, much smaller need so little heading force by comparison they are headed then sheared off the parent stock one each. One can see just behind the nailhead serrations from the clamp that holds the wire during the heading. The points are put on by a pinching operation that leaves tiny two triangular bits as scrap.
|
|
- Mike
- Sunday, 01/28/07 14:08:32 EST
|
Many upsetters are automated these days if there is much size in the production runs. At the axle shop we had several automatic upsetters that would use "Auto tongs" to move the billet down the grip slide to progress the axles thru the 4 to 5 dies it took to make the axle flange. Once running, they had an axle in each die position on every hit. Took much bigger drive motor as there was much less recovery time on the flywheel. Also used "C' type slot coil induction heaters to provide the thru-put. The material handling equipment cost as least as much as did the upsetter. The upsetters will all be massive, and OLD. They have not made any new upsetters since about 1970 I was told, and most are 1950 and before. They are so massive in the frame that they seldom break a frame, and everything else is makable. There are NO foundreys that can pour a large upsetter frame in the US today. A 9" upsetter has a two piece frame and the halves will run about 150,000# each after machineing. The newest upsetter in that shop was about 1958 I think, and the newest in the three shops they owned was that one. It had of course been rebuilt about every 10 years or so.
As to holding the bar against the heading force, in an upsetter, that is what the grip slide is for, as well as the backstop that sets the amount of stock in the machine to upset. Our 10" upsetter was used to make a 22" by about 3" thick flange on a approx. 5.5" bar in 5 hits. It you can do this a puny 5/8" square is not much challange:)
|
|
ptree
- Sunday, 01/28/07 14:24:59 EST
|
In a continuous upsetting process like this how would they keep the die heads cool? Cooled water jackets?
|
|
Ken Scharabok (Poor Boy)
- Sunday, 01/28/07 15:18:48 EST
|
Aren't 6010 and 6011 pipeline rods, designed to weld through just about anything-- rust, paint, poor fit-up-- avoiding or minimizing those nasty inclusions by floating the crud to the surface? They are much easier to start and run, than the 70-series rods but will never give as pretty a bead.
|
|
Miles Undercut
- Sunday, 01/28/07 15:32:36 EST
|
I said it was HUGE machinery. The dies and grippers weighed more than any one piece in your shop. In this case contuinuous was the length of a bar in 4 hour shifts. While there is a lot of heat transfer for a given time, the times are VERY short. Heads formed in tenths of a second. I think a lot of these machines had circulating water cooling but in many cases it was just a spray. . . the water and steam went where it may. This was also OLD equipment. Probably just post US Civil War.
|
|
- guru
- Sunday, 01/28/07 15:33:30 EST
|
I am learning saw pounding. I need to dress a roundface doghead hammer. Any advice on hammer face dressing ? Thanks
|
|
- jack
- Sunday, 01/28/07 15:58:39 EST
|
Ken,
In our shop continous meant something a bit different than what the GURU is thinking. We had only to load 10,000# bundles or stock in about 20' lenghts. The bands were cut, and then the system did the rest. First a bar unscrambler lifted one bar at a time onto the shear. The shear cut the billets(1.25 to 2.62" dia) to lenght,( that is why some of the bars were more than 20'lenght was to allow a crop end and then multiples of desired lenght) Then the billets went to the induction heater. From there to the upsetter for forgeing, then to the cooldown conveyor, and then into a tote. From the time the bands were cut till the forgeings came out of the tote no hands touched them. Consider that there are only really about two companies in this country that make these axles, They have to be FAST.
In this service die heating is a REAL problem. That is where the die lube I often speak of was developed from. These dies work, when everything is right at about 600F. If the cooling sprays are not right, they are washed out in minutes! The die lube that I speak about is diluted to perhaps 5%, and that 95% water is the cooling medium. It mostly flashes to steam, removing huge amounts of heat. Even so, at 600F, a 2250F steel would weld to it at these tonnages. The die lube is designed to allow the steel to flow with almost no friction, prevent welding and galling, and to prevent frictional heating. In the automatics, there is a 6 second window to squirt die lube/coolant and get the heat out and let the lube dry completly. And it works. The dies used in this service are mostly a prehardened proprietary die steel that is essentially 4140! We turned the dies in normal CNC lathes, and then went right into service on the short runs, and H-13 for the long run stuff.
If you have not tried this lube, against the graphite based lubes you can not imagine the difference. Just as the GURU cautions against reinventing paint, I caution against reinventing die lube.
|
|
ptree
- Sunday, 01/28/07 16:02:00 EST
|
When speaking of huge machines, such as upsetters, one must be aware of the costs of operation that are very different from a small shop.
An upsetter, or a upright forging press such a National Maxi-press, use lots of air for the clutch and brake. i would guess that a 9" upsetter uses about 25 hp of compressor to operate. The clutch piston is after all about 6' diameter, and the brake pistin is 20" or so.
These machines also use oil in a total loss system to lube the bearings. The lube oil for the crank, slides and cam bearings is ISO-460 gear oil. This is so thick that it is easier to shovel at 30F than to pump. I put in a heated tank, and a heat traced manifold to cover a city block plant to keep these machine running relaiabley in the winter. 9 upsetters used something like 1700 gallons a week. All that gooey gear oil ended up in the pit under the machine.We had rope scroungers to pull it back up, and then we had to dispose of 2000 gallons of water and scale contaminated oil a week. I found a recycler to clean it up and return it. A HUGE savings.
Imagine doing a rebearing job, when it takes a 10ton crane to pull the bearing caps. The mains on the crank were 36" dia, x 24" wide bronzes, custom poured for that machine. The cranks were custom, open die forged heat treated 4140. Break a crank on a 9" upsetter and you can be back in production for about $110,000, about 2 weeks later, IF you have a spare crank on hand.
|
|
ptree
- Sunday, 01/28/07 16:12:02 EST
|
Hammer Face Dressing: Jack, It is an art. It is best done on a belt sander. The next option is an angle grinder but you can mess up badly with one of these. NEVER use a bench grinder unless you have a huge one where the wheels are three or four times heavier than the hammer.
The best way to learn is to look CAREFULLY at a good hammer for the given purpose. Almost all hammers have a crown to the face but some are arced in one direction rather than crowned. The crown should be enough that you are unlikely to accidentally mark the work with and edge. The edges should then be radiused smoothly blending into the crown.
When starting from scratch on a face with sharp edges I use an angle grinder and I work in facets keeping the lines straight and the widths similar. Start with chamfers then split the chamfers. Round gently then go to the belt sander to blend the facets into smooth curves.
When dressing a hammer with a previous dress I start and finish with a belt grinder or possibly a file and sand paper.
All this requires a good eye for shape and a deft touch with the grinder. You can easily wreck a hammer with a heavy coarse grindder and have to shorten it 1/8" to recover. Knowing what shape you want is the hard part.
|
|
- guru
- Sunday, 01/28/07 17:05:03 EST
|
Ptree: I love those descriptions of Big Machines and their operations!
|
|
- John Odom
- Sunday, 01/28/07 18:16:56 EST
|
John Odom
Like many memories you tend to wash out those bad memories, like working 3 weeks of 20 hour days in the cold or hot to get those big un's back up when they break. I do love those big old things too. I think I like the big hammers better than the upsetters. Upsetters are harder to fix! The big hammers mostly just needed big machine tools to make new parts. Not like an upsetter that needs a crank forged, and when machined, that forging weighs in at about 100,000#.
bearings for the back shaft are roller bearings custom made and take 6 months to a year. If you have two crashs in a short time you end up in deep do-do!
Seriously, any forging equipment tends to the high to very high maintenance side of the game. The main machine is dependent on all the support stuff like billet conveyors and the induction heaters and all their support stuff. All working in a hot, gritty beyond belief environement. And if you are running large induction heaters, you tend to have issues with stray currents welding the balls to the races in bearings on the stuff that is close. I was the maintenance manager just long enough in the axle shop to really get an appreciation for what the maintenance guys are up against. I prefer plant engineering or even safety/enviro to maintenance manager. I really enjoy R&D best of all, but that's a hard gig to find.
|
|
ptree
- Sunday, 01/28/07 20:43:07 EST
|
WOW, thanks guys, and LOVE the story Mr ptree! That is amazing!!!!!!!
|
|
Sam Salvati
- Sunday, 01/28/07 21:33:40 EST
|
I dress my hammers very crefully with an angle grinder, then finish off with a high grit belt sander with the plattern removed so it gets nice and slack. The slack takes care of the crown nicely. My polished hammer faces forge almost mirror finish cold.
|
|
- Nippulini
- Sunday, 01/28/07 21:51:25 EST
|
Sam, Billy Merrit (sp?) from Indiana has made a pattern welded RR spike. I've always assumed he forged it to shape.
Wouldn't be that hard to make a header and then ise a top tool to finish it to shape.
Thomas
|
|
ThomasP
- Monday, 01/29/07 00:59:01 EST
|
6011 vs 6013 arc welding rod? In reviewing the links sent to me on the current options for various rods I noted 6013. Appears much like 6011, but with less splatter. For those who use both on a regular basis do you have a preference?
In playing with 6011 I noted the flux deposit is very difficult to completely remove. Same problem with 6013?
|
|
Ken Scharabok (Poor Boy)
- Monday, 01/29/07 04:59:31 EST
|
Ken, These are the two primary rods I use in an AC buzz box.
E6013 is a general purpose rod often suggested for sheet metal work. It flows well and has a classic arc welding flux slag that makes a medium thickness smooth hard shell that pops off cleanly from good welds. In fact it will peal and pop off on its own in many cases. On bad welds it is a lot of work to clean off and trying to weld over slag filled pits just produces bigger pits. It makes very smooth welds with practice.
E6011 is a noisy agressive rod that puts down a rough bead with a thin slag covering in most cases. It will burn through rust, paint and scale and stick things together better than most other rods. It takes much more practice to make a clean smooth weld but your welds are more likely to be tight if your welding prep is shoddy. It is the junk yard warriors rod. I personally have a harder time starting and keeping an arc going with this rod than E6013.
For those of you that have a hard time starting an arc there is a brand of rod (Lincoln I think) that makes rods with an easy start tip. They look a little like a box match with a little light colored tip dipped onto them. They are a LOT easier to start the first time. However, if you need to restrike the arc after a short tack or short bead then they are not a lot of help.
As in many things, in welding cleanliness is next to godliness. If you take a minute to slde that angle grinder over the edge of that dirty old rusty plate or I-beam before you try to weld it you will get a smoother cleaner weld than if you leave rust and dirt. Leave the rest rusty as it helps keep sputter balls from sticking.
|
|
- guru
- Monday, 01/29/07 06:29:58 EST
|
On the road today. Will be back in this afternoon. . .
|
|
- guru
- Monday, 01/29/07 06:30:50 EST
|
Guru & Ken, thanks for the anvil repair info. I think I'll leave it for the minute and just use the anvil. The hardy is 1 1/4" so I will put in a sleeve with a section of plate to provide uniform support over the area that is broken off. That way I can start using hardy tools but don't have to commit to serious anvil repair just yet.
Regarding the repair, for future reference - the iron under the missing plate is vary non-uniform in height. Am I better off trying to build up the low spots or grind down the high spots to make a flat surface prior to welding on a new section of top plate?
I have now used the anvil a couple of times. After 2 years using the head off a truck or a section of rail-road track, I can now fully appreciate why both of these are crap options compared to a real anvil!
|
|
andrew
- Monday, 01/29/07 06:38:46 EST
|
I'm sure many of us have seen this one, I'm adding it to the forum for the recent discussions involving railroad spikes.
http://www.appaltree.net/aba/images/projects/KootenayRailroadSpikeContes.jpg
|
|
- Nippulini
- Monday, 01/29/07 12:57:32 EST
|
Does anyone know anything about Iroquios Ironworkers? Looking at their press/ironworker combo and any info on this company would be appreciated.
jamie
|
|
jamie
- Monday, 01/29/07 14:53:41 EST
|
A few more ?'s about ironworkers. What does a stroke control do for ya? How bout a roundover punch? I've never used a press for any forging. Is 40 ton enough push (what kind of operations could it handle) thanks again
|
|
jamie
- Monday, 01/29/07 14:58:40 EST
|
ptree - you forgot the biggest pressure of having a large press down, the customer / production manager / employees on piece rates / etc etc breathing down your neck for the duration of the rebuild ! -
I remember "fondly" rebuilding a cluch on a 2500t maxipress, going a bit behind schedule and nearly stoping production at one of Nissans engine plants, a few sleepless nights !
I was reading some technical papers about press / upsetter main frame design & the elastic circuit. The frames are only stressed to 2.5 ton sq inch of section at the weakest point on the circuit under max load - probably why they last so long.
|
|
- John N
- Monday, 01/29/07 15:33:04 EST
|
Needed to go into town so I stopped by auto parts store with welding supplies. Bought a package of 6013. Impressed. Welds much like the 312-16 I have been using.
|
|
Ken Scharabok (Poor Boy)
- Monday, 01/29/07 18:06:22 EST
|
I am interested in learning how to make a cast and melt copper to make decorative items for my muzzle loader. Can you tell me where to start. I used to melt lead and make my own bullets, but I need to know how to safely melt and poor copper. Thankyou
|
|
john
- Monday, 01/29/07 18:45:10 EST
|
Iroquois is a new company- the ironworkers look ok- not especially refined, as compared to the industry leaders, but it should work fine as an ironworker.
The press idea is hard to decipher from their website- I cant tell if it has an independant cylinder for the press, or it is somehow using the main cylinder to push down press tooling, like the Scotchman ironworkers do.
Although it seems tempting to buy an all in one, I am not sure it would be that great.
A real ironworker doesnt need stroke control, because the stroke is always the same- it shears, or punches, and then returns. But I assume you would want more control over it when using it as a press.
the "roundover punch" is not a standard industry term- I am guessing its what they call a rounded press brake die for the press section.
If it was me, I would do what I did- buy an ironworker, and build a press. A real press can be built to be more flexible in terms of sizes it will work, whether you build an H frame or a C frame. A real press can have a 2 speed pump, which an ironworker doesnt need.
I am a fan of GEKA, Mubea, Peddinghaus, Piranha and Scotchman Ironworkers, in that order.
40 tons is ample for most forging. Although my friend Bernie Hosey has managed to break his 150 ton press by overloading it squashing 8" pipe, but he is special case- sorta in the "madman" category- the majority of smiths I know who use presses to forge with would be happy with 40 tons.
|
|
- ries
- Monday, 01/29/07 18:52:35 EST
|
John N,
I did not mention the customers, and management breathing down my neck, but it always happened:( We did not have piece work in the last shop, so the guys wern't as hostile:) The big Nationals do indeed have huge frame sections, but I have seen several that were cracked/broken. We had an Ajax that had a scab plate on the side that was 6" plate about 4' x 8'. Lots of weld too! We bought the remains of two 9" Nationals, and but the good halve together, welded up and line bored to make one good machine from two broken machines.
The toggle linkage on the upsetters saves them most of the time, but you get a dead cold machine, with a cold billet and the wrong toggle springs and!!! A cold billet that breaks the machine open can still break a crank, and sometimes it breaks the toolslide pockets as well.
We had a frame, out back in the weeds, off a 9" that had more welded up cracks than I could count and it was cracked again!
I still like steam hammers and boilers more! Primitive but more fun.
|
|
ptree
- Monday, 01/29/07 20:26:40 EST
|
ries (and all)
thanks for the response. a little about me and my needs. i am a one man shop with a little help here and there. so the machines i am looking at are on the lower (price) end of the spectrum. the unit will not be used constantly, so the pricier machines seem like overkill. I know, ya get what you pay for but sometimes its hard to pay double.
i have a line on a lightly used iroquis with a bunch of tooling for a decent price or an edwards 55 ton with a coper/notcher, which I really want, and tooling for about a grand less. cant really go much higher with my single phase service.
in any case, it will be a decent investment as there are so few of the lower end machines on the market in my area(pacific nw). seems like a lot of those edwards units being sold.
if anybody has any feeling about these units or ironworkers in general this is a big buy for me so I appreciate the input.
|
|
jamie
- Monday, 01/29/07 20:26:42 EST
|
is there anyone here, who could point me in the direction of a college with a machinist major? i'm loknig at a tool/die maker degree. thanks
Andrew B.
|
|
- ANdrew B.
- Monday, 01/29/07 22:52:48 EST
|
I know what you mean about used machines of any kind in the pacific nw.
But I am extremely skeptical of edwards ironworkers. They are pretty mickey mouse, if you ask me.
Iroquois I just dont know about- have never seen one. And they have almost no national presence- no ads, no dealers, no hits on google- kinda suspicious.
I have found that the cost of shipping from other states is often worth it, since the prices elsewhere are so much lower. I have a freight broker in Medford Oregon I call up, and he gets an independent trucker to pick it up, and its not really that expensive.
There is a very nice Mubea on ebay right now, at 4 grand, but its in jersey, probably cost another 500 to 800 to get it trucked out here.
I would be looking at www.machinetools.com and www.locatoronline.com
also check out www.macpubl.com - this is the west coast used machinery magazine, machinery journal.
old george washington machinery, over in Quincy, in eastern Wa, has several hulking old mechanicals you should be able to get pretty cheap- heavy, but bulletproof old buffalo's and a peddinghaus.
He also has something he calls a "gebr vitte" but the model number says Mubea to me. All of the machines he has he is asking 3 grand or less for.
Mechanical ironworkers are going to be cheaper than hydraulic- they are not as nice for precision punch placement, but they are a lot faster for production work. Bigger machines are almost always a better deal, dollar for dollar. Everybody wants the little guys.
I would not go below 35 tons- the punch capability just gets too small.
I know my ironworker still brings a smile to my face every time I use it. One of my favorite tools.
|
|
- ries
- Monday, 01/29/07 22:53:53 EST
|
sorry- thats www.macpub.com , no "L".
|
|
- ries
- Monday, 01/29/07 22:54:53 EST
|
Jamie: I have a Metal Pro 4000. This is a Mickey M. machine compaired to Rise's favorites. But at $1300 with the shear, brake, notcher and a bunch of round and rectangular punch & die sets and in OK shape it was a pretty good deal. Downside is that it is slow and the inside the frame location of the punch & notcher limits capacity. I didn;t have much floor space left anyway, so the small footprint fit My requirement. I dont use it full time, I am a 1 person "hobby" type shop that does payed work from time to time. At the plant there was a Peddinghaus 44 T mechanical. That was an awesome machine, I would do immoral things to get one. It had a 3 punch slide on it so You could have 3 sizes mounted ready to go and lock 2 up out of the way and put a transfer block in to activate the one You needed. The punch could be lowered to locate it with a cam on a handle and the ram would free travel down to the punch, push it through and then retract it. This machine had the capacity of any 50 ton machine, I think the 44 was metric tons [2200#] But as the Guru says about power hammers, ANY is better than NONE
|
|
Dave Boyer
- Monday, 01/29/07 23:43:04 EST
|
Andrew B.: The usual way to become a tool & die maker is to serve an apprenticeship in a toolroom. I did it from 1977 to 1981. You need to find a company that offers apprenticeship, take the job and they will send You to night school or set You up with a corospondence course. Many states regulate the apprenticeship process. Check with Your state labor relations board. If You get into an approved apprenticeship it is more likely that a different employer will accept Your papers as meaning something. This is a trade well worth learning even if You don't do it for Your whole life. If You go the college rout You will probably have to major in Machine Tool Technology. That would be OK, but You won't be a tool and die maker when You are done. The 'Book Learning" part of the apprenticeship coveres blueprint reading, mechanical drawing, shop math, machining operations, basic heat treating & simplified metalurgy, jig & fixture design, stamping dies, and injection molds and die casting dies. At work in the toolroom You learn how to operate the machinery, and build/repair what ever sort of tooling they build or use at that plant. After completion of the apprenticeship it is wise to work at several other toolrooms and get more and different experience. This may piss off the place You served the apprenticeship, but it is better for You and better for industry in general. You should make it a point to figure out who the smart guys at each shop are and keep an eye on what they are doing and how they do it. Every shop will have people of varying ability, the sharp ones are the ones to learn from.
|
|
Dave Boyer
- Tuesday, 01/30/07 00:03:56 EST
|
Andrew B: For further information about career opportunities in tool and die making contact the National Tooling and Machining Association, 9300 Livingston Road, Fort Washington, MD 20744. (800) 248-6862. www.ntma.org. Likely they can tell you about tool and die making training programs in your area and perhaps even refer you to member manufacturers with an apprenticeship program.
|
|
Ken Scharabok (Poor Boy)
- Tuesday, 01/30/07 07:53:19 EST
|
Casting Copper Alloys: John, Casting brass is relatively easy, copper is tricky because it absorbs so much oxygen.
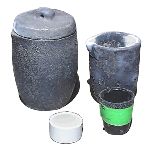 First you need a good crucible. You cannot get away with homemade for high temperature melting. Graphite are common, silicon carbide are the best and clay are the cheapest. The small white crucible to the left is a common jeweler's melting bowl and will do well for many small projects. First you need a good crucible. You cannot get away with homemade for high temperature melting. Graphite are common, silicon carbide are the best and clay are the cheapest. The small white crucible to the left is a common jeweler's melting bowl and will do well for many small projects.
IForge #137 Lost Wax casting demo
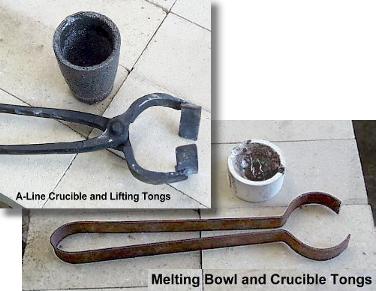 You will need tongs and or pouring shanks to fit the crucibles. This is NOT a one size fits all job. All your crucible handling tools MUST fit well and usually are matched sets. You will need tongs and or pouring shanks to fit the crucibles. This is NOT a one size fits all job. All your crucible handling tools MUST fit well and usually are matched sets.
A full set of protective gear is a must.
This varies depending on the amount of metal but at a minimum is safety glasses, leather apron and gloves. Foundry spats are essential if you work at bench level. These keep hot metal from running into your shoes where it STAYS until you get the shoes off. A full face shield is better than safety glasses and protects your pretty face and beard.
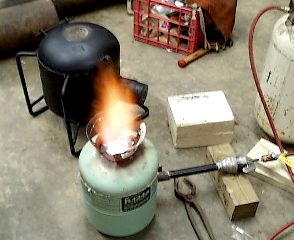
AND you will also need to have a way to melt the metal. This can be done in a coke, charcoal or gas furnace. You can also use an oxyacetylene torch to melt small quantities of brass in a jewelers melting bowl. The melting furnace above is typical however it was based on hard refractory designs even though it was made using Kaowool. A much better design is to have the top 3/4 lift off or tip up so that you can lift a small crucible with pouring tongs rather than using lifting tongs and then transferring to a pouring shank or tongs.
The following are our other iForge demos.
iForge demo Molds I
iForge demo Molds I
We have book reviews on the foundry books by Chastain and I highly recommend the books by C.W. Ammen.
|
|
- guru
- Tuesday, 01/30/07 11:35:43 EST
|
|
|
[
CSI - anvilfire MEMBERS Group |
Getting Started in Blacksmithing ]
|