| WELCOME to the anvilfire Guru's Den - V. 3.0 |
|
THIS is a forum for questions and answers about blacksmithing and general metalworking. Ask the Guru any reasonable question and he or one of his helpers will answer your question, find someone that can, OR research the question for you. This is an archive of posts from March 16 - 24, 2006 on the Guru's Den |
|
|
|
Eric, re: PAABA (Pittsburgh Area Artist Blacksmith's Ass'n.) Usually meets once a month - last week on Sunday, open house at Jymm Hoffman's shop in Ambridge, PA & open shop at the Blacksmith Shop in historical Old Economy - Economy, PA The website for the group is www.paaba.net The next events are April 22 at Rice's Landing down on the Monogahela River, and April 29 at Fort Allen Antique Farm Equipment and Blacksmith Days. At least one PAABA member is from up in your neck of the woods - Tionesta, PA - Gary Snyder, if memory serves. It's a good group with a cross section of experience from amateurs - for example me, a metallurgist who's a hobby smith on to Jymm Hoffman, who makes his living primarily doing 18th century style smithing. Ft. Ligonier has kept him busy the last several years producing the iron mountings for cannons, howitzers, etc. |
| - Gavainh - Thursday, 03/16/06 00:19:34 EST |
|
Mike Anderson: On the other part of your anvil question, it should be single or double horn, but the horn can also be called a bick or pike. Most of the London-pattern anvils are single horned. Double-horned were, and apparently still are, preferred on the European continent. Usually the rear horn is much like you had taken a single-horn and cut off the heel on both sides at an angle. A double-horn may have a hardy hole at both ends of the center plate. To see various anvil types click on the NAVIGATE anvilfire link and scroll down to the advertisers. Centaur Forge, Pieh Tool Co and others carry a variety of anvil types. Anvils were traditionally made for various crafts or divisions thereunder. For example, at one time Mousehole Forge in Sheffield, England made: London-pattern, double-piked, farriers', coachsmiths', Soho-pattern, hammer makers', engine smiths', sping makers', double-arch, edge tool (cutlers') and saw makers' anvils. I have also seen anvils identified as chain makers'. Older anvils in the U.S. are predominately of the standard, single-horn, London-pattern, or that pattern modified with a clip off of the step/table for farriers, but other styles do occasionally show up. The definitive reference on anvils is Anvils in America by Richard Postman. It is available in the Anvilfire store. Use the same process as above down to STORE. |
| Ken Scharabok - Thursday, 03/16/06 02:52:47 EST |
|
G'day again thanks for the info on the cowboy hats for the wizards great help. Is demo 165 nov 12 2003 the last of Iforge or is it some where else. Dinny from down under |
| Dinny - Thursday, 03/16/06 06:26:03 EST |
|
When someone tells a story that seems to be stretched of the truth a bit, we say "That just doesn't ring true." Is this another one of those blacksmithing terms that worked its way to everyday language? |
| - Nippulini - Thursday, 03/16/06 11:03:32 EST |
|
Ringing True: That is hard to say. I suspect it is from the bell making field rather than blacksmithing. Bells can be loud and far from a clear or "true" note. |
| - guru - Thursday, 03/16/06 11:15:34 EST |
|
Nnippulini. The alpha guru has done mucho research on musical ringing, nodes, etc. I suspect that the ringing true expression comes from the world of tuning forks, glockenspiels, cymbals, pianos, xylophones, and marimbas. |
| Frank Turley - Thursday, 03/16/06 11:20:49 EST |
|
Photographing Ironwork: From the mail on how to photgraph ironwork. On our iForge page we have the following on How to photograph ironwork Much depends on the type of work and its location. Railings and gates are the most difficult to photograph. In the shop or field they require professional lighting. In the shop they require a commitment to do the job right. This means a seemless background. Professionals use rolls of wide special paper for this. Amateurs often use a sheet. This works but must be cleaned, ironed so that there are no wrinkles, and draped so that there are no distracting shadows. Making a clean background may seem simple but folks screw this up on a regular basis. I have seen photos with grossly wrinkled sheets, stains on sheets, dirty paterned blankets rather than a sheet, footprints on cardboard, holes in paper, the background half missing, obvious draping over the person holding the sheet. . . Every time I see this I ask if these people have eyes? Al these problems have been on photos sent to me to publish! For small objects up to book size I use a stand I built with a curved surface that produces a seemless cornerless background. I cover this curved surface with a fresh clean piece of drawing paper or photographers seemless paper. The work is set on this, lighted to my satisfaction and then photographed. Natural lighting is often used but occasionally artificial lighting is needed. Professionals often use a curved plexi-glass surface that is frosted on the back side so that it can be lighted from behind. These days I do all digital photography. The advantage to this is that I can immediately load the image on a large monitor and examine it closely. If I do not like the results I can take the photo again. Digital also gives you the advantage of easily cropping adjusting and removing backgrounds. Often an item has the background removed and then artificial shadows put in their place. Lighting should be sufficient to see surface textures but not produce too much glare. Flash is almost always a problem causing glare or white out as well as too strong of shadows. I always take photos with and without flash if extra lighting is needed and I do not have any other source. One in ten is better with flash than without. A tripod or any stationary surface to place the camera greatly increases the quality of a photograph even when you have good light. The important thing is to LOOK at what you are photographing. Many people do not pay attention to details or composition. Most of the quality of a photograph is in the eye of the photographer. The angle of view, perspective, lack of cropping (of the object). IF you have done a large expensive job or a piece you believe may be the defining point in your career it pays to hire a professional photographer. It can easily cost a thousand dollars or more to get that ONE perfect photo but what will it be worth to be on the cover of Dona Meilach's or Giuseppe Ciscato's next book? These are moments that make or break a career. |
| - guru - Thursday, 03/16/06 11:31:31 EST |
|
Jock, I could not agree more. We just paid $1800 for two shots of one of our frames.We do take digital shots ourselves but these are for costing reference and internal use only and never released to the public. You only get what you pay for. Sometimes good enough is not "good enough". A professional earns professional pay. |
| daveb - Thursday, 03/16/06 11:54:05 EST |
|
Okay, how about "forging" documents and "fabricating" lies? |
| - Nippulini - Thursday, 03/16/06 12:16:20 EST |
|
At the International Medieval Congress at Kalamazoo, last year, I asked one of the professors exactly that question. Her case was an explanation of a 13th c. forgery of documents. She replied that yes, the blacksmithing operation and the falsification of documents shared a root word and meaning. The twist in the case was that the forger made it look like a forgery had occurred by erasing a part of the text, and then put the erased text back exactly as it was so as to annul the entire document. Wish I was going this year, but my normal crew can�t make it, and the wif doesn�t have the house built yet. Fabricate is Latin, but I�ll let other qualified folks deal with that. Wild swinging weather all over the tidewater; the days are spring and the nights are winter! Visit your National Parks: www.nps.gov Go viking: www.longshipco.org |
| Bruce Blackistone (Atli) - Thursday, 03/16/06 12:28:24 EST |
|
other smithing phrases regularly in use 'strike whilst the irons hot' & 'plenty of irons in the fire' - dont think we need much of the background on these two! |
| John N - Thursday, 03/16/06 12:59:45 EST |
|
Alright Ken, I'll keep that in mind. Thanks a lot! |
| - Rob - Thursday, 03/16/06 13:33:56 EST |
|
I need a bigger anvil. I want to forge tomahawks from solid 1-1/4" stock and smaller. I will need at least a 200 lb. anvil. I don't want to shell out minimum $750 for an anvil because I am only 16 and I need to be saving money. What can I use as a substitute for an anvil and where can a find it? |
| - Tyler Murch - Thursday, 03/16/06 18:44:26 EST |
|
Hello Gentlmen, Does anybody out there own or know anything about Iron Store Giant powerhammers. Ive just bought one and am looking for tips advice etc. |
| Kerry Neilson - Thursday, 03/16/06 18:51:41 EST |
|
What's the difference betweem metalcutting and woodcutting vertical bandsaws? |
| Bob G - Thursday, 03/16/06 18:59:54 EST |
|
One cuts metal, the other cuts wood. (Sorry Bob, couldn't resist) |
| - Tom H - Thursday, 03/16/06 19:22:32 EST |
|
Actually, Tom, thats not true- I cut wood with my metalcutting bandsaw, and I have cut metal with woodcutting saws. The main differences are blade speed, and mass. To cut metal, particularly hard metals like steel or stainless, you need a much slower blade speed than for wood. So metal cutting saws are designed to go much slower. If you try to cut steel on a woodcutting saw, you will probably just strip the teeth off the blade. The other big difference is rigidity and weight of construction. A big Do-All metal cutting saw can easily weigh a ton or more- while a 14" delta wood saw is a couple of hundred pounds. Also, woodcutting saws are almost always what are called "vertical" saws, with the blade running downwards thru a slit in a table. Metal saws are made both that way, and in "horizontal" mode, where they use gravity and hydraulic cylinders to pull the blade down thru metal that is clamped in a vise. What do you want to cut, what metal, what size, how much of it per day, week or month, and what is your budget? |
| ries - Thursday, 03/16/06 19:29:30 EST |
|
I was thinking of buying a 3 phase industrial woodcutting bandsaw and slowing the blade down by using a phase converter so that I could cut steel aswell. |
| Bob G - Thursday, 03/16/06 19:37:58 EST |
|
Guru, As per your instructions before posting here: I live in northern Illinois,55 yrs old,practically no experience. Ive been gathering my potential shop,for years. Question is, my forge. A recent answer you gave,makes it bottom blast flat pan,I think. It's cast,34"L x 23"w x4" deep. It's from Chicago, blower says:Western Chief No. 2 Canedy Otto mfg. The tuyeer and grate is flush with bottom of hearth,no fire bowl. Was the fire built right on the hearth? or was there a firebrick liner or something I'm missing? I'm in the process of rebuilding the blower and plan some beginer courses before I fire it so no rush. I'll sure appreciate you're help and discussion. Thanks for now. What a great site! |
| Chuck Holtz - Thursday, 03/16/06 20:14:07 EST |
|
If you mean using a VFD to control the speed on the motor, while also supplying 3 phase power from single phase- well, that might work. It would depend on the motor, and the desired speed. I personally dont know enough about phase convertors and VFD's to say, but there is a really good forum on them over at the practicalmachinist.com website. Where I live, a decent 3phase woodcuting bandsaw, a big one in the 24" to 36" size range, sells for about the same amount as a metalcutting saw- both run 2 grand and up around here. One advantage to a real metalcutting saw is they often come with built in variable speed, so you can tune the cutting speed exactly to the metal being cut. The metal saws also usually come with a built in blade welder- this used to be handier than it is now, as the new generation of bi-metal blades are so much better than high carbon blades for most uses that they are worth using, and they dont weld for beans on a garden variety blade welder- they require a fancy $20,000 high freq blade welder. Metal cutting saws usually will take a smaller blade than woodcutting saws as well- 1/2" to 3/4"is common for metalcutting, while a big woodcutting saw is often 1", or even 2" blad width, for resawing. Still, if you can get a good deal on a big, heavy woodcutting saw, something like a tannewitz, it might be worth doing. |
| ries - Thursday, 03/16/06 20:52:10 EST |
|
I aquired a Champion Forge and Blower No 200 1/2 Drill press and I am stumped regarding the operation of this particauler drill press. For example I cannot for the life of me figure out how the darn drill press goe to direct drive as opposed to automatic feed. Back about a year ago I was to to look at the Champion catalog, good idea , but it does not give any info on how the drill press operates. I would appreicate any advice that anyone could send my way! tHANKS! |
| Bobby Lancaster - Thursday, 03/16/06 21:34:48 EST |
|
Wood and metal cutting machines:. In good machinery there is a BIG difference. My woodworking bandsaw runs 5,000 feet per minute. This is 200 times faster than a metal cutting saw. To slow it down would require a gear box, not just belts or a variable speed control. On the other hand, even though my wood working band saw is a heavy duty saw its frame and table is not designed for the foces involved in cutting metal. Wood takes almost ZERO feed pressure, steel takes hundreds of pounds per linear inch. THAT is also where a big difference comes in in metal cutting band saws. They usualy have a power feed or a weight assisted feed so that you can push hard enough to saw heavy metal. Without the power assist a metal working band saw is only good for aluminium or sheet metal. You CAN cut small pieces by hand but not for long. There ARE machines designed to be dual or general purpose. However in saws this is rare. In my shop I would never consider converting my band saw to use on anything other than the wood it was designed for. In a blacksmith shop you make molds and patterns, mock up sculpture, make handles and dozens of other wood working tasks that a good bandsaw can do. |
| - guru - Thursday, 03/16/06 21:58:49 EST |
|
I have a cheap 3 wheel bandsaw I keep a metal cutting blade on for copper and steel sheet. If I try to cut 1/8" or heavier steel, it will cut okay for a short while, but then the blade will suddenly go dull. My theory is that with more teeth in contact, I'm not getting enough pressure on each to keep the piece from work hardening. Does that make sense? |
| Mike B - Thursday, 03/16/06 22:07:37 EST |
|
Mike, this is from running the blade too fast for the material. Steel saws at 90 to 120 feet per minute. Faster will burn up the blade every time. |
| - guru - Thursday, 03/16/06 22:09:40 EST |
|
What happens on thin material is that the fewer teeth often shear the material rather than cutting and you get away with it. OR they are digging in deep enough to be self cooling. Yes, if you have insufficient feed pressure the blade will tend to rub then dull. However at the proper speed saw blades rarely fail due to insufficient feed pressure. |
| - guru - Thursday, 03/16/06 22:13:35 EST |
|
Bob G: The speed of a woodcutting saw will lilely be in the 600 to 1000+ Feet Per Minute range. For steel cutting You need 75 to 200 FPM. This is better acomplished with a jackshaft and belts as it is a great reduction. The blade guides on a metalcutting saw often guide the blade closer to the work than on a woodcutting saw, as woodcutting saws often use ball bearing guides to deal with the great surface speed, depends on the saw, and comes into play in contour sawing. For contour and a lot of general work a 1/4" blade is common. If You need to alter the blade guides, I suggest that You coppy a Do All. |
| Dave Boyer - Thursday, 03/16/06 22:25:56 EST |
|
One of the handiest feed devices for a bandsaw that could be easily shop built was a length of threaded rod with a small handwheel on 1 end and a point on the other. The "nut" had a shank on it that engaged in a hole in the tasble insert directly in front of the blade. It is used in conjunction with a half circular plate with notches on the outside to engage the point of the screw and notches on the inside to engage smaller workpices. there were teet to engage the roller chain that was part of a gravity feed system as well. This is Do All equiptment. |
| Dave Boyer - Thursday, 03/16/06 22:36:48 EST |
|
Bobby Lancaster-- My Champion 200 1/2 is lying on its back against the wall of my shop, awaiting a clean-up and restoration (where it's been for the last 20 years or so) but it appears to me that the auto feed works by means of a long arm, on the left side facing the drill as it would be if you were facing it on a post. This arm is actuated by a cam on the horizontal drive shaft. At the top end of the arm is a pawl, which when flipped into the forward position, serves to advance the horizontal toothed wheel up top, turning it on threads that send the main shaft a tad deeper into the metal you are drilling. Then the pawl ratchets back on the cam action and engages the next tooth. To deactivate the auto feed, it looks like you reach up and flip the pawl on its back so it can't engage the teeth. |
| Miles Undercut - Thursday, 03/16/06 22:44:05 EST |
|
I made the hardie from angle iron from the i-forge demo by whitesmith and I wasn't able to cut with it, all that I did was put 2 divets in the edge, I was trying to cut a bar in half and didn't have it hot enough as I'm using a portable forge and its a long piece, but is this all that i did wrong or are there other possible factors. I ground it to a fairly sharp point is this the wrong thing to do as the edge has no strength or will heating properly be sufficient. Thanks, Stephen |
| - Stephen - Thursday, 03/16/06 22:47:15 EST |
|
Why not just take the lazy way out if the drive assembly permits and slow that woodcutting bandsaw down by means of a step-down pulley? Did that with a WW II vintage Delta 12-inch (!) bandsaw, has worked great for years on sheet copper, brass and steel. Steel plate over about 1/8 gets the O/A torch anyway. Heavier brass awaits the eagle's flight and a plasma cutter. |
| Miles Undercut - Thursday, 03/16/06 23:02:56 EST |
|
I have a champion 200 1/2 and had to make the pawl and arm for it. Mine has a flat belt drive wheel and a crank. The feed arm has a cam on the axle between the wheel and the crank. This oscilates the pawl on the serated horizontal wheel at the top. A half nut sort of arrangement locks or unlocks the feed mechanism. Lifting the pawl allows you to back up. I have sent (or tried to) some pictures to Bobby L. There are also pictures on http://www.owwm.com/PhotoIndex/ByMfg.asp?MfgID=165 one of which is mine. |
| John W - Thursday, 03/16/06 23:07:59 EST |
|
Mike Anderson UMBA does have members in the Twin Cities, but most of the smiths here are members of the Guild of Metalsmiths. www.metalsmith.org Next meeting is in April, come on by and meet the gang. There is often a person or two selling off material. Feel free to drop me line if you have any questions about them. |
| Escher - Thursday, 03/16/06 23:17:06 EST |
|
Have you guys seen a tong for forming the cone of an arrowhead like described here: http://www.the-exiles.org/Article%20makingarrow.htm |
| John W - Thursday, 03/16/06 23:24:13 EST |
|
John, Those are commonly called scrolling tongs. Most smiths make their own. There are a few on the market. See the OC scrolling tongs on the Blacksmiths Depot tongs page. Your 200 1/2 drill is not a 200 1/2 accoeding to the 1920 Champion catalog. The center lever mechanism is different than anything in the catalog and does not look original. It may have been a 200 when new but looks to have been modified. All bets are off as to how it works customized. |
| - guru - Thursday, 03/16/06 23:43:04 EST |
|
Hardies: Stephen, When making edge tools from mild steel you want the edge to be a steep angle, 45 degrees included or more. I have used the edge of a piece of square bar as a hot cut. This is a 90 degree angle "edge". Then when you cut you want the steel very hot. It also helps to grease the cutting edge. This burns off helping to cool the edge. Working fast helps but if that means working excited then SLOW DOWN and concentrate on what you are doning. Fast comes from practice and skill. Good hardies are made of steel sufficient to cut steel cold. Those used hot often loose their temper from heat and will ding if used cold. If the bar you were cutting was a piece of spring steel or other high carbon steel, at a red heat it will be as tough as a piece of mild steel cold. . . Hot cuts used under power hammers have a square edge and are pushed through the steel like a dull knife through butter. As a new smith we often want the hardy to be a miracle cutting tool. A hack saw with a good coarse blade is better. . . Hardies are commonly used for cutting small stock hot but can also be used cold if good steel. |
| - guru - Thursday, 03/16/06 23:54:22 EST |
|
John W. Those tongs would be custom made. I have an old pair that is similar to that described. I use them for holding pipe, because the round jaw, like a rod goes inside the pipe and the flat goes outside. The tongs in your article would have one tapered, conical jaw instead of a parallel sided rod-like jaw, as on mine. |
| Frank Turley - Friday, 03/17/06 00:33:11 EST |
|
I'm not too enamoured by that article on arrow making; beeswax to hold it on? Probably more expensive in medieval times than using pine rosin that will do a better job and still be easily removed using heat. I've used simple pine rosin/pitch to fasten the heads on my irish nails and been very happy with it. The original quarrel point I own shows a forge welded socket seam not a butted one. "Open" sockets did exist but the ease of forge welding WI plays into this. Also no discussion on how modern metal differed from medieval ones. I shape my sockets with a simple swage---I use the cutting step if necessary and true over a handy small bic that fits in the hardy hole. Generally I look for an indication of how it was done---folks making 10,000 of them a year probably have the moves down pat---rather than trying to reinvent the wheel. I forged an old set of sheet metal shears into a set of scrolling tongs, grungy old ones were $1 at the fleamarket and there is a dearth of needing them for their original purpose. Thomas |
| ThomasP - Friday, 03/17/06 00:56:03 EST |
|
"Authentic" Methods: We are also talking about a time when tools or the material to make them was very expsnsive and speiclty tools were rare unless absolutely needed. I've made thousands of scrolls and never needed or wanted scrolling tongs. I did not know they existed and did without very nicely. I've also rolled tapered tubes for a variety of purposes without them. Thomas's small bick would have been necessary to forge weld one which as he noted was very common on small wrought items that we would not dream of trying to forge weld in mild steel. When trying to recreate any old method simplier is better. The more ancient the method, the less tools you want to apply. |
| - guru - Friday, 03/17/06 07:58:46 EST |
|
Guru, Great Site!!!! My background: Community College in Machine Shop Tech., Caterpillar Tractor Machine Tool Operator; mills, drills, lathes. I've built and fired my first forge. Works great (I think?). Question: Lots of info on how to get the fire going. Whats the best way to put the dang thing out? |
| Butch - Friday, 03/17/06 08:56:45 EST |
|
Butch:If it has an electric blower, shut it off, pull all the unburned coal back away from the fire, sprinkle (not pour) a little water on it. Check it again before you leave the area. (No matter what ANYBODY tells you, don't pee on it)BOG |
| 3dogs - Friday, 03/17/06 09:45:51 EST |
|
So peeing on it is also not a good way to quench either I assume? Speaking of which, I just finished a knife blank forged from what I believe to be a bearing race rod. I did a nice briney quench, now I'm tempering in my oven. Any suggestions as to what temp I should be tempering at? What's the best heat treatment for this? |
| - Nippulini - Friday, 03/17/06 10:50:32 EST |
|
Butch, 3dogs covered it pretty well. Coal fires go out fairly easily when broken up. Left on their own they will burn up most of the remaining coal in the forge. If you are not in a hurry just break it up and let it cool. In an hour or so it should be cool enough to pick through by hand. If there are any hot spots then it may need a sprinkle of water. There are several reasons for not dumping lots of water on a coal fire. 1) Hot cast iron grates, fire pots and forge pans will crack. 2) Super heated steam blasting back from the fire can cause serious injuries. 3) Excess water leaches acid from the coal ash causing excessive corosion of the forge. When shutting off air it helps if there is an air gate. Hot coals will create their own draft through the tuyeer and blower. |
| - guru - Friday, 03/17/06 10:57:35 EST |
|
TGN, See our heat treating FAQ. It has heat treatment for 52100 which is a common bearing steel. Peeing on fires results in a permanent stench that only a skunk would like. |
| - guru - Friday, 03/17/06 10:59:53 EST |
|
FYI re: Champion 200 1/2-- the one in the picture John W. put up on the old woodworking tools website is exactly identical to what is depicted in my reprint of the January 1, 1909 Champion catalogue as the Champion 200 1/2. This one, however, is a bit different from my 200 1/2, which was patented in 1904. The auto-feed cam-driven lever on mine is on the left as you face the drill on a post. Same with the 200 1/2 in my catalog. (However, that auto-feed lever on the 200 in my catalog is on the right side. Big day at the factory: "George, J.W. wants to move the self-feed over to the other side." "Howcum?" "The new artistic director says it just seems unbalanced the other way.") The manual feed lever on mine is set off a bit on the right side. In the center of mine is a protuberant hoodgie which you can push up to return the feed back to the top of the main shaft. Mine appears to be all original. Looks as if it would be extremely difficult to modify the drive arrangements on these old beasties. |
| Miles Undercut - Friday, 03/17/06 11:26:39 EST |
|
a real novice question- at the end of the day- is it best to quench the coal forge fire with water- push unburned coal aside and let flame burn out ???? I am just starting out... |
| bob - Friday, 03/17/06 11:46:45 EST |
|
That 1909 Champion catalog reprint came from Centaur a few years ago. Thirty-six thrill-packed pages for a measly $6.50. A state-of-the-art grabber of a sales pitch on every page: "Just think of it! The drill bit is raised out of the work AS QUICKLY AS SNAPPING THE HAMMER OF A GUN." |
| Miles Undercut - Friday, 03/17/06 11:55:34 EST |
|
bob, I would not suggest quenching with water IF you have been working at your forge all day long. It may cause the firepot (if it is cast iron) to crack. You don;t want that. What I do is to push all the burning coal into the hood so the smoke will be able to travel up the chimney. This moves all the burning coke away from any possible draft coming up through the tuyere. I have found that the fire generally has gone out in about a half hour. My forge is all steel with a steel hood, so pushing the fire into the hood area still keeps things safe. Hope this helps, |
| Paul Bilodeau - Friday, 03/17/06 11:56:47 EST |
|
There is one tool common to previous times that we almost never seem to use nowdays---*HELP*! A one person forge was pretty much an oxymoron in previous times. Capital items were expensive but labour was a lot cheaper especially since you could work the kids! Thomas |
| Thomas P - Friday, 03/17/06 12:33:23 EST |
|
I'm livin up in nw montana, aka logging country and see tons of what i think are planer blades at the scrapyard. 3-4' long,3/4" thick sometimes an alloy,sometimes rusty. any idea what type of steel they are? merci jamie |
| - jamie - Friday, 03/17/06 13:28:11 EST |
|
I have read quite a lot about the Clay Spencer Tire-Hammer built as part of various workshops. The reviews are great, the size is ideal for my developing shop and the price to build is particularly appealing. Unfortunately, I am not in a position to attend any of the workshops. Has progress been made in forming plans and building advice for the hammer? Do you know of anyone who has built one and might have plans to their version? I'm eager to start the process; so, any instruction, advice, or better yet - plans are much appreciated. |
| Larry Moyer - Friday, 03/17/06 14:28:17 EST |
|
Does anyone know of a good grease for relubeing the gears in a 4&1/2 inch grinder? Any info would be greatly app. |
| stroker - Friday, 03/17/06 15:21:51 EST |
|
Larry, we are hoping to have a hammer build in Tallahassee, Fl May 26-7-8. Plans may be available by then. The workshop is to be at Bettenger Welding in Tallahassee. His e-mail is bmchild2@aol.com if anyone is interested. Cost shouldn't be much over $1000. Stroker, go to your local industrial supply (not Walmt)and tell them what you want the lubricant to do or go to the guy that rebuilds the things and he'll probably give you enough to do the job. (Take a plastic baggy). |
| Ron Childers - Friday, 03/17/06 16:08:10 EST |
|
stroker, I have a 4" grinder and all I have used is high temperature wheel bearing grease. I greased mine when I got it 20+ years ago and it still runs fine. Just make sure that you DON'T completely fill the gear housing as things (grease, gears, etc.) will need to expand as they heat up if you are working hard and for a long time. |
| Paul Bilodeau - Friday, 03/17/06 16:53:46 EST |
|
I�m building a 2� x72� belt sander and tried to find the best belt speed from the postings a few months or so back and got lost. What was that speed again. |
| Mani De Mers - Friday, 03/17/06 19:20:54 EST |
|
Stoker, I would try the high temp whel bearing grease suggested for disc brake equipped cars, or what I used was Dow Corning GN assembly paste. It is a 70% moly grease that is the cats meow for these types of things. I was able to get a pound from the old shop, but they used to sell it in a toothpaste tube size as well as a pound brush un cap can. Hagemeyer has it. Try Mike at 502-961-5930. Tell him to advertise on Anvilfire |
| - ptree - Friday, 03/17/06 19:58:53 EST |
|
Stoker, I use Dow Corning GN Assembly paste. This is a 70% moly grease that is the cats meow for these types of things. I also use it in my wormgear box on my little 4 x 6 bandsaws. I stir a tablespoon of motor oil into about 3 tablespoons of the paste for the gear box on the saws, use it straight up for the grinders. Mike at hagemeyer at 502-961-5930 has it in 1# cans with a brush cap. |
| ptree - Friday, 03/17/06 20:02:45 EST |
|
Sorry about the double post. I thought the first was lost. |
| ptree - Friday, 03/17/06 22:24:10 EST |
|
Hi - I am learning to make copper bowls and can do the raising part, but when it starts to get curved in (like a teapot shape) I can't find a way to smooth it or planish it. The "sivlersmith" book I have talks about and has pictures of an "extension arm". I have had no luck searching for a source of these (grobet doesn't have them that I can find). Any idea either where I can find one? I'm surprised that these are not available, is there another way to do this? thank you for your help Terry |
| Terry Braun - Saturday, 03/18/06 11:16:33 EST |
|
Terry; That's where the blacksmithing comes in. Remember, all those old guys in India and Syria never even heard of Grobet. |
| 3dogs - Saturday, 03/18/06 13:18:56 EST |
|
What you are looking for is a stake- and there are many different kinds and styles out there, commercially available, or you could make your own. Pieh tool and Blacksmith Depot, both advertisers here, carry some stakes. Others are available from Rio Grande, LacyWest, and Shor International- google em all, and you will see tons of different stakes. Shor in particular has a great web page showing lots of long arm stakes for raising vessels. Many are now discontinued, but once you see what they look like, you can watch for em on ebay, or make your own. You might also want to take a look at "Metal techniques for craftsmen", by Oppi Untracht- it has a section on this kind of work. |
| ries - Saturday, 03/18/06 15:20:09 EST |
|
Terry: I know little about the work you are doing, but I have admired that kind of work from afar. One friend from long ago who made silver hollowware called the extra long, snightly flexible stake with an ofset head, for working the upper pert of recurved vessels a "snarling iron." I don't know if tbis is the official name or is just what he called them. He used it by striking the "snarling iron" just outside the mouth of the vessel. The "snarling iron" then sprang UP to hit the inside of the vessel. I once made one to use in removing a dent from a narrow-mouthed vessel brought to me for repair. Under the circumstances, on insistence of the owner, after my protestestations of incompetence, I could not refuse to try. God helped me and the job was successful. |
| - John Odom - Saturday, 03/18/06 15:46:44 EST |
|
Tyler Murch: Check at all of the scrapyards in your area for just big old chucks of flat metal. Locally scrap iron is $.25 lb. You can also check at places which stock and cut metal for machine shops and such. They have have large end drops. However, there you will likely have to pay full retail. |
| - Ken Scharabok - Saturday, 03/18/06 19:14:35 EST |
|
ATTN: all who own or are knowledgeable on the repairs of lathes. I am a meber of the new jersey Blacksmithing asoc. and have a friend who is willing to sell me one of his old lathes. Now it's nothing great but I don't even know how to work one so I just want one to lkearn on for now. The tailstock is in good condishion but the rest of the lathe is covered in rust(how much and how deep I have yet to find out). So my question is whats the best way to go about restoring this old lathe so thats it's in usable condision? also and hints on keeping it from rusting again(my garage leaks so i'm hopeing to prop it up on some wood covered with plastic or something) thanks for all the help. John |
| John Scancella - Saturday, 03/18/06 21:29:17 EST |
|
Lathe Ways and rust: John, I scrape dry rust off machine ways with a scraper or wood chisle then go after the remaining rust with scotchbrite and WD-40 then fine 320 grit wet-or-dry sandpaper and WD-40 or kerosene. Then clean to remove all grit then oil and move the cariage or table and work where I did not have access until the entire surface looks new. Done properly you should still be able to see the original hand scraped surfaces if they existed. It is a time consuming and painstakeing job. When you are done you will know a lot about which parts do what on ethe machine. You can also use naval jelly and water but I find that this is only good for non-precision surfaces and still leaves LOTS of hand work to complete. |
| - guru - Saturday, 03/18/06 22:03:42 EST |
|
Snarling Irons: Yes, this is the proper name for long spring arm planishing tools. They are used to strike from the inside when you cannot get a hammer to the back of a heavy dent OR a stake on new work where you would work around the low spot while it is supported on the stake. These are used heavily in the musical instrument repair business to know dents out of brass instruments in places that you would think impossible to get to. For raising from scratch you use a saddle arm stake OR an extension arm with small shanked stakes similar to "mushroom" stakes. The tool holding stake arms were common in both the industrial sheet metal and silversmithing world 50 years ago but are no longer made. Today if you need such tools you search for antique tools OR you make your own. They are rare enough that it would be cheaper to buy tools and learn blacksmithing well enough to make your own. OR ask one of the many folks here to make them for you. That said, In 2000 at the ABANA conference in Flagstaff, AZ there was a Mexican copper working family making large copper vessels. They had two stakes made from torched off truck axel. One was bent and set into a stump. Its end was smooth and rounded but you could still see torch marks.. . Cheap simple tool AND it was a primary tool. In autobody work AND raising soft metal items you hold a heel dolly in you hand behind or inside the work and strike against that. These dollies are available from auto tool suppliers. Two that I have came from Sears many years ago. They are not a difficult tool to make but take lots of grinding or filing. A belt grinder is an ideal tool for finishing these. |
| - guru - Saturday, 03/18/06 22:22:20 EST |
|
Possible Planer Blades: If these ARE planer blades they are probably High Speed Steel (HSS). It is very good steel but very hard, slightly brittle and nearly impossible to properly heat treat by common methods. It is an air hardening steel in thin sections and brittle like glass after forging thin and alowing to air cool. It is not recommended for amatuers. |
| - guru - Saturday, 03/18/06 22:27:23 EST |
|
Contenti Co. at www.contenti.com, 800-343-3364 has scads of stakes and a 4-inch, 21-pound swage block to set them in. As with most jewelry and silver-smithing tools, they are not inexpensive. The blowhorn stake, for example, is $589 in the 1999 catalog, the little block, $342. Another big jewelery tool outfit, Metalliferous, in mid-town NYC, had a slew of them a few years ago, second hand, and I got the impression they get them in frequently. |
| Miles Undercut - Saturday, 03/18/06 22:51:54 EST |
|
I�m building a 2� x72� belt sander and tried to find the best belt speed from the postings a few months or so back and got lost. What was that speed again |
| Mani De Mers - Saturday, 03/18/06 22:59:24 EST |
|
John and Miles, My question actually goes further how do I engage the direct drive mechanism do-hicky? That is what has me stumped.I am going to have to forge a arm and prawl becaous mine is missing.The center lever on my 200 1/2 looks kinda like a small round handle that sticks out about 2 to 3 inches. I appreciate your responses. I should have been more clear in the fisrt post, I do have another smaller Champion Forge and Blower Drill Press and already know about the arm and prawl,but thanks for the detailed info.Also John thank you very much for the pictures and the link!I look forward to hearing more!Thank you ! |
| Bobby Lancaster - Saturday, 03/18/06 23:16:18 EST |
|
Alright Ken thanks. Also I thought of keeping an eye out for a large old anvil with a broken off horn or something. |
| - Tyler Murch - Saturday, 03/18/06 23:16:27 EST |
|
Bobby: on mine there are two horizontal wheels.One above the casting that the feed screw goes through and one below. The casting it is marked open and close with arrows. By turning the lower wheel about 1/4 turn left or right you engage a sort of half nut that frees the screw to be moved by the feed handle or closes to have it moved by the pawl and wheel above. You noticed that mine has a 16 inch flat belt pulley on the left side as well as a crank. The feed handle was broken and I re-welded it. It is about 18 inches long. The excursion of the feed arm and thus the movement of the pawl is governed by a set screw that rides on the eccentric cam that is on the horizontal drive shaft, the one between the crank and the pulley. There are two speeds of gears driving the shaft. Moving a gear cluster up or down changes the drive ratio. Is that confusing enough? |
| John W - Saturday, 03/18/06 23:29:07 EST |
|
Mani: my home built has a 1700 rpm 1/2 hp motor directly driving a 6inch wheel. The wheel circumference is about 1 1/2 feet so the speed is around 2250 fps. (if pi were 3 instead of , well you know...) I think that is about right. |
| John W - Saturday, 03/18/06 23:34:23 EST |
|
Thanks John W. The next purchase is the pulleys and that info will really help. |
| Mani De Mers - Saturday, 03/18/06 23:42:30 EST |
|
I built a 2x72 inch belt grinder using a 1 HP 3500RPM motor. Mine is relatively simple...direct drive, and only one speed. The drive wheel is 4 inches in diameter. The belt speed is 4 inch dia x 3.14 x 3500 rpm / 12 inches per foot or 3660 surface feet per minute. I use the 80 grit blue zirconia belts. They seem to hold up better than the brown ones. It works real well on steel, but if I use it on wood, the belt seems to clog quickly. For steel, I seldomly use my bench grinder anymore. I think 3000-6000 sf/m would be good. I don't know how it would perform at a slower speed. For comparison, a 6 inch bench grinder running at 3500 rpm would have about 5500 sf/m. After you get it running you will wonder how you got along without one. |
| DonS - Sunday, 03/19/06 00:41:52 EST |
|
Bobby Lancaster-- Just studying it, my hunch (I've not set this thing up)is that the autofeed arm is always going back and forth against the cam on the drive shaft. To engage it you flip the pawl over. The small round handle you mention releases the clutch on the vertical main shaft and allows you to return the bit back up to its topmost position for the next drilling job. There is a separate lever on the right of mine that serves as the manual feed. |
| Miles Undercut - Sunday, 03/19/06 01:18:33 EST |
|
Guru, I have a dear friend that is on SSI and has pracitally nothing. He heats his house with a wood stove and that's it. The wood stove that he has, has some cracked and missing firebricks for the lining. The thing is, is that not the WHOLE firebricks are gone. Some have half still in the stove and he doesn't want to tear the stove apart and replace the brick, he just wants to get a type of firebrick "clay" of sorts to patch it in. I was wondering what would be best for this. Would it be ITC-100, or stuff called "furnace cement", and where I could buy this. Please, I need your info. Thanks much. Hillbillysmith. |
| Hillbillysmith - Sunday, 03/19/06 02:18:29 EST |
|
Were can I locate and by borium at a reasonable price or can I manufacture it my self cheeper ? I am a farrier in colorado and some of my customers need it for traction in the ica and snow and I am looking for a better sorce for the product |
| David - Sunday, 03/19/06 02:59:13 EST |
|
I've been wondering lately "just how difficult" it would be to make some simple throwing knives when I googled across another forum on doing knife blades, which in turn led here. I'm surprised to see with some basic tools and a lot of tinkering people can do some very interesting things with steel. Having no knowledge other than what I'm gaining here or equipment -- could I get some estimates on the following: What I would spend to set up a basic blacksmithing shop, at least for major parts (e.g. an anvil ; do I need a raised metal bed for my forge?)? How much time and resources I would have to devote to learning the basics of this art before beginning a first project? I realize the answer here can vary greatly, but honestly - how long have other amatures spent before getting to their first successful project? Any answers are greatly appreciated. Regards, Wes Clark |
| - Wes Clark - Sunday, 03/19/06 03:41:43 EST |
|
I've been wondering lately "just how difficult" it would be to make some simple throwing knives when I googled across another forum on doing knife blades, which in turn led here. I'm surprised to see with some basic tools and a lot of tinkering people can do some very interesting things with steel. Having no knowledge other than what I'm gaining here or equipment -- could I get some estimates on the following: What I would spend to set up a basic blacksmithing shop, at least for major parts (e.g. an anvil ; do I need a raised metal bed for my forge?)? How much time and resources I would have to devote to learning the basics of this art before beginning a first project? I realize the answer here can vary greatly, but honestly - how long have other amatures spent before getting to their first successful project? Any answers are greatly appreciated. Regards, Wes Clark |
| - Wes Clark - Sunday, 03/19/06 03:41:59 EST |
|
I've been wondering lately "just how difficult" it would be to make some simple throwing knives when I googled across another forum on doing knife blades, which in turn led here. I'm surprised to see with some basic tools and a lot of tinkering people can do some very interesting things with steel. Having no knowledge other than what I'm gaining here or equipment -- could I get some estimates on the following: What I would spend to set up a basic blacksmithing shop, at least for major parts (e.g. an anvil ; do I need a raised metal bed for my forge?)? How much time and resources I would have to devote to learning the basics of this art before beginning a first project? I realize the answer here can vary greatly, but honestly - how long have other amatures spent before getting to their first successful project? Any answers are greatly appreciated. Regards, Wes Clark |
| - Wes Clark - Sunday, 03/19/06 03:42:10 EST |
|
Hillbillysmith: I suspect what you are thinking of is called refractory cement. An area hardward store may be able to special order it for you and it is on eBay as listing #8269022807 at the moment from seller industrialfirebrick. I purchase from them on a somewhat regular basis and am very pleased with service. David: Borium and Carbraze are sold by Centaurforge.com. However, I suspect it is going to be expensive anywhere you locate it. |
| Ken Scharabok - Sunday, 03/19/06 04:05:07 EST |
|
Dave, I don't know what you consider a reasonable price but any of the big farrier supply houses will carry borium and drilltec. I usually get stuff from Centaur Forge or Anvil Brand but there are lots of other suppliers. I don't know anything about how you would go about making it but given that time under a horse usually pays far better than shop time or anything else you do, I can't see it being more economical in the long run. I just buy it and charge for it...the labor/time being the more costly component. |
| Mike Ferrara - Sunday, 03/19/06 05:27:43 EST |
|
Wes, I fooled around on and off with hare-brained schemes for a couple of years. But once I got serious about building a gas forge, asking around for the other things I needed to buy, and, most importantly, cleaning out my garage to have somwhere to put them, I think I was forging in a couple of weeks. You don't play rugby by any chance, do you? |
| Mike B - Sunday, 03/19/06 06:55:28 EST |
|
Borium David, This is dround up carbide cutter bit material. You can get the used dull inserts easily enough from production machine shops. However, grinding them up is a REAL trick. They are brittle and break but inly under great force. The material is second only to diamond in hardness and will chew up machinery. The last machine I saw for processing this was a big old blacksmiths power hammer with a hopper built around the lower die. Carbide dust had seriously damaged the ram that hammered the material. As noted, just by the stuff from a farriers supplier. |
| - guru - Sunday, 03/19/06 08:16:58 EST |
|
Hey how's it going, I'm an apprentice farrier over the water in Scotland, now I'm sitting my diploma in 4 months time and I'm looking to make my specimine shoes, one of which is the patten bar shoe, would appreciate it if you could give me an idea where to start much appreciation, Graeme |
| Graeme - Sunday, 03/19/06 08:32:18 EST |
|
Refractory Repair: Hillbillysmith, When there is a significant volume to repair they use ramable refractory cement. It is not cheap and does not come in small quantities. Using ITC products you would use ITC-100 for primer and ITC-200 to fill. In this case I would use the ITC-200 mixed with some crushed light-weight refractory brick (refractory grog). Cost would probably be the same as buying a larger volume of ramable cement and the repair more durable. However, durability on these things depends largely on the condition of what the material is applied over. The time to do this is when you can let the material air dry for as long as possible. Note that we no longer list some of the ITC products in pints. Last summer ITC announced that it was going to stop manufacturing pints. However, they reversed their descision on several products. I will have to check again to see it any of the others are going to be in pints again. |
| - guru - Sunday, 03/19/06 08:32:43 EST |
|
Guru, How much does this "ramble refractory cement"? Where can I get it and in what size quantity is it sold? If he uses the ITC-200, do you need ITC-100 to go on the inside of the stove itself before the ITC-200, after the ITC-200, or don't I have to use the ITC-100 at all if he uses the -200? How much is the ITC-200~100? since he can't afford anything, I am prabaly going to buy some and give it to him, plus I want some for an expariment. Thanks. |
| Hillbillysmith - Sunday, 03/19/06 09:54:40 EST |
|
Hillbillysmith: Where are you located? ITC products are the 'top of the line" and worthwhile in industrial/commercial applications, but are overkill for a home heating stove. See if there is an industrial refractory dealer in a nearby city. Talk to him and tell him what you want to do. He/they will probably GIVE you enough material from broken bags/job leftovers. I have rebuilt furnaces/forges at several schools with materials that were donated that way. |
| - John Odom - Sunday, 03/19/06 10:04:05 EST |
|
Miles, Sorry I though I had said something about thay. To use the auto feed: flip the pawl over forward (I made mine out of a tire tool end) to engage the searations on the top wheel. Make pull the lever down to place the drill bit on the work. Turn the lock wheel to engage the half-nut arrangement and start cranking. YOU may want to turn the searated wheel a few times to tighten up the drill bit against the work and save some time and you may need to adjust the screw that rides on the cam. If it isnt clear I will go out and try to make some detailed pictures of the pieces. |
| John W - Sunday, 03/19/06 10:08:04 EST |
|
Wes Clark, Starting in blacksmithing on the cheap is a function of how good a scrounger you are. Buy a complete shop all new, and a $100,000 comes to mind. Of course thats the building, a lathe, mill, powerhammer and many very nice to have tools. Our forebears often had nothing much more than an open air shop with a roof, and you can do as I did when I started, and forge in good weather in the open. An anvil is a large chunck of something dense and hopefully hard. Don't get hung up on the idea that it has to look like an "anvil". A 4' chunk of railroad rail, set on end into the ground makes a fair anvil. A 5 of 6" diameter bar set the same way will also work. Hammers from junk shops and flea markets can be had for a dollar or so. If you can weld, or know someone who can the infamous brake drum forge can be cheap. Can't do the coal thing? A homemade propane forge can be done cheap, and has you forging quick without the learning curve to tend the coal fire. A simple project to learn hammer control and make something usefull is the simple S hook. Many make a usable S hook their first time out. Tell us what part of the world you are in and we can make some more detailed suggestions. The best route for a beginner is to find the local blacksmiths group and go to the meetings. Many have open forge time at the meetings and have experts to guide. Good luck |
| ptree - Sunday, 03/19/06 10:45:46 EST |
|
Graeme, The patten bar shoe "The principles of Horshoeing 2" by Doug Butler gives step by step forging instructions with pictures. I can't give any advice based on experience because I've never had to make one but it's just a bar shoe with a vertical extension. In brief and because you probably don't have the book... Dr. Buttler recommends measuring the shoe as usual but adding an inch to each heel, twice the heel hight and the bar width. The stock length used will no doubt differ a bit depending on how you forge and whether or not you crease it. Turn it, punch it, bend the heels down, scarf them, turn them in and weld, rocker the toe. If you can already make a nice bar shoe, I don't think this shoe will present much of a problem. Good luck. |
| Mike Ferrara - Sunday, 03/19/06 10:51:24 EST |
|
Refractory Products: As John Odom and Ken pointed out there are cheaper products than the ITC stuff. These are quite specialized for the metal working and ceramics industry as well as some other special uses. Yes you need to ITC-100 to make repairs with the other ITC products. It is 36.50/pint and thr ITC-200 repair compound is $82.50/half gallon. So you are looking at 119.00 plus shiping. Also as noted everything depends on your location. In Virginia the nearset supplier of refractory products for me was a 120 mile round trip. As an industrial supplier they sold only full containers and broken containers were rare. They WOULD sell to the public but do not ship to individuals or take credit cards. This is not unusual for industrial suppliers. The last time I bought castable refractory from them it was $40 for a 50/lb bag. Note that ramable is not the same and is usualy premixed. It is designed for repairing worn refractory brick in place. But it has a short shelf life and is more expensive. It is not unusual for there NOT to be a particular type of commerical supplier in your neighborhood or even your state. BUT there might be several in your area. Get out the yellow pages and look for foundry and refractory. |
| - guru - Sunday, 03/19/06 11:05:57 EST |
|
Wes Clark. May I recommend "Basic Blacksmithing an introduction to toolmaking with locally available materials" by David Harries and Bernhard Heer Isbn 1 85339 195 6. It is a concise book for use in third world countries. Since I did not have a goat to skin I did up grade my first bellows to an electric blower. BOG Good basic information starting with simple tools from scrap. We all need more tools. |
| habu - Sunday, 03/19/06 11:13:45 EST |
|
David, A po' boy approach to the borium solution is to break up cast iron into tiny nuggets (wearing eye protection) and torch braze them where the shoe receives the most wear. Of course, cast iron is not as hard as tungsten carbide (borium), but it serves for a while. Besides the toe and heels, I used to apply a little borium just inside the nail crease to make the crease and nail heads last a bit longer. Graeme, I can't add much to what Mike has said, except to say that in the "olden days" before the advent of certification specimen shoes in the U.S., I used to make a flat, bar shoe and braze a jar calk on each heel area, in the line of stride. This seemed to give a gentle lift, unless the horse was in soft going. |
| Frank Turley - Sunday, 03/19/06 11:20:46 EST |
|
John W-- Thanks, but I'm not the one asking about how the drill works. Man wanted to know how to disengage the autofeed is all. FYI there are two differen Champions called 200 1/2 and they have two completely different lever set-ups, autofeed lever positions and speed change arrangements. Hillbillysmith-- To patch the stove lining: go to the local hardware store or block yard and get a sack of Sereset, which is the stuff masons mix to make the mortar for use in fireplaces. Beware: it shrinks and crazes quite a bit. May need two slatherings or more before you get it solid. |
| Miles Undercut - Sunday, 03/19/06 11:39:06 EST |
|
Wes, I have a lot of friends who are in the entertainment business. Throwing knives are not usually forged, they are heavy stock sheet metal cut to shape, then further finished with stock removal method. Balance is key, shapes are usually mathematically calculated before the pattern is laid out. A buddy of mine in N.Y. named Throwdini sent me an original pattern from Harry Houdini's throwing knives. They are about 18" long!! There really is no need to learn blackmsithing in order to make throwing knives, although a serious genuine interest and knowledge in metalworking is recommended. Good luck! TGN |
| Nippulini - Sunday, 03/19/06 12:30:00 EST |
|
Costs of Getting Started: Wes, See what Ptree so elegantly had to say above. Most throwing knives are made from flat stock, sawed out with a band saw and then the edges ground at a steep angle leaving a relatively dull edge. Some are shaped more but most are nearly flat. The point does the work and the shape is designed so the are properly balanced and to be heavy so they stick. You could make these with a little more effort using a hack saw or a home made frame saw and a file (or two). Cost, about $50 (saw blades and files are NOT cheap). To do it efficiently without getting a lot of blisters about $1,000 for a decent belt grinder and you sub out the cutting to a shop that does laser or waterjet cutting OR you can spend another $1000 on a used band saw or $1500 on a small plasma torch outfit. To setup in blacksmithing can be done on the primitive level for almost nothing if you are a scrounger and are serious as well as hard headed. However, as noted, files, blades and abrasives are not cheap or free. You can work around them, even MAKE them but it is not very cost effective. Used tools also seem cheap but if you spend every weekend for a year driving around looking for them just what did all the wear and tear on you vehiucal cost? To buy what you need new without purchasing junk and assuming you have a job to backup your hobby. Suppliers picked semi randomly, you could do all your shopping at one place if you time it right. A quick start list. $550 175 pound Euroanvil - Blacksmith Supply $575 NC Whisper Daddy Forge (gas) - Blacksmith Supply $110 2.4# Hofi Hammer - BigBLU Hammer $ 30 (1) pair OC Chainmaker Tongs - Blacksmiths Depot $ 75 (2) pair OC V box tongs (1/2" - 1") - Blacksmiths Depot $550 6" leg vise - Blacksmiths Depot $ 28 3 piece safety glasses - anvilfire $ 15 Peddinghaus slitting chisle - Pieh Tool Co $ 37 Hardy - Pieh Tool Co At about $2000 you have the basics but also need standard shop tools. Belt grinder, hacksaw, files, slack tub, large and small ball pien hammers, pliers (not to mention mechanics tools to assemble and maintain much of the above). Add another $1000 minimum. On the other hand you may already have much of this. Once you have all the above you will have all the tools needed for forging but that is about all. You will also want an arc welder, drill press, cutoff saw or chop saw. Add another $1000 to $2000. Now you can efficiently cut hack forge weld and grind making various projects as well as many of your own tools. Total cost about $4000-$5000 not including shipping, handling, a place or setup. For about the same cost you can include a coal forge. THEN, there is the treadle hammer flypress AND power hammer. . . . Add about $10,000 and that does not include the lathe and milling machine to make tools and dies as well machinery you cannot buy like a McDonald Rolling Mill. You will find that many of us in this business are tool junkies. And you will find that you can spent as little as you want or ALL your money on tools. My question to folks that ask how much it costs to get started in this very rewarding hobby OR profession is, "How much did you spend on electronc gear the last couple years including the PC you are reading this message with?" Getting started in blacksmithing costs about that much. . . |
| - guru - Sunday, 03/19/06 13:04:02 EST |
|
John W-- Come to think of it, didn't we have a discussion here some time back re: what holds the gears in position on the 200 1/2? Seems I recall looking at the pix of your resoration then and reporting to you how mine works. It's probably somewhere in Jock's fabulous archives. |
| Miles Undercut - Sunday, 03/19/06 13:11:51 EST |
|
Hillbillysmith, I've gotten refractory cement at Home Depot and also at my local hardware store. They come in small 8-oz tubs up to 1 pint. They probably come larger, but not at these stores. I think I spent $6 for the 8-oz container. If your store has this stuff, it would be in the wood stove area, along with the flue pipes and fire tools. |
| - Marc - Sunday, 03/19/06 14:47:18 EST |
|
Time or Money---I once put together a "starter" kit Forge, anvil, hammer, tongs---and it ran about $25 and a bunch of time from someone who has been called a rather talented scrounger---me The forge was built from a brakedrum found on the side of the road set into a metal frame from an old bench stool found discarded. The blower was an ancient small vacuume cleaner bought for $3 at the fleamarket then plumbed with an radiator hose and other plumbing parts from the fleamarket and a rheostat to moderate the blower (fleamarket) The anvil was a broken knuckle off a train car coupler and a couple of hammers and pliers for tongs---fleamarket. I used this forge for billet welding till I gave it away. I will say that already knowing what works in building a forge helps a lot---though the first one I ever built worked and worked well with no exposure to smithing save Weyger's book since watching them at Williamsburg 20 years previous to building it. My PC? $125 inclusive several years ago---what other electronics? (Linux is free and zero maintenaince costs...) Thomas |
| Thomas Powers - Sunday, 03/19/06 18:02:38 EST |
|
DonS Perfect! I�m using a 1.5 hp 3500 rpm motor also. I haven�t built it yet and already don�t know how I ever got along without it. |
| Mani De Mers - Sunday, 03/19/06 20:19:30 EST |
|
John W-- By cracky, we did talk about your 200 1/2, here, in June of last year. I've looked again at the pix of your drill press, and it is indeed a bit different from the one I have, having as it does the long central lever. Mine has a stubby little handle to release the clutch and a separate longer lever on the right to work the manual feed. |
| Miles Undercut - Sunday, 03/19/06 21:29:28 EST |
|
Thankyou for all the responces to my question about boruim and drill tech, the local stores are now charging $14.00 for a unfluxed 12 inch rod and $17.00 a fluxed rod so I am trying to find out if there are any sorces cheeper out there to aquire it . I knew that it was made out of carbide but did not know that only diamond was harder than the carbide . I will go to Centaurforge.com and check out thier supplies . I am just trying to find the best place to acciure it . Know that I found out how hard it is to break up the chips into proper size I will just purchace it from the store and pass the cost on . I just hate to see how expencive all the supplies are getting for the farrier buisness is getting . Note that it is rising fuel prices and in the case of the steel because we ship it over seas so it is not here locally . thanks againt for the info and if you have any more suggestion and info I will be glad to here about it |
| David - Sunday, 03/19/06 21:55:29 EST |
|
Hello. i was just wanting to no how to make a medival round shield. |
| John - Sunday, 03/19/06 22:01:29 EST |
|
Graeme , Just a note on jar calks , I have horse that has knee conformation that causes interference and the books recomended jar calks / jumping calks but when I went to find them at the local shoe store they did not have any or even any high carbon steel to use for them that I could weld on . So needless to say I wond up making some calks out of one of my old rasps , do you know of any manufactured jar calks or all need to be hand made? |
| David - Sunday, 03/19/06 22:05:07 EST |
|
David, First, we must define out terms. To me, a jar calk is made out of high carbon or spring steel, and they are not extremely "tall" compared to, say, an old fashioned toe calk. They are brazed on; I use a snippet of copper wire for the solder and borax for the flux. I have always made my own jar calks. You forge a sharp little nib on the calk to drive into the yellow hot shoe, and that holds it in place while you braze. Another method is to use a pair of "brazing tongs" and by their use, you can eliminate the nib. One jaw is flat and the other is bowed, concave side inward. The thickened end of the concave side rests on the calk while the braze is taking place. The tong must be fit properly, the flat jaw on the foot surface of the shoe and the end of the bowed jaw holding tightly onto the calk. High carbon steel cannot withstand a high welding temperature, a sparking heat. The mild steel shoe can withstand the high temperature, so it is easier to braze the jar calk than to weld it. The old fashioned, manufactured calks,like a draft horse toe calk, had a nib built in as part of the manufacturing process. I think they were probably mild steel, so forge welding could be done. As to the interference, is the horse toe wide? Sometimes, a horse will appear to break over on the lateral toe, but in flight, the foot will "scoop to the inside", trying to make up for the bad conformation. Trimming to lower the lateral toe area of both feet might help. A diagonal rolled toe might be in order. Try a moderate roll to the medial toe area, to change the breakover. Don't do anything radical if the horse has a full mouth and the bones are fairly well set; just use moderate changes. The above are just suggestions, since I have not seen the animal. My old mentor said that if you can't change the flight of the foot, then you "remove the offending portion". This means if the horse is brushing, you rasp off the hoof wall that is doing the brushing. "What helps one horse will be the undoing of another". |
| Frank Turley - Sunday, 03/19/06 22:50:46 EST |
|
Shield: John, First, from what country (continent) and exactly what century? There are others that know much more about armour than I but I believe these are mostly wood with an iron center boss and rienforced edges. I understand that many were laminated wood (like plywood) although many were carved from the solid. When laminated the thin boards would be curved over a form (probably steamed) then glued. Relatively narrow boards would be used but otherwise the grain was turned at different angles like modern plywood which makes it much stronger. Hardwood plywoods like maple are unbelievably strong. Just making the reproduction bosses is an art. Norman bosses had a center tit or knob that I believe was a result of the manufacturing process and a way the hold the piece while working it. My theory is that many armour parts were made from lumps of iron rather than plate. Some shapes are easier to make by bending a bar then flattening it than to cut from plate. It is also much more efficient use of material where cutting plate produces much waste. The classic Norman shield boss can be made from a short lump of round par that is first fitted to ring tongs, formed into a cone then spread and hollowed with a large pointed punch. Once hollowed it could easily be worked over the horn of an anvil or on a special bick until nearly flat as it thins. This will produce the round shape with thicker center with much less labor and little material loss. But this is just my theory. The same result can be gotten by the more traditional raising of plate but to produce the center knob would take a greate deal of raising. Solving such problems is the work of the historical reinactor and recreator. Most recreational reinactors make shields out of flat plywood and rivet or bolt on plain bosses and grips. Some suppliers sell curve foirmed plywood blanks for the purpose. The best way to learn is to look at how some SCA armour is made. |
| - guru - Monday, 03/20/06 00:21:19 EST |
|
David: You were provided several sources, so check them all out. One not listed as a possible source is Mankel Blacksmith Shop, Ken Mankel, PO Box 35, 7835 Cannonsburg Road, Cannonsburg, MI 49317 Phone: 616/874-6955 Fax: 616/874-4053. If they have a website I cannot find it. Anvil magazine should also have a fair number of farrier suppliers listed in it. |
| Ken Scharabok - Monday, 03/20/06 06:33:48 EST |
|
Jar caulks... David, there are lots of calks and studs available commercially. Again, check suppliers like centaur. I usually make the jar/jumping calks you refer too. I often just make them from mild steel and I keep some scraps in the truck just for things like that. High carbon steel of all flavors is available from suppliers like Admiral Steel. Keep in mind that unless you use an air hardening steel it may not be hard by the time you braze or weld it on unless you quench it while hot enough to reharden. Also, if you purchase new high carbon steel it's sometimes delivered anealed. |
| Mike Ferrara - Monday, 03/20/06 07:04:28 EST |
|
Shield, as the Guru has pointed out you are talking about nearly 1000 years and locations from Byzantium to Iceland. Round center grip wooden shields are often seen in northern Europe around the early middle ages, Small metal bucklers are found around a lot of europe during the renaissance and to just blow your mind look up a picuter of the Medusa Shield done in the Negroli shop in the Italian renaissance. May I commend the armour making forums at armourarchive.com to you---and not the english spelling of armour. Thomas |
| Thomas P - Monday, 03/20/06 11:17:06 EST |
|
Just for grins yesterday, I welded up a billet in my gasser out of a piece of timing chain. Should have an interesting pattern in the knife blanks. Any suggestions for hardening and tempering. I have enough billet to do 4 blades but I don't want to do the trial and error phase. I would like to end up with atleast 1 blade to give to the "engine destroyer" as a reminder to CHECK THE OIL on occaision. Help please. |
| brian robertson - Monday, 03/20/06 12:32:49 EST |
|
Brian, A test piece does not have to be very big. We have a FAQ on roller chain Damascus but it has little on heat treating. The steels listed are not very high carbon and should water quench. The draw should be the minimum for most steels (about 450F) in a thick blade, more in a thin blade. |
| - guru - Monday, 03/20/06 13:49:35 EST |
|
Brian: The Guru has it right. Timing chain won't get very hard, but it is brittle. Warm water quench, and personally I'd try tempering starting at 350F and see what that does before moving up in 25 degree increments. Hold at tempering heat for 2 hours each time for best results. |
| Alan-L - Monday, 03/20/06 14:23:55 EST |
|
SORRY ABOUT THAT GURU, I'M GOING TO BUILD A COAL FORGE. |
| ROBERT - Monday, 03/20/06 14:36:09 EST |
|
does anyone know of any stories concerning the smith who made the nails for the crucifixion? |
| daniel piotte - Monday, 03/20/06 15:29:42 EST |
|
Coal Forge Parts Sizes: Although you can build different size forges I have never seen a chart of tuyeer to firepot dimensions. All the parts are made of steel, cast iron or ductile iron. DIY forges means steel. The firepot can be 1/8" to 5/8" thick . The thicker the more durable. The rest of the parts are typicaly steel pipe. Do not use steel flex it rusts out too fast. Look at our brake drum forge for average to small forge part sizes and arrangement. See our article on Coal Fire Management and coal reserve. This has a lot to do with the size of a forge. If you want to build a first class coal forge you start with a commercial firepot. Everything else can be made by hand. See BlacksmithsDepot, Centaur Forge and Pieh Tool Company for forge parts. See our plans page for a side draft hood. |
| - guru - Monday, 03/20/06 16:21:25 EST |
|
Daniel Piotte: As far as I know there are none. The bible doesn't mention the blacksmith in that regard. Likely they were just everyday spikes, perhaps used repeatedly. On the general topic: There is some speculation Jesus didn't carry a cross, per se, but rather only the crossbar. The upright stayed in the ground. Jesus was nailed to the crossbar and then it was lifted up via forked ended poles to fit in a slot at the top of the crossbar. Also, spikes through the palms would not have held the body weight unless it was also roped at the shoulders to the crossbar. If a suspended weight, then spikes through the wrists makes more sense. |
| Ken Scharabok - Monday, 03/20/06 17:57:11 EST |
|
Thanks for "doing my homework boys" on the timing chain. Would I use a refracrory brick to lay blades on in the oven(when she's not home) or set them on the racks? Should the blades be laid flat or stood on edge? |
| brian robertson - Monday, 03/20/06 18:10:42 EST |
|
Brian, just lay it flat on the rack. A brick adds thermal mass you don't really need, but one in the oven somewhere else besides under the blade helps keep the heat even once it's up to temp. As you noted, DO NOT do it while the wife is home! |
| Alan-L - Monday, 03/20/06 18:32:36 EST |
|
I have pounding for a while and the shapes are starting to come out right, but how do I go about descaling and prep. for final finish. Thanks to all. Otis |
| Otisthedogking - Monday, 03/20/06 20:28:44 EST |
|
Otis, For small to medium work power wire brushing is used. For larger work grit blasting is often the best. For preparation for exterior installation grit blasting is best though some outfits use chemical cleaning. On heavily worked iron with lots of detail smiths often wire brush, sand, file clean by hand and wire brush again. Ocassionaly this is done to bring out the details in work that will be grit blasted to finish. Note that there are some distinct hazzards to wire brushing. See our iForge safety demo on the topic. Wear protective gear, be sure work cannont get away from you, use guards on grinders and wire brushes. |
| - guru - Monday, 03/20/06 21:32:17 EST |
|
I knew there was a folktale about the smith who forged the crucifixion nails, but I had forgotton the details. I googled "Jesus cross spikes blacksmith", and came up with a blog[?] www.klishis.com. When I tuned it in and scrolled about 2/3 of the way down, I came upon the tale of a haunted crucifixion nail, one that wasn't used, but kept glowing at a red heat ad infinitum. |
| Frank Turley - Monday, 03/20/06 21:35:42 EST |
|
More on cleaning: In production shops (its a production shop if you make a living out of it) they use tumblers and vibratory finishers to clean scale off work. The big advantage to these process is you toss the part in and walk away. The machine does 99% of the work. These processes also debur sharp edges which is a huge time saver. Tumblers are rather limited (and noisy) but vibratory finishers can be used on very irregular work as well as large and small pieces. Things like fire place tools can be cleaned in a vibratory finisher a half dozen at a time. In the time it takes to make another set the first will be clean and deburred without your time or attention. The initial cost of these machines may seem high but they replace a full time laborer and pay back their cost in a month or so depending on your production rate. It is like a gas forge. You can get by with a coal forge until you have a power hammer. But you NEED a gas forge to feed that hungry power hammer. The same with the vibratory finisher. If you use a gas forge and a power hammer you are (or should be) producing work at a rate that requires a full time clean up person OR a machine to do it. The machine is MUCH cheaper, does not require employment insurance or the other expenses that go with having an employee. |
| - guru - Monday, 03/20/06 21:43:03 EST |
|
Guru thanks for the answers I had a chance to buy a midsize vibratory finisher at an auction but didn't know what to do with it.It went cheap, maybe next time. otis |
| Otisthedogking - Monday, 03/20/06 22:18:48 EST |
|
Crucifixition techniques. I watched a bit on the History Channel one night, and if they are right, they stated that nails used in crucifixition were first driven through a piece of wood about 3 inches square with enough thickness to have some strength and then through the flesh so the head would not pull through the flesh. I didn't watch very much of this show. A tad gory for my tastes. Also, some things on the history channel are well researched, others are.....less researched. They did say most crucifixitions were done with rope instead of nails. Suffocation was the mode of death, and if the victim was lasting too long they would take a sledge and break the legs, and/or stick a spear in the victim. Rather unpleasant topic. But then executions were designed to set an unpleasant example. |
| Ellen - Monday, 03/20/06 22:38:43 EST |
|
There is a legend, about Katherine the smithwife. A roman soldier went to a blacksmith to get the nails. The smith refused to supply the nails because he figured that Jesus was a goodman and it wasn't right to execute him. His wife figured he was foolish and made the nails herself. I wish I could give sources for this legend, but I do not rmember where I read it. I do remember when telling this tale to my Aunt she had some comment about yeah sure, blame the wife.......... |
| JimG - Monday, 03/20/06 23:47:56 EST |
|
I saw a program today about submerged welding. Not underwater, but a wire arc welding process done under a thick layer of fluxing material. They didn't divulge too much info about what the flux powder was. It looked like black grainy sand. Guru, any more info about submerged welding? |
| Nippulini - Tuesday, 03/21/06 00:19:53 EST |
|
TGN; That type of welding has been around for a loooooong time. We used it at American Shipbuilding in the late 60's, and the equipment (Lincoln) we had looked kinda old then. Very good system for flat work, we used it for long seams in 3/8" plate, single pass, with a backup strip. |
| - 3dogs - Tuesday, 03/21/06 02:35:55 EST |
|
Crucifiction stories. . we need Paw-Paw on this one. He is greatly missed. . |
| - guru - Tuesday, 03/21/06 09:17:19 EST |
|
Submerged Arc Welding: Although little used it is still in many welding text books. It was one of those semi-proprietary systems that was only good for certain purposes. The powder cover was fed through a hopper that surrounded the wire. Another such system is electro-slag welding. It is very similar and was used to make the 8" deep welds in stainless primary coolant pumps for the nuclear industry. This large weld on the perimiter of the pump was made by rotating the pump so that the weld was always on the top (flat). |
| - guru - Tuesday, 03/21/06 09:33:30 EST |
|
Vibratory Finishers: Dan Boone uses one and is always glad to demonstrate it. He put it on a heavy concrete pad outside his shop to keep the noise down. The Kaynes (BlacksmithsDepot) sell them. |
| - guru - Tuesday, 03/21/06 09:35:52 EST |
|
Interesting. Most of this I have already found out, also that this was one of the first methods devised to help eliminate oxygen present during the weld. What I am interested in finding out is what the flux powder is made of? I've read manganese, silicon, etc., I've also heard that certain powdered metals were used to add to the weld pool, create alloys, stronger welds, that sort. I know this may sound arcane, but could I use this type of flux in conjunction with FCAW? |
| - Nippulini - Tuesday, 03/21/06 12:13:32 EST |
|
TGN, I saw that show too. Good one. The part that really piqued my interest was when they said that old welding rods were made with paper wrapping to provide the CO2 shielding... gonna have to try that. |
| T. Gold - Tuesday, 03/21/06 14:04:02 EST |
|
I have a Peter Wright anvil, can you tell me the weight with the markings 0,2,30, these markings are on the same side as the Logo can't find anything on the opposite side. Thanks I do enjoy the information on this forum. As a beginning metal worker I don't always have any idea what you are talking about, but I do find it interesting. Thanks |
| Rob Thompson - Tuesday, 03/21/06 14:43:38 EST |
|
Medieval Craftsmanship: I�m coming in late here, having spent part of the weekend in the 9th century! As well as being a materials dear, labor rich society, the medieval mindset (and much of the pre-industrial mindset, even after the invention of the clock) had a very different concept of time. A job might take as long as it took. You would not be paid by the hour but by the piece, and how long it took depended, in part, on how hungry or skillful or busy you were. With talent and practice and TIME and patience a craftsperson can do incredible work with a minimum of tools in almost any period. Time was not money, time was life (...and pretty much all that God gives you when you start out) so you made good use of it, and struck the balance between quality and quantity. Even guild rules that limited the amount of time worked were based on seasons and were more influenced by good natural lighting (and therefore good workmanship) than any restriction of commerce. Lots of neat modern power tools MAY allow you to do good work faster (or screw-up more quickly), but wonderful blades, armor, implements, tools and hardware have been made over the centuries without any belt grinders, power hammers, gas forges or a number of our current conveniences. They used them when they had them (water powered hammers, grinders and bellows cam in very early) but they didn�t have to have a full suite if cool stuff to produce quality work. Not that I would distain the modern conveniences! They had a camp at Military Through the Ages, this weekend, of Civil War Era "Army Laundresses" with their boiling coppers, wash tubs, washboards and lye soap. What fun that must have been! A little very light snow on the banks of the Potomac. Good thing it�s spring! Visit your National Parks: www.nps.gov Go viking: www.longshipco.org |
| Bruce Blackistone (Atli) - Tuesday, 03/21/06 15:06:08 EST |
|
Rob, The designation 0,2,30 would give you a weight of 86 pounds. The "old" weight designation was based on hundredweight. The first digit would be units of hundredweight (the 0 in this case) and 1 hundredweight equals 112 pounds. The second digit refers to quarters of hundredweight (28 pounds each) and your anvil weighs 2 (2x28=56) and the third digit is remaining pounds of 30, although this seems a little odd as there should be 3 quarters and 2 pounds left over. Strange... Are you sure that those numbers are correct? |
| Paul Bilodeau - Tuesday, 03/21/06 15:31:22 EST |
|
The legend of the smith's wife making the nails was fairly common. There are several medieval/renaissance paintings of the Crucifixition showing a lady forging out nails in a bottom corner---documentation on medieval forges and anvils. There is also the legend that a gypsy stole the spike that was for Jesus' head and so were given license to pilfer other items since then. Thomas |
| Thomas P - Tuesday, 03/21/06 16:25:32 EST |
|
I will check those numbers on the Peter Wright anvil tonight. My number retention and recall has declined with age. I will assume it is less than 200# as I can pick it up. Thanks will look again and write it down. |
| Rob Thompson - Tuesday, 03/21/06 16:49:31 EST |
|
Yep those number cannot be right. The rules are the last digits must be less than 28 and the middle digits less than 28. Sometime the old numbers are hard to read. Scrub with a wire brush and try again. |
| - guru - Tuesday, 03/21/06 16:58:33 EST |
|
It is possible the numbers were stamped intentionally. Say the stamper meant to use a 3 stamp and picked up a 2. Now what? Cannot erase the 2. Thus, he put 30 to make it come out to the correct weight. As noted in the past on the forum anvils were sold by weight, but it was fairly important to get it right. |
| Ken Scharabok - Tuesday, 03/21/06 19:41:48 EST |
|
Submerged arc welding. At the boiler shop we used submerged arc to do ASME pressure vessel welds, often in steam drums up to 6" thick or so. A weld in these vessels starts with a 55degree prep, so a tremendous amount of weld metal has to be laid in. After welding the joints are X-rayed. The submerged arc welds may very high quality welds. We started the weld on a chunck of scrap tacked onto the part as the start was poor. This took a large manipulator as the weld joints might be 8 to 12' long. Always weld on the top, and we rotated the drum for the circumfrential joints. The weld wire was really more of coiled bar, as we used 1/4" and 5/16" wire. The neat thing is that after the weld cools the flux pops off in chunks about the size of a thumb nail. We swept up the flux and sold it as scrap back to the flux maker for regrind. |
| ptree - Tuesday, 03/21/06 20:22:53 EST |
|
This is probably a stupid question, but I'm curious. Does the thickness of your forge play a considerable role in how quickly and easily your coal/charcoal heats to welding heat? Thanks in advance! --Rob |
| - Rob - Tuesday, 03/21/06 21:44:03 EST |
|
Rob, The "thickness" of the fire is important, no matter the hearth thickness. For example, a cast iron fire pot is about 4�" deep and the coke bed should be a little deeper than that. The hot spot of the fire will be about 5" above the tuyere or higher. An early 20th century book on blacksmithing said that the fire should be "deep, clean, and compact. |
| Frank Turley - Tuesday, 03/21/06 22:25:22 EST |
|
Thickness of what? Masonary walls? Steel plate? Or depth of fire as Frank addressed. In a coal forge the mass of the forge makes little difference but in a gas forge it makes a considerable difference in heatup times. Gas forge mass is a double edged sword (bad pun). Heavy forges are slow to heat up but radiate heat more evenly and are less sensitive to the addition of a cold mass of iron. Lightweight insulated forges (Kaowool) heat up quickly but do not retain much heat and are sensitive to the addition of cold steel. In coal fires the temperature is much higher than needed and there is usualy excess BTU's to heat the forge. Heat reflected from the surface of the forge has little or no effect except in very large furnaces. Heat comes from the radiant fuel in coal and charcoal forges not from the forge walls as in a gas forge. Then as Frank noted, the depth of the fire IS critical. A deep fire uses up all the oxygen and scales less than a shallow fire. Placing your steel near the top of a hot solid fuel fire is better than lower where there is possible free oxygen. Clean steel welds at lower temperatures than scaled steel where you need to melt the scale, not just reach welding temperature. |
| - guru - Tuesday, 03/21/06 23:33:58 EST |
|
How could a heavier gas forge take longer to heat up if it is lined properly with Kaowool and ITC? Shouldn't the refractory equivalent be the same? I figure a forge shell 1/4" thick should take the same as a forge with a shell of 1/8" as long as both have the exact same measurements and insulations? I can understand that the heavy ones to retain and radiate heat and cold irons and such, but do you mean heat up time to the point that the surface of the shell gets hot? My forges don't have thermometers. |
| Nippulini - Wednesday, 03/22/06 01:44:05 EST |
|
I'm just starting out in this craft (hobby at this point), and this might be a stupid question to ask, but why not just weigh the Peter Wright anvil on a scale to get the weight regardless of what the numbers say? |
| Glenn Tate - Wednesday, 03/22/06 03:15:38 EST |
|
Aw gee, Glenn, Where's the challenge in that?(BOG) |
| - 3dogs - Wednesday, 03/22/06 04:07:31 EST |
|
Glenn: Weighing is a good idea, especially as many very old anvils have lost some mass to use and rust over the years. What's interesting here is the anomaly. Those numbers shouldn't be in that form. Also, I think the Chief Guru made a small error, above. The second number should always be three or less and the third number should be 27 or less. Forge Mass: TGN; I think Jock was referring to the difference between light forges like we use and the heavy, firebrick lined forges used in light and heavy industrial uses, like the natural gas Johnson that they had at the University of Maryland back in �72. (We were making angle iron oarport liners for our first longship; a not-so-good idea, as it turned out.) These suckers can be three feet long, a foot wide and weigh who-knows-how-much. As Jock noted, in our smaller gas forges, especially if you get overanxious and start putting in some iron before it really gets hot, you can see the color go down if you put in a piece of cold metal. On the big industrial models, the same piece would be about equivalent to spitting in the ocean. Had to brush snow off my truck this morning on the banks of the lower Potomac! Visit your National Parks: www.nps.gov Go viking: www.longshipco.org |
| Bruce Blackistone (Atli) - Wednesday, 03/22/06 09:50:32 EST |
|
A very good history of welding is at http://weldinghistory.org/ |
| - Hudson - Wednesday, 03/22/06 11:03:54 EST |
|
A very good history of welding is at http://weldinghistory.org/ |
| - Hudson - Wednesday, 03/22/06 11:04:27 EST |
|
Did some work with a wire brush on the Peter Wright, the numbers were 0-3-20, if my math is correct it would be a 104# anvil. No wonder I could pick it up. Thanks for the help. |
| Rob Thompson - Wednesday, 03/22/06 12:42:07 EST |
|
Hi!! I have allways dreampt of bladesmithing, but I live in Mexico... I supose my cuestion is if you know any place where I could learn Bladesmithing in Mexico or in the USA, that I could go from here to there, but my real problem is time and money, time because it costs much to be there a mot of time, and money, because I dont have mutch. So If you could help me, I would be mutch abliged. I am 27 years old, I speak 90% english, and I am very resolved in learning blathesmithing. Maibe if a bladesmith could offer a place to stay while he teaches me, like Jim Hrisoulas, now that he had that regretfull accident, if maybe he could tellme how and ill pay for my expences and for some clases... whell you get the picture. In any thing that you could hellp me I would be very abliged. |
| David I�esta - Wednesday, 03/22/06 14:23:25 EST |
|
David, if you can't find a local bladesmith I would suggest you look into the American Bladesmith Society's school located in Southern Arkansas. They offer a number of courses taught by top notch instructors and can take you from beginner to expert if you go through all the courses. Thomas |
| Thomas P - Wednesday, 03/22/06 14:39:11 EST |
|
What accident involving Dr. Jim Hrisoulas? Hope it's not serious! I love his work. And his books. |
| Ellen - Wednesday, 03/22/06 15:12:41 EST |
|
You're not talking about his lawn mower accident are you? Wasn't that 4 or 5 years ago? |
| Stephen G - Wednesday, 03/22/06 15:34:58 EST |
|
can u tell me how to remove fiire marks from brass? thanks Andy. |
| andy daly - Wednesday, 03/22/06 15:35:08 EST |
|
why is a side draft hood better than an overhead, inverted funnel type hood? Would you have to assume an absence of wind, like an indoor forge, for the overhead? |
| John W - Wednesday, 03/22/06 16:23:41 EST |
|
Hoods: John, Overhead hoods are very inefficient in that they must move all the cold air at their opening as well as the warm. This diluted mix is cooler and results in less draft. They need HUGE stacks OR power ventilation to work properly. Side draft hoods suck up mostly hot air thus they have a much more powerful draft and do their job much more efficiently (and better). If you want a smokey shop build a big 3 foot diameter funnel shaped hood and dump it into a 12" stack. . . only under the perfect condition of hot fire, low smoke and low blast will you NOT have smoke rolling out from under the hood. |
| - guru - Wednesday, 03/22/06 16:29:49 EST |
|
John W: One reason is that the overhead hood can also interfere with large irregular objects you want to heat. A "hood" has greater area so the capture velocity is less for a given airflow. Effectiveness is directly related to capture velocity. |
| - John Odom - Wednesday, 03/22/06 16:29:59 EST |
|
Burnt or oxidized brass: Depending on how the brass was oxidized an acid dip such as vinegar will remove much of the discoloration. However, for a bright finish you almost always have to mechanicaly clean the surface (file, sand, polish. . .). |
| - guru - Wednesday, 03/22/06 16:31:59 EST |
|
I would be interested in purchasing a copy of the book � Hugh McDonald Steel Rolling Mill Plans� I tried sending a mail to larbooks@impulse.net but haven�t received any reply. Can anyone help me? Best Regards David |
| David - Wednesday, 03/22/06 16:52:38 EST |
|
David, Norm's phone number is listed on our getting started page. |
| - guru - Wednesday, 03/22/06 16:55:21 EST |
|
OK thanks guys, and sry if that was a really stupid question. At least I know I probably wont need to get a new forge then, because mine is a scrap forge with rather thin (I believe 1/16") metal. Again, Thanks a lot! --Rob PS David, I live close to the US Mexico border. How close are you and to what particular state? I could do a bit of research for you if it's around here. |
| - Rob - Wednesday, 03/22/06 17:35:28 EST |
|
David: Norm Larson seems to be having some problems with filling orders. If you do get him on the phone, it may not result in any action on his part. I purchased a box of books from him about a year ago and am still trying to get him paid. Have sent two checks, neither of which have been cashed. |
| Ken Scharabok - Wednesday, 03/22/06 17:51:17 EST |
|
Looking for a job? From an email I recieved today "Would you be able to cnc machine a titanium head for a boar spear. Or do you have a point of contact that could help me out?" Anyone want to tackle this? just email me and I'll forward the info to you. |
| JimG - Wednesday, 03/22/06 18:10:42 EST |
|
I have a 100# Fairbanks Power Hammer. The Drive Pulley is on the top,outside rear and the motor is mounted on the floor. This is a 3" flat pulley on the 1750 rpm 2 hp motor. There is a factory brake inside the drive pulley that is made from a spit ring that expands against the pulley when the treadle is released. The problem is getting the machine running. It appears that as I start the machine the pulley has to slip around the smaller motor pulley until the machine is moving and then the adjustment slip occurs around the larger diameter machine pulley. As a result, I get a lot of hesitation and burning of the belt and small pulley until the hammer is moving. I do use belt dressing. I assume the machine would run better with the moter overhead because the slack would be around the larger diameter machine pulley and would slip on this pulley until the machine was running. My goal is to get the machine to start as easily and smoothly as possible. Any thoughts. |
| Steven Bronstein - Wednesday, 03/22/06 18:47:05 EST |
|
I have a 100# Fairbanks Power Hammer. The Drive Pulley is on the top,outside rear and the motor is mounted on the floor. This is a 3" flat pulley on the 1750 rpm 2 hp motor. There is a factory brake inside the drive pulley that is made from a spit ring that expands against the pulley when the treadle is released. The problem is getting the machine running. It appears that as I start the machine the pulley has to slip around the smaller motor pulley until the machine is moving and then the adjustment slip occurs around the larger diameter machine pulley. As a result, I get a lot of hesitation and burning of the belt and small pulley until the hammer is moving. I do use belt dressing. I assume the machine would run better with the moter overhead because the slack would be around the larger diameter machine pulley and would slip on this pulley until the machine was running. My goal is to get the machine to start as easily and smoothly as possible. Any thoughts. |
| Steven Bronstein - Wednesday, 03/22/06 18:49:41 EST |
|
Howdy again. First off, I want to thank all of you who answerd my question about punching hammer eyes. It really helped out when I made the hammer, which, by the way, turned out pretty good. Now on to another matter concerning hammers... about two weekends ago I was at my ABANA chapter's (Blacksmith's Association of Missouri) meeting and saw a spare tire hammer there, and saw one of the guys use it. It really grabbed my attention. And from what I hear, they are quite a dandy, and they do seem to work real good. Anyways, I have been inspired to do some research and then build one once i have a good understanding. One of the things that I'm not too sure on is the type of linkage that would be best and/or most feasible to use. The one I saw had a clone Little Giant linkage, but trying to make one seems a little too complicated for me. I have looked at the power hammer page, and I do like the idea of using shock absorbers for the linkage. However, I also like the linkage used on the Roller-Guide JYH, which I would think would be a lot like using a shock absorber. If so, then does one have any advantages over the other? Or would a Little Giant style he a better way to go? One of the other things that I am concerned about is finding a heavy enough piece for the anvil. I was wondering if several pieces of 1" plate could be welded up to form a suitable anvil that would hold up to the repetitive pounding. Would it work? I know that welded-up anvils have been used on treadle hammers, but I'm not sure if it would work for a power hammer. Well, I believe that's all I have for now. I really appreciate any help you guys and gals can throw my way. I'm just trying to get some ideams and options together before I commit to anything. Once again, thanks! Ian Wille |
| Ian "Blueboy" Wille - Wednesday, 03/22/06 19:17:37 EST |
|
Steven Bronstein, The location of your idler pulley (wich creates the belt tension) should be near the small driver pulley on your motor. If your idler set up near the large driven pulley you will have to move it. An old copy of an Audels Mechanics and Millwrights guide will have a section on flat belting that may help you with proper positioning. Are you sure your brake is releasing fully when you hit the treadle? Roger Smith who posts across the street at forgemagic has a beautifully set up Fairbanks running from a line shaft and may be able to help you with specifics on your hammer. |
| SGensh - Wednesday, 03/22/06 19:22:37 EST |
|
Fairbanks Clutch: There is also th matter of direction of rotation. You want the belt tight (doing the pulling) on the side opposite the idler. If it is on the load side the force is trying to lift the idler making it harder to operate. If the belt is too losse you also cannot create enough tightening force to make it work. I have seen many of these run on very small motor pullies and work correctly. However, the original design was for a low speed motor (600 ROM) or a low speed line shaft that could use a pulley nearly as big as the one on the hammer. The other thing is the general adjustment and lubrication. The hammer should be tight but run friction free. Dave Manzer used what he called the "bounce test". WHen you stopped the hammer with the brake the ram should bounce up and down on the spring. If it does not then you a have a lubrication or friction problem. |
| - guru - Wednesday, 03/22/06 20:34:44 EST |
|
Shock Linkage: We proved they work but they are highly inefficient. I do not recommend them. The LG or Dupont patent linkage is the BEST. However you get the same dynamics from the leaf spring type linkage such as the South African JYH. You can use this same linkage on a tire hammer. It is safer than coil springs and has less parts. 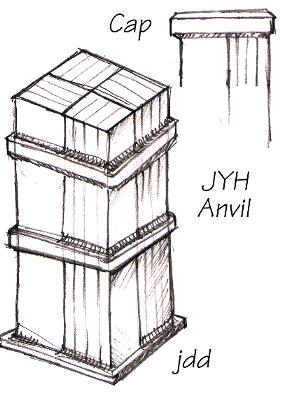 Built up anvils for power hammers are OK but not stacked. You can assemble a bundle of bars and weld them together as shown here. Note that the outside edge of EVERY bar can be welded to the cap, collars and base. Mounting brackets and lift points can be built in as well. This is one of those things where you start with a bunch of little pieces and rapidly create something you cannot move on your own. Using 3/4 b 3" bar 30" long you end up with a 6 x 6 weighing over 310 pounds. Using 1 x 4" bars the weight would be 544 pounds. The important thing about building this is to have clean square cuts on the ends of the bars. You can also build this anvil with a hollow core to use for shanked tools and punching. Just be sure to leave an opening at the bottom for tools and plugs of steel to escape from. Built up anvils for power hammers are OK but not stacked. You can assemble a bundle of bars and weld them together as shown here. Note that the outside edge of EVERY bar can be welded to the cap, collars and base. Mounting brackets and lift points can be built in as well. This is one of those things where you start with a bunch of little pieces and rapidly create something you cannot move on your own. Using 3/4 b 3" bar 30" long you end up with a 6 x 6 weighing over 310 pounds. Using 1 x 4" bars the weight would be 544 pounds. The important thing about building this is to have clean square cuts on the ends of the bars. You can also build this anvil with a hollow core to use for shanked tools and punching. Just be sure to leave an opening at the bottom for tools and plugs of steel to escape from. |
| - guru - Wednesday, 03/22/06 21:13:20 EST |
|
Ian Wille, If the dupont style linkages are not feasable for you, the leaf spring helm is very easy to build. Have a peek at mine on the jyh page. If you are a good scrounger, and can weld, then very little machine work is required. Note that I have changed my drive over to a compact spare tire forthe clutch instead of the belt shown. |
| ptree - Wednesday, 03/22/06 21:48:04 EST |
|
Guru, Once the hammer is moving all is well, the idler arm is on the return side and when I stop the brake engages and the ram bounces a few times. No one seemed to think much about the issue of the smaller drive pulley being below the larger machine pulley. This means the slack is around the smaller faster moving pulley and would seem to be harder to engage smoothly rather than the larger diameter machine pulley. Of course this is also how it has been done for many years. |
| Steven Bronstein - Wednesday, 03/22/06 23:00:35 EST |
|
Steven B: I dont know jack about powerhammers, but a belt clutch like Yours needs to be able to slip while the relatively heavy mechanisim comes up to speed, I think using belt dressing is probably not a good idea in this case |
| Dave Boyer - Wednesday, 03/22/06 23:33:12 EST |
|
--Rob I live in Denmark, witch is not so close, thanks anyway. |
| David - Thursday, 03/23/06 03:35:20 EST |
|
Ian Wille: If you settle on the spare tire hammer design it will likely be more economical for you to travel to one of the workshops where they are group made - one per person. Clay Spencer (934 Partridge Lane, Murphy, NC 28906-6149), for one, heads up these workshops around the country. I believe the workshop cost is around $1,400 (without meals or lodging). Likely cheaper and a better end result than you trying to scrounge up something on your own. |
| Ken Scharabok - Thursday, 03/23/06 08:45:17 EST |
|
Forge Hoods: This leaves me with the question as to what would be a practical arrangement for a forge hood if the forge is set up in the middle of the shop? A sleeved, raising and lowering side-draft box? A four-armed hood with narrow intakes? A sleeved chimney that expands to larger and larger sections as you go up the stack? A twenty foot (6 M) stack? If my wif insists that I build a new forge (AFTER the new house and with available funds) I am intensely interested in doing it right and cheap. :-) Crawling back up into the 40s on the banks of the Potomac. Visit your national Park: www.nps.gov Go viking: www.longshipco.org |
| Bruce Blackistone (Atli) - Thursday, 03/23/06 09:51:04 EST |
|
Atli, I like the side draft box. I have one with an 8"D x 20' tall one that works OK. Mine is in a fixed position, but the idea of a sleeve to get the hood out of the way for large or irregular pieces sounds like a good idea. I am aware that many smiths install a 10"D pipe, but 8" works OK once it gets heated a little. The top of the stack should be at least 2 feet above the roof ridge. |
| Frank Turley - Thursday, 03/23/06 10:57:27 EST |
|
Accident?? What accident?? News to me...I am in RPFS mode, barricaded in my studio, but still here, more or less in one semi-functioning piece..(getting older sucks..) Unless it's the "Lawn Mower Incident" but that was years ago and thanks to modern medicine and a damn good optomologist I can still see, although now I need glasses for up close work, but still 10000 times better than an empty socket. I have no idea where this came from.... JPH |
| GHPoMCI - Thursday, 03/23/06 10:57:43 EST |
|
I want to make a hardy hole for my anvil (railroad rail). How do I get the square hole to be square? I do not have a plasma cutter, but I do have a cutting torch. Torching and fileing? |
| Hillbillysmith - Thursday, 03/23/06 11:19:02 EST |
|
Steven Bronstein, You said that your idler is on the slack side as it should be but you did not mention if it is near the driver or driven pulley. It will normally work better near a small driver rather than a large driven in a vertical configuration. One other thing to look at is making sure that the driving and driven side of the pullies is tangent to a vertical line rather than trying to have the centers of the shafts arranged vertically. In other words the working side of the belt should be vertical when loaded so you get the maximum contact area when the idler pulley wraps the belt onto it. Most books with information on belting discourage vertical belt arrangements as inferior to horizontal or angled setups. |
| SGensh - Thursday, 03/23/06 11:32:10 EST |
|
JPH, glad to hear you're not injured, I'm a large fan of your works, both in steel and on print. Hate to lose you too soon. Keep fighting the good fight. |
| Blade - Thursday, 03/23/06 11:46:38 EST |
|
Hillbilly, what we do with rail anvils around here is get a section of 1" square tubing and weld it to the end of the rail. You then have to use offset shanks on hardy hole tools that get heavy pounding, like guillotine tools and such, but it works fine to hold a hot cut. If you don't want to do that, drill a 1" hole through your rail and use a diamond chisel (diamond-shaped cutting end, not diamond tipped) to square the corners, clean up with a file. |
| Alan-L - Thursday, 03/23/06 12:41:55 EST |
|
Hillbilly I-forge demo #164 |
| - Tyler Murch - Thursday, 03/23/06 13:09:59 EST |
|
Is there a formula for calculating the size a burner has to be to the size of the forge? I'm thinking about using an old hot water heater storage tank, not all of it, but part of it, and make the forge about 2 feet high. Thanks |
| Greg - Thursday, 03/23/06 13:45:46 EST |
|
Good Sirs, I am new to this page, 54 year old novice currently in West Virginia with a small shop along the Greenbrier river. I would like any info on forging a "goosewing axe" I have secured a sample but must replicate backwards (southpaw) My intention is to replicate a "user" for my log cabin restoration. My main question is the ridge located between the bit and haft running parrallel to the cutting edge on the German samples I have seen in books. Is this formed from the outer edge of the eye wrap? My intention is to use hot roll with a file steel bit, is this sensible? Thanks jim |
| Jim - Thursday, 03/23/06 13:45:48 EST |
|
Jim in West VA: A goosewing is a heck of a first reproduction! It's on my list of things to make one of these days, but it'll be a difficult one to do as far as the eye goes. Hot rolled with a file bit will work just fine. The ones I've seen are made from 4 different pieces: The eye back/blade connection, the eye front, the body, and the edge. There's a schematic of one in "The American Axe" (I think that's the title) by Henry Kauffman. From what I could tell, the ridge you speak of is not related to the eye, but rather is just part of the body segment. The eye back/body connection is a flat piece, to which you weld the other half of the eye and the main body section, both of which are also flat pieces. You'll need a drift to hold the shape of the eye during welding and subsequent forging. You can use hot rolled to make that as well. The good news is that with such large chunks of steel you'll have an easier time welding. The edge steel is applied to the back side of the blade, not sandwiched. This keeps the hardenable steel as the entire cutting edge, if that makes sense. Good luck, and keep us posted! |
| Alan-L - Thursday, 03/23/06 14:36:23 EST |
|
Hillbillysmith. The first anvil I had was a rail anvil. I just torchcut mine after cutting out the web. You'll be much more productive using a large hunk of steel and fabricating a hardy hole on the outside. I was given this advice and made a rail anvil anyway. :) Made lots of stuff, but probably doubled my production with a heavy anvil. |
| Mike H - Thursday, 03/23/06 14:39:12 EST |
|
Hey, I'm not sure if you guys could help me here, but it has to do with welding so maybe you can. I'm working on attaching a chainsaw to my bike so I wont have to pedal, but I need to weld a guard on the gears of the wheel to keep the chain on. Does anyone know if the gears are steel? I've not had the bike long enough to see if it rusts. Thanks in advance! --Rob |
| - Rob - Thursday, 03/23/06 14:45:00 EST |
|
Atli (Bruce): A hood on a central forge can be very good. We have one on our main demonstrating forge at the Choo-Choo Forge (my club) shop. It will NEED a powered induced draft fan arrangement to provide proper functioning. The book "Industrial Ventilation" has a lot of data on designing such hoods and the fan requirements etc. I once used (in someone else's shop)a huge forge about 6' in diameter under a big round hood that had a 3 hp fan. It worked well. The forge blower was also multi hp. The shop had once been an industrial forging shop, but they didn't forge anymore. |
| - John Odom - Thursday, 03/23/06 15:11:55 EST |
|
Motorizing a bicycle: Rob, Yes the sprockets are steel, They are usualy chrome plated which means you have to remove the chrome or weld with 304 or 305 SS welding rods. The problem you will have is that the chainsaw motor runs VERY fast, maybe 8,000 RPM or more. The most reduction you will get from a single chain setup is about 5:1. This means the bicycle wheel would try to turn 1600 RPM. With a 30" diameter wheel (guessing) your bike would be trying to go 2.38 miles per minute (143 MPH). Just turning the wheel this fast will probably blow it up seriously injurying anyone nearby. On motorcycles they have a two or three step reduction in speed between the engine and the wheel. The primary is usualy about 3.5:1. This slows an 8,000 RPM engine to 2,286 RPM. Then the final drive is another 3.5:1 (approximate) getting the wheel speed down to 653 RPM or less. On a 30" wheel that is about 58 MPH. The math: Wheel diameter * PI /12 = Feet circumference Feet circumference * RPM = distance per minute in feet distance per minute in feet / 5280 = miles per minute miles per minute * 60 = MPH For gear reduction you normally count teeth (240 teeth to 12 teeth = 20:1). However, for estimating purposes you can use the ratio of the diameters measured at the same place (outside of teeth OR the pitch line - middle of teeth). Do the math. Normally when a small motor is added to a bicycle it uses a friction drive to take advantage of the large diameter of the wheel. In fact the wheel cancels out (basic math) and you use the surface velocity of the motorized friction wheel to determine the operating speed. Good luck with your project! |
| - guru - Thursday, 03/23/06 15:49:32 EST |
|
Sorry about all the post. It gets on my nerves when new people do it so I feel stupid. I was at school and I looked at three different computers It was on none of them. |
| - Tyler Murch - Thursday, 03/23/06 17:27:02 EST |
|
Notorized bicyles: check out www.whizzermotorbikes.com to see a motorized bicyle. Maybe you'll get some different ideas as to how to proceed. The model shown can do 25mph and gets over 100 mpg. Actually, looks like fun, but I have the 700 cc Honda and it'll do better than 25 mph......grin! |
| Ellen - Thursday, 03/23/06 18:00:38 EST |
|
notorized = motorized. Geeez! |
| Ellen - Thursday, 03/23/06 18:01:25 EST |
|
Notorized bicycles? Sounds like somebody hasn't hammered the CPA out of her system yet. (GRIN) I have a friend whose Dad does this for a living. (www.electricrider.com) He has conversion kits and some pictures of the various parts used that might give you some ideas. Eric |
| eander4 - Thursday, 03/23/06 18:21:47 EST |
|
Hmmm... OK, thanks guys. This is a relatively small motor, actually. it was only a 10" saw. it's been sitting in my garage for years. |
| - Rob - Thursday, 03/23/06 21:10:33 EST |
|
Guru, I have a set of oxygen/ acytalene torches that are hooked up to propane. My question is: can I hook up an air compressor with a regulator attachment to the torches instead of oxygen? I only ask this because I thought of a gas forge. The gas forge has fluted holes at the back of the burner to suck in air to creat a blue cone type flame instead of having just a big yellow roaring fire. If this could work, I was planning on getting a regulator from the local welding shop and some air fittings from the local hardware store and hooking them together and connecting to the torch. |
| Hillbillysmith - Thursday, 03/23/06 22:24:55 EST |
|
I am new to blacksmithing and I got my anvil today. I am curious about it. The numbers on it are 175 which I assume is the weight. The next numbers are 1861 76 there are no other markings that I can find. Any help would be grateful. TIA |
| Kurt Tate - Thursday, 03/23/06 22:30:14 EST |
|
Rob : I have a clamp on bike motor, it usesa friction wheel about 1 1/4 dia. direct driven off the centrifical clutch. Motor looks like a weedwacker engine. For a drive roller, You might get one from a Lawn Boy self propelled mower, looks about like what is on My bike. |
| Dave Boyer - Thursday, 03/23/06 22:31:08 EST |
|
Hillbilly: You won't have much luck, as the high flame temp comes from the pure Oxygen. It won't get any hotter than an air/fuel torch, and will probably be be harder to setup as the tip & mixer were for Oxy/fuel. |
| Dave Boyer - Thursday, 03/23/06 22:36:40 EST |
|
AlanL, Thanks for the info the other day about the treatment of the tiller blades and bladesite address. My brother and I make a couple of hawks this weekend from RR spikes (our first ones), spikes were aleast 30 to 40 years old, based on where they came from. Now a word for anyone reading this and wanting to start hammering some metal.Talk about it to everyone. Why ? you never ever know who blacksmiths as a hobby, example: This past summer my brother went to a county fair, there was a blacksmith demoing, so he goes to watch and when the smith turns around , it's a man from the church he's attends and knew the man for a couple of years, he even taught the man children in sunday school. and then this week I was talking to the guy we just promoted to welding supervisor, he used to built blackpowder rifles.What I am saying is ask questions, talk about what your wanting to do, sometimes tools,leads, and friends will come from the most unlikely of places. Support anvilfire , join CSI the people in blue. |
| daveb - Thursday, 03/23/06 22:38:31 EST |
|
Hillbilly: Aditionally, cutting will not work well below 99% Oxy, and won't wok at all below 98% Oxy. |
| Dave Boyer - Thursday, 03/23/06 22:39:06 EST |
|
JPH--Glad to hear this was not something current. Tales can get started in the durndest places--huh. Chuck |
| sandpile - Thursday, 03/23/06 22:51:40 EST |
|
Thank you all for your help. I will tweak my hammer setup and see if I can get it running more smoothly. |
| Steven Bronstein - Thursday, 03/23/06 23:03:05 EST |
|
Rob, size and speed are not correlated very tightly except that the larger engines often run *SLOWER* than small engines. A chainsaw at 8krpm is running about 2-3 *times* faster than the engine in my pickup driving on the interstate. Atli what about a powered down draft system? My old "railroad" was originally set up that way. (Actually I'd go with the telescoping side draft myself) Anvil: There are few anvil companies that dated their anvils, william Foster did so from the 18teens through the 1860's and Fisher did starting around 1880. So my guess woukd be that it was a william foster. (I have the remains of an 1828 william foster myself) HOWEVER without a good description it's like saying I have a pickup that has a number on it tell me about it! Thomas |
| Thomas P - Thursday, 03/23/06 23:46:38 EST |
|
Thomas, so should there be another marking somewhere else on the anivl naming the maker like William Foster? What else should I look at? What more of a description should I give? |
| Kurt Tate - Thursday, 03/23/06 23:55:44 EST |
|
Kurt, If you are correct in reading your numbers it is not an old English anvil. These were all marked in the Hundreweight system. See: Anvil Weights Then: English Anvil Weight Calculator Clean the marked side of your anvil. It only takes a light coat of paint or a few years of dirt to fill the markings. If the markings are actually 125 then the weight is 173 pounds. Quite a few anvils came into the US that were not marked. All anvils for import were supposed to be marked some time after the Revolutionary War. However, personal anvils were brought over by smiths who bought them in England in the local (non-export) market. Then all there is to go by is the style of the anvil. |
| - guru - Friday, 03/24/06 00:55:07 EST |
|
Kurt Tate: Although there may be odd balls and orphans, only two anvil manufacturers were basically known to date anvils with the year. One was William Foster and the other Fisher. Put the anvil on a bathroom scale for weight. If 175 or so, then it eliminates WF. Fisher's year is not necessarily year of manufacture, but year that particular mold was made and should be fairly close to year of manufacture. William Fosters had a body of wrought iron with a steel plate and had the year and stone weight on the side with the horn to the right. Should have a ring. Fishers had a body of cast iron with a steel plate and had the year under the heel and the weight normally on the foot to the right with horn to right. Should not have a ring. Normally last digit was left off, such as 160 pounds given as 16. WF's marks were stamped in, while Fishers were part of the mold. Look real close at the front foot to see if there isn't FISHER there. Shape was also quite different. WFs would have the classic Old English fairly pointed feet. Fishers typically had the London-pattern feet, become more pronounced over the year. On the 76, it might be anything. Anvils frequently have miscellaneous markings which no longer have a meaning. The more I learn about anvils the less I find I know, but the above should be close. |
| Ken Scharabok - Friday, 03/24/06 02:07:05 EST |
|
i am trying to case harden a jewelers anvil i made for a friend, in your opinion, what's the best way to prepare the leather prior to case hardening? |
| jared - Friday, 03/24/06 02:30:08 EST |
|
Thanks guys I will read up on anvils and take a closer look at mine. It doesn't really matter to much. It seems to be a well built anvil that has had a lot of use but is still in good shape no swayback no chunks missing or cracks. It will work for my first anvil. And the price was right. Thanks again. |
| Kurt Tate - Friday, 03/24/06 07:49:22 EST |
|
Hillbillysmith: You can make such a setup burn, but not well. And you CANNOT cut. In cutting, the fuel/oxygen mixture preheats the steel. Then the steel BURNS in the pure oxygen that is released when the cutting lever is pressed. The heat from the steel burning in oxygen is VERY GREAT. For this to happen the oxygen must be very pure, 99% or better, and the process won't work at 98% oxygen, as stated above. There are air-acetylene and air propane tips for heating, but NOT cutting. They produce WAY less heat and at a lower temperature than the oxy-acet. |
| - John Odom - Friday, 03/24/06 08:24:21 EST |
|
Jewlers Anvil: Jared, What process are you using? In the old timey wrap in dry shoe leather they were talking about OLD very dry leather that had many of the oils washed out over time. Bone meal charcoal is a case hardening medium better and in the leather wrap method is usualy recommended to pack around the piece inside the leather. Then the whole is sealed in clay. The clay seal is the critical aspect to keep air from penetrating and oxidizing the contents. This needs to be a good sculpting or potters clay that will survive the heat without cracking up and falling apart. To prevent the whole from bursting from the gases released by the leather I would make a vent hole with a small nail in the wet clay. The clay should dry in a warm dry place for a week or more. It should be bone dry or have a warm dusty feel indicating that it is 100% dry. Then when heated it should be done so slowly. I would heat the dried mass on top of the wood stove that you are going to case harden it in prior to putting it in the stove. Now, heating is the trick. You will need to keep the mass in the hottest coals of the fire for three or four hours. This is a COLD mid winter's day project. Then when you think the contents have been at a red heat for several hours you remove the mass then break it open dumping the entirety in water. Hopefully the piece was at a red heat long enough and still that hot when you dump it to harden it. If the tool is a modern steel other than a high quality KNOWN low carbon steel or wrought iron I would temper the piece. The same process can be carried out in the forge in a sealed graphite, clay or steel box and is less likely to fail. Care should be taken not to overheat in this case where the problem is getting hot enough in a wood fire. If I were making a jewelers anvil I would make it out of an annealed tool steel like A2 or O1, blanking by sawing, then shaping with files (as most were) then flame hardening the top surfaces. The old ones I have seen had microscopic pin holes drilled through the square horn. They seemed to be all steel but that is difficult to discern. |
| - guru - Friday, 03/24/06 08:58:06 EST |
|
Anvil Weight Calculator Too cool! Is this new, or have I just missed it among the many wonders of this web site? Given its utility and the ease of use, I think it needs to be noted on the other historical and metalworking bulletin boards (and bring more folks to Anvilfire). |
| Bruce Blackistone (Atli) - Friday, 03/24/06 09:42:39 EST |
|
Jared, You can also forego the use of leather, bone, and charcoal, and purchase the proprietary "Kasenit" in powder form. Kasenit requires less time in use than carburizing the old timey way. |
| Frank Turley - Friday, 03/24/06 09:49:30 EST |
|
Weight. The British Imperial System of using the three digits to indicate total weight was and is also used in British bell founding. I found this out because at one time, I was doing a little research on the ironwork which attached the bell to its wooden stock. The blacksmith also made the "gudgeons" and bearing surfaces upon which the bell pivoted and swung. Depictions of our Liberty Bell [cast in England] always show it with its stock and ironwork, but we seldom are cognizant of that portion. |
| Frank Turley - Friday, 03/24/06 10:08:06 EST |
|
Bruce, It's new. I have not yet linked it to our math page or anvil articles. I am working on having it do the reverse calculation. . . The math is easy, its the coding to make it work backwards in HTML that's the b****. Those that say its easy are the ones that write the dozens of calculators out there that only work in IE. . . DUMB! |
| - guru - Friday, 03/24/06 11:16:12 EST |
|
Frank: They used the hundredweight system for their muzzle loading artillery, too. The figures are usually stamped on the breach or one of the trunions. Back to bells: Gudgeons are the fittings on the hull that engage the pintles on the rudder. So are the rotating points on the bells pintles or trunions? |
| Bruce Blackistone (Atli) - Friday, 03/24/06 12:29:43 EST |
|
Guru, Cool calculator. Are you going to limit the left-hand number to 19, since 20 cwt = 1 tonne? I guess it's entirely irrelevant as long as you are talking anvils, but long tons started tp make a lot more sense when I figured out where they came from. |
| Mike B - Friday, 03/24/06 12:43:15 EST |
|
Hmmmmm. . . Mike, I just got it working in reverse and you HAD to mention that! Didn't know that about long tons but had a suspicion as I worked on this that there was a limit. I will add a note and error test. . . but not another place. |
| - guru - Friday, 03/24/06 13:07:13 EST |
|
Anvil Help What kind of anvil is that at ebay 6266101942, and what is its general state of repair? |
| JohnW - Friday, 03/24/06 13:34:59 EST |
|
Long tons. It is interesting that a long ton of 2240 lbs, or 20 hundred wt. is exactly equal to a metric tonne of 1000 kg. |
| - John Odom - Friday, 03/24/06 13:48:52 EST |
|
Actualy 1 long tonne = 1.01605 metric tons or 1 meteric ton = 0.9842 long tonne. But it is very close and used interchangably when dealing with rough numbers such as cargo loading. |
| - guru - Friday, 03/24/06 14:14:00 EST |
|
Also, 2240 divided by 112 gives you, waaaa-laaa, 20. I really don't see the point in it, but perhaps it made calculating how many tons of anvils were in a shipment easier. But then perhaps they were simply being 'British'. In the mid-1960s I was in England (Navy shore leave). Then you were using pounds, shillings and pences. Bought a small item at a merchant. They had to count the change three times before they thought they had it correct. |
| Ken Scharabok - Friday, 03/24/06 14:20:38 EST |
|
ebay anvil: John W. You will have to ask the seller for a better picture or take a gamble on it. I cannot tell the brand from the low res photo and the face looks like it has something glued to it covering the hardy hole. There is definitely some serious chiping along the step. |
| - guru - Friday, 03/24/06 14:25:44 EST |
|
JohnW: Heck if I know. BAD photograph. Looks like no hardy hole, double pritchel holes and part of a top plate broken off of the heel area. I would lean more towards U.S., rather than British, made. I've asked seller for additional information. Assuming the hardy hole hasn't been welded over in the past, if some of the top plate is missing and the body isn't cast iron and you can pick up the anvil, might well be one worth salvaging/repairing. Based on what appears to be severe damage to the top plate, I suspect it has a body of wrought iron rather than cast iron. |
| Ken Scharabok - Friday, 03/24/06 14:39:29 EST |
|
guru, ebay anvil -- thank you for your good observations. By the way, I'm JohnW -- John W is a different guy |
| JohnW - Friday, 03/24/06 14:41:04 EST |
|
thanks Ken |
| JohnW - Friday, 03/24/06 14:42:41 EST |
|
Making change. . . In Costa Rica they are trying to make some changes in their money. They currently have two sizes and colors of 5 and 10c coins and a 20c as well as a new 25c coin. . . Since the 5c coin equals 1 US cent their smaller 2c and 1c coins are no longer used and everything is rounded off to the nearest 5 colones. I am sure other countries are going through the same. No matter how "metric" people want to be we still use fractional curency, halvs, quarters and twentieths (5c). Of course we in the US now have 50 different quarters and several different nickels as well as a dollar coin smaller than a half dollar to confuse folks. . . |
| - guru - Friday, 03/24/06 14:58:27 EST |
|
JohnW: Seller has added a couple of more photos. 1890 Fisher. 110 pounds if I understood their reply correctly. Does have hardy hole and a large gouge out on one side of heel. Was probably used to hold something being cut with an oxy/ace torch and they cut into the anvil. The gouge is probably repairably using cast iron welding techniques on the body portion. Top still looks rough overall. If 110 pounds, on the light side for typical blacksmithing. If it were buyer pick up at a cheap price may be worth fooling with. If you have to have it shipped, then I would say to pass it by. LOTS of better anvils are around. |
| Ken Scharabok - Friday, 03/24/06 16:41:53 EST |
|
I AM PLANNING TO MAKE MY FIRST TOUCHMARK. IS THERE A LIST OF TOUCHMARKS SO I DON'T COPY SOMEONE ELSE'S? I PLAN TO USE 3Ds OR DAN D FORGE. THANKS! |
| DAN DIRKSEN - Friday, 03/24/06 16:49:17 EST |
|
Anvil -- Thanks again, Ken. I don't think I want to do that kind of repair, and these guys are at least 150 miles awy from me. |
| JohnW - Friday, 03/24/06 16:56:16 EST |
|
Dan, Not all marks are registered but we DO have a registry. See the drop down menu under "Touchmark Registry". |
| - guru - Friday, 03/24/06 16:58:18 EST |
|
Metric: the rest of the world can have it. I like our units of measurement just fine. My opinion only. Currency. A lot of folks in Europe underwent a severed devaluation in their monetary assets when the switch was made to Euros. Germany was hit very hard. The way it worked was, the German mark was quite strong, and trading well against the dollar; they switched to Euros which were valued very high at the time; then the value of the Euro fell 40%, so wham; instant reduction of your cash assets by 40% Not all Europeans are overly thrilled with many of these changes. The German social security system also had a 10% benefit cut last year. If it ain't broke, don't "fix" it. |
| Ellen - Friday, 03/24/06 17:51:31 EST |
|
thank you, i read about charring the leather first and thats what i did, should i redo it with fresh leather? because now i have a lumpy mess and i dont know how i'd get it around the anvil other than maybe making like a slurry ?? |
| jared - Friday, 03/24/06 18:11:40 EST |
|
Could anyone clue me in on a huge pair of tin snips? These things are about 2 ft. long, and one of the handles is turned down at a 90 degree angle. What were they made for? |
| tbird - Friday, 03/24/06 20:02:24 EST |
|
tbird-- they are anvil shears. for cutting whatever they will cut. the bent part goes into the hardy hole. |
| - Miles Undercut - Friday, 03/24/06 20:10:18 EST |
|
tbird-- an anvil shear. bent part goes into the hardy hole. they cut whatever. |
| miles undercut - Friday, 03/24/06 20:11:27 EST |
|
Bruce, I never quite straightened out the terminology on the gudgeon, as used with the bell hanging. Each dictionary has its own definition, and they vary one from another. The large rod-like pins I think are called gudgeons in bell founding, ane they extend from the ends of the bell stock on a single axis. Each rests on a bearing surface. I don't recall the term "trunnion" being used in bell hanging, although, in essence, that is what the whole shooting match is. I don't think the term "pintle" is used in the bell hanging trade. I understand that a pintle, technically, is a marine term as you mentioned, and I have often wondered how it came to be applied to a strap hinge support and pivot. The old fashioned English term for a hingle pintle, is a "hook", a "hinge hook". Somehow, somewhere along the line, we started calling it a pintle. |
| Frank Turley - Friday, 03/24/06 20:18:51 EST |
|
tbird, I think those large bench shears date back to the early days of armour making. The bent shank could be put in a hardy hole as Miles points out, but more often they were put in a hole in a table or workbench. In that way, one shear blade rested on the table, and there was less chance of the sheet metal twisting between the blades while being sheared. The table kept the sheet reasonably level. |
| Frank Turley - Friday, 03/24/06 20:38:03 EST |
|
Chuck: Yeah.....there's already way too much "stuff" circulating in reference to yours truly and well, how this one got going is beyond me. At least I seemed to of quashed it this time... Back to the salt mines...14 days and counting till RPFS JPH |
| GHPoMCI - Friday, 03/24/06 20:44:30 EST |
|
Big Shears: To add to what everyone said above they were fairly common until maybe 40 years ago. Although I have not seen any new for a long time they are fairly common in used tool sales. The design does go back VERY far. In the images I have seen from the 1500's they were attached to a stump (large log) that was set into the Earth. This provided a very stable base. In one the shears were set into a strap on the side of the stump that also held an anvil. In another there was a socket in the stump to receive the the shank on the shears. I have a pair about 4 feet long and have seen many others in the 3 foot range. At one time they were made so heavy you had to move them with a crane and they were a permanent shop fixture that took several men to operate. Modern tools have replaced this brute force method of cutting metal. See The anvil bench of 16th century armourer Conrad Seusenhofer. |
| - guru - Friday, 03/24/06 20:50:33 EST |
|
I have an anvil that was suppose to have been in a poney express station in Santa Barbara Calif,so the story goes.Does a anvil have any markings that would indicate how old it is and who made it.The size is between 90 to 140 lbs.Any info would be appreciated. Thanks Jim |
| james mullins - Friday, 03/24/06 21:05:03 EST |
|
James Mullins, Yes, many had markings, but not all. If you can make out any on your anvil, send them in, and we'll try to help. |
| Frank Turley - Friday, 03/24/06 23:24:04 EST |
|
James Mullins: I find it interesting in that the Pony Express existed for less than two years (1860-1861) but is so ingrained in American history. If of that period, highly likely to be a British import, although Fisher was making anvil then. It may have made the trip around the horn with the 49er gold rush. If very old and double-horned, might be Spanish. If the anvil is marked, it is probably on the side with the horn to the right, but may also have markings below the heel, under the horn and on the front foot. A couple of manufacturers put on the weight stamps on the opposite side to the logos. A good trick is to lay anvil on side, horn or heel and dust with flour. Brush off excess, leaving flour in depressions. Often stampings jump right out at you. Of course, if marks are raised, then it would be cast. The overall shape can be a giveaway, but many anvil brand were so similar they cannot be told apart without markings. If possible, look at the base to see if it is flat, has an oval depression or a depression leaving a lip around the outside of the base. The number and placement of handling holes under the horn, heel on in the bottom can be of assistance. Tap horn with hammer. Does it ring or just make a thud sound? Can you see an obvious top plate on the anvil? Some anvil defy identification of brand, but most can be at least identified down to the most likely candidates. More information please. |
| Ken Scharabok - Friday, 03/24/06 23:59:49 EST |
|
|
|
|