| WELCOME to the anvilfire Guru's Den - V. 3.0 |
|
THIS is a forum for questions and answers about blacksmithing and general metalworking. Ask the Guru any reasonable question and he or one of his helpers will answer your question, find someone that can, OR research the question for you. This is an archive of posts from July 25 - 31, 2004 on the Guru's Den |
|
|
|
I have an old pair of brass tongs, the jaws are completely flat and and round. I was wondering if they were for working with metal or for moving coal becouse of the grey stains on the inside of the jaws. |
| - Lone Blacksmith - Saturday, 07/24/04 22:40:21 EDT |
|
Quenchcrack et al-- We're getting close with this "creep" concept, and Jock's "set," to what I am trying to find out about. Not a bending past the yield point, just a steady stress inducing a change. Fascinating subject! |
| Miles Undercut - Saturday, 07/24/04 23:06:35 EDT |
|
Dear Guru and vicopper, Thank you for the detailed information and the reference of the book. In fact, it's much clearer to me now - although it was complicated to find out the structure of the thread ;-)) Thanky you for helping me. Gabi |
| Gabi Francois - Sunday, 07/25/04 05:49:23 EDT |
|
Lone: Sounds to me like they are standard fire tongs, for metal work. BUT, I can't imagine using brass tongs for forging. Are you sure they are brass, and not just painted? |
| Bob H - Sunday, 07/25/04 06:01:16 EDT |
|
polar, It would seem to me that the concept of an "original" set of cast stairs is kind of confusing. The terms "original" and "cast" are, to some degree, mutually exclusive. If someting is cast, it is by nature a reproduction of the original master. Lone, I wouldn't want to work hot metal with brass tongs, due to the thermal conduction of the brass. Who wants tongs that get hot all the way to the handles? Possibly they were for moving hot silver from a soldering or annealing pan into a pickle bath. If steel tongs are used for that, the silver becomes flash plated with copper, an undesirable occurrance. MIles, I know from experience that magazine springs in Glock pistols will slowly fail if left fully compressed for several months or more. Most shooters try not to fill magazines to full capacity for just that reason. Another reason to love revolvers. (grin) |
| vicopper - Sunday, 07/25/04 07:06:33 EDT |
|
Vicopper, I think Polar was referring to building stars. If I guess correctly, these would be the cast iron stars that are placed on the outside of a brick wall to spread the load of a tie rod use to reinforce a strucure, or to hang a structure inside a brick wall. On "creep" This is a very serious effect in the steam industry. At the temp's seen in power generation, the high pressure can cause creep failure in relativly short time frames. Most utility power generation involves 1000F and 1500psi steam, with a strong move to 1200F and 2500psi. The industry standard alloy is F-11 or F-22. These are forged Cr.-Mo alloys that have good resistance to high temp. oxidation and creep failure. In a high temp/pressure valve, a few thousandth's creep will allow leakage across the seats, and at these pressures the steam will cut the Stellite seat, in a process called "wire drawing". Once this minute leak path is established the steam will cut the much softer steel body like a flowing stream against a mud bank. The chrome-moly imparts high temp strenght and resistance to creep, and also reduces the oxidation of the steel surfaces. A plain carbon steel body in the industry standard of A-105 (C-1023) will both creep fail and oxidize away to failure in a short time at these conditions. |
| ptree - Sunday, 07/25/04 09:33:24 EDT |
|
Had no idea I was dealing with such a hazard, have been using low octane lawnmower fuel in both of my gasoline blowtorches for 30 years, starting the coke in my homeshop forge with one of them routinely. Never had a clog, put a new washer in the pump of one of them, store both with the gas can in the old dog house out under the grape vine to keep them cool in the summer and to let any fumes disipate. Now I will be more apprehensive (scared) every time I light the favorite off. Never thought of polishing either one to its bright brass possibilities. Now I wonder if I will ever get the gasoline lead pot lit that my Grandfather left me for plumbing. |
| Cap - Sunday, 07/25/04 10:22:45 EDT |
|
i have found a 1942 anvil that was apparently never used , it is a 250 lb fisher eagle that was owned by a carpenter who picked it up from an army depot around WWII. It is still coated in cosmoline grease. any one have a guess as to what it is worth? |
| charles lee - Sunday, 07/25/04 10:22:55 EDT |
|
Charles, Anywhere from $500 to $1500 depending on who is interested, maybe more. I am e-mailing you the address of Joshua Kavett, the fellow that runs the Fisher-Norris Museum. He may be interested. |
| - guru - Sunday, 07/25/04 12:12:22 EDT |
|
Ok, the basic problem is i have a 24" long forge (12" wide) which has 3 ron reil style burners all three of which are not getting enough air (or something) and flashing back through the burners. I'd be eternally greatful if you could answer this problem. All right, tell me if you can make sense of this. I tried every prescribed method to repair my burners including some others that i thought of myself (repositioning the flares, taking the threading out of the reducer bell). This includes filing the inside of the jet tube and checking for blokages. Someone said that #60 was too large a hole, but the website with the plans said it was good (brian somebody's page, linked to from ron reil site) and even suggested making it bigger than #60; 59 or 58 even. I think, even though i also doubt his page is wrong, that this might be the problem. So i tried one thing after another until i got chokes hooked up on all my burners. After choking them ALL to just a sliver, they worked fine! The flame was green, though, which made me think it was reducing (which would make sense), however, the flame that came out of the forge was yellow. Also, when the burner wasn't choked, a lot of yellow flame came out. In addition, reducing flames are supposed to be cold, and yet i had an easy time of forging with it (the pieces even built up scale, isn't that impossible in reducing?). The most normal flame i got was when i left it unchoked and blew in the bell, i would then get a steady non-backflashing flame. Help! It works, but it doesn't seem right to have it choked off and the flame running green! Is there a danger in using a reducing flame? (that is what a green flame means, right?). You have to take into account that only a week ago it worked perfectly. I took all of the burners out to fiddle with them and when i put them back even the working one backflashed. Also the rate at which they did greatly increased (which i THINK is better because it seems more uniforme and just needs a little more air pressure to work). I've been thinking i'll just get some new brass tubes and drill new holes at a smaller size. Why, though, does choking off most of the air make it work next to properly? |
| Julian Kingman - Sunday, 07/25/04 13:06:52 EDT |
|
Building Star: Polar, As pointed out, in castings an "original" is the pattern all the rest are copies. Many foundries also used the same pattern for a century or more so dating these things based on style is virtualy impossible. ALSO, virtualy every foundry that produced these things also made them from their own in-house made pattern. In a given locality where there was more than one foundry making these things, say in a large city, it might be possible to identify a foundry's style of star. However, styles were copied and the difference between a copy made 200 years ago and last week is difficult. As to dating the thing its condition whould be the best indication. The type of mortar stuck to the back (soft lime or hard concrete) the layers of paint if it was painted, the rust texture, especialy around the nut location. However, if the item has been striped of paint, sandblasted or other cleaning method used it would be VERY difficult to determine if it was 200 years old or a week old. The provenance (who, what, where, when) of an item is almost more important than the item. The paint, dirt and corrosion comes next. Coupled together a good guess can be made as to age. Do-gooders that clean antiques destroy all the history and ability to determine age . . . |
| - guru - Sunday, 07/25/04 13:33:27 EDT |
|
Hey everyone. I'm new to blacksmithing and have a few general questions. First, what is a clinker breaker used for, and where does it go? Also, on a forge, don't you need some type of grate at the bottom of the firepot to keep coal from falling down to where the air flow is? And are these usually always installed on commercial firepots? Thanks in advance for answering my newbie questions. |
| - Jonny - Sunday, 07/25/04 13:55:46 EDT |
|
Forge Trouble: Julian, There are as many things that can go wrong as can go right in these things. 1) Flash back is caused by fuel/air velocity less than the flame front velocity. Normally this is the result of too big a burner for the volume of the forge OR too large a jet in the burner, thus low velocity. This can also be caused by turbulance caused by bad shaped bells (some reducers are hemi-spherical and do not have good flow characteristics). 2) Angle of entry or position in the forge. If the fuel/air velocity is low and the burners are in the top of the forge the pressure of the rising gases will cause flash back. Burners at some angle, say about 30° from vertical tend to permorm better. Burners that enter at an angle tangental to the interior lining of the forge have smoother flow and create a spiral turbulance in the forge that results in more even heating. 3) Detail of construction such as burrs on the edge of drilled holes (did you de-burr INSIDE the orifice far end?), flaping pieces of teflon tape, missalighned orrifices. . . IF the orifice it not aimed down the center line of the burner tube the fuel/air flow is to one side and low velocity turbulance results on the oposite side which can result in flashback. All new burner designs recommend using MIG tips as orifices for the following reasons: a) Smooth precision bores b) Proper lead in bevel and no need to de-burr interior holes. c) Long bore, easy to align b) Higher gas velocity due to long bore. 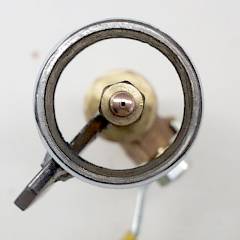 When I build burners with MIG tips I check the alignment by sighting down the burner from the output end THROUGH the MIG tip. Perfect alignment can be achieved but I have found that if you are within a circle 1/3 the size of the tube at the outlet it is close enough. A drilled orifice can easily be impinging its gas jet at the rim of the bell. . . burrs can make it even worse. See my photo on our Gas Forge FAQs page.
Green flame is usualy caused by burning copper. . . Choking the burner does not necessarily make it run rich if it was running too lean to start with. Then there are little things like spiders building nests in pipes and mub-daubers clogging tubes. . . |
| - guru - Sunday, 07/25/04 14:02:51 EDT |
|
Coal Forge Parts: Jonny, A clinker breaker goes at the bottom of the fire pot where the air enters from the tuyeer. In most cases it does not act as a clinker "breaker" but more of a way to stir up the ash and clinkers to make them fall through the tuyeer into the ash dump. I prefer a grate-less fire pot. Grates, especially those with holes in them clog fast and burn out just as fast. In the most common commercial coal forge the triangular clinker breaker "ball" acts as an obstruction to prevent excessive coal from falling into the ash dump. In forges without a clinker breaker a heavy piece of stainless steel bar can be used to advantage. It should be loose so that it is easy to remove and replace. See our article on building a brake drum forge and the photos of Forge parts on the Kayne and Son page. Although it is very easy to build your own coal forge the commercial firepot tuyeer combinations are very efficeint and hot burning, and generally worth the money if you are going to do much forging. However, find out if you can obtain coal at a reasonable price first. If not you may want a diffeent kind of forge. |
| - guru - Sunday, 07/25/04 14:31:03 EDT |
|
hi, im a intermediate smith with a real knack for metal work, I work with sheet metal every day and that brought me into working with diffrent metals and of course blacksmithing, I was wondering, because I work with alot of mild steel, whats the proper tecknique to oil baking to prevent rust, I dont like to paint because it hides alot of details. thanks in advance! -tim, montague mass |
| tim - Sunday, 07/25/04 15:45:21 EDT |
|
I would like some help identifying this anvil http://home.cogeco.ca/%7Evulcans-forge/tools.html the face is 3.5" wide and 13.25" long after cleaning the face looks to be welded on and there is a weld seam at the waist. the only markings are the 1 0 8 (=120lbs) and a V on the front of both feet under the horn. as you can see it cleaned up well with just a belt sander I still have to radius the corners they are to sharp for my liking. oh yeah bought it for $100 canadian at a yard sale (about $80 US) the 6" post vise on the same page was a $15 buy at the same sale some nutbar has welded sections of files to the jaws as a gripping suface :( I can see a lot of grinding in my future |
| Mark P - Sunday, 07/25/04 15:56:08 EDT |
|
that url should be http://home.cogeco.ca/~vulcans-forge/tools.html another question I picked up some welding rod at a yard sale about 500 rods for $20 I can identify most of the designations 7018 7014 6013 6011 etc but there are about 40 rods with "AG600" with three red bands above that can anybody help me with what these particular rods are for? |
| Mark P - Sunday, 07/25/04 16:26:40 EDT |
|
Oil Baking: Tim, none or any method you chose. When you bake or burn on oil (any type) you are accelerating drying or forcing non-drying oils to dry, which is just making a form of varnish. If you do not like paint but you like burnt oil you just don't know how to paint or to chose paint. Most new smiths start off burning oil onto their work or applying wax to a hot surface. This is a lousy, temporary, non protective hard to maintain finish. Then they start using mixtures of oil and wax and solvent of their own recipes or others. Finaly they add driers and graphite. . . all this is a PAINT formulation. P A I N T ! It is a low quality untested amature paint formulation. So if you are going to use paint why not use the BEST formulated by professionals? Have I used enough negative adjectives in this paragraph??? Study a book on oil painting. Art suppliers have lots of specialy varnishes and oils. Talk to automotive finishers, look at what can be done with lacquers and a spray gun (works of art). It is another part of the job to LEARN. LOOK at what Hollywood does with wood, plaster and PAINT! I am continously asking smiths, Why can Hollywood can make wood and plaster look like wrought iron and blacksmiths can't make wrought iron look like wrought iron? The answer is mostly lack of trying, or not considering the finish as an important part of the craft. Most do not quote enough to finish a job. . . A good professional finish can cost as much as the metalwork. LOOK at the finishes created by potters. These folks start by producing a piece of art THEN they continue with a process that is so mysterious they often lose half their work. It is a gamble, they cannot go back. But they KNOW the work is not complete without an amazing finish. In metalwork you can always clean off a bad paint job and start again. Paint hide details? Only if you glop it on and do not know how to apply a REAL finish. Paints can enhance texture or hide it either one. Paint can BE the texture and detail or not. It is up to you. Paint, varnish and lacquer can be applied with brushes, spray, rag and by hand all to different effect. Translucent tints are darker where thicker and can create volume and shape as well as enhance texture. Colors can be rubbed in to create aged or an organic look. Highlights can be created to acenetuate edges or create focus. Glazes can create great depth. AND all this can be done using professional long lasting, color fast, protective coatings. . . See my 21st Century page article on paint. Start with a protective finish then use whatever top coat suits the work. EXPERIMENT! Do not give into one color (flat black) suits all purposes. . . |
| - guru - Sunday, 07/25/04 16:31:52 EDT |
|
Portable Bellows/workshop. Hello Guru! For some time now I have been studying your portable forge (depicted on this website) but find it too large for my needs. I love the bellows idea and recently aquired a one of a kind piece at an auction but I could use some advice on this one. I have worked as a blacksmith at a National Historic and I am familiar with the large models but this one is a two chamber, foot operated portable type. It is 21 inch long, 12" high and 10" wide. The manufacturing label show a crown over the letters ER. Another label show letters RLP inside a diamond. It was manufactured in 1959 and also reads "10" D/A FOOT BELLOWS". There is a foot plate on the top chamber and a coil spring pushing the bottom chamber upwards. The air outlet/nozzle is 1" diameter and shoots upwards. Surprisingly this little bellows throws off a nice air flow. I've searched the internet and books but cannot find any info on these anywhere. It is a beautiful piece and would like to use it wisely and efficiently. I would be more then happy to send digital pictures to anyone willing to help. Thank You. |
| Louis - Sunday, 07/25/04 16:34:03 EDT |
|
More on Finishes: Go out into a parking lot and LOOK at some OLD cars. Look for the 15 and 20 year old clunkers (like mine). Then LOOK at the finish. If it has not been wrecked or scratched up OR rusted from the INSIDE, 99.99% of the finish will be PERFECT. There will be no rust, no flaking paint. The metal will be perfectly preserved. This is from a finish that is only a few thousandths of an inch in thickness. When you sell a piece of quality ironowrk the customer deserves at LEAST this good a finish. If your work is a high class all forged and classicaly joined piece then the finish should reflect the care that went into the rest of the work. The problem is, most smiths quit when the forging is done. They turn their artwork over to nature to do its worst. OR they let the customer finish the work to avoid the responsibility and cost. They quit with the job half complete. . . Imagine that potter I mentioned above expecting his customers to buy all his work as bisque ware and to finish it themselves. . . SURE, you say he didn't FINISH the job. . . Well, if you don't finish your ironwork why should he finish is pottery? It is no different. |
| - guru - Sunday, 07/25/04 16:43:56 EDT |
|
Thanks Guru. I was actually planning on buying a firepot and maybe a fan from Centaur, and then building a base to go around it. I was wondering because the firepot I was looking at didn't seem to have either (clinker breaker, or grate). Do you think it's a good idea to buy these things and build a base on my own? And if so, do I need heat resistant bricks, or can I use regular ones? Thank you. Oh, and I ordered several books off the internet on blacksmithing, so please don't think I'm lasy and just want you to answer my questions forever ;) |
| - Jonny - Sunday, 07/25/04 16:54:27 EDT |
|
Anvil ID: Mark, From the shape and the fact that it has that clamping ledge along the front and back of the feet I would say it is a Peter Wright OR made by one of his close competitors. It is definitely a forged English anvil from the area where Peter Wrights were manufactured. Ocassionaly anvils were shipped without the brand name to be privatedly branded. Most were never labled other than a stencil if that much. Most of the major makers sold anvils this way. |
| - guru - Sunday, 07/25/04 16:57:28 EDT |
|
Mark P does it weigh 120 or 108? Only english anvils used the CWT system, American and swedish anvils used pounds. With the numbers close together like that it looks more like a pounds marking to me. Also can you post a picture of the underside of the base and the underside of the heel? These two locations can often narrow the possibilities of the maker or the age down quite a bit! Thomas |
| Thomas P - Sunday, 07/25/04 17:04:20 EDT |
|
Hello...I am just starting out and have a problem,,bought a propane forge and use barb b que size tanks...some work,some don't have enough pressure...yet all these tanks will work on the grill.I'm at a high altitude so I bought a regulator with a gauge..Some tanks will give me the 5 psi that I need,yet some stay at almost zero. All tanks are OPD.Greatly appreciate any help |
| ARTHUR LYNN - Sunday, 07/25/04 17:41:57 EDT |
|
Julian, It sounds like you're encountering a problem that I ran into a few months ago. Check the alignment of your jets relative to your burner tubes, and as the Guru said, do a burr check. Ptree, Thank you VERY much for the tip on the aircraft tubing! I've found a source online for exactly what I need. Got any tips on how to forge 4130? Partly cloudy in Kaneohe, Hawaii. |
| T. Gold - Sunday, 07/25/04 17:47:32 EDT |
|
Thomas P. just checked the unknown anvil on my scale it is actully 121.25lbs. I have uploaded the pics of the underside to my website (and resized them to load faster) Guru, I had thought it maybe a Peter Wright but the wieght marking is on the other side from the one I already own I also added a couple more pics of the now stripped down post vise and the result of two hours of grinding on one side of the jaws |
| Mark P - Sunday, 07/25/04 18:38:26 EDT |
|
proof then post website is http://home.cogeco.ca/~vulcans-forge/ tool pics at http://home.cogeco.ca/~vulcans-forge/tools.html |
| Mark P - Sunday, 07/25/04 18:41:54 EDT |
|
I have a large stock of clinkers that I need to get rid of but I needed to know if clinkers could decompose and if it is possible to do it myself then how? Thank you. |
| - Lone Blacksmith - Sunday, 07/25/04 19:11:58 EDT |
|
T. Gold, I have never forged 4130 tube, but can offer the following. In the aircraft trade, ox/fuel welding was used for years, and when a change to tig was made, cracking in the heat affected zone was a serious problem. Furnace stress releiving was the answer. The tig weld had too limited heat input as the flame was very intense but small, and a sharply delineated heat affected zone occurred. Gas welding was slower, with a larger heated zone, allowing a softer heated zone. I know that 4130 is hot worked, but I suspect that the work is then furnace heat treated for obtaining the desired condition. The 4130 will air harden somewhat but should not be severe. Is AIRCRAFT SPRUCE the source? |
| ptree - Sunday, 07/25/04 21:48:50 EDT |
|
Lone: I don't know about the rest of the crew here, but I use clinker to fill potholes in my gravel road. They only degrade on a somewhat geologic scale, and they may have some sulfer content, depending upon the quality of the coal, so they might be harmful if you dump them in a garden and such; but for the most part they're just another form of rock, and I use them as such. I've also used them to help get my truck off an icy spot by the forge during the winter, so there's a second use. Some folks have been known to sell them cheap at craft fair demonstrations as "dragon turds". It's a nice idea to have someone else to pay to haul them away. (Of course, I've never stooped so low, except, maybe, on days ending in "Y".) I'm sure others will add their suggestions, if they haven't already. Cool and humid on the banks of the lower Potomac. Visit your National Parks: www.nps.gov Go viking: www.longshipco.org |
| Bruce Blackistone (Atli) - Sunday, 07/25/04 21:54:56 EDT |
|
Ptree, Aircraft Spruce is indeed the source. From what you're saying, it sounds like I should be able to forge it and let it air cool. I'll order some excess so I can give it a try first. Can 4130 be stick-welded without HAZ cracking? |
| T. Gold - Sunday, 07/25/04 23:51:06 EDT |
|
Autofeeds: I was using my hand/power drill press this weekend to run a number of 1/2" (13mm) and 3/8" (9.5mm) holes through some 3/16" and 5/16" (4.7mm & 8mm) steel straps. I switched the pawl over to autofeed and set the screw for the slowest setting, and it seemed to work well, but I'd also flip it off for oiling the drill, and tended to twist it down by hand before setting the pawl again, just to make sure. The bottom line is that I'm always suspicious of the autofeed. The fact that my loaner hand-cranked post drill has a broken table, and some of the finer drills start to flex when auto-fed leads me to be a tad suspicious. So, what's the practice out there? Auto-feed for larger diameters? Hand tight for finer stuff? Empirical knowledge is most useful when it is drawn from a broad range of sources. Guru: The chuck key is in the mail; thanks for the loan. Cloudy w/ anticipated rain; and lower 70s (!) on the banks of the Potomac. Visit your National Parks: www.nps.gov Go viking: www.longshipco.org |
| Bruce Blackistone (Atli) - Monday, 07/26/04 08:58:59 EDT |
|
Mark, thanks for the extra pics; with the weight in CWT it's not an American anvil; not squat enough for a Mousehole. I can check tonight if the base looks like my William Foster, (unfortunately my WF has lost 80% of the face and all the heel so I can't say if the shape is similiar...WF also date stamped their anvils mine was made in 1828) One thing I did note is that it's rather roughly "dressed" which would definitely rule out Peter Wright IIRC. Paw Paw you got AiA handy? My copy's at home but lots of pictures and 28 Kb dial ups just don't go together well... Thomas |
| Thomas P - Monday, 07/26/04 10:06:18 EDT |
|
Bruce, I believe Bridgeport doesn't recommend autofeed in a J-series vertical mill on any bit larger than 3/8 or so but I set my mill on lowest quill speed and finest feed to drill up to 1 inch in mild steel. I always use a sharp bit and stand there to watch the work plus use a lot of coolant. I don't do 8 hours of this every day so I can't see that it has caused a problem. Drill motors designed for drilling may be more robust in the autofeed department. |
| - HWooldridge - Monday, 07/26/04 10:26:43 EDT |
|
I neglected to say that I also drill pilot holes so the large bits aren't cutting a full diameter. |
| - HWooldridge - Monday, 07/26/04 10:28:13 EDT |
|
Thanks for the posts on hammer steel, axle hunting I will go. Now, I learned to dish on upended welding tanks (emptied, cleaned and cut down). I'm having a heck of a time finding some for myself. Or if anyone has better ideas for dishing bowls, I'm interested. |
| MikeA - Monday, 07/26/04 10:35:17 EDT |
|
Coal Forge Construction: Most modern coal forges have no bricks in them. The firepot is set into a plate with a frame around it to help raise the caol bed a couple inches and to keep the coal from falling off the forge. Usualy the rim has a cut out to about 1-1/2" (38mm) on sides opposite the fire pot and is about 3 to 4" (75-100 mm) deep the rest of the way around. The purpose for much of the area of a coal forge is coal storage. Coal is contantly being pushed toward the center of the fire and it is much more convienient to do so from the table of the forge than to be constantly shoveling in fresh coal. Bricks just add a ton of weight to something that you want to be semi-portable. Refractory or fire brick work surfaces are handy for heating and welding with a torch. I used a fire brick setting on top of a vise to weld some parts for Paw-Paw Saturday. Refractory bricks are expensive and there are much better uses for them than filling the bottom of a forge. |
| - guru - Monday, 07/26/04 11:28:20 EDT |
|
Hand Crank Drill Feeds and Cutting Oil: Bruce, 1/2" was the maximum size for most of these machines. With a good sharp bit that is making chips you should be able to run the feed near full tilt with a 3/8" bit and at slightly lower rate at 1/2". My procedure for using one of these machines is to preload the bit with the feed wheel until it feels a LITTLE stiff and set the feed paw to feed. This actually springs the frame and column of the machine. Then start cranking. If the feed pressure drops rapidly then add some tension. A sharp properly cutting drill bit will make nice curling chips (in a shallow hole) when at proper feed pressure. Less than proper feed pressure (or with a dull bit) and the chips tend to break into small pieces. However, on some metals including some A-36 plate it is hard to get curling chips. But there should be a constant stream of chips. IF a drill bit is not making good chips then it is dull, or does not have enough feed pressure. NOT making chips is bad and indicates a rubbing bit that is getting hot and wearing. This is why electric hand drills are really hard on bits, it is difficult or impossible to have enough feed pressure on bits larger than 5/16" (8mm) by hand in steel. Do not back off on the bit to oil. This allows chips to get under the bit and stops cutting. As long as chips are being freely ejected just keep drilling and oiling. The only time you want to back off the feed is when breaking through the bottom of the hole OR if chips stop ejecting from a deep hole. Normally chips will eject smoothly from the hole up to about 2 diameters. Deeper if they are continous curling chips. When the chips start breaking up and packing around the bit in a deep hole then you need to remove the bit from the hole and clear the chips (I use a stiff paint brush). The trick here is that if a loose piece gets under the cutting edge of the bit it will rub and not cut and is hard to clear. At this depth a pumped coolant system that floods the work and rinses away chips is required for production drilling. . . But that is not a possibility for most of us. Most of these old machines got broken from abuse. Moving damage, accidents, being tossed in a pile of junk and such. The table should always be kept centered. If it is rotated off center it will twist under drilling pressure which is likely to break the bit AND could break the table. At drilling pressure the frame, column and table arm all spring quite a bit. Even on my big 20" drills with 6" diameter columns you can see the table spring a half inch or more under drilling pressure. . . Think about what THAT does to bit alignment! The advantage to hand cranking these machines (I know yours has a motor) is that you can feel when things are getting stiff or the feed rate is too high. When it becomes hard to crank due to the feed rate then you need to disengage the feed for a few turns then reengage the feed before the preload is lost. |
| - guru - Monday, 07/26/04 12:34:09 EDT |
|
Dishing: Mike, what are you dishing? How heavy of stock? Hot or cold? There are two simple methods. One is to use a wood stump. This has the advantage of soft edges that do not mar the work or create thin places in sheet. Wood is great up to anything that does not need to be done hot (anything less than about 10ga steel). The second is a ring made from cut off pipe or rolled by hand. Radius the inside edges of the ring and weld it to a base plate. The edges of the ring act EXACTLY like a metal dish or swage block. The only part of a bowl that makes contact is the edges until the piece is the same shape as the bowl. . . A ring made of 3/8" or 1/2" (10 or 13mm) bar has sufficient width to provide a nice rounded edge. Use thicker if you have it and can work it. Then there are commercial swage blocks which our larger advertisers sell. They have many useful shapes other than dishing bowls. The biggest mistake made with dishing bowls and swages is that they are made much too deep. I have made this mistake and almost all commercial blocks are too deep. These are not a mold or form but a work surface. A dish in wood or metal that is about 3/8" to 3/4" (10mm to 20mm) deep and 3" to 4" (75 to 100mm) in diameter is sufficient for making almost any size dish. Gentle radiused edges are the most important. Cylinder ends like you are looking for are very close to the perfect shape. But there are many other substitutes as mentioned above. Wood becomes radiused with use but it does not hurt to create the proper radius. Most commercial swage blocks are a good start. The overly deep bowls need to be treated like a rolled ring. Their dishing bowls need to be hand dressed with a grinder starting with removing all the casting texture and then heavily radiusing the edges. I had a local fellow contact me about cylinder bottoms. I will have to contact him and see if he still has them. |
| - guru - Monday, 07/26/04 12:56:59 EDT |
|
Mostly going to be doing SCA type armor, so 12-18 gauge steel. I tend to start my dishes hot and then finish them up cold though I learned all of my armoring skills cold. I have a few stumps and plan to make dishes out of an ash plank as well but I wanted the cylinder bottoms for hot work. I've tried pipe but it wasn't prepared or stabilized properly so I hated it. I like the ring idea, will try that one. I just like the useable surface at the bottom of the cylinder bottoms too, it's great for getting those last little imperfections out while assembling a helmet. I'm shying away from swage blocks for now due to cost though I assume there's a couple in my future sometime. I'm in SoCal by the way. |
| MikeA - Monday, 07/26/04 13:53:19 EDT |
|
Thomas, I always have AIA handy. It sites in a shelf just above my monitor. Mark, send me the pictures and I'll try to figure it out for you. |
| Paw Paw - Monday, 07/26/04 14:21:26 EDT |
|
I was wondering if some one out there knew wear I could find a copy of plans for a �Smithin Magician�? Many thank in advance |
| Matt Johnston - Monday, 07/26/04 14:25:49 EDT |
|
Matt Johnston, go to the upper right-hand corner of this page, click on the pulldown menu and go to the "iForge" tutorial page. Look at demo #41. Then think about joining anvilfire to help maintain this great resource! |
| Alan-L - Monday, 07/26/04 15:58:04 EDT |
|
Mike possible sources for gas bottle dishing forms: Hydrotest facility---may require bottle to be cut on site Ask at welding supply for location of nearest, scuba shops may be able to provide this info too. Fire-extinguisher companies---old bottles get retired, suggest you only accept straight CO2 extinguishers to avoid dealing with chemicals Soda dealers---commercial soda machines use CO2 bottles---that's a lot of bottles out there, find out what they do with their damaged ones Note not all these bottles will have usable bases, however some of the smaller ones may have rounded bases that make good forming stakes. Finally find someone who is making "bells" from the bottle tops and arrange to buy the bases *cheap*. I also find discarded bottles from time to time of all three classes. Make sure a discarded bottle really is junked and at zero relative pressure. *NEVER* mess with an Actelyene bottle they CANNOT be made SAFE; the old ones being filed with asbestos and acetone, the new ones with a silicate material and acetone and risidual acetelyene in both cases. Thomas |
| Thomas P - Monday, 07/26/04 16:29:50 EDT |
|
T.Gold, I don't think that stick will suit for the application of 4130. I would go with a good gas weld, or try just straight 4130 without the SS welded on. By the way, what kind of SS would you weld on? What tube size by od? |
| ptree - Monday, 07/26/04 18:14:03 EDT |
|
Mike, Soure for very nice dishing forms. Go to the nearest industrial piping distributer, and ask if they have any "butt weld type pipe caps" A brand reconized by everyone in the industry is "WELDON" these caps have a nicely finished hemispherical shape, although they may need triming as the may be a bit deep. These will be available in all standard pipe sizes, and if you ask if they have any slow moving stock you may get a deal. If there is a pressure vessel builder near they also use hemi heads to make vessels(tanks), and these are available in even inch sizes up to to big to haul in a pick-up. Good luck |
| ptree - Monday, 07/26/04 18:24:26 EDT |
|
Very good, thank you. There sure is a lot of good info out there. I especially liked the sword making faq. As an armorer I've had plenty of people tell me they want to make a damascus breastplate (smile and nod) or a full suit of Maximillion plate (smile and nod) for their first piece. Love it. So next question, my new house unfortunately has neighbors so I'll need to watch the noise level. Any advice on soundproofing a garage? I've seen garage bands hang old carpets on the walls but I'm concerned about the flammability. I also considered placing pieces of styrofoam insulation in between the uprights behind the pegboard. |
| MikeA - Monday, 07/26/04 19:14:49 EDT |
|
Ptree, The SS will be 316 or possibly 309 (unlikely). Tube sizes will vary, but be around half an inch plus or minus a quarter inch (different size pipes are good for different size pieces), with .095 walls. 4130's corrosion resistance isn't good enough to be used alone, unfortunately. |
| T. Gold - Monday, 07/26/04 19:16:28 EDT |
|
MikeA, DO NOT USE STYROFOAM. If you think carpet is flammable, you'll be really impressed when you see foamed stryene plastic burn. Flames, smoke, poisonous gases, everything every fire fighter hates. If you want insulation, use fiberglass. It is fireproof to the first approximation. For soundproofing, Owens-Corning, the pink fiberglas people, also make a sound suppressing fiberglas batt material. Check it out. Sheetrock acts as a sounding board unless it is mounted on special metal spring strips. Do a Google search for "home theater soundproofing" for some more ideas. Think in terms of stoppiong reflected sound and absorbing wave peaks instead of transmitting or reflecting them. |
| vicopper - Monday, 07/26/04 19:46:12 EDT |
|
Julian and Arthur, When I built my Gas Forge on the cheap I was having similar problems and found it was because I had used the Acmenut connector from a gas barbecue instead of purchasing the adapter which screws into the inside threads of the propane bottles valve. The big plastic hand tightening nut from a barbecue regulator has a pressure reducing scheme built into it which won't allow more than a few pounds of pressure at the input of the regulator. if you are using one of these you can run a drill bit thru inside of the nut to defeat this feature. hope this helps Adam |
| lazarus - Monday, 07/26/04 20:16:18 EDT |
|
I'm assuming of course that you have used this nut to attach an adjustable propane regulator because a gas barbeque regulator won't work. (no more than 3 psi ever from one of those) |
| lazarus - Monday, 07/26/04 20:20:15 EDT |
|
I'm kind of new and need to ask where would I get or determine different types of steel.(i.e. "1050" medium carbon steel) |
| - Jay - Monday, 07/26/04 20:46:53 EDT |
|
T.Gold. Short lenghts of very high quality, seamless 316SS in 1/2 x .095 are available from any Swagloc dealer. Look in the yellow pages under piping, and they will be listed as "xxxxx Valve and Fittng' with the xxxx being the city name. They sell other sizes as well. I used that exact size to plumb hydrostatic test machines for pressures to 10,500psi. They also sell it in Monel I think as well as Hastaloy. Both are very high alloy, high temp alloys. Also very expensive. I think when we closed the plant we probably scrapped several lenghts, and if so I may yet have them. 4130 to 316SS may work with a 309SS rod using stick, but at those temps, I suspect that there is no real good weld process. |
| ptree - Monday, 07/26/04 21:01:39 EDT |
|
Sound Proofing: This is difficult to do and many of the materials used are flamable. When foam insulation is used it should be covered with sheet rock as fire proofing. Fibreglass insulation is good sound proofing and fire resistant. Hard flat surfaces are the worst for reflecting sound. Generaly an empty shop is noisey and a full one deadens sound. Shelves, stock racks, things hanging on the walls help. Ceilings are the biggest problem. Ceiling tiles are your best bet. They are made to be fire resistant and are designed to deaden sound. Using these on the upper part of the walls or on dividing panels will help. Don't forget doors, especially in a garage. If you use peg board on the walls with furing strips a layer of split fibreglass behind the peg board will also help deaden sound. In areas where sparks and fire are not a problem you can hang carpet on the walls. This is the same reason for tapestries over stone walls. They did little for warmth but they do a great job of quieting echos. If your shop is a garage with a drive in door used for ventilation then what you do out doors can help. Bushes and shrubs eve height and along fences can reduce sound transmission. Look at possible reflective sound paths. Look out your door at any hard flat surfaces on buildings you can see. These will reflect sound just like a mirror does light. Imagine a beam of light reflecting off the back of your house into the neighbor's back yard. Sound does a very similar thing but also probagates in circular waves. This means that it can go around corners to a point. AND. . .one of the best things to do is to be friends with your neighbors and let them know about your hobby. A fire poker, trivet or plant hanger as a gift can go a long way. . . |
| - guru - Monday, 07/26/04 21:13:37 EDT |
|
Carpets on wall: Vertical flame spread can be tricky, and I've been slapped around by our fire and safety folks just for suggesting it. However, I know there's fiberglass carpeting for in front of fireplaces and woodstoves, as well as fiberglass curtains available. Also, if you don't have enough ceiling tiles for the entire ceiling, be sure to get some on the walls and ceilings in the corners. "Corner reflectors" are very efficient at bouncing sound back to the source, and in this day and age everybody tries to have everything at a true 90 degree angle, so that we can be more efficient at going deaf. ;-) Cool and humid on the banks of the lower Potomac. Visit your National Parks: www.nps.gov Go viking: www.longshipco.org |
| Bruce Blackistone (Atli) - Monday, 07/26/04 22:33:26 EDT |
|
Howdy, first of all, to all you other blacksmiths out there. I'm just a 15 1/2 year old beginner, been working at it all summer in fact. I'm planning on building a shop in my back yard(16'x16'with an 8' high ceiling) and i have everything laid out for it( i live in the city by the way). The only thing I'm having trouble with is deciding on what kind of floor i want. Its either dirt or concrete. I'm not sure which would be better, so I thought I would ask , to see which one you prefer in you shop. Any input will be greatly appreciated. Thanks, Ian Wille |
| Ian Wille - Tuesday, 07/27/04 00:15:27 EDT |
|
Ptree, I prefer carbon steel bodies to stainless for the texture and visual aspeects, though I do appreciate the source and may look into that for some other stuff (heat exchanger, student pipes...). This is not a super load bearing weld, and I'm pretty sure that these are usually either welded with 309 stick or TIG welded. I think I'll do the welds with 309 stick and if they don't hold up I'll take them to a pro welder and have him TIG them. I may also drill through and do socket welds... think I'll give up on the forge-welding idea for the moment. When are you usually on the Pub? |
| T. Gold - Tuesday, 07/27/04 01:54:14 EDT |
|
Dear Guru: I purchased a hollow bronze statue at an auction and it appears as though someone tried to patch the holes and cracks with some sort of putty. I would like to remove the putty and patch the holes and cracks with matching bronze. Can you recommend a book or website that will provide some do-it-myself instructions for simple repairs? Thanks . . . |
| Celeste - Tuesday, 07/27/04 03:09:29 EDT |
|
Bronze Statues: When I was in college I visited a musuem show with quite a few original Greek Bronzes. Almost all of them were patched due to flaws in the casting. This was done with litle square or rectangles of bronze that were fit into the flaws. I am not sure exactly how the attachments were made, but today this could be done with a silver solder. The trick would be getting a very close fit between the patch and the hole. Doing high quality repairs on metal work takes a great of skill so if you are new to this, you may want to find an art museum or local art school that teaches bronze casting and see what they recommend for repair techniques. They may be willing to help you with the project as well. Patrick |
| Patric Nowak - Tuesday, 07/27/04 11:42:03 EDT |
|
Ian Wille: If you're getting big machines like a power hammer and a hydraulic press, then you want concrete. If you plan on doing it by hand, dirt will be easier on your feet and back, and way cheaper and easier to do. |
| AwP - Tuesday, 07/27/04 04:13:22 EDT |
|
I found a recipe for wax for forged items online. I mixed the following ingredients together, heated them indirectly until all was melted, then shook vigorously (described as Doug Merkel's paste wax recipe). 1 cup Johnson paste wax 1 cup Boiled Linseed oil 1 cup turpentine 1/2 cup Beeswax 2 TBSP Japan Dryer My understanding was that it should cool to a soft paste. It didn't, it is still very runny, and never really drys on the metal. Can you advise where I may have gone wrong, or suggest an alternative recipe. Thanks... Dave Hammer |
| Dave Hammer - Tuesday, 07/27/04 09:20:04 EDT |
|
"Recipe" Dave, See my post above (about two days ago) titled "Oil Baking" on 7/25 then the follow up a post below it. Then if you search our archives for "natural finish" and "oil finish" you will find similar responses dozens of times. Your problem is too much solvent. The commercial paste waxes I have bought recently like bowling alley wax had much more solvent than in the past. They may also have changed their formulation (as it is their perogrative). It is also possible that the writer miswrote a quantity OR used an old can of wax that most of the solvent had dried out. The 1/2 cup beeswax sounds way short for the amount of turps and should probably be a couple pounds of beeswax. The given mixture WITHOUT the turpentine is enough to make a soft paste. THEN there is the possibility that your boiled linseed oil had solvent already added (did you read the label closely?). Lots can go wrong when you are playing at amature chemist. |
| - guru - Tuesday, 07/27/04 11:55:45 EDT |
|
Sound. Yup old "Drop ceiling" tiles work great. You can get them for free if you aren't shy. When you see a store being remodeled they sometimes replace the old ceilings. Got mine from a mall. If you don't want to lose head room by hanging them, they can be screwed onto the rafters (walls too). Fiberglass insulation covered by these tiles does a decent job of making the small shop an oven too, but you'll plan on plenty of ventilation. For a roll up type of garage door you might try a roll of insulation that looks like tin foil "bubble wrap" packaging material. Sorry, can't remember the name of it. Its flexible and you can probably glue it to the door. I just stapled it to wooden swing out doors. It will never be sound PROOF, so do as the guru suggests and give away a few good neighbor items. |
| - Gronk - Tuesday, 07/27/04 09:33:24 EDT |
|
Hello I am wondering what post drill press drill bits are worth,I have 2 sets of 3/4 9/16 1/2 3/8 5/16 1/4 3/16 and some more od and end drills (namly 1/2 3/8 5/16) thanks Coldiron |
| Coldiron - Tuesday, 07/27/04 10:58:54 EDT |
|
Reordered a few posts above: DIY Bronze Repair: Celeste, This is a very technical business and it would be VERY easy to destroy the statue. As Patrick pointed out there are some standard methods of repairing brass and bronze sculptures and skill is required. I have repaired some small brass andirons and it is VERY easy to do more damage than you repair. On small pieces it is almost easier to make a replacement than to make hard metal repairs (welding). 1) The oldest method is patches which are generaly held on from the inside by studs on the clips. Often an area is carved out to recieve the patch so it is flush to the surface. 2) Welding. This is common in original castings and repairs of large statues. The famous "Little Mermaid" sculpture (in Stockholm Harbor I think) has lost her head to vandels several times and it has been found an welded back on. The problem with welding is that it is difficult to match the base metal exactly. AND even when you have a color match the variations in alloy almost always oxidize differently so that what is a color match on bright metal is not a match on aged metal. On bright polished sculpture the finish should be protected by clear lacquer to prevent oxidation. 3) Metal filled epoxy resin. Devcon makes various grades of epoxy with fine metal powder fill. They make it with steel, aluminium and several bronzes. These are commonly used in foundries and shops for repairing large castings. They are professional products that require skill in application and finish. They are never a perfect match and are usualy always an obvious repait. It is most comonly used on very expensive low production or one-off machinery castings. |
| - guru - Tuesday, 07/27/04 12:17:48 EDT |
|
guru-- i havent recieved the email with joshua kavetts address i am actually not looking to sell this as i am going to set up a shop--- but if the price was right...ya never know |
| charles lee - Tuesday, 07/27/04 12:26:05 EDT |
|
Blacksmith Bits: ColdIron, These old style bits are so rare that I have never seen a set. So they should be classed as a collector's item, not a user item as are many old tools. I try not to deal in collector's prices as they are completely crazy. For those that do not know what we are talking about, blacksmith bits are 1/2" shank bits that were made to fit the old hand crank drill presses. All the bits had 1/2" shanks with a screw flat down to 1/16"! Sets usualy consisted of 1/8" to 1/2". Larger bits were rarely used on the average size hand crank drill and since undersize 1/2" shank bits are still made they are hard to identify unless they are part of a set. Major manufacturers like Morse made them and the old ones are hard to tell from new. The best I can tell from the old catalogs is that these have not been made since the 1940's. I have them listed in 1930's catalogs but not my several 1955 industrial catalogs. I'd love to have photos of a set of these. The catalogs I have only show the undersize shank type even though they list bits down to 1/8". |
| - guru - Tuesday, 07/27/04 12:46:33 EDT |
|
Bronze repair: Besides the methods that Guru posted, I found a fourth way to repair castings in "Practical Casting" by Tim McCreight. For holes (you mentioned cracks too which this won't help with) you can tap the hole and screw in a bronze rod (threaded for a larger hole or an oversized wire taper for small ones), cut it close to the surfact then gently peen it to snug it in tightly and blend the edges. |
| AwP - Tuesday, 07/27/04 13:01:33 EDT |
|
Recycling Ceiling Tiles: Although this should not be a problem due to the tight controls on removal of this kind of thing, the old tiles had significant amounts of asbestoes mixed with the fibres. . . I am not an alarmist when it comes to asbestoes but using any asbestoes products on your property can cause regulatory and possibly sales problems later. Modern drop ceiling tiles are mostly fibreglass but they still make the celulose fibre type as well as a mix. Generaly they have a textured surface. The rougher the better for sound absorption and dissapation. They usualy have a paint type coating but should not be re-painted because they lose a lot of their sound absorbing properties when painted. |
| - guru - Tuesday, 07/27/04 13:20:51 EDT |
|
Shop Floors: A lot has been written on this and I should probably compile a FAQ. 1) Dirt and wood floors are easiest on the feet. However, tools and small parts easily get lost in a dirt or gravel floor. Center punches, drill bits and even tongs can get lost in the dirt. Dirt floors require almost daily maintenance to keep flat and clean (watering, raking, packing). Loose dirt tracks from the forge floor to other areas. 2) Brick floors have been common in forge shops of all sizes due to their heat resistance. However, they require maintenance in the way of replacing bricks and releveling areas that become trip hazards. The common method of setting bricks in sand rapidly degrades to a rough surface with trip hazzards. Unless kept very flat they have no advantage for moving machinery. 3) Concrete is easiest to maintain, easiest to move and set machinery, tools and benches on. It is the easiest to clean. To avoid foot strain one can put cushioning mats in the places one stands for long periods of time. These are surprisingly small areas in front of the anvil, in front of the most used bench and most used machine (drill press, lathe, milling machine). 4) Heavy wood floors have many of the advantages of concrete. Although they are flamable wood floors do not spall from heat like concrete. An application of borax disolved in water reduces the flamability. Sheet metal nailed to the floor around the forge and anvil can protect from hot scale and loose bits of hot iron. Light wood floors will not support machinery or even heavy benches and are not recommended for a shop. |
| - guru - Tuesday, 07/27/04 13:39:37 EDT |
|
Charles Lee, our email encryption system has scrambled your address so that I can not use it. Please send me an e-mail so that I can reply to it. Sorry. . we have recently discovered that e-mail addresses with a period in the name section do not properly encrypt. I have not had a chance to debug the system. . . |
| - guru - Tuesday, 07/27/04 13:42:56 EDT |
|
So another question. I just learned to forgeweld recently so I don't expect to be good or at least consistent for a bit. Can an arc weld be reheated and dressed for a hammered appearance? Or is this one of those things where I need to give you the steel alloys and the stick I'd be using? |
| MikeA - Tuesday, 07/27/04 14:05:48 EDT |
|
More thoughts on... Dirt Floors: I just added another 80 pounds of "Playground Sand" to freshen-up the place. It's like walking on a beach until it settles in a bit. Sure is fire-proof, though, and anything that hits the wood gets scooted over into the sand. Sand is self-fluxing, too, if you drop something in it while welding. ;-) Rubber foot mats (for the brick section): These do have an advantage, when you drop something hot, of reminding you that it's a fire hazard. The smell certainly gets your attention in short order. Wood planks: Fire resistance depends, in part, on how much dirt/sand and scale you have sitting on them, and how thick and close-grained they are. Heavy floor planks are less likely to catch than thin splintery ones (like I have). The biggest danger is something hot with enough mass to stay that way, bouncing to an obscure corner, leading to a comical scene of a desperate smith splashing water into an inaccessible corner behind heavy stuff. Lots of wooden floors are shown in old photographs of forges. On the other claw, forge fires were not that uncommon, and I�ve read of one Japanese swordsmith who has been burned out three times. Most of the NPS national historic sites seem to be brick or dirt, which tends to survive well in the archeological record anyway. (After all, bricks are just another form of dirt.) Hazy and humid on the banks of the Potomac. T-storms coming again... Visit your National Parks: www.nps.gov Go viking: www.longshipco.org |
| Bruce Blackistone (Atli) - Tuesday, 07/27/04 14:38:39 EDT |
|
For small rubber floor mats, I've found that big truck mud flaps work well. You spot them all the time along major highways, I always stop and pick them up. |
| Paw Paw - Tuesday, 07/27/04 15:06:47 EDT |
|
The *most* dangerous type of wood floor is one that has gaps in it where hot stuff can dive below and find the leaves/rat's nest/old papers---or any of a surprising number of flamable objects that can build up under the floor---how about an old oil seep from an old machine? nice orange hot piece of steel landing on it can make for a lot of fuss and bother. My new shop looks to be steel; Been discussing the beamwork necessary for the rolling chainfall(s) and it looks like the cross beams for the sides will just fasten to them---I'd just put up *heavy* expanded metal but we get a lot of wind round these parts---I just hate it when a cust blows over the anvil righ before you slap some metal on it to do a weld! Captitano Atli Atli, have been having trouble doucmenting the use of Fae to weave cloth, suggest looking into ventilating forge more. Thomas |
| Thomas P - Tuesday, 07/27/04 15:10:17 EDT |
|
Determining steels: Buying is based on your range of price and I cant tell you how to determine different types, im just starting to study metalurgy. |
| - Lone Blacksmith - Tuesday, 07/27/04 16:30:48 EDT |
|
Paw Paw; do the safety glasses really help that much as the semi goes by? Thomas's evil twin skippy |
| Thomas P - Tuesday, 07/27/04 17:18:18 EDT |
|
Skippy, You could probably answer that question better than I can. (grin) |
| Paw Paw - Tuesday, 07/27/04 17:40:55 EDT |
|
Repairing castings: The claqssic way to repair a void in a bronze casting is to clean the edges of the void, chamfer lightly on both sides, and then peen in an appropriately shaped piece of sprue form the casting pour. This gets you a near perfect color match, and when peened in carefully and then dressed flush with a sharp chisel or burin, is virtually impossible to see. The more modern method, and one that works well when you can't get to the back surface, is to drill the void out to a clean hole that can be tapped with an SAE (fine thread) tap. After tapping, countersing the hole lightly. Screw in a matching piece of bronze that you have threaded to match. Then chisel off the excess and peen to fill the countersink chamfer, cleaning up with a sharp chisel or burin. Cracks are another matter. Traditionally, in Cellini's time (Renaissance era), the crack would be drilled at each end to prevent further cracking, and closed with the peened post as detailed above. Then, the entire crack was closed by drilling/riviting one hole after another, overlapping them just enough to get a solid fill. Very tedious work, but many such repairs have lasted for centuries. Today, a TIG welder can do the job very neatly if you have the proper filler metal. For matching metal to use as filler, one can take some from the inside of the piece if there is an area that will permit so doing. Failing that, you get the best match you can find, and then clean up the weld carefully to minimize the amount of new metal visible. But even when TIG welding cracks, they should have the ends drilled to stop propagation of the crack during welding. The best place to find someone to do the work is usually the art department of a large university that has both a sculpture program and a museum. The "repair" of any work of art is a difficult decision to make. Yes, you want the piece to be as good as it can be, but who decides what is right if the original artist is no longer around? Bad, obvious repairs done in the past are usually fair game for restoration, but not always. Think what would happen to the value of that old cracked bell in Independence Hall if someone were to "repair" the crack. |
| vicopper - Tuesday, 07/27/04 17:45:32 EDT |
|
Thanks for the answer to my "runny wax" question. I'll check the labeling on the ingredients again. Your other posts (7/25) you suggested I review reminded me of the first day I used the term "thunder showers" at a weather school when I was in the military (1966). The instructor yelled at me, saying that "thunder showers" was slang, and the proper term was "thunderstorms". Well, just being a country boy (North Dakota), I was a little taken aback, but later learned the value of consistent terminology. Anyway, I have painted cars, built furniture and used all kinds of finishes (wipe-on, spray, brush, rubbed), incuding varnishes, paints, oils, plastics, lacquer, etc. I learned a long time ago that a project is about half done when you just start preparing for finishing. Anyway, I am new to finishing forged items and had the impression (from reading) that items for outdoors should be painted, but indoor items could be finished with good results with wax formulas. By the way, did you retire from a paint company before you became a blacksmith. I will definitely look at the archives for information on finishes. Thanks again... Dave Hammer |
| Dave Hammer - Tuesday, 07/27/04 18:17:24 EDT |
|
One last thing to note many early 20th century "bronzes" are really patinated whilte metal (zinc based alloys) often slush cast. The melting point of zinc is considerably below that of brass or bronze so folks who blithly take a torch to them are often unpleasently surprised. Thomas |
| Thomas P - Tuesday, 07/27/04 18:26:15 EDT |
|
Dave Hammer, I have been using Johnson's old fashioned paste-floor wax for quite a while. If saves me mixing all that stuff together. If you overheat the iron, sometimes linseed oil will leave an olive drab area, pretty yukky and hard to get rid of. |
| Frank Turley - Tuesday, 07/27/04 19:52:00 EDT |
|
this is charles lee about the fisher eagle anvil that looks unused and still in packing grease --250 lb my email address is c..lee@earthlink.net yes there are two dots in the address i am curious to find out if i should keep it and use it or sell it and get another less pristine anvil to use |
| charles lee - Tuesday, 07/27/04 20:30:05 EDT |
|
Charles Lee, If I had that pristine Fisher, I would be all over it. I love Fisher anvils for their hard faces and lack of ear-piercing ring. I might feel a bit silly, using an anvil that might bring big bucks from a collector, but I think anvils are for using, not just looking at. The only thing that I would think that might make me suggest that you sell it is if you are a brand-new novice that has no hammer experience. In that case, either set it aside and get a used one to learn on, or sell it to someone for 4 to 6 bucks a pound. It would be a shame to chip it all up and ding up the face while you're learning hammer control. With no experience, that WILL happen. That's my two cent's worth, your mileage may vary. |
| vicopper - Tuesday, 07/27/04 21:27:37 EDT |
|
A Wrenching Experience So here I am sorting through my father�s tools and toolboxes and wrenches are stashed all over the place. �Ah ha!� sez I, �I can combine them with all of my open end and box wrenches and the duplicates will probably make a couple of extra sets that I can pass along to the kids and niece. So I dump three or four dozen wrenches out on the workbench and start sorting. I could count the number of duplicates without running out of fingers on one hand. It seems that when you�re dealing in increments of 1/32nd or even 64ths, and with wear and tear, not too many wrenches match up. (Only three metrics in the stash, and they had one duplicate, except the pair had 10mm open ends and an 11mm and 10 mm box ends (?).) T-storms all day on the banks of the lower Potomac. Wish I could send some of this excessive rain out to Thomas. he needs it, and the wif can't get the grass cut. Visit your National Parks: www.nps.gov Go viking: www.longshipco.org |
| Bruce Blackistone (Atli) - Tuesday, 07/27/04 22:03:19 EDT |
|
Some folks had expressed an interest in the plans for the new house and shop that Sheri and are are getting ready to build. They can be seen on the Anvilfire Foto site. The property plat is there also. |
| Paw Paw - Tuesday, 07/27/04 22:39:26 EDT |
|
Gidday from Kiwiland (New Zealand). Could you tell me if it is common practice to give a name to an anvil (like 'Joe')? If so, can you give me any references to this practice in the literature? Many thanks, Erskine Hewett. Wellington, New Zealand. |
| Erskine Hewett - Tuesday, 07/27/04 23:13:12 EDT |
|
I'd call an anvil Ferris, personally. |
| HavokTD - Wednesday, 07/28/04 01:51:03 EDT |
|
I don't think it worked the first time, so here goes again: Is it common to give anvils names, like 'Little Joe' or 'Big Tom'? If so, can you give me any reference to the practice in the literature? Thanks, Erskine Hewett. Wellington, New Zealand. |
| Erskine Hewett - Wednesday, 07/28/04 04:47:20 EDT |
|
My 100 kilo "Made in the U.S.S.R." Russian anvil is named (transliterated from Cyrillic) Kuznyetz, meaning �Smith�. Lesser anvils remain unnamed. �Thud� also comes to mind as an appropriate name, although I think it�s been taken by a crew member on the longship. Swords get names (Limb-biter), rifles get names (Betsy), Ships have names (Egil Skallagrimson), I don�t see why an object sacred enough to marry couples over and cure children shouldn�t have a name. Wet and wetter on the banks of the Potomac. Visit your National Parks: www.nps.gov Go viking: www.longshipco.org |
| Bruce Blackistone (Atli) - Wednesday, 07/28/04 08:21:14 EDT |
|
Blowpipes: So, on my way home last night I drive past a production glass shop. I remember that T. Gold was asking about the pipes they use and swing in to ask a few questions. I explain my interest and I'm sent to chat with the foreman. Yup, they lose the tips of the pipes all the time. Seems its a nightmare when they come off in the furnace. He tells me that they used to send them out to be repaired by a local weldor but they just don't stand up. He showed me a large pile of broken pipes and said that at $80 bucks a pop, it gets expensive. I asked him if he thought there would be a drawback to wrapping a collar or sleeve around the joint at the original weld to strenghten the joint. Say an inch and a half. He said it sounded like a good idea to him. They would just have to adjust how far they hold the end over the stand they use to roll the pipe on. Said the weight wouldn't be a factor. I didn't want to take too much of his time as he was supervising a crew of a half dozen glass blowers. If there is something else you want me to ask them I'd be happy for another excuse for a visit. No No No... not another hobby involving fire. |
| Gronk - Wednesday, 07/28/04 10:27:54 EDT |
|
My Painting Experiance: No, I do not and never have worked for a paint company. However, I have used professional lacquers and automotive finishes since I was 10 years old (some 45 years). I have painted race cars and automobiles, applied custom and metal flake finishes on cars and motorcycles. I have also repainted antiques, furniture and fancy Victorian woodwork and finished musical instruments. I have also used various ceramic glazes and produced paintings with both oil and acrylic paints including, landscapes, nudes, portraits and non-objective "modern" work. As a blacksmith I forgot all the above and put some pretty crappy oil and wax finishes as well as bad paint jobs on various items which I have lived to regret. I also succumed to the one color suits all (black) syndrome. And I have seen some very good smiths reputations nearly ruined due to poorly applied finishes. Most recently I was asked to give an opinion about a failing clear finish on polished steel . . . It was the customer's request which the smith should have refused. Both were wrong but it will probably end up in court. I am trying to help YOU avoid MY mistakes, and the mistakes of others. After all that, I had the experiance of building some huge industrial machinery that included structural steel, multi-ton castings and machined parts. Some of the early shop finishes were pretty lousy so I did research to find a better way. Some of this was applied to ironwork I had produced as a smith that was rusting to death. The best finishing technique is to clean the metal absolutely clean and remove all scale. Sandblasting is the best method especialy if there is welding flux and scale or rust. A chemical etch can also be used. Then apply a thin coat of pure zinc powder paint. This is the next best thing to hot dip galvanizing and much cheaper. Over that a chemicaly "neutral" primer is applied. I prefer Dupont High Speed sanding red oxide lacquer primer. Over that a color fast top coat is applied. That can be sprayed lacquer or brush applied enamel. For work to be burried or in contact with the ground the Federal government requires hot dip galvanizing. They are right. However, galvanizing must be aged or acid etched and special primer applied for paint to stick. If all the paint is applied sensably by spraying the final coating thickness is much thinner than one brush applied coat of enamel. This finish shows all the detail and texture you want. If you want to see more texture glazes can be applied as mentioned above or directional spray to create shadows and highlights. Pieces repainted by the above method have shown no rust in some 20 years of outdoor exposure in damp Virginia. Originaly a couple pieces had heavy rust and pock marked finishes from poorly applied paint or from expanding weld flux. The new finish on one piece of sculpture cost as much as I had originaly charged for the entire piece and instalation. . . . But the rust and degradation of the finish has stopped. This life coincides with good automotive finishes that are not mechanicaly damaged. This does not include some of the new water based clear coats. . (miserable stuff). Most rust on automobiles occurs from the INSIDE, where dirt, sand and silt get caught inside panels where they stay moist almost forever. When these dirt traps include road salt they can corrode through the metal in just a couple years. This internal damp pocket corrosion is not to be confused with exterior surface rust. As far as interior pieces not rusting. . . There are only a VERY few ancient pieces of ironwork left from the late bronze age and early iron age (you can count them on one hand). These pieces are the badly rusted remains of work that was preserved in the driest most stable envoronments possible (Egyptian pyramids). In other burrial places that were not quite as dry only the faintest trace of rust stain is left of iron parts of bronze devices. . . Even as late as the Roman era there are VERY few examples of anything iron. With items like Roman locks there are tens of thousands of brass keys and only a handful of badly rusted hard to identify iron lock plates. . . Yes these are extreme cases but I have seen considerable rust on many modern interior pieces that were oil finished. This includes work in the Washington National Cathedral that was only eight or ten years old. Many older pieces there were originaly bright finished or thinly waxed over scale. Now they are rusting OR have been waxed so many times that the surface detail has been lost worse then having thick paint applied. . . The problem with these finishes is that they require constant maintenance. The finish must be cleaned off (with solvent), loose rust removed and the oil/wax finish reaplied at regular intervals. NO, you can not just tell the customer to re-wax every so often (as the Cathedral and other places are doing). I have had several places contact me about what to do with the 1/8" thick layer of GOOP created by annual reapplication of the original wax/oil finish by maintenance personel (as originaly instructed by the smith). Solvents strong enough to remove this thick gummy varnish cannot be used in the quantities necessary. The method chosen by one place was to use expensive dry ice grit blasting. This was the only suitable method in an interior location that overlooked a large indoor fish pool. . . But customer maintenance is rare. Most will wait until there is so much rust that the work must be painted and then a thick coat of brushed enamel will be applied over the rust (just what you wanted to avoid). Then there will be later applications of more paint. . . Top quality work deserves a long lasting quality finish. Home brew wax finishes are not a quality finish. They are just cheap and lazy. Nor are they "traditional" or "natural". The natural finish for iron is, rust. Rusted to dust. It is your choice. |
| - guru - Wednesday, 07/28/04 11:11:10 EDT |
|
Naming---you name things that have developed a "personality" usually means you spend a lot of time with them and get to know them so a favorite hammer or anvil might very well be named---usually they will tell you if they need a name--or if they like the name you give them---I don't think my wife's large rusty brown station wagon likes the name "blood clot" it started eating the books on tape I had for the solor run from OH to NM... Finishing: when I was in Germany a lot of new exterior ironwork was just hot dip galvinized no other finish was used---I didn't like it myself. I'm thinking of doing some gates for my new place and my parents place out of stainless just to avoid the finish issue. Out here the UV is deadly to finishes (and people); so I'm going to go two ways: a rust finish---it's dry enough out here that stuff not in contact with the grounds lasts dang near forever and with the stainless (got to see about electropolishing, perhaps in ALBQ) Course if I could scrounge enough Ti, I'd just use that and go for the neon colours.. Thomas |
| Thomas P - Wednesday, 07/28/04 11:36:15 EDT |
|
Anvil Names. . . Hmmmmmmmmm. I suspect some do name their anvils but I have not heard of any (other than Bruce, above). Maybe it is because of the way you treat an anvil (constantly pounding on it) that naming them is not common. Hammer's on the other hand have historicaly been known to be given names. |
| - guru - Wednesday, 07/28/04 11:42:40 EDT |
|
European Ironwork: In Europe they take finishing their ironwork much more seriously than we do. They have a longer history of decaying work and a more severe problem with acid rain which is even destroying many ancient bronzes. In Germany I believe the building codes require for galvanizing. Hot dip and flame spray are both used. Flame spray is preferred on work that needs the surface texture preserved. As noted above, galvanizing can be painted but requires special preparation and primers. Etching primers for zinc are usualy the same as for aluminium. I once asked a German smith why he put so much labor into flame galvanizing a forged door instead of making it out of stainless steel. He claimed that stainless was too expensive. . I think he was undervaluing his labor as many of us do. In Germany it is common to make grave markers from metal. Stainless is prefered but plated steel is also used. Now here is an application where there will be little on no maintenance and the work is expected to last for centuries. . . Many European smiths have gotten away from the plain black finishes and much color is used. Guilded ornaments are not unusual. Dry Climates rust iron much less than wet but rusting still occurs. The actual rate of rusting from moisture is some ratio of temperature change and humidity. In damp environments with steady temperatures there is not a much condensation as in drier environments with wide temperature swings. Locally daily condensation in the spring and fall are more of a problem than rain. But in many arrid desert climates there are wider daily swings in temperature and IF there is any moisture to condense it WILL condense on cold metal. The best low maintenance finish in arrid conditions is rust. I've seen exterior work in Northern California that had a smooth dense rust finish that was over 100 years old. However, bimetalic corrosion from dissimilar metals is still a problem. |
| - guru - Wednesday, 07/28/04 12:29:37 EDT |
|
Guru, I'm sure this is not as good as galvanized, but I have been experimenting with cold blue or blackening finishes. I sand blast and then apply the chemical. It must be washed and "killed" or it will after rust but leaves a nice traditional color. You can even get some pretty reds and oranges if the after rust is left in places. I then use several clear coats of polyurethane. The bluing agent is an oxide so will prevent rust to a degree but it is very thin and will rust if not over coated. |
| - HWooldridge - Wednesday, 07/28/04 13:20:25 EDT |
|
Jock, The paint summary message should become an FAQ. |
| Paw Paw - Wednesday, 07/28/04 13:51:52 EDT |
|
As to rust and climate the best way to see what your area is like is to look at items that have been exposed for many years. While walking the local area looking for scrap i have run across *un*galvinized sheetmetal that dates to the early 1960's at the latest (according to the trash dumped with it) The part above ground has a tight unpitted rust coating, the part in contact with the ground is skelontinized at best. It has the "rust patina" so many people are trying to duplicate, now if I just had a plasma cutter to make some stuff from it... Thomas |
| Thomas P - Wednesday, 07/28/04 15:25:48 EDT |
|
Lone Blacksmith's Brass Tongs: These are not blacksmiths tongs but a pressing device for making smooth folds. I cannot remember what they are used for but I have seen them in the past. They may be a tight spot tool for ironing. . . |
| - guru - Wednesday, 07/28/04 16:09:07 EDT |
|
I dont know if this is the place to ask, but nothing else on this website will respond to me. Is something wrong with the Slack Tub Pub? I registered a month ago, last thursday and tried again today thinking it might be my email. I have not got any email back from any of them or from the webmaster. |
| Tydeus - Wednesday, 07/28/04 16:16:08 EDT |
|
Jock, sounds more like a seam crimping tool for standing seam roofing. |
| Paw Paw - Wednesday, 07/28/04 17:32:43 EDT |
|
Mr. Guru, I need an anvil, but don't know what size to get. My plans are to forge blades from the size of knives to swords. I read that a heavy railroad rail makes a good anvil. What size would you suggest? Jon |
| - Jon - Wednesday, 07/28/04 20:42:54 EDT |
|
The only name I have called my anvil can not be used on this forum...it got named when I droped it on my foot :( |
| Mark P - Wednesday, 07/28/04 21:42:29 EDT |
|
what hammers would one recommend for a beginning blacksmith and where should i get them? i am looking at peddinghaus hammers. namely the german or french design sold by centaur forge. i would like a uri design, but they cost a bit too much. thanks in advance |
| evisr8 - Wednesday, 07/28/04 23:40:23 EDT |
|
I rename my anvil every time I back into the point on the horn. Maybe I should have left it smashed. |
| - bgott - Thursday, 07/29/04 01:21:27 EDT |
|
Pub registrations. . . I am very sorry. I am several months behind. Every now and then I catch up on a dozen or so. Trying to get there. . . |
| - guru - Thursday, 07/29/04 01:33:55 EDT |
|
Good day, I would like to ask a question that I am not sure about. Allow me to start with saying this, I have reasonably no clue what I am doing at all. OK, I might as well start from the begginning if i am going to ask this. I was at a Boy-Scout camp recently and i noticed that they had a metal workig shop there. I really liked what i saw, so i decided to look into it on the net. That is when i came across this web-site. When i was watching them working with the metal at this camp i was at i kept wondering how it is that you would go about making a sword, like in the olden days. Well that is my question, I hope it was valid. Thanks for taking the time to read my post, Thanks, Sean |
| Sean - Thursday, 07/29/04 01:48:23 EDT |
|
what would be the correct quinch temp and fluid to harden a-36 as much as possible thanks Dave |
| Davettlsed - Thursday, 07/29/04 01:56:55 EDT |
|
Jon, Your anvil question was answered by your mail. Hammer size: evisr8, For starting out you do not want too large a hammer. Unless you use a hammer every day in your work such as a carpenter then you can hurt yourself with too large a hammer and get very frustrated. I used to use a 3 pounder when I worked full time but now I prefer about a 2 pounder and due to too many hours at the PC I can only wield it for a short time. It takes me a couple hours a day at the forge to build up to where I can use a hammer all day. One of the most popular small hammers is an 800 gram (1.76 pound) hammer. If you are average sized and fairly strong and then or 900 gram (2 pound) hammer is a good starting weight. Many smiths use nothing larger than a a 1000 10 1200 gram (2.2 - 2.63 pound) hammer. For heavy work (after you have lots of practice and have both strength and control) you may want to use a 1300 to 1600 gram (2.87 to 3.5 pound) hammer. An 1800g (4 lb.) hammer is too big for anyone except a professional that uses a hammer all day. If you hand hurts or you tire quickly then you need to use a smaller hammer. Then work up as your muscle tone and control develop. CONTROL is more important than how hard you hit. The power comes from practice and control. Start our working small stock (less than 1/2") with a small hammer until you gain control. Note that most of those German hammers sold by Centaur, Pieh and Kayne must all be dressed before use. The sharp corners must be rounded off and the faces crowned to suit. A gentle crown in all directions moves metal a LOT faster than a flat face. The corners of the pien should be dressed as well. This can be do with a file but these are hard steel to file. A belt sander works best. |
| - guru - Thursday, 07/29/04 01:59:28 EDT |
|
Swords: Sean, see our FAQ's page. Quench: Davettised, see our FAQ's page. |
| - guru - Thursday, 07/29/04 02:02:43 EDT |
|
Help ! I work at an open air museum in nothern alberta and while digging through there junk pile. (the most amazing junk pile) I found this: <dead link>. Its about 8 feet tall and 3/4 of a foot wide. It looks like a type of power hammer except the cam shaft is almost to flimsy. It is all machined and heavily built. You can't see but on the bottom of the body there is a set of gears that run a belt out to the hammer shaft just above the bottom suport. I don't know weather the shafts spins or what. If you have any idea what it is that would be super. |
| Sherk - Thursday, 07/29/04 02:04:04 EDT |
|
Horn Points: From the factory all anvil horns (past and present) come blunted to about a minimum of a 1/2" dia flat, slightly less on light anvils and bench anvils. Larger anvils often have slightly larger flats. Many users weld then up and grind them sharper. . . It is a BAD practice. I know a popular smith that has a needle point on a 300+ pound anvil. VERY dangerous. Just brushing by it could result in a serious wound. Often used anvils have been pounded on the soft point of the horn and they are mushroomed over. Dressing this off is the right thing to do. But do not sharpen it. |
| - guru - Thursday, 07/29/04 02:12:03 EDT |
|
Jon: 100# is a good all around weight...the more the better. RR rail anvils have long been used to keep blacksmithing from getting too crowded. They're frustrating to use as folks generally set them up horizontally . Set a long rail upright and forge on the end...that puts the mass right under the work where it belongs. And be careful what you name it. |
| - Pete F - Thursday, 07/29/04 03:30:43 EDT |
|
Sherk, Your web address states a violation of terms of service. E-mail me the photo and I will ID it or post it. I prefer NOT to go to Lycos/angelfire sites with their obnoxious (and sometimes dangerous) pop-up advertising. |
| - guru - Thursday, 07/29/04 09:50:31 EDT |
|
The Uri Hofi Hammer: Big BLU Mfg. Co. now has these for sale. Getting a Passport: These are good reasons to get a passport now if you don't have one. It used to be you could travel anywhere in North and Central America with a goverment issued ID like a driver's license. A visa was issued at the airport. Since 9/11 this is no longer true. Now you need a government issued passport (if you want to get back into the country OR out of the airport). It can take four to six weeks (officialy eight if they are busy) to get a US passport after you get YOUR end together. You need a certified copy of your birth certificate, photo ID and or proof of US citizenship and 2 copies of a passport photo. You can download and print the PDF format form from the US State department OR pick up copies from your local main post office. You can apply at most larger post offices and other government offices. The Department of State website has a searchable list of local offices. Some offer on-site photo services. Application fees are currently $85. travel.state.gov/passport/ I DO NOT recommend that you go to one of these offices and try to fill out the form there. The form includes questions like your parents birth dates and places of birth, same for spouses or ex-spouses. Some of this information you may need to look up. Doing it at the Post Office can take several hours. I had to fill in the forms twice to get it right doing it at home with no pressure. Be sure to print page 4 on the back of page 3 (the part you fill out). Many folks do not have a certified copy of their birth certificate handy. To get one of these you need to contact the records department of your state of birth. There is usualy a small fee ($2-$5) that you will have to mail in. Most of these places are pretty fast in responding but if you are in a hurry it could take a couple weeks. Your birth certificate is attached to the passport application and will be returned with your passport. When traveling it is recommended to keep your passport in a safe place and carry a photo-copy of the ID page. If you lose your passport you will need the passport number to get one reissued. Do it now. |
| - guru - Thursday, 07/29/04 10:49:27 EDT |
|
Hi- I built a gas forge in a workshop years ago and need to replace the KOL(?) wool inside and can't remember where they sell it. Any ideas where to buy this in small quantities? Thanx |
| karen - Thursday, 07/29/04 11:51:16 EDT |
|
Note; I'd suggest keeping the passport in a "neck safe" on you at all times and keep the photocopy in a safe place. In a foreign country your passport is your link to the United States Government; you may be asked to show it almost anywhere. If you are involved in an accident or other legal issues you better have it on you! Also due to the rise in terrorism there is an increasing market for stolen passports---don't carry it in a pocket. Note in the case with your laptop is *not* a good place---as one of my coworkers found out the hard way as *both* went missing. Passports are good for quite a while so if you think you might need one in the next handfull of years---get it now and keep it in your safety deposit box! Now to wrangle myself into the meeting in Salzberg in Oct... Thomas |
| Thomas P - Thursday, 07/29/04 12:13:16 EDT |
|
Karen Kaowool is availible at http://www.anvilfire.com/sales/ |
| JimG - Thursday, 07/29/04 12:16:39 EDT |
|
Hi Everybody! (Hi Dr. Hibbert!) Anyway, I was wondering what is a good starter steel to work with. I know of a steel warehouse not too far away that has anything I would need, so availability isn't really an issue. Thanks. |
| - Justin - Thursday, 07/29/04 14:34:12 EDT |
|
Justin, If you can get it at a reasonable price, I would suggest getting 1018 mild steel. It is low carbon, reasonably easy to forge, and dependable in it's composition. If that is not available, then you might as well just get the cheap A-36 structural steel. It is also low carbon, but may have other alloying ingredients that can make it somewhat erratic and less easy to forge than a definite alloy specification. Most of us can only get A-36, so that is what we use until we need medium or high carbon steel. |
| vicopper - Thursday, 07/29/04 14:55:50 EDT |
|
Passports: Yes, by all means get yours now. If you're coming from the mainland, you shouldn't need it to get here to St. Croix, USVI for the CSI Hammer-In and Beach Extravaganza this winter, but that could change with the political climate. Why take a chance on missing out on forging on the beach in a tropical paradise, just because you didn't have a passport or weren't a member of CSI? |
| vicopper - Thursday, 07/29/04 14:58:56 EDT |
|
Passports: As Vic pointed out you do not need one to Visit the American Virgin Islands but they are very small specs in the sea and it is not unlikley that a diverted plane might land in another country or another country's territory. . Good idea to have your passport. Otherwise you can end up like the guy in "The Terminal" (a good movie) who can never leave the airport. If you have a passport you could take advantage of your diversion and stay in a nice hotel or play tourist until the next flight out. Mild Steel: Justin, as VIc mentioned SAE 1018 is generaly the best thing available. Normally it is grouped as SAE 1018-1020. Is used to be that you could get in both cold drawn (CF bar) and hot rolled (HR bar), but for quite a while it has only been available as the more expensive CF bar. AND in recent years some CF bar has been produced from inferior ASTM A-36. The A-36 is common structural steel like used in heavy beams and plate. It is higher carbon (on average) than SAE 1018-20 but is still considered a "mild steel". Most smiths buy hot roll because it is cheaper and only buy the cold finish in small sizes not available any longer in hot roll. For as long as I have been buying steel 1/4" square was not available hot and neither have small hex or octagonal stock. In fact I think octagonal stock has not been available for a very long time. Half round, which was commonly used by farriers is now only available from specialty suppliers. Kaowool: Karen, as Jim pointed out we sell it in our store. Se sell it by the running foot and also carry ITC-100 to coat it with. |
| - guru - Thursday, 07/29/04 15:32:04 EDT |
|
More Travel: One travel guide I read recommended that you keep your passport locked in the hotel safe and carry the photo-copy. Made sense but I suspect it depends on what kind of trouble you get into. I carried mine in the front pocket of my Carharts. Everything was fine until I took them off due to the heat and tossed them in the back of the car . . and THEN we rolled the car. I had to scramble BACK into the upside down vehical to retrieve the Carharts WITH my passport. You can also get an "International Driver's Licence" or IDL. These are an odd bit of documentation because they are defined by the United Nations but there is no official issuing athority. AAA (The American Automobile Association) used to pretend that they were the issuing authority but they were not. They were just the only folks issuing them for a long time. The fact is you can issue your own! However, there IS a UN Travel Authority group that some issuers are members of and they use a nice official looking rubber stamp on the license. The IDL consists of a booklet (like a passport) with traslations in different languages of the line descriptions on the license form (last name, first name, address, city. . ). In the back is your "license" which includes besides name and address, your photo, state drivers license number, AND passport number. This is handy in that it gives you a copy of your passport number. The IDL is NOT a stand alone license and is supposed to be accompanied by your official license. I shopped around and found an outfit called IDL International (idl-international.com) that issued a 5 year license for only double what everyone else wanted for a 1 year license. You need to send them a photo-copy of your driver's license and a passport ID photo. So while getting your passport photos made you may want to ask for one extra. After seeing the roads in Costa Rica it may be a few years before I get brave enough to use it. . . |
| - guru - Thursday, 07/29/04 16:38:17 EDT |
|
I know I'm a bit late on the springs under tension thread, but how long would it take for spring creep to effect something like... Hypathetically speaking... the valve springs in a 1979 firebird? |
| HavokTD - Thursday, 07/29/04 20:14:04 EDT |
|
While I'm bugging the more knowlegable.... What's INOX Stainless? I've gotten a couple of decent cooking knives, and some travel coffee mugs labled as Inox. |
| HavokTD - Thursday, 07/29/04 20:20:16 EDT |
|
OK, OK, I'll leave you all alone after one more question.... Where's a good place to find a jewler's saw. I asked all of my suppliers and they looked at me like I was mentally damaged. Not much of a tool shop if they don't know what a jewlers saw is, IMO. |
| HavokTD - Thursday, 07/29/04 20:26:59 EDT |
|
Tony, The Firebird is toast, give it away. (grin) INOX is a European stainless steel group like ANSI is here for steel. One place to get a jeweler's saw frame is Rio Grande Supply, another is Gesswein. Both have web presence, I think. If you're getting a saw frame, be sure to get a bench pin while you're at it. You don't need the fancy holder for it if you have a bench you can just screw it down to. |
| vicopper - Thursday, 07/29/04 21:51:13 EDT |
|
Are the purple pellets that u find on the rail road tracks iron ore? |
| burton smink - Thursday, 07/29/04 22:03:35 EDT |
|
Are the purple pellets that u find on the rail road tracks raw iron ore pellets? |
| burton smink - Thursday, 07/29/04 22:06:36 EDT |
|
Hi! I am 14 years old and am VERY interested in blacksmithing and forging. I am willing to spend a lot of time at it. Though my money is limited, so I would like someone to tell me the easiest way to make a forge, what type of metal to use to forge, what will work for an anvil and please put it in simple terms? I have aquired a brake drum and I also have a firepit in my backyard. Will those help? |
| Shaner - Thursday, 07/29/04 22:12:45 EDT |
|
Will reebar work for steel that you are going to forge? |
| Shaner - Thursday, 07/29/04 22:15:08 EDT |
|
Paint Finishes. I certainly have to bow to experience. Not all of us have the equipment for the finishes you propose. But allowing that a few of us do, we should put the best finish on our work we can. My work isn't for commercial consumptionm (at least not yet), but I still want it to last for generations for my family. Thanks for your advice. Dave Hammer |
| Dave Hammer - Thursday, 07/29/04 22:22:34 EDT |
|
Will a 25lbs cylinder weight that is for exsercising do for an anvil?It is about 1 inch thick. |
| Shaner - Thursday, 07/29/04 22:31:26 EDT |
|
The weight is made of steel. |
| Shaner - Thursday, 07/29/04 22:32:03 EDT |
|
for the right price, Vicopper, the amazing firechicken is yours. :-) |
| HavokTD - Thursday, 07/29/04 22:42:14 EDT |
|
When you say getting 1018 mild steel at a good price, what do you mean? What is a good price, say per pound, or rod, or however they price them? |
| - Justin - Thursday, 07/29/04 23:19:35 EDT |
|
Steel Prices: Justin, lately they have gone nuts. Your local steel supplier will probably give you a fair competitive price. It should be half of what you would pay at Lowes or a hardware store. I'm used to 30c/lb prices, I'm sure they are much more now. |
| - guru - Thursday, 07/29/04 23:32:13 EDT |
|
Getting Started: Shaner, See our FAQ's page and our Getting Started article (linked at the top and bottom of this page and on the home page). There are links to forge construction plans and other projects and articles. A 1" steel plate is not suitable for an anvil. That ligting weight is probably cast iron. It will be too springy and bounce around if steel and likely break if cast iron. 25 pounds is very small for a forging anvil and as such the mass needs to be as compact as possible (a cube or short cylinder). One common anvil used in 3rd world countries is a sledge hammer head of 12 to 18 pounds set into a stump. It provides compact mass and a hardened work surface. Thousands of knives and small swords are forged on these in places like India and Pakistan. Short pieces of RR-rail have also been used but they are relatively light and the thin web makes them very springy. See our iForge demo on tools from RR-rail. Spend some time at flea markets, trade lots, junk shops and yard sales and you will find something suitable. |
| - guru - Thursday, 07/29/04 23:45:05 EDT |
|
HavokTD, constantines has saws and blades. Add .com to their name and look under saws. |
| Jerry - Friday, 07/30/04 00:00:02 EDT |
|
Purple Pellets: Burton, I don't have a clue. Found along the rail road it could be any kind of mineral to rat poison or defoliant. . . anything carried by rail. Auto Valve Springs: HavokTD, These are high performance long life springs. I've never heard of failure of valve springs due to age but if you were looking for perfect OEM performance you should probably replace the springs. When an engine sets for decades the springs are the least of the problem. There are almost always open intake valves on a couple cylinders. These have been open to the outside air and condensation. Thus rust. Cylinders rust, valves rust in place (can result in bent push rods on turn over). |
| - guru - Friday, 07/30/04 00:02:10 EDT |
|
Howdy again! I got another question, and this time its about collaring. First I wanna say thanks to all who answered my floor question. Your help has gone to good use! Anyway I was working on a plant hanger today for a family friend and it was going to have two hooks, along with a monogram and a rain gauge holder. well, i thought to punch(this is 1/2" HR square by the way). Well, to make a long story short, it didnt work. So i thought about collaring everything on. I was wondering how hard it is for a beginner. Ive read about it, but reading doesnt tell everything. I dont have a monkey tool or jig for them, so it may be difficult. If it is too difficult, ill just wrap it around or put to use my harbor frieght wire welder.:) Once again, Thanks abunch! Ian Wille |
| Ian Wille - Friday, 07/30/04 00:03:29 EDT |
|
Jewlers Saw: I bought mine from Brookstone as well as the blades. I also bought skip tooth wood blades for it from Garrett-Wade. These were made for a power scroll saw but work in the jewler's frame just as well. These have always been a very specialized saw and were carried only by jeweler and watch and clock maker suppliers. I've had dozens of very comprehensive and specialty tool catalogs that didn't carry a jewlers saw. Mine was made in Germany and it has a LOT of hand filed and welded parts. The box joint for the adjustment slide is made of hand sawed and filed parts brazed togeher. The only hardened parts are the clamp pads and the thumb screws. They are a simple enough design that they would be a very good DIY project for a smith. Not an economical project, but a good project. I THINK the drawings in my iForge demo are complete enough to make one from. I could add a few dimensions if you need. Odd, Constantines announced last year that they were going out of business. Add them to my list above. |
| - guru - Friday, 07/30/04 00:15:06 EDT |
|
By the way I have checked out the iForge demo on collaring and read about how to do it in books, but i want your opinion, if you think collaring is something a beginner can do. Im gonna be out of town for awhile, and wont have much time to work on it next week or the following. Not that i dont want to try it, because i do. By the way, in two weeks i will be giving a demo at Mo. State Fair through 4-H(part of the reason i wont have much time) Ill be making a 7" meat skewer out of 1/4" square. Well, thats all for now. Oh and sorry for the long posts.I am wordy :) Thanks,Ian Wille |
| Ian Wille - Friday, 07/30/04 00:22:41 EDT |
|
Collaring: Ian, Monkey tools are used for making shoulders and tightening riveted joints, not collaring. See our iForge demo on collaring. On a small item like this I would weld the parts together and then collar over the welds so they don't show. Then the collar doesn't need to be 100% functional. It helps to be able to clamp this kind of thing together in a vise or with a C-clamp while collaring. |
| - guru - Friday, 07/30/04 00:23:15 EDT |
|
Thanks guru, i didnt really think of that! I appreciate your help and wisdom very much! Thanks, Ian Wille |
| Ian Wille - Friday, 07/30/04 00:29:07 EDT |
|
INOX: This is speculation on my part, but I've always assumed INOX stood for something like "inoxidizable" is some European language or other. In other words, it may just means "stainless." |
| Mike B - Friday, 07/30/04 08:09:51 EDT |
|
Burton S. if they are the dull purple marble sized balls they are most likely taconite pellets. Taconite pellets are a pre-processed low grade ore mixed with flux and baked to resist the forces in a blast furnace. We have used them in a bloomery before; but you have to crush them up. WEAR SAFETY EQUIPMENT as the CO can't make it into the interior in the time and temp a small bloomery produces. It also has *way* more slag as that flux is set up for the blast furnace. Blooms from taconite pellets are more like iron soup---we do the early consolidation with tongs not hammers! Dragging a magnet in a local creek for magnitite yields a much nicer ore to work with---if your area has it in the creeks/beaches/etc. Collaring, winding the joint with the rod they use for shipping re-bar, usually free at the place that sells re-bar can make a nice collar as well. (*not* rebar tie wire; the shipping bundle fastener) Also suggested to do this *over* the welded pieces, taper both ends so that it terminates nicely too. Thomas |
| Thomas P - Friday, 07/30/04 10:35:01 EDT |
|
ian wille are u going to monte clare state U? |
| - John S - Friday, 07/30/04 11:33:58 EDT |
|
i've just started some metal working in the past couple of days using accytalene and oxygen and a rosebud attachment for heating the metal..right now i'm stumped i purchased some .25x1 440c high carbon stainless and throught the proccess of shaping it it has developed a curve down the back of the blade when i first tried heating it up and hitting the hi point it cracked...how do i fix this curve with out cracking the steel again? Ron |
| R.A. - Friday, 07/30/04 12:31:48 EDT |
|
Jeweler saw, I think I got mine at www.woodcraft.com. It was a few years ago. They're used in marquetry. Steve |
| Steve A - Friday, 07/30/04 12:58:18 EDT |
|
John: ive never heard of that university before. Where is it located(like town, state, so on..). I would appreciate any info about it. Im located near Cape Girardeau, Missouri, and plan on going to U of Missouri at Rolla( great engineers school), but im still lookins since im only a sophmore in High School. Anyway, any info on Monte Clare State U would be appreciated! Thanks, Ian Wille |
| Ian Wille - Friday, 07/30/04 13:12:09 EDT |
|
I am planning to build a propane forge for someone in another country. I will be using U.S. parts. Are adaptors readily available for conversion to metric propane sources? |
| N. Creel - Friday, 07/30/04 13:49:12 EDT |
|
"Taconite pellets are a pre-processed low grade ore mixed with flux and baked to resist the forces in a blast furnace." Acually there are several types of Taconite Pellets, Fluxed (with limestone and binder), Acid (with just binder) and these also can be magnetic or non-magnetic depending what ore body they come from. Yes Iron Ore can be non magnetic. |
| - Hudson - Friday, 07/30/04 14:11:11 EDT |
|
Metric Pipe: N.Creel, Good question. I do not have a good definitive answer. In many "official" metric countries use Inch standard hardware for many things. There are also some things that are fairly standard such as the valve threading on cylinders. Aparently "pipe" sizes are universaly the same as our inch series based on a nominal ID and an odd common OD but are called out in metric DN (diametre nominel). There ARE thread differences. 6 DN = 1/8 NPS 8 DN = 1/4 NPS 10 DN = 3/8 NPS 15 DN = 1/2 NPS 20 DN = 3/4 NPS 25 DN = 1" NPS McMaster-Carr lists several pages of metric pipe fittings including NPT to BSPT (British Standard Pipe Tapered thread) adaptor nipples. However, these are different than Metric Tapered (MT) threads which have a different thread angle. . . I think this is one of those figure it out when you get there things. . . Did you know that standard spark plug threads are metric? Always have been. . 14mm. |
| - guru - Friday, 07/30/04 14:33:29 EDT |
|
Thanks guru, I really appreciate the info. McMaster-Carr didn't even cross my mind. The customer may be able to find an adaptor, but if he doesn't, we can order the appropriate one from McM-C. Thanks, N. Creel I never knew spark plugs had metric threads; that's interesting. |
| N. Creel - Friday, 07/30/04 14:40:29 EDT |
|
thanks for the insight on the paint subject, I never thought to use a sray gun. thanks again! |
| tim - Friday, 07/30/04 15:07:23 EDT |
|
440C Stainless: RA, Heat Treatable stainless is NOT the material to begin forging. Stainless steel does not heat treat the same way as plain carbon steels and is picky about how it is treated. "Thermal conductivity is significantly lower than that of carbon and alloy steel. High stress during rapid heating may cause warpage and cracking in delicate or intricate parts." Start forging at 1900 to 2150°F. Do not forge below 1750°F (a ful red or red orange). Cool slowly from finishing temperature and anneal. It is recommended to anneal in a salt bath at 1250 to 1400°F. Air cool. To harden preheat at 1000°F and then step up to 1400 to 1450°F. Austentize at 1850°F (soak for 30 to 60 minutes). Quench in oil or air (oil prefered). Stabilize by subzero treatment at -100°F. This should begin immediately after cooling from hardening. gradual cooling is recommended. Temper at 325°F for 60 HRc Temper at 375°F for 58 HRc Temper at 450°F for 57 HRc ABOVE Paraphrased from a three page article in the ASM Heat Treaters Guide. Details were left out or the parts that apply to blade making (thin sections) was emphasized. This means that heating with a torch is a sure fire way to produce a surface heat that results in stress cracking. You probably heated too fast and forged at too low a temperature. Upon cooling the steel hardened. If it was worked too cool the anvil quenched it faster than recommended. On reheating if you did not reach forging temperature the steel was both hard and unequaly conditioned. High hardenability steels must be treated gently and with close attention to details. Heating should be done in a forge. Preheating is normally done on the hearth, in a cooling (shut down) forge or in a seperate furnace. Preheating is required to prevent thermal shock. Salt baths are used to prevent oxidation during the long soak times. Annealing, hardening and tempering this steel is best performed in temperature controled salt baths. The curve: in your blade was a normal result in forging any blade. When you thin the edge the steel wants to move in all directions and the edge becomes longer. When one edge is longer than the other it forces a curve into the piece. Normaly when one edge is forged you start by bending the piece in an arc to compensate for the curve from tapering. The amount is done by a seat of the pants guess and experiance. If you guess right the forged blade will be straight. Long curved blades like scimitars are the natural result of forging one edge and letting the steel do what it wants. Edge tapering curvature can be straightened a LITTLE while at forging heat but not 100%. To make a straight single edge blade you MUST start with a compensating curve. |
| - guru - Friday, 07/30/04 15:25:40 EDT |
|
Paint Sprayers For what it's worth, I use a "Critter" paint sprayer I got from LeeValley. It's dead easy to clean, uses sealers for the paint canister so is fast to change colours. At $50 it has definatly paid for it's self in time and money spent on spraybombs. Plus I've been able to mix paint to get nonstandard colours. This remark brought to you by the letters C S and I, and the colour blue. |
| JimG - Friday, 07/30/04 15:35:46 EDT |
|
Paint Spray Gun: This is one of those basic tools that every shop should have. It is just ONE reason to have an air compressor in a blackmsith shop (the others are, air hammers, air chisles, die grinders, air clamps. . .). Sprayed on paint can be be applied thinly and evenly alowing multiple coatings (primer and finish) without thick buildup. Lacquers must be sprayed due to their fast drying. Multiple coats allow for various color effects and glazing or clear coating. My spray gun is an old Craftsman that was sort of a middle of the line gun. Their top of the line at the time (1968). I bought an extra can/cup to go with it. A good investment. It is a "full size" gun with a quart can. I have used it to do fancy air-brush type work on motorcycles as well as paint entire automobiles and trucks. However, a spray gun is not necessary for a layered look or custom painting. Spray cans can be used economicaly on small objects. When lacquers are applied as base coats then tints in varnish or metalic enamels can be wiped on with a rag to enhance texture, create shadows or highlights. The same techniques can be used along with spray techniques. Some of the cheapest production lawn furniture is produced with hand applied highlights and shadows on the base green. This results in a very natural organic look. This is another case where the bottom of the line product is superior to much "first class" custom work in some respects. Think about those finishes. EXPERIMENT, be creative. |
| - guru - Friday, 07/30/04 15:58:58 EDT |
|
Hey y'all, I am late for the post about soundproofing, but maybe this will help. I was a tin knocker for 20 years or so, mostly ductwork and archetectual. Some applications required strong sound attenuation( air duct in military field com bunkers,marine engine rooms,libraries,etc.) It almost always consisted of lead sheet on a foam backing. The lead,being massive is not moved (or barely) by the sound waves, and is decoupled from the wall or whatever by the foam. Drywall is heavy and cheap if you rig some way to keep the vibraton from transferring to the wall. The price on the real stuff is more like gold on foam. Also, if they are tearing down a dentist or doctors office near you, the X-ray rooms are built with sheetrock clad on one side with lead. |
| david mcclellan - Friday, 07/30/04 16:13:19 EDT |
|
I have just built a brake drum forge and was wondering if I could use charcoal instead of coal? |
| Shaner - Friday, 07/30/04 16:25:53 EDT |
|
Shaner: Charcoal has been used by smiths for thousands of years. Be sure to use real wood charcoal as the bar-b-q briquette type is mostly filler and binder. If you HAVE to use briquette I suggest the cheapo stuff, not self lighting. It tends to leave less ash and fewer clinkers. A charcoal retort is not hard to make and there is the steel can and pit meathods too. Do a search. |
| Shack - Friday, 07/30/04 16:51:49 EDT |
|
Addendem, Charcoal: The brake drum forge is bottom blown, most charcoal forges are side blown to keep the light weight charcoal in the forge. Bottom blown forges tend to spray the embers once they get small The curve of single edged blades can also be reduced or eliminated by fullering the spine side of the blade. Start with a narrow fuller and expand as needed to get the curve out. |
| Shack - Friday, 07/30/04 16:55:26 EDT |
|
On sound prooffing, When I had to reduce the noise level in the machine shop I worked at a few years ago, I did a bit of research. It seems that the thin (1/4" plate) chutes that we used to move parts were acting as a vibrating surface. Read drum head. From research, a very dense, stiff surface will not transmit sound back to air on the otherside from the noise well. Ie. a concrete wall won't pass noise through well. A typical sheet metal pole barn structure will transmitt the noise well. As David Mcclellan noted the dense lead, uncoupled from the sheet metal did not transmit the noise. I also had to deal with impact noise from forgings being dumped onto the chutes. I used 1/4" thick UHMWPE plate, with a 1/8" thick 70 durometer rubber isolator to uncouple the poly plate from the steel. Was able to drop 20 Db at 3' from the chute! I suspect that drywall,mounted over the thin styrofoam insulation the is used when residing old houses would yeild a lot of sound deadening and some thermal insulation. I would insure that the fastners did not pull the drywall hard enough to crush the foam. Another post from CSI member, with esoteric experience, offered to the blacksmithing community. There are many with the experience, some share, and a few join CSI. Join the few! |
| ptree - Friday, 07/30/04 18:28:08 EDT |
|
My first, fuzzy idea had been to purchase sheets of the insulation foam (backed by aluminized mylar I believe, like the emergency blankets), cut them into 16" strips and placing them between the upright 2 x 4's in the garage framing. They would be held in place loosely by the pegboard. I figured that if it didn't work I wasn't going to be out a lot of money. Also if I achieved limited success, I could add more strips, up to the thickness of the 2 x 4's. So just talking about this specific idea, I'm better off if they're held in loosely, right? So they can vibrate in place without transmitting that vibration to the walls or anywhere else? Or would them vibrating then just transmit the sound straight through? Also, many thanks for the tip on the butt weld pipe caps. Found a place a few miles away that has loads of 6"ers for $20 a pop and they just can seem to get rid of the last few 3"ers on the shelf so I'm cutting a deal to help them out, poor guys. |
| MikeA - Friday, 07/30/04 18:51:19 EDT |
|
*can't* seem to get rid of Sorry. |
| MikeA - Friday, 07/30/04 18:53:35 EDT |
|
thanks for the advice everyone. I'm gona check with my woodworking suppliers first, and then online for the jewlers saw. You've gotta love having a good answer for all those questions that are bugging you whenever you remember to ask. Well worth the $1 a week, if you ask me. JOIN CSI NOW!!! Don't be left behind!! |
| HavokTD - Friday, 07/30/04 19:22:52 EDT |
|
Havok, any knifemakers' supply store (I usually go with Jantz supply) will have jeweler's saws and blades for fairly cheap. Gesswein has them, but for MUCH more money for the same saw, the theory being that real jewelers will pay more than skinflint knifemakers. If you want to work with metal, get your supplies from places that deal with metalworkers. Unless you enjoy the dumb looks you get from woodworker supply places when you tell them what you want to do, that is. I do like the occasional "But you can't do that without industrial equipment!" just before showing them the pictures... |
| Alan-L - Friday, 07/30/04 20:46:48 EDT |
|
Say, Guru, i just wanted to thank you for the help you gave me on my burner problem. I think i may just put one of those jet nosles on my burners. They're all working alright now, though; i just had to fiddle around with the brass pipe a little to get the right angle and they work great now (quite hot). Thanks again. |
| Julian Kingman - Friday, 07/30/04 22:50:20 EDT |
|
Instead of noise-proofing the entire shop, how about just (fireproof) curtaining/acoustical-screening off the area where the most noise originates, the way industry does it? Be a lot cheaper, faster, easier. Hammering and grinding can be done on a contained area, in a contained time frame-- daylight, normal working hours. Guy across the road herein rural-residential area spent 18 years (!) building a 40-foot steel yacht (read big LOUD drum), hammering, grinding beads, etc. with no acoustical baffling. The neighbors got used to it. |
| Miles Undercut - Saturday, 07/31/04 01:14:38 EDT |
|
Funny you should mention that. I was thinking of perhaps just sort of partitioning an area around the anvil, stake and grinding areas. Heavy plywood would reflect it well, though I would take a pounding, maybe those static shooters ear protectors would help. I do try to be considerate. Save the loudest stuff for midday weekends, grinding and planishing, do hotwork after the day job during the weeks to build up stuff to grind and planish for the weekend. A yacht? Wow. |
| MikeA - Saturday, 07/31/04 02:14:05 EDT |
|
I only do this once a year so it's not surprising to me that I cannot recall how to go about this. What do I need to do to find the date that my annual CSI membership expires? I believe it to be sometime in August or September and I want to make sure I do not let it lapse. Thanks If you haven't joined CSI why not do so now ? It's little enough to contribute to maintain this wealth of information. Harley |
| Harley - Saturday, 07/31/04 05:08:20 EDT |
|
Mike, If you're going to make a sound barrieer around your anvil area, don't use plywood panels alone. They will only refl;ect the sound back to you and UP. Remember, the floor is the worst reflector for sound you have. If you want pretty effective sound barrier panels, look at the one in commercial offices. Those use fabric over foam over Homasote board. The best ones also have a panel of Durock or Transite (cement board) in the very center. That layered sandwich will absorb sound rather than reflect it, and the dense Transite board at the core doesn't act as a transmitting membrane for what little does get through, it just stops it. You might look around a large metro area for a used office supply store and see if you could get a few of those carrel walls cheap. Add a layer of fireproof curtain fabric to your side, or spray with a mixture of 20 Mule Team Borax and water for fire resistance. Weld up some little brackets with casters for the bottom and you're in business. Remember what I said about the floor? If you can't have a dirt floor, then you're going to have to live with the reflected sound from the floor. That means you have to make the ceiling as acoustically dead as possible, since it is opposite the floor. The sounds we generate when doing metal work are percussive noises from hammering, and those really annoying high-pitched whiny grinder sounds we make when backing into the anvil horn. (grin) Seriously though, the high-pitched percussive sounds are the easiest to absorb, and the most important ones to absorb since they reflect so well. They are also the ones that do some really quick and permanent damage to your hearing. This is a subject that I am sadly too knowledgeable on. My hearing has been irrevocably ruined by those noises, and now I need $5K worth of fancy hearing aids to understand my wife when she talks to me. (Yes, she's worth it. What else can I say, she reads this board, too.) If you do anything to confine the noises you generate, you MUST wear GOOD hearing protection. Preferrably OSHA approved ear muffs with at least 28db attenuation. I recommend that you also wear a set of ear plugs inside the muffs. I have some of the electronic automatic noise cancelling muffs now, and I think they're great, particularly when doing demos. The cheap $29 ones from Harbor Freight work just fine. Your hearing is certainly worth it. |
| vicopper - Saturday, 07/31/04 07:21:56 EDT |
|
Harley, Since you're signed in as a member, just go to the Member's Business Forum on the drop-down menu above. At the bottom of the message input window it will show the expiration date of your membership. |
| vicopper - Saturday, 07/31/04 07:24:03 EDT |
|
As an industrial safety guy, I can recommend the Peltor ear muffs that have the band behind the neck as the most comfortable that I have ever worn. They are less than $20.oo through industrial supply houses and have the added avantage of being comfortable to wear with a face shield or welding helmet. I put them on as I enter the shop, and they do not interfer with any other safety equipment that I use. They are so comfortable, that I also wear them to mow! |
| ptree - Saturday, 07/31/04 08:55:27 EDT |
|
To control sound in a shop, the hanging panels are very good for high Freq sounds, but not very good for low freq. If you are using a JYH, look at the machine as a generator, and you may be able to reduce sound there. The sound of dies hitting hot metal is not often the main source of noise. I filled the column of my JYH with steel shot, and the frame quit acting as a bell. I placed the machine on a 1/8" urathane conveyor belt scrap, and the foundation is 24" deep. Prior to putting my safety hood on, I could run the beast with the shop doors open, about 75' from the open windows of the house, and not distrub the sleep of my daughters. Grinding, or anvil work did wake them. When I got smart and installed a 10ga hood to contain the top works, It oil cans and vibrates, and it will wake the girls. My next project is to stiffen and insulate the hood, while still allowing me to remove it by myself. While attacking the noise source is rather hard with a handheld grinder, other sources can be reduced. Using a bench grinder or wirewheel? Use a very stiff bench that won't oil can. Mount anvils for noise reduction. Then think about insulation/absorbtion. Absorbtion is better than insulation as it does not reflect the noise back at you. |
| ptree - Saturday, 07/31/04 09:05:05 EDT |
|
Sound Proofing: All good suggestions. Just remember when doing it yourself that ALL foam boards are flamable and potentialy hazardous. When used in construction they are required to be covered by a layer of non-flamable sheet rock. Covering potentialy flamable materials with peg board is a bad idea, ESPECIALY where welding or grinding may be going on. Most fireproof curtains are made of fibreglass. A heavy curtain on a movable framework like welding curtains are setup is a handy way to block/absorb sound that can be moved out of the way. You could probably combine both into one. Welding curtains have a heavy translucent light filter ing plastic to reduce arc flash and still let some light in and allow others to know someone is behind the curtain. A fire proof curtain in front of this (sound source side) will get the advantage of the plastic as a deadening material. Lead coated foam of fiber board is the best industrial duty sound stopper. However, lead as waste is considered a hazardous material and its use should always be carefully considered. Lead coated foam is usualy used behind those nifty looking egg box / pyramid covered foam panels used in recording booths. The textured surfaces limit reflection of sound and the lead behind it absorbs. This is a high tech and expensive sound deading system that is not suitable for the welding and blacksmith shop due to the flamability of the foam panels. They are fire retardant, but not fire proof. . . For long term, dense foliage like shrubs and trees can reduce a lot of sound transmission from back yard to backyard. Remember, that if you can SEE your neighbors house (note second story windows), that they can probably hear what you are doing. AND as mentioned above, sound can reflect off surfaces, like the back of your house, a wall or other hard surface. Angled surfaces can fool you, think of them as mirrors, or look at what reflects in the windows on a house. Although blacksmithing can be noisy, the NOISIEST tool I know of is a circular saw. They are loud, high pitched and a raggedy harsh sound. You can tell when construction is going on miles away from the sound of these cutting wood. . . |
| - guru - Saturday, 07/31/04 12:28:42 EDT |
|
Dear Gurus: I have just moved to the United States from Senegal where I was an intern at a workshop building wrought iron furniture. (My boss is the father of famous Senegalese musician Youssou N'dour, for those of you who know 'World Music.') I am now living in Manhattan, New York and am looking for full time employment here. I am from Madagascar but have moved here with my American wife and have a Green Card, which allows me to work legally in this country. I would be willing to do any kind of work, however I would most like to continue to build on the skills I gained in Senegal. Can you suggest ways in which I might find employment in this domain? Do you know of any foundries or other businesses in the New York Metropolitan area that I could contact? What kinds of diplomas or licenses are recommended? Where can I learn this trade besides through experience? Do you recommend traditional schooling? Should you have the time and/or inclination to respond to my questions, I can be reached at cossratia@yahoo.fr. I would greatly appreciate any advice you have for me. Sincerely, Coss Ratiambahiny |
| coss ratiambahiny - Saturday, 07/31/04 13:11:51 EDT |
|
Coss, Welcome to the United States! You will, I hope, learn to love America as much as you love Senegal. I will let the other guru's explain the educational methods, but I will suggest that you go to http://www.abana-chapter.com/ locate the chapter nearest you, and contact them as soon as possible. There you will meet other blacksmiths who love their craft, and are willing to teach and learn from others who also love the craft. Again, Welcome! |
| Paw Paw - Saturday, 07/31/04 13:25:43 EDT |
|
Can anyone give me info on books or news letters with information on how to construct a railing for porch steps. Any help would be apreciated. David NC |
| David NC - Saturday, 07/31/04 16:59:29 EDT |
|
Thanks Vic, Will renew next month. Anyone else want to join in? It's the best investment in blacksmithing you will ever make. Harley |
| Harley - Saturday, 07/31/04 20:38:56 EDT |
|
I am just getting into blacksmithing, and have been given a small forge, which the original owner said was a duck nest. I've dated it to a 1909 tool catalogue which says that it is used in the forge to direct the force of draft from the bellows to the center of the fire. Do you have any further information on this Duck Nest, and could you give me an approximate value??? Bruce |
| Bruce - Saturday, 07/31/04 22:10:17 EDT |
|
Bruce, That's a bit like asking us to tell you how much your car is worth without any pictures. (grin) Send me a couple of pictures, and I'll try to help you out. I'm not in the business of pricing antiques, but I will help you figure out approximately how much it is worth. |
| Paw Paw - Saturday, 07/31/04 22:27:40 EDT |
|
|
|
|