| WELCOME to the anvilfire Guru's Den - V. 3.0 |
|
THIS is a forum for questions and answers about blacksmithing and general metalworking. Ask the Guru any reasonable question and he or one of his helpers will answer your question, find someone that can, OR research the question for you. This is an archive of posts from August 16 - 24, 2006 on the Guru's Den |
|
|
|
Time Zones: Yep, our English friends go to bed early, our California friends go to bed late, and our New Zealand and Australian friends are clean into Tommowland. :-) I will gladly take calls from our NPS unit in Guam ( http://www.nps.gov/wapa/ ) at home, since we're never in the office at the same time. Getting up at 04:30, I'm very sensitive to the changes in daylight throughout the seasons. The nice thing about blacksmithing, though, is it's not daylight dependent, and I have done some of my best work at night. It sort of serves as a perfect complement to my daylight outdoor activities around the farm and on the longship. Warm and sunny on the banks of the Potomac. Visit your National Parks: www.nps.gov Go viking: www.longshipco.org British Paerwork Reduction Act of 1814, celebrated tomorrow! http://www.eyewitnesstohistory.com/washingtonsack.htm http://www.nationalcenter.org/BritishBurnWashington1814.html |
| Bruce Blackistone (Atli) - Wednesday, 08/16/06 08:54:53 EDT |
|
That should have been: British "Paperwork" Reduction Act of 1814 |
| Bruce Blackistone (Atli) - Wednesday, 08/16/06 08:56:09 EDT |
|
Got lost in central PA and came upon an anthracite mining town that's been abandoned... I forget the name. The state turned the whole town into a museum and have even let people live in the original houses of the miners. Wonderful detail in coal mining, production, and lots of information on the major types of coal and all their uses. Unfortunately the original smithy burned down and was never reproduced. I'll get the specifics later on, but if anyone is lost in central PA, check it out. |
| - Nippulini - Wednesday, 08/16/06 09:05:02 EDT |
|
Propane fuel efficiency: Can anyone tell me which is more fuel efficient a naturally aspirated forge or one with a blower. |
| oljoe - Wednesday, 08/16/06 10:57:07 EDT |
|
Forge Efficiency: Oljoe, There is no difference other than that you have more workable adjustment on a blow forge and can make them run VERY rich or very lean. When both types of forge are heating the same volume they are equally efficient. The problem arises when home built forges do not match burner capacity to enclosed operating capacity. A forge with an undersized burner will never reach maximum temperature but will appear to be very efficient. A forge with too much burner will have more combustion going on outside the forge than in thus wasting fuel. Overall design is more ciritical than the type of burner. The only advantage to an atmospheric burner over blown burners is the atmospheric burners run a little quieter and need no electricity. The advantage of the blown burners is they can be pushed to burn really hot. |
| - guru - Wednesday, 08/16/06 11:25:28 EDT |
|
Thanks guru for the quick response. I am going to build a new forge and was trying to decide what to build. Since I have a blown forge I think I will build a smaller naturally aspirated forge for general forging and portability. I have some castable refractory that I used to repair my blown forge. Is this something that I should use to build the forge or should I get some K-wool and ITC-100? Another question if I may. Is a round forge design better or will a box type work just as well |
| oljoe - Wednesday, 08/16/06 12:07:04 EDT |
|
Oljoe, The castable is more durable than the kaowool but it is heavy in even small quantities. This also makes a forge that is slow to heat up. The tubular or round forge is best when using Kaowool because the arch makes it self supporting. IF the forge is to be portable I would use kaowool for everything except the floor. Brick or castable works best on the floor. The ITC-100 reduces dust from the kaowool, helps protect the kaowool from small quantities of scale and flux. |
| - guru - Wednesday, 08/16/06 13:18:16 EDT |
|
Thanks guru, Kaowool and ITC-100 it is, along with a castable floor. I remember seeing a formula to calculate volume of a forge body somewhere�.maybe here. A search should turn something up. Thanks again. Joe |
| oljoe - Wednesday, 08/16/06 14:17:40 EDT |
|
What is the essential shape for an engraving tool? I couldn't find it on anvilfire, unless I missed it and the pictures and sites online either don't give a good picture or they are just trying to sell them while as I want to make my own. Thanks in advance! ---Rob |
| - Rob - Wednesday, 08/16/06 17:43:12 EDT |
|
It seems to me a perfectly tuned naturally aspirated forge would be more efficient. The blown forge squanders the energy used to originally compress the propane and then burns electricity to make up for it. But I suspect the electricity use is small compared to the inefficiency of a poorly tuned forge. The worst trouble I had with time zones was working with an office in Saudi Arabia. There was an eight-hour time difference, but worse, the weekend there was Thursday and Friday. If you needed something from them after about 9:00 Wednesday morning, you couldn't get it until the following Morning. (Actually the folks we had there were really good about taking calls at "home.") |
| Mike B - Wednesday, 08/16/06 18:33:01 EDT |
|
"following Morning" should be "following Monday." |
| Mike B - Wednesday, 08/16/06 18:33:36 EDT |
|
The range of tuning for a blown forge is much greater than for an aspirated one as there is a certain ammount of pressure and opening you have to have for it to aspirate. With the blown forge I can go with no gas no air up to massive ammounts of either or both. Note having recently had a vendor charge me for a complete fill up for a partial tank a blown forge that can run the tank all the way to almost ambient pressure would be more monetarily efficient in such cases; unfortunately He's the vendor open Saturday Mornings that does cheap fills rather than switchouts... I really enjoyed working in Jakarta Indonesia about 1/2 way around the world from my home base in OH back then. If I had a problem I would call my boss right before bed and sometime during the night a fax would be shoved under the hotel room door with the solution on it. |
| Thomas P - Wednesday, 08/16/06 19:17:24 EDT |
|
Rob, There is much more than just one shape for an engraving tool (graver or burin). Essentially, they are all chisels, therefore an "inclined plane" in mechanical terms. In practice, the cross section can be round, square or rectangular, diamond, onglette or knife edged. the determining factor is the type of line or contour you wish to engrave. Each one cuts a different gouge in the surface, and the way it is sharpened also affects the appearance of the final cut. If you really want to know about gravers, pick up a copy of "Engraving on Precious Metals" by A. Brittain, et al, or "The Art of Engraving" by James Meek. Both are good, straightforward books on the subject. |
| vicopper - Wednesday, 08/16/06 21:11:27 EDT |
|
I would like to know why blacksmiths plunge their hot, newly forged metal pieces into cold water to cool, rather than just letting them cool in the air. It seems like the cold would make the metal more brittle. |
| Cathryn - Wednesday, 08/16/06 22:12:01 EDT |
|
Cathryn: If the steel has low [.1% or less]carbon, plunging in water to cool won't make it hard or brittle. The water is just to speed the cooling process, as once the steel looses it's red color, You can't tell if it is still hot enough to cause a burn by looking at it. Better safe than sorry. |
| Dave Boyer - Wednesday, 08/16/06 22:36:09 EDT |
|
Cathryn; I find your statement a bit strange; I've been forging only about 25 years now and I don't know *ANY* smith that regularly "plunge their hot, newly forged metal pieces into cold water to cool" and in fact I have been told that one of the most famous smiths in America wouldn't allow water in his shop! Of course a lot of this is to do with forging A36 that may have an apreciable carbon content; the old real wrought iron would still be very soft after a quench due to the very low carbon content that was generally supplied, (Yes you can have a high carbon wrought iron "steel"; but it's pretty rare in the scrap stream) Could you share with us where you got this notion from? Thomas |
| Thomas P - Wednesday, 08/16/06 23:04:48 EDT |
|
...unless it's Hollywood, in which case they just like the steam and the sound, which says to the viewer: This is REALLY HOT! ;-) |
| Bruce Blackistone (Atli) - Wednesday, 08/16/06 23:07:47 EDT |
|
Larry Soule', There's a company called "Carolina Glove Company", (look it up on Google), they sell ambidextrious kevlar gloves you can buy singly. For bearings, come close to the housing diameter and shim it up, come close to the shaft diameter and rout it out. Never could find exact sizes and it sounds tacky, but I'll gotten 3 years out of a "busted " blower so far using that method! |
| Thumper - Wednesday, 08/16/06 23:48:34 EDT |
|
new balcksmith, much previous experience in other metal working, skilled professinal woodworker, looking to expand and learn, I am looking for an anvil to buy, and have tried to do my homework to learn what to look for as far as condition of the anvil, sound, rebound, and how it was made in the first place, I cannot afford to just go out and buy the best brand new anvil made today, and have recognized the new cheap ones as not being worth buying, specifically I am questioning about a new anvil available on ebay (and yes I am leary of any of these) there are new 110 pound anvils claiming to be cast hardened steel, 75-77% bounce test, 45-50 rockwell, made in europe (won't say were) from atlas anvils, from "frankie8acres", these are constantly available at about $150 with $65 shipping, is anyone familiar with the quality of this particular anvil? How good or bad a deal is this? Hopefully I have not repeated a common question, if I could have found this out from my own research, I would not have asked, Jared |
| Jared - Thursday, 08/17/06 00:18:31 EDT |
|
Thumper Etal. . Kayne and Son sell lefts or rights as needed. Larry was looking for someone to trade with. . . Quenching newly forged parts: I quench a LOT of decorative parts. Especially when doing demos, before handing to the audiance to have a look. Anything critical cools on the forge a short time before quenching. Nothing is quenched at a visible heat. When you are doing demos and there are a LOT of interuptions it is much more likely to get burned picking up something hot . . so cooling before lying down is for MY safety. There is a big difference in working in a zoo where you are the attraction and working in a sane shop environment. The only time I have had trouble with brittle pieces in mild steel is bending and squareing up drive hook corners in a vise. The vise absorbs heat fast enough to harden sections 1/4" square and smaller. So I usualy reheat drive hook corners to prevent fracture. I've only had a few problems with 1/4" (6.4mm) square but 3/16" (5mm) mild steel will harden to the brittle point almost every time, even with a hot vise. So they need to be at least normalized after bending. Liquids are not the ONLY quenchant. This also gets us back to the ambient light problem. Working in bright daylight you cannot see a hardenable read heat. . . |
| - guru - Thursday, 08/17/06 00:35:48 EDT |
|
Engraving Tools: Most for lining work are a miniature version of a diamond point or "cape" chisel with the face ground to make on sharp corner the cutting edge. Small HSS cutter bits and old taps make good graving tools but you have to add a handle. |
| - guru - Thursday, 08/17/06 00:38:58 EDT |
|
Ebay Anvils: Jared, The particular dealer you are discussing is both a lier and theif. He stole images from anvilfire and argued for months that they were his. His discriptions of anvils are mostly taken from here and hit all the key words. See our FAQ about Selecting an Anvil and the articles linked to it. See the review of the Russian anvil. These anvils are available from Harbor Freight for $100 or less, ocassionaly with free shipping. If you are a professional of any type then you should know better than to buy junk tools. Good anvils are not "just steel". They are hardened (from hardenable) tool steel, are properly ground and finished, having a good usable shape. If you cannot afford a good new anvil then look for a good USED anvil. They typicaly sell for the same as the import junk on ebay and most of the old anvils are as good as the very best made today if not better. |
| - guru - Thursday, 08/17/06 00:48:52 EDT |
|
Jared, Questions about these anvils come up from time to time. Basically, these anvils really aren't worth messing with. Speculation is that these are the same anvils that Harbor Freight sells in their retail stores for about $90. Since they haven't been sold online by Harbor Freight in a few years they have started popping up on e-bay for twice the retail price. You should take a look at the article in the anvil FAQ on this site titled "cheap Russian anvils" as this is a description of this anvil from a few years back as well as a rundown of some of the shady history of this anvil on e-bay. For the $215 you would pay to buy one of these questionable anvils you can probably find an infinately better used anvil. The best thing you can do is get in touch with the local blacksmithing group in your area. Usually someone in the blacksmithing group will know where there is a small horde of anvils. I recently visited the shop of a guy who had about 40 good quality anvils stacked up in his barn. |
| Steven Galonska - Thursday, 08/17/06 01:04:35 EDT |
|
I have many years experience welding and fabrication of steel and have been blacksmithing for a couple. I am looking for a power hammer for my home shop. There are many kinds and sizes out there. What in-put do you have on good used or new hammers out there that would be good for a novice (with some experience)? I have been looking at the Big Blues, but would prefer a lower cost used hammer. Thanks. Mike |
| MIKE M. - Thursday, 08/17/06 01:22:19 EDT |
|
I am looking to buy an ironworker and have been offered a FICEP early Geka style iron worker. Does anyone know anything about these machines ? It has 29 tonnes punching power and 55 tonnes shearing power. |
| mark - Thursday, 08/17/06 02:35:38 EDT |
|
Jared: As far as I know ATLAS is simply a name this seller came up with. If you look at the one at a Harbor Freight retail outlet it has a sticker on it which says they are imported exclusively by HF and has Made in Russia on the sticker as well. I'm speculating this seller merely buys them retail at HF, removes the sticker and then lists them on eBay. I can't image how he would be obtaining them otherwise. Working backwards from the HF price of about $90. In that is the freight from Russia to the U.S. May be shipped out of a Baltic port or a Pacific one. In any case shipping hunks of iron can't be all that cheap. Then HF wants to make a good profit on them. It wouldn't surprise me if the production plant only receives about $15-20 each for them. Yes, labor is cheap in much of Eastern Europe (and technically Russia is both an European and Asian country) and some foundries are state subsidized, but just how good of an anvil would you expect for that price? The seller uses a bait and switch tactic (at least IMHO). The anvil shown in the opening photograph won't be what you receive. He doesn't tell you that until towards the end of the listing. The one you will receive has the hardy hole diamond to the horn. Consensus seems to be this greatly weakened the anvil body at that point. Last I looked at this seller's fixed shipping charges they were computed based on the fartherist continental state away from him. Anything closer he also made a profit on the shipping. If interested in one as a starter anvil HF has retail outlets in many locations. When you are through with it, it will have a scrap value of about $6. |
| Ken Scharabok - Thursday, 08/17/06 07:34:47 EDT |
|
Power Hammer Cost: Mike M,, The Big BLU's are the least expensive hammer on the market for their size and capacity. While you can purchase a new Chinese hammer for less you must choose a much smaller hammer to pay less. Kuhn and Phoneix are in similar quality class but you get more hammer from Phoenix. However, there are supply problems with both. Used hammers vary a lot and you may have to wait to find what you are looking for. Little Giant made more hammers than anyone selling them on credit. This means they are available AND you can get parts for them. They are finicky and difficult to operate unless very well maintained. Bradley and Fairbanks made better hammers but they are complete orphans. Champion made an OK power hammer as well. But again, it is an orphan. While Bradley is not a 100% orphan there are no parts and castings are replaced by machined or fabricated parts. So they might as well be orphan. Used prices vary but are runing in the $2,000 to $4,000 range for all sizes of Little Giant in good to just rebuilt condition. Hammers with problems or missing motors are selling for $1,000 to $3,000. Other mechanical hammers are more or less depending on condition. Several years ago Chambersburg Utility hammers in the 200 to 500 pound range were being scraped at a significant rate and prices ran $500 to $1500 for these wonderful machines. Now that the market seems to have dried up the prices are MUCH higher. Old Nazel and Chambersburg self contained hammers sell for $5,000 to $20,000 despite the Chinese hammers of simmilar design no being imported. Industries that are still using these 75 to 80 year old machines routinely spend tens of thousands of dollars on their repair. Nazels are undoubtedly the best. They have a smoother control and a simpler drive train. Chambersburg's have simplified controls that work well but they put reduction gearing in the middle of the drive train. When this fails it is VERY VERY expensive to replace. Chambersburgs were manufactured more recently so you are more likely to find newer hammers. However, many self contained hammers were purchased for use in metalurgical laboratories and ocassionally you can come across one with virtualy no operating time. Good luck. |
| - guru - Thursday, 08/17/06 08:51:40 EDT |
|
fwiw, My HF anvil is slowly becoming a cheap DIY swageblock. Everytime I need to I cut& grind a new impression into it, Or drilled different size pritchells too. |
| - Mike - Thursday, 08/17/06 09:57:19 EDT |
|
If you must have a cast iron ASO, Northern Tool has them in a recent catalog: 55# for US$35 and 70# for US$50; if you're going to buy a piece of junk you might as well not waste much money on it! Thomas |
| Thomas P - Thursday, 08/17/06 10:42:36 EDT |
|
AH. . so THAT'S what it is! A DIY swage block kit. Here's your blank, just carve away! Sort of like some of the bad block patterns around that have parting lines down the middle of side impressions. . . |
| - guru - Thursday, 08/17/06 10:45:31 EDT |
|
I once considered machining swage blocks from solid steel slabs. Had a fellow with a big lathe that was going to machine the bowl shapes. I was going to mill the side grooves and hand dress the larger flame cut portions. Deal fell through when the other fellow picked up some lucrative work. Then steel plate prices rose and it got hard to find as well. A few folks have had flame cut blanks made but the designs were lousy and tried to flame cut small impressions that should have been left to hand shaping. Phoenix Jewelers Supplies has a line of small dapping blocks (jeweler's versions of swage blocks) that are machined from solid (in Spain I think). In this technique ball end milling cutters make all the dish impressions and the side grooves are gang milled 8 or 10 at a time using the same setup for hundreds of blocks. Drilling your own heavy bolster or punching blocks is not a bad job and makes a useful and valuable tool. |
| - guru - Thursday, 08/17/06 11:17:18 EDT |
|
I have a piece of a press brake die that I purchased form another smith. It weighs about 30# and is roughly 6" on a side. I have ground a depression in one side of it to use for dishing. Using a 9" angle grinder, it only took me about a half-hour and one disc to make a depression 3" in diameter and about 3/4" deep, which works just dandy. I'll do another side or two using my 7" and 4-1/2" grinders, to have a decent spectrum of depressions. A handy item, as it is heavy enough to just sit there when in use. |
| vicopper - Thursday, 08/17/06 12:07:48 EDT |
|
Ficep and Geka are two completely different companies, Ficep is italian, and Geka is in the Basque country of northern spain. So an ironworker could not be both- its one or the other. Both make very good machines. Ficep is not supported in the USA at all- most early Ficeps were imported by Heller and sons in southern california, but I am not sure if they would have any parts or info on an older Ficep or not. GEKA is currently imported and pretty well supported, by Comeq in Baltimore, but I dont know if they would support an older machine or not either. But GEKA in Spain is pretty easy to deal with, and have some english speakers there. By the way you spell "tonnes" however, I suspect you may not be in North America- which might make your support issues tougher. FICEP in Italy is still in biz as well, but I have never dealt with em. Is this ironworker mechanical, or hydraulic? The older mechanical ironworkers are pretty bulletproof, but the europeans mostly shifted to hydraulic close to 30 years ago- which means if its mechanical, its probably a 60's or earlier model, and therefore parts are pretty unavailable. 29 tons punching aint much- its about a 1 1/4" hole in 1/4" plate, or a 5/8" hole in 1/2" plate. Of course, it depends on what you commonly do, but most fab shops really like at least a 40 ton punch. 50 is better. Punches, dies, and coupling nuts are available for these machines, reasonably priced. Shear blades are sharpenable or replaceable, a bit less reasonably, but not excessive. But other parts are probably not easy to come by, so you should inspect the machine carefully, and make sure it works. Ficeps are sturdy, usually a lot of machined steel parts, as opposed to castings, unless its REALLY old, which means they are easier to remake than a casting would be. Location affects price- where are you, and how much is it? Model number? I have some, but not a lot, catalogs showing old Ficeps- might have it, might not. |
| - ries - Thursday, 08/17/06 13:44:40 EDT |
|
ries I am in England and the ficep is going for �300 and i dont have the model number |
| mark - Thursday, 08/17/06 13:58:44 EDT |
|
I have what I think is a Hay-Budden anvil and would like to know when it was made. I found 2 numbers on the front. I think they are 415627 and 176. The numbers were difficult to read. Any help would be appreciated. Thanks. |
| Brian - Thursday, 08/17/06 15:41:39 EDT |
|
Brain: 176 should be weight plus or minus a couple of pounds. I suspect what you are seeing is A15627, which would date it to 1919. Would have a one-piece forge steel top half and a cast base, which likely was cast mild steel. |
| Ken Scharabok - Thursday, 08/17/06 19:05:38 EDT |
|
Quenching hot steel -- not to omit the obvious, the best reason to quench steel is that you're making a tool and *want* it to get hard. In that the case, the quench is followed immediately by tempering to reduce the brittleness. |
| Mike B - Thursday, 08/17/06 20:27:33 EDT |
|
If the Ficep works- that is, if it punches holes and shears without problem, I would think �300 is quite a good price. Over here, any working ironworker would be worth twice that at a bare minimum, and hydraulic ones would run more like �3000 to �8,000 used. Ficep is still around - www.ficep.it and they still make ironworkers. They will sell you punches and dies for it, I am sure. They even have a UK distributor- www.ficep.co.uk First thing I would do is get the model number and serial number, and call up the UK distributor, and ask to talk to the tech guy- whatever they call them over there- and ask about the machine, parts availability, and so on. My guess is that somewhere in the UK, there would be an aftermarket punch supplier, as there are here in the USA, who make cheaper punches to fit most manufacturers equipment. But if not, punches and replacement shear blades should be available direct from Ficep. |
| - ries - Thursday, 08/17/06 20:49:32 EDT |
|
Making swage blocks. I have a friend who made a small one by hammering ball bearings into a block of hot steel. If you have a big power hammer (I don't know 500 pounds or more?) you can make a medium to full sized one. |
| - Tyler Murch - Thursday, 08/17/06 21:24:16 EDT |
|
Miles Undercut ...Thers another nice old Stude at the intersection of 285 and the old Pecos Trail |
| - Arthur - Thursday, 08/17/06 22:07:44 EDT |
|
Speaking of blocks, I am still looking for a pattern maker willing to make two patterns for just spoons and rivet heads. Would be cast out of bronze or similar metal. |
| Ken Scharabok - Thursday, 08/17/06 22:10:52 EDT |
|
Thanks for the quick response to my question about power hammers. The info will help me find the right one. |
| MIKE M. - Thursday, 08/17/06 22:26:13 EDT |
|
i have a piece of titanium that i would like to make a bracelet from but i have no idea how to work it ! hot? cold? or can i even use it ? bob |
| Bob mathie - Thursday, 08/17/06 22:31:02 EDT |
|
thanks all for the info, I was more than leary of such a purchase, but like you said, he hit all the keywords, enough to make one curious, as with all my other crafts, my intent is to have tools that will still be working for many years to come, and have my work turn out likewise, I will continue to look for a good used anvil. |
| Jared - Thursday, 08/17/06 22:39:59 EDT |
|
Arthur-- Many thanks! I'll check it out. |
| Miles Undercut - Thursday, 08/17/06 23:04:32 EDT |
|
Patterns: Ken the pattern is EASY. The problem is finding and dealing with a foundry. The foundry will dictate the style of the pattern, loose, boarded match plate, ganged, mold box. . . and often the material, wood, resin, aluminium. When you you know EXACTLY what the foundry wants then you make your pattern. I have two mahogany loose swage block patterns and a (near finished) wood match plate (expensive) large block pattern that the foundry we found would not accept. They wanted resin mold boxes which required starting from scratch. Some foundries only want metal patterns for durability. THIS I fully understand since my wood patterns came back from the last foundry with sputter ball burns. . . Most foundries have an in-house pattern maker or a local pattern maker they prefer to work with. They are expensive and unless you give them detailed engineering drawings and insist on them meeting them you WILL NOT get what you wanted. Having patterns made prior to contacting a foundry can be money thrown away. |
| - guru - Thursday, 08/17/06 23:15:32 EDT |
|
I'm starting to work in metal a little bit, just got through making a simple gate for the garden, and now I want to put some thin, flat-stock "curlie cues" on it, like you see on wrought iron gates and railings. I need some direction on where to find a design or help for making a jig to bend the flat stock *consistantly*...I've been cold-bending some 1/4" around some small diameter pipe and I think there is a better way.... Any help would be appreciate. Thanks in advance, -Glenn |
| - Glenn - Thursday, 08/17/06 23:19:23 EDT |
|
Ti : Bob, Industraily Ti is heated in a vacuume and handled under very strict conditions. However, a variety of folks including our Thomas P. has made a variety of things from it. Thomas made a pair of tongs. It DOES have a very narrow working range. After cleaning and polishing the Ti you can heat it and produce the most gorgeous temper oxide colors you have ever seen. I have a Star Trek pin that is beautiful shades of deep blue and red created mearly by heating. |
| - guru - Thursday, 08/17/06 23:22:03 EDT |
|
Glenn, see our 21st Century page articles on benders. They are easy to make. |
| - guru - Thursday, 08/17/06 23:23:31 EDT |
|
some alloys of Ti give off dangerous fumes. |
| - Tyler Murch - Thursday, 08/17/06 23:24:29 EDT |
|
Thanks Ken for the info on my anvil. |
| Brian - Thursday, 08/17/06 23:26:04 EDT |
|
Centaur Forge has a really awesome portable 7 lb swage block at a great price. |
| - Billy - Friday, 08/18/06 00:18:26 EDT |
|
Can you use copper pipe welding flux for forge welding? |
| Christian Sanchez - Friday, 08/18/06 10:47:15 EDT |
|
Ti can be fun to work with. I try to stick to CP 1 or 2 TI to avoid the fume problems. At forging temp it's dead soft, much softer than steel at forging temp---but once it drops in temp it turns hard fast! It will also absorb gas and become brittle as glass if you have to forge it a lot, so work it fast and hard with as few heats as possible. as for making a bracelet? What alloy? What Heat Treat? Do you just need to bend it around or do you need to manipulate the thickness? I've cut Ti with a hacksaw; not fun but it worked. it workhardens to an amazing degree why drilling/lathing/etc is hard you have to use a substantial cut to avoid workhardening it beyond workability. I also made a blacksmith's eating set from Ti for our ABANA chapter's potlucks----dishwasher safe! And I think I just found my sheet of Ti so I can make a plate and drinkintg vessel as well bwahahahahahahaha Note: Ti makes lousy knives and swords. Thomas |
| Thomas P - Friday, 08/18/06 11:01:13 EDT |
|
Copper pipe, if welded, is done with TIG and no flux. Copper pipe is usually not welded but soldered or brazed. These fluxes are not suitable for forge welding. |
| - John Odom - Friday, 08/18/06 11:26:50 EDT |
|
Copper pipe, if welded, is done with TIG and no flux. Copper pipe is usually not welded but soldered or brazed. These fluxes are not suitable for forge welding. |
| - John Odom - Friday, 08/18/06 11:27:40 EDT |
|
I'm working on a project where I will start with a piece of 1.5" round and taper it in opposite directions down to 5/8" round. The final product needs to be 16" long in total. My question is, how long does my 1.5" piece need to be so that the tapers end at the correct size and length? |
| Mike H - Friday, 08/18/06 12:26:33 EDT |
|
I will be forging it down of course. |
| Mike H - Friday, 08/18/06 12:27:32 EDT |
|
I recently got a 60# swedge block from Kayne. It came with a "foundry finish" about the texture of a #40 grit. There is no ugly parting seam in the way. It seems very nicely designed and cast. The depressions are nice and deep. Most of it I can get to easily with my grinding wheels but there are a couple of depressions less than 1.5" I am not sure how to get into without damaging the edges. It's always a pleasure to deal with Kayne. |
| adam - Friday, 08/18/06 12:44:55 EDT |
|
Frustrum of Cone or Truncated Cone: Mike, See my post above of 08/09/06 to Thumper on the subject of volumes. A little logic and slight of hand is needed to figure this out without getting into real geometry or odd constants (see Machinery's Handbook). In this case I will cheat and use a program I wrote that calculated the volume of truncated cones. For HALF your bar the volume will be 7.494 cubic inches so the full bar will be 15 cuin. Divide the area of a 1.5" circle into 15 and you get 8.488". There are three (or more) methods of calculating this volume. In my program I used proportioning to determine the theoretical length of a cone coming to a point then subtracting the extra to get the final volume. Full length = R1 * L / (R1 - R2) The other way is to use a volume of rotation added to the cylindrical volume of the small diameter (D2). The area of the volume of rotation is (L * (R1 - R2)) / 2. The diameter it is rotated through is at the center of gravity of the right triangle formed by the holow cone. This is 1/3 the distance from the side next to the cylinderical section. Base of triangle = 3/4" - 5/16" = 7/16" Cg offset = 7/16" / 3 = .1458 Radius of Rotation = 5/16" + .1458 = .458333... Diameter of Rotation = .91666... Area of Rotation = (7/16" * 8") / 2 = 1.75 Volume of rotation = PI * .91666 * 1.75 = 5.039 Volume of internal cylinder = PI * 5/16" * 5/16" * 8 = 2.45 Sum = 7.49 cuin. Same as above. Length for twice that volume is 8.488" (I'd round to 8.5 for scale and texture losses). The volume of rotation calculation is no simplier than others but it can be applied to many cases and is a good check against other methods. Although it requires a couple more steps if you used the sum of area of the triangle and rectangle and found their center of gravity the entire volume can be calculated using the volume of rotation method. |
| - guru - Friday, 08/18/06 14:16:15 EDT |
|
Mike's tapering project: It sounds like you have two cones, each 8" long. So you calculate the volume of one of them, and http://www.abe.msstate.edu/~fto/tools/vol/cone.html is a cheat-sheet for that. Multiply by two to get the total volume and then figure out the height of a 1.5" diameter cylinder with that volume. |
| - Marc - Friday, 08/18/06 14:16:26 EDT |
|
Oops. Too slow with the keyboard. |
| - Marc - Friday, 08/18/06 14:17:38 EDT |
|
Finishing Swage Blocks: Adam, what shape depressions? When I last finished a swage block the following tools were required: 7.5 Angle grinder with full wheel and worn out (small) wheel. 6"x 1" HS Norton flap wheel (used on angle grinder). 1/4" die grinder with HS flap wheels, cylindrical stones, tree carbide rotary file, cylinder carbide rotary file and rubber arbors for 2" and 3" diameter sanding disks. Conical spiral sandpaper "wheels" that fit a threaded arbor (gift of Steve Kayne). Cheap small diameter flap wheels used in an electric drill. Hammer and chisels (cape, straight, oval). (2) 24" Bastard Files Ah. . it was everything that a large industrial supplier had in a foundry town. . . plus what I had on hand. In 1984 the cost of the abrasives to clean up four similar blocks cost $90 and did not include the worn 7.5" wheel (about 4"). Time required, 2 days. These were the same finish quality as the Newman blocks. One of the new 4.5" grinders whould have been REAL handy (they did not make them then). Some of the V grooves cleaned up well others did not. The sand burned into the surface quiuckly wrecked the edges of the files I tried to use to clean up the V grooves. That was half a day per block and $22 worth of abrasives. If you fugure $15/hr for labor that is $87 to dress a small swage block. Much more if you do not have the tools time or skills. I keep telling folks that they need to convince foundries that the finish is VERY important and would be worth the extra cost to do RIGHT. . . the way they did it 100 years ago! Prior to those above I had some bad castings from a friend's pattern that finishing started by weld repair, then facing on a shaper then TONS of hand grinding. . . These were cast from "left over" metal and were so porus and full of the most bizzar shrinks and crystaline formations that the welding was almost impossible and did more damage than it repaired. Drilling ONE 1/2" through hole took a couple hours on a HD drill press due to the metal hardness (white CI). I ended up selling them off for scrap price AFTER all that work. . . Dressing blocks all over is not easy. There are no tricks. You have to find and purchase the proper size and shape abrasives. A good 1/4" air or electric die grinder is almost a neccessity. Much of the finishing I did was with hammer and chisels followed by files and hand sanding. Flap wheels can be shaped with a dressing tool but have a brief life in corners. Large angle grinder wheels can be used at an angle to the axis of a half cylinder to clean up from 3/8" diameter to as large as the wheel. Edges of Depressions: These should be rounded off very soft. On the block you are working on the only depression that has the correct edge radiusing as-cast is the large bowl. All the spoons and smaller hemispheres should have similar radii. All the other corners should likewise be radiused. Swage blocks, like anvils, even though we like to keep those sharp edges for looks they are bad for forging and provide weak places to chip off. A good swage block looks old and well worn or as if it has been a stone in river the edges worn down to where thee is almost nothing to wear. The only edge that really needs to be sharp as-cast is at the parting line if cast as a loose pattern. Otherwise as a boarded pattern the parting can be just below the face where the radiusing ends (never, ever at the cneter line). Most hemispheres in blocks are much too deep. They should be no more than 1/4 of the shape, some preferring 1/5 or less. When too deep they can benefit from extra edge radiusing. Note that there is a significant difference in the shape of half rounds in a swage block and a forging die. In a swage block they are used for final dressing often using a matching top tool. They should be close to half round with broken edges. A forging die should be much wider and the only part matching the final radius should be about 90 degrees of the bottom. A finishing swage should fit about 160 to 170 degrees. |
| - guru - Friday, 08/18/06 15:15:37 EDT |
|
Thank you Guru and Marc. This is an invaluable resource and I thank you very very much. |
| Mike H - Friday, 08/18/06 16:04:37 EDT |
|
When I have to clean up swage blocks one of the tools I find most usefull is a die grinder with solid carbide burrs. The one I use most is a 3/4" diameter bit with a half round on the end. The burrs are expensive, but they cut very quickly yet leave a smooth finish if you use a light touch. The MOST important thing is to keep tools moving, it is easy to grind too much. Because of this I have asked the foundry that casts blocks for me to err on the side of leaving a little flash. The grinders they use are VERY aggressive. A 4" or 5" grinder with a worn down disc held on an angle often works well. With a 4" or 5" grinder you can "feather" the switch so it grinds a little slower. |
| - JNewman - Friday, 08/18/06 18:56:37 EDT |
|
Ive ground down literally tons of dies & impressions, and it never ceases to impress me how much work can be done with a 4.5" angle grinder, 'hard' disks & ''flap' disks, you can remove an amazing amound of metal with one cheap tool - ALWAYS remember the PPE though, we all get cocky and dont bother with the specks - squinting and looking away slightly does not work! - I know people who have no depth perception because of this attitide! The carbide burrs are the worst offenders in a die grinder - they fire off hot needles that stab right into you - be warned!! You get 2 chances with your eyes, if your lucky... |
| - John N - Friday, 08/18/06 19:09:42 EDT |
|
Good point John N even with glasses on I have got stuff in my eyes I wear glasses AND a face shield now when I use those burrs they do spray!! little shards of metal when new. |
| - JNewman - Friday, 08/18/06 19:48:10 EDT |
|
They must have had special rules for Virginia-dont run with scissors, and no modern tools- because in 1984, out here in Washington, I had several 4 1/2" grinders- Black and Decker, Makita, Bosch, Porter Cable, and many others were available at least as far back as the mid 70's. In fact, I still own a couple of Bosch 4 1/2" grinders I bought in the 70's. Like John Newman, I used solid carbide burrs and flap discs on the 4 1/2" grinder to clean up my John Newman swage block. With good quality abrasives, the cost has gone down quite a bit- one $5 Klingspor alumina zirconia mop disc will do a whole swage block, and a carbide burr will last a lot longer than one block. I am afraid that foundry quality aint gonna come back in my lifetime- in fact, it seems more likely that CNC milling prices will keep coming down, and it will end up being cheaper just milling em from solid. I know quite a few guys around here who run a hundred grand machine for $50 an hour. My friend Phillip Baldwin has been making a few swage blocks from 4" plate, having em flame cut- but he is not doing spoon dishes or other depressions in them, just making the edges all curvy. He is not selling em though- he uses them himself, and his apprentices end up with them. Seems like a combination of a flame cut blank with CNC milled depressions would result in a "no cleanup" swage block at competitve prices. |
| - ries - Friday, 08/18/06 19:54:42 EDT |
|
If I had but known, I could probably have had some swage blocks made from old drop froge die blocks in the CNC edm, and had a really nice set. That CNC EDM would go into a polish routine at about the end of cut and give a mightly nice finish. and they would have been "Hardtem" Ohhhh wellllll.... |
| Ptree - Friday, 08/18/06 21:13:28 EDT |
|
I was going to try a "Penny Weld" with copper wire this weekend at a demo at an historical park.Is the flux used for this type of weld borax? Anyone who is looking for tools, or wanting to learn blacksmithing volunteering at a local historical park is a good way to prospect and you get to learn using other peoples coal. Grin http://www.astorhousemuseum.org/CCHP/CCHP_home.htm |
| habu - Friday, 08/18/06 21:44:25 EDT |
|
Habu, Yep, borax works just fine. You can even use brazing flux if you want, since you're really brazing using copper. Sometimes helps to mash the wire flat first, to increase surface area to volume raito, and sand it clean, too. |
| vicopper - Friday, 08/18/06 21:50:58 EDT |
|
$50/hour CNC: It does seem odd that that a $100,000 machine and the carbide cutters to use in it can make money for somebody at $50/hour while a blacksmith shop with presumably lower overhead can not. |
| - Dave Boyer - Friday, 08/18/06 22:15:52 EDT |
|
$50/hr CNC just barely makes money making the right products. Precision products and products that need precision in quantity but cannot afford $200,000 die costs for injection molding are profitable by avoiding the die costs. Same with some laser and plasma cutting as apposed to punch and die work. But when the quantities hit a certain level CNC is too expnesive and the old standby production die methods come into play. Per part costs also drop. . . The more precision the end product the more profitable CNC becomes. This is especially true where parts would be cast or forged THEN machined significanly. CNC can often avoid that preliminary process. The reason the single $50/hr CNC machine makes more profit than a $50/hr blacksmith shop is that the CNC machine has more produictive hours in the day. Most small shops I know have at least two machines earning $50/hr EACH or more while attended by ONE machinist. And many of these machines are priced in the $25,000 range rather than $100,000. The class of work and the amount of hand work involved is what makes the profitability different. I have a friend that produces a CNC product machined from high quality aluminium plate. Roughly 20 parts are machined from one plate (one stock change for 20 pieces). These are then run through a vibratory finisher for an hour or so and then sent to the anodizer. The parts are then bagged and ready to sell. Several machines run at one time and labor per part is very negligable. The parts sell for $50 each so there is $1000 worth coming off the machine per setup. I do not know how long each part takes but the machines run mostly unattended. |
| - guru - Friday, 08/18/06 23:37:16 EDT |
|
4.5" grinders. They may have been around but I had not seen them at the time. You also have to remember that many of the nifty face flap wheels for them that make them so useful are relativly new. They even make little masonary saws for them. . . When I finished my blocks I did not just dust off the sandy surface and parting flash. They were ground to about a 64 RMS or better finish all over. The costly abrasives were the big Norton flap wheels. They rapidly conformed to the shapes being ground and put on an exceptional finish. These were also fairly heavy blocks 4" thick which tend to have more sand texture than smaller blocks. They were cast in ductile iron and were as close to perfect as castings come. The same foundry was making four to eight ton castings for us at the time. The old foundries used facing sand on this type casting and got excellent finishes that needed very little or no dressing. The big old industrial block I have has a near paper smooth finish on all surfaces and other than chipping off the fine flash had no further finishing. This was typical of old blocks. It is sad that you cannot get the same quality any longer. Folks that do a lot of hand grinding and finishing usualy figure out the techniques to make flat smooth surfaces. But I have seen some that even with coaching could never understand that working at too steep an angle and in the wrong direction can just make flaws deeper and create more work or never get the desired results. Keeping the tool moving steadily is critical to avoid making things worse. Also a light touch is required. Working with the cut diagonal to the edges and then reversing it to the opposite direction makes flat surfaces the quickest. Working in an organized manner is critical and I think the violent noise and vibration of heavy grinders makes many folks go blank so that they forget to THINK about what they are doing. . . |
| - guru - Saturday, 08/19/06 00:05:23 EDT |
|
Grinders definitely are infernal machines. Wear hearing protection! |
| adam - Saturday, 08/19/06 10:26:16 EDT |
|
Habu, COPPER BRAZE When the copper melts, it helps to quickly apply pressure between hammer an anvil without striking, just press. Or squeeze in the vise jaws. The pressure enhances the capillarity. Then, to clean the braze, give the work a � to 1 second water quench. This will pop and raise scale oxides, and by then the copper should be frozen (no longer molten) and you can wire brush the hecky darn out of it on all sides. DIE GRINDERS. The directions on my Makita say to move it from the right to the left when in use. It can be grabby if you move it the other way. Also, I always wear earmuffs when I use it, not just for hearing protection, but to keep the sharp, tiny burrs out of my ears. |
| Frank Turley - Saturday, 08/19/06 11:28:27 EDT |
|
Right to left: In milling going the same direction as the cutter would "walk" is known as "climb cutting" and can leave a rough surface as well as try to drag the cutter along and cause chatter. With die grinder cutters (rotary files) climb cutting will try to pull the tool out of your hand and WILL DO SO if you do not have a very firm grip. Climb cutting can be beneficial with a VERY light cut. This requres both a light touch and a very firm grip which is difficult to master. It is best to avoid with rotary files especially in holes. The worst problem I have had with die grinders is in holes. I broke a B&D electric die grinder when it grabbed in a hole (in wood) and whipped around ONE very fast turn in the hole. The motor to gear box screws could not take the inertia and ripped out of the housing. . . Light weight air powered die grinders are much better in this respect as they do not have the overhung motor mass. Bad things can happen and they survive. The worst time I have had with a die grinder was at the eye doctors. . . he had just removed a rust spot. No problem. But then I saw him pull back with his miniature die grinder type tool and all I could think of was that tool whipping around my eye ball. . . I fainted and they had to carry me out. I thought it was very odd as there had been no pain and everything was all over. . . until I saw the little motorized tool. . . Folks without experiance with them wouldn't think twice about it. But I did. |
| - guru - Saturday, 08/19/06 13:59:50 EDT |
|
I have to agree that there is a lot more to grinding than you would think. You think of grinding as a grunt job anyone can do, but in reality, grinding takes a much more delicate touch than welding, or cutting, or running a drill press. And some people never do get it- I have had guys work for me that would always gouge everything they tried it on- they didnt realize you let the grinder do the work, you dont have to try to push it right thru the metal. In my shop, its often me that does the finish grinding- even though traditionl business logic would say let the lowest paid employee do it. I have been lucky enough over the years to have a couple of guys who had the touch- and it looks like my current new hire, a student at the local welding college, may turn into one of those. |
| - ries - Saturday, 08/19/06 14:30:46 EDT |
|
Never, never, EVER chuck a needle file into a die grinder. Don't ask how I know this. |
| Miles Undercut - Saturday, 08/19/06 15:29:22 EDT |
|
Or, for that matter, ANY round file, either. |
| Miles Undercut - Saturday, 08/19/06 17:46:58 EDT |
|
Antiquing: What is the best way to antique a blade without buying a chemical? I've heard of using mustard, mayo, and stewed tomatoes. Any input on how these work? Do you sand the blade afterwards, or just leave it? I want aged (pitted, eaten away look), but not rusty. |
| - Rob - Saturday, 08/19/06 18:50:32 EDT |
|
Rob, hammer scale into it, and sand off the high spots. That's one way. Are you from the Ocmulgee bs guild by any chance? |
| - Tyler Murch - Saturday, 08/19/06 20:52:58 EDT |
|
Why don't any of the new swage blocks have holes that go all the way through like the old ones????????????? Those are the handiest kind for me. |
| - Tyler Murch - Saturday, 08/19/06 20:54:51 EDT |
|
I need some help identifying an antique anvil a friend of mine has for sale. the only markings visible are a six pointed star with diamond in the center on the side and a number 10 under neath the horn the hardie hole is approx. 5/8 with a pritchel hole of approx. 3/8 the anvil has good rebound and ring but i am curious as to the maker and approx. date any help woud be greatly appreciated |
| john bankston - Saturday, 08/19/06 22:11:58 EDT |
|
Tyler Murch, The new blocks don't have through holes because they must be cored during the casting, and that costs big bucks commpared to a center-part cope and drag casting. Coring a casting takes core molds and knowing exactly what you're doing, something that modern foundries don't have. In the old days, the "apprentice test" for sand casting was to cast, in one piece a teacup and saucer, with a teaspoon in the cup and a sugar cube in the bowl of the spoon. Casting that item took skill at core making, parting and multi-part boxing. I seriously doubt that there are more than a dozen founders in the US today who could do it. These days, most foundries only want to do investment casting. |
| vicopper - Saturday, 08/19/06 22:46:10 EDT |
|
Die Grinders & holes: The grinding wheel or burr should be 1/2 the diameter of the hole You are grinding OR SMALLER. This keeps the wheel from trying to run around the inside of the hole and causing the problem Jock mentioned. It is also necesairy to keep the wheel contact area small enough for efficient stock removal. |
| Dave Boyer - Saturday, 08/19/06 22:48:28 EDT |
|
Modern sand casting: Today a lot of low production castings are made with a once and done styrofoam pattern that burns out when the molten metal is poured in. In high production the foam is cast in a permanant tool. The foam pattern may be cast in several parts and assembled so that complex shapes can be made with the permanant tooling. |
| Dave Boyer - Saturday, 08/19/06 22:54:04 EDT |
|
John Bankston: You may have discovered a previously unknown anvil brand. According to Anvils in America by Richard Postman only two brands were known to use a star in their logo. The American Star and a Swedish North Star. Both are five-point stars. A six-pointed star would certainly seem to have a Jewish connection. The 10 likely indicates an initial weight of 100 pounds, but, for a U.S. or British anvil, at least the hardy hole size is small for what was commonly used for that size - at least 3/4". If the logo and 10 are raised it indicates a cast body, perhaps one-piece cast or cast iron body with a steel plate. If cast, the anvil might have come from any number of foundries, perhaps as an attempt by them to enter the anvil market or as a special order for a customer. This might be particularly true if a one-piece cast since only a fairly small number are known to have mastered putting a steel plate on a cast iron body. If you can provide some good photographs from four sides and bottom and close-up of the logo I'll forward them to Richard Postman. Just click on name and provide as attachments. |
| Ken Scharabok - Sunday, 08/20/06 01:15:07 EDT |
|
Hello.i have 3 question 1- what is the maximum temperature to which medium carbon steel must be heated prior to quenching if maximum possible hardness is desired? 2- what is the maximum temperature to which meium carbon steel must be cooled prior to quench if maximum possible hardness is desired? 3- what is the rule of thumb in regards of carbon content when selecting heat treated steel? |
| kei - Sunday, 08/20/06 06:30:30 EDT |
|
John Bankston: Added: If cast, a good ring may indicate possibly cast steel. |
| Ken Scharabok - Sunday, 08/20/06 07:46:42 EDT |
|
Kei, This sounds suspiciously like a homework question, which we normally don't care to answer. I'll give you a blacksmith's view; I am not a metallurgist. Depending on which book you read, a medium carbon steel has a carbon content from about 0.30% to 0.55%. Quenching in water or brine is recommended. As examples, AISI/SAE 1030 is hardened at 1550-1600�F. 1040 is hardened at 1500=-1550�F. 1050 is hardened at 1475-1525�F. I can't answer your #2 question, but our shop practice is to agitate the piece in the quenchant and bring it out when it quits "churning"; supposedly, that helps prevent cracks. You can hear and feel the churning which is vapor evolving, etc., under water. When that ceases, you're usually at about 150-200�F. There are many rules of thumb, depending on what the end-use is. I would check "Machinery's Handbook". Also, some tool steel catalogs will contain a "tool steel selector" or guide suggesting which steel to use for a particular job. If you're dealing with plain carbon steels and not alloys, you'll want information on AISI/SAE W1 high carbon tool steel. W1 often is listed in the catalogs as containing from 0.70% to 1.3% carbon, so you must specify the carbon content when you order it. |
| Frank Turley - Sunday, 08/20/06 08:42:21 EDT |
|
Greetings, I am looking to comunicate with someone that Has knowledge about erie self contained forging hammers. I have a #300 self contained Erie hammer that is sick and I have not found anyone that has even seen one. If you know any one that has one please send me there info on getting together with them. |
| David Norrie - Sunday, 08/20/06 09:29:44 EDT |
|
Tyler; I've used this method before, but it didn't give me quite the same effect. What is the Ocmulgee bs guild? |
| - Rob - Sunday, 08/20/06 09:55:23 EDT |
|
David, I have no experiance with these particular hammers but in general this type and other pneumatic hammers are very sensitive to valve wear. When new the valves were VERY snug fits and with time they wear and corrode. This includes both the throttle valve and the reciprocating valve. Wear in the reciprocating valve greatly effects performance and air consumption. Next is the resciprocating valve linkage. Any back lash in the pivots will make the hammer run jerky and be hard to control. The total travel of the valve is vairly short and a little wear in each pivot can add up to a significant percentage. Repair of the valves is often done by spray metalizing to build up and then precision grinding to fit. Worn linkage is either drilled and reamed for oversize pins or bushed. Also note that when converted to air these machines MUST have a lubricator that injects oil. |
| - guru - Sunday, 08/20/06 10:05:50 EDT |
|
Rob, See ABANA-Chapter.com for a link to the Guild. |
| - guru - Sunday, 08/20/06 10:06:53 EDT |
|
what do most of you guys charge an hour for welding and fabrication/blacksmithing work ? |
| mark - Sunday, 08/20/06 10:29:01 EDT |
|
Will 5160 make a good cross peen hammer? At what size should I go from oil to water quench? Or maybe a heated brine rather than water. |
| - Tyler Murch - Sunday, 08/20/06 10:38:43 EDT |
|
Modern Foundry Work: The problem as noted is largely lack of skill. But the other problem is that swage blocks and other small quantity castings are considered nuisance jobs. Unless you are buying a significant amount of a foundry's annual production you are just a bother. I even had one foundry tell me that sorting out MY castings from his regular work at the end of the day was a nuisance. Cored holes require not only the core boxes and making the cores but for the moldmaker to carefully place each core and close the mold without upsetting the core. The more cores the more likely that one will get fouled up. Making and setting cores takes time and increases the chances of a bad casting greatly. Small cores also have the problem of burn through and most foundries today refuse cores of less than 1" in blocks. I know for a fact that holes as small as 7/16 (10 mm) WERE CAST in blocks. To avoid cores one swage block maker put heavily drafted (tapered) holes in the pattern so the large holes were part of a two piece mold. The taper was much more than just draft. This results in large ugly holes that have little practical use. You can ocasionaly find these being sold on ebay. In the old days a casting that needed a fine finish had the pattern first covered with a thin layer of fine sand called "facing sand". Then the regular sand which must be quite coarse for swage blocks was placed in the flask and rammed up. Cores would be coverd with a coating of a fine refractory material. This was all skilled work that takes time. Today it IS POSSIBLE to apply a coating to the mold to improve the finish. However, this is still one of those extra steps that iron foundries do not normaly do so it would increase the nuisance factor greatly. Today foundries often do not even deal with patterns and flasks at all. Even boarded patterns are now passe'. They want mold boxes that produce a complete mold from resin bonded sand. The mold boxes must have registration for both pieces plus the impressions for the part. There is no loose "pattern". The mold makers are unskilled laborers that dump sand into the boxes from a chute, tamp it with a big pneumatic tamper then move on. Mold parts are removed from the boxes, assembled, clamped together and they are ready to pour. The process has been reduced to where any monkey can do it. . . In this environment there is no need to keep a skilled worker on the payroll for the few nuisance jobs that come around. All the skill is in the patternmakers shop. I've had large foam investment castings made. The shop that cast them specialized in them so they were not a nuisance job. However, these were castings that weighed TONS. . . the money was in the large amount of iron per casting. Centaur forge sells blocks with holes. They cost as much or more per pound as good anvils. |
| - guru - Sunday, 08/20/06 10:42:53 EDT |
|
Tyler, I'm guessing that 5160 might make a servicible hammer. All specs say that it's an "oil hardening spring steel". I don't think I'd guess about the quenchant. Use oil at 1525�F, a bright cherry red. You may get a case-core effect after quenching, meaning that you'll get full hardness for maybe 1/8" in from the surface, and a tough core inside of that. That's OK though, because you will temper the hard case (having nothing to do with "case hardening"). The terminology is confusing. After tempering, you should have a nice tough hammer head and peen. In making springs, the temper is usually drawn between 800�F and 1300�F. You will need to experiment, because I suspect you'll be tempering between 450�F and 600�F. The reason that we're guesstimating here is because all the specs you're going to run across will be talking about springs, not tools. Francis Witaker used to say, "Don't make tools out of spring steel; make springs out of spring steel." I know. I know. Lots of guys make knives and tools out of 5160. However, it's a spring steel. One of my books says that it can be also be used for "scrapers, equalizers, and bumpers." |
| Frank Turley - Sunday, 08/20/06 11:21:06 EDT |
|
David Norrie: IS it a self-contained hammer? Like with it's own motor and built-in compressor? I know Erie made self-contained hammers, but I've never seen one. They bought the design from Beaudry & Co. What sort of problems are you having? |
| - grant - Sunday, 08/20/06 11:26:54 EDT |
|
David Norrie: There is a 600-lb Erie listed on eBay now: 170019299707. |
| Ken Scharabok - Sunday, 08/20/06 11:47:48 EDT |
|
Frank, 5160 Bumpers One of my bladesmith friends got some bumpers from automated vehicles from a nuclear power plant. They are 3/8" x 4" and 5160. |
| - Tyler Murch - Sunday, 08/20/06 12:54:04 EDT |
|
This Hammer is from the late 30's, I think. I have talked to Erie Presses which made them and they don't even have it on record. It is a self contained with a 15 HP motor inside. The stroke on this hammer is 17" and when you step on the tradle, the hammer slowly comes down and hits very soft with about a 3" stroke. Now the hammer comes down and the stroke stay long and when it gets to the bottom when the dies hit, as you push down more the dies lift up away and the stroke gets longer until it starts to hit hard. I basically have lost the soft hitting. It hits hard. I have taken most of it apart and the inside is brand new looking, all the rings are perfect, so it is a mistery, I have been in contact with all the people I know that rebuild older air Hammers and they sre stumped. I have been using this hammer 18 years and it is the first time there ahas been anything wrong. It is not the same as a Nazel, or Chambersberg. Ken, the Erie on Ebay is a utility Hammer as I have been told. I hope this makes sense. |
| David Norrie - Sunday, 08/20/06 13:17:01 EDT |
|
Tyler, As I understand it, brine gives a faster quench than water because the salt raises the boiling point and retards the formation of a steam jacket. Heating the brine should slow the quench by bringing the solution nearer its boiling point and also reducing the temperature differential between quench and steel. I suppose you could heat brine to the point where it would quench at the same speed as water. But why bother? |
| Mike B - Sunday, 08/20/06 16:05:13 EDT |
|
Ken; first thing I thought of when I read "six pointed star" was Iron City post vises used that star IIRC. I wonder if they did an anvil sometime as well---no Jewish connection that I know of with the Iron City Logo. Thomas |
| Thomas P - Sunday, 08/20/06 16:34:00 EDT |
|
I have to speak out in defence of modern foundries. Yes there are a lot fewer actual moulders in most foundries. But lots of places have a couple of guys (not all of them are old) who know how to mould loose and tricky patterns. As to them knowing how to set cores. I have made or worked on patterns that have lots of cores. Take a look at a locomotive undercarriage next time one goes by. They are hollow, there are 70 to over 100 cores in each mold. One of my customers has 3 aluminum cups and saucers sitting on their boardroom table another cast 5 statues from wooden statues that were full of cracks and undercuts these all had to be reproduced. The drag half or the mould had close to 100 separate cores that were all parted off by the moulder. Here is a picture of one of the statues that were moulded www.tiesenhausen.net/Figures/004.html . Facing sand is still used but sometimes in moulding machines it can only be used in the drag. I have seen lots of flaws in older castings. Swage blocks were often machined on the two flat sides. While ductile iron is a far stronger material and better for swage blocks, it is less fluid than grey iron and thus slightly finer detail can be reproduced in grey iron. The costs of running a foundry are very high and patterns are one of the tools that they use. It is very easy to spend a lot of time trying to get a good mould off an unknown pattern. If there is not much money to be made off the castings then they can lose money very quickly. Many factories will not deal with small orders these days. Yes most foundries want want mounted patterns. But I still make lots of loose patterns for large castings. |
| - JNewman - Sunday, 08/20/06 16:57:32 EDT |
|
Erie Hammer Problems: David, I would suggest talking to Bob Bergman if you have not already done so. I know he has rebuilt a large variety of air hammers, so maybe he can help. Do an internet search for either Old World Anvils, or Postville Blacksmith Shop to find his contact info. You might also try Bruce Wallace at Wallace Metal Works, who is an advertiser here. In addition, you may want to look at a copy of "The Hammerman's Emporium" by Douglas Freund, author of Pounding Out the Profits. The "Emporium" is a collection of manufacturer's literature covering air and steam hammers. There might be a useful tid-bit in there. Patrick |
| patrick nowak - Sunday, 08/20/06 17:58:16 EDT |
|
JNewman is right, and so is the GURU. Most foundries won't nwork on special or low production runs, and there are few real moulders left. But they are not ALL gone. The trick is to find the right foundry. I used to have a foundry here that let me make up a mold for them to pour, they charged me by the pound. When the owner retired and the sons took over, they automated and moved to higher production runs, but kept doing some huge one ofs that were profitable. I can't go into the production area any more. |
| - John Odom - Sunday, 08/20/06 20:21:33 EDT |
|
Since sandcasting is such a lost art, and sandcast takes a ton of finishing, perhaps a nice investment cast swage block may be feasible. The accuracy and finish is superb and the thru holes would not be too tuff. Might be able to shoot the wax in a reinforced rubber mold. I have a modern swage block I got from Honest Bob, and it sure beats no swage block, even if it does not have through holes. I have some 2 1/2" plate and am thinking of shooting a bunch of holes in one for a home made swage/bloster. |
| Ptree - Sunday, 08/20/06 20:39:23 EDT |
|
Mike, Why bother? Well, it will quench as fast as water, but not make any of those steam pockets. It's like a more reliable quench I spose. Learned that from a very well known bladesmith. |
| - Tyler Murch - Sunday, 08/20/06 20:44:52 EDT |
|
Actually I think the swage block of the future will be forged- Old Mr. Sarver could easily use his CNC Mill/ EDM technology to create a master, and his 100 ton fly press to forge the appropriate (non thru) depressions in a flame cut blank. Flame cut all the edge profiles, then forge the two big sides. |
| - ries - Sunday, 08/20/06 20:47:34 EDT |
|
Hi Gurus! What is the Canadian/North American number/name of a bronze alloy that can be forged and tig welded? Where would I find a supplier? Please send answer to duerst@gmail.com. Thank you so much. Whoever you guys are, you must eat steel and metal, because you seemed to know everything. My respect!!!! duerst |
| duerst - Sunday, 08/20/06 21:57:24 EDT |
|
Patrick, thank you, Bob is the one that I have talked to the most. He is a old friend, and I bought a 5B nazel from Bruce, so I am in touch. No one has seen this type of hammer. I will continue. |
| David Norrie - Sunday, 08/20/06 22:49:03 EDT |
|
guru i do have a job i went to school for tin knoking and welding got a job as a welder been doing that for a year now metal work didnt iterest me when i was young but i got to welding and now i got metal in my blood i was a painter not much money in that i also have four kids and that is why i was looking for getting started on th cheap i've read books The black smith by aldern a watson and one other from cover to cover i dont do thing littly and i reserch the heck out of every thing before i do it i will read the books youve sugested i've read all three of my welding books two i grabbed from the trash as tech wwas throwing them out 1967 was the youngest one. one even has my instructors name in it.i have a car but the state of maine took my lic but dont tell the cops i drive. pleasse excuse my ignorence to your trade i mean no disrespct Christopher |
| Christopher - Sunday, 08/20/06 22:52:52 EDT |
|
duerst, Atlas metals in Denver is a main supplier of bronze, it is a silicon bronze, you can find them on line. |
| David Norrie - Sunday, 08/20/06 23:25:23 EDT |
|
Hello there , I wanted to ask If any of you Know where In central Virginia, Is a Good Scrap Yard that Has Old Machinery Parts Like line shafts & flywheels, Old machinery that has been scraped ? also used steel plates. I have seen some steel Plate out in front of Klines welding on RT 460 East . But, they are asking the Going rate that You can get the same thing clean from BMG steel for. So If you can direct me toward a good Salvage Yard that would be wonderful. Sincerely Yours, John M. Carter |
| John M. Carter - Monday, 08/21/06 00:23:50 EDT |
|
Does anyone have any plans for making my own manual section benders/ ring rollers ? |
| mark - Monday, 08/21/06 02:27:14 EDT |
|
duerst, The Copper Development Association may be able to help. www.copper.org You have more than one choice. |
| Frank Turley - Monday, 08/21/06 08:17:54 EDT |
|
Water jet cut swage blocks? |
| Frank Turley - Monday, 08/21/06 08:24:57 EDT |
|
Guru, your harmonic dinner bell design won me a blue ribbon at the Grange Fair yesterday. I just wanted to let you know and to thank you for the design idea. The little lady won a third prize for her banana bread, and I won an additional third prize for Largets single sunflower head. None of my herbs won anything. :( Anyway, thanks once again, I'll let you know when I'm ready for next year. |
| - Nippulini - Monday, 08/21/06 10:13:18 EDT |
|
Sheet metal snips. Looking to buy some good quality aviation snips and tinner's snips. What do people recommend? Thanks |
| adam - Monday, 08/21/06 10:50:17 EDT |
|
Thomas P: Yep, I probably jumped to a possible conclusion on a six-pointed star likely being Jewish-related. I looked up an Iron City logo on eBay. Anvil has a diamond within star while they have IRON over CITY. Sure would like to see photos of that anvil. |
| Ken Scharabok - Monday, 08/21/06 11:53:34 EDT |
|
I'm trying vinegar and water for antiquing, and it's going well. How can I get the rust off without ruining the aged look, i.e. polishing it at all? |
| - Rob - Monday, 08/21/06 12:12:20 EDT |
|
Rob, Is'nt the rust the point? Washing with baking soda and water will kill the acid and rinse off the loose rust. |
| - guru - Monday, 08/21/06 12:46:00 EDT |
|
Forged Blocks: I have looked at tooling for such a venture. You want to start with a common cylindrical blank that flows to fill the impression. This is cheap and efficient and if cut just the right length will not quite fill the corners leaving nice soft round edges. The die sides can fit in a tapered holder so that the sides are draftless. Takes a BIG hammer even for small blocks. But it would make very nice 10 - 20 pound blocks with a reasonable sized hammer (around 1,000 pounds). Die cost would not be too outrageous either. But it is still a significant setup. Would need a part ejector and scale blow out. Complete setup would want a dedicated hammer or you would setup and run a large batch of blocks (annual output) before tearing down the setup. I'm not sure one if the 100 ton fly presses would do it. Maybe, but I do not have a feel for it. |
| - guru - Monday, 08/21/06 13:01:38 EDT |
|
Snips- I am still a big fan of Wiss- for their old style plain blade snips. I have a set of Wiss Bulldogs W5N 16 1/2" snips I use most of any snip in the drawer. The added weight and long handle length make cutting straight lines in sheet metal much easier- leverage really helps. I like Klenk for the aviation snips- I think they are much better than the wiss, or any others, and they are made in america. www.klenktools.com |
| - ries - Monday, 08/21/06 13:11:52 EDT |
|
Bronze- Most blacksmiths like silicon bronze- thats C655. It forges well, and tig welds very nicely. Besides Atlas in Denver, already mentioned, a good place that stocks a lot and will ship is Alaskan Copper and Brass. This stuff is not cheap. Price will vary depending on shape- round bars are MUCH cheaper than flat or square. Many shapes that are common in steel are not available at all in bronze, unless you order a truckload- 40,000lbs at six to ten bucks a pound adds up fast. It is worth it though, to pay the money for a known alloy- trying to forge a bronze alloy that has too much zinc in it, or significant amounts of lead, will drive you to frustration faster than any other method. New swear words will be invented, and expensive material ends up in interesting shaped puddles on the floor. |
| - ries - Monday, 08/21/06 13:15:59 EDT |
|
Erie - Beaudry Hammer: I do not know if he has anything on this hammer but Bruce Wallace has the Beaudry information that is available and I have seen a photo of the Beaudry Self Contained hammer. Seems that the hammer LOOKS different than a Nazel but the cylinder and valving is very similar (maybe a copy). |
| - guru - Monday, 08/21/06 13:18:57 EDT |
|
In thicker materials, like 4" steel, most water jet machines leave a much bigger draft angle than old fashioned oxy-fuel. Now there are some newfangled waterjet machines that use a computer feedback circuit to angle the head as it turns around the piece, actually cutting an angle that counter affects the draft angle- but we are talking a quarter million and up here- twice or more the price of a normal waterjet. Waterjet is great for thin materials, like up to an inch or so, or materials that cannot be cut with other techniques, like aluminum/carbon fiber honeycombs, or rubber shoe soles, or cork, or for patterns with 50 thousandth of an inch wide lines in them. But for cutting plain old fashioned thick sheets of steel, oxy fuel is still used the most in industry. I think it makes the most sense to torch cut the perimeter of a swage block- with CNC torches, and current technology, the edge quality is amazingly good- then you would only need to forge the depressions on the two big flat sides. But Grant is the man who really knows- if a project like this were to catch his fancy, he could figure it out quite easily. |
| - ries - Monday, 08/21/06 13:21:57 EDT |
|
By the way- Alaskan Copper is NOT in Alaska- they warehouse in Seattle and Portland Oregon. So shipping to anywhere in the USA is not TOO expensive. And unless you live in a few big cities, you will have to pay shipping on bronze- its just too oddball and expensive for many people to stock it. Farmers Copper in Texas and Copper and brass sales which has warehouses all over the country also may stock it. |
| - ries - Monday, 08/21/06 13:25:48 EDT |
|
Brass / Bronze: See our FAQ on the same. Forging brass alloy #377 has a forgability rating of 100, the industry "standard". I concur with Ries about knowing the alloy you are working with. The critical thing about brass/bronze is that you work it just below the point where it falls apart. So it is VERY helpful to have some controlled heat source. I've done it with a torch and careful obsevation and only lost a couple parts. A friend has forged loads of it using coal and only lost maybe 2 to 5%. . . Significant losses of expensive metal. Not sure why folks want to TIG weld brass/bronze. It welds easily enough with Oxy-acetylene. I've welded a small mountain of 1/2" square. . . |
| - guru - Monday, 08/21/06 13:34:05 EDT |
|
Forged Blocks: Ries, the problem is the material must GO somewhere when you forge depressions. The best place is to fill the die. But if you start with a near-net shape plate and try to put in depressions you end up needing to hold the part in a die and work it hard enough to encrease the entire thickness (upsetting). It is not a very good way to go. The problem I have found with flame cut block blanks is that even with very fine flame cutting they need a lot of dressing and the stop/start point repaired. This is on top of a relatively high initial cost. THEN you have depressiona and holes to machine. It can be done but the total costs are quite high. Casting is still the ideal way to go. However, neither foam or wax investments cure the core hole problem. You would THINK they would but this does not address the fact that the cores need to be a different material and reinforced. |
| - guru - Monday, 08/21/06 14:11:04 EDT |
|
Ah yes, the old constant volume problem- the pesky metal has to go somewhere. No matter how you skin this particular cat, costs are high. And demand is not particularly large. I have one of John Newmans swage blocks, and I like it a lot- but I dont use it too much. As to tig welding- once you have lived with a tig welder for a few years, or 25 of em in my case- you tend to use it for most things. I, too have oxy welded my share of stuff, and I avoid it when possible. The fine control over heat input with a tig welder makes it my tool of choice for just about any metal. I use my oxy-fuel rig for heating with the rosebud, and not much else. But I have two tig machines running most days, in our 3 man shop. We tig mild, stainless, copper alloys, aluminum, and even some pot metal alloys. I like the clean and neat, quiet and tidy aspects of it, I like being able to tig weld inside finished spaces- we had a job a while ago where we had to weld inside a carpeted library, with all the smoke detectors on. With tig, there was no spatter, no hot stuff flying around, no smoke to speak of, and we welded within 2" of finished wood floors, carpets, and finely finished wooden handrails. Of course, we used a heat proof welding blanket to sheild stuff, but the ease and safety, along with the speed, makes it far preferable to gas welding for me in most circumstances. I have tig welded in 80 foot manlifts, at the tops of ladders, inside vehicles, in basements, commercial kitchens, and all kinds of other oddball spaces where I would hesitate to use a gas torch. Part of it, I am sure, is what you are used to, but I find that for things like copper alloys that conduct heat very well, the ability to put 300 amps in a 1/8" circle, and then feather it down to weld a 3/4" square to 16 gage sheet is often quite handy. |
| - ries - Monday, 08/21/06 14:49:37 EDT |
|
TIG - I suspect that quality of equipment has a lot to do with it as well as practice. I have a primitive Airco add-on unit on my multipurpose welder. The thimble valve has been a constant nusiance and the unit does not seem to adjust well. I have a difficult enough time welding similar sized pieces together. |
| - guru - Monday, 08/21/06 15:34:37 EDT |
|
I want to attach my 100 lb anvil to a wood base made from a maple log. I remember seeing one time (no idea where) some sort of mechanism for securing the anvil. Is there a source for such an item? Can you describe it or send a sketch? Thanks |
| Peter Weston - Monday, 08/21/06 19:10:39 EDT |
|
FYI: The Craigslist for Kansas City, MO listed an English Wheel today. They are asking $1200. The phone number is 816-591-9939. |
| Fred - Monday, 08/21/06 20:01:34 EDT |
|
Iron City: I think it more than likely that the Iron City star was meant as a Jewish symbol. Thomas and I have already been over this. |
| adam - Monday, 08/21/06 20:37:24 EDT |
|
snips: Ries, thanks for your recommendations |
| adam - Monday, 08/21/06 20:45:08 EDT |
|
Adam - Snips: In avation snips I like the ofset type where Your hand is above the sheet while cutting. Be sure to get left & right hand [red & green handles] because they will only cut circles in the direction they are designed for. The ones I have presently are Wiss, but I got my Dad a set from another US maker, but I don't remember the brand. |
| Dave Boyer - Monday, 08/21/06 21:32:44 EDT |
|
is it better to cool a metal fast or slow. we are forging a sword |
| Bill - Monday, 08/21/06 21:41:00 EDT |
|
Bill, depends on what you're planning to do. For heat treating, cool fast in oil for hardening. |
| - Rob - Monday, 08/21/06 21:48:29 EDT |
|
Bill, If you are forging a sword and don't know the rudiments of heat treating, by all means COOL IT SLOW! If you cool it fast it will shatter. |
| vicopper - Monday, 08/21/06 21:59:17 EDT |
|
Well I got to sorting through a pile of misc tools that had been rotting away in my back yard - a lot of screwdrivers (I heat the tips and bend them into small prybars and hook tools) but also a few pairs of heavy snips including a couple of Wiss. A med. sized pair by Crescent had slack jaws so I curved them by tapping over a hollow spot on the anvil. I notice I dented the rear side of the jaws - ok so I did few licks over the step . Are the jaws sposed to be that soft? I would like to sharpen them - whats the recommended implement? Thanks |
| adam - Monday, 08/21/06 22:18:08 EDT |
|
Adam ole sock, Are you being a cold smith? Don't place hardened steel on hardened steel and hit with hardened steel. Like it says in that old "Christmas Story" movie about the BB gun, "You're going to put your eye out." If a sharp file will remove material on the blade, use it, maintaining the proper edge angle. No big rush. |
| Frank Turley - Monday, 08/21/06 23:02:18 EDT |
|
2 Questions: These will be an easy ones for you, but not easys one to find already written up on the web. The Quench. How is it made? I have heard about plain water(?) and an 'oil' quench and a 'soap' quench. How do I choose and how do I make them. I have read about allowing a piece of metal to cool slowly to 'soften' it. I have also read about putting it in 'something' to do this in. What is it put into. I know it has a technical name, but how to I create it? Any help is greatly appreciated. I have been looking through the site and love what you have done here. Thank you for this excellent resource. |
| William - Monday, 08/21/06 23:05:16 EDT |
|
William, see our FAQ page under quenchants and het treating. |
| - guru - Monday, 08/21/06 23:32:37 EDT |
|
Anvil Stand; Peter, See our iForge demo on stands. It has all popular types and methods. I prefer not to anchor my anvils down because then you must move the stand with the anvil anytime you move it. Old time smiths used a couple spikes to keep the anvil from moving. I use fitted wood blocks that fit between the feet. If you bolt or chain it down do so with something that you can remove without too much effort. Anvils I've had to remove from stands had bent dogs and chain welded over the feet. The stands were as bad as the attachment method and thus the need to remove them. . Peter Wright anvils have a flat ledge fore and aft designed for a clamping mechanism. Bolts spacers and a U-clamps will do but I have never seen them used OR clamps on this place obviously designed for clamps. . . Most other anvils slope at this point and are not suitable for clamping. Some anvils such as Fisher Eagle anvils had flat bosses fore and aft for bolting. My 200 pound Hay-Budden has two holes drilled fore and aft but they only look to be suitable for placing the anvil over a couple pins as the top of the holes slope 45°. Too much for angle washers. The holes are still sharp and burred so I do not think the special holes were ever used. . . |
| - guru - Monday, 08/21/06 23:44:48 EDT |
|
Guru: I read a reference to a |
| - tbird - Tuesday, 08/22/06 00:38:17 EDT |
|
Guru: I read a reference to a "harmonic" dinner bell. I can't find it in the archives. What do you do different? I am called upon to make these for chuchwagons, and I would like to imporve on it. |
| - Tbird - Tuesday, 08/22/06 00:39:59 EDT |
|
Guru: I read a reference to a |
| - tbird - Tuesday, 08/22/06 00:41:44 EDT |
|
Adam: The surface where the two blades pass by one another should be left alone, only the cutting edge gets sharpened. The angle is a bit less than square, about 80 degrees. If a file will cut it use a file, otherwise grind. You might need to remove material from the stop to let the blades close all the way. Snug the pivot bolt so there is no play. The file or grind lines should go aproxametly perpendicular to the cutting edge, not paralell to it. |
| Dave Boyer - Tuesday, 08/22/06 00:58:32 EDT |
|
Hi everyone I'm a student from Croatia and I always loved medieval knights. I was searching net and found your web. I started to train archery. I'm interested to make myself one armor but I don't have expirience nor what materials to use. Also don't know what tools should I have for the beginning. I have hammer that's for sure :-). I'm interested in in armor that is not hard to make. |
| - Hammer - Tuesday, 08/22/06 05:34:26 EDT |
|
I am involved in building four new hybrid side draft forges at our Sidney, Maine location. We teach Blacksmithing during our Jan Plan term and are completing a new blacksmith shop with an attached classroom and study areas. The side drafts are to be based on the Gerakaris/Bourdon design, but we ran into a clearance issue with our pre-engineered wood roof trusses. The flue size is 12" round, with four inches of solid masonry, giving us about 22.5" outside dimensions. The trusses are 24" on center, leaving us 22.5" between them. NFPA codes stipulate a 2" clearance to combustibles, hence the issue. Our mason proposed changing over to a prefabricated metal asbestos type chimney below the tusses and continued up through the roof. I have seen what the manufacturers make to transition and it seeems to be doable, but I can't get an idea on the temperatures that the SS double wall chimney may see. Has anyone seen this done before, and if so, any issues and any ideas on temperatures? Any other elegant solutions would be helpful as well. Thanks. |
| - Gus Libby - Tuesday, 08/22/06 08:22:13 EDT |
|
Hammer: What period are you looking at? The harness for a high medieval knight is considerably more complex than the gear for an early medieval foot soldier. Forging a domed shield boss and a simple spangen helm is well within most folks capabilities. From there,life gets more complicated as you ascend towards more modern (by Viking standards) equipment and armor for the upper classes and nobility. Remember, a lot of the armor that you see in museums was preserved because it was considered so valuable, considering the materials, time and skill that went into its creation. Anvilfire has some further information at: http://www.anvilfire.com/21centbs/armor/index.htm Also, take a look at: www.armourarchive.org Lastly, study all the books you can get your hands on, as you practice your techniques. I'm sure several other folks here will add to this reply. Happy hammering. Sunny and warm on the banks of the Potomac. Visit your National Parks: www.nps.gov Go viking: www.longshipco.org |
| Bruce Blackistone (Atli) - Tuesday, 08/22/06 08:31:45 EDT |
|
Summation Upon Further Thought Hammer: To sum up- pick a time, pick a place, pick a role, and see if you can start assembling your harness. There is wuite a lot of variation, even ampoung archers, according to the where and when of their lives (and how lucky they were). |
| Bruce Blackistone (Atli) - Tuesday, 08/22/06 08:39:05 EDT |
|
Guru's Triangle "Best Ringer Ever" : Tbird, It is a triangle with two equal sides. This takes three heats and bends. The result rings somewhat like a tuning fork. The extra heat is worth is as they ring much better. It is less dissonate and rings longer. The dimensions I found that worked well were: 1/2" dia HR bar 30" long (13mm dia x 762mm) chamfered ends. 1) Mark at 5", 15" (center) and 25" (127, 391, 635) 2) Clamp in vise between two of the marks 3) Heat at first (5") mark next to the jaws and bend 60°. 4) Heat at 15" mark and bend 5) Heat at last corner and bend, then adjust until ends are 1/4" to 3/8" (7 - 10mm) apart. 6) Quench as soon as possible but not while visibly red. I used a small cutting torch tip to heat and worked the heat around the bar. You want a short heat. Bending and adjusting was done with bolt tongs. These were old German tongs and fairly heavy. They also worked as a hammer for light tapping to adjust. When bent correctly little adjustment is needed. The finished triangle should lay flat. If the corners are off the ends will not be on the same axis. If you have a good eye and are doing this in a comfortable setup (I used a small leg vise) very little adjustment is needed. If you work quickly the last two corners are hot enough to align by griping the last leg firmly from the outside with the bolt tongs and twisting and pulling a little. When I started making triangles I made dozens of sizes over a period of a couple weeks. All ring some but this one rings the best. Ocassionaly I would be asked to make custom dinner bells. I made one once from about five feet of 1" square to the same pattern. It rang OK but not as well as expected. I now know that the proportions are the length to the cross sectional area not the diameter. So if you want to scale up get out the calculator. With lots of R&D you may find that there are better proportions but this was the best I found in a couple weeks and bending up hundreds of pounds of bar. In inches the dimensions are also easy to remember. 30, 15, 10, 5. I find twists and decorative ends to reduce the quality of the ring. If you want to add to the bell then do so with the bracket and striker. I would also make regular two bend triangles on request to the same proportions. They rang well but not as brightly. I had one customer complain and I reminded him that I had already warned him that it would not sound like the other triangles. . . |
| - guru - Tuesday, 08/22/06 08:51:50 EDT |
|
Here's the one nice http://img225.imageshack.us/img225/7936/armorao6.jpg This is my favourite picture : http://img221.imageshack.us/img221/134/dsc00318agu2.jpg THANK YOU FOR REPLY :-)))) I wish I live in US and help you guys and get some expirience I also tried to find if anyone else is doing blacksmithing in my coutry but nothing so far :-( (probably there is at least one) |
| - Hammer - Tuesday, 08/22/06 08:54:07 EDT |
|
My best era is 1100-1400 |
| - Hammer - Tuesday, 08/22/06 08:58:21 EDT |
|
Stack Temperatures Gus Libby, it has been common to use galvanized pipe for forge stacks and there are many modern forge installations using tripple wall stainless pipe. The temperatures will be no hotter than from a standard fireplace. In fact the coal fire while hotter is much smaller and stack temperatures generally lower. You are also starting at a considerable distance from the forge where the excess air is well mixed and the temperaturs much cooler. They make a rectangular flue liner for this purpose (fitting between joists) AND if you plan far enough ahead the trusses can be on greater than 24" centers. In non-habitation structures like barns, sheds and work shops they are often 5 feet on center. In modern shops it is much more cost effective to forego extravagant brick chimneys and forges and use modern manufactured forges, side draft hoods and steel pipe. You can fully outfit the entire shop with tools for the cost of one masonry chimney. |
| - guru - Tuesday, 08/22/06 09:12:23 EDT |
|
Hammer: From where in Croatia do you hail? Family (on father's side) comes from Suhopolje. E-mail me by clicking on my name and we can chat off forum. |
| Ken Scharabok - Tuesday, 08/22/06 10:38:35 EDT |
|
Guru: Thanks for the detailed directions for the triangle. I'm going to the shop now and try it. I really appreciate your responses to me and others. Thanks again, and sorry for the partial messages. |
| Tbird` - Tuesday, 08/22/06 10:54:06 EDT |
|
Cold steel. Awww I was just tapping it - then when it did move I tapped it some more and then... I guess I should have pressed it in the vise. Thanks Dave, I will sharpen them as you suggested |
| adam - Tuesday, 08/22/06 10:54:46 EDT |
|
Guru, Thanks for the quick reply. Our blacksmiths/instructors are insisting on masonry for at least the first part of the side drafts and our mason also. The mansonry side drafts should outlast me and will be beautiful in the shop. Tools aren't as big of an issue as we are relocating from our old forge. Again, thanks for the quick reply. |
| Gus Libby - Tuesday, 08/22/06 11:29:32 EDT |
|
Armour: Hammer, That is pretty fancy stuff. For some general information on tools and basic how-to see our NEWS pages covering the West Virginia Armour-In (Vol's 29 and 33). NEWS 33 page 5 Probably the most difficult task is just cutting your steel plate. A throatless shear like a Beverly Shear (show on the page above) makes the work much easier. You can also use a "nibbler" but these tend to get expensive in the size necessary for plate armour (16ga, 1/16" or 1.6mm plate). Hand chisels have been used but this requires a lot of clean up (grinding and filing the rough edges). The same applies to using a torch. If you use these rough methods plan on having a grinder to dress the edges. The second most difficult task is developing your patterns to cut the plate to. Armour patterns are much like dressmakers' patterns. The difference being that the plate is stretched in working it. You can start with cardboard or poster board. Fit pieces to the person or body part for the armour. Allow room for padding. If you must cut wedges out of the pattern to make it fit (darts in dressmaking) remember that the final perimiter is where the flat plate starts. Instead of removing material, you stretch it to increase the lacking area. Both designing and making the patterns take experiance that you can only gain by just "doing it". Always start with a pattern so that if it is wrong you can correct it. Making patterns is an art that you will need to develop. Once you have a feel for how the metal will change from the pattern then you will make better patterns. Shaping the plate is done on stakes and in wood "stumps". Short sections of tree trunk make good dishing surfaces and do not mar the work. If natural tree trunks are not available then framing lumber can be laminated to make dishing blocks. The vast majority of your shaping can be done on wood blocks. Stakes are used for finishing by planishing and for detail work such as edging. Stakes can be bought or fabricated. Most armourers end up making their own stakes because general sheet metal and silver smithing stakes are too light weight. You do not need a lot of stakes but one good round surface (spherical) of about 3" (~75mm) diameter is very handy. Stakes can be forged from one piece or fabricated. It is common to weld a steel ball or other shape on a shank. Automotive "dollies" the hand tools that are used to support sheet metal as it is hammered from the outside are good tools to make stakes from. Hammers of various types are used. There are classic heavy repousse' hammers and light silversmith's planishing hammers. The entire range is used by armourers. The heavy dishing hammer with the 2.5" (64mm) ball end by Allan Bauldree was the most useful for heavy dishing. Most Armourers I know have a significant collection of hammers. Some are common commercial hammers such as ball piens and planishing hammers, others are custom made by the armourer or a smith. There are also smiths that specialize in making tools and hammers for the related trades. You start with what you can find or make and just keep searching. |
| - guru - Tuesday, 08/22/06 11:33:26 EDT |
|
I might try doing a shield first to get a feeling. Just I don't know what steel to use (as I know there are many steel types). What's the thickness of steel (5 mm enough for a shield?) One more question. When working with steel do I need to warm it up till it becomes red and hot? I might get stake :-) at least round surface Thanks for reply. |
| - Hammer - Tuesday, 08/22/06 12:06:30 EDT |
|
Flue Liners: An 8.5 x 13 flue liner has 73% of the area of a 12" round liner (rectangular liners are dimensioned outside rather than inside) and a little more than a 10" round. In use it is probably equivilant to the 10". These are designed to fit between joists on 24" centers with necessary covering and clearance. |
| - guru - Tuesday, 08/22/06 12:15:35 EDT |
|
Here's one nice but I dont know dimensions and what is behind it. http://us.st11.yimg.com/store1.yimg.com/I/tins_1872_2810989 Does anyone have the drawing with all dimensions for a similar shield maybe? |
| - Hammer - Tuesday, 08/22/06 12:16:45 EDT |
|
Steel for Armour: Hammer, Most use the best grade of mild steel plate they can find. However, standard hot rolled structural grade will work, just not as evenly. Ask your local steel supplier what they have in stock. Note that shield construction was often thin sheet metal over wood, plain wood, or wood edged and bossed with metal. Shields were sometimes carved to shape from solid but the best were laminated (like plywood). Modern makers often start with bent or formed plywood. Scale or pieced armour held together by leather strips or applied to a leather garment is probably the easiest metal armour to make. You can get very creative with this style. |
| - guru - Tuesday, 08/22/06 12:24:24 EDT |
|
Just a note on masonry flues: My stack, a 16' concrete block and brick with 12" square liners, cost $350 for materials and labor (I hired a couple of masons to do the hard part). That's about the same as one three-foot section of triple-wall stainless. |
| Alan-L - Tuesday, 08/22/06 12:35:07 EDT |
|
Hammer, I suggest you look for books on the subject. Books are generally cheaper than tools and the information is often necessary first. There are many good books on armour. Shields are often scaled according to the user and needs. However, an armoury that provided standard weapons and armor to an army would have a one-size fits all policy. But personal custom armor is made to size. Current styles and traditions also determine sizes. Arched shields of the type you linked to are commonly made from 1/2" (13mm) plywood. This one may or may not have a metal plate but it does have SCA required edging. Most of these are wood and hand painted. See http://ic.net/~blues/wfshield.htm#1 The only shields I have made were for my children when they were very small. These were 10" x 12" (254 x 305) and 3/8" (10mm) thick, "heater" shape. The arch was made by screwing the plywood to the back brace with flat head screws. They were reinforced slightly with a thin coating of automobile body filler (polyester resin and powdered glass fill). This also filled the edges and covered the screws. They were painted with family coats of arms in traditional colors using acrylic artists colors. A Christmas gift for 6 year olds, included aluminium swords. Note that plywood shields ARE historicaly correct. Although plywood was not the common construction material it is today laminated items were commonly made for certain purposes. A wood shield made from a single board will easily crack and split in two. But when two or more layers of wood are glued together with the grain in different directions it resists cracking and it MUCH stronger. ALSO, when making a curved shield the thin layers are easy to bend and glue in the bent position. The article linked above recommends using two thin sheets of plywood to make one bent sheet. This works well if you do not have access to thin cut wood or verneers. An early shield maker would probably not have access to large thin sheets of wood either. He would have to make his own thin boards. So relatively narrow boards would be used. This suits the technology of the time AND produces a very strong product. The tools needed were a wedges and a froe to split boards, a draw knife and scraper to finish, weights to hold in place while gluing. Hide (or hoof) glue was used then as it still is today for some purposes. Round shields with hemispherical surfaces can also be made this way. . There are many armour sites that specialize in the details of armour. |
| - guru - Tuesday, 08/22/06 14:03:34 EDT |
|
I read an interesting article comparing aluminimu SCA shields to wood shields. While many folks claimed they like the aluminum shields because they were lighter, they in fact weigh the same as wood (1/2" plywood compared to 12ga aluminium.). However, they are more durable and almost indestructable for the application. The only drawback is not being historicaly correct. Minimum weight required by the SCA is 8 pounds. This was probably based on the minimum wood needed to make a safe shield. |
| - guru - Tuesday, 08/22/06 14:48:13 EDT |
|
Hammer- There are several blacksmiths in the vilages north of Zagraub |
| Ron Childers - Tuesday, 08/22/06 15:03:01 EDT |
|
Waterjet Swage Blocks: The place where I work is scrapping out a bunch of heavy bar/plate -- among other pieces, a 7" x 2" x 9' block of mild. I am going to check with our local waterjet place and see how much it will cost to get a section of that shot through and edged with holes. We got quoted something like $1400 for six holes each in 30 plates, with pickup and delivery! I'm thinking that since I'll be able to drop the piece off and give them an AutoCAD drawing, they probably won't want much more than $100 for it... (fingers crossed) Zero finish work for me, too, other than knocking off the sharp edges. Will keep y'all posted. |
| T. Gold - Tuesday, 08/22/06 15:47:51 EDT |
|
Hammer: May I commend to your attention "Techniques of Medieval Armour Reproduction : The 14th Century", (ISBN: 1581600984); Price, Brian as a very good bookto start you on your way. T Gold: any vocational education places near by where you might arrange to get the outside edges milled to various shapes as a "class project"? I had my cannon counter bored, a breech put in, the touch hole drilled and the breech plug end turned into a beautiful turnip by such a progran for less than 1/10 the cost quoted me by a machine shop---a donation to their end of the year party fund. They said it was a lot more fun than just doing a task on a piece of scrap and then adding it back on the scrap pile after grading. Thomas |
| Thomas P - Tuesday, 08/22/06 18:17:11 EDT |
|
I am wanting to get started with blacksmithing and looked at you getting started page. I saw the forge plans you had on their and was wonding how you keep the coals from falling through the large center whole? |
| - Thom - Tuesday, 08/22/06 18:59:42 EDT |
|
Thom, you make a grate for the forge. Although I've never worked with coal, I've been told that the coal sticks together as well but I'm not sure of this claim's authenticity. You would have to ask someone who uses coal regularly on that. |
| - Rob - Tuesday, 08/22/06 21:38:07 EDT |
|
Thomas, pretty sure there is no vo-tech on the island that does machinework, but that's definitely worth looking into. Don't think they will want to wear out a set of broaches putting in all those square and hex (!) holes that I want though! (Grin) |
| T. Gold - Wednesday, 08/23/06 04:00:20 EDT |
|
Thank you Ron, do you have their website (if they have one) or their names maybe. I will try to find the books in Croatia. :-) |
| - Hammer - Wednesday, 08/23/06 05:34:54 EDT |
|
Hammer, I don't think the Croatian smiths have a website as they are not organized, but I'll try to get addresses for you. |
| Ron Childers - Wednesday, 08/23/06 06:59:10 EDT |
|
Thank you, yessssss :-) |
| - Hammer - Wednesday, 08/23/06 07:12:51 EDT |
|
Ok, granted that I'm just a simple country smith here, but how useful are the big multipurpose swage blocks? What good are all those different sized holes running through them other than tradition? I have a few small swage blocks that go in the hardy hole so I am familiar with those. |
| JimG - Wednesday, 08/23/06 10:38:08 EDT |
|
Coal Forges and Grates: Thom, Many people make the mistake of using small grates or grates with small holes in coal forges. This results in clogged grates or burned out grates. You are better off with a larger opening and losing some coal down the ash dump. One popular design uses a horizontal pipe with drilled holes. These burn out and rust out especially when used with coal rather than charcoal. On the brake drum forge I show a single bar across the hole. On about a 1.5" (~38mm) hole this works well. On a large hole of say 2" (~50mm) or more a U shaped bar makes three openings. One of the best forge grate designs around uses a "ball" ash grate. The "ball" is tringular in cross section. When rotated it clears ash and clinkers from the tuyeer. It can also be used to make a concentrated fire by having the point UP or a difuse fire by having the point DOWN. The ball doesn't really have points as it is very rounded but it IS triangular. Most of the pointyness is removed so that it will fit into a round hole. How coal behaves in your forge depends on the type and grade of coal. Good blacksmithing coal (high grade bituminous) softens and sticks together as it cokes down forming larged lumps than you start with. It is used in sizes from large nut (walnut) to fines (dust). When fines or "breeze" is used it is moistened to hold it together until it starts melting together. Stoker coal (1/2" and smaller but no fines) often tends to drop through large grates until it starts sticking together but is not a major problem. Nut coal is less likely to fall through a grate but makes a more open fire that is more difficult to control in a small forge. Anthracite (hard coal) burns very hot but does not melt or coke down. It requires a continous blast of air to keep burning and is difficult to start and keep started burning. Low grades of coal (high clay or ash content) do not melt and aggregate well nore do they coke down. Normally you do not have much choice in the type of coal that is available so you learn to use what you can get. However, if all you have available is low grade coal then you should be looking for another type of forge. |
| - guru - Wednesday, 08/23/06 10:45:07 EDT |
|
JimG-- re: big multipurpose swage blocks: no home should be without at least one. The bigger and heavier, the more and the more varied the holes and declivities the better. |
| Miles Undercut - Wednesday, 08/23/06 11:22:54 EDT |
|
Well, I made shield front side, dimensions are in cm. What do you say for dimensions, my height is 1.8 m. I'm making shield for me. here's the link http://img180.imageshack.us/img180/2204/shieldsu0.jpg is it too small maybe? (I designed it myself) I will use plywood thick between 1 to 1.5 cm and aditional mild steel thick about 2 mm. Will it be good??? |
| - Hammer - Wednesday, 08/23/06 12:02:14 EDT |
|
Swage Block Designs and Uses: I've designed, made, used and collected various types of swage blocks over the years. I've also studied the collections of others. Use varies according to what you do in your shop on any given day and the availability of the shape you need and whether your block is on a stand or not. Old industrial blocks were mostly holes on the flat surfaces. These were used for hot punching holes of all sizes and shapes and for heading as well. The holes can also be used to back up steel bolster plates. Holes are also useful for bending hot or cold and make good field alignment tools for railings. Many blocks have slots with radiused edges for bending flats similar to a bench block (another tool). Large holes can also be used for dishing the same as using short sections of pipe. I have a collection of odd shanked (hardy) tools and stakes that fit none of my anvils but fit my large industrial swage block. A number of its holes have large radii as-cast. These were probably for dressing radiused shoulders. One design purpose of the larger holes on large blocks is simply to lighten the block and reduce the average section thickness in order to make a better casting. Very large industrial blocks often have no section thicker than an inch or two even though the block is 4" deep or more and several feet square. This gives you much more edge space for a given weight block. Although most industrial blocks have mostly large holes I have a catalog that has European blocks that have millimeter increment holes starting at 12mm. Edge grooves include rounds from 3/8" up and are designed to be used as a lower swage for dressing (not forging) rounds, squares, hexs and octagons. I use them to support bars while incising or preparing to split. The hexes were used for dressing hex bar and heads, octogons the same and for forging rifle barrels. The small round grooves can be used to do edging on sheet metal and can substiture for a beading stake. The very large V's are also handy for sheet metal work making bends and dressing corners. Combined with the ability to hold stakes in the holes some swage blocks are very useful in the sheet metal shop. Peddinghaus makes a small cube that holds a stake anvil and has just a couple simple shapes for these purposes. Another common shape on old blocks was the large curve. This was used to bend and dress the ends of wagon tires and I find it very useful for making cold bends and adjusting scroll lead ins. I probably use the large curve more than any other surface. The industrial blocks of the 19th and 20th centuries varied greatly in sizes and design. Although many look alike to the casual obsever it is difficult to find two alike even though they were prouction cataloged items. Some foundries made one or two and others made dozens of different sizes and patterns. 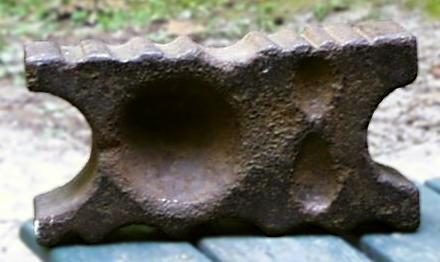
Antique Block, Josh Greenwood Collection Blocks with many spoon and bowl shapes are relatively new. In the old days smiths made custom or personal patterns for his own use and cast once or twice by the local foundry. These commonly are very simple, have no cored holes and are usualy rectangular. You will find many ancient blocks of this type and no duplicates. Ocassionaly an industrial block would have a single shallow dish in the center but multiple dishes were the purview of small jeweler's "dapping" blocks until recently. In the 1970's Josh Greenwood and Wallace Yater started making "artist blacksmith" blocks and launched the current trend. Josh made four different patterns the smallest of which is the popular 60 pound rectangular block now sold by Blacksmith Supply. Josh had his two small blocks cast on various occasions and sold them at blacksmith meets. Wally made the famous two block set where the cones of one block extend into the other. The Yater blocks were a sizable 12 x 12 x 4" and were all hand finished before delivery. They also had cored round and square holes. The Centaur Forge "A" and "B" blocks are copies of the Yater blocks. The point of the artist blacksmith swage block is to provide a block to those that do not have the skills or access to have a personal block cast. In this regard they must "shotgun" the types of shapes guessing at what will be useful for the most people. An important design consideration is to have as many possible impressions as will fit on a given size block. This makes the most use for the expense of the casting and increases the probability of having a useful shape. With the exception of the blocks by John Newman (who posted above on blocks and finishing) most of these patterns have been designed and made by amature patternmakers. Thus few have holes requiring core boxes. Many of the amature designs also have weak overhung corners or are improperly parted. The popular SCABA block is parted down the center of the block making the side impressions worthless without spending many hours grinding out the hump from the draft. Blocks of this type are always parted at the corner, never the middle. Artist blacksmith swage blocks include shapes such as spoons, dishes and shovels. The dishing depressions are usualy much too deep to be useful. It is a mistake I once made using other amature blocks as examples. Dean Curfman of Big BLU manufacturing quantifies the depth of a useful depression as being no greater than 1/5 of the sphere. Armourers and sculptors find the large bowl shapes to be the most useful. Spoons are a handy shape but need to be in more proportions rather than sizes as a small spoon can be made in a large depression. I find shovel shapes fairly useless unless you want a shovel mold so every one looks the same. In this case I would want MY mold, not someone elses. When I was making shovels I made them from 6" wide to 12" wide dustpans. A universal block for making shovels could have a variety of different "heel" impressions with different radiuses and different angles, not a single impression. It would be a very interesting shape. The tapered cones on the Yater blocks are probably the most useful for this purpose. Other shapes that have been put on blocks that are too specialized or useless are leaf depressions, spoons with handle grooves, heavily tapered holes. There are many shapes that have not yet appeared on blocks that could be very handy depending on your specialty. Swage blocks have come a long way from personal blocks to industrial blocks to artist blacksmith blocks. They vary greatly in quality (metal and finish) and usefulness of design. Some are works of art while others are no better than the cheapest ASO. Everyone wants one but few use them. Most of what is done on them can be done on a block of wood. One is never enough as there are so many patterns with so many variations. Meanwhile they easily become the biggest toe stumpers in the shop as they gather dust and rust. I have five blocks, two from my own patterns. I cannot say that I have used every side of every block much less every impression. But when you need them, you need them. My block with large bowl gets used as a flux dish more often than anything else. My industrial block is used most as a stake plate. My "block le fem" has never been used. I also have two more patterns that have never been cast. I will probably make more. . . Yes, this is a specialized form of acquisititus. |
| - guru - Wednesday, 08/23/06 13:51:56 EDT |
|
hey all i was wondering what yall knew about metal band saws. you see alot of cut off band saws labled vertical/ horizontal. am i to assume that you can stand the whole carriage upright and move the table up. i am really only intressted in vertical band saw part so i can split the legs out on andirons and split hinges to make those handlebar mustache shapes. I imagine you get what you pay for... im only looking for something light duty and reasonably cheap could i alter a wood band saw with pulleys and different motors to slow the speed down? any recomendations? thanks |
| coolhand - Wednesday, 08/23/06 16:54:20 EDT |
|
Shield, Hammer: Using the thinner 1cm plywood you will also want steel closer to 1mm. The total weight is the issue. At 1mm the steel plate will weigh about 3.28 pounds (1.49kg). Double that and you are very near your desired weight without the wood, trim, grips or paint which will be about 30% of the weight. The thin wood (10mm) will weigh 2.3 lb. (1kg). So using 1mm steel and 10mm wood your weight will be ABOUT 5.6 pounds (2.54kg) before any additions. This will let the total come very close to 8 pounds (3.6kg) - probably more, which is your optimum weight for a practical fighting shield acording to the SCA. The lamination of steel and wood should be very stout. However, at one of the Armour-Ins they were playing with a battle ax made from a pointed mason's hammer. It would easily puncture and penetrate to the end of the point (a hands length) a steel oil drum with very little effort. SO. . as romantic and impervious as plate armour looks, one good wack with a light (not a heavy) battle ax or spike and you would be lucky if it was not a mortal wound. I suspect the friction of wood could slow the spike considerably if the wood was firmly attached to the steel plate. It would probably reduce the penetration by half. It is easy enough to test. |
| - guru - Wednesday, 08/23/06 17:19:09 EDT |
|
Band Saws: Coolhand, Yes the small cut-off band saws tip up and you can use them like a small vertical band saw. The table is very small and the blade cannot be more or less than the standard size (1/2" x .024"). This makes them difficult to cut curves. The reason the blade cannot be changed is in order to twist the blade for cutting long bar the wheels have a shoulder on them and will only accept the one size blade. While the little 4x6 saws WILL do the job there are many on the market that do not work out of the box. You want to purchase only the best in a recognized brand like Jet if you purchase this kind of saw. The larger saws are generaly better but also quite a bit more expensive, it is this one size that you must be VERY leary of. I have an old 1970's Rigid which is a wonderful saw (the original of the type). We also have a nearly identical Sears saw. The difference was the replacement of the bed and some other part with pressed steel rather than castings. It is junk enven though it has the same gear box and guide system. The Taiwan "clones" are faint ghosts of this machines. Yes a wood saw can be converted to cutting metal and a FEW were designed to do both. However, good wood cutting bandsaws run up to 4,000 and 5,300 FPM (60 MPH). Metal cutting bandsaws run between 80 and 120 FPM. That is a 45 to 50 to 1 difference in speed. To get these speeds most band saws use a high reduction worm gear drive. The advantage of a standard bandsaw is the rubber tired wheel. The wheel lets you run any width blade you want from little 1/8" scroll saw blades that will turn around in their own length to big heavy 1" blades suitable for high pressure resaw and straight line work in hard material. The blades are also not twisted which means they last longer and the guide system is not nearly so critical. The disadvantage of a standard bandsaw is the throat depth. This is usualy limited by the wheel diameter but some saws increase it by adding a third or fourth wheel. This is added expense but greatly increases the throat depth. NOW. . if you are really cheap, adventurous and imaginative you can build your own junkyard bandsaw. The wheels are automotive wheel and tire assemblies which give you the right diameter (about 30"), the rubber tire AND the crown. You want worn out tires or tires with very smooth tread in the middle. The most difficult part is the tension adjustment and tracking mechanism. The frame must hold the wheels in place fairly ridgidly HOWEVER, band saw frames flex and part of what the tracking adjustment does is compensate for the spring in the frame when the blade is tensioned. Guides are easy. You want a sealed ball bearing on a shaft for the back of the blade. Side guides can be steel, brass or even wood. They do not touch the blade except when the blade is pushed by the work. Some adjustment mechanism is mandatory. The table takes a little thought. Look at a real bandsaw. The table can be wood (plywood) or metal. You can design it to tilt or not. Back in the 1970's Mother Earth News ran a series on building your own bandsaw this way. They listed Volkswagon wheels which might be hard to obtain these days. Years ago I saw a home built bandsaw in an old black county millwrights shop. At the time the old fellow, the son of a slave was about 98 years old. The frame of the saw was mortise and tennoned wood (like mill framing). The wheels were 1926 Chevrolet wood spoked rims which in their former life had been painted teal blue with red pinstriping. The tires for the blade were cottom mill belting about 1/8" thick attached with nails. The guides were simple sticks of wood. This saw had been in operation since shortly after the Chevrolet wheels became available, probably about 1930. It had been used to cut 120 oak gear teeth for our grist mill in the 1950's and used to make hundreds of pieces of furniture and dozens of grandfather clocks. The mound of fresh sawdust around it said it was still in operation. I told myself I should go back and photograph the saw and the other home built machines in the fellow's shop. But a year later the shop burned and everything was a total loss. The point? DIY bandsaws are very possible and can work surprisingly well. Old bandsaws are relativly expensive and make the alternative cost effective. |
| - guru - Wednesday, 08/23/06 18:05:25 EDT |
|
Thank you guru :-) So you didn't mention about size of shield so I consider it as good, right? Is it possible to shape 1 mm mild steel without fire, only with hammer and grinder for cutting it? |
| - Hammer - Wednesday, 08/23/06 18:14:38 EDT |
|
coolhand-- I put stepdown pulley arrangement on my ancient Delta 12-inch vertical bandsaw, and it has worked fine for years cutting thin brass, copper, plastic, steel. To get that authentically funky old tyme look on andirons and hinges, however, you really need to be cutting them with a hot chisel. |
| Miles Undercut - Wednesday, 08/23/06 18:44:36 EDT |
|
Hammer yes: For folding and bending that is the way to work metal that size. you can make a bending clamp with two long pieces of lumber and wood screws to clamp. You can hammer against this. When you start to fold the sheet over with your hand it will curve outwards - start hammering on the belly of the curve and work toward the fold line. Absolutely wear hearing protection for this. Bandsaws. Lincon's ArcWelding projects books have designs for shopmade bandsaws including one from motorbike wheels and a 3 wheeler. I repeat the wisdom bestowed upon me by 3dogs - "The Lincoln Arc Welding books, available at the Lincoln Electric , are a very good deal." Great books at very reasonabl prices. Their New Lessons in Arc Welding is only $10 and it is hands down the best arcwelding book I have been able to find. |
| adam - Wednesday, 08/23/06 18:46:43 EDT |
|
Welding question(s). First, just how strong is a forge weld supposed to be compared to OA or electric? Second, how do you get a total weld (invisible when done), without having your material look like a 4th of July sparkler when you pull it out of the fire along with several burned and pitted spots? My welds are strong enough to stretch out loops on handles without popping loose, but when experimenting and chisling welds apart to see the contact line, mostly I've got welds in the center but not at the edges. I'm working with a good neutral coke fire, scarfing, regulating the air, have the work off the tuyere (center of the fire),and am using the dehydrated (hydrogonous), borax sold on ebay and I'm stumped! |
| Thumper - Wednesday, 08/23/06 19:20:34 EDT |
|
My vertical bandsaw that I saw steel with is one I made from 2 cast iron exerciser wheels I found. The exercisers were out for the trash pickup. The wheels are approx 16 inches in dia. The saw uses the same blade as my horizontal saw- 93 1/2 x 3/4. It has a 1 hp -1725rpm motor with a 50 to 1 gearbox- Blade runs approx 200fpm Frame is square tubing. I put blade guides on the top only- Very simple to build- I think the only thing I purchased new was the motor - the rest was in my stash. |
| - ptpiddler - Wednesday, 08/23/06 20:06:41 EDT |
|
Hello everyone, long time reader, first time poster. First a quick introduction, My name is Justin and I'm a 25yr old engineer living in Rhode Island, and a beginner to blacksmithing. My experience is limited to having worked a few weekends with a local blacksmith, and having read everything I can in books and online. I've spent the last few months obtaining everything I need to start doing work on my own, and just this last week obtained a whisper baby forge (nc tool co) and a pair of leg vises. My first question concerns my vises. I'm one of those people who always likes to know /what/ I have and I've been trying to identify them. The first is the only one with any markings on it, "No 100" stamped on the outside of one of the jaws. It has 5.75 inch jaws and weighs just a tad over 100 lbs, which from what iv'e read would probably make it English in manufacture. The person I obtained it from believed it was a peter wright. Here are a few pictures of the vise and the markings on it if anyone is able to help identify this first one. http://www.tharkis.com/images/vise1-1.jpg http://www.tharkis.com/images/vise1-3.jpg http://www.tharkis.com/images/vise1-4.jpg http://www.tharkis.com/images/vise1-5.jpg The other vise has no markings of any sort, has 4.5 inch jaws, weighs ~45 lbs. The most distinctive feature of the vise is the fact that the mounting hardware (which is broken / almost totaly missing) is of the sort that went through the center of the leg and then through the spring and is held in place with a pin, the pivot bolt is also held in place with a pin driven through it. As can be seen in one of my pictures, the rest of the mounting hardware was snapped off some time ago, but has left the bit holding the spring in place. The only thing I've been able to determine about this vise is that the style of mounting and holding the spring likely dates it pre 1835 or so. Here are some images I took of the smaller of the 2 vises I have. http://www.tharkis.com/images/vise2-1.jpg http://www.tharkis.com/images/vise2-2.jpg http://www.tharkis.com/images/vise2-3.jpg http://www.tharkis.com/images/vise2-4.jpg My appologies in advance for the number of questions. I think I've been saving them up for when I finally make a post. My next questions are general smithing questions about using a propane forge. First, what pressure should I be operating my single burner whisper baby at? Second is it possible to burn my steel in a propane forge? Third, I dont have a good cart or table for my forge, are there any particular cautions I should take when building one? i.e. should it be all metal, is just a metal surface sufficient? (Iv'e got a 2x2 sheet of 16 gague mild steel I was going to bolt onto the top of a wooden cart I'm going to make out of 2x4s and 2x6s, which is my current plan) Lastly, what size bar stock in general would be the most handy to have around to start to make things like my own tongs, hardies (my anvil has a 1" hardie hole) and the like. Currently I just have a whole bunch of 1/4 inch bar stock, and 12' of 3/8th inch bar. Due to the hours that the closest place I can get bar stock from is open, Iv'e got to order in advance, and pick it up in the last 15 mins before they close, so I need to know ahead of time what I want to pick up. Thank you for your time, patience, and for this great resource! I'm looking forward to learning a lot by trial and error now that I can fire up a forge this weekend on my won for hte first time ever. I'll admit though, I'm nervous about it too, having never really worked with a propane burner before. |
| jmercier - Wednesday, 08/23/06 20:43:10 EDT |
|
A good option for a forge cart would be a discarded barbecue grill - take the lid off and fill with sand and level out with some brick pavers. Most grills have a place to clamp the 20 LB propane tank and come complete with wheels- you might be able to rig up a place to hold your tongs and if you beat the garbage crew, you can't beat the price |
| - ptpiddler - Wednesday, 08/23/06 21:16:19 EDT |
|
I stole a much better smith's idea and made a little table for my cheap Portaband knock off so I can clamp it in a vise and cut small stock. I'd love to have a 4X6 for cutting off stock, but my shop space is at a premium. On the other hand, I use the little saw on a 400W inverter to cut up 20' sticks at the steel center. Can't do that with a 4X6. My saw is variable speed; I suspect a fixed speed motor would require a bigger inverter due to the startup load. |
| Mike B - Wednesday, 08/23/06 21:18:40 EDT |
|
tongs: 3/4" round or maybe 5/8" sq is the lightest you want for the jaws. 3/8" round is right for the reins if you are welding them on. Tongs are not a beginner project unless you go for one of the simplified designs like twisting flatstock. How are you going to make your hardie tools? Most people arcweld the tool head onto a piece of 1" shank or whatever their hardy size is. For cutting tools chisels and cutoff hardies you will need some "tool steel". Many of us use old leaf spring, auto spring , axle steel etc. Others buy new tool steel. You definitely can burn steel in a gas forge - just not quite as easily as in a coal forge. When hot steel lands on wood there is instant combustion. I say use only non combustible materials, metal, cement board, tiles, bricks etc. Start out forging the 1/4" stock. Make hooks - good luck - have fun! |
| adam - Wednesday, 08/23/06 21:26:18 EDT |
|
I used a BBQ cart for my gas forge but totally removed the BBQ and bolted a plate of steel across the gap and then bolted the legs of my forge to the plate---lighter than all that sand. Note I allowed for expansion when I bolted it down. Strength of forge welds: well they used to weld up driveshafts for ships, anchor chain for battleships and drawbars for locomotives out of wrought iron so they were getting some pretty good welds Thomas |
| Thomas P - Wednesday, 08/23/06 22:56:07 EDT |
|
jmercier, Welcome aboard. I have a collection of leg vises, something that just seemed to have evolved over the years. The second, older vise is English, and your date estimate is probably correct. It is constructed in a rather involved fashion. The internal threads and the lathe turned portion of the box are all brazed to a forge welded tube. The stops, usually two, were tenoned into the basal portion of the box, and brazed on lengthwise. I've never seen a mount-tenoned, early vise that had a jaw width wider than 4.5". The larger vises came in probably after 1850. I have seen a number of these older vises, and the mounting plate was invariably split and splayed, and made of wrought iron.* The two flat pieces deriving from the central split were splayed away from each other with a nice curve. Often, the ends were finished as shouldered, circular finials, made to receive a nail, and not too unlike a simple finial for a strap hinge. Just beyond the crotch of the split, the tenon was forged. This mounting method was replaced later with the U-shackle, key, and wedge, the latter being stronger than the tenon. Witness what happened to mercier's vise. I do not use any of my older vises. I think they should be either museum pieces or collectibles. The first pictured vise is a Peter Wright. Sometimes you can make out on top of the box the serifed imprint: P. WRIGHTS PATENT SOLID BOX Peter Wright was trying to say that his screw box was NOT brazed, that it was better, that it was solid. Less frequently, you will find stamped on the box,the seal of Great Britain. These often disappear in use, because the letters are small and not imprinted deeply. If you take the screw and box apart, you will probably see a single letter on the box body. I think this is an inspector's mark, but I'm not sure. A four part series of articles covers the subject of leg vises thoroughly. These are hard copy: "Anvil Magazine", July, August, September, October, 2001. "Restoration of Leg Vises", by James R. Melchor a Peter M. Ross. *The split & splayed mounting plate is shown being forged by Peter Ross in the August issue, Part II, pp. 18-21. Thumper, You can weld just under a sparking heat, at a sweating heat. If shuts occur, use light rapid blows rather than heavy ones. |
| Frank Turley - Wednesday, 08/23/06 23:21:52 EDT |
|
Greetings. I have a Dagger from Toledo Spain that my grandfather brought for there 30 years ago. It is nickel Plated and it shows some time wear. How do I know if the blade is made of steel or aluminium? |
| Hector Mendoza - Thursday, 08/24/06 00:36:49 EDT |
|
Hector: If a magnet sticks to it it is steel. If it is a purley decorative piece it could be made of a non magnetic material, aluminum being one, but brass/bronze or potmetal are possibilities allso. |
| Dave Boyer - Thursday, 08/24/06 01:58:58 EDT |
|
I was wondering what exactly "dressing the face" of a hammer meant and how this is done. I couldn't find anything online and I don't have any metalworking books yet so, if you don't mind, could you explain? |
| Sean B. - Thursday, 08/24/06 04:48:13 EDT |
|
One more question, how do I burn steel? What would should do to deliberately ruin it? I would like to know this so I can prevent it from happening on accident. Thank you for your help. |
| Sean B. - Thursday, 08/24/06 05:06:03 EDT |
|
Propane forge height: I tried the BBQ grill first, but didn't like the height, or lack thereof. The problem is that for a propane forge to work, you've got to keep it covered. This made checking while heating a pain, albeit a small pain. I like mine on top of my rolling tool chest. The opening is about shoulder height, maybe a little lower. It's easy to look in and still pretty natural to pull pieces out to work. The tool chest stand is also real convenient to store things like ... um ... tools. Chisels, hardies, etc. And when I first used it I was also using 20-lb tanks. I took out the bottom drawer and the tank fit in there nicely. It's on wheels, so it's move-able. Just another idea... |
| - Marc - Thursday, 08/24/06 08:23:34 EDT |
|
Burning steel - Welding heats Sean, The forging temperature of steel is well above the rapid oxidation temperature where scale forms. The hotter you heat the steel the more rapidly it oxidizes. When sparks start comeing off the steel it is burning. However, long heats at elevated temperatures will burn the steel. The exact temperature at which steel burns is proportional to its carbon content. The higher the carbon the lower the burning temperature. Pure iron or wrought iron burns at around 2,700°F and high carbon steel around 2,500°F depending on the oxygen available. It is possible and commonly done, heating above the burning temperature in an oxygen free atmosphere. Sean AND THUMPER, Welding heat does NOT need to be a burning heat. You must control your fire so that there is no oxygen where the steel is to create a welding heat without so much scale you cannot weld. Often you will see the steel sparkle AFTER removing it from the fire. This means you have a good fire. However you may have overheated the steel. |
| - guru - Thursday, 08/24/06 08:41:53 EDT |
|
Sean, extreamly burned steel is usualy very obvious as it is crumbly looking. Usualy at the burning point much of the steel falls into the fire. . . When you do it you will know it. |
| - guru - Thursday, 08/24/06 08:45:14 EDT |
|
Dressing Hammers: Sean, this is something you should not do unless you have experiance or that it is a absolute necessity. Most old hammers were dressed from the factory to a usable shape and should be used as-is until you know what you are doing. Many NEW European smithing hammers come rough ground and are not usable as is. These have sharply chamfered corners and nearly flat faces. Dressing is grinding the face to a usable shape. What is usable for one trade may be different in another and different smiths have different preferences as well as needs. Over time hammers will wear or change shpae and need to be redressed. Most hammers do not have a perfectly flat face. They have a curve called the crown (like the crown of a roadway that lets the water run off). The amount of crown varies and is hemispherical in round faced hammers and more pronounced in one direction on square faced hammers. Note that square bodied hammers with chamfers on the sides are round faced hammers. Beyound the crown the edges are radiused. If you look at most carpenter's hammers you will see the crown and then a machined chamfer. Where these meet makes a line which will mark the work, especially in forging. So there should be no line where the crown meets the edge. There should be a gentle blending into a radius. The ideal edge is eliptical in cross section. On old machine dressed blacksmiths hammers, standard cross peins with a round face, the crown was quite high and even though it ended at a 45° chamfer the crown was sufficient to prevent the edge from marking the work unless you held the hammer at more than a 30° angle. However, this edge should still be lightly dressed. Factory grinds on round faced hammers are done in a lathe which helps make the crown symetrical and centered. Square faced hammers often have what is known as a "rocker face". This curves from front to back only OR perhaps with a very slight curve side to side as well. The corners are heavily radiused in an eliptical dress. The advantage of the rocker face is that it moves metal in one direction only so you have more control. Bladesmiths like rocker faces to draw out edges as the material moves OUT rather than trying to lengthen the edge by moving in all directions. The "Hofi Hammer" has a rocker face. If you look at ball pien hammers you should see a flat face with a very small chamfer or radius. The flat face is very useful for some purposes but not for forging. To use a ball pien hammer (British Engineer's Hammer) for forging you need to grind a crown on the face as well as radius it. Carefully studying the faces of various hammers will teach you a lot. The best way to dress a hammer is on a belt sander/grinder with the handle off. Belt grinders are very good for dressing due to their flexible surface that can wrap around the work. Thus I prefer old used hammers at flea markets to NOT have been rehandled as they are easier to dress. Besides which most have poorly installed handles. After a belt grinder and angle grinder works but takes much practice and skill to get the desired results. Last choice is a bench grinder. Most common bench grinders with 6" wheels are NOT suitable for dressing hammers. The reason is that you should NEVER grind anything close to or greater than the weight of the wheel. Items this heavy tend to bounce against the wheel and can shatter them. You need to have either a heavy duty grinder (pedestal type) with 8" or greater wheels or to only dress very small hammers. To hand grind anything to a specific shape it helps to do so in controlled steps. Grinding facets like a cut gem helps to keep the shape symetrical. Then you grind the corners of the facets flat (making more smaller flats) and then roll the ginder on the surface (or the work on the grinder) to blend the shape smoothly. Using this logical approach is a great help even to the experianced. Besides the face of the hammer the pien should have the corners radiused. Anything that will cut or mar the wok is bad. Piens are also often poorly shaped and need ridges or ledges smoothed out. |
| - guru - Thursday, 08/24/06 10:18:31 EDT |
|
Sean, The face of a hammer can be thought of as a "stamp", and whatever shape, texture or effects the hammer face has will be stamped into the metal you are working. So, you want your hammer face to be "dressed" to give the result you want, rather than some other effect. Generally, forging hammers should be dressed so that they have no sharp corners. The face is usually slightly curved, rather than absolutely flat. Where the face meets the sides of the head, the face curves more and changes direction, rahter than having a sharp corner. A sharp corner would pound a divot into the surface of your workpiece if you hit with the ahmmer face anything except absolutely parallel to the metal. A little "rocker" to the face and softened corners allows you to err a bit on you hammer control without damaging your work. Drawing and fullering hammers have faces that are narrower in one dimension making them, in essence, a blunt "wedge." Tis wedge shape moves the metal more in the direction right angles to the length of the face than it does the other direction. The degree to which the face is narrowed and the radius of the face curvature determines how aggressive a wedge the hammer is. The face should still have a slight rocker on the long axis, to keep from having corners that dig in to the work. The best way to dress a hammer face is with a belt grinder or belt sander. You don't want to use a bench grinder, as the hard wheels will result in an uneven grind. A belt sander allows you to work against the platen or in a slack area of the belt, working gently to ease corners and the like. You *can* do the rough profiling with a 4-1/2" angle grinder, but it takes some practice to get it right. You still need to finish up with the belt grinder or sander. The better you profile and finish your hammer faces, the better they will work and the better finish they will leave on your work. |
| vicopper - Thursday, 08/24/06 10:22:30 EDT |
|
I was typing while Jock was posting, I guess. |
| vicopper - Thursday, 08/24/06 10:23:48 EDT |
|
Jmercier, Stock: When you get starting out stock you should have a selection that ranges from 1/4" to 3/4". Later you will want some 1" square. You rarely do much hand forging of 1" (especially with a Whisper baby) but it is good for animal heads and heavy andiron parts. You will probably find that you go through much more small stock than large because it is easier to work. My favorite size for firetools was 7/16" (11mm) square. It is much stronger than 3/8" and much lighter than 1/2" and does the job. . . Whisper Baby Pressure: Normally about 7 to 10 PSI. However, small cheap gages are nortoriously inaccurate. When new they MIGHT be within the normal 3% of full range but within a year or two they may be off by 50 to 100% (read 3 or 12 when actually 6). Even better quality gages degrade quite rapidly. So you only use these as a general reference from day to day but they almost are worthless to compare to others. The Whisper Baby is a very limiting forge. It is handy for very small work and very difficult to weld with. I've worked 3/4" in mine with great difficulty, 1/2" is a slow heat and 3/8" and below works well. The next size up two burner forges are MUCH more useful. The only reason I have a Whisper baby is that I bought a larger forge for a friend as a Christmas Gift. Unknown to me he had ordered himself a Whisper Baby. They both arrived on the SAME delivery truck! Boy was he surprised. He did not need two forges and I ended up with the Whisper baby. . . Old Vises are almost impossible to identify as to a specific maker and there is no authoratative list of makers. Out of a dozen or so vises I have had only ONE that had any markings of any kind. It is marked very faintly on the box (nut) as made by Brooks and Cooper. Blacksmiths leg vises were so common and made so nearly identical that they were considered a commodity item and sold by the pound often without identifying the maker. See the post by Frank Turley above, he is pretty knowledgable on these. |
| - guru - Thursday, 08/24/06 11:09:04 EDT |
|
Guru, I'm going to start on a propane forge soon with just under 10" steel pipe. I will be buying the kaowool and ITC-100 from you, once I save up enough extra money (I'm selling two swords soon, I'll use that money). Shall I e-mail you for shipping costs, or is it a consistant shipping rate? Tahnks in advance, and I'll let you know when I get the money for that. ---Rob |
| - Rob - Thursday, 08/24/06 11:12:03 EDT |
|
Wheeled Tool Cabinets: These are very handy in the shop if you can afford them and until they get overloaded. I have one that will not move any longer. . . They also make wheeled shop carts of various sizes for this purpose. However, you should check prices carefully as the carts can sometimes cost more than a tool chest with all those handy drawers. In our machine shop I tried to outfit each machine tool with its own tool cabinet. Large accessories sat on top and small tools in the drawers. Almost every machine tool needs this kind of storage. However, it is sometimes hard to convince workers of the logic of keeping the milling vises and dividing heads on top of a cabinet at nearly machine table height rather than underneath. I also like to keep a full set of wrenches needed for each machine in that cabinet. Forge height is what you are used to. I know a lot of people that put their gas forges on high stands. Mine are about desk height or a little higher the same as most coal forges. BBQ grill stands are convienient only in that they are often FREE found by the dozen in suburban trash. The really cheap ones are too light duty. I was given on and cannot see it being useful for anything in my shop. If something won't safely support 300 pounds or more safely it has little use in a (my) blacksmith shop. |
| - guru - Thursday, 08/24/06 11:48:57 EDT |
|
Shipping Rates: Rob, shipping is based on weight and zone (how far you are from here) and our shopping cart calculates it (more or less). Local shipping is very cheap but West Coast shipping is much higher from here. If the cart does not work for you (some browsers choke on the Java applets) then write or give me a call and I will run the numbers for you. |
| - guru - Thursday, 08/24/06 11:53:15 EDT |
|
Tool cabinets: I got mine from my neighbor at her yard sale for $30. Check flea markets and auctions, too. |
| - Marc - Thursday, 08/24/06 12:21:51 EDT |
|
I went to shop and they don't have 10 mm plywood, they only have 8 mm and 12 mm. Is 8 mm to thin or should I take 12mm for my shield? |
| - Hammer - Thursday, 08/24/06 13:06:38 EDT |
|
Cheap tool cabinets: A couple of years ago, the local government was pitching out a handful of old metal desks, the kind that have a Formica�-covered particle board top. I got to the pile before the dumpster driver and snagged a few bases and all the drawers and tracks I could pull off and fit in my truck. The drawer bases on these desks are all made the same, regardless of final configuration, which open up the possibilities. I took one base that was originally a 6" top drawer and a file drawer beneath, and re-configured it with six shallow drawers pulled from various other desks. That is the file, chisel and punch cabinet by the forge, now. Another samller base from a secretary's return was fitted with two shallow drawers and one file drawer and sits next to the drill press and pedestal grinder to hold bits and tooling. Two bases were stacked atop one another and fitted with all 6" drawers to hold my raising stakes and other oddments. The "vanity screens" from the fronts of the desks were recycled to make cabinet tops and other sheet metal needs. I ended up with a total of about fourteen shallow drawers, ten 6" drawers, two file drawers and two knee-hole drawers from the scrounging session. The two knee-hole drawers were hung under the welding table top to hold torch tips, Vise-Grips and tapes, etc. Very handy, and don't interfere with the shelf underneath. All the steel desks were high quality to begin with, so all the drawers are on full-extension ball-bearing tracks. Those tracks just clip in and out of the bases, so re-configuration is a snap. Some even interchange between differen brands. A quick squirt with some paint and you have nice matching tool chests. |
| vicopper - Thursday, 08/24/06 13:07:00 EDT |
|
Burning Steel: The easiest way to burn steel that I know of is to turn around, when working an item at a high heat, and try to explain something to a guest or student. 8-0 Forge height: My coal forge is at waist height, but my Whisper Baby (the "Baby Balrog") is set just a bit below head level, which makes it rather easy to keep track of the small stuff. Clouding up and warm on the banks of the Potomac. Visit your National Parks: www.nps.gov Go viking: www.longshipco.org "Hang up and drive!" |
| Bruce Blackistone (Atli) - Thursday, 08/24/06 13:57:16 EDT |
|
I keep my French Pattern hammers in the vanity and sometimes I dress them in little frilly frocks and then we all sit around and have a tea party |
| adam - Thursday, 08/24/06 14:43:41 EDT |
|
Stock Dimensions: Hammer, I was just going by the options you gave. We are in the US and I do not know standard metric lumber dimensions. Here I would use 3/8" under the 1mm steel if I could get it. Currently all lumber here is made to the absolute minimum which is less than the nominal (given dimension). It used to be plywood was ON the nominal but now it is all undersized a bit. Either 8mm OR 12mm should be OK. One will be a little heavier and the other a little lighter than what I caculated. As to working the 1mm steel, for making this shield all it will need to be is bowed unless you intend to have some repousse'. It is a little thin for plate armour. For that you may want 1.5mm. For raising a helmet you may want 2mm but for piecing one the 1.5mm is good. The 1 mm will also be good repousse' which is best done seperately then applied with glue or rivets to the flat plate. |
| - guru - Thursday, 08/24/06 15:06:08 EDT |
|
Thank you all for the help so far! =) I'll see if I can pick up a grill cart in the next few days. Someone sent me an email about my vises, but my gmail spam box ate it and I accidentally deleted it before reading it instead of moving it to my inbox. If that person could resend the email I'd greatly appreciate it ! I guess my next thing to do is fire up the whisper baby and beat out 60 feet of 1/4 stock into wall hooks! |
| jmercier - Thursday, 08/24/06 15:13:00 EDT |
|
How do I make atomspheric burners for a gas forge without a blower assembly? I am looking for a simple design like on the poor boy forges Ken makes. I already looked under plan files and didn't see what I was looking for. Thanks |
| Turkey Feathers - Thursday, 08/24/06 15:52:29 EDT |
|
THANK YOU GURU - WITHOUT YOU I WOULD BE LOST ;-) |
| - Hammer - Thursday, 08/24/06 16:11:23 EDT |
|
Power Hammer Foundation: I plan to set my Kuhn Clone hammer onto a 1.0 thick steel plate, with the plate cast in place on top of a poured concrete pier. The manufacturer recommends setting the hammer on top of a piece of �rubber part �to avoid vibration�. I could use conveyor belting or horse stall mat, but the "soft" surface would tend to isolate the hammer from the foundation. The ratio of hammer-to-anvil is now 1:6 or so, and I'd like to increase it by coupling it to the steel plate (about 1:10). There will be 5 bolts passing through the anvil and another 4 bolts in the hammer frame thru the steel plate and into the concrete. The bolts are 5/8 diameter, and the anvil is bolted to the hammer frame with three bolts and tensioned with springs. I think a "bedding compound" like a slow cure epoxy would do a better job of taking out the irregularities between the plate and hammer than an elastic pad. I'd appreciate your comments and a recommendation on the epoxy to use. I was planning on using 2 part construction epoxy used to set tie-down bolts into concrete. I made a plywood template of the hammer bottom to locate typical building construction 5/8�s anchor bolts through the steel plate and into the concrete pier. The anchor bolts would be tie-wired to the rebar cage in the pier. The holes in the steel plate are 1.0 inch to allow for some miss-alignment. I do recognize the risk of the bolts not matching up with the holes in the hammer anvil and base even with the template holding them while the concrete sets. One other fellow with the same hammer suspended the hammer over the form, and then poured to assure the bolts would align. I don�t know of an easy way to hold up the 2200 pound hammer with the 400 pound 1.0 inch plate up in the air for the pour, get the �mud� into the form, and they lower the hammer down onto the form top. One alternative would be not to use cast-in-place anchors, but to set the hammer in place and then bore the holes into the slightly cured concrete and insert bolts, again with the same epoxy. Local building code here in earthquake prone western Washington allow the use of set-in-place anchors for shear loads, but tie down straps are also required for the vertical loads. I would expect most of the loads on the bolts would be from the vertical bounce and rebound from hammering, so this might not be the way to go. Any and all comments and suggestions are appreciated. |
| Bob J - Thursday, 08/24/06 16:45:18 EDT |
|
adam-- are you by any chance the same adam who only recently denigrated in this very forum jewelry making and miniature-making 'cause he feared it might jeopardize his image as a studly dudley? |
| Miles Undercut - Thursday, 08/24/06 16:48:14 EDT |
|
Gas Burners: Turkey Feathers, Our gas forge FAQ has a burner that has worked for me every time. It is pretty simple to make. Blower burners are simplier and as a DIY project work more consistantly. |
| - guru - Thursday, 08/24/06 17:22:44 EDT |
|
One question on the propane burner: What size should it be? The dimensions with insulation will be about 7 1/2" diameter, by 14" long. |
| - Rob - Thursday, 08/24/06 17:29:28 EDT |
|
One extra bit of information, I will be using a blower with the propane. I'm not sure if this will alter burner size or not, but just to be sure. |
| - Rob - Thursday, 08/24/06 17:41:49 EDT |
|
Kuhn on concrete: Bob, note that only about 1/4 of your 1" plate will be adding to anvil mass due to the load being on one end and the plate being relatively thin (for an anvil). In the good old days Centaur Forge sold Kuhns on 8" slabs of steel. However, only about 40% of this mass applies to anvil mass. But it was a LOT of mass and increased the working anvil mass to over 20:1. First, I would worry about the concrete pier. Is this above the floor or going through the floor? If above the floor it is relatively fragile (as concrete things go) and will need LOTS of rebar and very good concrete (not cheapo low strength sacrete). Be sure to vibrate the concrete. If the pier goes through the floor it should be larger below the floor and the pit dug down to hard soil. There needs to be padding around the hole to alow the pier to move. If I was mounting a plate under a Kuhn I would put the padding between the plate and the concrete. The concrete is low mass (does not add much to the anvil) and is relatively fragile. I might consider wood if not going through the floor. Never wire tie anchor bolts to the rebar mesh! They will end up WAY out of alignment. Weld them on in the exact position they belong. Otherwise a 2" oversize hole won't be big enough. WAYYYY back, Little Giant recomended isolation subes around the long anchor bolts so that they could be flexed into place. The Chinese hammers call for the same on their new hammers. Steel, cardboard or PVC can be used. With what you are doing I would drill and tap the 1" plate to attach the Kuhn. Then I would have seperate anchor bolts to hold the plate to the concrete and use conveyor belting as padding between the plate and the concrete. OR run the anchor bolts through both base plate and hammer. . . Holding the hammer perfectly level and setting it into the concrete is a nearly impossible task. . |
| - guru - Thursday, 08/24/06 17:51:04 EDT |
|
I have had my chinese air hammer bolted down to my slab with concrete anchors for close to 5 years now. I just set down a horse stall rubber pad, then put the hammer on top of that, and drilled thru the whole mess into my 6" thick slab. I cant remember for sure, but my guess is that I used about 8 bolts, 3/4" diameter by 5" or so long, probably something like a powers lok bolt, which would be good for around 4000lbs in tension each. In 5 years of pretty heavy use, the bolts havent even thought about pulling out. This is an 88lb hammer, but since it is a two piece, the weight is a bit more than Bob's- around 3500, as I recall. Bigger hammers like dedicated footings, but under 100lbs seems to work fine just sitting on a slab. The bolts are mostly just to keep the hammer from walking around. I do know a couple people who are running 165lb self contained that are similarly just bolted to slabs. |
| - Ries - Thursday, 08/24/06 17:57:25 EDT |
|
If I am setting anchor bolts for a machine, I always weld them to rebar that is very rigid to keep them in place. While welding the bolts in, I weld some pipe for an isolation tube to allow flexing the tiedown. I usuall have about 12" to 16" of depth in the tube to allow a gentle bend in the bolt. On the upsetters I helped set last year, we had 4 bolts for the entire machine. 4" 4140 bolts, set into 8" sch 40 isolation pipes with 36" of depth. Of course the pad was about 100 yards of high strenght concrete with about 5 tons of rebar. You tend to measure those bolt locations closely, as setting a almost 400,000 pound frame down on bolts that stick up 4 feet from the pad is kinda expensive and you don't want to do it twice. |
| ptree - Thursday, 08/24/06 19:22:36 EDT |
|
Hector's Dagger -- Nickel is magnetic. I don't know for sure about nickel plating -- it might be too thin to make a difference, or even a non-magnetic alloy. But conceivably a magnet could stick to a piece of nickel-plated aluminum. |
| Mike B - Thursday, 08/24/06 19:43:35 EDT |
|
anybody using a hoffi hammer? i would like to try one,are they worth the money? where can i buy one?thanks |
| clark-kentski - Thursday, 08/24/06 19:45:38 EDT |
|
Clark, Lots of folks are using them. I don't. . too many years using standard round faced hammers. Big BLU Manufacturing is the official US manufacturer and sells them direct. Just click on the drop down menu and scroll down. |
| - guru - Thursday, 08/24/06 20:34:24 EDT |
|
Clark, I use a couple of them, and really like them. I've slightly modified both of mine, to add a bit more rocker to the "flat" face and to the peen, as well as softening the peen a bit. They're worth the money. |
| vicopper - Thursday, 08/24/06 20:53:40 EDT |
|
Coolhand: I don't think you would be very satisfied using a combination vertical/hortizon bandsaw for vertical cutting. Set straight or at an angle the base keeps you from being able to really get into a good position in front of the table. |
| - Ken Scharabok - Thursday, 08/24/06 21:19:47 EDT |
|
4x6 saw in verticle: I put My left foot on the saw, as it tends to want to tip over backwards when I push stock against the blade, and it gets Me closer to directly in front of the blade. This is not an ideal situation, but I have been doing it since '83. The biggest problems are with cutting contours as was mentioned, and trying to cut larger stock, as there is not much work clearance. I NEVER use the larger table that came with it. |
| Dave Boyer - Thursday, 08/24/06 22:01:47 EDT |
|
4 x 6 Vertical: The Original Ridgid, had a heavy enough cast iron base that you could push fairly hard on the blade but the limit was about 1/8 material. You stand stradling the saw and the position is just right. However, by opening the vise full or removing the angle iron jaw (one bolt) you could sit on the bed and use the saw comfortably. We have done that on small jobs with numerous parts. When I bought my saw I thought I was going to be cutting the curved back of shovel blanks. That was what it had been used for by the previous owner. But aparently he had workers that did not mind the length of time it took or how badly it buggered up the saw and broke blades. . . I should have had a clue by the original table that had a very jagged 3/4" diameter hole cut and worn from twisting and dragging the blade. OBTW, The original table was a little 3 x 5 plate. With a very minor modicication the saw accepted a 6 x 6 which was much more convienient. I made a wooden table a foot square for cutting wood that attached to the larger metal table. The problem with bandsawing thick steel by hand is the necessary feed pressure and slow cut. I've notched and cut lots of small pieces up to 3/8" easily. But long cuts in 1/4" up are very slow and require contant pressure. The tendancy then due to tedium and stress is to lose focus or push crooked and twist the blade or miss your line. Even heavy metal cutting band saws have power feed and feed assist for curves. Just because the saw can do the job doesn't mean the operator has the fortitude and persistance. These are very handy tools but they are designed to cut straight lines and do light duty cut off work. And as I mentioned before, most sold today are so poorly made that they do not work out of the box and those that do will cost you many years off your life due to frustration. The Original cost about $700 in the early 1970's. Some of the cheap copies are selling for half that TODAY. . . You get what you pay for. Pay an impossible price and you get an impossible machine. |
| - guru - Friday, 08/25/06 00:32:19 EDT |
|
|
|
|