| WELCOME to the anvilfire Guru's Den - V. 3.0 |
|
THIS is a forum for questions and answers about blacksmithing and general metalworking. Ask the Guru any reasonable question and he or one of his helpers will answer your question, find someone that can, OR research the question for you. This is an archive of posts from October 8 - 15, 2005 on the Guru's Den |
|
|
|
Dear CSI Members: It is CSI election time! This message is being sent to all CSI members past and present. If your membership has expired you cannot run or vote. Please consider re-upping. We still need your support. Expired members will be removed from our database prior to the election. Until that time your login will work so that you may access the members business forum. This gives you access to the document viewer and all pertinent CSI documents. Over the last several years CSI has gone through many trials and tribulations. Through it all there has been the focus on growing the organization so that there will be a permanent group in place to perpetuate the teaching, learning, camaraderie, and skills that are displayed daily on the anvilfire website. As you may be aware, a group of Anvilfire regulars met on-line on August 10th, 2004 to form a volunteer board of directors to guide CSI through the incorporation process towards becoming a 501c3 non profit organization. That process is well underway now, and approval is expected in the near future. The interim volunteer board of directors of Cybersmiths International Incorporated has reached the point where it is time to call an election to elect the permanent board per the adopted by-laws. At the August 30th, 2005 meeting the BoD appointed an election committee to oversee the election process. The purpose of this email is to announce that nominations are open for members of CSI to run for these positions, and to provide you with the election rules. The election guidelines are on the next 2 pages of this document. The newly elected board will take over on January 1st of 2006. All seven (7) BOD positions will be filled in this election, with the President, Vice-President and Treasurer having two-year terms and the remaining four positions, one-year terms. This is your organization. Please take the time to vote in December, and please feel free to post up any questions you may have, or email any of the election committee members. For election guidelines see the business forum document viewer. Sincerely, CSI Election Committee FredlyFX, Election Committee Chair & Vice-Chair of CSI Guru, Election Committee member & Ex-Officio CSI Board Member daveb, Election Committee Member & CSI Treasurer Note: If you cannot remember if your membership has lapsed login to the members forum at http://www.anvilfire.com/members/forum/index.php and look below the control buttons at the bottom. Your membership expirey date is shown there. Business details are listed in the business forum NOTES and links. |
| Gronk - Tuesday, 10/11/05 21:48:37 EDT |
|
Does anyone have a good high heat finish for a hand forged fireplace screen? I don't want to use high heat paint and I think that bees wax will melt if the fire gets hot enough. |
| Jeff - Saturday, 10/08/05 18:47:43 EDT |
|
I was wondering, On th ematter of knives and blades, how would one temper-line a long blade (Ie, combat scythe, naginata, or a longsword) without making a long and thin forge especially for that length? there has to be a way, right? right now I have a small forge, (only about 9" by 9" firebox) bu tI cna fit long peices due to the vertical slots cut into the sides. I also have an oxyacetelyne torch, but I can never get an even heat for the whole lenght of the blade. (And I have tried hard). Thanks for the help. |
| Tyler The Blade - Saturday, 10/08/05 18:50:40 EDT |
|
Tyler the blade, I would suggest you go to one of the blade forums,eg, Dfoggknives.com and ask that question. We are blacksmiths and are smart enough not to accept work as you describe (grin). |
| quenchcrack - Saturday, 10/08/05 18:54:05 EDT |
|
What is a "hollow core" anvil? there are a bunch of them on ebay just now. Sounds peculiar. |
| - JLW - Saturday, 10/08/05 19:01:10 EDT |
|
Buffalo Fan. Ferrara and Scharabok, I have a twin to the fan on eBay. They are about one half the size of a regular fan. The gear case is 4 3/4" x 7 1/2". It has a 7" D fan case with a 5" D fan. The blast pipe is about a 1 1/2" I.D. Mine was originally hooked up to a cast iron riveter's forge with an 18" x 20" hearth and curved pipe legs. It puts out air, but I don't think you'd get much done, if you were doing work larger than builders' rivets. |
| Frank Turley - Saturday, 10/08/05 19:21:16 EDT |
|
JLW: They are pretty well described in the item description. Practice of putting a hollow in an anvil isn't new. American Star did it cicra 1850 via a large and deep hole into the center of the anvil (see Anvils in America, page 197). They called it a 'tempering cavity'. Intent was to allow a faster cooling of the anvil body. Note the manufacturer, MFC, is now a forum advertiser. |
| Ken Scharabok - Saturday, 10/08/05 19:49:56 EDT |
|
Little blower-- I have one of these, great for getting the embers going in the wood stove, only the management here thinks it stirs up too much soot. |
| Miles Undercut - Saturday, 10/08/05 20:45:37 EDT |
|
Tyler I am guessing but Im imagine most serious bladesmiths use a salt bath. But as others said go to the sword forum or Don Foggs web site |
| Ralph - Saturday, 10/08/05 22:17:52 EDT |
|
I saw an article on Anvilfire a few weeks ago and can't find it now. It was about a guy who made a furnace which could melt steel using propane as fuel. I would like to convery this idea to charcoal and upsize it to melt around 500 lbs of scrap steel at a time. I would then use this steel to pour anvils to my design. What do you think about this and do you have any suggestions? |
| Jack Roth - Saturday, 10/08/05 22:26:26 EDT |
|
CSI Mail: Just got a e-mail from Gronk concerning upcoming elections for CSI. Had I not recognized the name GRONK, I would normally have deleted it as it did not have a subject line. Would be good to amend that in future mailings, something along the lines of Anvilfire News, or some such. So any others here that get a e-mail from Gronk, it is official and go ahead and open it up. Just a heads up from a fellow CSI member. |
| Bob H - Saturday, 10/08/05 22:26:46 EDT |
|
Traditional method of heating a long blade in a solid fuel forge with a smaller hot spot is to gently move the blade back and forth from one end to the other through the hot spot until the entire thing is up to temp. Melting steel: unless you are very careful what you get from melting and pouring is not what you put in the pot. If you have the metal in contact with the fuel like a cupola you will get cast iron. Also look into segregration during cooling, piping, etc. Actually making a home built furnace might be more expensive than having a professional set up do the pour---and a LOT more dangerous. Just pouring a couple ounces of brass can be tricky much less 500 pounds of steel! Thomas |
| Thomas P - Saturday, 10/08/05 23:26:05 EDT |
|
Does anyone know if there is a reasonably priced source to purchase buttress or acme screw assemblies for blacksmith leg vises? Thanks |
| burntforge - Sunday, 10/09/05 00:08:43 EDT |
|
Jack Roth: I guess my question would be why reinvent the wheel? Melting the scrap steel would only be one step. You are also looking at having a mold made to your design, then tempering and finishing it. Even then you are likely to end up with a cast iron anvil of dubious quality. If you have a unique design, and only it will suit your purpose, consider contacting some of those who cast up farrier anvils to see if they can do the work for you. As expensive as it would be, and I do suspect you are looking at perhaps $1K per anvil for a small run, it would likely be far cheaper, and much safer, than doing it yourself. |
| Ken Scharabok - Sunday, 10/09/05 02:56:14 EDT |
|
Steel Targets: I suggest top mounted hanging steel targets because because the bullets/bullet spray tends to be directed into the ground, A range I know of found that the basic tip-over targets were spraying bullets fragments over a large area. Also the hanging type doen't have to be reset. |
| - Hudson - Sunday, 10/09/05 05:43:54 EDT |
|
NC Tool I accessed the NC tool site the other day and a notice popped up stating that the URL is available and no other information was there. Has the NC tool company gone the way of "Artist Blacksmith Quarterly"? |
| David Shadwick - Sunday, 10/09/05 07:49:02 EDT |
|
Frank Turley, Thatks fr the heads up. Hudson, If the targert is intended for silhouette competitions or practice it must be free standing. Scoring deoends on whether the target falls or not. All those guys can hit the target but it must fall and that doesn't always happen. |
| Mike Ferrara - Sunday, 10/09/05 08:20:41 EDT |
|
Jack Roth: Sreel casting is difficult as noted above. It is far more difficult than cast iron. I've made small steel castings, but I had access to an industrial induction furnace. Steel casting in a fuel fired crucible furnace may be possible but isn't practical, especially for large castings. |
| - John Odom - Sunday, 10/09/05 08:40:02 EDT |
|
David Shadwick the nc tool site is still up and running. This is the proper url: www.nctoolco.com |
| burntforge - Sunday, 10/09/05 11:32:50 EDT |
|
Jack Roth: If you were to cast with scrap steel, how would you control the alloy content? A friend of mine, Ken Mankel, has his line of anvils cast at a regular foundry. Ken then does the machining on the anvils to clean up the casting. He grinds the base level and then the top. He drills the pritchel hole. He grinds the horn smooth. He then heat treats. Are you prepared for all that that entails? |
| Bob H - Sunday, 10/09/05 11:48:34 EDT |
|
CSI Mail: Yes Bob I neglected to put a subject in one or two (Dozens) email letters. I apologize for any inconvenience. If anyone did delete an email from Gronk sent last night, give me a shout and I will re-send it to you. All members of CSI, past and present,(read current or past due), should have received the email. If you feel that you should have, but did not, I will send it to you. The database is large but it is certainly possible someone was missed. |
| Gronk - Sunday, 10/09/05 11:56:31 EDT |
|
For those who don't know Jack, Jack Roth is the proprieter of Oklahoma Farriers school and also has a forge shop/manufacturing operation in the Phillipines. Jack, Jack, Jack, what are you up to now? Sounds like you want to get your crew down there casting anvils. I have to agree with the others here that it just is not practical, but I'd love to see you prove us wrong. |
| - grant - Sunday, 10/09/05 13:06:52 EDT |
|
Melting steel: for those of you who are simlarly inclined, please be aware that steel must be melted under a carefully controlled slag to prevent the liquid steel from absorbing a lot of oxygen. Your composition will very from scrap lot to scrap lot so you need a way to run chemistries during the melting opertion. Since even scrap steel will contain heavy metals, it is carefully monitored by the EPA. You better be able to account for every pound of scrap, casting and slag. There are small steel foundries all of this country who are equipped to do a lot of small run projects. Since the interest is in the anvil, not the melting of steel, I would contract the melting and casting to professionals who know how to do it right. |
| quenchcrack - Sunday, 10/09/05 15:23:59 EDT |
|
I've thought about this whole backyard steelcasting thing a lot, and I think that the trick is to do it BOF style. Build a cupola that can handle the desired amount of iron in a reasonable amount of time, and a ladle sized appropriately -- preheat ladle, tap iron into it, and blow down the ladle with oxygen. Add alloying ingredients, stir, and pour. Someday I may actually do this... heh. Time will tell. Partly cloudy and warm in Kaneohe, Hawaii. |
| T. Gold - Sunday, 10/09/05 15:45:12 EDT |
|
HEy I wouldn't put it past us blacksmiths to do casting every once in awhile, why gosh darn the blacksmith in trenton does it.anyway steve chastain has a book(you can find it on amazon) that tells all about melting steel(yes steel) which I found to be very interesting. So go ahead and do it if you feel you can. I would love to try to cast my own anvil just for the bragging rights |
| - John S - Sunday, 10/09/05 15:53:07 EDT |
|
ohh he even has his own website http://stephenchastain.com/ |
| - John S - Sunday, 10/09/05 15:54:26 EDT |
|
Listening to the chatter re: casting steel anvils in the backyard: anyone considering same should go watch a Bessemer converter for a day or so. From up close. Undercut's Law: everything takes three times longer, is three times more complex and will cost three times more than ever you expected. Undercut's Law of Thermodynamics: Prigogen was right: entropy can be reversed, but it will take a while, and it costs. Undercut's Corollary to Von Heisenberg's Uncertainty Principle: observing a process affects the observer, too. Undercut's Maxim: never let your brother-in-law do concrete work for you. |
| Miles Undercut - Sunday, 10/09/05 18:19:26 EDT |
|
what "Bainite" and "Martensite" means? |
| Víctor Zamora - Sunday, 10/09/05 22:30:52 EDT |
|
Punching holes in steel with firearms. Some years ago I made interesting pedestals for driveway accent lamps. The material was .25 wall 10x10 steel sq.tubing. The holes design were carefully laid out, In order for me, Not the best marksman mind you,,, to accurately hit where the layout points were,,The holepuncher was a 30.06 rifle using surplus FMJ cartriges fired at about 20' away. Safely thru a narrow gap & behind a wall of railway sleepers. Within the tubing filled with damp sand to prevent the projectile damaging the opposite wall. (all 4 sides were punched with designs) Anyway I cant safely reccomend this practice. The results are very interesting, finished fire blackened and waxed, The lamps always recieve comments. |
| - Sven - Sunday, 10/09/05 23:44:07 EDT |
|
Victor, Bainite; Martensite; Pearlite. These words are microstructures (microestructuras) in the steel, especially evident when viewed through an electron microscope. The structures occur at different heating and cooling temperatures and rates. Martensite occurs quickly when medium carbon steel or high carbon steel is quenched in a liquid, normally in the cherry red ranges. It is confusing, because in English we say "quenching to harden" for the Spanish "templar/templado". Also, in English, we say "temper" for the Spanish "revenir/revenido". There are many blacksmiths and toolsmiths who have never seen a microstructure, but who are successful. After tempering (revenir), you obtain a microstructure called in English, "tempered martensite". |
| Frank Turley - Monday, 10/10/05 00:07:53 EDT |
|
NC Tool Thanks for the correct site for NC Tool. I had followed a link from another site and came to the message. Apparently the link is incorrect. |
| David Shadwick - Monday, 10/10/05 06:30:32 EDT |
|
I go away for a weekend and you folks get BUSY! Drilling Support and Shop Smith: Tables on even the heaviest drill presses flex under drilling load. MOST small drill presses are wood working machines that expect NO drilling load. This is why the Shop Smith makes a lousy metal working drill press expect for very small work. The combination of the small support arms and the aluminium table are much too light. Drilling anything over a 3/8" (10mm) hole in steel is risky and inefficeint. From there up the drilling pressure cannot be sufficient to prevent burning up drill bits. I have been using a Shop Smith my father purchased new around 1952 since I was 10 years old and KNOW this machine. I've used it for every possible purpose but like it as a wood lathe the best. As far as raising the head I could do this as a skinny 70 pound kid. Lower the machine flat, slide the head and then rais the machine. If the machine is propery mounted this only takes seconds. I could lower the head by gently loosening the lock and using the fact that the head would not slide if unequaly supported. The tubular ways MUST be kept scrupulously clean, polished and oiled. Not only is the table flex a problem in drill presses the flexibility of the column effects drilling. Even on a bif old geared head drill press with a 5" diameter cast iron column there is flex sufficient that you can see it in the belt tension. Drilling needs rigidity and is why so many machinists prefer using a Bridgeport type mill with a quill head for drilling. I have seen many old mills with worn out quills and spindles and absolutely no table or knee wear due to using them as drill presses. . . Big production drill presses often have tables as heavy as a milling machine OR a ridgid non-movable base that has no flex. The best way to reduce drilling press is to drill a pilot hole the size of the dead center of larger drills. I use 3/16" bits universaly for this for bits from 5/8" up to 1". Removing the dead center area (the part of the drill that is a chisle point) greatly reduces drilling pressure and heat. All small bits should be used with factory ground split points because this does the same in reducing pressure and heat. |
| - guru - Monday, 10/10/05 09:25:29 EDT |
|
Hollow Core Anvils: Our new advertiser MFC manufactures theses. They are a farrier's anvil with 1" miniumum wall thickness. The purpose is to make a light anvil, which is almost an oxymon until you need to lift your anvil in and out of a truck a half dozen times a day or more as a farrier does. These anvils are all steel unlike the model with an expensive bolted on aluminium base. They provide the proper face width and horn size for shoeing that would normaly require a 100 pound plus anvil. That 15 to 25 pounds reduced weight can be the difference between a hernia or a bad back from lifting an anvil at the end of a long hard day. . . Any smith that does demos will appreciate that. |
| - guru - Monday, 10/10/05 09:52:58 EDT |
|
Bullet Stops: Years ago some friends of mine built one of these for indoor use. The reaction plate was sloped at about a 35 to 40 degree angle and at the top there was a cylindrical section (made from an old tank of some sort) that caught the bouncing round. The tank had a relatively wide slot that the plate fit in and bullets passed through. The angle of the plate greatly reduced the force and prevented dents or penetration. In use the bullet hit the plate, skidded (as evidenced by the lead smeared on the plate), then bounced up into the tank where it was caught. I do not know the exact details of this design or if it performed safely. All I know is that it was used for a time and I saw the lead smeared plate when it was dissasembled. If this is a viable system I am sure there are plans or reports on gun sites or publications. THIS IS NOT A RECOMMENDATION. |
| - guru - Monday, 10/10/05 10:03:56 EDT |
|
thank you guru. |
| Víctor Zamora - Monday, 10/10/05 10:46:19 EDT |
|
DIY ANVIL Casting: As mentioned by the folks above casting steel is no so easy as it would seem. In very small quantities it is done in little crucibles but when you get to anvil size quantities it is a serious operation. Besides flux coverings there is the matter of the chemical composition of the refractory lining, mixing and adjusting the alloy to suitable for casting. For good casting there are casting alloys that are not exactly the same as wrought alloys. Although they both start the same the wrought alloy is conditioned by rolling or forging and the cast alloy must be good steel as-cast. Typicaly if you try to cross the two you do not get good results. When you melt scrap (even clean scrap) you are often trying to convert a wrough alloy to a cast alloy. As T-Gold noted a small coupla (only good for cast iron or bronze) is the best small or DIY foundry setup. This is suitable for casting swage blocks and other items but not anvils. DIY Anvil making is best done by fabrication or sculpting from large pieces of plate. However, the steel market is no longer what it was a few years ago. I used to be able to make a phone call to Ryerson Steel and within a couple days I would have a slab of steel of any size in any one of a variety of alloys (including 4150) on my doorstep for $1/pound cut. Today the heavy plate market is greatly reduced and you are lucky to get A36 or mystery steel much less a specific alloy at quadruple the price of 10 years ago. American indusrty IS in decline. In any case, IF you can find a good source of heavy plate I would manufacture and anvil much like the way the two part Hay-Buddens were made. I would use a 40 to 50 point carbon or alloy steel for the top and anything I could find for the base. The top COULD be heavy square bar rather than torched from plate. A piece 4 x 4" (100 x 100mm) would make a nice width face and the horn does not need to be any deeper than square. The heel and horn slopes would be torch cut then the horn profiled from above. All four of these cuts can be made by machine in a gentle are OR straight. The horn then needs to be made octagon in section and the rest of the shaping is heavy grinding. In a production situation using a large boring mill (vertical turret lathe) the horn could be machined conical. After the top is finished (hardy and pritchell drilled and shaped the top could be heat treated prior to attaching to the base. This would save on considerable expense as heat treating is priced by the pound. The base shape can vary but a classic German style base can easily be flame cut from a rectangular block and I am amazed that Peddinghaus is still forging them. The base and top are then welded together at the waist. Viola' you have a modern shaped anvil. Using the above methods and a modest power hammer you can forge the top. . . Open die forging IS still alive. Another anvil style that can be flame cut from one piece of plate is the old stake anvil. Heavy ones over 100 pounds with 4" faces were common in France and Spain at one time. It is more matrial efficient to weld these together at the top of the shank but it DOES require a large weld. You have to balance the waste material with the cost of materials and labor. Then there are the cylindrical and plain rectangular block anvils used by bladesmiths. . . |
| - guru - Monday, 10/10/05 11:39:18 EDT |
|
Have done some forging in the past with charcoal making some broadheads and knife blades. I just bought some coke. Tried it last night and had a hard time getting it to catch fire. Seemed to be not as hot as the charcoal. What am I doing wrong? How do you properly use coke? |
| David - Monday, 10/10/05 13:05:41 EDT |
|
There is a handsome small but eminently useful stump anvil, ancient Roman style, lurking within every chunk of good-sized RR track 15 inches or so long. (See Tools and Weapons by Sir William Flinders Petri for pix.) Torch off along the bulb at the web. Now draw out the bulb from about five inches from one end to a long, gradual point, with flat edges. At the swelling where you have begun to flatten it punch a slot and insert two pieces of flat stock maybe 1/8 by perhaps 1 inch. (If there is no swelling, make one for authenticity's sake, so future archaeologists can go nuts when they find it in the ruins of your shop.) Bend into four opposing scrolls, two on each side. These will serve to keep the point from driving deeper into the stump with each blow. Drive anvil down into stump to scrolls and Bob's your uncle. (Purists and other perfectionists can harden and temper before driving.) |
| Miles Undercut - Monday, 10/10/05 15:32:34 EDT |
|
Coke: David, Coke is coal that has had all the volitiles cooked out of it. Natural forge coke is light and fluffy and burns fairly well. Foundry coke is made in a big closed retort and the coke compressed while it is soft making it more dense. The result is fuel that takes a lot of heat and air to burn. Coke fires need to be deeper than others in order that the lower portions of the fire heat the fuel above and lets it burn hotter. More air is needed than in coal and charcoal fires. Foundry coke works in larger commercial firepots with contiunous air but not well in shallow forges. It is almost impossible to use with a hand crank blower or bellows. |
| - guru - Monday, 10/10/05 15:47:53 EDT |
|
what quality of steel is a railroad spike manufactured from? |
| jcwhite - Monday, 10/10/05 17:55:12 EDT |
|
HOO HAA! Yes, do it in YOUR back yard! Your home-made steel will fizz like a soda when you finally realize you need to kill the oxygen evolution reaction with something....what was that stuff....Ferro-silicon........but how much? This is really just dirt so if you add too much your steel will be laden with inclusions and just fall apart in the forge. But yes, do it in the back yard! The Chinese tried this in the '70's and it is estimated they made 790,000 tons of something nobody could do anything with...hehehehehe I'll watch from over there......... |
| quenchcrack - Monday, 10/10/05 19:52:56 EDT |
|
jcwhite, see or FAQ's pages. |
| - guru - Monday, 10/10/05 19:56:50 EDT |
|
Mr. Undercut: prithee, where didst thou observe a working Bessemer Converter? Today, the Basic Oxygen Furnace (BOF) has taken its place almost everywhere in the modern world. However, I recognize the value of your other observations: Where I work, maximum entropy is our equilibrium...... |
| quenchcrack - Monday, 10/10/05 19:58:29 EDT |
|
re: Steelmaking - I think QC's got a year or two on me, but I've never seen a working Bessemer converter (They did have the shell of one as an architectural attraction at the freight house shops in Pittsburgh - aka Station Square, the P&LE stattion that was converted to restaurants and high priced shops in the 80's.) Heck, I've never even seen a woring Open Hearth - they'd been retired at every steel mill I've ever worked in, though I understand Bethlehem steel ran them into the 1980's. A major folly in finances/steel making. Most shops now either run a BOF (if they're integrated shops with blast furnaces) and have for a number of years, or run EAF'sif they're scrap based. Some secondary processes are out there - induction for small lots of specialty materials, followup processing with AOD, VOD, VAR or ESR - sometimes combos of those methods. Even the smallest mini-mill I've ever been in has had a spectrometer & Leco carbon/oxygen analyzers to analyze the heat of steel as it's being made to make sure you hit the required chemistry ranges. |
| - Gavainh - Monday, 10/10/05 21:09:34 EDT |
|
I am planing on buying an Erie steam hammer. Correct me if I am wrong but I think it is a 100#. I figured the weight of the ram at 67# and the top die at 18#. Thats a total of 75#. Add the rod and piston and get about 100#. The die is 3" X 6". It has a 1" pipe inlet and its about 8' tall. How much would this thing weigh? Is there any books on this hammer available? What would it be worth? Its been sitting in an open building for 10 years and is rusted solid. It needs a new rod and the ways ground at the least and may need extensive internal work. Thanks for your thoughts. Danny |
| - Danny D - Monday, 10/10/05 23:02:37 EDT |
|
quenchcrack-- Bethlehem, Pa. Johnstown, Pa. Sparrows Point, Md. Pittsburgh, Pa. Nothing prettier than when that baby lights up the night sky with a pour. |
| Miles Undercut - Tuesday, 10/11/05 00:41:08 EDT |
|
To those who make blades, If one is to use an oxyacetlyne torch upon a rig that is continually supplying water in a steady stream. one can heat a small section of the blade and immediately quench it as the said peice is run through the water. Upon that I ammend that if one was to make a rig for this, one could very easily temperline blades of nearly any size and/or form. Just my two cents, If someone were to cast anvils in carbon steel, wouldnt said anvils possibly develop the same problems that cast-iron ASOs have? I'm just sayin, if anyone were to be interested in doing such a thing, The casting mold should be formed out of crucible-grade clay or better, not sand. Also, remeber that elcetrode furnaces are very popular now. If one were to manage to contract a furnace to perform this, one could possibly create massive amounts of anvils at relaitvely low prices. Also, if anyone were to do this, please let me know, because I would definitly be interested in purchasing one, depending on the final cost (after the token machining to fit specifications. Also, if anyone were to give me a fully formatted drawing of an anvil that they wanted (dimensions incl) I might be able to make a 3D CAD .dwg of the anvil, for use in making the molds. As usual, it will be the start-up that costs the most, so anyone who is interested in doing this should make sure that they will go ALL the way. Just a suggestion. Peace to all, and remeber, a sharp blade is dull compared to a sharp mind. (My personal words of advise) |
| Tyler The Blade - Tuesday, 10/11/05 01:39:14 EDT |
|
Just an observation I still think a manufacturer could pretty well copy Fisher's steel top plate technique using modern methods. For example, the top plates could be quickly cut out of say 4140 plate using today's precision plate cutting techniques, including hardy and pritchel holes. The problem with these up until Fisher standardized the technique was the consistent bonding of the cast metal to the top plate. If lugs were welded onto the bottom of the plate I would think the metal would flow around them, locking the plate to the casting. I'm not sure a pour would even require cores other than in the plate itself. Say you had a 1 |
| - Ken Scharabok (Poor Boy) - Tuesday, 10/11/05 05:10:55 EDT |
|
Ken the problem I see with the above means is that sire the lugs would help hold the plate in position, but if the caster could not duplicate the Fischer process and truely bond the entire plate to the body you would not have a good anvil as the anvil would be 'dead' No rebound to say nor would it hold up under reasonable to heavy use. But this is just my un-educated ( as in never done castings) thoughts |
| Ralph - Tuesday, 10/11/05 06:21:20 EDT |
|
Tyler, re the oxy water system. Not sure how well this would work. At best you get a blade that is unevenly heat treated. Most likely you get a warped or cracked blade. Seems best to heat the whole blade up to a uniform heat and quench it at one time. Better consistancy and all that. If you are looking to make a long blade seems that it would be easy enough to make a long heat treat forge with a few gas burners. Basically a longer tube of say 3 inch to 4 inch inside diameter. |
| Ralph - Tuesday, 10/11/05 06:25:05 EDT |
|
Bethlehem Steel I know the company is out of business, but is there any steel-making in that town? My son goes to Lehigh and I haven't seen anything related to steel actively going on down there. Would love to visit a place on my next visit, if there is one. |
| - Marc - Tuesday, 10/11/05 07:54:54 EDT |
|
I saw Bessemer converters working in the Birmingham suburb of Bessemer Alabama in the '40s, during the war. They were all gone in just a few years. They were SPECTACULAR! In the '50s at ARL I designrd and built prototypes of spectrometers for the steel industry. My design was the workhorse of the imndustry for many years. |
| - John Odom - Tuesday, 10/11/05 08:19:02 EDT |
|
Continous Heat Treating: Tyler, This is how surface flame hardening and production hardening and tempering of stuff like music wire is done. ASO's Yes, that was the point of the quality of steel comments. The big foundries casting steel anvils are inded modern foundries. Sand must be used for items this size but for high quality castings the sand can be coated with a wash that produces a fine finish and reduces sand inclusions. However, few do so. The castings made in the Czech Republic and India are reasonablely priced but so-so quality. Those cast in the US and Europe of the best possible steel in much higher tech foundries are very good but pricey. High tech foundries use up a LOT of high tech consumables. As to pattern making. An anvil pattern is simple enough that a good pattern maker or sculptor can create the body of the pattern in less time than you (or anyone else) can make a 3D CAD drawing with all those compound and blended curves. Starting with the split and doweled wood block at the ready I can saw, sculpt and finish an accurate anvil pattern in an easy afternoon. Where things get tricky is boarding or boxing (depending on the foundry requirements). This is still done by hand in most cases. The pattern is easy, dealing with foundries is the hard part. The only time a 3D-CAD drawing is advantagous is where a very complicated mold or pattern is to be whittled out of steel by a CNC mill or rapid prototyped. This is especally true when other critical parts must fit. 3D-CAD and solid modeling is also good for producing images of products that do not exist. Currently products are commonly marketed well before the first part has come of the production line. You cannot believe ANYTHING you see in the computer age. . . |
| - guru - Tuesday, 10/11/05 08:51:01 EDT |
|
John, Lucky you, Best I seen is the DuraMetal foundry Tualatin Oregon. They make brakedrums for trucks, busses, etc. and wear plates for paper pulp process equipment. Using induction furnaces loaded with scrap (primarily railway wheels) Its still impressive to see the loading the furnace and pouring out, and yes they have a lab on site and inspect each batch. Sadly their foundry area is a awful 'sweatshop' of working condition. Unbelievable dirt and crud buildup everywhere, Hoses, powercords draped all over. Furnace control cabinets not fully closed exposing busbars, You name it,,, its awful. At least they had decent lighting and ventlation. Their machineshops were alot better, And the finished products are nice. Humans are funny, If it looks good, It must be good. Its all about the paintjob. |
| - Sven - Tuesday, 10/11/05 09:20:54 EDT |
|
I had a project once in part of Tennessee that meant every Monday morning I would drive by the foundry in Chattanooga as they were making a pour, usually around 5:30 in the morning. Can't tell you how many times I nearly drove off I-24 into the river while trying to watch those gorgeous streams of molten iron... |
| Alan-L - Tuesday, 10/11/05 10:54:38 EDT |
|
Howdy: Had Drill this weekend and I was down at the Motor Pool and talked with a couple of mechanics down there playing with the heavy equipment. They looked at me like I was crazy until the Motor Pool NCOIC came over wondering what I was doing there (I think he thought he was in some sort of trouble..my presence makes people feel a bit uneasy at times..)and well, I am able to get all the hydraulic fluid I need at cost. Sometimes it's nice having those little silver eagles. Plus I have been in contact with a very helpful local smith that is hooking me up with someone who knows this stuff. I will say that I am delihted to find someone else in the area who's intterested in doing hot work. I thought I was a lone voice in the wilderness.. More as things progress. JPH (ph, since one of ya asked..the P is for Paul...the English translation of my legal name...which is actually Dimitrios Apostolos Chrisoulas) |
| GHPoMCI - Tuesday, 10/11/05 11:09:39 EDT |
|
Another method of casting that is probably too expensive, but would yeild a near net shape is precision investment casting. A model is made, a rubber or permanent mold is made to shoot the wax, and then the investment is built up by dipping and also fluidized bed coating with the investment. The castings can have detail that boggles the mind, and Howmet used to do up to 10,000# castings in various materials. Just a thought. |
| ptree - Tuesday, 10/11/05 11:17:52 EDT |
|
May I commend to your attention lost foam casting of steel. Easy to carve the positive with a hot wire system. Thomas |
| Thomas P - Tuesday, 10/11/05 11:20:19 EDT |
|
Thomas: Wasnt that originally wax? Same concept right, so basically, make the form out of foam (or wax or whatever) and then pack the sand around it? If so, that might yeild above satifactory results, especially compared to ASOs. Hopefully we can sort this out soon, before I go and do it myself! Impulse is man's greatest curse, it makes them do everything else that we call bad. (I sound like a fortune cookie, lol) |
| Tyler The Blade - Tuesday, 10/11/05 11:43:03 EDT |
|
Anvil Casting: Making your own anvil, by any method, gives you a certain personal satisfaction, but there is no way to make it cost effective. The cost of materials is not that significant any more. At one time, it was and it made sense to put steel plates on wrought iron or cast iron bodies. One of the advantages of the Fisher process was that you got the hard steel surface by casting, which is cheaper than forging (the other method of making anvils at the time). Today, there would be no advantage to a bi-metal anvil. The cost savings of using cast iron would be offset by the prep work needed to use a steel plate for the face. Fisher had a special mold design that caused the iron to flow accross a pre-heated steel plate. This flow cleaned the plate and the temps allowed boding to be achieved. Trying to re-create this process on a small scale is not cost effective. Having an anvil forged and machined by my company, while possible, will not be cost effective. The cheapest way to get a reasonable anvil is to by a Chezch anvil. You may be able to fabricate one cheaper, if you don't have to pay new prices for the steel and don't consider your time of any value. All that said, I still think it would be cool to make you own anvil, just don't expect to save any money doing it. (It may be possible for that luckey someone who knows the right people to get a 1-off goverment job sort of thing done for cheap, but you would be hard-pressed to do production cheaper than the foriegn suppliers). Patrick |
| Patrick Nowak - Tuesday, 10/11/05 12:17:32 EDT |
|
Lost Foam vs. Lost Wax: In lost wax you must burn out the wax and the mold material must be able to withstand the heat and handling. In lost foam you pack sand around the part and pour the metal. The foam dissapears in a puff of smoke and a little flame (surprisingly litle). In 1983 we had patterns made for a half dozen machine tool castings weighing 5,000 to 15,000 pounds. The patterns were huge but the core box for one was the size of two pickup trucks and very expensive! I asked the foundry about lost foam and they thought I was crazy. . In 1991 we went to the same foundry and they refused to make patterns. They said they could hand make the lost foam patterns dozens of times for less than permanent wood patterns AND the sand handling cost was much less. These were huge complicated patterns with bosses, trunnions, port holes ledges and ribs. All repeated hand carved from foam. There was also no cores and core boxes to deal with OR storage of the patterns. In high production of automobile parts they have permanent metal molds to make the foam parts. Multiple pieces are glued together making parts that would be nearly impossible to core using standard methods. See process described by Ptree. Although a foam anvil pattern would be easy to make there is no go economic reason to do so. The cost of makeing the foam investment for one casting would cost almost the same as a permanent wooden pattern and a corebox for the hardy hole. After the second or third casting you would be losing money. Foundries: Again, the biggest problem is dealing with a foundry that will do low production of heavy castings. Note that anvils while not heavy in total compared to other castings they have MASSIVE thickness compared to almost all other castings. The thickness imposes differences that even though a foundry can handle the size of the pour they cannot handle the compact mass. Sand must be coarser, more refractory, risering is different. Also note that every foundry has different pattern requirements and may not want to work with an amature pattern maker. Combine this with the fact that anything less than a thousand of something being a nuscance order and you find why everyone just doesn't run down to the corner foundry (the way they used to) to have something cast. |
| - guru - Tuesday, 10/11/05 12:21:27 EDT |
|
DIY anvils: As a piece of sculpture this is a great project. For years I have had an odd-ball dream of making a big anvil and stand from all one piece (or several welded together) as a working piece of art. The cutting torch gives the iron carver a huge advantage over his predessors. With the right hardware you can hand cut 8" plate. With simple fixturing you can do nearly machine cut quality work. OR you can rig a machine feed on a lathe that will cut a straight line as well as any cutting table. Torch, grind, file, chisle, fabricate. . I was looking at an anvil that would have a work area similar to a 500 pound (227kg) anvil but with a base that would put the whole at around a ton or so. The base a work of art of some kind. |
| - guru - Tuesday, 10/11/05 13:10:33 EDT |
|
Guru, you ever have dreams of a mucking big hunk of D2 and a massive 5 axis CNC with automatic tool changers? Always wanted a copy of that french armourer's anvil with the sculptured sides. Thomas |
| Thomas P - Tuesday, 10/11/05 13:20:42 EDT |
|
We have a good example of what it REALLY costs to cast a steel anvil in the USA, in small quantities- Russel Jaque's Nimba Anvils. He has a good patternmaker make the patterns, he has them cast in small lots in the USA, heat treated, then he hand finishes each one. All of what you would want to do if you were making a steel anvil. And he sells them for about 5 bucks a pound, retail. Now I have seen the way Russell lives, and there arent any Cadillacs or diamond rings present- he is not making much more than his labor costs to coordinate and finish, market and ship. So there is not a lot of fat to cut there. If you were doing quantities like he is, say 20 to 40 anvils at a time, MAYBE you could shave a quarter or two off his price- So you could make an anvil for $4.50 a pound. But there is no way you could get much cheaper unless you were running, say, 1000 anvils at a time. And even then, I cant imagine you getting below 4 bucks. And it costs a lot of money to transport, store, market, sell, and ship a thousand anvils- so my guess is, if you were trying to sell anvils as a business, you would still be right around Russel's 5 bucks a pound. For 1 to 10 anvils, my guess is you would need to double that, just because all along the way your oddball requirements and onesies and twosies quantities would cost you more. There aint no free lunch- when anvils were cheap, workers got a quarter an hour, if they were lucky. |
| - Ries - Tuesday, 10/11/05 13:22:42 EDT |
|
I recently became responsible for a foundry that produces abrasion and impact resistant parts for hammer mills. The castings of interest are approximately 450 Lbs and can be thought of as 5 inch thick plates. The alloy is as follows: .35C, .9Mn, 1.2Cr, .8Ni, .40 Mo, 1.0Si. The questions is in reference to heat treating (third party). The desired hardness level is 375-425 BHN. We have through heated parts to 1650F and quenched in water polymer that is supposedly equal to oil quenching. The reported as quenched hardness was 401-495 BHN (seems like a huge scatter from same lot?). After tempering to 625F for 7 hours (total furnace time) hardness were still 420-485 BHN. Parts were tempered again to 700F for another 7 hours. Still the parts were too hard, ranging from 444-504. It was thought that 700F was sufficient tempering temperature to lower to acceptable range so the next step was to connect thermocouples to each part, ensuring part temperature was reaching the foresaid air temperature. Castings were tempered using attached thermocouples with contact blocks at 700F for 7 more hours. Again, parts checked between 429-477. At least we know the parts were reaching air temperature but we are now bringing up tempering to 775F for 7 hours. We are gathering information and determining a "tempering curve" however this is coming at a great expense and time. As I am new to heat treating and casting for that matter (mini-mill background), I have a multitude of questions, however this is the most pressing issue. Is there an effect of us tempering this many times? Will this skew the data for future processing? What do you recommend for this alloy to reach a desired 400 BHN +/- 25? Is there somewhere to find alloy specific data that would help streamline our practices? Your knowledge and assistance is appreciated. Thank you for your time. |
| - William Steel - Tuesday, 10/11/05 17:31:18 EDT |
|
guru: could you give me an idea of how I would approach making small bowls out of flat stock ( 5/16 thick , 2 -3 " square). thanks |
| scott - Tuesday, 10/11/05 18:15:04 EDT |
|
Alloy Specific: William, ASM publishes a number of books including Heat Treaters Guide, Standard Practices and Procedures for Steel. This includes hundreds of standard AISI and tool steel alloys. Given a standard alloy designation it is easy to look up. Retempering does not hurt and only makes a difference under microscopic examination and performance testing. If you are going to do tests under load and wear conditions you will want to temper a peice under your final production methods. My questions. How much surface was machined off the test surface if any at all? Castings often have a VERY hard surface and this might explain the scatter. Have you chemicaly tested the final casting? Are the numbers above the actual chemistry or the theoretical? More carbon than states seems a likely culprit. Have you tried annealing a piece and testing it? You cannot reduce the hardness less than as-annealed. Does the heat treat sequence include annealing or are you counting on the cooling and shake out to cover the anneal? I'm sure our metalurgists will have some input on this question. |
| - guru - Tuesday, 10/11/05 18:36:43 EDT |
|
Scott, The simplest way to make a bowl out of plate stock is to sink it. Since you're working with fairly thick stock for the purpose, you'll need a pretty good-sized hammer and a depressed form. The hammer should have a domed face with a dome radius equal to or smaller than (=/<) the desired radius of the inside surface of your bowl. The depressed dome form can be anything from a tree stump into which you've carved a depression to the base of a *de-commissioned* oxygen cylinder. The depression doesn't need to be as deep as the bowl, just deep enough to allow you to work the piece in it. Actually, if you are working the steel hot, which you'll pretty much have to be due to its thickness, it will burn its own depression into the stump. With the hammer and stump lined up and, you just heat the steel to a nice orange-yellow and whale away. Don't whack on it afterit has cooled below a dark red. Re-heat and re-beat as necessary to develop sufficient depth, then smooth it out. The smoothing process id done over a mushroom stake, which can be a stake, a trialer hitch ball, big ball bearing, that sort of thing. The metal is heated to a orlange-yellow heat and placed over the stake ball and the outside is planished with a flat- or shallow dome-faced hammer of moderate weight. Work in concentric circles from the center out to the edge. The cooler the metal gets, the less effect the hammer blows will have, so final fussy tune-ups are often done at a lower heat (dull red) to give more resistance to the hammer. |
| vicopper - Tuesday, 10/11/05 18:44:33 EDT |
|
Bowls: Scott, This can be done a number of ways. The easiest is with male and female form tools, and a press or striker. Remember that your male form tool needs to allow for the material thickness. This is a place where a press or power hammer are very desirable but it can be done by hand. The dies can be forged and machined, machined 100% or sculpted from rough forgings by hand and with a grinder. The blacksmith way would be to make an oversize male tool and use it to form the lower die. This takes a lot of force to make the lower die. OR starting with a swage block with a bowel in it make a matching tool the right under size. You can do this roughly using a ring or section of a pipe as the lower die and a round faced hammer or large ball pien. In any case that thickness plate is NOT going to forge easy. In my shop I would jury rig some kind of dies and press the piece hot under my manual 20T hydraulic press. |
| - guru - Tuesday, 10/11/05 18:48:30 EDT |
|
I'd use my screw press: put a slight dent in the piece so a steel ball won't roll off and then put a toroid on the press base and heat the metal, plop a steel ball the correct radius on it and squish---repeat as needed; but I know a lady who prefers to use plastic explosive to do this sort of work---of course she's been complaining that the cost of explosives has gone up by a factor of 4 in the past few years---more paperwork on it! Basically you need to tell us what tools and skills you have and how many you need to make and we can figure out the easiest way for you.... Thomas |
| Thomas P - Tuesday, 10/11/05 20:24:49 EDT |
|
I'm getting started with repousse and would like to work with copper for now. Can you tell me what type of soft copper to ask for; and what is the annealing process. Thanks. |
| Steve S - Tuesday, 10/11/05 21:15:36 EDT |
|
Steve, you just want copper sheet. Most commercial copper is high purity low oxygen copper, the closest thing to elemental metal that can be made. The purer, the more ductile. Most copper sheet is soft to start (annealed). To anneal after working you heat to a low red in low light then quench in water. Copper can be worked a lot before it work hardens. The trick is that when working details they may become brittle while most of the part is still soft. You reduce oxidation by spot annealing. Thin copper like copper flashing is too weak to hold its shape. Material in the .025" to .030" range is good for small copper pieces. As the work gets bigger the thicker the plate should be. The best way to learn in this field is to do. |
| - guru - Tuesday, 10/11/05 21:32:01 EDT |
|
Erie Hammer: Danny, You have calculated the rating correctly. The things rust hurts are the cylinder, valves, valve stems and drive rod. The rod can be replaced but will need very careful machining. The tapered ends were originaly fitted using a tapered plug gage. Now you will need to blue them in to the ram and piston (both held on with tapered fits) for a perfect fit. The only literature I have on this type hammer is by comparing to a comprable Chambersburg. I have all the general catalog specs of all Chambersburg models. There are two styles of C-frame hammers, one with an integral anvil and one with a seperate anvil. In the small 100 pound hammer Chambersburg only made the one-piece hammer. The specs are: 100 pound, 4.5" bore, 13" stroke, dies 3x6.5, throat 10", 1" inlet, 1-1/2" outlet, weight 3000 pounds, required HP compressor 10HP. Books, no. There is a (very) little general reference material in old engineering manuals. As with most old orphaned machinery you are on your own. Repairs are a reverse engineering process. These are mechanicaly simple machines and standard machine shop practices apply. In the 1921 Audels Engineers and Mechanics Guide Vol. 2, I found setup instructions for a Niles Bement C frame hammer including attaching and removing the ram. Many old editions of MACHINERY'S HANDBOOK have general hammer foundation and forge floor articles. Newer references are much more general about hammers of all types. For operation any modern power hammer reference or video's apply. Flat open die forging methods from industrial references and the Lillico book Blacksmiths Manual Illustrated apply as well as the techniques in the Dave Manzer and Uri Hofi videos. |
| - guru - Tuesday, 10/11/05 22:40:06 EDT |
|
re: William's heat treating of castings problem. Some thoughts in addition to the guru's - what temperature variation do the furnaces being used for processing have? (Consider both the austenitizing and tempering furnaces.) Was the quench well agitated so that uniform cooling was achieved (Also, is the temperature of the quenchant controlled, or does it rise significantly during the quenching process?), thus getting you a uniform starting hardness in your "plate"? (Your initial hardness scatter seems high to me, indicative of some problem. Also, the initial rise in hardness makes me think you had some retained austenite after quenching that transformed to martensite during the first temper.) Are you hardness testing in the same area each time, or bouncing around on the casting? Are you testing the same, or different castings? Did you have decarb/alloy segregation from the casting - typical when casting an ingot was to have a surface skin that was relatively alloy/carbon free when compared to the balance of the ingot. The center was much richer in alloy content. What sort of time at tempering temperature are you achieving - do the tempering furnaces rely on radiant heat for those low temperatures, or are they boosted so you can rely on convection as well? What about residual elements - did you pick up some Va, Co, or W from the scrap used (I'm assuming a scrap charge). Any of those elements even in low levels will greatly increase the resistance to tempering. .05 Va in a heat of 4140 jacked required tempering temperatures over 50 degrees F. Also, what type of Brinell hardness tester is being used - I haven't been impressed with the accuracy of the so called portables I've had to use over the years - has it been calibrated & checked? With the high level of Cr & Mo, I'd expect this alloy to be very temper resistant. A lot of my experience was with 4140 - our rule of thumb was that tempering at the same temperature for the same time was good for at most about a 7 to 14 BHN number - sometimes we saw 0 reduction. Usually, we automatically upped tempering by 20 degrees F to get a BHN reduction of 14 to 21. But, that was 4140 - you've got a heck of a lot more Mo almost double, and higher Cr, as well as the Si, much more resistant to tempering temperatures. Too many unknowns for me to currently make a big WAG as to what tempering temperature you'll need at the end to get your desired hardness, good luck though, especially in wading through the torment of "20" questions above. |
| - Gavainh - Tuesday, 10/11/05 22:46:48 EDT |
|
Some months ago Luarel Machine & Foundry had a blowout sale of it's remaining anvils. They sold the 400# at about $800 if I recall. I don't know but guess that they sold them at cost or only slight loss. But of course, there is NO reason to operate a buisiness if it can't make a profit. |
| Dave Boyer - Tuesday, 10/11/05 23:12:54 EDT |
|
Tempering problem: I am no match for the PROFESSIONALS on this site, but have You been able to get the desired results on a smaller chunk of this alloy ? It would take a lot less time to develope the proces on a smaller sample, and if You find that it can't be done to a smaller part, ain't no way Youre gonna do it to that big casting. |
| Dave Boyer - Tuesday, 10/11/05 23:22:15 EDT |
|
Flame Hardening : We [at work] had an old lathe set up for this purpose for heat treating the draw radius on some modular tooling for forming truck frames. Esentially it hardened one corner of lengths of 2"x6" stock. It used a special multi flame heating tip. |
| Dave Boyer - Wednesday, 10/12/05 00:26:13 EDT |
|
MISSING BLACKSMITH ALERT - Matt Tilton, from Ballard (Seattle), Washington: Matt is missing. His family has not been able to contact him for over a year. If you know him please tell him that his brother Rob is looking for him and to PLEASE call. |
| - guru - Wednesday, 10/12/05 07:50:59 EDT |
|
William Steel, I am NOT a metalurgist or heat treater, but have worked on many quench problems in polymer/water systems in induction hardening, A couple of questions on the initial quench. 1. I know that you said that the parts were basicly 5" plates. Is there any chance of pockets that can trap steam? In large, heavy parts this is a real problem. The steam pockets slow down the quench. Also increase stress and cracking. 2. The polymer additive we used was pretty sensitive to bulk quench temp. We had to do a lot of work on heat exchanger sizing, flow in the tank, nozzles etc, and clean out the scale fines on a regular basis. A high flow rate from the tank to the exchanger is required to maintain the even temp in big part quenching. 3. Last, any oil on the parts prior to heating for quenching or tempering plays heck with the polymer quenchs. I do not fully understand the dynamics of the issue even after three years of experiece, but the oil somehow left a coating that reduced the quench rate, leading to quench cracking, and scattered hardness in the much smaller parts we ran. I did a lot of testing to see how and why, but can only say that in our setup, oil on the parts going into the heat treat led to hardness scatter and quench cracking. We were induction scanning the parts, with a quench just under the coil, but this could be a quick thing to check. |
| ptree - Wednesday, 10/12/05 08:32:19 EDT |
|
I received a request for a hardy cone 2" at the base tapering up to 1/2" at 2" high. Mild steel would have been fine. I don't do lathe work. Anyone interested in having the request referred to them? Remember you don't need to machine on hardy shafts. If say 1" desired, lathe stem down to 3/4" and then tack weld on a length of 1" thick wall tubing. Works just as well. Just click on my name and mention lathe work referral. |
| Ken Scharabok - Wednesday, 10/12/05 08:44:15 EDT |
|
Dave Boyer: I am not sure LM&F selling out necessarily represents the U.S. anvil market. They produced a very specialized product aimed at a very limited market with a good deal of competition. |
| Ken Scharabok - Wednesday, 10/12/05 08:46:37 EDT |
|
LM&F: These folks run a regular full time foundry busines and the blacksmithing line of anvils, forges, cones and firepots were a sideline interest of one of the owners. They dropped out of the market (perhaps temporarily) because they had high production work that needed all their attention. The fact is, this DOES represent the state of the US anvil manufacturing market. Foundries must be geared to high production work to stay competitive today. Odd hand molded work or short production runs are disruptive when there is other work to be done. To charge what it is worth results in the prices we don't like to pay but ARE the costs of producing a first class anvil. The fact IS, to cast a top quality tool steel part the size of an anvil is not an easy job. Casting steel requires high tech sensors and a laboratory that checks the chemistry of each melt before it is poured. It is an expensive operation to maintain and thus must rely on continous production work. Foundries that do not have this high level of technology cannot produce good steel castings. Old time primitive foundries cast grey iron and ductile without nearly the problems of the steel foundry. However, these products ARE NOT suitable for making anvils and there lies the quandry. Forging an anvil has less technical problems but still requires a sizable operation and significant equipment. To do so in low production results in higher prices. Currently Peddinghaus is having problems getting steel in anvil sized billets and has stopped production. I suspect that in recent years we have seen the "good old days" of anvil pricing and availability. |
| - guru - Wednesday, 10/12/05 09:22:12 EDT |
|
A follow up question on casting anvils. I understand what you are saying about modern testing in a steel foundry. My question is - How did Fisher pull it off in the old days? |
| Steve G - Wednesday, 10/12/05 09:29:47 EDT |
|
Fisher poured cast iron which does not need high tech control. The process welded a preheated steel plate to the cast iron body in the mold when the iron was poured. It was considered an inexpensive way to manufacture an anvil at the time. The steel used was the crucible steel of the time which also requiired special handling of the billet to remove ingotism by forging. But that was also the same steel used to face forged anvils of the time. |
| - guru - Wednesday, 10/12/05 09:55:34 EDT |
|
Another note. Many cast steel anvils are of marginal quality and do not compare to the forged anvils OR the best cast steel anvils. These lower quality anvils are servicable but are still lower quality. When you buy Nimba, Rat-Hole or MFC you are getting a top quality steel casting. LM&F and others have produced medium quality anvils (based on steel and hardness) at lower prices. You get what you pay for unless you buy an ASO. |
| - guru - Wednesday, 10/12/05 10:01:22 EDT |
|
Traveling: I will be out of the office again for a few days. Be back Saturday. |
| - guru - Wednesday, 10/12/05 10:02:06 EDT |
|
I am resurfacing a 150# anvil. The original plate (what was left of it) has been removed and I plan on brazing a 4 inch flat spring onto it. My question is what would be the best way to temper that plate once it is brazed onto the anvil. Would quenching it right after do the trick? And suggestions would be greatly appreciated!!! |
| Matthew Gardner - Wednesday, 10/12/05 13:28:48 EDT |
|
HAWKEYE HELVE HAMMER: ive just aquired the smaller version of these and am looking for pictures and or dimensions of the wood post and subframe mount locations. the one i have is all there but the wood has rotted off leaving just the old lag bolts. with a little work i think i should be able to get every thing freed up and restore it like new. any help wuold be appriciated. thanks.. knipweld@brainerd.net |
| jeremy k - Wednesday, 10/12/05 13:41:50 EDT |
|
brazed anvil: I dont think you will be able to quench brazed parts. Quenching a 150# block of steel is not a casual affair even when the plate is welded. A piece of spring steel ought to wear pretty well even unhardened. I would just let it cool slowly covered with ash or dry sand. Another concern about brazing: Heavy pounding causes the anvil to mushroom. This spreading action makes the layers try to slide over each other as they spread at different rates. There will be a lot of shear on the braze and it might separate eventually. Not sure, just a concern. |
| adam - Wednesday, 10/12/05 15:08:12 EDT |
|
Matthew, you most likely will not get a good result by brazing a spring steel top on that anvil. The best thing now is to look at it as a door stop. If you were going to continue to try to fix it, you need to weld hard facing rod to the face surface. Bead after bead, row after row, clean and grind between each pass, weld 90 deg to the last layer of passes until you have at least a quarter inch of weld. This is a very time consuming and costly way to procede. Good luck. |
| - Wayne Parris - Wednesday, 10/12/05 15:18:34 EDT |
|
Guru: I believe you misinterpreted what I said about LM&F representing the U.S. anvil market. Your answer pertained to U.S. anvil production. The market for anvils is somewhat different. To me the fact the ASO are selling indicates a market for low-cost, mid-weight anvils still exists. (By the way, I see frankie8acres is trying a new technique. He lists three anvils at once. Two buy-it-nows for $190, then one bidding auction starting at $9.00 with a reserve price. I suspect a buyer would look at the two buy-it-now listings as a price guide and think they are getting a good deal for anything less.) On the mushroom tabs on the bottom of a top plate. If you do the direct cast to plate bond it has to be almost 100% perfect to work. With tabs you might get away with something less than perfect, meaning fewer rejects. With steel plate cutting technology today, top plates could be cut out of something like 4140 fairly easily, including hardy and pritchel holes. If you just put sand cores in the top plate you might put in the hardy hole by drilling from underneath through the cast material, say a 1 3/8" drill bit for a 1" hardy hole. When you reach the bottom of the plate you should have a sqare hole through the plate and a round hole below to where four corners of the hardy shaft touch the sides. For the pritchel drill out from the plate. A cut-out pritchel in the plate in advance means you don't have to drill through hard steel. |
| Ken Scharabok - Wednesday, 10/12/05 15:24:58 EDT |
|
Is there a way to latch a double gate without using drop rods? |
| BC - Wednesday, 10/12/05 15:40:13 EDT |
|
BC- there are locksets available with hook shaped plungers, which will lock a pair of doors or a gate together when you turn the key. And of course you could make manual latches that worked the same way. But if there is no stop of any kind, and the only thing keeping the gates shut is the latch, then its kind of a wiggly situation. It really depends on how big the gates are, how heavy, what kind of things are gonna be trying to open them- gentle winds, or ravaging street gangs? You can make one gate have a continuous plate that the second gate catches on. Then make both of them have stops over at the gate post so they cant go past the closed position, only open in one direction. Then make a latch with a hook that pulls the two gates slightly together as it latches them. But all in all, drop rods are better. |
| - Ries - Wednesday, 10/12/05 16:01:06 EDT |
|
Ken- the process you are describing would produce half of what you want- a mid weight, medium quality anvil. But it wouldnt be low cost- because by the time you get your steel/ iron sandwich cast, in small quantities, like under 100 anvils at a time, and then do all your drilling and grinding, and buy your 4140, its gonna cost more, not less, than an imported Czech anvil. There are a lot of reasons why casting even iron in the USA just plain costs more than those Czechs can do steel for. OSHA, Insurance, cost of living, EPA regs, lack of experienced workers, and lack of infrastructure, to name a few. When the cold war was raging, those giant foundries in eastern europe were built by trickle down russian money- they dont have the normal costs for land, structures, and equipment that we have here- the communist government build the Bronco Foundry at no cost to its current owners. I dont doubt there is a market for cheap anvils- just like there would be a market for $500 brand new F150's. But that doesnt mean anyone can make any money making anvils for less than the $3.00 to $5.00 a pound that anvils are currently selling at new, in the USA. They just cant be made any cheaper, unless you can get a Bill Gates Grant to subsidise the manufacture. Now if the chinese could be convinced that there was a market for a few hundred thousand cast steel anvils a year, then you could get a bit cheaper, and certainly lower quality, but steel prices are worldwide commodity prices, and most anvils have only a bit of labor in them- its mostly fixed costs that are similar in China. |
| - Ries - Wednesday, 10/12/05 16:10:45 EDT |
|
One more anvil thought- its actually going to be harder, and more expensive, to drill holes in 4" of sand cast iron, than it would be to drill 3/4" of hard steel. The iron will have hard spots, sand, and will wear out bits faster than a proper speed/pressure setting on nice hard 4140. But in a production situation it would not be a drilling operation anyway- a core would be much cheaper and quicker. Really the basis of the problem is the difference between making one of something for yourself, where labor is not an issue, and neither is time, versus trying to manufacture a product and sell it in the marketplace. Once you become a real business, with all the associated costs- liability insurance, taxes, overhead, workers comp, and on and on, a lot of things that make perfect sense in a one man, non profit shop, become simply impossible. The reason big expensive machines are present in lots of factories is they save enormous amounts of money. Even on the small scale my business works, I saved tens of thousands of dollars by spending 10 grand on an new ironworker. The same principles apply to making anvils- its simply much cheaper to do it right, and nowadays, the best combo of simple and right is cast steel, heat treated afterwards by a pro heat treating shop. And once again, we know how cheaply that can be done, because a bunch of companies are doing it, and none of them are run by Donald Trump. |
| - Ries - Wednesday, 10/12/05 16:21:01 EDT |
|
How do you find the center point of a round bar (3/4") as it intersects with a rectangular railing (1/2"x1")? This also assuemes you have multiples of the round bar, like in a railing. |
| A Thon - Wednesday, 10/12/05 18:23:22 EDT |
|
Ries; we drilled and re-drilled and counter drilled one of the HF chinese cast iron anvils when we were making it into a propane stove and it was so soft and graphite rich a material we were wondering how it held together for shipping! I assume it was sand cast. Thomas |
| Thomas P - Wednesday, 10/12/05 18:48:35 EDT |
|
New anvil face? I've heard from a friend that usually knows what he's talking about that you can "re-face" an anvil with some kind of welding rod or wire from a wire-feed welder. This stuff is supposed to be pretty hard and just layed on till the desired thickness is achieved and then ground off to whatever shape you want. Is there any truth to this? If so, please tell me more... Thanks, Randall |
| Randall - Wednesday, 10/12/05 18:58:00 EDT |
|
Anvil reface: you have to be a bit careful with hardfacing. that stuff is prone to cracking if not done right and not all hardface is suitable. There are a couple of articles online one at iforgeiron and another at elektric anvil. The rod's not cheap either $5 to $10 per pound. I am doing some refacing on my anvil using the iforgeiron plan of MG740 which is medium hard with great crush resistance. The beads go down nice and fat. I disagree with Ken on this that its not too hard to build up 1/4" layer - though an entire anvil face would be a couple of days work for me. Also one must have some experience with the welder and grinder. |
| adam - Wednesday, 10/12/05 19:47:46 EDT |
|
William Steel: You could have a series of problems. Do you grind into the parts .030-.060" to run the hardness test? If not, you could be reading the effect of decarburization which will lower the hardness. The Moly in your alloy will slow the tempering reaction down considerably. The high silicon, good for castability, promotes ferrite, not martensite so you will always get a mixed structure. 5" thickness needs a LOT of agitation and lots of space between each piece. Several tempering cycles will not harm the parts but you cannot temper new parts at the last time/temperature you did to get good results on the last run. Tempering is cumulative. Do not expect very deep hardening with the alloy you use; you might get 3/4" of martensite. The rest is going to be soft ferrite / pearlite. |
| quenchcrack - Wednesday, 10/12/05 20:17:43 EDT |
|
A Thon, Your question is worded in a confusing fashion. It almost sounds like a homework question, which we don't answer, but since it is a topic that may be of use to the general readership at some pooint, I'll take a shot at answering it. (Finding the center of a round bar is no more difficult than using a center square and scribing two lines. Where they intersect is the centerpoint of the diameter of the bar.) If you are trying to locate the centers of evenly spaced round pickets for making holes in a piece of flat bar that is mounted at an angle, then you have an exercise in simple geometry. If you know the rise/run of the stringer (rail), then you can simply plot that on a piece of paper, making even divisions on the true horizontal and rising from those points perpendicularly. Where the lines cross the angle, you locate your holes on the rail. YOu can also calculate the ratio of the hypotenuse of the triangle to the horizontal leg and use that same ratio to determine spacing of holes in the angled piece (hypotenuse) of your railing. For example: A stairway with a rise/run of 8"/12" would have a hypotenuse of the square root of the sum of 8 squared + 12 squared, or about 14.42". The ratio of the run(12") to the hypotenuse (14.42") is 1 to 1.2, so if you want pickets that have a horizontal spacing of 4" o.c., the holes in the rail parallel to the stringer would need to be 4.8" o.c. |
| vicopper - Wednesday, 10/12/05 20:19:24 EDT |
|
Re: nickel finish on gun receiver.Read several methods somewhere as follows: blue first then use hydrochloric acid to slowly remove blue or leave metal white then treat w/nitric acid or leave metal white then abrasive blast or abrasive blast then electroless nickel plate. Having said that, which method will give me an antique nickel finish without having that cheap aluminum look? Thanks, Mark. |
| Mark - Wednesday, 10/12/05 22:27:52 EDT |
|
Matthew G : The method that would most likley work would be to furnas braze an air hardening plate 1/2 to 3/4" thick to the anvil after machining it flat. It would not need to be quenched, and the temper would not loosen the braze joint, but this would be an expensive rout to take, probably costing more than a good quality new anvil unless You had acess to the equiptment and materials to do it Yourself. As meentioned the spring would be pretty tough if left unhardened, but I think You will need to preheat the anvil pretty hot to braze the spring to it. |
| Dave Boyer - Wednesday, 10/12/05 23:13:36 EDT |
|
Hi Guru I am a bit confusses about your post concerning cast steel anvils of marignal quality. You rate an LMF anvil as marginal quality compare to a Nimba. The Nimba is made from 8630 and so were the early LMf anvils. Then they switch to a 8620 blend that they found to have better wear resistant and hardness qualities. They are both cast with very nice finishes in very qualified foundries. They both have a 50 Rockwell. They are both professionally machined and hand finished. I am confussed how a Nimba is of better quality?? Now the MFC is 4140, but only has a 30-35 rockwell. I have been told by Mfc that the fast quench makes the face resistant to dent and dings at only a 30-35 rockwell. I would have to try one to believe it. If I just don't know some details that you know that validates your post they may be possible. I am not calling you out on your post. I am just really confussed by it since I am not a metallurgy expert. Please validate. I am really sad to here production has stopped on the Peddinghaus due to unavailable billet sizes. Thank You |
| burntforge - Wednesday, 10/12/05 23:29:06 EDT |
|
Sorry I can't spell tonight. I meant confused in my above post.I guess I really am. |
| burntforge - Wednesday, 10/12/05 23:41:07 EDT |
|
Burntforge: If I remember You got one of those last LMF anvils, did You get to use it before Your health deteriated? I thought they were claming about RC54 on the website, not extremely hard, but really tough. Should compair favorably to "Woodpeker Lips" IMO. I don't think anything that will be struck by hard steel should be above RC58 anyway, too much chance of spalling an edge. |
| Dave Boyer - Thursday, 10/13/05 02:07:41 EDT |
|
adam: "I disagree with Ken on this that its not too hard to build up 1/4" layer..." If I am the Ken involved I don't remember making a comment related to this. On the anvils I redo, I use 7018 rod simply because it is cheaper, easly to use, finishes nicely and holds up well for up to moderate use. Sort of like the adage about getting 80% of the results from the first 20% of effort. |
| Ken Scharabok - Thursday, 10/13/05 02:39:37 EDT |
|
Could you tell me how a medieval blacksmith would make a metal file, please. I don't see how they got serrated edge. Thanks. |
| John Bates - Thursday, 10/13/05 03:35:32 EDT |
|
John they would have formed a steel blank to the shape desired. The usually mounted on a lead block the would use a special chisle ( not sure how it was special, I think it was the geomerty of the cutting edge.) Also a special hammer if I remember correctly. The cut in the teeth in the desired pattern. The heat treat it. Time consuming and tediois and expensive to buy |
| Ralph - Thursday, 10/13/05 04:41:24 EDT |
|
Thanks Ralph.. that's very helpful. |
| John Bates - Thursday, 10/13/05 06:18:59 EDT |
|
Hi Dave I never got a chance to use the LMF anvil. It is a beautiful anvil. I really can't say what I really feel about it as far as forging. They are a 50 rockwell just like the Nimba. I really like the design of the Nimbas also. I just don't understand with same materials, hardness and process to make them how they can really be of much different quality. Maybe there is something I really don't know too. |
| burntforge - Thursday, 10/13/05 08:15:20 EDT |
|
The spring is 1/4 inch thick. I will be using an oxyacetylene torch to braze it on. I have considered many, many options and this seems to be the most cost effective way to ensure I have a decent surface on my anvil. I already heated the plate once to flatten it out and it only has some minor dings from the hammer at red hot, so I think overall it is a good idea unless there is something I don't know. Which is why I'm asking the pros... |
| Matthew Gardner - Thursday, 10/13/05 08:44:53 EDT |
|
Matthew, The problem I see with trying to braze that spring onto a 150# anvil body is twofold. First is the problem that it is only 1/4" thick, which is really too thin to provide as much resistance as will be needed to prevent the hammer forces from being transmitted to the braze joint, which will end up being work-hardened to the point of cracking. It is a different metal, with a different coefficient of expansion and ductility than the steel. Secondly, and probably more to the point, I don't know how you're going to get the entire anvil body up to the requisite heat to effect the braze joint all at once. If you try to do it in bits and pieces, it will weaken the previous area when you heat a new area. |
| vicopper - Thursday, 10/13/05 09:24:17 EDT |
|
Mark, To get a decent nickel plate on a steel receiver, you need to get the receiver to the degree of finish that you want by filing, sanding, etc and then get it chemically clean. A quick rinse with dilute phosphoric acid will finish the cleaning, followed by thorough rinsing wiht copious quantities of distilled water. Once clean, the receiver is put into a bath to flash plate it with copper. Without the copper base plate, the nickel won't adhere properly, if I recall correctly. After the copper plate, it is again cleaned, rinsed and then plated with nickel. Nickel is easy to electroplate, so there isn't any real reason to use other methods, I don't think. Some of the gunmakers here may have more up-to-date information on this; my information is from thirty odd years ago. |
| - vicopper - Thursday, 10/13/05 09:29:23 EDT |
|
John; in general the medieval smith used a wrought iron blank and case hardened for the file. Theophilus gives explicit directions on how to do this in "Divers Arts" written circa 1120 CE. IIRC he mentions cutting the teeth and then greasing them wrapping it in leather and moulding kneaded clay around the piece and then heating. Thomas |
| Thomas P - Thursday, 10/13/05 10:18:50 EDT |
|
ken: I slipped a gear on that one. I cant find who made the comment either. Sorry about that. Must get the Doc to adjust my meds. I just wanted to make the point that its not too hard to build up a thick face with HF rod and even a whole anvil face could be done in a day or so. Matthew. IBMO (in my blunt opinion) you will invest a lot of work for 2nd rate results. Even if you get a first rate bond (and a large braze like that is not trivial to do well) the plate is too thin and the bond wont stand up to long term wear. You are much better off using a cutting torch to V off the top of the anvil and arc welding a solid weld from the center of the plate out to the edge and using a piece of 5/8" - 3/4" tool steel plate. If you need a piece of steel for this I can probably help you out. This method, if done carefully could yield an anvil as good or even better than the original and isnt much more work than your plan. As for heat treating, quenching a 150# anvil is quite an affair but it can be done in your back yard. I would seriously consider just leaving the face unhardened. Another other way to go, as mentioned previously is to lay down hardfacing rod. Probably spend at least $150 for rod and grinding disks. Wise men will tell you that it isnt worth it when you can buy a NEW, perfect #175 anvil from Euroanvils for $470 +sh. I would fix the old anvil anyways. |
| adam - Thursday, 10/13/05 10:25:25 EDT |
|
hmmm .... IMBO ... still have to get those meds right. |
| adam - Thursday, 10/13/05 10:26:22 EDT |
|
Matthew: Just a wild and crazy idea and assumes you already have the hardy and pritcel holes in the plate. Take two pieces of say 1/4" x 1 1/2" mild steel, drill out two or three 1/2" holes towards the bottom of one side and weld on 1/2" nuts over them. Now weld these to the sides of your spring steel plate with the nuts to the bottom. Position on the top of your anvil and mark the spots where the nut holes meet the side (just give hole a quick spray of paint). Drill some say 1/2" deep holes there. Now use 1/2" x 1 1/4" or 1 1/2" bolts to lock the plate to the anvil. You might put some sort of adhesive under the spring plate to fill in any remaining gaps between it and the anvil top. Seems like the anvil would be functional without the repair being made permanent. OK guy, get up off the floor from laughing. |
| Ken Scharabok - Thursday, 10/13/05 10:34:57 EDT |
|
"antique" nickel plate: I don't do anything with modern guns or plating, but Vicopper has it right. Whatever the surface quality of the base metal is is going to be the surface quality of the nickel plating, and you sure as heck NEVER see a bead-blasted or acid-etched finish quality on old guns. I'd take it to the platers prepped for a knock-yer-eyes-out shiny finish, as that's what the originals had. Once you have that, it seems like it'd be fairly simple to "age" the new surface chemically. Do a search on patinas to find out what's available for nickel. It tarnishes on its own to a kind of yellowish tone, without the blue-white overtones of chrome. The abrasive blast/electroless nickel thing is for a matte finish, designed as a cheaper alternatuive to brushed stainless on modern guns. |
| Alan-L - Thursday, 10/13/05 11:05:10 EDT |
|
re Files. Thomas is as usually correct. I missed the 'Medieval' part John I would also be willing to bet that 'scrapers' were also made and used. |
| Ralph - Thursday, 10/13/05 11:11:21 EDT |
|
Back when I was doing a lot of welding and millwright work for the local scrap yards, I was called upon occasionally to build up the hammer blocks for the aluminum can shredders. (Soft as it is, aluminum can be very abrasive.)I can't recall what the alloy of the blocks was, but I would first build up the worn parts with 7018, which would act as a cushion against the hard stuff that would invariably get into the scrap, then, bring it to its final size with a couple of layers of hardface rod. Had I used nothing but hardface, the edges would have soon chipped off. Of course this machine was subjected to a LOT more impact than a smith can produce with a 3 lb hammer. |
| 3dogs - Thursday, 10/13/05 13:00:01 EDT |
|
I am mainly doing this to say I did it. Not to mention I have spent a great deal of time finding the necessary equipment. I do however have an alternative to heating the anvil to the necessary temp. How about building a small brick oven with about 4 inches of coal in the bottom. Start the coal burning, set the anvil into the oven and completely cover the anvil with coal, top, sides and all. Open a spot in the bottom to put some air to it and let it heat to orange hot, uncover the top and braze away. I know it's crude but would it work? I don't really need a perfect anvil. I just need MY anvil...if you know what I mean. As far as that wild and crazy idea, I think the nuts and bolts would get in the way.... |
| Matthew Gardner - Thursday, 10/13/05 13:11:01 EDT |
|
Patrick; didn't you do a bolt down top once? How did it work out? Funny thing about Al---it comes with an aluminium oxide coating which is *not* soft---I've seen someone scratch their car windshiled trying to scrape frost off with an Al can. Thomas |
| Thomas P - Thursday, 10/13/05 13:16:05 EDT |
|
ThomasP; Yup, Aluminum Oxide, as in grinding wheels. |
| 3dogs - Thursday, 10/13/05 13:53:44 EDT |
|
Matthew; I hate to be an ant at your picnic, but it looks like the general concensus here among folks with a lotta experience in such matters is that you're whippin a' dead horse. Of course, it's YOUR horse, and you can whip it if you want to, but I'm afraid you're not gonna get a very good ride for your efforts. |
| 3dogs - Thursday, 10/13/05 14:00:00 EDT |
|
One problem with shreading Al cans is people tend to put things in them, like old iron nuts or pebbles to add weight to what they bring in. |
| Ken Scharabok - Thursday, 10/13/05 14:00:33 EDT |
|
Matthew- Re: Anvil repair- I imho, 1/4" is way too thin to try to replate an anvil. The thicker the better- I did one with 1" plate and it's ok but 1 & 1/2" would be better. also, you'd have a deeper step. You didn't say the brand but any antique value is gone now anyway. Arc weld a heavy plate to it and forget about hardning- Hit the work and not the plate and maybe it will get you by until you find a usable anvil. |
| Ron Childers - Thursday, 10/13/05 14:16:47 EDT |
|
3dogs, You can call it whippin' a dead horse, as do I when others are doing it, but when I'm doing it I just call it tenderizing the meat. (grin) |
| vicopper - Thursday, 10/13/05 17:40:35 EDT |
|
Matthew, Criminetley! The mole hill is becoming a mountain. If I were you, I'd do just what you'd do if you were you. I would be tempted to plug weld it with a decent rod, something like Adam has been suggesting. Drill a series of evenly spaced holes and vee out the edges of the plate. Arc weld through the holes and all around the edges. This is NOT a good way. It might affect rebound and it might give you a little "judder", but if you must put on a plate, it is better that some of the other methods that have been posted. |
| Frank Turley - Thursday, 10/13/05 20:30:02 EDT |
|
Was given a small anvil;it weighs about 40 pounds. It has 1895, and a 5 and a 2 cast on one end. One "leg" has a 5 on it. On the other end the name "Fisher" is cast into the end. Can you tell me about it? Thank you for your help and experience. Bill |
| bill - Thursday, 10/13/05 22:10:54 EDT |
|
Hello, I have always been interested in blasksmithing and have picked up some items here and their but have not ever begun to do any blacksmithing myself. I don't know if this is the type of question that is appropriate to your forum. If not, I will understand. I am in possession of a small anvil with the top approximately 8-1/2 inches by 3-1/4 excluding the horn which extends about 4" past the rectangular top which has a hardy hole approx 1/2" x 1/2" through to the bottom. The side of this anvil is shaped like one half of a bell with a round hole approx 7/16 in diameter through to the bottom. The other side has a protrusion of of approximately two inches. This side has an opening which is somewhat oval in shape with the center of the hole approximately 2-1/2" wide with top and bottom of the hole being 1-1/4" wide. The overall height of the opening is 3-1/3" (sort of reminds me of a large key hole). It appears that this anvl was originally a portion of something else. Perhaps a vice of some sort??) The whole unit seems to have been cast as one piece. There are no manufacture or other markings on it. Can you identify this old piece? If not, can you suggest where I might be able to see this item as it was originally? By the way, do you know of any site which may have pictures of different anvils? If there a blacksmith museum someplace? Thanks for you time. |
| Flavio - Thursday, 10/13/05 23:36:38 EDT |
|
Bill, Richard Postman devoted quite a few pages to the Fisher anvil in his book, "Anvils in America". The company was called Fisher & Norris out of Trenton, New Jersey, founded in 1843 and ending business in 1979. The company was the oldest, successful anvil manufacturer in the U.S. The anvils were cast and many of them had an image of an eagle on the side as you face the anvil with horn to your right. They advertised as the Eagle Anvil Works. In 1847 and 1853, Fisher and Norris patented a process where they cast iron onto a slab of steel for the face, and they figured out a way to make them cohere. |
| Frank Turley - Thursday, 10/13/05 23:44:58 EDT |
|
Flavio: You appear to have half of an old anvil/vise combination as you speculated. These were very popular back in the late 1800s/early 1900s. Made by several manufacturers in a variety of shapes. On some vise jaw came in from the back, on others from the side. Some had other tools, usually a drill, which could be mounted on them. Apparently provided to not be terribly practical as either an anvil or vise. Anvil portion still can be a bench anvil though. |
| Ken Scharabok - Friday, 10/14/05 00:37:21 EDT |
|
1/4 inch thick spring plate is the thickest I can find without spending massive amounts on perhaps some T1. Does anyone have a piece 4 in. x 14 3/4 in.? I have enough spring that I could layer it and make it 1 inch easily. |
| Matthew Gardner - Friday, 10/14/05 10:00:35 EDT |
|
Good morning; I just realized that I haven't let you know that we changed e-mail providers that's why your reminder came back. Tinker Shadetree Bud Williams |
| Bud Williams Tinker - Friday, 10/14/05 10:10:05 EDT |
|
Frank and Ken....Thanks for the information, it is appreciated. WOW! You guys are fast in responding!!!! |
| Flavio - Friday, 10/14/05 10:14:49 EDT |
|
Layering pieces to make a top is just compounding all the previously mentioned problems. 4"x 14.75"---have you checked to see if there is a local dumptruck company that has a broken leafspring off one of the trucks? (Perhaps some semi's as well but I don't recall their springs) a leaf from a RR car would be a gracious plenty---all this should be scroungeable or at scrap cost. Where are you at? Thomas |
| Thomas P - Friday, 10/14/05 10:46:50 EDT |
|
Matthew, Layering the spring will do absolutely nothing good for it as an anvil face. Stacking up flat pieces, unless they are adhered to one another by molecular diffusion bonding (forge welding, essentially), just results in more places to absorb energy rather than reflect it. Very bad thing for an anvil. You should be able to find 1/2+" thick flat spring stock at a place that services heavy equipment. I've seen leaf springs on heavy ewuipment that were almost an inch thick. Then you could chamfer the sides of the anvil and stick weld the spring on and have a useable anvil. Not as useable as a good un-messed-with anvil, but useable enough. |
| vicopper - Friday, 10/14/05 10:52:59 EDT |
|
I am located in Chattanooga, TN. I found the piece of 4 inch spring at a semi repair shop but I don't know if they have anything thicker. I had a really hard time just finding them. Our resources are very limited. We have to drive/order out of state just to get coal. |
| Matthew Gardner - Friday, 10/14/05 11:08:07 EDT |
|
Sorry guys, my brain has been tied in knots. That piece of spring is 5/8 inches thick not 1/4 inch. |
| Matthew Gardner - Friday, 10/14/05 11:11:17 EDT |
|
Dear Guru, Alex Bealer Blacksmith Association is redesigning/major overhauling our web page. I am studying your FAQ on this, thank you for posting. Are there any new issues or ideas that you have that might be specific to us? Thanks |
| Tone - Friday, 10/14/05 11:33:03 EDT |
|
Anvil Repair- Yep- I bolted faces on two anvils. That was not very succesfull. I even countersunk the bolts and welded them to the face plate, but the joint was never really solid as it should have been. If I had an anvil that needed an entire new face plate, I would approch the repair in one of two ways. 1) Hardface to the desired thickness. 2) Get a piece of steel with good hardenabilty like 4340, 5160, or even 1060 about 1" thick. Bevel the anvil so that you can weld a full penetration weld accross the entire width of the face. (I also tried welding the edges of the anvils mention above to the plates and they just cracked off). Make sure to preheat and weld with passes alternating one side to the other. For heat treat, I would build a venturi style gas forge that can sit on the anvil face. I would heat to non-magnetic and then quench the anvil in the creek behind the house. This second method is described somewhere on the net. For a small anvil-less than 200 lbs, I would probably just hardface it. Keep in mind that all these techniques are designed to produce a prodcut similar to our modern ideas of what an anvil should be. Anvils from much earlier in time would not have hard faces and much good work can probably be done with the anvil just the way it is. Patrick |
| PatricK Nowak - Friday, 10/14/05 12:30:44 EDT |
|
The advantage of hardfacing is that you dont have to quench the anvil. Welding on a steel plate (solid weld from the edges right thru to the center) you likely do a lot more welding but skip all the grinding involved with hardfacing. Gunter's hardfacing method http://www.metalsmith.org/pub/mtlsmith/V23.1/anvil-r.htm Jr Strasil's hardface method (which I am using currently) http://www.iforgeiron.com/Blueprints01/BP0101Anvil%20Repair/BP0101anvilrepair.shtml Leimkuhler Making an anvil from mild steel and hardfacing http://www.metalwebnews.com/howto/anvil1/anvil2.html |
| adam - Friday, 10/14/05 13:07:49 EDT |
|
Fabricated anvil. HB used to make their anvils from two pieces welded at the waist. I believe it was just a large edge weld. How much welding does it take for the assembly to respond to a hammer blow as if it were a single block? |
| adam - Friday, 10/14/05 13:22:29 EDT |
|
Matthew I feel for you; it's 80+ miles *each* *way* for me to see the endocrinologist or endodontist and I've been averaging at least 1 visit a month...half a day off work per as well. Living outside of a town that peaks near 10,000 people when tech is in session (and it's the biggest town in the county!) I know how it must be like in Chattanooga TN---I flew 50# of good smithing coal back in my checked luggage when I went to Quad-State. 5/8" is fine as it stands no need to layer---though 1" is still better... Thomas |
| Thomas P - Friday, 10/14/05 13:37:26 EDT |
|
Refacing Anvils for the 100th time: I've been away and not read the whole thread, but other than a technical excersize it is a waste of time. For what hardfacing rod, electricity (yes it cost$ dollar$ for heavy welding), the abrasives (also quite expensive and do you have the HD grinder to use them?) and your time at HALF minimum wage (days of welding and grinding) you can purchase a really GOOD used anvil and pay for a good small anvil or make a big dent in the price of a REALLY good new big anvil. READ the repair descriptions closely. It can take DAYS of grinding all day to do a decent job. Welding the face around the edge is not a good repair and unless the anvil is terribly abused and has NO usable face is ruining a possibly good tool.
Rewelding by forge welding a new face on an anvil is a pipe dream. This was a factory process that took special anvil forges, handling tools and a team of smiths and strikers that knew what they were doing. I do not know anyone that has done it. It is NOT impossible, just a big job and not something you want to try as a first. This is one of those subjects that if you have to ask how then you have no business attempting it. . . In years past there were folks that actually repaired anvils properly. These were all anvil manufacturers that had all the capability's to do the job. As to Matthew's question nobody asked if his faceless anvil was a wrecked cast iron body anvil which is the type to be most likely to have all the face removed. In that case it cannot be welded with any strength (brazing is the only possibility and it SHOULD be oven brazed meaning it needs machined faces.) and heat treating is probability not possible in this case either. . . . 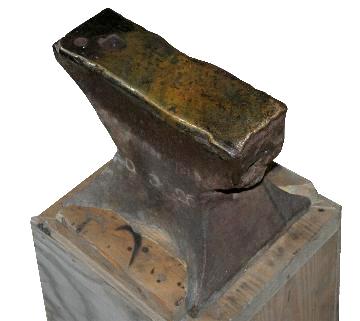 I need to finish my article on using old anvils. . I've got some beauts that most would consider junk that are FINE for doing anything you want. "Repairs" would probably ruin them. Not too long ago I bought a $50 hornless junker (left), then needed a demo anvil. . everything locally was too big and had too sharp of corners to be useful (over jealous repairs by the owners). I dressed the old worn out anvil to remove the heavy rust pitting, dressed the mushrooming and radiused the chipped places to remove cracks and sharp edges. Nothing on it is straight but it is a fine working anvil. I DO miss a horn but it did not stop me from making hooks and scrolls, leaves and other things. . . The first time I used this anvil prior to dressing it the only problems was the face was too rough and imparted a lot of texture to the work and the chipped edges were sharp and put cut marks (resulting in cold shuts) in the any place worked on the edge. . . I need to finish my article on using old anvils. . I've got some beauts that most would consider junk that are FINE for doing anything you want. "Repairs" would probably ruin them. Not too long ago I bought a $50 hornless junker (left), then needed a demo anvil. . everything locally was too big and had too sharp of corners to be useful (over jealous repairs by the owners). I dressed the old worn out anvil to remove the heavy rust pitting, dressed the mushrooming and radiused the chipped places to remove cracks and sharp edges. Nothing on it is straight but it is a fine working anvil. I DO miss a horn but it did not stop me from making hooks and scrolls, leaves and other things. . . The first time I used this anvil prior to dressing it the only problems was the face was too rough and imparted a lot of texture to the work and the chipped edges were sharp and put cut marks (resulting in cold shuts) in the any place worked on the edge. . .
LEFT: Old William Parker, Pond Forge English anvil circa aprox. 1850. Missing horn, face swayed and pitted from rust. Edges and face dressed just enough to be usable. |
| - guru - Friday, 10/14/05 20:24:34 EDT |
|
It would not take much to make the above anvil look "new". Fabricating a horn and arc welding it on would not be difficult. The edges could be welded up and the welding hidden in a few minutes with careful dressing. There are many problems with this. In not too many years this will be a 200 year old anvil and is already fairly rare today. It could easily sell for four figures then as long as the repairs are not found out. Given 20 years of rust on the repairs that is unlikely. . . Even today it could be a collector's item. It IS however just a poor example of an old anvil. Perhaps in the future it will be prized as-is for an old antique. . . As a usable tool it is a fine anvil. Replacing the horn would make it more so. But that leads to the question above of future fraud. . . and possibly destroying value as an antique. As a conversation piece it has more merit than the $50 I paid for it. Paw-Paw wanted it as a prop to continue to selling the Yankee sapper story which has no historical basis, but IS a good yarn. I like it for the wear and tear and fact that you can tell it was used long after the horn broke off. I also like it for the fact that it IS evidence that anvils can be worn out. For doing forge work it is just as good a anvils I paid a great deal more for. Shiney and new is nice but this anvil has character and works fine. It can only get better with use. |
| - guru - Friday, 10/14/05 21:11:07 EDT |
|
Mathew: I live in the Chattanooga metro area. We have LOTS of resources. I'm listed in the phone book in the Collegedale section. Give me a call sometime, but not on Saturday. |
| - John Odom - Friday, 10/14/05 22:17:00 EDT |
|
I'm sorry I'm not a member, but please help me. I've been surfing the web for three day's now and this is the closest I've come to maybe finding something out. I found an old hammer head, it is a Heller Bros. product, It is stamped on the head HELLER, with a horse, MADE IN USA and the number 521C. If you can tell me any thing about this I would love to hear it. Thanx John John |
| John Burgdorf - Friday, 10/14/05 22:49:52 EDT |
|
Please just bare with me a little longer. I have an early 1900's eagle branded Fisher that I found at a flea market about 10 years ago. Half of the top, hard plate was missing. I did a spark test and the body is just cast iron, so I decided to remove the old plate and replace it. I have access to an acetylene torch, an arc welder and coal forging tools. I am willing and prepared to pop this sucker into a homemade brick/coal oven and braze it. However, I want to make sure I do it right. I now know that I don't have to temper it which is a huge relief. I plan on taking an entire day (as soon as I get some coal) and slowly heating it up to brazing temperature. Also, would it be a good idea to weld the edge after it is brazed or will it be strong enough as is? I sincerely appreciate everyone's contribution and patience with this endeavor. Thank You!! |
| Matthew Gardner - Friday, 10/14/05 23:00:37 EDT |
|
Matthew G : You will not be able to weld the edge afterwards, DON'T TRY. If You insist on trying to furnace braze the plate on, get some furnace brazing compound. It is a mixture of fluxes and finely ground brazing alloy made for this type of job, but admittedly usually on a smaller scale. The compound is placed in the joint before heating. Put the hardee & pritchel holes in the plate before You start, and make carbon plugs to keep them lined up. The other end of the plate can be positioned by a U shaped steel bracket that You gan grind off if it gets brazed fast.The joint needs to be thin to be able to take the impact, this is really important. Your idea of a propane fired furnass is the way to go, it will take a lot of fuel and a lot of time to get this job done, Grant's "20 minute gas forge" as shown on this site is the way to build it. This is stacked firebricks and a blown burner. I forget where it is on this site, but it is at the area where they are discussing forges. If You pull it off, You will understand why everyone was discouraging You, If You fail, You will REALLY understand. |
| Dave Boyer - Saturday, 10/15/05 01:26:37 EDT |
|
Dear Gurus, I'm still alive... following along every day, just not much to toss into the discussion. But now I have a question again :) I finally have access to some good-size blocks of steel, so I of course want to make a good power hammer. I'd like to do bolt-on dies if possible. What I need to know is how fine of finish I need to put on the mating surfaces between the dies and the top surface of the anvil. Unfortunately, I would hazard to guess that I will have to lap the mating area flat... in which case I'd like to know how fine of lapping I'll need to do. Thanks for your help! Bright moonlit night in Kaneohe, Hawaii. P.S. Soon to join CSI, now that I have a _real_ job... :) |
| T. Gold - Saturday, 10/15/05 06:42:24 EDT |
|
About the brazing compound. I bought prefluxed brass brazing rods. Could I flux the joint and use the coated rods? I have been draw filing the anvil making sure the top is as flat as possible (here again, I don't have access to machining equipment) and I will be absolutely sure the top fits as flatly as possible. Some of the top corners on the anvil are worn to a curve but not bad enough to be of concern. I know this isn't going to be easy, but believe it or not I think it's fun. This will just make another story for me to tell people about one way or the other. Of course, if it works I will have repaired an anvil for less than $10. |
| Matthew Gardner - Saturday, 10/15/05 08:36:52 EDT |
|
Mating Surfaces and Finishes: TG, The finish is not nearly as critical as the flatness. In machining the surface finish is described as RMS (Root Mean Surface) and is described in numbers next to a little finish mark. Flatness is another thing. If you blue parts and you have a rough machined surface of say a 250RMS then the bluing would be easily visible on the cutter marks as 1/16" wide bands with more or less equal non-contact spaces. What would be important is that the contact be equal across all the high spots. Coarse machining with a powerful machine tool will produce a 250 finish. Sawing, flycutting and shaping will produce a rough but flat surface. Fine sawing like a small 4x6 cutoff saw with a 10-14 TPI blade will produce a 125 finish but not necessarily flat (actually most unlikely flat). Most milling on small mills and turning on small lathes will produce a 125 finish by hand or power feed at a fairly fast rate. Good iron castings and fine flamecutting can produce a 125 finish. A 64 RMS finish is a very smooth machined finish that you cannot easily see cutter marks. It will feel very smooth using the fingernail test but you still may be able to detect some wavyness. At 125 you can definitely feel the surface roughness with your fingernail. The grooves in a phonograph record if lightly pollished to take of the sharp peaks would be about a 64RMS finish. Normally a 64 is a VERY good machined finish. A 32 is a very smooth but flat looking surface like uncoated paper. A 64 finish is difficult to achieve by hand feeding on most machines, requiring a fine power feed. Most machinists when faced with producing a 64 finish will polish to a 32 to be sure it meets the requirements. A 32 RMS finish can be produced on most hard metal with 180 grit paper. In jewelery a fine cast finish may be a 64 to a 32 finish. A 16 finish is considered polishing in machine work but can still be a semi-flat surface. An 8 is equivalent to rough polish and less than that is a fine polish. There are surface finish standards or comparison blocks sold for machinists as well as electronic devices for measuring surface roughness. In the rougher finishes the example blocks have turned, milled and shaped surfaces because each process looks different at the same finish. I have a very old set of individual blocks produced by General Electric before WWII. These are probably some of the oldest standards made as this was the era when numerical specifications was becoming more important to industry to avoid arguments over things that were often subjective (like judging an Olympic event on artistic merit). Flatness as noted has little to do with surface finish except that most machine tools produce a very flat surface when doing fine machining. . . UNTIL you unclamp the work. When a machinist needs a very flat part he will clamp the part as gently as possible and produce a rough cut, then flip the part over and use that surface as a reference and machine the oposite side then repeat the process several times. Getting a piece square and true as well as flat is a trick when starting with rough stock or a casting. That is why good drawn bar and stretched aluminium tooling plate is so pricey. Starting with true material has great value. On you power hammer if the surface finish is between a 250 and 125 that will be fine. An engineer would specify a 125 or better as well as a flatness spec of +/- .002" on a small hammer mating surface and +/-.005 on a larger machine. You have to remember that steel is flexible at any temperature and when you bolt down dies you could easily bow small dies .015" or more with 1/2-13 bolts. . . The hardened die surfaces would be speces out at a 64RMS finish all over and a 32RMS max on the working surfaces. On a DIY hammer you get away with a LOT less but you do need fairly flat mating surfaces for the dies. Welded on flanges will warp a bunch but the bolts will pull pull the warp back down. . . The important thing is that parts do not rock back and forth in use. Its one of those subjective things were you know it is "good enough". Use your own judgement but don't get too anal about it. Often a bad fit will let you know then you just fix it. . . |
| - guru - Saturday, 10/15/05 09:33:37 EDT |
|
Hi Guru I am a bit confused about your post concerning cast steel anvils of marignal quality. You rate an LMF anvil as marginal quality compare to a Nimba. The Nimba is made from 8630 and so were the early LMF anvils. Then they switch to an 8620 special blend that they found to have better wear resistant and hardness qualities. They are both cast with very nice finishes in very qualified foundries. They both have a 50 Rockwell. They are both professionally machined and hand finished. I am confussed how a Nimba is of better quality?? Now the MFC is 4140, but only has a 30-35 rockwell. I have been told by MFC that the fast quench makes the face resistant to dent and dings at only a 30-35 rockwell. I would have to try one to believe it. If I just don't know some details that you know that validates your post they may be possible. I am not calling you out on your post. I am just really confused by it since I am not a metallurgy expert. Please validate. I am really sad to here production has stopped on the Peddinghaus due to unavailable billet sizes. Thank You |
| burntforge - Saturday, 10/15/05 09:47:26 EDT |
|
Matthew, $10. . . ??? The fuel to heat the anvil to do a forge or furnace braze is going to cost $35 to $75, more if your furnace is not well constructed. If you start with too little you will easily waste the first $50 worth. . . That is how these jobs go and end up costing a lot more than you planned. On large flat surfaces the joint is prepared by making it very flat +/-.005" and smooth (better than a 125 finish - see above). The surfaces must be oxide free. A thin sheet of brass (also cleaned) is placed between the surfaces. A thin paste flux may be used esxpecialy around th edges. As John noted you need some way to keep the parts aligned. Then the whole is brought up to a low red heat to where the brass just becomes pasty and the parts settle together. This must be done slowly when cast iron is involved. Then the whole is let cool slowly. This is where the problem comes in. The slow cool will anneal the top plate to where it is dead soft. Very high carbon steel may air harden but this is a tricky area. Hardening will not occur at the point below which the joint freezes. Cooling the plate will warp it away from the surface pulling the joint apart. . . It may be possible to flame harden the plate after everything has cooled if need be but this is another big setup and expense. If you have edges that do not match up due to edge wear then you will need to torch braze these while the assembly is still very hot but the joint has frozen. It may be easier to grind the sides narrower to remove the radiused area. |
| - guru - Saturday, 10/15/05 09:55:26 EDT |
|
John Burgdorf: I'll take a stab at answering your question. Heller Brothers Co. apparently specialized in high-quality blacksmithing and farrier tools. A Google search shows them in operation from 1866-1899. However, with so many of their tools still around in very good condition, I speculate the tools were still being made after 1899. You can probably get specific information from the National Museum of Horse Shoeing Tools and Hall of Fame in Sulphur, OK (carousel@brightok.net). |
| Ken Scharabok - Saturday, 10/15/05 10:20:10 EDT |
|
Brazing - so, Guru, you are saying that I should flux the anvil, place a sheet of brass on top, another layer of flux then the plate? I was going to use brazing rods...but I think your way would be sooo much easier. Where can I find sheets of brass? Welding supply? I've never worked with sheets before. |
| Matthew Gardner - Saturday, 10/15/05 12:10:25 EDT |
|
Burntforge, I based my comments on statements made by folks that had bought LMF anvils 5 or 6 years ago. At the time they were reported as being too soft. Nimba had trouble with their early anvils and went to a different heat treater that gave them a harder heat treat than stated on their webpage (52-52 HRc rather than 50). The problem many of the modern makers have is that folks will buy an anvil then go out and test every square inch of the surface. On anvils the hardness will always vary due to the shape and size of the anvil and thickness of section. So a minimum hardness is given in the specs but in actuallity it is often harder than stated. I will admit I have not personaly comparison tested these anvils and have only used two of the three. I prefer a rebound test at the center of an anvil to other tests all over the face. Old makers had some of the same problems but did not have numeric values to state or meet, they were just the best that could be made. In the case of the top brand anvils this was VERY hard to where chipping was common ESPECIALLY when folks did not dress the corners of anvils. Today makers are specifying a softer anvil to reduce chipping complaints and the possible libility of flying spalls. This is a problem for numerous industries making hard steel parts and tools. On anvils I would make them harder and ship with good rounded corners that are less likely to chip rather than hold back on the hardness. Another problem that is universal is that larger anvils do not harden as well as smaller anvils. When a line of anvils is made from the same steels the smaller anvils will be hard and the larger softer because they are difficult to quench and can be self tempering from residual heat. In general all the cast anvils are made softer than the plated or forged steel anvils becuase it is difficult to get a really good high carbon steel casting. Kohlswa makes (or made) a realy hard cast anvil but they also had a reputation for chipping. MFC doesn't state a hardness on their website but claim water hardening of the alloy steel which should produce a harder steel than the normal oil quench for this steel. The heat treaters guide gives untempered hardness as high as 59HRc untempered for this steel. Their small hollow anvils should quench considerably faster than solid anvils and thus achieve significantly more hardness than solid types. However, I would question what steam buildup does in the closed spaces. . . I personaly prefer the very subjective USE test. My two best working anvils were a 100 pound Kohlswa and a 128 pound M&H Armitage (late) mouse hole. The Armitage was one of the hardest anvils I have ever used. For small work the current 300 pound Kohlswa I have is not nearly as convienient as its 100 pound brother that I no longer have. It is too long a reach from the center of the anvil to the tip of the horn and the horn is a bit too bulky. I have not had a chance to do heavy work on it but I am sure it is better for the work that it is scaled for. As to softness and marking of anvils. In careful use anvils get smoother over time. However hammer edges WILL mark an anvil and unskilled or klutzy users can make a mess of the hardest anvil face. So markability is not a very good test. However, I HAVE seen anvils so soft that our 1" ball 10" rebound test will leave a dent in the face of the anvil. . . |
| - guru - Saturday, 10/15/05 12:27:24 EDT |
|
I'd like to inject there is always the possibility older anvils may have been in a barn or structural fire, which would have nicely annealed them. My neighbor has a 100 LB PW fished out of the ashes of a barn fire. Perhaps at the CSI Hammer-in we can borrow it for you to illustrate the dropped steel ball test. Larry Wood, in Dayton, OH, shop burned down. He had 10-12 anvils in it. I know he had at least some rehardened and it was a fairly expensive process. |
| Ken Scharabok - Saturday, 10/15/05 12:52:34 EDT |
|
I'm a student at Chandler High School in Arizona and for an english report we must research a topic we are mildly interested in and would like to know more about. I chose blacksmithing, it has always been something I i found interesting. I would like to know if there are any blacksmiths willing to have a an online interview (e-mail) with me for my research purposes. The sooner the better. Thank you. -Daniel Welch |
| Daniel Welch - Saturday, 10/15/05 13:24:26 EDT |
|
coated rods should be fine. After you flatten the anvil, you need to mate the plate by painting on some machinists blue, setting the plate in place and rubbing to reveal high spots. File or scrape the high spots and repeat.... |
| adam - Saturday, 10/15/05 15:02:44 EDT |
|
Dear Sir, Do you know about beeswax finish on iron/steel hardware items. pl. advise. regards, sanjeev |
| sanjeev - Saturday, 10/15/05 16:39:35 EDT |
|
beeswax finish |
| - sanjeev - Saturday, 10/15/05 16:40:11 EDT |
|
Burntforge, are you sure that alloy was 8630? The last two digits of an alloy number is the average carbon content so we are looking at a .30 carbon steel. Sorry, but I don't think that will get to 50Rc in that mass and thickness. I think it may have been 8650. Hardness on the surface does not imply hardness deep into the anvil. A hard surface underlain by a very soft core will crack, dent and chip easily even though it is 60Rc. I would prefer a Rc 50 to a depth of several inches rather than Rc 60 for 1/4" and then Rc 30 to the core. |
| quenchcrack - Saturday, 10/15/05 16:40:17 EDT |
|
Hi quenchcrack I did make an error. The Nimba is 8640 and the LMF anvil is 8630 Nickel-Chrome Moly Alloy. What do you think of the little farrier MFC anvils with the 4140, but only with a 30-35 Rc even with the tempering holes for fast quench. How can they have a hard service with such a low RC? Thanks |
| burntforge - Saturday, 10/15/05 17:15:32 EDT |
|
Jock Guru Thank You for the detailed anvil information. I found it very interesting and helpful. I did look into the RC hardness of their anvils contacting the a couple of times. They appear to be a nie anvil and a great price. I would like to try one as you said before a purchase. MFC uses those anvils in their farrier school and they have three hundred students a year and they said they hold up very well withour denting. Early one they did mention they had a baych of the bent sideways rough finish ones that did indeed dent and they are sold as a second. I didn't think they were well knoiwn and was really surprised to see them advertising on Anvilfire. I am really glad they are bringing more revenue to this sight and making their product more well known. They carry many farrier supplies. |
| burntforge - Saturday, 10/15/05 17:21:45 EDT |
|
Forgive my spelling. My pain medication is making it a little difficult to type. Jock Thanks again for the time you put into the response above. I really love this site and appreciate all the time and efforts everyone puts into responses and helping others. |
| burntforge - Saturday, 10/15/05 17:26:11 EDT |
|
Guru; I have a couple of anvils that have the horn but are missing the heel, (including an 1828 William Foster), it has become clear to me that these must result from confederate raids into union territory as "payback" for their removal of horns... Now lets see how long it takes to get this mal-factoid accepted as gospel truth! Thomas |
| - Thomas Powers - Saturday, 10/15/05 17:33:42 EDT |
|
Tommy That is a good one! |
| burntforge - Saturday, 10/15/05 18:25:38 EDT |
|
Jock, thank you, that was _exactly_ what I needed to know. I didn't know about the RMS measurements. I've seen those mentioned before but had no clue what they meant. I only need a portion of the surface to be flat and true like you are saying, so I will probably rough it out with a sanding disc in the grinder and then lap the part I need flat with some float glass with a sheet of 220 grit sandpaper contact-cemented to it. As you mentioned I'm planning on probably using 1/2" bolts for the hold-down... good point about the warpage. We shall see how it works. Thanks again! Cloudy and cool in Kaneohe, Hawaii. |
| T. Gold - Saturday, 10/15/05 18:31:32 EDT |
|
Mark your calendar: The first annual CSI - anvilfire.com - Hammer-in will be held on the farm of Ken Scharabok (Poor Boy Blacksmith Tools) near Waverly, TN on April 21-22, 2006. Featured demonstrator will be BigBlu Powerhammers, with the opportunity to test drive at least one of their hammers. Primitive camping on site, but motels and a full-service campgrounds (at Loretta Lynn's Dude Ranch) nearby. Fishing pond on site for the kids. Strong possibility of a tour of the nearby World of Tools Museum - probably the largest private collection of tools in the U.S. Details are still being hashed out, but likely there will be an item donation to an auction or iron-in-the-hat drawing, in lieu of a registration or vendor fee, at this point. Tailgate sellers WELCOME!!! This is intended to be an very laid back event, much like the early ones at the Studebaker Family Homestead. |
| Ken Scharabok - Saturday, 10/15/05 18:48:42 EDT |
|
Burntforge, carbon = hardness. Quenching fast does no good at all if the carbon content is too low to get the metal hard. 4140 is a good, tough steel with adequate hardenability for small anvils. 30-35 Rc sounds soft to me. It can be quenched in fast oil and tempered harder than that. I have quenched 4145 in cold water to get maximum hardness and depth of hardening. This was when we were making oilfield drilling tools. Ever see a 12" diameter bar of steel 35 feet long split down the middle like a old log? I have pictures...... |
| quenchcrack - Saturday, 10/15/05 18:57:03 EDT |
|
Ken, BRAVO! I hope to be there! |
| quenchcrack - Saturday, 10/15/05 18:58:15 EDT |
|
I've got no experience smithing copper. Are copper rivets done cold? Is a 1/4" diameter copper bar strong enough for a coat rack? |
| Tyler Murch - Saturday, 10/15/05 20:26:19 EDT |
|
The 1/4" is for the rivets that hold the hooks by the way. |
| Tyler Murch - Saturday, 10/15/05 20:27:28 EDT |
|
Someone can appoint me to where to find some (or lots) of photograps about artistic blacksmithing (doors, window guards, candlesticks, and so... please and thank you. V. Zamora. |
| Víctor Zamora - Saturday, 10/15/05 20:33:28 EDT |
|
T. Gold A quick lapping compound for hard steel parts, that will do a faster job than the glass with paper is "Clover Reel Mower Sharpening compound" This is a water based, silicon carbide grit in a gel. It is used to sharpen the reel mowers used on golf courses. You may be able to get a pill bottle full if you know anyone who works a golf course greens. Clover makes many diferent compounds, in both silicon carbide and Boron Nitride. The oil based compounds are available in small cans, and in different grits. With very good technique, a flatness of 6 to 8 light bars is possible from machine lapping and with VERY good technique 4 light bars by hand, in a clean room. If I remember correctly, a light bar is 4 millionths of an in from flat. Light bars reffers to using a monochromatic light and an optical flat to measure flatness. I do remember the number of light bars one can attain, as I spent several months as a tech school coop hand lapping small discs to a 4 light bar standard. Very slow work, and boy was it boring. |
| ptree - Saturday, 10/15/05 21:44:22 EDT |
|
Thanks for your help and info source for the Fisher Anvil. Bill |
| bill - Saturday, 10/15/05 21:54:15 EDT |
|
V. Zamora, żWhat are your interests; Mexican iron? There are many books. There are some good old books that you may find at big city used-book stores...or perhaps at www.campusi.com or www.abebooks.com. "Hierros Forjados" by Antonio Cortés from the 1930's, is a beautiful book. "Hierros Coloniales en Zacatecas" by Victor Manuel Villegas, Imprenta Universitaria, 1955. "Hierros de Oaxaca" by Enrique A Cervantes, Mexico, D.F., 1959. A fairly new book, a how-to on blacksmithing, is "Guía Práctica de la Forja Artistica" which is listed under "Bookshelf - Reviews". Click on the menu "NAVIGATE anvilfire" on this page, and then "Bookshelf-Reviews". Scroll to "Guía Práctica...". A big, fairly expensive book is "The Art of Ironworks in Mexico" in Spanish or English. One of the large Mexican banks (comercio) published it. |
| Frank Turley - Saturday, 10/15/05 22:08:22 EDT |
|
Thank you Frank... see you soon. V. Zamora. |
| Víctor Zamora - Saturday, 10/15/05 23:06:18 EDT |
|
|
|
|