| WELCOME to the anvilfire Guru's Den - V. 3.0 |
|
THIS is a forum for questions and answers about blacksmithing and general metalworking. Ask the Guru any reasonable question and he or one of his helpers will answer your question, find someone that can, OR research the question for you. This is an archive of posts from November 17 - 23, 2002 on the Guru's Den |
|
|
|
Bridge Trusses Nalani, Almost all bridge trusses are made of steel. In the past they were made of wrought iron but that is no longer made in bridge size quantities. Prior to that wood trusses were used. The first all metal bridge was made in England of cast iron but I do not think it was a truss. Modern bridges rust. Paint is used to prevent rust. It is renewed often. If you have ever been on the golden gate bridge in San Fransisco, CA you will have seen painting crews. They never stop painting. They sandblast off the old paint and apply new. When they get to the end they go back and start all over again. . . There is a steel called CorTEN that is rust resistant. It rusts until it has an even coating and then suposedly stops. However, every and all components must be CorTEN steel. The problem is where is come in contact with other substances (the pilings, the road bed). AND it creates rust stains on other things near it. The result is that many highway bridges and outdoor sculptures made of CorTEN are now being painted. Stainless steel does not rust but it is ten times as expensive as plain carbon steel and labor to make anything of it is also higher (about 3x). It is also not as good a structural material as plain carbon steel so more is required. . . Good exterior rust protection is a multi-coat process. See my article on Corrosion and its Prevention on our 21st Century page. In truss design the mathematics are what is important. But that must be based on good logic and the capability to visualize complicated structures. |
| - guru - Saturday, 11/16/02 23:14:10 GMT |
|
Zaida, Your email bounced. Contact me direct. Gerg, See our Getting Started article. The size of your hand hammer is more critical than anvil size. Fuel costs are largely a matter of transportation costs. You can easily spend more on shipping than on the fuel. Kayne and Son has fair prices. The amount you need depends on how long you work at the forge every day and how many days a week. . . Order a 50 pound bag of good coal to play with. Then you will have an idea about what GOOD coal is and how much you need. Stainless: Tracy, Heat treating stainless requires accurate temperature control and is generaly based on time held at temperature and is a different process than carbon steels. There are huge differences in alloys and unless you know what you have it will be very difficult. Holster Springs: Mike, there are a couple ways to make springs. One is to start with spring steel, shape it and heat treat it (see our Heat Treating FAQ). The other is to purchase stainless spring wire. This is a prehardened alloy steel designed to be bent into shape and used as-is. Generaly it is limited to round wire. It is TOUGH to bend but it avoids the heat treating. McMaster-Carr sells spring steel music wire, flat spring steel AND stainless spring steel on-line. |
| - guru - Saturday, 11/16/02 23:29:16 GMT |
|
i am working on a chain mail hauberk and have use some thick 12gauge fencing wire so i know it wont rust i have all the links cut and was wondering if you had any advice on making it because this is my first one and dont want to screw up. |
| Bryan - Sunday, 11/17/02 01:02:21 GMT |
|
Bryan, The cut ends of the galvanized wire are going to rust. There are numerous web-sites that cover nothing but mail. Try the web-ring on our Armoury page. |
| - guru - Sunday, 11/17/02 01:38:38 GMT |
|
Thanks guru! Anvilfire is an amazingly rich wealth of knowledge, I'm so glad I stumbled upon it. I would really be groping in the dark without this place. |
| Gerg - Sunday, 11/17/02 02:52:20 GMT |
|
First Iron Bridge The Guru is correct. The first iron bridge was constructed at Coalbrookdale in England in 1779. It crosses the Severn River and it is still in service. The ribs and plates were made of cast iron, from Abraham Darby's foundry nearby. Heavy trucks are no longer allowed to use the bridge. The bridge is a single arch bridge, and the joinery is of the type traditionally used by woodworkers. The first bridge to use wrought iron was constructed, in 1826, by Thomas Telford. The bridge had wrought iron chains. It spanned the Menai strait connecting Wales and Anglesey. I presume that it was a suspension bridge. Regards from the G. W. N. (Montreal sector), where it's supposed to snow heavily tomorrow. SLAG. |
| slag - Sunday, 11/17/02 04:55:09 GMT |
|
Yeah Caleb !!!! Guru and Nalani: Another problem with corten in marine environments is that it continues to rust wherever water pools and wherever there is a mechanical attachment where 2 layers touch or overlap. Folks who trusted the hype are much less than pleased...the other thing is the awful baby-poop orange color it turns. Gimmie honest rust and oversized steel most anytime...clank |
| - Pete F - Sunday, 11/17/02 06:59:43 GMT |
|
Vicopper, Pete and all, I think that joining CSI was my only logical choice. I personly know(face to face) about ten local blacksmiths and I acquire on average, 3 books per week(mostly used) that are composed of history, experience and technical data on various subjects ranging from steam producers to stone walls. Yet, with all of this physical knowledge at my fingertips I still find myself coming back here almost every day, just to make sure I am not missing out on any of the very practical, wide ranging and often rare information shared here. Don't forget the ambiguous I-FORGE demos! They are substantial in their own right! If one were to add up all of the combined referance data, knowledge and wisdom that is on tap here at AnvilFire via the various permanent(yet continualy updated) pages and the many minds that abide amoungst us and provide invaluable advice, I am sure it would surpass the composition of many a university's library and staff. I think that one dollar a week is not asking very much at all to maintain such a unique and substantial resource! I am curious as to the estimation of how many blacksmiths have been born from this site or at least pushed out of the nest? With over 2,000,000 visits it is most assuredly a substantial amount! Being an advocate of an institution such as this, that is spreading the word about an art/craft in which the old Master Blacksmith's kept trade secrets which they would only pass to their own blood or sometimes their apprentices is liberating in a way. |
| Caleb Ramsby - Sunday, 11/17/02 07:53:19 GMT |
|
zaida.monnich Pewter figures moulds can be bought from these suppliers they can be custumized after casting them www.miniaturemolds.com www.dutkins.com/index.cfm www.princeaugust.ie The best of these is Prince August but they are located in Ireland and shipping can take forever. The other two are in the US and shipping is yherefore much easier. they also sell kits that get someone new to casting making figures within an hour or two. I can and have made custom molds and figures but unless you are looking for several hundred figures the price will give you pause. Most gamers take standard figures and customise them afterwards. There are several sites on the web that show how to do this. For figures that are going to be used and handeled for gameplay be sure to use a lead free pewter, or for a cheaper sorce of mould metal you can use the lead free solder put out by Kester it has a low melting point (for extra mould life) and has the advantade of being available at any good hardware or plumbing store. e-mial me if you have any further questions I will be happy to help Mark |
| Mark P - Sunday, 11/17/02 14:27:37 GMT |
|
got a ? I bought a lg 25 new model in great shape but no motor. how much is it worth. I want to know if i payed to much. thank you |
| steelwelding - Sunday, 11/17/02 18:55:03 GMT |
|
Caleb, I can't answer for how many smiths have been "born" at this site. But I can say that in the last five years, I've sent at least 25 smiths here for answers to questions that I've been asked either in person or in email. At least five of them are now members of CSI because they felt the same way as you do. I just finished answering a question for a "new" smith in California. He found me via a search for blacksmith at one of the search engines. I did answer his question, but I also encouraged him to check out this site closely. |
| Paw Paw - Sunday, 11/17/02 19:10:46 GMT |
|
I am an 18 year old senior that over the past few years I have become very interested in blacksmithing especially in sword making. I have a few questions about this buisness and I was wondering if you could help me out with these questions 1.can you make a good living by doing this? 2.would going to an art school to study metals in an addition to welding help? or if there is any thing else please e-mail me thank you |
| Alex - Sunday, 11/17/02 19:29:29 GMT |
|
Harbor Freight Anvils> Well, after reading about the 110 pound cast steel anvil in an anvilfire article, I visited the harbor freight website. I did a search for "steel anvils" and got three listings, one of which was a 55 pound carbon steel anvil. From the photo, it looks like its a better finish than the 110 pound model. But thats not much to go on. Has anyone tried the 55 pound model, and was it any good? Thanks. |
| - taylor - Sunday, 11/17/02 20:17:40 GMT |
|
Little Giant Hammer: Steelwelding, "Great shape" can mean a lot of things. The newest of these machines is 40 years old and the average is 80. 25 pound Little Giants are one of the most abused machines as a group as I have ever seen. Guides and pins and bearings wear, springs get tired, dies get battered or rusted into place, do-it-your selfers make modifications. . . The price range for these machines is $400 to $2800 US. There are several early and late types as well as one heavy duty model 25# hammer that is worth more than the others IF you know the model. Some have anvil blocks and others do not. Some were designed to use a motor and others off a line shaft. Those designed for use with a line shaft take considerable work to install a motor (thus reducing the price if there is none). Lots of folks think the late models are better but they are NOT. The late guide system wears curved making it impossible to adjust and expensive to repair. . SO, there are too many variables to say without inspecting the hammer. |
| - guru - Sunday, 11/17/02 21:26:10 GMT |
|
Taylor, I have not seen the 55 lb cast steel anvil in person but as I recall, it sells for about the same price as the 110 Lb Russian anvil. The 110 Lb is not a bad anvil for $.79 pr lb. If this is your first anvil, bigger is better, believe me. The face of the Russian anvil is a bit soft but still very servicable. Check out the review of the Russian anvil in the Anvilfire news section. |
| Quenchcrack - Sunday, 11/17/02 21:38:14 GMT |
|
Sword Making: Alex, the TOP people, those with higher degrees in engineering or metallurgy as well as having studied the applicable art and history and who produce the very best work can make a fair living. But of those most struggle. Those that are lucky enough to find work in movie industry OR produce museum quality collectors pieces AND develop a well known reputation can make a living at sword making. It is not easy and there is a LOT of competition at every level. Imports currently dominate the US market and they range from cheap slave labor junk to masterpiece art works from Eastern Europe where the economy is still in terrible condition. |
| - guru - Sunday, 11/17/02 21:40:06 GMT |
|
55 Lb Harbor Freight Anvil: We happen to have that anvil up at our forge. QC is right, it costs the same as the 110 Russian (which makes me wish I'd known that before I bought the 55lber..) but it's a sturdy little anvil if you mount it to something HEAVY. Ours isn't presently mounted (it's just temporary until we get our big anvil placed) and it bounces alllll over the place. The hardee hole is also a bit far back on the face of the anvil for my taste.. making the anvil bounce around even MORE when you're using the hardee. Once the bigun' is in place, I plan to build a good sturdy base for the 55lber and bolt it down tight. I'll probably take a sander to the face too.. smooth out some of my errant hammer marks (from working the metal too cold on an anvil too soft and light). Chances are good we'll be buying one of those 110lbers soon too. (Can never have too many anvils. ) Still trying to find a blower to replace the burned up Vaccuum. Can't seem to get my hands on a car heater blower.. might have to get desperate and use a hair drier agian! Robert "Asgard" HPL steele |
| - Robert "Asgard" - Sunday, 11/17/02 21:52:36 GMT |
|
where can I learn to become a blacksmith? |
| Bill - Sunday, 11/17/02 21:53:50 GMT |
|
Hello Guys, Sorry i have not been in touch, being at school keeps me pretty busy. I am studying Arboriculture in Maine. In september and october i went to a blacksmiths roundup and then volunteered as a blacksmiths apprentice for living history days at the maine forest and logging museum. I am slowly returning to my forge for some tool needs. I would like to make a peavey and a pulphook. I would like some assistance on design and fabrication, preferably without arc welding, but i can weld if need be, im just more interested in traditional techniques. The hinge point and the cone/point fabrication is challenging my mind. Also the fabrication of the pulphook handle and attachement to the hook itself. Maybe someone would like to do a demonstration, or next fall when i figure out this stuff i could do one. Thanks for your help, hope all is well. |
| Robert Hogg(SmithinScout) - Sunday, 11/17/02 22:11:28 GMT |
|
in your gettin started in blacksmithing you said dont start with a hammer too big if your slight build. I'm 6'2 343lbs is it ok for me to get the 3lb. hammer? |
| Bill - Sunday, 11/17/02 22:36:38 GMT |
|
Bill, Carl Carlson, Sr., was about your size and was the senior blacksmith for making assembly line equipment at International Harvester, south of Chicago. Occasionally, he would wield a 16 pound hand sledge. Your body will tell you what you can handle. I use a 3 pound cross peen for most of my work, which is of the hardware variety, and I don't weigh 200 pounds.....yet. |
| Frank Turley - Sunday, 11/17/02 23:07:40 GMT |
|
Guru, Two questions: I have a buffalo Forge Co. post drill that has a chuck on it that is marked: "KO Lee Company, Aberdeen So Dak, A470". I'm wondering what the best way is to make this drill work with regular drill bits. The chuck turns easy, I think it would work fine with the right drills. I have a Lufkin metal folding ruler #1306D. The markings on one side of this are inches, the other side look like inches at first glance, but each inch is longer than an inch!(actually about 1 3/16"). The side with the "too long inches" is marked "100ths". Have you heard of such a scale? I didn't notice this at first until I thought I was all messed up when some measurments kept coming out different. Doug |
| AZDoug - Sunday, 11/17/02 23:53:31 GMT |
|
I am after the best deal for 500Kg blacksmith coke, area around Melbourne/Victoria |
| Alfred - Monday, 11/18/02 00:27:40 GMT |
|
55 Lb anvil - Just checked www.harborfreight.com and found that their 110 pounder is 30 dollars more than the 55 lber. Still a great bargian though. Robert "Asgard" Correcting his error. |
| - Robert "Asgard" - Monday, 11/18/02 01:10:57 GMT |
|
Bill, Take a look at the IForge demo #6 Hammer Control. Control is VERY important and there are many factors that affect it. I am 6', 215# and can wield a 10# hand sledge but not for very long or very accuratly, once I used a 14# hand sledge for a few heats just to see what would happen(it wasn't pretty). The perfect weight for me is about 4 1/2# to 5# but when I am working small stock I use a proportionaly sized hammer, down to 2#. Remember that force is equal to the mass times the velocity squared. So the FASTER you can swing a hammer the more force you can exert and usualy the more accurate the blows. The tendons in ones forearm can sustain severe damage by jumping into Blacksmithing with too heavy of a hammer, one must progress in stages, start at 2# or for your size 3# shouldn't be that too far up the scale and work up. Before you start smiting hot iron I would suggest practicing on a piece of 2X4 which you should hold in your hand(not the end you strike;). Back up the 2X4 with something solid like a tall stump placed at the correct height for YOU. As the IForge demo states this is at the bottem of your fist when standing in a natural position. You can use the indentations in the wood to tell how strong the blows are from various sized hammers. Remember to take BREAKS about every half a minute to two minutes of continous pounding. This is mandatory, because you would have to stop to heat the iron any ways, take this time to inspect your indentations and think about HOW you are swinging the hammer. Practicing on the 2X4 will show you what happens when fatiege sets in and will give you a whole lot of confidence in your aim. As with anything, warming up and streching are very usefull. I know a few blacksmiths that never use a hammer over 2# and still get plenty of work done. It is the technique that realy matters NOT the strength(although it helps). |
| Caleb Ramsby - Monday, 11/18/02 01:18:14 GMT |
|
Does www.harborfreight.com ship outside the US? |
| Gerg - Monday, 11/18/02 02:05:22 GMT |
|
Gerg, I'm sure they will tell you if you ask. |
| - guru - Monday, 11/18/02 02:19:22 GMT |
|
Lance Burch, My email response to your last re: tie wire, keeps bouncing. Hotmail won't accept it for some reason. |
| Paw Paw - Monday, 11/18/02 02:19:52 GMT |
|
Chucks and Scales: Doug, you have not said what is unusual about the chuck. If it is a standard style chuck it fits whatever round bit is within its range. Many do not start at zero. There were also many types of square tapered shank chucks that drill bits are no longer made for. I have a couple 1/16" twist drill bits that have huge 5/8" square tapered shanks. I've never seen a chuck for them but I am sure they were made in the 1900's. My best guess about your Lufkin rule is that if you look at the 12" mark that opposite it will be the 10 for tenths of a foot. The divisions between each number mark is probably 1/10 of the distance or 1/100ths of a foot. These are used in some contruction and in surveying. There are many odd scales made. There are engineering graphing scales that divide an inch into 20ths and 40ths. There are shrink rules for castings where a foot is 1/8", 3/16" or 1/4" longer than a standard foot. When patterns are made via the shrink rule the casting should come out to the acutal dimension. Shrink rules are usualy marked by the amount of shrink per foot AND the material to be cast. PI tapes are used to measure diameter by placing the tape around the part and directly reading the diameter. Each bas unit = 3.1416. . inches (or mm or cm if metric). Slide rules that were 10" were made so that the evenly divided L scale was exactly 10" and could be used as a measuring device. On my iForge demo on the framing square we discussed the fact that the standard carpenter's square has scales divided in 1/8ths, 1/10ths and 1/12ths and their multiples and subdivisions. The 1/12ths scale can really fool you but is also handy. It has even markings for 1/3rds and 1/6ths and if you are measuring something divided in thirds it will give you even markings so you are not guessing at decimal equivalents of odd fractions on a scale that doesn't have odd divisions. And a truely wonderful excersize is working with a dividing head where one turn = 1/40th (9°). So ten turns = 1/4, eight = 1/5. The dividing head input plate is divided up so that almost any concievable division of a circle can be made. Need a 213 tooth gear? Need to divide a hand wheel scale into 1/10ths or even 1/12ths? A didiving head can usualy do it. |
| - guru - Monday, 11/18/02 02:53:43 GMT |
|
When sharpening HSS and it gets blue, have you softened the metal and need to carefully grid it back until bluing is gone? I have recently heard that does not softent the metal. Thanks, Don |
| Don Pencil - Monday, 11/18/02 02:53:53 GMT |
|
Hammer Size: Bill, Frank Turley is a full time smith and probably can use that 3 pounder all day. I used to use a 3 pounder when I worked full time but now I prefer about a 2 pounder and due to too many hours at the PC I can only wield it for a short time. It takes me a couple hours a day at the forge to build up to where I can use a hammer all day. Starting with too big a hammer is a good way to hurt yourself. Start small. One of the most popular hammers is an 800 gram (1.76 pound) hammer. If you hand hurts or you tire quickly then you need to use smaller. Then work up as your muscle tone and control develope. CONTROL is more important than how hard you hit. The power comes from practice and control. |
| - guru - Monday, 11/18/02 03:05:10 GMT |
|
High Speed Steel HSS Don, Good HSS is designed to operate at a red heat at the cutting edge. However, it will not hold up long at that temperature. When you discolor metal while grinding the point at which you are grinding may be getting a lot hotter than the color surrounding it suggests. Normaly you have not hurt the temper of HSS steel but it is not good practice. Overheating can also cause cracking and other problems. The blue (or purple or yellow) is only on the surface so removing it is no judge of repairing a tool that has been overheated. |
| - guru - Monday, 11/18/02 03:14:09 GMT |
|
AZDOUG: Sounds like your rule has large marks for 1/10 ft on the "back". Small marks would be 1/100 ft. Harbor Frieght: I used a China 55 lb anvil for the first time at a Salt Fork Craftsmen meeting last Saturday. It was surprisingly good for not being tied down, but the horn would take major grinding if one wished to approximate a circular cross section at any point. Working with hot iron the top held up well for the limited use, only denting with a hammer miss. Bridges: An early 20th century bridge near me is slated for demolition. It has several 1x1 inch tension bars with forge welded eyes on each end. What is the probablilty these are wrought iron? Since this is Oklahoma, opened in 1890, statehood 1907, the bridge is probably no older than 1910 but is all riveted construction of angle iron and strap composite beams with no original field welding. It only spans about 75 ft but has several of the tension bars with welded eyes. A much larger bridge of the same vintage was demolished a couple of years ago but I was out of town and didn't have a chance to acquire any of the materials. |
| Andy Martin - Monday, 11/18/02 03:16:55 GMT |
|
Hammer Size: I cannot more wholeheartedly agree with the guru on this. When I was younger and stupider:-) My favorite hammer was a 6# hand sledge, I was pretty good with it and used it for everything, except the final tweaking of a blade. I am to the point now that I hate most hammers over 3#. It doesn't matter how big and how strong you are:-) You need to learn to use the right hammer the right way. Most people can push themselves hard enough to damage themselves and strong people are really prone to this, I have pushed myself to failure in the gym and at the anvil a number of times, it is stupid, don't do it. When you hurt yourself you increase the likelyhood of causing yourself chronic problems, especially from repetive stress injuries. You are probably big enough and strong enough, and determined enough to weild a big hammer, and even have some fair success with it, but it is much better to be patient and safe and start with a small good quaility hammer with a handle that fits you. And then take the time to learn how to swing it well, after you can work as long as you like with a smaller hammer you can start to use a heavier hammer when you need it and use it well. I am a full time farrier and blacksmith and I am WAY too young to feel this old. Take the time to learn to do it right, even if your body won't thank you, it might complain less later on:-) |
| Fionnbharr - Monday, 11/18/02 03:45:52 GMT |
|
Bride Iron: Get it weither it is or not:-) I love 1" square very useful size. Get it spark test it on a grinder and then get it a dull red in your forge and then thump it real good:-) If it fractures and splits kinda like wood it is wrought. Have fun and send me some;-) Remember wrought is cold short and you HAVE to work it hot. Don't hit it cold, cause it will split and fracture:-) It will also sometimes split past where you want it to when you are slitting it, so drilling pilot holes for your slits can save you some headaches. It loves to forgeweild though so enjoy... |
| Fionnbharr - Monday, 11/18/02 03:56:19 GMT |
|
Old Bridge Iron Andy, Wrought iron was made by a production process for making corrosion resistant iron for bridges and such up into the 1930's. This was the prefered material by some engineers and bridge builders. The forge welded tension rods are very probably wrought iron (99.9%) and there is a good chance that the rest of the bridge is too except for modern repairs. Go take a CLOSE look anywhere there has been heavy corrosion. It usualy shows the grain of the wrought iron. ASK the highway department engineer. If the entire bridge is wrought it NEEDS to be saved for the material. Otherwise it will go the scrap at 1 cent a pound and get turned into a Toyota. . . |
| - guru - Monday, 11/18/02 04:01:06 GMT |
|
BEWARE of ANOTHER 55# ANVIL SHAPED OBJECT! I was at the flea market the other day and came across another chinese cast ASO that superficially resembled the Russian version. This had "55 lb" cast in its side. The face actually still had casting pits in it! This despite some heavy (and crude) grinding. The hardy hole (centered in the "boat tail" shaped heel) still had casting sand inclusions and flash at the bottom, so that it was almost closed. It had a semi-conical horn and no table. Altogether the WORST A.S.O. I've ever seen. I'm sure no one here would be fooled, but some first time enthusiast might, somehow, mistake it or one that wasn't near so aweful, as useful. It was bad even by my low standards. Packing for California Tuesday... g'night |
| Bruce Blackistone (Atli) - Monday, 11/18/02 04:21:25 GMT |
|
Andy; Before I knew about such stuff, a whole wrought iron RR bridge was scrapped put about an hours drive from here..been kicking myself ever since. |
| - Pete F - Monday, 11/18/02 06:38:14 GMT |
|
Hi, I am out in the southwestern part of the US. I am looking for information on how to fabraciate a hand held bellows for a fireplace,a book or well-drawn plans, help please... |
| james perry - Monday, 11/18/02 11:52:18 GMT |
|
wrought iron: Pete me too - They took down an old bridge near me about 12 yrs ago and I didnt know enough to take advantage. Now I find myself paying to have WI shipped to me from the East Coast. Hammer wt. Its important to realize that muscles grow much faster then tendons. Its one thing to get strong enough to swing a 3# hammer, its another for the tendons to catch up to where they can safely take the strain. And I can tell you that once you get tedonitis in your forearm it takes a long time to heal up |
| adam - Monday, 11/18/02 15:13:39 GMT |
|
Hello I'm new at this game and don't type fast but here goes. I am searching for an anvil holddown device to help me work alone. Often cutting plates is a catch and dodge game,any ideas? |
| Stan Tilton - Monday, 11/18/02 15:15:40 GMT |
|
Any Blacksmiths in the Way? I'll be in Inyokern, California (between the Mojave dessert and Sequoia National Forest) for part of Tuesday and Wednesday, then bashing back to LA to drop off one of our people and up to Sequoia National Park for a meeting on Thursday. Time may be real tight, but if I'm going to be tripping over any of you, please let me know. I'll have my laptop to keep track of my office e-mail (bruceunderscoreblackistoneatnpsdotgov). I've actually managed to meet some of you fine folks in my travels, but missed catching up with others due to work-load and changes. Hope to try, anyway. Let me know if you're on the/in the way. (I'm getting up at 02:00 tomorrow to make the earliest flight to LAX, so I'm in for an early bedtime tonight.) Sunny and cool on the banks of the Potomac. Visit Sequoia and Kings Canyon National Parks: www.nps.gov/seki/ Go viking: www.wam.umd.edu/~eowyn/Longship/ |
| Bruce Blackistone (Atli) - Monday, 11/18/02 15:16:04 GMT |
|
Hold Downs: Stan, we have several on the iForge page. See demo #125 "Hold Downs" We have also had other designs sent to us. But most are rather complicated lever arrangements attached to the anvil stand. You can find this type design in the Art of Blacksmithing and other books. But I much prefer the simpler designs shown in our iForge demo. |
| - guru - Monday, 11/18/02 15:40:25 GMT |
|
In reading an old book on blacksmithing I came across the following. Is this possible or a bit of reprinted Lore? Is there a modern comparison? Thanks! TO MAKE STEEL AND IRON AS WHITE AS SILVER Take 1 pound of ashes from white ash bark, dissolve in soft water. Heat your iron red, and cool in this solution, and the iron will turn white as silver. |
| Ramiel - Monday, 11/18/02 17:04:54 GMT |
|
I have seen those Chinese steel ASO's being sold as "reproductions". I was told that they are hot (no pun intended) decorator items. For those of you who feel obligated to decorate your shop, here is the perfect accessory. Now if I could just find a cast iron hammer to go with it............ |
| - Quenchcrack - Monday, 11/18/02 17:56:46 GMT |
|
I'll cast another vote for smaller hammers. My first was a three-pound cross peen. Found it a little hard to control, but think part of that may have been a relatively thick handle - I have small hands. Now I have two favorites: an anonymous two-pound cross peen and the 800-g "Czech hammer" from OCP. I've observed that metal moves faster with the two smaller hammers than it does with the three-pounder, even when I'm fresh. And I can swing the smaller hammers for hours without feeling run down. I do find myself using three- and even four-pound hammers for driving chisels and punches, though. I mentioned this observation to my father, who taught machine shop and welding for decades. He agreed, and said that he'd seen so many students insist on using the biggest hammer they could find, even though they couldn't swing it very long or very accurately. There were some pretty big guys in his classes, too. Steve |
| SteveA - Monday, 11/18/02 18:55:29 GMT |
|
AZDoug: those markings sound to me like decimal inches (one foot divided in 10 instead of 12). |
| - OErjan - Monday, 11/18/02 18:55:55 GMT |
|
QC, I had several cast iron hammers given to me when I was very young in "toy" tool kits. First time you try to drive a real nail the face end of the head breaks off. . I learned VERY young about CI. Ramiel, You can create lye from wood ash and that will disolve rust and scale from steel. I think the heating step may have been a waste but then hot lye works faster. The results will be clean "bright" steel but the color will be normal steel grey. Sounds like a bit of poorly reproduced misinformation. |
| - guru - Monday, 11/18/02 18:57:47 GMT |
|
Comparing Hammers: IF you can swing a small hammer fast enough it will hit harder than a large hammer. Many smiths prefer quick and fast but others like slow and heavy. IF one hammer has more curve to the face (up to a point) than another it will move steel faster with less effort. If the face of the hammer is smaller it will SEEM like it does more to the steel than a larger hammer applied with the same force. Unless you look quite close at several hammers that appear similar you may not notice the subtle differences in the face that move steel faster. |
| - guru - Monday, 11/18/02 19:03:44 GMT |
|
re sword making: even though the europe/asian market is cheaper and only the best can get a job for movie production is it still possable to make a good living at say owning a store that sells swords and the such and selling items at medevil conventions or other events? |
| Alex - Monday, 11/18/02 19:12:49 GMT |
|
i'VE JUST RECIEVED A LITTLE GIANT,I THINK IT'S A 100.I need an expanded diagram of the flyweel an clutch mechanism,also what and where can I get to replace the clutch pads which I presume are aspestos?Does anyone have an 3hp motor for it,I'm on the central coast of Oregon,help and many thanks. |
| Don - Monday, 11/18/02 19:52:34 GMT |
|
Sandblaster vs Tumbler Guru! I inquired about tumblers before but now I am wondering if a sanblaster wouldn't be better. I have no experience with sanblasters. I make mostly small items such as hooks, candleholders, towel rods, etc... I presently wire brush and find it too time consuming and dangerous. I was thinking of cabinet sandblasters as a solution but I don't know if it's good enough to remove some of that stubborn scale. Also, I don't really know what type of blasting abrasive is better and how much cleaning can I expect from one bag of abrasive??? Also, a good sanblaster clean scale fast??? Yours Truly Louis |
| Louis - Monday, 11/18/02 20:25:46 GMT |
|
Smaller hammers: Since force is proportional to mass * velocity ^2, it sounds like it would be advantageous to have a comparatively long handle on a light hammer. I'm getting ready to re-handle a small cross-peen (probably a pound and a half) would it make sense to take a handle made for a framing hammer (14-18"?) and re-carve the eye end to fit the oval eye of the cross-peen. Or should I just use a ball-peen type handle? Curiosity: I have a small old square-face cross-peen hammer head with a VERY small eye - a pound + hammer with a tiny eye that would look more sensible on a six ounce ball-peen. . . any notion what the maker had in mind? A handle tapered down that small would be real whippy and minimize the shock back to your hand but I suspect I'd need to make 'em by the dozen and get real efficient at changing 'em as they broke. . . Or should I just drift out the eye to a more normal size? |
| John Lowther - Monday, 11/18/02 20:37:47 GMT |
|
Comparing Hammers, In my above comments about hammers I said that I can use a 10# hammer, I should have added that I almost never use it anymore(at least not one handed). The head size is over 2" dia. and it is flat, this combined with the slow speed that it is swung at with one hand meens that it doesn't move very much metal and thus impractical. With a 4# hammer I can move more metal than the 10# and the strikes are much more accurate and cause less fatigue and stress. When I first started I used a 3# hammer BUT at the time I was using ax's a LOT, both spliting and choping down trees. So I was preconditioned for blacksmithing. I am also amidexterous(I taught my self to be) so every few heats I switch the hammer hand, this helps to prevent fatigue greatly. After being away from the forge for a while it is ASTOUNDING how heavy a 2# much less 3# hammer gets after a few hours. It is control that matters though NOT power, this means lots of practice. I like to say "Practice makes better, nobody's perfect.". One thing I would like to add is that the control of the stock is just as important as the control of the hammer. When apprentices abounded the Master Smith would hold the stock and direct the striker's blow not only by taping the stock but by moving it practicaly constantly. It doesn't take long to figure out that a minute movement of the stock drastically changes the effect that the blow has on the metal. |
| Caleb Ramsby - Monday, 11/18/02 20:42:08 GMT |
|
Sandblasting I just realized that my previous questions might have been a little ambiguous. My questions are: #1- Does a sandblaster clean scale off well and fast? #2- Does it use up alot of abrasive material? Thank You Louis |
| Louis - Monday, 11/18/02 22:07:31 GMT |
|
Louis. A few years ago I aquired a 48" bead blast cabinet with dust collector. I honestly don't know how I lived this long without one. it can be used with different blast medium, from coarse ground glass to walnut shells and so goes from very agressive to fine cleaning. I use mine mostly with medium glass beads that will quickly remove moderate scale and leaves a fine finish that takes paint well. The blast medium is cheap and goes a long way since it is constantly recovered and reused untill it gets too fine to cut. It also works real well to remove galvanizing before welding, paint, rust, dirt, etc, etc. |
| bbeck - Monday, 11/18/02 22:29:58 GMT |
|
Harbor Freight Anvils> The following are the details for the "steel anvils" from harbor freight that most would be interested in. Just about everything else is too small or cast iron junk. The 110pound is Russian made. The 55pound looks to be made in India. ----------------------------------------------------------------------- 55 LB. CARBON STEEL ANVIL Heat treated and tempered for hardness, ductility and high resilience. Softer inner-body absorbs impact. * 1 x 1 square hole * Overall: 5-3/4W x 15L x 7-1/2H ITEM 42028-0VGA $69.99 ----------------------------------------------------------------------- 110 LB. CAST STEEL ANVIL Designed to last a lifetime. Gives the support and surface area for heavy duty jobs. * Striking surface: 12.6L x 4W * Base: 11L x 7.4W * Hardie hole: 1.15 square * Pritchel hole: 0.375 diameter ITEM 46707-0VGA $99.99 |
| - taylor - Monday, 11/18/02 22:36:48 GMT |
|
100 lb. Little Giant: Don, These came in at least 2 different models and maybe three with different clutches. The clutch linings have been leather, cotton and wood. There may have been an asbestoes composite but would no longer be available or neded. Little giant clutches run wet with oil in order to slip and control the speed. If it is a 100 is should be cast into the crank wheel on the front. If you are not sure see our specs sheet on our Power hammer Page. These are dimensions for LATE Little Giants which are about 4" shorter than the early models. There are also two pages with photos of a 1918 100# Little Giant. There is a book on Little Giants by Kern that has some parts information but the original LG parts information was not very good and there are no assembly drawings. The Kern book is mostly historical data and some dubious how-to repair advise. See our Power hammer Page manufacturers listing for parts or service. |
| - guru - Monday, 11/18/02 22:55:51 GMT |
|
louis. Sandblasting is a great process to have in ones shop. It is not like wire brushing though. Media blasting is much more agressive, alot quicker, and safer as long as you don't use sand. Sand, silica will KILL you. I use sand outside, blast media inside in my cabinet. There are different kinds to choose from. You will also work out other ways to finish the blasted pieces. At first you will be alittle shocked as to how to handle the super clean metal. Only thing wrong w/my cabinet is that its too small. |
| - Pete-Raven - Monday, 11/18/02 22:57:16 GMT |
|
Cheap Anvils Until someone has verified the material and constuction DO NOT take the sellers word for it. The vast majority of these imports are being misrepresented as something they ARE NOT. Sellers that have been notified that they are misrepresenting those items continue to do so. The HF 110# Russian is either not as high of carbon as a good anvil should be OR not hardened as hard as it should be. Probably the former. Any softer and it would be an ASO. |
| - guru - Monday, 11/18/02 23:09:24 GMT |
|
Sales at Fairs: Alex, very few people make a good living this way. Most use it as a supplement or do local shows for advertising. These are the places where there is head to head competition selling work made by others. Most folks doing this are doing it part time as a second or retirement occupation and often do not need to make a significant profit. Some do it at a loss which makes it difficult to compete if you must make a living at it. Ocassionaly merchants that work shows full time can make a living at it but it means traveling full time, living on the cheap and constantly hustling from one place to another. Being on the road full time means that they do not make the goods they sell. Often they have to lie to show organizers about the source of their products in order to gain entry to shows where only items made by the seller are to be sold. . . THIS often creates problems. It is a hard life. There are only a few major "Ren Faires" in the country where significant sales are made. Many of these have permanent stalls rented to the same craftspeople over a long period of time. IF you are lucky enough to live close to one of these and are able to get a booth at one then sales can be good. But these are far and few between. I spent years working the "crafts shows". I never actually made a profit at it. It was fun and I enjoyed doing it. But there was no money in it. |
| - guru - Monday, 11/18/02 23:52:16 GMT |
|
Grit Blasting vs. Tumbling vs. Wire Brush: All these methods have their advantages and disadvantages. Tumblers and vibratory finishers have the advantage that a bunch of parts can be tossed in the bin and you can walk away. It it takes an hour or ten it doesn't matter because YOU are not standing there doing the work. Grit blasting is both time and energy expensive. But it will do things that other methods will not. Grit can leave a sharp toothed clean surface that paint with adhear to better than anything. It will remove hard scale in places that other methods cannot reach. But you have to stand or sit there and manipulate the parts and the gun and it IS very slow. Grit blasted steel needs to be handled with clean oil and grease free gloves and painted immediately. It rusts VERY fast and the tooth holds oils that will keep paint from sticking unless very well degreased. There is also the problem of disposing of the used grit. It is always classified as hazardous waste even if it is relatively benign. However, if you remove any paint with it the grit is then far from benign as it will contain the heavy metal pigments (cadnium red, yellow. . ) as well as lead. Disposal means the entire bulk and you pay by the pound. Currently a new grit blasting method is used where ground dry ice is the media. When you are done the media has harmlessly evaporated and all that is left is the material removed. This is still a hazardous waste but it is reduced in volume and weight a thousand to one. Tumbing media has the same problem but being larger it can be rinsed or screened. |
| - guru - Tuesday, 11/19/02 00:09:46 GMT |
|
Lye solution is the ultimate "super quench". Lot of old books mention it and even comment on the "white" finish. Seems it blasts the scale off which gives a faster quench and is better (faster) than brine. The "white" finish looks sorta like a sand blasted finish. Russ Swider down in New Mexico was experimenting with it 10 - 15 years ago and developed many formulas for "super quench". An old heat treating book I have shows lab experiments of different quenches. Seems salt and to a larger extent sodium hydroxide (lye) crystals form on the surface as the local water evaporates. The crystals then explode, blasting the scale off. The explosions also agitate the water locally. It's these explosions that help create the white surface. |
| - grant - Tuesday, 11/19/02 00:10:25 GMT |
|
Yeah, sand blasting IS great for painting or hot spray zink or aluminum. The nice thing about tumbling is that it gives a "planished" finish rather than the satin finish of sand blasting. This looks much better if the piece is going to be clear finished. Glass bead blasting can give a similar shiny surface. |
| - grant - Tuesday, 11/19/02 00:19:39 GMT |
|
"Grit", either sharp sand or steel grit are abrasive whereas "shot", either glass or steel "peins" the surface. |
| - grant - Tuesday, 11/19/02 00:24:26 GMT |
|
guru, et al....what is the proper way to present a drawing to a machinist describing a curvature? for example, a fuller die. i do understand the geometry. radius and part of or a percentage of the circumferance? angle of the taper and distance from the working end to paralell sides?? what do they want to see?? i have not had a chance to speak with the machinist yet about this....the description of a walkway arch could be described this way also?? thanks.... one more that got by you the other day..is there any advantage of a furance that uses 220V vs 110?? thanks again... |
| rugg - Tuesday, 11/19/02 02:08:09 GMT |
|
Sand blasting Sand or media blasting uses a lot of abrasive media. The volumn of the media storage tank determines how long you can work without refilling. If the media is recycled, the cost is less, but you still need ample media. Gravity feed systems are not as efficient as pressurized feed systems. Both will do the job, pressurized feed just does it better. No matter what the media, it takes a LOT of air. Unless you have a LARGE compressor with sufficent air storage, you will have to wait for the air to build up again. |
| - Conner - Tuesday, 11/19/02 02:32:31 GMT |
|
Dimensioned Drawings: Rugg machined curves are given in radius dimensioned off a center that is also dimensioned. If the radius is tangent to angled surfaces then the included angle of the radius is given. Angles are given in degrees but long tapers are given in inches per foot (in the English system). You should try to reference everything off a common surface or corner to prevent mistakes from creaping in. Drawings to be given to a machinist should have (reasonable) tolerances on all the dimensions. +/- .005" is a common tolerance but +/- .001" is tight on average size parts and you will pay more to meet it. The general rule to tolerancing is to never require anything to be better than it needs to be. See you MACHINERY'D HANDBOOK it has some basic drafting information. The NEW geometric tolerancing system is a pain and most people do not understand it. Notes to the effect of "radius A must be tangent too surface B" are acceptable and appreciated by most machinists. Detailing parts is an art learned from experiance. |
| - guru - Tuesday, 11/19/02 03:09:02 GMT |
|
120VAC vs. 240VAC vs. 480VAC: The higher the voltage the smaller the wire that is required for a given load. Copper is expensive so small wire is good. OR the same wire gives you a margin of safety. On a small distribution panel two (1PH) or three wire (3PH) loads are evenly distributed on the incoming wire. Balanced loads are better for the power company and the environment and occasionaly your power bill. The electrical code also limits the size in amperage of a single wire (120VAC) circuit. Above 30A you generaly must use 220VAC circuits. Note that in Europe and some other places 220 volts is the standard current for small appliances, lighting and such, so the above only applies to the US and places with a 120/240 VAC distribution system. |
| - guru - Tuesday, 11/19/02 03:17:46 GMT |
|
guru, thanks for the replies. the reason for the volt question: the furnace that i am interested in has the option of running on 220. standard, the unit runs on 110. is there any advantage that you can think of by using a unit operating on 220 vs 110? if you cant imagine any benefit, ill order the 110 as i wont need to put a 220 outlet in; i can use what i have...thanks |
| rugg - Tuesday, 11/19/02 05:36:58 GMT |
|
Guru, I bought some 4130 on the online metal store. I was going to use it to make some hammers. I originally had wanted to buy 4140 but could not find it . Is 4130 suitable for making hammers? TC |
| - Tim Cisneros - Tuesday, 11/19/02 05:38:37 GMT |
|
QuenchCrack; RE ASO as "reproductions. I just hate the thought of cast iron ASOs reproducing! John L. In a general way, there are 2 schools of hammer wielders, it seems to me. One school uses thick, often short, handles with heavier heads and applies a lot of " body english" trying to smear and cadjole the metal sideways at the moment of contact. They are bearing down hard when the hammer meets the metal. One can sometimes see their hammer faces reflect that smearing action. They tend tohave thick wrists and massive forearms. EA Chase is a good example of this. The other school of hammer swinging might be thought of as "ballistic". They tend to almost throw the hammer head at the work using longer handles and smaller hammer heads over a longer swing. If you are not applying a lot of pressure to the handle at the moment of contact then it is possible to use a much lighter and more flexible hammer handle that absorbs shock well and is easier on the arm. Folks who use this type of hammer quickly learn not to let other folks borrow them as the handles are fragile if used otherwise. This is just my theory and may be pure hokum. |
| - Pete F - Tuesday, 11/19/02 06:14:36 GMT |
|
rugg- I'm assuming that your furnace is electric resistance heated, rather than gas-fired with forced air. Given that, the heat it develops is a function of the watts it consumes. Watts equals volts times amps. A heating element is a straight resistive load...a thousand watts can be arrived at by 110 volts drawing 9.1 amps, or by 220 volts drawing 4.55 amps. The size of the element controls the voltage required. You pays yer money and you takes yer pick. As Jock said, the governing factor may be how heavy of wiring you have to supply the unit. A 20 amp, 110 volt circuit will give you about 2000 watts, allowing for some losses. Most household wiring is no bigger than 12 guage, which is rated for 20 amps. Some wiring is only 14 guage, rated at only 15 amps. Check your wiring size to be sure of what you have, and use the appropriate sized circuit breaker for both the wire size and the load. NEVER try to cheat on the breaker size...that will start a fire better than the best Boy Scout! N.B.- A number of cheap houses built during the Vietnam War were wired with aluminum, due to the copper shortage. Extra care and caution should be used if you have aluminum wiring. It corrodes, suffers from galvanic resistance problems at connection points, and can be risky in general. It should be de-rated AT LEAST one guage step for load factor. |
| vicopper - Tuesday, 11/19/02 08:31:35 GMT |
|
The other thing that happens with aluminum wire is that it gets loose sometimes. If the screw on a outlet or switch isn't torqued properly. And sometimes even if it is. Aluminum has more resistance than copper so it heats up more for a given current. And since aluminum thermal expansion is double that of steel and 30% higher than copper, under high electrical load, the aluminum can expand under the screw and with a combination of loosening the screw and the aluminum compressing due to the thermal load, the connection can get loose and spark or actually fall off the screw. Either the spark or shorting can cause a fire. That's one reason it's always a good idea to wrap the connections on switches and receptacles with electrical tape. Keeps the wires from falling off. |
| - Tony - Tuesday, 11/19/02 13:58:24 GMT |
|
Hey its me agian just need some info on insurance. My Bussiness Plan Project is cominig out great thank u for all your help on this. Oh ya thomas Iam sorry I haven't emaild u it wont let me send it to u so just email me instead goto go later :) |
| George - Tuesday, 11/19/02 14:45:57 GMT |
|
120 vs. 240VAC vs. 110: Rugg, 110 VAC is an old standard from back when houses had 30A 220V main panels and distribution systems had a lot of resistance. The modern US standard is 120VAC and at one point inbetween it was 115 volts. . . Now, this doesn't seem much difference BUT when you purchase light bulbs rated at X hours at 110 volts and run them on a 120 VAC system that MAY actually be 125 VAC the life of the bulb is HALF! In our rural machine shop we were replacing bulbs every week and the average life was only two weeks. I purchased a case of 130 volt rated bulbs from our local electrical supplier and they lasted on average of a year. Check the voltage in your house or shop then the rating on the bulbs at your local grocery store. . . Yep, you THOUGHT there was a light bulb conspiracy, there IS but it is VERY subtle. Using dimmers on all your lighting circuits helps. Back to the furnace question. You have never mentioned AMPS or Watts or at least not in the repeat question. As VIcopper mentioned, this is critical. IF at 120VAC the unit needs 30A or more then you will probably need a special outlet put in (normal in modern wiring is 15 or 20A). Check your distribution panel. IF the distribution panel is an old fuse box then it doesn't matter what size fuse is in the holes. 15A should be the maximum if this was an old domestic installation. Ocassionaly one of these boxes are used with 10 gauge distribution wire in a shop or garage and THEN larger fuses are apropriate. I use 10 gauge wire for all my shop wiring and many outlets are on 30A breakers. The reason is that many 120VAC tools I have will trip a 20A breaker under normal use. Those include my B&D Wildcat angle grinder and my mag base drill press (if using a large drill). In our old shop I had to rewire exisisting outlets with heavier wire for those tools. SO, you THINK you may be avoiding installing a special 240VAC outlet by using a 120VAC device. . . but you may not. Normally 120/240 VAC devices give you the option for the rare event that a building does not have 220/240 volt two wire (plus ground) service. |
| - guru - Tuesday, 11/19/02 14:59:39 GMT |
|
Hammers: Energy = 1/2 mV^2. Force = ma (mass x acceleration). force is NOT proportioal to mV^2 |
| adam - Tuesday, 11/19/02 15:01:48 GMT |
|
Rugg: I've been using a small Cress electric furnace (8"x8") for years. It's 115vac at 12 amps, so it is quite safe to use on all decent home circuits. Remember to keep any combustible material away from the furnace (mine sits on a steel table 12" from the wall & anything else). Never allow anything to touch the heating coils, this will cause a short circuit and likely burn-out the coil. Turn the furnace OFF when opening the door, so you don't accidently short the coil when loading or removing (it's a shock hazard as well). If you (or anyone) would like more furnace tips please feel free to email me -- |
| Zero - Tuesday, 11/19/02 15:46:08 GMT |
|
Hi there my name is Wade Duncan I am from Moncton NB Canada , I was wondering if you would have any idea if there are any sort of formal training programs offered in this area or even in this country , I have looked and have not had much luck . I am wondering about this sort of work as a full time job . Thanks for you time |
| Wade Duncan - Tuesday, 11/19/02 16:03:16 GMT |
|
Question for you experts: I've been having the same problem on a couple of different smithing processes and wanted to get some opinions on the cause. I first experienced it when working on iForge demo #12, the railroad spike axe. After upsetting the spike, I noticed that some cracks had formed in the surface of the steel, perpendicular to the length of the spike. I figured that the cause was either (1) me working the steel too cold, or (2) pre-existing flaws in the spike. Lately, I've been working on some bottle openers of my own design, and these same sorts of cracks are appearing in a very specific place after a bit of drawing and bending. Since I'm using new steel stock for the openers, I'm guessing that I have been working the steel too cold. Am I missing anything? Thanks in advance for your input. |
| - Marcus - Tuesday, 11/19/02 16:30:58 GMT |
|
Marcus, Not knowing the alloy that you're using for the openers, it's a little difficult to diagnose. But, IN GENERAL, stock splitting is a sign of working at the wrong temperature. Usually that means working too cold. Try heating the stock till the first "flea" comes off before you start working it, and stop working while it is still showing some red. Re-heat and keep going. This requires that you keep a near constant eye on the fire and stock. |
| Paw Paw - Tuesday, 11/19/02 17:40:46 GMT |
|
I am someone who is just starting to get into chainmail jewlery and armor. i was wondering if there was a way to paint or change the color of the links to add to the beauty |
| Acrall Drageth - Tuesday, 11/19/02 18:39:53 GMT |
|
hello, I'm doing a CAPP course and i need a live feed from a career of my choice, i've chosen blacksmithing and was wondering you would answer some questions. please email me if you have the time. |
| Tully Irving - Tuesday, 11/19/02 18:40:27 GMT |
|
Paw Paw- Yeah, that's what I figured. I'm just using simple mild steel for the openers. I have a bad habit of working the steel into the black, trying to get that last bit of adjustment done. Since most of my work up to now has been hooks, rakes and other simple things, the mass of the stock has probably been more forgiving than it should. Now that I'm working on more complex items that involve some thinner segments, I guess my bad practices are catching up with me. Ah well. A couple of ruined bottle openers are a small price to pay for a bit of learning. I'll give it another shot this weekend and keep a closer eye on the metal. Thanks, as always, for your help. Marcus |
| - Marcus - Tuesday, 11/19/02 18:56:43 GMT |
|
Wondering what typical R-values might be for refractory materials like kaowool, board, and castables? Or is R-value even meaningful in a forge environment? Thanks, Steve |
| SteveA - Tuesday, 11/19/02 19:03:33 GMT |
|
Steve, I don't think I've ever seen any refractory material with a stated R value. Usually the spec given is the max temperature the material will withstand. |
| Paw Paw - Tuesday, 11/19/02 19:14:13 GMT |
|
Adam, I am the one who originaly stated the infactual equation. I some how got E=MC^2 and E=1/2 MV^2 confused with F=MA. I think I was just tired and too excited about seeing a question that was within my grasp. . . well it almost was;} |
| Caleb Ramsby - Tuesday, 11/19/02 20:27:57 GMT |
|
Do you have a formula that will disolve the left over flux on a pieace that has been forge welded, making basket twist handles , have been sand blasting them but takes to long, the flux residue eats through the finish unless i sandblast the piece. Thanks Rich Heinicke |
| rich heinicke - Tuesday, 11/19/02 21:56:28 GMT |
|
Regarding the composition of the Russian anvils, I checked the Nimba site and they use 8640, which is a nominal .40% carbon, alloy steel. The Russian anvil was analyzed and found to have .38% Carbon. I am guessing it is a plain carbon steel, not the alloy steel used by Nimba. I am also fairly certain that these anvils are not heat treated per se, they are probably air cooled from red hot after being shaken out of the mold. It is possible that the faces are chilled in the mold or they might even put them in a quenching medium (Vodka?) when they shake them out. The face is indeed harder than the body but not much. I continue to use mine and although it shows some scarring on the face, I will have to work a lot harder to wear it out anytime soon. When that happens, I will post it on E-bay as a collectible with "fantastic rebound and awesome ring, perfect for the amature swordsmith". |
| - Quenchcrack - Tuesday, 11/19/02 22:44:04 GMT |
|
Wade. Haliburton (Toronto)collage offers a 13 week program in blacksmithing. Algonquin (Ottawa)collage offers a farriers program. Highland forge in Westport Ont.offers day,weekend and two week programs. there are others e-mail me if you would like more info. |
| Mark P - Tuesday, 11/19/02 22:47:50 GMT |
|
Colour Mail Acrall, Steel is best plated or painted otherwise it rusts. Blueing requires oil or lacquer (clear paint) to prevent rusting. Stainless steel can be used and kept oxide blue-black or polished and will hold up to centuries of abuse. If you want bright temper colors then make things from titanium (but there is a whole host of working problems). Decorative mail, armor and jewlery can be made of aluminium. Hard alloy aluminium is as strong as mild steel and it can be color anodized. The anodizing puts on a hard aluminium oxide surface that is very wear resistant and then the pores are filled with colored lacquer. Color anodizing can be almost any color but the common ones are, clear, black, gold, red and blue. Green and purple is occasionaly done. Most anodizers do small batches and if you are not in a hurry you can usualy get the requested color. Black and gold anodizing look fantastic together. However, these colors are not "traditional" and may look odd to some folks. Color case hardening can also be done but it too needs oil to prevent rust. |
| - guru - Tuesday, 11/19/02 22:58:54 GMT |
|
I've seen pictures of both silver and gold anodized mail3. The gold was absolutely gorgeous. The same catalog has maile in black, and copper. I'm about half tempted to make some out of copper wire for costume use. |
| Paw Paw - Tuesday, 11/19/02 23:17:57 GMT |
|
Flux Removal: Rich, I investigated that many years ago and it takes VERY strong acids that also eat the steel. The problem is that the fired flux is very glass like and being a solvent of everything it has few solvents of its own. It combines with water but very slowly. It is hydroscopic and that is what causes it to expand under paint and wreck the finish. That said. . flux boils off at slightly above welding heat. So that is one way to get rid of most of it. Often if you don't use a lot of flux it disappears in the forging process. . but if you have any left it is problematic. I'm not sure what is in the other fluxes like anti-borax but they may be less likely to cause a problem. However, sand based fluxes ARE glass when they cool and harden. Not much help here. |
| - guru - Wednesday, 11/20/02 00:04:00 GMT |
|
Copper Mail: This was used in the movie Exclibur (lousy movie, great exposition of crafts) and then blacked in some manner. The blacking did not like the salt in sweat and resulted in bright coppery areas around the faces of the actors. . I have never seen copper colored anodizing but I expect a red-orange would make a brilliant copper color over the aluminium. That copper mail will turn your skin green. . . AND it is heavier than iron. Aluminium is the way to go. |
| - guru - Wednesday, 11/20/02 00:09:18 GMT |
|
On coloring Maille: Some time ago a good friend of mine started making the stuff out of electric fence wire he bought at TSC. Have no idea what the metal has in it, but so far, despite abuse, the belt he made me has not rusted, and I've had some degree of success coloring a link or two by heating them up in a toaster oven (Haven't had the guts to toss the whole thing in the oven yet, and hope for the best). Can't get an even color out of it.. but they look nifty all rainbow-y Heh. Just a thought.. Robert "Asgard" HPL Steel. Hoping to win a decent ebay post vise. |
| - Robert "Asgard" - Wednesday, 11/20/02 04:16:50 GMT |
|
For removing borax or borax/boric acid flux from silver, I used to use a hot 10% solution of sodium metabisulfite, which is basically half-neutral sulphuric acid. A 10% sulphuric acid solution will work also, but the metabisulphite is a good bit safer for your skin and clothes. Both are pretty slow to etch steel. I heat the solution to just almost boiling, and the flux is gone in 20 ro 30 minutes. I haven't tried this on steel more than a couple times, but it worked fine. The metabisulphite is available from jewelers supplies, sold under the name Dixcel and others. |
| vicopper - Wednesday, 11/20/02 04:25:55 GMT |
|
removing borax: since it is hygroscopic, put the whole object in water, the borax will dissolve overnight, the iron will rust some, but it will be red rust wich is easy to remove by brushing or tumbling or even sandblasting. Usually i use the slack-tub for small parts |
| Stefan - Wednesday, 11/20/02 06:47:48 GMT |
|
Vicopper; One might even get one's sodium metabisulfite a little bit cheaper from a winemaker's supply house, if there's one handy. Best regards, 3dogs |
| - 3dogs - Wednesday, 11/20/02 08:22:00 GMT |
|
3dogs, Are you sure that is not sodium thiosulfate. . a diferent thing altogether. |
| - guru - Wednesday, 11/20/02 15:05:27 GMT |
|
Robert, That may be stainless wire. |
| - guru - Wednesday, 11/20/02 15:07:13 GMT |
|
Sodium bisulphite from a wine makers store would be much more expensive. It has to do with the grade of chemical and the level of product liability insurance required. Pickling acid is technical grade, which is just so-so as far as purity goes. Food grade bisulphite for sterilizing is more pure and is intended to be ingested by humans, who are notorious for suing big companies for millions. The cheapest source is usually the least "refined" one. |
| vicopper - Wednesday, 11/20/02 15:34:03 GMT |
|
Adam: Your assesment of F=MA is correct, but the deceleration of the hammer against the steel is the F involved in the equation and in moving the steel. The amount of steel to be moved is based on it's strength and the energy you put into it. So certainly E=1/2MV^2 is the formula to be used, if you double the velocity of the hammer as it hits the work you quadruple the energy and potentially the amount of steel moved, less energy absorbed in bounce, etc. Double the size of the hammer and you double the energy IF you are moving the hammer at the same velocity. My dad explained the oft-misunderstood phrase "Don't force it, get a bigger hammer": If you are trying to move a shaft, etc, a bigger hammer swung slowly does less damage to the end of a shaft because the hammer hits slowly with Force behind it. Ideally you hit the shaft with a slow blow which is all absorbed within the elastic range of the steel (shaft and hammer) so no permanent deformation takes place. A small hammer, swung fast, will just peen over the end of the shaft. So if I want to bump a shaft, I get the biggest hammer I can find and move it just fast enough to do the job. Sort of a high speed press. With a small hammer, you can make a nice rivet head on a large shaft laying on the bench without ever moving the shaft. In blacksmithing, you usually want to deform the work. Use a large hammer, swing it slow, and you can drive the anvil into the ground. Use a small hammer, swing it fast, keep the work hot, and you can even work on an anvil which is not tied down. |
| Andy Martin - Wednesday, 11/20/02 16:07:24 GMT |
|
zero, that is the unit that i am looking at. appreciate the offer to get advice via e-mail. will contact you sometime this week.. |
| - rugg - Wednesday, 11/20/02 17:13:05 GMT |
|
Energy does not necessarily move metal. Energy is the CAPACITY to do work. Energy does not equal work even though they both have the same units. Force moves metal. Adequate force anyway. The force from the hammer MUST create stress in the material larger than the yield stress for the material at that point in time, in order for the metal to deform. Difficult to determine what the yield stress is when the hammer is moving the metal. The moving hammer head at the point which it contacts the steel has a KINETIC energy of mass times velocity squared divided by 2. NOT all of the kinetic energy in the hammer is changed to work in the steel. E=MV^2 will only get you the maximum energy available to do work on the metal. It WILL NOT get you the work done on the metal. This is a VERY Complicated calculation! I challenge anyone to adequately explain the energy/work relationships in hammer and anvil forging. Personally, I think it�s easier to calculate/estimate using F=ma. The problem with F=ma is that a=acceleration=the change in velocity divided by the change in time. How do you quantify the time the hammer is contacting the work? Grin. Andy, I�m not trying to give you a hard time, but the statement �The amount of steel to be moved is based on it's strength and the energy you put into it� is vague because you cannot quantify how much energy you put in. You can make educated estimates based on how much material WAS moved, but the number of variables is huge and some very hard to measure. The bigger hammer vs. smaller hammer doing damage to the shaft is a stress issue. Force over area. The bigger hammer will *generally* have a larger face so the stress (pounds per square inch) is less for the same force (pounds) from the hammer. More of the transferred force from the bigger hammer is going to moving the shaft instead of deforming it as with the small hammer that has a smaller face and more likely to deform the shaft. All that said..... Hit it Hot and Hit it Hard! Grin. If the intent is to move a lot of metal anyway. Strikers use big hammers, not small. Both mass and velocity matter in general hammer and anvil work. Different technique is required for different work. There is no �better hammer for all circumstances�. |
| - Tony - Wednesday, 11/20/02 17:59:57 GMT |
|
HELLO I AM IN THE MARKET FOR A NEW ANVIL FOR MY SHOP AND I WAS TOLD OF A FEW GOOD ANVILS. I WAS WONDERING IF A PETER WRIGHT OR A HAYBUDDEN ANVIL WOULD BE THE BEST FOR MY MONEY. ALSO WHERE IS A DECENT PLACE TO FIND A GOOD ANVIL FOR A NICE PRICE AROUND MARIETTA G.A. |
| Justin - Wednesday, 11/20/02 18:16:46 GMT |
|
IS FILE STEEL OK FOR MAKING KNIVES. ALSO I HAVE HEARD OF PEOPLE MAKING TOMAHAWKS OUT OF OLD RASPS. HOW DO YOU DO IT? |
| Justin - Wednesday, 11/20/02 18:19:18 GMT |
|
Dear Guru, I am a hobby knifemaker of a few years' experience and I have been doing stock removal almost exclusively. Being of limited funds and, more importantly, space, I have not yet set up a forge for my work. I have now seen or heard reference to a one-brick forge, made out of a hollowed-out firebrick, for small projects. This sounded like a great idea except that all the fireplace suppliers in the area (Southwest Iowa) give me blank looks when I ask about soft firebricks (every source says it must be a soft firebrick), and if they ask why I want one then I get these "Are you kidding me?" looks and end up with the entire staff clustered around me agreeing that they've never heard of such a thing. I'm getting to the point I hate asking. Can you tell me a brand name or specific type of brick I should be requesting to expedite this project? "Soft firebrick" just isn't cutting it. Thank you, David Cox peltast_dc@yahoo.com |
| David Cox - Wednesday, 11/20/02 18:51:08 GMT |
|
Bought a weed buner recently at a welding supply and it came with a fitting to screw right into the tank. I asked if I needed a regulator and was told the new tanks have a built in regulator! This might be part of the reason people have been having trouble with their forges on these new tanks. Would be nice to know what pressure they are regulated to. Might be a problem for atmosphereic forges. OBTW: I offer a wide range of blowers available from Kayne & Son. |
| - grant - Wednesday, 11/20/02 18:52:34 GMT |
|
Hammer weight, etc. Whoa and Wow! All this talk of force, velocity, and vectors has got my head swimming. Having been a teacher for years, I think you just have to be there. In other words, it can't be explained with words. It's similar to a baseball bat swing or a golf swing. How can you explain an efficient swing with words and math? If you're working with a hammer in front of me, I can tell in a few seconds whether you're struggling or not. I try to explain to students what they are doing wrong, but it is ultimately up to them to self-learn. Finally, there comes a point of "breakthrough", and they can feel the difference themselves. If there are two schools of hammering as Pete F pointed out on Tuesday, I am of the "ballistic" variety. I like the longer, slender handle. I either make my own, or I shape a store bought one. I thin them down with a horse rasp or disc sander and scrape them with a piece of glass. I give a � linseed oil - � turps finish, rubbed in well, before putting the handle on the hammer. While on this subject, I was watching master farrier and blacksmith, Edward Martin of Scotland working a few years ago. He averred that in the arc of the swing, there was "a bit of a pullback feeling" as the metal was struck. Lots of beginners push/slide the hammer forward on the work thinking that they are helping draw the metal out. Don't. Hit the metal fair and square and if you have that slight pullback feeling, that's good. |
| Frank Turley - Wednesday, 11/20/02 20:07:40 GMT |
|
David, try going to a ceramics supply store, the kind of brick you want is used in kilns and not in fireplaces. As for cost, you should be able to assemble a starting kit of anvil, tongs, hammer and a forge that will do everything from s hooks to forge welding billets for pattern welded blades for about US$25 *total*; I've done it. You don't have a london pattern anvil and top of the line tools but they do work and work well---but you are right about the space constraints Justin *stop* SCREAMING at us we hear you! My advice is to not sink a lot of money into an anvil until you are sure you are hooked on the craft. I'd add in Fisher, Trenton, Arm&Hammer (not vulcan) and Mousehole to your list and say the one you get the best deal for would be the best for you. As to finding them talk to people! You don't want to buy from a smith---like trying to buy their kids. You want to buy from someone who has no use whatsoever for an anvil but has one sitting around the garage or basement ambushing their shins on a regular basis. You can still find good anvils for $1 a pound and *under* that way vs $2 a pound + $$$ shipping on e-bay. Thomas |
| Thomas Powers - Wednesday, 11/20/02 20:58:38 GMT |
|
David, I doubt soft firebrick has any application in domestic fireplaces. You can usually find it at a ceramic supply store. You will recognize it soon as you find it. It's very light weight and very friable - you can crumble it with your fingers. Here is one possibility: http://www.baileypottery.com/kilns/kilnmaterials.htm |
| adam - Wednesday, 11/20/02 21:07:06 GMT |
|
Hammer size, One more thing to throw in is what you are bashing on makes a big differnce, My shop anvil is 239 pounds, I also have a stake anvil weighing maybe 15 pounds I use at SCA events, using the same hammer doing the same work I get tired much faster at the small anvil |
| JimG - Wednesday, 11/20/02 22:36:24 GMT |
|
A bizzare question, I am sure. I was handed a length of chain today which exactly fits the waist of the young lady who handed it to me. She wants it turned to a belt. It rather resembles the chain from a motorcycle.. but it's "thicker".. several links thick. Apparently it was salvaged from a dumpster (real reassuring, eh?) outside the art building on a college campus. It's a bit rusty.. but not terribly so.. and she does want it painted black.. but I'd like to get that rust off first. It's just surface rust, and I'm not about to spend hours at it with a wire brush to get the stuff off if she isn't paying me (did I mention that part?). Anything I could soak it in for a few hours to get enough rust off that I can just spray paint the blasted thing and let her do her belt thing? Heh. Needless to say I'm less than enthused about the project, but it'll be a good experience. Practice for when I need to do something constructive later ;). Soaking it for several hours in Cola was suggested. That work do you suppose? Oh well. If nothing promising shows up, I'll just tell her it's impossible and ignore it. Heh. Thanks in advance. Robert "Asgard" HPL Steel A sucker for a pretty lady. |
| - Robert "Asgard" - Wednesday, 11/20/02 22:57:38 GMT |
|
Calculating the amount of work that a hand operated hammer exerts on a piece of metal or any other object is a difficult one. It would be realitivly easy to do said calculations on a drop hammer which utalizes gravitational force as it's energy supplier. A steam/air hammer or mechanicaly powered hammer would also be realitively easy. Well Tony here I go! In the hand held hammer the main energy source is the swinger the secondary force is from gravity. I believe that a dynamometer conected via cable to the head of a hand held hammer would give one the desired figures to calculate the pressure exerted upon the metal. If one were to let go of the hammer or cease manipulation at the exact moment it bounced off of the metal and had another dynamometer attached from behind the anvil via another cable it could calculate the energy returned to the hammer. Thus a large % of the energy not used. The cable on the second dynamometer would need to be accelerated at the exact same rate of the hammer on the down stroke to maintian tension thus achieving a correct figure. If both dynamometers were conected to a graph with syncronized times then one could obtain the time that the hammer and the metal were in actual contact. Then if one were to have the knowledge of the exact temp. of the metal, amount of metal displaced and the resistance of the metal at that exact moment this would give one the amount of energy that was actualy transmited into the metal. After subtracting the energy of deflection and displacement from the applied energy one would have the amount of energy absorbed by the anvil and minute deformation of hammer head. One could also use the amount of applied energy and contact area to come up with the pounds per square inch that were applied to the metal. Another option is to talk Honda into letting us use thier robot for a few experiments. Then we could control the exact amount of energy applied to the hammer and use it's onboard systems(which may need to be fabricated or adapted) to calculate the exact forces applied and recieved from various actions and the exact amount of time that each action took to happen. . . but that would be too easy;} Frank is right though, everything that matters can be more than adequatly concieved with an experienced eye and attention to detail, plus a good bit of experienced instruction. This is the most important of ANY factors. I prefer a handle that is slimed down to the shape that ax's usualy have. The store bought "round" handle gives me no perception of orientation of the hammer head and frequently causes mistakes. Frank is "turps" turpentine or is it a oil or wax? All of this discussion about hammers would yield an informative although somewhat ridiculis section on the "factors in operation of a hammer". |
| Caleb Ramsby - Wednesday, 11/20/02 23:04:58 GMT |
|
Soft Firebrick: What you are looking for is "insulating refractory brick". They are used outside hard refractory brick in foundry work and for complete furnaces in pottery work. They come in various densities with some as light as styrofoam. Example: 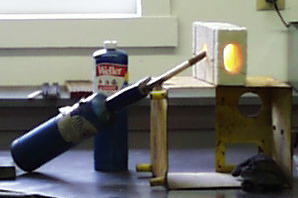 Forges are not just the capability to get to a certain temperature it is getting there in a relatively short time. The short time requires greater BTU than the micro forge can handle OR the small propane torch burner will provide. |
| - guru - Wednesday, 11/20/02 23:28:50 GMT |
|
Rusted Chain: Try soaking it in vinegar. Wash in detergent first to degrease. Will remove most of the rust in a few minutes to a few hours. |
| - guru - Wednesday, 11/20/02 23:36:58 GMT |
|
Hammers, Energy and Impact: We had a brief discussion about this a short while ago. The problem with determining the exact force in a forging operation is complicated by the work and resisting mass (anvil). Force developed is easy to calculate but force absorbed is another thing. Foot pounds of force are multiplied by the distance of travel of the hammer in the work less the movement of the anvil. A light anvil on a poor support can absorb a large portion of the energy. To avoid this they build counterblow hammers. Then the work is technicaly floating in space and being struck from opposite directions at the same time. A small fast hammer is good. A BIG fast hammer is better but hard to control. . so until you have the strength to control the big hammer stick to the small. Inexperianced folks that are not used to using hammers do not know when a hammer is too big for them. So I always recommend they start with a small hammer and to move UP when they feel ready. |
| - guru - Wednesday, 11/20/02 23:44:04 GMT |
|
My comments on hammer energy were not meant to be rigorous from an engineering point of view. The forum does not justify the detail. The key is that the energy in the moving hammer is all you have available to deform the workpiece. For a particular size hammer, a little faster blow gives you more results than a little larger hammer. Since most novices have difficulty controlling the hammer, they should generally start with a lighter hammer than they think they want and then move to a different weight when they gain some experience. Novices are the only ones who can benefit from this discussion. Experienced smiths have their technique developed and have established a set of intuitive guidelines for themselves that no amount of rigouous mathematics could sway. Nor do they need to change. What works for an individual is what they should stick with. But it is valuable for a novice to understand that hammer control is most important and that a small hammer can be used very effectively. |
| Andy Martin - Thursday, 11/21/02 00:07:47 GMT |
|
hello; cleaning chain is relatively easy. Electrolysis Made Easy http://users.interconnect.net/nlindsey/rusty2l/electrolysis/electrolysis.htm i normally use a length of black pipe with a pipe cap on one end. in this setup the black pipe is the anode. the chain is the cathode. for large chain which will not fit in the commonly available black pipe i take several small coffee cans with the lid removed from both ends. i punch 4 holes 90 degrees apart in the top and bottom edges. i use stainless steel electric fence wire and wire the cans together in a long tube. i use a plastic 55 gallon drum to hold the water and washing soda. i suspend the coffee can tube close to the middle. the chain is suspended down the center of the coffee can tube. i use an inexpensive 12 volt battery charger for this. i generally let this run overnight. turn off the battery charger, take the chain out, and scrub it with a kitchen scrubbing pad. rinse it in clean water. i than hang it close to the ceiling is that the warmer air will dry it out. then i just spray it with either wd-40 or kerosene. terry l. ridder ><> |
| terry l. ridder - Thursday, 11/21/02 00:27:34 GMT |
|
Re: One Brick Forge. I built one of these and they really do work well for small diameters, up to about 1/4"-3/8". W1 tool steel can be purchased for about $1.50 per foot and can be forged very nicely in this set-up. I have made a LOT of wood carving knives with blades in the 1"-3" range and heat treated them to Rc60. A word of caution: Do not put the tip of the torch INSIDE the brick. Tip Meltdown is guaranteed. Leave about 1/8" between the tip and the brick. Also, consider using a MAPP torch. It burns a lot hotter and might provide adequate heat for larger sections. Repeated heating and cooling of the brick will cause them to crack and spall after a month or two so if you are buying bricks, buy several. A wood bit will easily drill the hole or you can carve it out with an old knife. If you drill the hole all the way through the brick, be aware of the hot exhaust coming out EACH end. A hole from one end concentrates the heat considerably and you can overheat the piece that is directly under the flame. Last of all, this is like smoking that first cigarette. You can get hooked on smithing and end up hopelessly addicted for life. |
| Quenchcrack - Thursday, 11/21/02 00:27:47 GMT |
|
hello; david, if you are in iowa and you have the time if you come by my place i will give you a couple soft firebrick. 3600 degree fahrenheit soft fire brick. i have several cases of firebrick in my shop. i use them for crucible furnaces and for the front of my propane gas forge. if you need it i also could spare some kalwool. forget the temperature on this. i have a 500 ft roll, also in the shop. terry l. ridder ><> |
| terry l. ridder - Thursday, 11/21/02 00:35:40 GMT |
|
I think they call it "refractory fire brick". It is used to line fireplace inserts and such. |
| - grant - Thursday, 11/21/02 00:46:26 GMT |
|
Outfit here that supplies big chain (like 100 pound links) for ships tried tumbling some once. Took them DAYS to take out the knots! |
| - grant - Thursday, 11/21/02 00:51:27 GMT |
|
hello; while working to mount my post vise in a portable fashion i realized that it would also work to amount an anvil. obtain a scrap 100lb propane cylinder. if possible have the propane service company burn off the remaining propane and remove the value. if you are unable to have this done you will need to do it yourself. make sure the cylinder they give you has a working value. trying to empty a propane cylinder of remaining gas with a working value is extremely dangerous. fill the cylinder with water and dish washing detergent. let it sit a day or two. empty the cylinder of the soapy water. measure off the height of anvil support you want. how you cut the cylinder is up to you. i have used an oxy-acetylene, oxy-propane, large pipe cutter, and cutoff wheels in an angle grinder. i am still working on coming up with a good system to use to guide the torch while cutting the cylinder. most 100lb propane cylinder are 14inches in diameter. after you substract out the 1/8inch thickness of the cylinder wall this leaves you with 13.75 inches. this is a little over 1 square foot cross-sectional area. basically, i figure every 12 inches is a cubic foot. silca sand weighs soemwhere between 96-104 lbs per cubic foot. fill the bottom have of the cylinder with sand. rest anvil on the sand. if you want the anvil a little lower twist it down into the sand. depending on the bottom ring on the cylinder, you may need to repair or fabricate a new bottom ring. the anvil stand works rather well. terry l. ridder ><> |
| terry l. ridder - Thursday, 11/21/02 00:52:56 GMT |
|
hi, i am looking for 1/8-1/4 plate steel with a hammer tone finish. do you know where i can purchase some? your help would be greatly appreciated! preferably a distributer in the ontario, canada area. |
| roy andress - Thursday, 11/21/02 00:56:50 GMT |
|
for what it is worth, my two favorite hammers are a 28oz ball pein that i found in the street and a 1000grm swedish. the 2000grm german is rarely used; i cant hold on to it very long.... |
| rugg - Thursday, 11/21/02 01:14:02 GMT |
|
I am looking for info on how to color case harden gun receivers namely HR gun recievers. Both charcoal and oil style any help is welcome |
| - m wisney - Thursday, 11/21/02 01:51:31 GMT |
|
I purchased Anthractie Coal on the advise of the coal dealer. I have since heard that it is not good for forge work wjo is right and why/ Any pros and cons would be welcomed here Thanks |
| - Clark Lund - Thursday, 11/21/02 02:28:20 GMT |
|
hello clark; read http://www.anvilfire.com/news1/newsp302.htm and http://www.anvilfire.com/news1/newsp305.htm concernin an antharite coal firedd forge built by David Lawrence. it will work it just takes different methods of working with it. terry l. ridder ><> |
| terry l. ridder - Thursday, 11/21/02 03:07:42 GMT |
|
I'm considering renting a space that has a wood floor for a shop. I'm looking for ideas to cover floor for fireproofing. It also has a hanging block ceiling. am I crazy or is this easy to deal with, it is a great building |
| Jim - Thursday, 11/21/02 04:58:41 GMT |
|
"Turps" is turpentine. My dad always used the shortened version. The � linseed oil and � turpentine also makes a good gun stock finish...at least I think so. |
| Frank Turley - Thursday, 11/21/02 05:08:04 GMT |
|
Asgard; Warning!!! Guard your asse when trying to use a power wire brush on a length of chain!!! It is an invitation to disaster! There are a bunch of phosphoric acid based products like Ospho or Naval Jelly that will work or just pickle it in a mild acid solution ( muriatic or sulphuric) or better get some jewelry pickle like Sparex to soak it in..Use baking soda and water to neutralize the acid. Caleb:...turpentine. The handle thinning that I meant, and that Mr Turley ( that admirable smith) probably also referred to is in the opposite direction to the thinning of an ax handle. If you have ever abused an ax by flipping it over and using the back of the head to drive a wedge ( it tends to spring the ax head's eye) you know that those handles can deliver a pretty good shock to the hands. Whan was meant instead, was thinning a waist in the handle between the hand and the head parallel to the hammer faces so that it springs under the shock of impact; not laterally like an ax. Shaping the handle where the hand goes to provide orientation by feel is a good idea though. I had one long headed cross pein with a stout handle, about 3 1/2 or 4# that was just a beater to use. As an experiment I took a draw knife and thinned the waist to a point not much short of silly..about 2 pencils in section. I'm sure it will break eventually, but it hasn't yet; and it is much less tiring to use. Terry; While I greatly respect the depth of your expertese..I'm spooked about cutting any old fuel cylinder, including propane, with a torch. I have done it a number of times with the tank uncorked and overflowing with running water till I got the top off; But I wouldn't recommend anyone do it unless they know exactly what they are doing. Regarding a similar situation, the quote " BLEEW HIZ HAID KLEEEN OFF" still rings in my ears. |
| - Pete F - Thursday, 11/21/02 05:53:01 GMT |
|
hello; pete f. than they should purchase a new one that has never had any fuel gas in it. there are close to a million scrap 100lb cylinders in north america. with proper safety procedures followed to the letter, cutting a scrapped fuel cylinder is not that difficult. i respect the scrapped propane cylinder for what it could do. i am not going to be so paranoid that i do not use a free resource when it is offered. terry l. ridder ><> |
| terry l. ridder - Thursday, 11/21/02 06:22:51 GMT |
|
Fireproofing: One old blacksmithing book that I have recommends sprinkling a liberal amount of sawdust on the floor so that any hot gibbets that fall will immediately begin to smoke so you can notice them and put them somewhere safe. Probably would work, but I doubt you can convince your insurance underwriter that it's a good idea. The method we used to use for putting commercial kitchens in wood-floored buildings involved putting down two inches of wire-reinforced grout and then setting ceramic tile. The tile was for sanitary purposes. For a shop, I would be inclined to just cover the wood with one of the fire-resistant floor coverings that have replaced the old vinyl-asbestos tiles that are no longer sold. It won't be truly fireproof, but very little other than earth or concrete is. Any really fireproof covering will most likely be either too heavy for the supporting members (floor joists) or likely to trap moisture and rot the wood. I would probably build up an area immediately around the forge/anvil with a bed of 1-1/2" of packed cinders or sand/pea gravel mix. I'd still check my joisting and shore it up if I was uncertain. The cinder bed will be "fireproof" as far as dropping hot stuff goes, and is pretty comfortable to stand on, too. As I recall, that was what we used to cover the concrete floor under the big plasma-arc cutting rig that cut 6" stainless plate years ago. The concrete would explode if the torch hit it, but the cinders wouldn't. I'm willing to bet that the Guru has some good advice on this question. |
| vicopper - Thursday, 11/21/02 06:26:25 GMT |
|
Jim, I neglected to mention that if you put the cinders or sand/gravel over the wood floor, you need to put a vapor-barrier membrane underneath it since it will absorb any moisture that gets on it. Building supplies sell a heavy membrane for use under shower pans that will work just fine. |
| vicopper - Thursday, 11/21/02 06:29:42 GMT |
|
Hello all, Hammer handles: Mr. Turley, why do you scrape the handle with glass after you rasp it? Something to do with splinters? Never heard that before. Sheltered life and all that... |
| Eggleston - Thursday, 11/21/02 07:10:22 GMT |
|
hello; if i ever built a new shop i would go with a dirt floor. one corner would be layers of crushed rock covered with pea gravel covered with sand. the rest would be compact dirt. there would be a perimeter foundation for the walls. even there i would use straw bale construction, covered with chicken wire and mortar. terry l. ridder ><> |
| terry l. ridder - Thursday, 11/21/02 07:52:51 GMT |
|
Vicopper; You're most likely right about the sodium metabisulphite. I had a stream of reasoning going which was based on past experience wherein the price of an item was dictated by the amount of fun the consumer was gonna have with it. You know the scenario, the grade 8 capscrew at Ace Hardware was a piece of hardware. The same capscrew at the snowmobile dealer was "A Genyoowine Ski-Doo Part, fer cryin' out loud." That goes for anything in arts, crafts and hobbies in general. I failed to consider the human consumption angle, while assuming that the artist- jeweler was going to get ripped off worse than the home winemaker. Best regards, 3dogs |
| - 3dogs - Thursday, 11/21/02 08:34:10 GMT |
|
Terry; Yeah; I like old propane cylinders as material, especially the spherical ones.Have cut up many over the years. However, there are some problems with them. 1. the most common way for welders to kill themselves is cutting old fuel containers. 2. the scent accumulates in the bottom of the old tanks, is nasty stuff and a disposal problem 3.most of the older tanks are coated with lead base paint. 4.there is a fair chance that PCB oil was used to lubricate the pumps that moved the gas ( it was believed inert and has a high flash point) and tends to also accumulate in the tank bottom. Ummm, errr, Ahem...scuff.. Good Guru and friends ...help...please. I made another little problem for myself. It goes like this. When I first built my 5 HP 8"x72" belt sander, all the parts came from under the bench or the back yard scrap pile...glued up boat bumpers on concentric pipes for the rollers, bearings from a truck driveline etc. It roared and wandered but it worked for a few years and did a lot of grinding, as long as I fiddled with it and didn't mind the flying grease globs. Finally got fed up and decided to re-do it right. I bought (!!) new bearings and turned up new shafts, tightened up the rail guides and traded my way up to some fancy high precision rubber covered steel rollers. Swapped some old pulleys around to increase the belt speed, carefully aligned the rollers and finally got it running this aft. It is smooth and quiet and doesn't vibrate ( I'm not used to that)....BUT>> No matter how slowly and carefully I adjust the tracking , the belt won't stay centered. I can get it to run OK at the outside edge of the rollers, but as soon as I adjust it in past a certain point, the belt shifts inward fast and does nasty things before I can stop the machine or make compensatory adjustments. The rollers are NOT crowned but the roller mfg said that wasn't necessary and not how it was done on commercial machines. I sure could use your esteemed help here as I am flummoxed ( that's bad)..pete |
| - Pete F - Thursday, 11/21/02 08:44:38 GMT |
|
I am trying to find details on a risk assessment for a carbide-water generator but am having no luck. I was wondering if you have any suggestions in relation to this topic. |
| Daniel Arthur - Thursday, 11/21/02 10:23:06 GMT |
|
Hi all, I'm going to london for a couple of days. Does anyone know any intresting blacksmithing/armouring related sites I should go to while I'm there? (the Tower is already on my list of course) Matthijs |
| matthijs - Thursday, 11/21/02 11:00:07 GMT |
|
Daniel, Acetylene generator from water and carbide? My experience is that eventually they blow up. Weight/pressure balance linkage gets bound up and Kerfloowie! We had three big ones feeding casting welders in the largest non automotive foundry (at one time) in the country. The generators were in a separate and by itself building made of light panel construction so when it blew up, we could just pick up the panels and put them back on. Others may certainly have had safer experience. |
| - Tony - Thursday, 11/21/02 13:01:54 GMT |
|
Jim, Wood floors were very common in the shops in the U.S., even around the forge area. I'm not saying yea or nay to them, and I'm not going to discuss insurance, fires, etc. Eggleston, I can't give you a good woodworker's answer to why we scrape handles. It was advice given me by an old smith years ago. You know, there was a time when sandpaper was not invented, and lots of woodwork was scraped or chisel finished. I saw a Stradivarius cello once that had the original chisel marks on the "fiddlehead scroll". The scrapers were normally of steel with a "rolled" burr on one edge, but glass works OK on a rounding surface like a handle. Sandpaper does raise a kind of "nap" sometimes; perhaps that was the objection. Maybe a knowledgable woodworker could respond. Having said all the above, the old smith mentor who gave me this scraping info also said that scraping a handle was one of the few times that a smith could sit down, preferably in the sun on a nice day, and enjoy a moment of reprieve. |
| Frank Turley - Thursday, 11/21/02 14:00:49 GMT |
|
London: almost all of the Tower of London's armour collection is now at the museum in Leeds England; however "The Wallace Collection" is a world class armour collection still in London (also old masters paintings etc) If you get a chance to travel Coalbrookdale/Iron Bridge Gorge/Blist's Hill has a number of museums all in the same area including one on making wrought iron, one on fancy cast iron, one on coalport pottery, one on the early industrial revolution, etc. Thomas |
| Thomas Powers - Thursday, 11/21/02 14:38:00 GMT |
|
I'm not sure I am a knowledgable woodworker, but broken glass works well as a scraper and smoother even though it doesn't have the burr of a good scraper. The glass can be broken to have the curve of a spokeshave which helps on round or ovalish stock. It's cheap and functional. I learned about using glass when I started making rustic furniture. Take some interesting sticks, peel the bark off, put it together and scrape with glass until it's smooth and shiny. As the glass dulls it burnishes the wood also. Hammer handles are an excellent application for glass scraping/burnishing. Don't expect to remove much material with glass though. Bottle glass seems to work much better than window glass for me. Caleb, a valiant effort. Cable and instrument inertia and the number of if's should be noted. Grin! There are a lot more if's to put in also. |
| - Tony - Thursday, 11/21/02 15:13:19 GMT |
|
Glass scraping: wow, ya learn something new everyday. Thank you gentlemen. |
| Eggleston - Thursday, 11/21/02 16:06:13 GMT |
|
Eggleston; Those beautiful smooth and shiny lacquerware bowls that the Japanese artisans do so well are done with glass. Best regards, 3dogs |
| - 3dogs - Thursday, 11/21/02 16:12:00 GMT |
|
Speaking of flimsy hammer handles, the Chinese section gangs who laid the tracks for our Transcontinental Railroad put bamboo handles on their spike mauls. The bamboo let them "whip" the maul and the driving was done by the head, not the handle. Much less shock to the guy swinging the maul,too, by the way. |
| - 3dogs - Thursday, 11/21/02 16:25:11 GMT |
|
hello; i have worked with propane for 35+ years and have never seen a propane pump use any pcb oil during that time. i have taken apart many a propane pump. corken pumps do not use oil at all. (http://www.corken.com). also propane cylinders have to be recertified every five years. during that recertification the values are pulled and the cylinder inspected for internal corrosion. during recertification the cylinder is hydrostatically tested. some recertifiers also have the capability to strip the cylinder done to bare metal and prime and paint them. there are at least two that use powered enamel technology. in 35 years of working with propane i have never painted nor have i seen anyone paint cylinders with lead-based paints. concerning the mercaptan which may be present in an empty cylinder. common household bleach generally takes care of it. i have also found that the shunk odor remover also works on the mercaptan odor. similar but not the same chemical. concerning welders getting killed cutting old fuel cylinders. i saw a welder killed because he was welding on a nearly full propane bulk tank. we warned him about it and he said he had been doing welding for over 30 years. we left and were about a mile down the road when we saw the bleve. we returned to the site to provide whatever assistance we could to the local fire department about the other tanks and cylinders at the site. people do stupid things. stupidity is not a crime, but sometimes it is a capital offense. i be more concerned about the vast number of 55 gallon drums people cut up. those drums could have contained nearly anything. terry l. ridder ><> |
| terry l. ridder - Thursday, 11/21/02 16:44:18 GMT |
|
On Cutting Propane Tanks. What's wrong with a bloomin hacksaw? You can cut a 100 LB tank off very accurately in about 45 minutes of easy work. The tanks are soft and ductile, cut beautifully. Certainly safe, and one avoids having one's haid-blown-kleen-offen. |
| - Richard M. - Thursday, 11/21/02 17:32:25 GMT |
|
hello; richard m. i totally agree. hacksaw, power hacksaw, portable bandsaw, large pipe cutter. a person does not have to use oxy-fuel torch to cut a cylinder. terry l. ridder ><> |
| terry l. ridder - Thursday, 11/21/02 17:47:04 GMT |
|
Pete F- I have a friend with an edge sander in his cabinet shop. That thing runs a belt about 12 feet long by 6 inches wide. It is a sure enough indistrial machine that runs all day long. It has three rollers, at least one of which is crowned. The crowned one is the one that is used for the tracking adjustment. I don't see any way that a set-up without at least one crowned roller will track reliably. Regardless of what the other guy told you, its just counter-intuitive. The very best manufacturing techniques won't make every belt exactly perfect, every time. It only takes a couple of thousands difference in the length of the two edges for that thing to start walking along a cylindrical shaft. A slight crown in the roller stretches the belt a bit in the middle and keeps it on track. I'd try wrapping a couple of layers of tape in the center of the adjustable wheel and see how much crown is required to get stable tracking, then remodel that wheel someday when you have time. |
| vicopper - Thursday, 11/21/02 18:53:05 GMT |
|
Amen, Vicopper |
| - 3dogs - Thursday, 11/21/02 19:06:59 GMT |
|
While browsing my machinery's book I came across a section on cloudburst hardening or peening with steel balls to work harden. What was most interesting was an adjacent entry about magnetic superhardening with strong electromagnets that worked best after cloudburst hardening (or work hardening?). I have also seen references elsewhere about aligning steel to magnetic poles while hardening (Neotribal & Lively)and dismissed that as mystical soft science. The Machinerys reference got me wondering: is there any real science to magnetic hardening and are there any applications to industry (I'm curious) or blacksmithing/bladesmithing that could be used? |
| Tone - Thursday, 11/21/02 19:18:09 GMT |
|
Acetylene generators: Daniel, Yep, Tony knows what he is speaking of - very dangerous. Also high maintenance and sludge to dispose of. The pressure regulator device controlled the flow of water which determined the volume of gas generation. When it failed the explosion was not from the pressure but from the pressure causing the acetylene to dissociate explosively, creating heat and furthering the explosion. . . The current safety cylinders were invented by Presto-Lite to replace the old generators. Acetylene is produced by other safer methods today. |
| - guru - Thursday, 11/21/02 19:29:14 GMT |
|
Wood Floors: There are LOTS of variables here. In an OLD building like our 1806 Gristmill the wood is tinder dry and porus and can be ignited by something as simple as a cigarette ash. The only thing I do in the mill that generates sparks is to use a small 6" bench grinder for tool sharpening. Anything else would be suicidal. A good hardwood floor is fairly fire resistant and very kind to the feet BUT can you afford to mark it up with burned spots? In a leased building this could cause all kinds of problems. Paint, such as an epoxy can reduce the likelyhood of the floor catching fire from a small piece of hot metal or a coal from the fire. In Streeter's Professional Blacksmithing his shop is in a wooden building with a wood floor. The anvil is set on a foundation that penetrated the floor and there was a sheet metal guard around the anvil stand. The problems occur when you bring oxy-acetylene or oxy-fuel cutting into the wood floored shop. Almost nothing will withstand a pile of oxygen rich boiling slag. Heavy steel plate is the best. Concrete spalls if there is too much heat (but it doesn't burn). Brick also spalls and the slag welds to firebrick and is hard to remove. Wood. . forget it. Most grinding operations are no more problematic than in any other shop but but grinding and arc welding is going to make a million little burns in the floors, walls, GLASS. . . You are back to questions about damages in a leased buildiing. |
| - guru - Thursday, 11/21/02 19:43:45 GMT |
|
Belt Tracking: Pete, the manufacturer lied. Comercial belt sanders have crown on the wheels, just a tad less than regular pullies so it is hard to see, but it IS there. THEN these machines are very rigid. If applying load to the belt springs the frame then the tracking goes all to pieces. . I suspect your OLD machine did some self aligning due to loosness or the used wheels had crown worn on them. |
| - guru - Thursday, 11/21/02 21:56:18 GMT |
|
hammer weight, one thing that seems to have been forgoten it that a bigger hammer has a larger face.(well most of the time anyway) the larger face on bigger hammers spreds the force over a larger area. small forges I just finshed up a new bean can forge off propain with a normal torch head (the one on a hose.. much easyer to set up) it will get to just about a welding heat(with MAP gass I am sure it would easy get to a good welding temp.) one small (torch/ camp stove sized) tank last 6 hours or so and it will work fine for any thing up to 3/8" I real like it for heat treating small blades (under 6"/1") the little blades are really easy to over heat in the coal forge my old one was made useing a high temp cement (good to 3000) called Super 3000 only down sis of it is it takes a bit to come up to temp and losses a lot of heat. the new one is made with Kowool and a thin coat of the cement heats up faster and losses a lot less heat. (the old one would never get to a welding heat.) MP |
| MP - Thursday, 11/21/02 22:44:20 GMT |
|
"Floors" My shop where the forge and welder live, is all dirt. Easy to clean just rake it. Sparks of any kind don't last long. Easy on the back and legs also. But if you drop something small it may be lost for ever. Just placed my treadle hammer in the shop, was very easy to level off, just dig a little. I like the dirt floor. |
| Barney - Thursday, 11/21/02 23:45:08 GMT |
|
This question is rooted more in engineering curiosity than an absolute need to have the information before I can proceed with a project. You have been warned. ;) All refractories that I've seen are specced in terms of a maximum temperature. That's certainly the number I was concerned about when I was building my forge. But I've started wondering about the insulating properties of the stuff. The outside is a lot cooler than the inside, hence, insulating. Thermal resistance. That started me wondering if anyone has an idea of a typical R-value for common refractories, like the rating on fiberglass blanket insulation for houses? Seems like blanket products like kaowool would be the best insulators, castables would be worse due to density, and board would be in between. I'd also guess that most heat loss from most forges (note the "weasel words") ;) would be more by "infiltration", or heat escaping out the openings, than by conduction through the refractory. The thought is to maybe be able to do some calculating when I get to thinking about whether more insulation or another burner is more cost effective. Mostly I guess it's just that it's fun to think about these things when I'm occupied where I can't just do the experiment. Thanks, Steve |
| SteveA - Friday, 11/22/02 00:08:43 GMT |
|
Jock: A caution to all for your safety page. The following was in the Rapid City, SD Journal 11/21/02. A Belle Fourche, SD man was severly burned while grinding down welds when the hot sparks ignited his polyester shirt and jacket. He suffered 3rd degree burns to his chest and neck. He also suffered injury to his lungs from breathing the fumes from the burning polyester. He was air evaced to the Northern Colorado Medical Center burn unit in Greely, CO where he was initially listed in critical condition and later upgraded to serious condition. This should serve as a reminder to us all to wear the proper clothing at all times when doing any kind of hot work. Cotton or better yet, some sort of flame resistant fabric. Have a Safe Day Woody |
| Woody - Friday, 11/22/02 00:38:40 GMT |
|
Floor for Forge Shops "Perhaps nothing is superior to or cheaper than dirt mixed with ashes. If kept moist by sprinkling at least once a day, it is more comfortable to stand upon than other materials such as wood, bricks, or concrete. It is easily repaired and leveled in case holes are worn in it, and is not affected by dropping heavy or hot pieces upon it." Machinery's Handbook 12 ed. page 1545 Mach. Handbook (1945) vs Barney (2002) = same advise. |
| - Conner - Friday, 11/22/02 00:47:37 GMT |
|
3dogs et al., And the Japanese strikers use a whippy handle on their head-heavy sledge hammers. The kind of wood they use translates as "Cow Killer wood". Your guess is as good as mine. |
| Frank Turley - Friday, 11/22/02 00:50:20 GMT |
|
Tone, I am aware of a phenomenon called magnetic pulse welding. It is still a mystery to me but I seem to recall that it used capacitor discharge to send a pulse into steel with such force that it could achieve a solid state weld. Magnetic force is used to heat metals all over the world. It involves a torroidal wound coil conducting an electrical AC current. The current creates a magnetic field inside the coil. When a piece of steel is placed inside the coil, the magnetic field induces current to flow in the steel. Resistance to the current causes the steel to heat up. Because this type of heating is developed instantly through the steel, and initiates a high vibration of the atoms in the steel, heating is quick and the steel does indeed quench out 2-3 Rockwell points harder that if gas heating is used. |
| Quenchcrack - Friday, 11/22/02 01:51:14 GMT |
|
One more post....scraping wood is done to cut the wood fibers as you would with a knife or chisel. If you look at the finish of a piece of wood cut with a SHARP knife or chisel, it is extremely smooth. It is much smoother than can be achieved with sandpaper. Cabinet makers have used scrapers for centuries because it is the best way to achieve a mirror smooth finish. I cannot understand why you would want a hammer handle that smooth. I took fine sandpaper to my hammers and carving tool handles to remove the varnish and rough them up a bit. I find it easier to hold on to. |
| Quenchcrack - Friday, 11/22/02 02:04:14 GMT |
|
Insulating Values of Firebrick: You asked for it. Common firebrick (hard brick, fireplace brick) have a k value (thermal conductivity in BTU/sqft/hr/degF/in of thickness) which changes with temperature (as it does in most substances). At 800 deg F average brick temperature expect a k of 7 to 11, at 1200 F expect 8 to 12, at 1600 F - 10 to 13, and at 2000 F - 11 to 14. Insulating firebrick are much better, typically a 2600deg rated brick at 800F is 2, 1200F, 2.6, and 2000F, 3.8. The lower the temperature rating on brick the softer it is (generally) and the better the insulating value. A 2000 deg brick will be better than a 2600 deg brick. Fiberglass blanket at 100F, has a k of maybe 0.26 Kaowool at 800F, about 0.71 They are probably the same at the same temperature but I could not find them rated at a common temperature. For those not well versed in thermodynamics, one can say that q=(k*A/L)*(t1-t2), where q is heat in BTU/HR, A is area in SQFT, L is thickness in IN, t1 is the inside temperature in deg F or deg R and t2 is the outside temperature. Note if you double the thickness, cut the k value in half (by using a different insulation), or cut the temperature difference in half, with all other parameters remaining the same, you will cut the energy loss through the insulation in half. So a smaller k value is better. (Nitpickers: watch the algebra here, if you have a furnace with 1" of insulation and you double the thickness, you will also lower the outside temperature so the energy loss will not quite be half. To cut the energy loss exactly in half when you double the thickness you would have to also lower the inside temperature enough to maintain a constant t1-t2. This also ignores shape factors, radiation, convection, and boundary layer effects but is good enough to approximate what changes in insulation can do for you.) R value is an overall thermal resistance, where k is thermal conductivity. R is roughly L/k, so from the above numbers, 3.5" of fiberglass has an R of 13.5 (R-11) and 5.5" would be 21.2 (R-19). Advertised R values for fiberglass are for the composite wall or ceiling and include air gaps and studs or joists with nails or screws which transmit a little more heat than the fiberglass. Yellow pine at 85F has a k of about 0.94. Steel, by the way, has a k of about 310, so it does not make a very good insulator. 3.5" of steel would have an R value of about 0.01 so it does not compare well with an R-11 system. So 2.5" of soft brick should have a R value of around 1 where 2" of Kaowool might be as good as 2.8 (remember this is at a high temperature). Energy loss in forges is not a concern, but the k value can be used to estimate outside temperature of the forge. In industrial furnaces, a hard brick layer is commonly used on the fire side, with soft brick backup, then maybe a block insulation behind that. Gunned in place or hand packed castable mixtures such as a 1:2:4 mix is also widely used. The castable generally has a little better thermal resistance than brick, but not as durable. Kaowool with or without a rigidizer is used alone or behind (cold side) brick or castable. The Kaowool systems also include folded and bound "modules" which offer increased durability and abrasion resistance. My choice for a gas forge would be castable (insulating lightweight concrete) which can usually be purchased from companies found in the yellow pages. Castable has a shelf life and outdated material can be had for free if you can make the right connections. Typically it might weigh 80#/cu ft cured out. |
| Andy Martin - Friday, 11/22/02 02:44:48 GMT |
|
Floors: My daddy told me blacksmith shops are supposed to have dirt floors so thats what I started with. I'm really uncomfortable working in other shops. Of course I never sweep up anyway. The floor is becoming clinker-covered. Hammer Handles: I got started making handles on the shaving horse and like the draw-knife finish. Also make the handles very narrow between the grip and the head. They absorb shock very well. If you visualize the hammer in striking position on the anvil, the reduced part of the handle is only half a wide as the eye, or less, but as tall as the eye. I use home-cut hickory. Fire retardent clothing: Dupont Nomex required in refineries does not stand up well to cutting and welding residue. It is supposed to protect you from a flash vapor fire but sparks eat it up. Fire retardent clothing (FRC, generally treated cotton, a substitute for Nomex) is better but plain old cotton denim or Carhart style clothing lasts the best for the price. Of course when you get that warm feeling you need to stop and pat it out. |
| Andy Martin - Friday, 11/22/02 02:59:45 GMT |
|
Insulation vs. Temp Resistance: Steve, When we generalize there is often a need for "weasel words" else someone will get fixated on something as an absolute rule when it does not apply to all cases. The insulating value of refractories is not given in R value because that is a building construction term that assumes the rated product is used in a specific type of construction (See the details of Andy's post above). Refractories are generaly of two types, hard and insulating. Hard refractories are designed for resistance to heat, mechanical and chemical damage. They are used to line smelting furnaces, couplas and crucibles. Insulating value is not a concern in these applications. Insulating refractories are rated by temperature and density. The lower the density the greater the insulating value. In heavy duty applications insulating refractories are used outside of hard refractories. Large furnaces and couplas often have several layers of different refractories to do different jobs. Insulating refractories can improve the fuel efficiency of potter's kilns as much as 75% and it is common today to build kilns out of insulating brick or ceramic fiber blanket instead of hard refractories. The cost savings can be VERY significant. In blacksmith's forges we are generaly more concerned about maximum temperature than fuel efficiency and insulating refractories often help achieve those higher temperatures. But efficient use of fuel is good too. High temperature castable refractory weighs approximately 155 pounds per cubic foot (United Refractories UNI-CAST 65QS). Hard refractory bricks slightly more. The 1" Kaowool we sell is only 6 pounds per cubic foot. Some insulating refractory bricks also approach these low densities but are usualy higher to have structural integrity. The 20 to 1 weight difference is not only reflected in greater insulating values but also in much lighter weight construction. Besides fuel efficiency there is an ergonomic factor to using insulating refractories. In a furnace, kiln or forge you have a hot face (the inside) and a cold face (the outside). IF the cold face is hot enough then sufficient heat is radiated that it is uncomfortable to be near. My first gas forge was built from hard refractory brick. I made the mistake of turning the end bricks on edge so there was only 2-1/2" of refractory. In the time it took to heat up to working temperature (about 20 minutes) the exterior ends of the forge were so hot that you could not stand within 3 feet of them and within an hour the entire forge was that hot. In comparison the little freon can melting furnace I built using a 2" kaowool lining can be used to melt 3 pounds of brass in 15 to 20 minutes and the exterior is cool to the touch. If it is shut down between melts you can run it all day without the exterior getting hot. It took a full blast test firing about 2 hours to heat the exterior enough to discolor the paint. The disadvantage of low density refractories is that they do not store heat. In some potter's kilns this means that the load may cool too quickly and a controled cool down must be done by burning fuel and ramping the temperature down. In blacksmiths forges where heavy masses of steel are taken in and out they significantly cool the forge. So sometimes a hot face with a little thermal mass is good. It has also been found that ceramic coatings like ITC-100 greatly increase the infrared (heat) reflectivity of the interior of a forge or furnace. This does several things. Besides improving the efficiency it also reduces the amount of heat lost to the refractory it coats. This increases the life of the refractory. When applied to ceramic fiber insulation it prevents the breakdown of the hot face and resulting dust as well as preventing the spread of dust from the fiber insulation. When special kiln washes or ITC-100 is applied to insulating brick in kilns the fuel savings in a single firing generaly pay for the product. The efficiency can be further increased by the application of ITC-296A over the ITC-100 but I have not seen numbers on the amount of increase. Kiln washes also help seal the gaps between bricks and the porous surfaces of insulating refractories reducing the infiltration of gases (the heating media). Plugging the leaks IS a concern in forge and furnace design. In my stacked brick forge I can often close the access port and it will continue to burn as normal due to all the leaks. That is a LOT of leaks . . My stacked brick forge replaced the one described above that got so hot you couldn't stand to be near it. The big difference is that when I built the stacked brick forge I had just obtained a selection of odd foundry bricks that included extra long tie bricks and some insulating bricks. An exterior layer of insulating bricks makes a huge difference. I still like the flexibility of the stacked brick system but it would be better using a high quality fine pore insulating brick such as they build kilns from and are available from Thermal Ceramics. I have just read the book The Art of Firing by Nils Lou and I am working on a book review of it. It is written for people building potter's kilns but much of the information applies to building forges. He even has information on liquid fuel burners. Look for the review SOON! |
| - guru - Friday, 11/22/02 03:11:17 GMT |
|
Scrapers versus sandpaper /// And Glass. Wood sculptors avoid sandpaper use until the last step. The reason is that no matter how fine the sandpaper is, small particles of Aluminum oxide, silicon carbide or garnet abrasive gets stuck in the wood. Yes these particles are microscopic, and almost invisible. But, if a carving chisel, or gouge is used on the previously sanded wood the sharpened edge, of the tool, is dulled very quickly. Woodcarvers must hone their cutting tools regularly but none of us relishes doing it and we try to keep a tool edge sharp as long as possible. Also sanding tends to round the details of a carving and make it look flat. (i.e. no crisp edges). Therefor scraping is an attractive alternative. It leaves a very smooth surface cuts very thin shavings, and does not foul the wood. Puting a proper hook on a steel wood scraper is a skill and some wood workers never get good at it. (there are all sorts of jigs sold to solve that problem (I think I've got them all; being of the spastic klutz "persuasion", myself). Freshly broken glass is very sharp and makes an excellent scraper that works as well or better than a steel scraper tha has a properly rolled hook on the end. A glass scraper is easier to make. Which is a long winded way of saying that Mr. Turley is right, again (as per usual). Regards, SLAG. |
| Slag - Friday, 11/22/02 03:48:55 GMT |
|
Polyester clothes and forging and butane lighters A few notes up above, Mr. Woody relates a newspaper article that describes a fellow burned severly when his polyester suit cought fire while welding or forging. I would like to add another potentially fatal everyday item that should NEVER be anywhere near a welding out-fit or a forge. That innocuous looking item is a butane lighter. Every year a dozen or more people have a spark contact that lighter, (usually in their trousers), burn through and the pressurised butane gas explodes. The lucky victims only lose their leg. But more than half of the unfortunates, experiencing this mishap, lose their lives. I never would have anticipated such a problem, myself. I read about it in some OSHA material I chanced upon. An old fashioned (metal cased) zippo lighter is a good substitute. SLAG. (A worry-wart?). |
| Slag - Friday, 11/22/02 04:28:34 GMT |
|
Scrapers: We have an iForge demo on them with details. . |
| - guru - Friday, 11/22/02 04:36:55 GMT |
|
Just a reminder always wear safety glasses while working. I have gotten lazy with this because my normal glasses are polycarbonate and provided decent coverage. (I always wear my hearing protection, I have to save what little I have left:-) But, I recently got new specs, and the girl at the counter talked me into one of those narrow little frames that are popular now. So I had some slag jump up over my glasses and burn my eye lid, as well as one tiny stinkin speck of scale that adhered to my cornea, and I didn't realise it was there for a few day (yes I know, I am slow:-) So I went to the optomitrist, and he scrapped the slag off of my pupil, but there was a rust ring left on my cornea, that an opthamologist is going to have to scrap off. I was pretty lucky considering, this has only been an irritation so far... But safety glasses are cheap, and depth perception is kinda important to accuracy with a hammer after all... of course nothing shy of a full face shield would have protected me when I jumped the 3/4 square stock up into my face on Sunday. Did you know I couldn't really smell the mucus membranes as they burned... Think safety and then go get yourself hurt anyway;-( |
| Fionnbharr - Friday, 11/22/02 05:31:49 GMT |
|
hello; i have been looking at the iforge number 150 Braided Handles given by Jim Carothers on November 13, 2002. and wondering if there were problems using one bar of 1/4" round steel and the other bar 1/4" round brass or bronze? if there were problems using one bar of 1/4" round brass and the other bar 1/4" round bronze? i was thinking more for a candlestick. terry l. ridder ><> |
| terry l. ridder - Friday, 11/22/02 05:32:49 GMT |
|
Terry, In this case using a torch it should work fine. Finishing and corrosion protection might be tricky. The difficulty will be changing from heating steel to copper alloy. The steel is heated red to bend. The copper alloy would be the faintest red in very low light and a non visible heat in decent to normal lighting. Then tendancy will be to melt the brass in two. . . You will need to be very calm and very focused without interuptions. When done there is the problem of how to anchor the ends but this can be done with brazing and some imaginative blending. Brass/bronze or brass/copper will not be as tricky as they are both heated the same. You could also use stainless and steel. Buff the stainless which of course will also clean the steel but then you could apply a rust browning to the steel and have a black/white coloring. Then there is always gold and silver. . . :) |
| - guru - Friday, 11/22/02 06:01:01 GMT |
|
hello; i figure i would add my two cents to the refractory discussion. over the years i have been doing tests on various materials to have some first hand knowledge of how well they are at insulating properties. i started out with the following basic ingredients: calcium aluminate cement - 70% sodium silicate perlite vermiculite itc-100 kalwool - 3600 degree fahrenheit. grog - (crushed pottery) a.p. green 28 mesh fire clay silca sand borax glass flour ( ibc brown root beer bottles ) co2 gas cylinder large coffee cans. various combinations of the above items were used to line the coffee cans. using the same bottom halve and the same reil style propane burner the different combinations were tested melting 1 pound of aluminum ingots. using a homebrewed thermocouple to parallel port interface i was able to monitor the internal temperature and external temperature while the melts where taking place. (i used linux with rt-linux patches.) based on melting times and external temperature. kalwool with itc-100 came in first place. perlite with sodium silicate hardened with co2 coated with itc-100 tied for 2nd place. perlite, vermiculite, sodium silicate hardened with co2 coated with itc-100 tied for 2nd place. perlite, vermiculite, calcium aluminate, and sodium silicate tied for 3rd place. dave gingery's formula of 4 gallons silca sand 4 gallons fire clay 4 gallons grog 3 quarts borax minimal water coated with itc-100 tied for 3rd place. calcium aluminate, silca sand, grog, and sodium silicate came in 4th place. dave gingery's formula ( given above ) coated with a mixture of glass flour, fire clay, borax, and enough water to make a rich cream consistency. came in 5th place the bottom halve was perlite, vermiculite, calcium aluminate, and sodium silicate. terry l. ridder ><> |
| terry l. ridder - Friday, 11/22/02 06:27:38 GMT |
|
Lighter's Near the Forge For lighting the fire I use matches. I have made many of the Colonial Lighters as demonstrated by Sean Conner in the IForge demo #112. I use one of these with great success to light my smokes. Thus,there is no need for me to have a lighter on hand when at the forge. The Colonial Lighter is a great project for one to practice forging different handle designs! One modification that I have incorperated into the design a few times is to make two tight scrolls in the middle of the handle(touching each other) about 1" to 1 1/2" diameter. Then take an even heat in the scrolls(which can be a little difficult), put the "heater" end in the vice and use a hook with a handle on it to pull on the handle side. If the handle is in the black heat then it usualy does not deform when pulled upon. This works best with a loop handle or one that has part of it that can be pulled upon centered with the center piece. It looks realy neet when complete and works as a sort of radiator to help disipate heat before it reachs the handle, it's realy fun too. Thanks Sean Conner and all the others involved for the great demonstration. |
| Caleb Ramsby - Friday, 11/22/02 07:07:36 GMT |
|
Pete F;I like vicopper's suggestion of temporay placing tape on center of roller to crown for belt tracking. I run 11 1/2 ft long belts 6 inches wide on 2 1/2 inch rollers. To get the assembly to track required cutting crowns on both rollers. In setting this up it was absolutely stunning how the slightest augment to the crown cut would change the belt tracking fron non-funtioning to self tracking.Fred |
| Snow Smith / Fred - Friday, 11/22/02 09:27:17 GMT |
|
I coated the inside of my ''soft''firebrick forge with itc100 almost 3 years ago and it is holding up well .it seems to retard the deterioration that occurs where flames hit unprotected insulating bricks.can't say about savings tho. itc makes other products....itc 200 for repairing ''soft'' refractories . [I've used itc100 for this and it works]. they also make itc213 which is supposed to protect metal from heat..if it didn't cost $75 can [$40 U.S.] a pint[:-0]! I'd buy some just to test.Get them at larger ceramic supply outlets . in Canada try Tucker's Pottery Supply .don't know how their prices compare ,but some US products are much cheaper in Canada lydia |
| lydia - Friday, 11/22/02 15:12:12 GMT |
|
Lydia, The guru will probably sell smaller quantities in the Anvilfire store. We used some ITC 213 in the forge rebuilds that he did the demo on, and it worked well. |
| Paw Paw - Friday, 11/22/02 15:49:59 GMT |
|
ITC-213: Lydia, Yes it is pricy for small applications (actually $52 USD) and a pint goes VERY far due to its fine particle size and the thinness of the coating. I have been repackaging dilute ITC-213 in little 2 oz. jars. This was for forge repair kits which I am STILL assembling. It is just enough to coat the cast door frames, burner ends and a few other heat effected metal areas in an NC-TOOL type forge. I have been shipping a few jars as samples with larger orders of ITC or ITC and Kaowool. However as with many products in small quantities the repackaging, label and container cost as much or more than the contents. I cannot afford to sell these seperately and in the repair kits the pre-diluted product amounts to about $4 of the cost. ITC-213 is used to protect electric heating elements in kilns, nozzels in furnaces and kilns and exotic alloys while heating in the forge. We have industrial customers that use it in manufacturing operations including heat treating and mold wash for metal casting. I use it as a primer when I glue kaowool to sheet metal using ITC-100. |
| - guru - Friday, 11/22/02 17:32:48 GMT |
|
Could you put me in contact with someone that could explain how to make grapes, out of pipe or rod? I teach at a High school and would like to be able to get my students to be able to produce the grapes from scratch. Thanks Wayne |
| Wayne - Friday, 11/22/02 17:42:29 GMT |
|
Richard M: Don't assume that you cannot get a spark from hack sawing. |
| - grant - Friday, 11/22/02 17:44:02 GMT |
|
Isulating value is rarely considered in forge design as it is one of the lesser losses. Forges require the injection of great quantities of heat and the exhaust of the same. With exhaust temperatures of 2000f or more efficientcy has little meaning. How much good is insulating your house going to do if you don't have a front or back door? We're talking 10's or even 100's of THOUSANDS of btu's going out the openings, why worry about the hundreds of btu's going thru the walls? Only recuperators will make any real difference. |
| - grant - Friday, 11/22/02 17:57:40 GMT |
|
Hi - Got a question, hope you can help. Saw a video in a museum about the African Benin bronze casters and their primitive lost wax technique. I and a friend wish to reproduce this process. Our previous experience is in ceramics, me an enthusiast and him an ex-professional who ran his own successful pottery for many years. Sadly he is now too disabled to throw and has turned to modeling in clay and would like to eventually cast these sculptures in bronze. (Although he will probably use a professional foundry for this.) However we have always enjoyed the simplicity of Raku firings, and when we saw the video, we both decided we'd like to try and recreate the process, using basic materials. We are prepared to use kiln burners and propane to melt the metal, but what could we use as a melter? ( again if a commercially available product was the best way to go we would consider investing in one, but feel sure that these tribesmen wouldn't have access to these luxuries)and if any, what other pieces of equipment would you consider indispensible? Thanks KG |
| - Kevin Grey - Friday, 11/22/02 20:05:04 GMT |
|
Oops! Sorry Jock, I misunderstood. |
| Paw Paw - Friday, 11/22/02 20:15:14 GMT |
|
I think you do need good insulation in a gas forge to sustain the enormous temperature gradient in the forge walls. You want the inner surfaces to be at 2000f and the outer surface exposed to the cool air. The better the insulation, the easier this is to do. I have significantly improved the operation of a forge by doubling the thickness of the kaowool blanket. Made the difference between welding heat or not. Of course past some thickness there is no real advantage since every additional inch brings less improvement than the previous Gas forges are definitely not efficient. My current forge tries to recoup some of the exhaust heat by routing it around the outside of the refractory walls. Works pretty good but it still heats up my shop pretty darn quick. BTW does anyone have handy the number of BTUs in a gallon or a lb of propane? Just curious to know how many BTU/hour I am consuming. |
| adam - Friday, 11/22/02 20:28:23 GMT |
|
Grapes: Wayne, we have an article on a little die for making grapes, or acorns or berries. . on our 21st Century Page and there are several articles on that type of thing on our iForge page. Items such as this are usualy forged with clapper dies or spring fullers. Hand held spring fullers are easy to make of mild steel. However, they are easier to use when a shank is fitted for the hardy hole. Clapper dies are also easy to make but are more suited for use with a striker or a power hammer. This is an area where tool making is an important part of blacksmithing. Forging pipe is tricky and has the problem of steam coming out of the cold end if quenched and possibly resulting in sever burns. I would not forge any type of pipe with begining students. |
| - guru - Friday, 11/22/02 20:36:53 GMT |
|
Adam, Acording to Kent's Mechanical Engineers' Handbook, Twelfth Edition, entitled Power by J. Kenneth Salisbury the high heat per pound of propane is 21,646 BTU and the low is 19,929 BTU. When reactants and products are at 25 C.(77 F.). |
| Caleb Ramsby - Friday, 11/22/02 20:51:00 GMT |
|
Small Foundry: Kevin, Refractory clays have been known since ancient times and crucibles were made of clay. However, clay crucibles are relatively weak and thus dangerous. Modern graphite or silicon carbide crucibles are much stronger and can take higher temperatures. They are not cheap but they are a good investment if you are going to do any casting. Primitives also cast bronze directly from a coupla furnace like doing cast iron. The liquid metal collects in the bottom of the furnace and when it is taped the metal would flow down a trough into a mold or series of molds. We have an iForge article on lost wax that has some information to help you get started. |
| - guru - Friday, 11/22/02 21:07:16 GMT |
|
Insulating value of gas forge... Grant! Amen and Yea Brother! grin. The greatest loss is out the exhaust! One does want to have *good* insulating value to minimize startup time and maximize heat transfer to the work. If the walls loose too much heat, you won�t get the glow on the inside of the forge. In a gas forge, heat transfer to the work is primarily by radiation from the glowing hot walls of the forge to the work. The flame heats the forge and the forge heats the work. So if the walls lose too much heat, you won�t get the maximum glow and heating of the work won�t be as it can be. ITC100 facilitates the glow. For a given surface temperature, it is a better reflector and emitter of radiation than kaowool or non coated refractory. I was floating around on Ron Reils site last night. then got over to Rex Price�s page. Rex knows what he�s talking about! T-Rex burners. In plain words, I think anyone who is thinking about building or operating a gas forge, has not had lots of experience with gas burners, and does not read Rex and Ron�s info, is being ignorant. Not all of it is 100% correct, but it�s quite good. Especially Rex�s page. Just an opinion. Well..... maybe a *strong* opinion. After typing this, I see Adam posted about the same concept. But since I typed it all, you get it twice. Grin. |
| - Tony - Friday, 11/22/02 21:16:55 GMT |
|
hello; ultimately, the blacksmithing and foundry communities need to get together and pay for a chemical analysis of itc-100 at a minimum. reading the msds is next to useless. using the home chemistry lab of a professor at northern illinois university we were able to determine some of the ingredients in itc-100. sodium silicate, silca sand, and calcium aluminate. someday, i may just finance that chemical analysis myself, but at close to $5000.00 to $10000.00 usd it is not going to happen anytime soon. terry l. ridder ><> |
| terry l. ridder - Friday, 11/22/02 21:20:03 GMT |
|
Forge effeciency This is actualy coinciding with a subject that I am currently factoring into the design in my new solid fuel forge. Which will be a prototype for a much larger six fire pot forge that shall have the capacity to run any configuration of the six fire pots(one at a time, a row of 2, row of 3 ect.). The small single fire pot prototype will be for experimenting with the various systems involved. One of which will be an air preheater. This will recapture some of the heat from the exhaust and transfer it into the induction air. After the air has reached about 100 F. there is an increase of 2% effeciency for every 100 F. increase of the air. I have decided that the recuperative type of heat exchanger will be the easiest to construct and operate. The system will consist of a series of pipes placed in the exhaust stream(hood) at a 90 deg. angle to the exhaust gases. The combustion air will be sent through these pipes once. The construction involved will consist of threaded pipes (of proportional size to the air flow) set in holes made in the sides of the hood. I will place 180 deg. elbows onto the threads that jut out of the hood. Thus the main construction nescessary is making holes in the side of the hood and threading pipes together. It should be realitively easy. There will be a decrease in the pressure of the air because of the increased pipe length. I will also be installing a by-pass system that excludes the use of the air preheater so that I can figure out the difference of fuel used when the air-preheater is not in use. This system should also be aplicable to the gas fired forges. The high heat of the exhaust in a gas forge may require a cool down zone before the air preheater or the use of a heat resistant steel may be nescessary. The blower would need to be placed BEFORE the air preheater so that it would not see the higher temperatures. Has anyone applied this system to their forge(solid or liquid fuel)? If so, what were the effeciency changes that you experienced and what were the difficulties that you encountered? |
| Caleb Ramsby - Friday, 11/22/02 21:23:30 GMT |
|
hello; the modified sidearm burner is easier to build than the t-rex burner. also the modified sidearm allows for easier design of a recuperative gas forge. one of the main reasons to coat kaowool with something is the microfine fibres which it releases. inhaling those microfine fibres are not good and lead to silicosis. http://www.cdc.gov/niosh/consilic.html it is also the reason i coat nearly everything that silca in it. terry l. ridder ><> |
| terry l. ridder - Friday, 11/22/02 21:30:10 GMT |
|
Greetings to all, especialy the "old" regulars (you know who you are). Well haven't posted here in a while due to a new addition to our family, career changes and subsequent retrenchment from the IT industry. Have been lurking on the quiet tho'! David, for a quicky gas forge, I use a lightweight insulated building block, not sure of the composition. Here in Israel they are marketed under the trade name of Y-Tom. They measure 20cmx20cmx40cm, so have a lot of "meat" for hollowing out. I've even cut them (with a regular carpenters croos-cut saw) into slabs of 10x20x40 to form larger forge bodies. they last about 10 forging sessions before starting to crumble and crack. At about $1 a piece you can't go wrong!! Robert, to clean up your chain, first degrease it. Then imerse it in a diluted solution of Phosphoric acid till the rust comes off with the aid of a nylon scrubbing brush. Dry with a clean rag and hang to air dry. The bonus is that it leaves a layer of phosphate on the steel, which is inhierntly black and rust resistant. Your solution can be used countless times, But remeber to neutralise it and dispose of it responsibly when you're done with it!! Mike the Israeli Smith |
| Mike The Israeli Smith - Friday, 11/22/02 21:38:37 GMT |
|
Just a reminder to the members who may not be totally familiar with the combustion chemistry of natural gas. Please note that the men who are designing recuperators are using the HEAT from the exhaust gas to pre-heat FRESH combustion air. You should not contemplate directing the exhaust gas back into your atmospheric burner to preheat the air. The exhaust gas contains all of the nitrogen of fresh air plus the CO, CO2, and Oxides of Nitrogen (NOx) but much less Oxygen. You may actually retard the combustion process and produce dangerous or lethal levels of CO and NOx. Don't ya just hate it when that happens? |
| - Quenchcrack - Friday, 11/22/02 22:33:19 GMT |
|
Wow. Thanks a lot to everyone who's contributed to the forge efficiency and insulation discussion. Thanks, Andy, for the numbers. Can't get away from the engineering thought process. It's been an informative day for me on the forum. Gonna have to click that CSI link down at the bottom. Steve |
| SteveA - Friday, 11/22/02 22:34:58 GMT |
|
ITC Constituants: Welll. . . I've been TRYING to get more technical specs from the manufacturer but I doubt that they will give away the formula. Knowing the elements in a refractory is one thing but knowing exactly WHAT it is made from is another. The majority are processed minerals. The bulk of the agregate in most castable is made from synthetic mullite which is a ground bonded and calcined mineral product. But it is based on a rare and naturaly occuring minneral. Composition of many minerals is quite complicated and when processed it then may have a proprietary nature. In The Art of Firing Nils Lou says ITC-100 is probably a zirconia based mixture. ITC-213 is a completely different substance. It is redish brown and looks exactly like Dupont red oxide paint. |
| - guru - Friday, 11/22/02 22:59:22 GMT |
|
Recupretive Forges: A friend of mine has used a heat exchanger on his coal forge. In the winter he was having difficult getting forge welds in the kind of slow fire he likes. So he built a heat exchanger from a 55 galon barrel and some heavy galvanized stove pipe. The warmed air made enough difference and got the job done. But coal smoke is highly corrosive and the heat exchanger disolved to dust before the next season. The fact is that ANY amount of energy that is already in the intake air is energy that the fuel does not need to produce. At 100 to 200 CFM how long does it take a forge to change the air in your shop? If the air in your shop is heated in the winter, how much fuel did it take to heat that air? Recuptetive systems have been used since the 1800's. In big foundry and smelting furnaces the exhaust was first led through a large baffeled chamber on one side of the furnace. When the brick in it became hot they switched the exhaust to another chamber on the other side of the furnace and passed the intake air through the heated side. Once the process had started there was a constant supply of hot air and significant fuel savings. The ABANA plans for a recupretive gas forge are supposed to be very efficient and produce low emmissions. However, it is a complicated thing to build and many do not like the design. My idea for a recupretive coal forge is to take the heat from the bottom of the forge. This is not as efficient as a thin wall heat exchange in the exhaust BUT it is simple, it is where the blower is, it cools part of the forge that NEEDS cooling AND not being in the exhaust the corrosion problems are less. Forge exhaust heat exchangers should be made of stainless. All it takes is a pin hole to start recirculating hot CO2 and rapidly increasing the CO. As fuel becomes more and more expensive recupretive designs will become more and more common. The trick to recupretive systems is that they start cold and take a while to get to a recupretive steady state. In the meantime the performance is changing. |
| - guru - Friday, 11/22/02 23:26:47 GMT |
|
Asgard, go to Autozone and tell them you want a blower out of an 83 Chevy 1/2 ton pick up WITH the sqirrel gage. Should run about 20 dollars. |
| Bond-JamesBond - Friday, 11/22/02 23:31:05 GMT |
|
Hmm, "a constant supply of hot air"? Why, we could run quite a forge off this forum then! Not sure how long they ran in each direction in an open hearth furnace (15 minutes, 1/2 hour?) but I once saw a burner design for forges (a commercial unit) that placed one burner at each end of a slot forge, one burning and the other exhausting and reversing every few seconds! Claimed 20-30% fuel savings. When I was talking about isulating value in the walls I assumed a certain minimum thickness. Brick layed flat for 4-1/2 inch wall thickness, 2" minimum for kaowool, etc. My larger forges have 4-6 inch thick floors (brick and/or castable) and 6 inch ceramic fiber walls and roof. The ceramic fiber comes in 12 x 12 blocks that are zigzag folded. We compress to 8 inch wide as they stay in better. I also run solid brick forges and the only drawback is longer heatup time. |
| - grant - Saturday, 11/23/02 00:24:45 GMT |
|
Thankyou Conner.. Didn't know it was in the Book..I should read it sometime. I have the 14th edition.. |
| Barney - Saturday, 11/23/02 00:27:17 GMT |
|
where is a good place to buy candle cups and drip pans and the like? I tried Kayne&Sons, but they don't have any kind of selection. Other than making them,(I broke my wrist recently, and my wife is doing most of the work) what is a good resource? |
| Bond-JamesBond - Saturday, 11/23/02 02:54:37 GMT |
|
Regenerative Forges At one point I was contemplating using the regenerative type of heat exchanger. It uses a "wheel" that is composed of a honeycomb type construction from very thin metal. If the wheel is placed horizontaly then the honeycomb, thus the air and exhaust flow is orientated verticaly. It rotates at about 2-3 rpm. The exhaust flows through one half of the wheel and the combustion air through the other half. The clean combustion air gains the energy from the exhaust via the energy stored in the honeycomb. This is a system that is simular to the one described by the Guru dated form the 1800's. The exhaust and induction air are seperated via a close fitting "wall" that sandwiches the wheel, top and bottem, this segments the wheel into two halfs, one left, one right. The exhaust always flows in the opposite direction that the intake air does. This is so the intake air confronts the "cool" side of the thermal mass first and exits the hotter side. I was considering constructing this type of heat exchanger out of old radaitors or heater cores from automobiles since it has a large surface area to thermal mass ratio. They also have a low flow restriction. The major problems that would be encountered in the construction of this system would be in keeping the two gases seperated and contained in general! If there were any leak from the exhaust to the clean air there would be dire consequences as described by the Guru and Quenchcrack, it is also VERY complex to design and operate. Remember it has moving parts, many seals AND is exposed to VERY hot and dirty gases. Thus I have decided against utilizing this system. But this type of regenerative system has been used too great success in the field of boilers for quite a while. Yes, you are right Guru the tube in exhaust recupretive style will need to be manufactured from stainless steel. I hope to acquire some cheap from a scrap yard although this is doubtfull. For my system I will be using a down sized set of tubes for the heat exchanger part of the system. I will be using a 3" primary tube, reducing down to many smaller tubes when it reaches the hood. Thus achieving a much greater surface area. I have not decided on the exact size as of yet. They will enter the top of the hood horizontaly and via the 180 deg elbows "walk" their way down the hood. So that when the air exits the heat exchanger it will be encountering the hottest gases. Guru, I had considered incorperating a system simular to your idea into my forge prototype. Your's is much less complicated and more stable. The only reason I don't have your type of system in my design is that in the larger forge(which this is the prototype for) there will be MANY valves and pipes going into the bottem of the forge. . . 15 pipes and the coresponding valves. These will be required to acquire an even flow through out the whole forge when in full use(30" by 20"), while still alowing the use of just a small segment(10" by 10") of the fire pot area when wanted. I am also going to be incorperating an adjustment of some sort to increase the fire pot depth so I can use either coal, charcoal or wood as a fuel. There are a few different systems that I am considering to obtain this variable fire pot depth. One of which would disclude the posibility of an under forge heat exchanger. I still have a ways to go on the design, so I will keep you all posted. When I get to the construction stage I will take some photo documentation and post it on the Yahoo group page. |
| Caleb Ramsby - Saturday, 11/23/02 03:02:17 GMT |
|
Thanks for the info guru !This anvil has great rebound and seems to have a good rockwell. |
| - anvilbuddy - Saturday, 11/23/02 03:53:22 GMT |
|
anvilbuddy, That farrier's anvil has a VERY thin weak heal. Don't pound on it our use long tools in the hardy hole. There is a good chance of breaking that thin heal. Otherwise it is what it is. You will find that a more compact anvil of the same weight is better for forging. |
| - guru - Saturday, 11/23/02 04:18:54 GMT |
|
Guru: Hello Iwonder if you can tell me a quick and dirty way to melt aluminum for small home made casting.Thanks a bunch |
| m.khan - Saturday, 11/23/02 04:48:57 GMT |
|
Would like to find any information on a cast iron cross I bought in a antique store in Hudson New York. Its 4ft 6in tall 2ft across and 21/2 in in diameter with ivy and berries and bark like grain cast in it.I was told it was Belgian made around 1920 ,would like to find out more. Please forward any information Thank YOu. |
| - Dirk Gardner - Saturday, 11/23/02 04:57:34 GMT |
|
QD Aluminium Melting: Khan, Al can be metlted in a cast iron pot or a steel pipe crucible. The trick is that the Al disolves the iron and after a couple melts the pot springs a leak. The iron also contaminates the Al. To prevent this problem they use ceramic coatings in heavy cast iron melting pots. But for a one off casting where you might only need to make three attempts. . a cast iron pot will work. You want as heavy a wall as you can find and DO NOT use your wifes (or mothers) favorite stew pot. . it will be no good when you are done. Alternatively a section of steel pipe a little longer than its diameter has a steel plate welded to the bottom to make a crucible. It doesn't hurt to bend a pouring lip at the top. While you are welding on the bottom, weld on a stout bar or another smaller piece of pipe about 3 feet long for a handle so you don't need crucible tongs. An electric stove or hot plate gets hot enough but it is very hard on the appliance. Gas is better. . . a few bricks stacked around the crucible to help hold the heat and a large torch or weed burner will provide enough heat. Build this up on some sand to provide a fire resistant surface and a place to set the hot crucible and mold. Sprinkle some ground up charcoal on the melt to keep it from oxidizing and then skim off the slaggy crust just before pouring. Even though melted aluminium doesn't LOOK hot, that 1200°F liquid will go through flesh like a laser. Wear cotton clothes, leather shoes, gloves and a full face shield with safety glasses underneigth. PRACTICE your moves with the crucible BEFORE the melt. Where do you put it when you are done? No the stack of bricks is turned over. . Where do you pour the extra metal? V troughs in the sand work as a last resort but ingot molds are better. |
| - guru - Saturday, 11/23/02 05:10:50 GMT |
|
Terry R; You certainly have experience over me in propane tanks. I did talk to a guy who worked in a propane plant that used PCB oil in it's compressors in the 50 and early 60s, or so he said. Also, old Owen, who ran our local propane distributorship in Cambria for many years ( he retired in the 60s) used lead based paint on the tanks much as ships were painted with the stuff and Cal Trans painted the guard rails along the highway with it. It was the standard issue corrosion resistant paint for a very long time and was superior stuff if you ignore blood lead levels. I think that Duch Boy Paint once was the National Lead Company. Bleach takes care of mercaptan..good...wish I'd known. At my old place along the highway, I'd be cutting up a propane tank and the place would absolutely stink of that gas scent. Cars would screech to a halt and somebody inside would yell " I smell gas!! Stop!!" Then think better of it and drive up the road a hundred feet and yell the same thing some more. got to the point where I'd just smile and wave...without removing my goggles..and start cutting again. One of the Evans brothers was killed in the same yard some 20 years before, cutting open an old oil barrel...as you point out. Vicopper, Tony,Snow Smith and our Good Guru ;Many Thanks for your help. That pretty much confirms what i concluded in the middle of the night, ruminating on it..that a sprung idler wheel with a crown would eliminate the deflection that aggrivates the shifting of the belt and provide a tracking crown besides. I sure hope one crowned wheel will do it. Acetylene generators, Daniel; I ran a couple of old funky ones at the above location for a couple of years...motivated by both low income and some delusional back-to-my-weldors-roots impulse. It was cheap, and exciting...and probably kinda stupid. A big fiddle factor keeping them running right. Another factor in their instability was that guys would keep adding carbide and not clean them out regularly. I* was told that when the sludge in the generator reached a sufficient volume it would start to " regenerate", build up reaction heat which spurred on the regeneration and boom! The byproduct of the reaction was whitewash and a great supply of antacids. |
| - Pete F - Saturday, 11/23/02 05:53:11 GMT |
|
Bond-James Bond; If I remember correctly, I think I saw candle cups in Jere Kirkpatrick's latest flyer, (but I won't take an oath on that }:<) Best regards, 3dogs |
| - 3dogs - Saturday, 11/23/02 08:04:21 GMT |
|
Bond- James Bond; I will now take the aforementioned oath. Punch up Jere Kirkpatrick's Valley Forge & Welding web site.3dogs |
| - 3dogs - Saturday, 11/23/02 08:10:05 GMT |
|
Bond-James Bond: I buy all my candle cups and drip pans from Jere Kirkpatrick. Harley |
| Harley - Saturday, 11/23/02 09:28:49 GMT |
|
MICHAELM: I have lost the url to the site where you post your pictures! Please e-mail it to me or post it here. Thanks! |
| Quenchcrack - Saturday, 11/23/02 15:06:06 GMT |
|
Heat exchangers for gas forges: This is additional viewpoint. NOT disagreement. Regarding stainless for gas forge recuperators.... Stainless is expensive and conducts heat MUCH slower than carbon steel. I've done much work in industrial processes with stainless and other metals heat exchangers. In many cases, it was better to use carbon steel tubing and expect it to need replacement. We built things so the heat exchanger could be built and replaced easily and cheaply. Just something to consider. |
| - Tony - Saturday, 11/23/02 16:17:45 GMT |
|
Annndd.... frequently, in a shell and tube heat exchanger, only a few tubes will be the ones to corrode. Heavy end plates with small welds for the tubes make it easy to grind off the weld, pull the offending tube out, slip in a new one and weld it in. |
| - Tony - Saturday, 11/23/02 16:48:00 GMT |
|
Air to Air or Gas to Gas tube heat exchangers need relatively thin walls. Thin carbon steel in a coal flue will need to be replaced annualy. In auto exhausts stainless only cost Chrysler $2.5 extra PER vehical. The result is that my 15 year old hand-me down van with +300,000 miles and a worn-out/blown engine still has the OEM exhust on it. How many thousands of dollars in plated carbon steel junk did THAT save??? I'm going to recycle that exhaust system and put it on my old portable air compressor. . . and it will probably out-live THAT too. Several vehicals prior to the van we had a Pinto Station Wagon that managed to go 10 years with the aluminized steel OEM exhust. When the muffler finaly fell apart I tried to get an OEM replacement. . nope. Not available. The galvanized replacement lasted about 2 years and had to be replaced. And THAT one needed replacing when the it went to scrap. The aluminized exhust was one of those experimental things that Ford played with. I don't know how the spray metalizing compared in cost to stainless but it worked very well. In general heat exchangers are a pain to maintain. On forges and furnaces there are designs that work well with a double shell where the air is passed through. This keeps the exterior comfortably cool but the system is slow to react. I would not put tube type heat exchangers in a hood. The complexity of the connections makes it uneconomical. That is why you want to use less and put it in the hot part of the flue. On a coal forge you could probably make a double wall side draft unit that would pick up a lot of heat. Any way you go with a recupretive system it adds expense that may not pay off. That is why simplisity of design is critical. |
| - guru - Saturday, 11/23/02 18:37:27 GMT |
|
What are the 5 different names for the files. |
| Paul Sanders - Saturday, 11/23/02 19:21:49 GMT |
|
Forge efficiency: Over the years I've thought a LOT about ways to make my forges more efficient. My gas bill has been pretty stably over the last 25 years at 2% of my billing (this includes heating for shop and offices). Hard to get excited about cutting a few percentage points off of that. More money to be saved in other areas. In the end, I don't care much about thermal efficiency at all, I care about DOLLAR efficiency. I DO understand that hobby smiths may have a different view. |
| - grant - Saturday, 11/23/02 19:27:35 GMT |
|
Hmm, after posting the above, I checked it out and see I'm averaging closer to 1-1/2%. About 1/3 of that is heating so the forges account for only 1% of billings! How much time and money should I devote to saving MAYBE 10 - 20% of that? No, much better to spend the resorces elsewhere. |
| - grant - Saturday, 11/23/02 20:59:28 GMT |
|
Forge efficiency Since I am just a hobby smith(but I do forge a lot) the factor of efficiency in the construction or the use is not my main concern(I am probaly in the minority). My main concern is enjoying what I do and I get the most enjoyment out of constructing and using things that I have contrived. On the small test forge I will not be welding the tubes onto the hood, thus no end plates. They will just slip through a tight fitting hole and then be threaded into a elbow(foolish. . . you bet). I may need slather on some heat resistant clay around the pipes where they jut out of the hood to make a better seal. Because of the lack of end plates and many holes in the hood I will install stiffenrs. At home I do all of my blacksmithing outside(northern Illinois, read cold), so a few(?) leaks in the side of the hood where the tubes fit are not of great concern as long as the tube joints are tight enough to keep the exhaust from sneaking in. The third main type of heat exchanger is the one that the Guru just described, a chamber to chamber radaition/convection unit. It is one I am also strongly considering. The main reason I am making a small forge is so that I can test the differences in the various systems before making the big forge. I will most likely make and test both the tube and chamber systems on the small forge. Just for the small test forge I have decided to use thin walled high carbon steel instead of SS so the costs will be decreased(durability is not required). Which ever system I end up using in the big forge, I will be using stainless(remember it's outside). As the Guru pointed out, if I end up using the big forge for more than a few years then the stainless will pay for it self. So far my experience with heat exchangers has consisted of devouring information about them from books and working on the designs for my small system. I am obvously not even close to being an expert in the field of heat exchangers. So it shall be a learning experience for me to confront the actual construction of these contrivences. |
| Caleb Ramsby - Saturday, 11/23/02 22:13:51 GMT |
|
Caleb: I didn't really want to discourage you. Building things is half the fun. I'd suggest you use Neversieze on the pipe joints if you want any hope of getting them apart. At these low pressures a tiny leakage won't hurt a thing anyway. Actually the exhaust, being the lower pressure, won't "sneak in". Sounds like fun! |
| - grant - Saturday, 11/23/02 22:32:20 GMT |
|
Grant I did not view your post or any others as a discouragement to my project:) Don't worry I am almost impossible to discourage. . . good or bad;}. I do understand that those of you that use blacksmithing to make a living simply can't afford to "waste" the time and resources persuing such fanciful/inefective projects. I was thinking that the exhaust wouldn't be able to "push" it's way into the air intake, but I wasn't sure. The only thing that worry's me is that when the intake air is not under pressure the exhaust will get in and if it makes it's way into the fire pot via the pipes then it would suddenly combust or go boom. Thanks for the advice to use the Neversieze, I believe that I shall. |
| Caleb Ramsby - Sunday, 11/24/02 00:29:56 GMT |
|
|
|
|