| WELCOME to the anvilfire Guru's Den - V. 3.0 |
|
THIS is a forum for questions and answers about blacksmithing and general metalworking. Ask the Guru any reasonable question and he or one of his helpers will answer your question, find someone that can, OR research the question for you. This is an archive of posts from November 8 - 16, 2005 on the Guru's Den |
|
|
|
Animal Shelter needs advice: How would you install a steel garage door as a roof over an outdoor kennel? We have nine steel pipe kennels to do, each 10' X 10', so we need to do this the easiest/quickest/cheapest way. The garage doors (donated to us) have a minimal metal framework and we want to mount them about 2 feet higher on one side to act as a shed roof. Our question is how to get them secured on that side to the kennels, which are made of steel tube 1.5" ID open-ended verticals. If you cna come up with a way to do this quick/easy with recycled materials, so much the better. Thanks in advance for your advice. Tom |
| - Tom - Monday, 11/07/05 21:46:53 EST |
|
Hello all, I'm just getting started in this whole blacksmithing thing and I've found this place is a great resource. I've decided to make as many of my tools as I can for practice. I live near some railroad tracks that have had some recent maintatinance. I've found some large bolts, spring locking washers for said bolts, several spikes (some HC) and something that looks like a clip of some kind. It a solid strip not pressed like most of the retaining clips. The bolts seem to be used to hold rail togather. Are the bolts and washers generaly carbon steel? Should they be hardenable enough to make tools out of? Thanks in advance! |
| Blu - Monday, 11/07/05 23:45:52 EST |
|
Tom - Animal Shelter I volunteer for a local wildlife rehad center so I know where you're coming from. Seems like to could make a simple frame from fence pipe, U-bolts and fence pipe brackets avail at HomeDepot type places. Email directly and maybe I can sketch you some specifics. If someone knows how to weld they could also whip up a frame. Where are you located?? |
| dief - Tuesday, 11/08/05 00:34:06 EST |
|
Tom: For something quick and simple I would suggest 1/2" all thread rod. Cut a piece say 30" long. Drill 1/2" hole in the 1 1/2" pipe. Run nut on rod, rod thorugh hole and secure with a second nut below. On top, run down a nut, put on a washer, garage door, another washer and another nut. |
| Ken Scharabok - Tuesday, 11/08/05 01:14:40 EST |
|
Railway bolts and washers, The bolts and nuts will be ordinary mild steel. Depending what home-grown tools you have in mind, They can be hardened somewhat and maybe work OK. In Highschool I made sheetmetal forming hammers from RXR bolts, Worked fine, But just dont strike anything harder than the work material, It will dent those hammers. The lockwahsers will be a higher carbon steel suitable to make small edged tools of. That 'clip' sort of thing (If its what I believe it is,,) is also a higher carbon steel. No idea exactly what type of steel. Look at the 'Junkyard Steel' page and you can sparktest the stuff on a grinder and get an idea for yourself |
| - H�kan - Tuesday, 11/08/05 01:35:12 EST |
|
SGensh: That isn't to say I'm not starting to get 'power hammer fever'. Am trying to use a not-to-exceed, three-year payback on cost vs return. Right now a third-party build JYH seems the best option for my usage. |
| Ken Scharabok - Tuesday, 11/08/05 09:14:28 EST |
|
Thanks H�kan! |
| - BluSpecs - Tuesday, 11/08/05 10:26:53 EST |
|
Power hammer: I would love to have one and if I though my neighbors would put up with it I would build one today. But since I dont have one, my hand hammer skill has gone a lot further than it would have otherwise. I have noticed that some professional smiths who work with pwr hammers are not very effective at drawing out with a hand hammer. |
| adam - Tuesday, 11/08/05 10:53:39 EST |
|
Ken, Adam, My power hammer is an air hammer based on the Kinyon plans which I built several years ago. It was always intended to be just a first test version to work out the kinks so the second one would be really good. Well I'm only now getting the parts together for version two. The kinyon style hammer is very easy to build and with only a few slight modifications can be very controllable. My ram is 120 pounds but I have way too little anvil mass so the machine is not as effective as it could be. The anvil block I've acquired for the next one is about 3,500 pounds (from an old drop hammer) so it ought to work a little better when I finally get it done. I find that I still love to draw out and reshape lighter bars on the anvil for scrolls and brackets and such but I do use the air hammer for the heavy drawing and a lot of preliminary work. The power hammer can never substitute for hand hammer skills in my opinion. It's just another tool which opens up possibilities with it's use. If you have the opportunity to try a hammer somewhere (like at a meeting or demo) don't be reluctant to step up and have a go even if it will make you want one more (grin). |
| SGensh - Tuesday, 11/08/05 12:15:38 EST |
|
Power Hammers: Except for those starting blacksmithing very late in life it is good to have plenty of experiance with a hand hammer before having a power hammer. However, there are SO MANY things you can do with power that are difficult or impossible to do working alone that it really opens up your world. 3rd Party JYH: I have seen a number of these and have found that the arrangement has been modified such that they do not work properly. There are some very simple rules to ram and die height positions that these hammers are not following. Spacers were needed to raise the dies 3" for drawing with control. |
| - guru - Tuesday, 11/08/05 12:39:13 EST |
|
The RRbolts I have picked up in the USA seems to be hardenable; in fact I had to draw temper on one to drill the shaft (2hp dayton motor drill press). I generally heat treat them when made into hammers and none have dented in the last 10 years of use---course I am generally working on hot metal with them. Tom: what is the snow load and wind load of your area? Will the door need a center support? If not I'd just get some self drilling/tapping metal screws and go down the sides fastening it to the metal frame. That's how my steel sided/roofed shop is done. Thomas |
| Thomas P - Tuesday, 11/08/05 12:50:20 EST |
|
Hardware and Alloys: Depending on the bolting system washers are also hardened steel. Torque washers used in grade 5 and up systems are supposted to match the bolt hardness so that they slide properly while tightening. Grade 8 and L9 system washers are quite hard. Spring type lock washers are a spring steel and quite hard. They are designed to cut into the bolt or nut preventing it from turning. I have some large 1-1/2" lock washers that are significant pieces of steel to recycle. Recyling Steels for Toolmaking: If you are recycling steels then one of the best sources is other old tools. These are often much less than the cost of new raw material at the flea market. Hammers can be reshaped into hammers, punches, flatters, fullers and already have the eye punched. Punches and drift pins can be reshaped into specialized punches like pritchels, eye punches and so on. I have made numerous center punches from hex key (Allen&tm;) wrenches by stock removal that were quite satisfactory and indistinguishable from commercial punches. Pry bars are often nice long pieces of hex tool steel that is often SAE5160 (spring steel) or equivalent. A 30" pry par could be converted into a half dozen punches. After old tools truck and automotive springs and axels have been a long time stand by steel for blacksmiths. Coil and leaf springs are both very good steel. AN uncoiled spring may be 6 to 8 feet long. Don't overlook sway bars as they are spring steel as well. Axels are often large enough in diameter to make a good hammer and are the perfect steel. If you make friends with the fellow that runs the local auto garage or truck repair he may be able to supply odds and ends of steel scrap. Offer to do some work in exchange (anything from sweeping the floor to yard work). On the other hand some shops may pay YOU to haul away the scrap. Newer automobiles have less and less steel and the pieces are much smaller and lighter. Truck parts may be the better source and it is not unusual for trucks to break an axel. . . Friends of ours here in the Carolinas work with the many NASCAR teams. They replace many suspension parts regularly. These include tie rod ends and high strength special alloy axels. . . Use your imagination, look around, there is often someone in your area doing something to produce scrap useful to the enterprising smith. In the end however there is nothing like KNOWING exactly what kind of steel you are working with. It is wonderful working with lengths of new steel of known peddigree. |
| - guru - Tuesday, 11/08/05 13:20:38 EST |
|
To be or not to be, a blacksmith? There are smiths of almost every age and every race, sexual orientation and social status. Although considered "mens" work in certain societies, women forged almost all the small chain when chain was all hand made. This included chain made from up to about 5/16" bar. Today as an art form blacksmithing has more women than probably at any other time. We have also had numerous young people (8 years and up) involved in blacksmithing. At one time child labor and child slave labor was used to produce nails by the millions. Today young people take up smithing as a hobby, learning skills that can lead to educations in art, engineering or other technical fields. It has also become a retirement occupation for many and it is not unusual to hear of someone starting into blacksmithing at retirement age. On this board we have NASA engineers, lawyers, doctors and priests all whom call themselves blacksmiths. We also have students, teachers, industry professionals, authors and a circus act as well as artists and professional metalworkers of all types. And yes, I know a number of gay blacksmiths that I can call friends that are also excellent blacksmiths. |
| - guru - Tuesday, 11/08/05 13:38:53 EST |
|
Animal Shelter thanks you for the advice on the kennel roofs. Someone also advise using plumber's strapping to lash the thing together? Is there something like that, comes in a roll, but a bit stronger? We are located in Lebec, California, about halfway between L.A. and Bakersfield, at the to of the Grapevine pass. We don get some snow and wind. http://www.cause4cats.org/ |
| Tom - Tuesday, 11/08/05 16:13:51 EST |
|
Left handedness? Now THAT is a serious problem! The entire world and most tools are right handed. Lefties have a much greater chance of getting injured from tools made to be used right handed. Ever try to use an electric drill or skill saw left handed? The trigger lock is on the left side and as soon as you pick it up and hit the trigger it is locked and you cannot unlock it without letting go of the saw! On the other hand there was some recent research that said that there are no true lefties. There are folks that are born right handed and those that are neither. Those that are neither can learn to be either left handed, right handed or ambidextrous. However, once learned at an early age you are what you are and it is difficult or impossible to change. |
| - guru - Tuesday, 11/08/05 16:18:51 EST |
|
Thanks for the advise everyone. I figure I'll get some enjoyment out of making my own tools and using them. I haunt the flea market quite a bit anyway so now I've got more junk to look for! There are several booths there that are packed with old tools form $1 - $2 a pop I really enjoy the iforge section, will it be updated again with more projects or is it more of an archive? |
| BluSpecs - Tuesday, 11/08/05 16:20:29 EST |
|
I ocassionaly add to iForge. I have three demos in the works, just have to finish and post them. . . |
| - guru - Tuesday, 11/08/05 17:19:35 EST |
|
Actually it's quite easy to change your handedness---just be careless with powertools/heavy equipment/heavy objects, etc. as the saying goes "Hand tools hurt; powertools maim!) Thomas |
| Thomas P - Tuesday, 11/08/05 17:37:57 EST |
|
Adam, I built a power hammer based on "The Big Green Machine" JYH. It was simple to build (as in less than "Rocket-Surgery...yuk yuk), and tolerances within 1/4 inch were acceptable. You won't loose your hand hammering finess but you will save mucho time over drawing out by hand. I use it to rough out drawn bar, but finish everything buy hand, that way I'm in total control of the finished look. I'm thinking about making different die's for repetitive designs also. As far as your neighbor's are concerned, take a lesson from Buddy Holly, line your walls with egg cartons and/or foam rubber sheet and you'll have no problem. Someone asked about fast rusting a couple of days ago....here's a tip, get some brush on "plumb" or barrel "browning" fluid at your local sportsman's warehouse, Bi-Mart, hardware store or gun shop. It's an alternate method of coloring your gun's lock and barrel rather than bluing and gives a nice rust (actual rust), brown patina which is favored among mountain man and Civil War reenactors for it's authenticity. |
| Thumper - Tuesday, 11/08/05 22:21:22 EST |
|
The chlorine crystals sold by swimming pool supply shops will make a decent rust in a day or so when mixed with water and sprayed onto the work repeatedly. Clorox diluted will do likewise. |
| miles undercut - Wednesday, 11/09/05 01:11:40 EST |
|
Thumper: I would love to see pix of your machine. I do love machines and I will end up with a home built pwr hammer - theres no escaping my karma :). Just that I am a lazy undisciplined SOB and if I had a soft option I would neglect my hammering. There is a wonderful fresh look to piece of ironwork that is formed with a few accurate hard blows as opposed to a piece that looks like it has been worried and bothered into its form. I can do this on upto 3/4" stock. When I forge larger stock, say 1" to make a pair of big tongs, I quickly knock it down to a manageable section and then the real forging begins. I cant really "forge" 1"sq as 1". |
| adam - Wednesday, 11/09/05 09:05:38 EST |
|
I have a questiona about an anvil I found at my great grand fathers house. The anvil is 33 and half wide by 14 inches and a half. This a large anvil. Markings are as follows: It has a name Fisher and date 1918 on the end with another intials of L and four marks 1111. The legs have numbers 3 and 35 on them. The top has been stuck well but overall in real good shape. Thanks Lee |
| Texas - Wednesday, 11/09/05 11:10:52 EST |
|
Texas, well your anvil is a Fisher made in 1918...in New Jersey... Fishers have a good tool steel face bonded to a cast iron body and while some folks don't consider them as good as an anvil made from tool steel forge welded to a wrought iron body they are a great anvil---especially since they don't ring and annoy the neighbors---as their adds used to say "leave the ringing to church bells" My main shop anvil is a Fisher though I also have Peter Wright, Hay-Budden and A&H anvils to hand... Thomas |
| Thomas P - Wednesday, 11/09/05 11:22:22 EST |
|
Texas: To add to what Thomas P. said, the 35 likely means it is 350 pounds. Fisher fairly routinely made them much larger than that and reportedly sold quite a few to the U.S. Navy for the large ships. Reason for anchor under logo? |
| Ken Scharabok - Wednesday, 11/09/05 11:36:04 EST |
|
mmmmmmm-ok here goes.. I have been having some troubles lately trying to forge weld in my gas forge. I use an NC tool whisper daddy #2. Nc tools claims that this forge will come up to heat in three minutes to weld. I have tested this forge to see if it would come up to heat and I have NEVER been able to get this sucker to come up to white heat to weld. Am i not holding my tongue right or something?? also, i spoke to one of our local smiths in the area yesterday and he says "you just can't weld in a gas forge. Well I have done some seaching through the archives and found several postings from folks that do welding with gas and produce damascus. I really need to get this thing moving to forge weld or buy another forge that will. any advice ??? Please email me with your advice. I know it's a pain but i don;t frequently visit back to this page that often. Thanks! Ed Green info@budoweapons.com |
| Ed Green - Wednesday, 11/09/05 12:33:21 EST |
|
oh yeah- sorry for the typos in my last post I know how much it annoys some of you but I was in a hurry. |
| Ed Green - Wednesday, 11/09/05 12:34:15 EST |
|
Switchblades andswer for miles undercut Miles, the reason you can get switchblades in every knife mag, flea market, etc. is because State laws concerning these issues supercede federal laws. It is the constitutional statement that the federal government shall not have the right to tell any state how to govern their state(basically speaking). So it really all depends on which state you live in (where the US is concerned). also, many of the ones you find nowadays can be bought in KIT form which is legal. It really isn't considered a switchblade until you put it together. Also the importation of switchblades into the US is also an issue. Some them that you can find already put together are either purchased in kit form, put together by the seller, sold or are made in the US. I know this has been an issue with true Balisong blades for years now. The US banned importation of them from the Phillipines now everyone and their uncle makes cheap knock offs they are so ungodly high for good ones like the Arc angel from coldsteel that no one really wants to buy one. As far as swtichblades- the blades are entirely too thin to be of any real practical use anymore. Many GREAT tactical knives out there (like Kershaw speed safe) are equipped with "assisted" opening devices which in essence makes them more effective than switchblades. Kershaw makes a GREAT tactical blade that will hold an edge like nothing I have ever owned including cold steel. Hope this sheds some light on the subject for you |
| Ed Green - Wednesday, 11/09/05 12:55:06 EST |
|
I know quite a few bladesmiths who make a living forge welding in a propane forge, even aspirated ones over a mile high in elevation! However, a propane forge may not be tuned for welding. A white heat (by my eye) is not required but tuning to make sure you have a reducing atmosphere is! Also most light refractories need protection from flux. I can't adress your particular brand as all the folks I know are using home made propane forges. Have you discussed this with the manufacturer? Should be someone on the staff to field use calls. Ed, federal laws superscede state laws; but anywhere the Feds havn't "spoken" is left to the states. States often have more restrictive laws but it's on a state by state basis---just compare owning automatic weapons in two states like NJ and AR. In one you only had to jump through the federal hoops (back aways ago when I had friends with them), the other had so many other hoops and most of them flaming that it basically was a *NO*. Thomas |
| Thomas P - Wednesday, 11/09/05 13:58:38 EST |
|
Ed, well stated. As to your forge question, you might try http://www.dfoggknives.com/forge.htm.; I forge weld damascus in my propane in my gas forge w/ no problem, but I use a blower. The double burner atmospheric forges seem to do a good job; I've used them but don't own one. |
| Ron Childers - Wednesday, 11/09/05 14:01:48 EST |
|
Guru, I was doing some calc's around sizing of forge blowers and came up with the following relations: You will burn appprox. .41 lbs coal/hr for 1 CFM of continuously provided air. 1 CFM of air (per hour)will produce 5700 BTU/hr 1 CF air will produce 95 BTU heat from coal. A 25 CFM blower will burn approx 10.2 lbs coal/hr and release about 142000 btu Coal at 14000 BTU/lb, 7.9 lbs air/10000 BTU (perfect combustion) Ref. Perry's Handbook Coal consumption will be lower if you reduce blast when beating, greater when welding. Dave L |
| - Dave Lawrence - Wednesday, 11/09/05 15:21:35 EST |
|
Gas Forge: Mixing is often a problem in gas forges - even if youhave the air/gas ratio right. Two easy things to try a. toss a handfull of firebrick rubble into the middle of the floor. this adds turbulence and catch points for the combustion. sometimes this simple trick can make a dramatic difference. b. Try running the forge a bit richer than you think. If you have poor mixing then you will need excess propane to consume all the available oxygen. Good luck ! |
| adam - Wednesday, 11/09/05 15:29:18 EST |
|
Here's some legal stuff on switchblade knives; http://www.ametecon.com/switchblade.html and http://www.pw1.netcom.com~blevine/sta-law.htm (scroll way down on that second one.) |
| 3dogs - Wednesday, 11/09/05 15:46:12 EST |
|
I have an anvil from my great grandfather and would like to know the history of it. The anvil is very large. It is 33 and half inches long and 14 and half inches in height.It has the name Fisher and a date 1918 on the end with another intials of L and four 1111 marks. The legs have the number 3 on one leg and the other 35. The has been well struck but overall conditions very good. Thanks for your help! Lee in Texas |
| - Texas - Wednesday, 11/09/05 15:51:10 EST |
|
Texas; there have been at least two answers after your last post of this; scroll up! Thomas |
| Thomas P - Wednesday, 11/09/05 15:59:55 EST |
|
Gas Forge Heat: I cannot believe NC would make that 3 minute statement. Most of their forges take half hour to 45 minutes to get up to "full" temperature and often a couple hours to reach a good welding heat. As noted, tuning is sometimes a problem. The NC forges are not adjustable unless you modify them. The easiest way is to use a brick or a bit of Kaowool and reduce the enclosed space. This will often raise the temperature. You can also clamp on an air restriction at the intake to make it a little richer but this is often not very effective. As a last resort you can open up the orifices one size. This will increase the heat but also the fuel consumption and dragon's breath. It is also not reversable without purchasing replacement orifices. |
| - guru - Wednesday, 11/09/05 16:09:24 EST |
|
Adam, I will try your firebrick trick first. anyone have any advice on tuning these particular forges for welding? I know welding in a gas forge can be done I have seen it. I bought the biggest one I could because I knew I would need it for the projects I work on from time to time. it is running three burners. The manufacturer recommends preheating the forge then turning up the gas pressure to 12lbs. I have folowed their instructions religiously more than a handful of times and still it doesn;t work. Should I turn up the gas higher?? is it dangerous to turn it up to more than 12lbs?? |
| Ed Green - Wednesday, 11/09/05 16:18:39 EST |
|
guru they do say it- it is printed in their catalog too. as far as orifice size what size would you recommend?? |
| Ed Green - Wednesday, 11/09/05 16:20:39 EST |
|
Ed: Just because your gauge reads 12 lbs, does not mean it is 12lbs. Try higher. Listen for the roar, and adjust it from there. Let us know how it all comes out. |
| Bob H - Wednesday, 11/09/05 16:38:17 EST |
|
Jock: Thanks for getting rid of the troll, while keeping your "To be or not to be a blacksmith" response. Sometimes we may cast our pearls before swine, but they remain pearls none the less. :-) |
| Bruce Blackistone (Atli) - Wednesday, 11/09/05 16:43:03 EST |
|
Ed, I use a very small gas forge which cruises at welding heat. The color, to my eye, is a light yellow like unsalted butter. There is no danger in cranking up the gas so long as the burners stay lit. I have run forges at 30 psi - its noisy like a jet plane. I would crank up the gas until the air cant keep up and you start to see the blue flames of unburnt propane burning in the exhaust. Dial back the gas until the dragons breath is just a 1" orange lick. Then set the gas to halfway between those two points - this is your starting point - welding heat, if its there should be nearby. Does your forge have openings? As you approach welding temp, the forge starts shedding heat through radiative transfer. Of course its always doing that but at welding temps this becomes a major factor. The forge loses a lot of heat by emitting light. A piece of firebrick set in front of an opening but a aways back so as not to block the gas flow will reflect back most of the radiant heat. I have also noticed that depending on the size and shape of the work, putting the work in the forge can interfere with the airflow enough to detune the forge and knock it down from welding temp. I usually turn down the gas a little when the work goes in. Definitely dont put the work in while the forge is warming up. Let it get to welding temp and then the piece goes in. This is more of a problem with a small forge. |
| adam - Wednesday, 11/09/05 16:46:20 EST |
|
thanks Adam. Yes the forge has two (really three)openings. the one on the front has an ALWAYs open door of about 5x5 inches builtinto the fron tdoor that is sulated as well. the back has a door of the same size (5x5) that has a closed flap. this allows for work to slide through when working long pieces. the firebox is rather large though. i needed it for the larger projects to fit for heat treating the entire pieces. i will take your advice and see if any of this helps. you have been a big help. |
| Ed Green - Wednesday, 11/09/05 17:31:20 EST |
|
Federal law preempts state law, but the the Federal government can only exercise the powers set forth in the Constitution. One of these powers is the power to regulate interstate commerce. This is probably the power under which the Federal law agaist swithblades was enacted. It could very well be that the Federal law can't be enforced agaist knives that are sold in the state where they are made and therefore never travel in interstate commerce. But I wouldn't necessairly bet on it -- the law in this area is very confused. (I couldn't get 3dogs' links to work, so forgive me if I'm repeating something there). |
| Mike B - Wednesday, 11/09/05 18:05:11 EST |
|
Feds once shut down a local farmer's produce stand, we studied it in business law class I had to take to become a computer engineer...that interstate commerce clause trumps *everything*. Thomas |
| Thomas P - Wednesday, 11/09/05 18:10:00 EST |
|
This romantic notion that the state supercedes the feds was put to rest long ago, I thought, when George Wallace backed down before Nick Katzenbach in the schoolhouse door. Gollee. The bleep goes on. The switchblades are being sold because the feds are too busy checking on library books. |
| miles undercut - Wednesday, 11/09/05 20:45:08 EST |
|
I offer one version of my Freon tank atmospheric propane forge for farriers. I received a request asking if I can reduce the height without greatly increasing width. Only way though I could really do so is to run the tubes along side the body and then elbow into the chamber. One on each side, one front and one back. Question I guess is really roughly how much efficiency would be lost using the elbows? (Remember they just need to get the shoes hot enough to adjust and fit.) |
| Ken Scharabok - Wednesday, 11/09/05 21:28:15 EST |
|
Nice old anvil on Ebay: Item number 6225175454 can anybody guesstimate its age? |
| Bob G - Wednesday, 11/09/05 21:32:45 EST |
|
Thomas, They even stopped a farmer from growing wheat on his own property to eat himself. That was back in the New Deal era. After that, I don't think the Supreme Court invalidated a law as going beyond the Commerce Clause was few years ago when they struck down a Federal law against guns in school zones. I do know that for at least some Federal firearms violations, they have to prove that the gun was actually transported in interstate commerce. Come to think of it, though, it's possible that's because of the way the statute is written and not any constitutional limit. If so however, it's possible the switchblade law is written the same way. |
| Mike B - Wednesday, 11/09/05 21:43:19 EST |
|
Hi there guru, I want to here your thoughts on how much to offer for a Peter Wright anvil that is about 150lbs. A person a know is selling one that is a bit rusty and has a couple chips on the edges. I realize the rust is nothing to worry about and I think the chips on it arent anything extensive, but what do you think is worth it, Thx, Kevin |
| Kevin - Wednesday, 11/09/05 21:46:00 EST |
|
KenS, I know that the burner tube should be as free of obstructions as possible to maintain the velocityof the unburn3ed fuel/air mixture at a rate higher than the burn rate of the flame front. This prevents backfiring, or "huffing". A 90� bend near the end of the burner tube is going to introduce a huge restriction, right where you don't want it. You would have to use some sort of a secondary venturi at the burner end to get the velocity back up, I think. And that will interfere even more with the flow pressure, affecting how well the mixing venturi performs. You may have trouble with it running too rich and have to modify your intake area to get more air in. This is all guesswork, as I've never tried that. I know that a number of commercial forges use a bend in the burner tubes for shortening the overall height, so there has to be a way that it can be done. The commercial forges don't ever seem to go much tighter than about 130� though, as far as I recall. What about changing the angle that the burners come into the shell so that they come in at about 3 o'clock and angle up? The flame should swirl around the top of the chamber and heat the whole area pretty uniformly. As i remember your forge design, the way yo make the burner assembly would work fine that way. It would be wider, though. |
| vicopper - Wednesday, 11/09/05 21:51:18 EST |
|
I need advise on where to get the best lines, valves, pressure gages, and fittings for propane use. appreciate any leads/tips/advise thanks |
| - morph - Wednesday, 11/09/05 22:10:38 EST |
|
Deleted posts: Burnt, It is hard to remove the offending material and leave comments referring to it and have it make sense. I may have axed the stuff too fast but the choice is to leave it posted longer while I figure out what to keep. I don't think there was anything deep about this person, just trite, rude and undisceplined with nothing better to do than stir up trouble. Just a low life troll. I posted a thoughtful response to the first question and had nothing but explictives posted in response. You may have missed them as I deleted sever batches. This is not the place. If you would like to try to take a discussion with him/her/it off line I can send you the multiple email addresses and names (both probably fake) used. We have managed to avoid trolls on our boards. Those that do nothing about them become a useless mess. In eight years we have only had to ban three. Let them find somewhere else to so their thing. |
| - guru - Wednesday, 11/09/05 23:11:32 EST |
|
Old anvil on ebay: That is what we would call a "Colonial" here in the states. Just VERY old in England. It probably dates from the early to mid 1700's but is very difficult to tell as this pattern was pretty much the same until the early 1800's. Examples like it here sell for serious collector's prices. |
| - guru - Wednesday, 11/09/05 23:17:48 EST |
|
Bends in Burner Tubes: This works in many forges but all I have seen had expanding tubes and the tures were rather large diameter. I have tried threaded 45° and 90° elbows and the burner did not work at all. Experimentation and testing is required. |
| - guru - Wednesday, 11/09/05 23:20:26 EST |
|
PW anvil value: Kevin, Prices on these things vary greatly mostly depending on who is buying and who is selling. In the 1960's the rule of thumb price for old anvils was $1/lb. Today it is not unusual for anvils to still sell for that little. Market price among folks that know the value of old anvils varies between $2.4/pound to as high as $4/pound for desireable classics in mint condition. Surprizingly an ocassional 150 year old anvil pops up that has never been used. Today NEW cast steel anvils can be purchased for as little $2.50/pound so this is holding down the prices of old anvils that WERE steadily climbing until a few years ago. However, the top new anvils sell for more like $7/pound. When you compare this to old anvils of equal usefullness and quality then that $2.50/pound does not look to bad. Today I had an email exchange with a fellow looking at the "NOT Chinese" anvils on ebay selling for $150 + $40 unrefundable S&H. By the time you get one of these pieces of cast iron junk delivered you will be paying almost $2/pound. You will also have something that you could not get HALF your money out of. For the same money you can find good old albiet beat up anvils that are just as functional as new. Besides being real tool steel and a wonderful tool you can also resell the OLD anvil for as much as you paid for it or MORE after having used it as long as you like. . Good old tool = good investment, satisfaction using Cheap junk tool = money down drain, dissatisfaction. . . RUST is normal for most anvils especially OLD ones. However, unless there is rough pitting of the face there is no harm done and even pitted faces can be dressed with a grinder if not severely pitted. NOT CHINESE anvils: But they do not know where they are made, just "not in China"? One of the ebay sellers points to the IMPORTER'S name and address (KING L.A. CALIF) as evidence that these are not cast iron Chinese anvils. . . . Claims to be hardened steel like all the other junk anvils being sold on ebay. This one is the brand sold in feed stores that I tested as softer and with less rebound than the concrete floor it was sitting on. . . The lies go on. . . |
| - guru - Thursday, 11/10/05 00:12:56 EST |
|
Best Lines: Morph, What you need are standard commercial grade pipe, fittings and tube for gas service. Parker makes a very good line. But if you want the gold plate standard of fittings go to Swagelok and get the nice 304 stainless steel tube fittings and stainless tube. However, stainless is pretty much a waste since the other hardware you will be using is brass and copper. Note that the plumbing code reccommends flared fittings for gas use, not compression fittings. In this case the tools and skill of the operator are more critical than the hardware. Regulators and gauges are best bought from any welding supplier. You want a guage in a range of about twice the maxiumum operating pressure of your device. I recommend 0-60 PSI. Note that all gauges have an accuracy tollerance of about 3% of full scale. The higher the pressure range the lower the accuracy at low pressure. If you are concerned about guages then you must have them routinely recalibrated OR replaced every couple years. Gauges corrode, bugs build nests in them and the bourdon tube gets hammered by improper valve operation causing gauges to be highly inaccurate. |
| - guru - Thursday, 11/10/05 00:27:31 EST |
|
SWITCHBLADE LAWS: Go to the mamma.com search engine. Enter "Michigan switchblade laws". They are items 1 and 3. |
| 3dogs - Thursday, 11/10/05 05:08:41 EST |
|
Kevin: Peter Wrights appear quite often on eBay, so you can somewhat use what they sell for as a price guide. I say somewhat since S&H is involved and may affect price. Just go to www.ebay.com and click on Advance Search in upper right. Now do a search on Peter Wright anvils in completed listings only. Right now it shows six ended within past 30 days. On three the bidding did not meet reserve. One 120 lb went for $179. One 130 lb (late model - nice) went for $563. One 154 lb went for $350. So you can see prices vary. Since you don't have S&H involved, I would say to start at $1.50 LB and be willing to go to to $2 - $2.50 LB, depending on condition. 150 LBs is a nice size. Large enough to get some serious work done, but still light enough to be able to move around as needed. On the Not Chinese or King LA listings, a third party sent me an exchange he had with the seller. Seller admitted anvils were from Russia, but wanted to avoid saying that as the guys on anvilfire.com really bad mouth them. That way they couldn't do a Google search on Russian anvil to find comments about it. I know King LA is an importer, but may not necessarily be bringing in the Russian anvils as I have seen listings with what look to be cast iron anvils (London pattern) with KING LA molded on the side. Thank you for comments on the propane tubes. |
| Ken Scharabok - Thursday, 11/10/05 07:42:23 EST |
|
Ed Green, I have a NC wisper delux that I use for shoeing horses. I have welded in it but I've since readjusted the burners (I thought I could make it better) and can't weld any more. The adjustment isn't very good in that you can't change one burner without changing the other. When I was welding in it I had to really crank the gas and it took the forge a long time to come up to temp. Bottles of course tended to freeze too. Check out some of the hot rod home made forges that some knife smiths use. They weld huge billets with no trouble. I just leave my NC for shoeing work and do my welding with charcoal or coal in the shop forge. You can throw a charcoal forge together pretty easy and cheap which may be an inexpensive option if you can get charcoal without too much trouble. |
| Mike Ferrara - Thursday, 11/10/05 08:04:40 EST |
|
Not Chinese or King LA: The one I looked at was definitely the Chinese pattern that I had tested. Those being sold that LOOK similar to the Russian now have a diagonal hardy hole which is common on many of the anvils clearly labled Made in China. We have not had anyone we know to purchase one of these and inspect or test it. ALL the ones on ebay are being grossly misrepresented so there is nothing in their listings that you can trust. Many have no marking or label. Those with "Central Forge" were labels put on by the importer for Harbor Freight and had nothing to do with a specific manufacturer. Also note that it is very common for Chinese manufacturers to use old US trade names, mispelled trade names or English sounding names on products to misslead the dumb Americans. . . Kingston, Chicago and Buffalow are typical. Remember when Japanese cars were sold under new made up names to hide their WWII industrial heritage? Remember Datsun? Also known a Nissan. . . and MGA (electronics) also known as Mitsubishi Heavy Industries. There is a huge billion dollar industry manufacturing cheap goods in China specifically for sale on ebay. Because they are sold through thousands of small individual dealers there is not warrantee, little libility that can be traced, no returns and no feedback other than what is written in forums like this. The ASO's are a microscopic part of this market. Products include all kind of tools and small appliaces. As pointed out by some of our members, the Chinese are not necessarily at fault, it is the importers that are asking for the cheapest possible product and both the maker and the importer know that the most deffective will never come back to them. |
| - guru - Thursday, 11/10/05 09:00:55 EST |
|
guru, thanks for the reply. more specifically, a general source for flexible propane line, fittings, gauges/ regulator, quick disconnect, ect..stainless braid rated for propane? copper ideal for propane? best way to seal brass fittings? some feel tape and "dope" are not necessary, brass on brass. reil's page has suggestions on where to find refractory materials (yes mr. S, i know the AF store sells that stuff, i have purchased through there before), but not propane plumbing supply source. saftey and durability priority. thanks |
| - -morph - Thursday, 11/10/05 10:48:30 EST |
|
Guru & Quenchcrack I purchased an Old World Anvil yesterday. I called them back today to give credit to anvilfire and quenchcrack. |
| burntforge - Thursday, 11/10/05 12:05:11 EST |
|
Morph, My engineer friend tell me that the most suitable method for piping propane is copper tubing, using either sweat-soldered fittings or flare fittings. Copper withstands the pressure, the heat, the propane as a solvent; in short, the works. Flexible rubber tubing can be obtained that is rated for propane (not all gas hose is suitable for propane) and rated to 300 p.s.i. It is much more expensive than copper and is still subject to damage from abrasion, hot steel and flame. Brass fittings are the way to go. Use gas-rated paste type sealant on the threads of NPT joints. I use Harvey's brand, only because that is what I can obtain locally. Teflon tape is fine if you are very careful not to get any loose bits in the pipe and you use just the right number of wraps on the joint. Neither paste nor tape is a substitute for properly preparing and fitting the joint! Threads must be inspected and cleaned, they must be cut to the proper amount of run for the pipe size, and they need to be de-burred. They must be tightened to the proper amount of engagement if they are to be expected to seal. The paste and the tape should be thought of more as lubricants to allow th epipe to screw down to seal than as some sort of leak-stopping goop. (Bare metal on metal is a prescription for galling unless the metals are carefully selected for the purpose.) I get all my gas fitting supplies at the local plumbing supply, my regulators from the welding supply either locally or online. Larry Zoeller sells regulators, burners and fittings reasonably, Google for Zoeller Forge. |
| vicopper - Thursday, 11/10/05 12:17:40 EST |
|
Animal heads - Can anyone suggest a good guidebook for the forging of animal heads(dragons, horses, bears, etc.). I've been dabbling with it, but want to get more serious about it. |
| - Tom T - Thursday, 11/10/05 13:04:07 EST |
|
Tom theres a smith in furndale, California called Frog man who makes the most awsome animal heads. his web site is: http://www.ferndaleblacksmith.com/ |
| packrat_red - Thursday, 11/10/05 13:17:43 EST |
|
David has a book that focuses on nothing but animal heads. I don't know what its called, but I'll ask him next wednsday. |
| - packrat_red - Thursday, 11/10/05 13:23:45 EST |
|
The Guild of Metalsmiths has a whole book on animal heads called "Iron Menagery." Centaur used to carry it. |
| Alan-L - Thursday, 11/10/05 13:34:04 EST |
|
Norm Larkins Books has the printing rights to Iron Menagerie. It is still listed in the last Centaur Catalog I have. |
| Ken Scharabok - Thursday, 11/10/05 14:02:59 EST |
|
Sounds a bit "off" to me. As I recall anvilfire gave a positive review of the russian ones as a good "starter anvil" compared to the cast iron ASO's... Thomas |
| Thomas P - Thursday, 11/10/05 16:05:33 EST |
|
Ken, regarding your burners: I've tried to run Reil style burners with a regular pipe elbow in the line -- doesn't work. Think it induces too much turbulence that slows down the flame front. However, I have some radius-bent 3/4" conduit -- you know, the premade "gentle bend" elbows that you can pull cable through without it kinking. About a 6 or 8 inch radius. I have not yet tried one of these, but I plan to, and I suspect that it will work as a burn tube for a Reil burner without modification. They are not expensive, so you may just want to buy one and try. It is worthwhile to note that on Forgemaster forges the elbow bend radius is fairly tight, and the piping is of a constant diameter (though cast from iron instead of built up from parts). I think it's safe to say that any way of doing this involving pipe fittings is going to fail, but I'm pretty confident there are alternate methods. Morph, regarding gas line: Welding supply house will sell you bell end fittings with barbs, and propane hose. Also valves, but you may be able to get those cheaper at a hardware store. You do not need to tape brass on brass, because generally brass on brass fittings aren't sealing on the threaded surfaces, they're sealing on designated crush surfaces. Agree with Vicopper -- copper is best. However, I don't usually use it, because it is inconvenient to move. Do note that you can make up your own fittings involving hose barbs simply by putting a hose clamp over the hose where the barb is. This can also be used to transition from left hand threaded fittings to right hand threaded fittings. It is also worthwhile to note that if you are running below about 75-100PSI, you can hose-clamp propane hose directly to copper tubing. Make sure that if you buy hose, it is the "All Fuel Gases" type T hose, rather than Acetylene Only, which will leak and stink and can cause an explosion under propane service. |
| T. Gold - Thursday, 11/10/05 16:38:15 EST |
|
Old World Anvils: Burnt, Thanks for the credits but Old World does not advertise here. Euroanvils, now operated by John Elliot at Blacksmith Supply IS an advertiser. But maybe OW will get the idea. . . |
| - guru - Thursday, 11/10/05 18:01:19 EST |
|
Note: Iron menagerie is out of stock at Centaur Forge. |
| - Tom T - Thursday, 11/10/05 18:01:42 EST |
|
Does anyone know what is going on with Norm Larson. It took me a couple of months to get him to send me a box of Ted Tucker's book, then another couple of months to get a bill for them, then he hasn't cashed the payment check in several months. I sent in another sizeable order about a month ago, but nothing on it. Health problems? |
| Ken Scharabok - Thursday, 11/10/05 18:19:12 EST |
|
1. We did not badmouth the Russian anvils, we badmouthed the guy who was using Anvilfire copyrighted material to sell his Russian anvils. 2. Old World Anvils is no longer owned by the man who started the company. He sold it to the present owners last year. |
| quenchcrack - Thursday, 11/10/05 20:29:44 EST |
|
sealing pipe threads. Having worked for a fitting maker, and doing leak testing for years at pressures from Vacumn to 33,000 psi, in fluids from helium to water and oil, I would not reccomend using any pipe threaded fittings without a sealant if a leak tight joint is desired. For gases, I prefer a anerobic sealant such as Loctite PST. Tape is indeed only a lubricant on pipe threads as Vicopper pointed out. Soap works about as well as teflon tape. I can not reccomend Swaglok enough. The threads have the best finish with what looks to be a burnished finish. I have used about $100,000 worth over the years, in low to high pressure automatic pressure decay test machines and NOTHING else performed. That said they are pricey. Note that all the fittings I used were 316SS, as was the tubing. I do not think that soft tubing will be a good choice with Swaglok as they have a Rb20 hardness reccomendation for tubing. I would avoid compression fittings sold at the hardware store used with soft copper as they are very subject to leaking if the tubing is bent or vibrated close to the fitting. |
| ptree - Thursday, 11/10/05 21:34:14 EST |
|
Is this page working or am I the only one awake? |
| Thumper - Thursday, 11/10/05 21:40:46 EST |
|
Sorry about that post, my page keeps opening with the bounce notice and all new stuff is above it....didn't look |
| Thumper - Thursday, 11/10/05 21:43:09 EST |
|
Hi Guru Old World Anvils I never noticed they are not an advertiser. I hope that mentioning this site to them will encourage advertising. Their product certainly gets a tremendous amount of press from this very site. They sold the anvil to me because of this very site. |
| burntforge - Thursday, 11/10/05 22:18:39 EST |
|
On eBay #4417758589, what was the purpose of the flare out at the base of the post vise jaws? Strickly ornamental or perhaps part of the forging process for the eyes? |
| Ken Scharabok - Thursday, 11/10/05 23:27:32 EST |
|
Ken according to Frank that is there, or may be there to keep filing out of the nut. |
| adam - Thursday, 11/10/05 23:44:49 EST |
|
Vice/Vise ducktail: Ken, There is only speculation about this feature. However, logic and observation show that it deflects swarf and prevents it from collecting in the thrust bearing surface lubricant. This feature is common on the earliest vises well up into the 20th Century by those that valued traditional style such as Reed, Prentise, Columbian and Paker. On later cast vises the feature became less prominant or took on the shape of a recess or counterbore but it was still there. Prentice used the entire line of stylish lines and chamfers developed on the jaws of old English vises. Like the shape of the violin this was perfection in design and modern makers who have turned their back on these traditional lines are doing a diservice to the manufacture of good tools. All blacksmiiths leg vises have this feature on both the front and back jaw (for symmetry) except some of the rather ugly modern vices. |
| - guru - Thursday, 11/10/05 23:55:01 EST |
|
I figure the vise jaw flair was/is to deflect any errant hammer blows away from the precious screw. As well, of course, as just being for pretty. |
| miles undercut - Friday, 11/11/05 00:29:52 EST |
|
Swaglok Fittings : The brass ones are for copper tube. I use them with marine refrigeration equiptment as they are on "Sea Frost" brand gear. My cousin uses them extensivly in deep vacuum lab equiptment, the rule of thumb is stainless tube gets stainless fittings, copper tube gets brass fittings. If You use them folow the instructions especially as to tightening. |
| Dave Boyer - Friday, 11/11/05 01:13:39 EST |
|
Mike, thanks for the advice. I tried some of Adams advice today. I used a couple of small mild steel strips of the many that I have lying around my dirt floor. I cleaned them up with a grinder and made nice shiny surfaces. I wired them together with stainless wire to form a small stack. I ran two experiments: 1. I put a stainless 3/4 inch plate in the bottom of the forge(mostly to keep flux from eating up my floor). 2. I cranked up the forge and let all things settle out temp wise. I stuck my stack inside and let it get red to orange all the while turning it to get an even heat. I removed the stack gave it some flux and cranked up the heat. In 7 minutes I was able to weld the front half (and a pretty good weld if I do say so). 2nd experiment: I did this to try out the advice of reducing the volume of the box. I stuck a brick (a firebrick) in the forge and proceeded to go through the same steps as before. I could not get that sucker to generate the heat that I could using the stainless plate. Hence my weld for that experiment never got off the ground. My results: the stainless plate in the botom seemed to help in generating just enough radiant heat to make the weld possible. My concern: this is 1/8 steel I used in the experiment for the projects I am getting ready to do I will be using darn near 1/4 inch and making scarf joints to weld rings for making what we in my branch of the martial arts call shuko. If it takes this long to do this on 1/8 inch it ewill take even longer and be harder to do with 1/4 and possibly fail since I feel that my first weld only made it by the hair on my chinny chin chin (but then it appears that close also works here as well as in horseshooes and hand grenades. What can I say? I am very dissapointed in the performance of this forge that it doesn;t live up to what the folks at Nc tool say it will do. The only reason I didn't build my own is because I actually use mine to make part of my living and didn't want to fool around and blow myself up so I figured buying one ready made was my best bet. Apparently I bought the wrong one. 3 minute welding temperature indeed! |
| Ed Green - Friday, 11/11/05 01:20:13 EST |
|
Ed Green: Is the forge still under warranty with NC Tools? If so, perhaps it should be returned as failing to meet stated operations. |
| Ken Scharabok - Friday, 11/11/05 01:40:10 EST |
|
Ed Green :Does that forge have a reflective coating in it? I don't know much about it, but I understand that it makes a big diference in a forge that gets "almost hot enough" and that it needs to be recoated from time to time to continue reflecting. I guess You have studied Ron Riel's site, and the links that go with it. |
| Dave Boyer - Friday, 11/11/05 04:58:01 EST |
|
Jock, I was looking for a "list of Advertizers" on Anvilfire to give our students and to distribute with the handouts at demos. Although I urge them to use this resource, some don't have access to a computer. (I printed iforge # 66 as required reading). |
| Ron Childers - Friday, 11/11/05 09:52:34 EST |
|
I need to build a "cremone bolt" for an entrance door, anybody know how to do this ???? Thanks |
| Andr� Boudreault - Friday, 11/11/05 09:58:27 EST |
|
Forge Welding in Gas Forges: Although the vast majority of laminated steel is welded in gas forges this is much different than making little bar lap welds. The problem with gas forges is that most tend to create much too much scale for making good small welds. When welding billets the closed stack protects the weld surfaces and the flux takes care of the rest. However, you must flux early. Once scale is created it is often too late. At the Flagstaff conference Daryl Meier demonstrated a variety of low temperature and high temperature welds in a 3 burner NC forge. To achieve the temperature required he used a piece of Kaowool to adjust the enclosure size. All this welding was done at high altitude. If you put a high density fire brick in a light refractory forge you MUST wait until that brick is saturated with heat to the center. The more mass the forge has and the more steel the longer it takes to heat up the total. In large heavy forges the mass of high density brick walls HELPS store heat and reduce the cooling that occurs when you add new cold steel to the forge. But this high mass requires time and or BTU to heat up. The statements I made about heat up time still apply. ALL NC forges require significant heat up time. For general forging you can put stock in the forge immediately but not for forge welding. But these forges are designed to be very frugal users of gas. You can increase the orrifice size, richen the mixture and get a better welding atmosphere. However, you can easily double the fuel consumption. THIS in turn can easily create a situation where a small propane bottle cannot keep up with the forge. Making these changes is a risk YOU assume when you modify anothers design. My recommendation to drill the orifice oversize was to go to the NEXT size. This requires measuring what you have using the shanks of number sized drills then using the first size the does not fit. Lots of folks have had success using ITC-100 to improve the efficiency of their gas forges. It also helps protect the lining from flux damage. If you use flux in a lightweight refractory lined forge plan or rebuilding it at least once a year or more often. Using ITC-100 over the light refractories will usualy increase their life 50% besides increasing the forge temperature a hundred degrees F or so. |
| - guru - Friday, 11/11/05 10:48:38 EST |
|
Advertisers: Ron, Click on "Advertisers" above the list of advertisers on the drop down menu. However, for print I need to add adresses and phone numbers as the list relies on links as setup. |
| - guru - Friday, 11/11/05 10:51:07 EST |
|
Ducktail vise projection. Yes, as Jock reports, the reasons for that projection are up for speculation. A few years ago, Peter Ross visited my shop and I showed him an early 1800s vise that I had purchased in Chicago. I asked him about the ducktail, and he answered with a question mark; "To keep filings out of the works"? That may not be a definitive answer, and it further leaves the questions as to why it was done on the fixed side where there was no washer and just how was it forged? I have a small German leg vise of about the same period of the early 1800s, which does not have the ducktails. Instead, the German anvils have a small block-anvil projection as part of the fixed jaw. Michael Pointer from Biberbach, Germany, visited my shop the other day, and confirmed that the German vises that he uses all have the anvil. He said that he normally utilizes it with the crosspeen for cupping and rolling stock in the convenient angle that it provides, the way we sometimes use the anvil step. In other words, it serves as a small Vee swage. On my vise, that angle is approximately 105�. Again, on my German vise, on the movable jaw side, there is no ducktail, but there is a small, curved-edged hood projecting over the washer, and it looks to be forge welded at the upper portion of the eye. This lends credence to the idea of keeping swarf out of that area. The Columbian vise, which was so popular in the 20th century U.S., began to minimize the vise projections, so that they became vestiges of those seen on the original, English forged vises. In 1763, Diderot's French encyclopedia had plates of the leg vice construction, but it is difficult to exactly read the engravings, and I don't have the accompanying text. There may be a projection on the fixed leg and a hood on the movable leg. The mounting plate is a heraldic fleur-de-lis, of course! |
| Frank Turley - Friday, 11/11/05 11:58:28 EST |
|
Speculation: Frank, you and I and Peter Ross think it is so then maybe we should stop saying it is speculation. If I was designing a tool like this that was going to be used for filing and sawing I would do exactly the same thing. However, I am a child of my environment and have studied vises and machines thought out by others for hundreds of years. I have designed in grit shields on shaft housings and oil slingers on shafts. They are the details that make good machinery last a longer. The ducktail on the back of English vises is symmetry of art. If these folks were not artistic designers then you would not have the acorn knob on the nuts, the chamfers or the stylish bench bracket. The shape of the jaws in general is a form follows funtion type thing as well as an artifact of forging. SO is the big frog eye swell around the screw and nut. However, the artistic blending of these elements combined with the line of the ducktail and chamfers is the finest industrial ART. The springs on the later American vises are just a bent leaf spring but the gracefully tapered, flared and chamfered Englich spring was art. Both do the job but one is a thing of beauty while the other is just a bent piece of flat stock. The bench brackets of early vises were beautiful forgings with rams head scrolls and bean ends. Later drop forgings were not nearly as nice but the hand made ones did not need to be so pretty to do their job. There is pride of workmanship in every part of these old tools. |
| - guru - Friday, 11/11/05 15:06:59 EST |
|
Cremone Bolts: Andre', This link shows a very nice bolt. The internal mechanism is called a "cassette". . . cremone bolt n. a surface mounted, top and bottom locking, deadbolt mechanism operated by a central handle One patent reference without drawings said it used a rack and pinion mechanism. This makes sense for the very compact units I see and the fact that both bolts are actuated at the same time. It can also be done with a double ended lever and two toggles. But this requires a larger box. |
| - guru - Friday, 11/11/05 17:03:18 EST |
|
You could make a very nice compact cremone cassette by using a small spur gear on the actuator and two larger gears that drive the bolts by means of a cam pin in a detent. Done that way, the cassette could be very little wider than the bolts themselves. It would be easy to incorporate a simple warded lock into the cassette as well, if you chose. A nice exercise in locksmithing! |
| vicopper - Friday, 11/11/05 17:49:44 EST |
|
Kilian's is shonuff proud of those puppies aren't they ?? |
| 3dogs - Friday, 11/11/05 18:15:51 EST |
|
Arc Torch: My arc welding book has a series of exercises for the carbon arc torch. Is this a useful device or is it just a poor version of a gas torch, which I have? Also, they arent cheap - surely one could make such a simple looking thing? |
| adam - Friday, 11/11/05 19:20:20 EST |
|
Just for information... I have a new email addy. It should be reflected now |
| Ralph - Friday, 11/11/05 19:41:34 EST |
|
What will take rust out of cotton? |
| emo - Friday, 11/11/05 21:05:17 EST |
|
Emo, Oxalic acid or phosphoric acid. Start out diluted to a 10% solution max, or you may remove the rust by removing the cotton. |
| vicopper - Friday, 11/11/05 21:16:48 EST |
|
ADAM; They gave me one with my Sears buzzbox back in '63. It's just as worthless now as it was then. |
| 3dogs - Friday, 11/11/05 22:49:02 EST |
|
Ken I too have ordered a book from Norm Larson in sept. and have not recieved it. He answered an email in oct and said he would check on it the next morning, but I have not heard back from him. Does any one else know anything? |
| David - Friday, 11/11/05 23:30:58 EST |
|
Adam : The Lincoln arc torch is clumsy to operate, the one that came with the Forney welder was better, but they are limited in usefulness due to the arc making a poorly defined blob of arc plasma. This is OK for hot bending, if You don't have a good sised rosebud it may come in handy. I brased a lot of stuff with an arc torch before I had O/A gear, but none since. |
| Dave Boyer - Friday, 11/11/05 23:55:32 EST |
|
Guru, I did all that you suggest in your reply. I waited until the firebrick was hot enough through and through. I think what was happening in retrosapect was that my gas cylinder was freezing up and causing some issues. I didn;t think about that until today when I remember a similar situation occurring when we had sweltering heat down here not too long ago. Since my forge sits outside it is subject to the heat of the day. One thing that I have been trying to find time to do is to reline my forge. Time has been the real factor but I think it is time to strongly find the time to do it. I am sure that this will help and this time I will reline with ITC also. I will still use my stainless blcok in the bottom of the forge though. I am very confident that it helped in the test welding run. As far as the forge being under warranty I seriously doubt that they would have any warranty beyond 90 days. Due to the fact that the forge camne to me disassembled their "out" is to say that I didn't have it set up correctly, the forge needs to be relined or some other excuse. That is not to say that NC Tool "would" say that but in my experience with large companies they generally tend to sway their way out of any warranty situations so I prefer not to bother with it. I am sure that I will stumble across the knowledge by accident myself or someone may be able to "show" me. I would love to join ABANA but there just aren't any people close to where I live and most of the meetings from what I understand are generally held in ashville at David Kaynes place. That is 4 hours from me and highly inconvenient. Anyhow enough of my incessant ramblking for today. Thanks Guru. |
| Ed Green - Saturday, 11/12/05 00:08:29 EST |
|
Question about propane torch forge: I've had my propane torch mini-forge on for about half the day, and a few minutes ago, the bottom of the torch basically frosted over. I'm assuming this means it's low on gas, but I just want to make sure it isn't hazardous in some way. Can I run the torch until the gas runs out or should I stop now? Thanks |
| - Ross - Saturday, 11/12/05 01:22:13 EST |
|
Ross : The frost is due to the liquid propane evaporating ino gass.This is how refrigeration works. What will hapen at some point before You run out of gas the low temperature of the liquid causes a reduction in pressure going to the burner and You won't get enough heat.This temp/pressure situation is called vapor pressure. At a given temperature the propane gas will be at a certain pressure, high temps=high pressure. You can warm the tank in a bucket of warm water and keep going longer. The frost line is the liquid level in the tank, at least You know how much is left. |
| Dave Boyer - Saturday, 11/12/05 02:57:30 EST |
|
Ed Green: Unless you ask NC Tools about the problem you don't know what their answer will be. What is it going to take besides possible a phone call or two. NC Tools has been around for a long time and I rather suspect they are aware of the value of good customer post delivery support. If all else fails consider bringing it to the Anvilfire.com Hammer-In at my farm here in West-central TN the weekend ofter National Tax Day (April 15th). You can let the folks attending brain storm as to what the problem may be. |
| Ken Scharabok - Saturday, 11/12/05 03:34:49 EST |
|
Does anyone know of an on-line source for 0-60 pound propane regulators. I check with Zoeller Forge and he can only obtain 30-60 from his Fisher brand catalog. I called my local propane supplier and apparently they use the same catalog. Perhaps they don't even make them in that range and I would have to settle for 0-30. |
| Ken Scharabok - Saturday, 11/12/05 04:15:34 EST |
|
Ken S, I know where you can get one for propane that runs 5-125 psi, if that will do. Try: http://store.weldingdepot.com/cgi/weldingdepot/22-452F-125.html |
| vicopper - Saturday, 11/12/05 07:27:34 EST |
|
Ken S, One thing I shold have mentioned with respect to the 5-125 propane regulator is that you might find that the indicated gauge pressure isn't all that accurate in the lower ranges. Most gauges are fairly accurate in the middle of their range, (in this case around 60 psi), and get increasingly error-prone at either end. If you only planned to use the regulator up to 60 psi max, you could swap out the 00-125 gauge for one that reads 0-60 and it would be more accurate in the 25-45 psi range. |
| vicopper - Saturday, 11/12/05 07:42:42 EST |
|
Ken, I don't know about on-line but my welding supplier sold me a 0-60 back in 85 when I built my forst gas forge. |
| - guru - Saturday, 11/12/05 07:45:35 EST |
|
Pressure gages. Typical cheap gages are rated by thirds, that is the accuracy is specified by the % of full scale accuracy for the first third of the range and the second third and then the third third. So the accuracy would be specified as say 2 1/2,-1 1/4,-2 1/2. On a 0 to 60 gage, this would mean that in the first third, the accuracy would be .025 times 60 or 1.5psi, and since its plus or minus thats a 3 psi range from the real value. You also have hystersis, and repeatablability. I think that a cheap 0 to 60 psi gage should probably indicate within about 5 psi of the real value, but only if calibrated recently. The easy way to specify the best pressure range for a gage is to have the intended working pressure at half the range, as this puts you in the middle third. Pressure spikes that peg a gage tend to destroy the gage. Years ago, as a tester in a fluid power lab, we used 0 to 160 psi gages on all our tests that would need only sorta accurate pressure indication. these gages were from a skid box of new but rejected gages that we deadweight tested prior to use. About 25% were so off that we trashed them! The remainder were able to be used for basic there is pressure or no pressure indication in the lab. By the way, these had been supplied for installation on a major makers pressure regulators that we house branded. Went on 0 to 125 psi air regulators for industry! If we needed accurate pressure , we used a test gage. These cost several hundred $ each 25 years ago. |
| ptree - Saturday, 11/12/05 09:16:28 EST |
|
Hi ! i try the tips to make forged parts looking rusty. i put the parts and an open container of muriatic acid in a plastic tote box with cover on it. there is some rust but a lot of place doesnt rust.i wash them with thinner before to remove any oil.any other tips for that.life is strange:when you want rust you cant but when you dont want, you have... |
| machefer - Saturday, 11/12/05 10:19:58 EST |
|
Google Rules! Did a search on 60 propane regulator and found www.tejassmokers.com. They sell of 0-60 regulator, gauge and 5' of hose for $56.95 (plus S&H). Decent price. Listing doesn't say 0-60, but they confirmed it. ptree: The primary propane forge I am using I bought at Quad-State last year (and, yes, I do not use one of my own products). Guy I bought it from showed me a Damascus-pattern knife he had made in it and the lining was eaten up with flux as somewhat proof he forge welded in it. However, with my 0-20 regulator I cannot get it much above a very high orange/low yellow. Thus, I suspect 30 would be about the tops I would need. I don't plan to forge weld, but I am getting into selling some primitive camping equipment (line racks, etc.) and need to put eyes in 1/2 rod. Much easier to do at high yellow than high orange. |
| Ken Scharabok - Saturday, 11/12/05 10:48:29 EST |
|
Rust: machefer, You DO NOT put the item to be rusted in the acid. You put the acid on the piece in the air. You need air and humidity to get rust, the acid accelerates the rust by acting as an electrolyte. In nature CO2 combines with water to make a weak acid (dilute carbonic acid). The acid also eats the steel on its own but will not create red rust without air. Using TOO MUCH acid will remove the rust. . . everything in balance. |
| - guru - Saturday, 11/12/05 11:26:43 EST |
|
Reving up gas forges: Our CSI treasurer Dave Baker made burners according to the instructions on the Ron Reil site, drilling an orifice using the drill size indicated. When we tested the forge with a single burner it worked but did not get particularly hot. Not even a decent forging heat and I tested it at several pressure ranges. I suggested that he drill out the orifice. THAT made all the difference in the world. The forge now fires up HOT. I have not seen it but I believe Dave said it looked like welding heat. More pressure CAN help with venturi burners but does not change the ratio of fuel to air. If your burner is too lean then more pressure just makes it run harder but just as lean. |
| - guru - Saturday, 11/12/05 11:49:02 EST |
|
Guru: Certainly don't disagree. However, there is rather convincing evidence this propane forge use to achieve forge welding temperature. I have made no chances to the gas orifices. Thus, problem leans towards being pressure related. By the way, S&H was free one my order to www.tejassmokers.com. Made an already good price great. |
| Ken Scharabok - Saturday, 11/12/05 12:15:49 EST |
|
If you re-read Ron's site, he SUGGESTS that you start with the SMALLEST drill then go biger as needed. Most folks seem to stop at the first try. Not enough interest in tuning them. I will say my first Reil type forge welded. But I did have two burners as it was not a small forge either. |
| Ralph - Saturday, 11/12/05 12:50:39 EST |
|
Another propane torch question: Ran out of gas with my propane torch. How do I dispose of the cylinder? Can I just throw it in the trash? Thanks |
| - Ross - Saturday, 11/12/05 13:22:25 EST |
|
Disposal of non refillable disposable propane cylinders: First, it depends on where you are. A ggogle search returned dozens of ordinances world wide (US, Canada, Japan, Korea, China) that prohibit putting these things in the trash. In industry and academia the bottles are tagged and the hazardous waste management people handle them as seperate items. The best two solutions follow. FORT CAMPBELL KY ENVIRONMENTAL HANDBOOK 6. Instructions: a. All propane should be completely spent before proceeding. Caution: bottles must be taken to an outside area where the excess gas can not accumulate and/or explode. A blowtorch adapter should be attached to the fitting, turned to the on position and lighted to burn the excess propane in the bottle. Let the gas burn until the flame goes out by itself.b. Once the gas has been spent, the core of the valve on the top (beside the main valve of the bottle) should be removed. The valve is similar to a tire stem valve and can be removed using a tire stem tool (Federal Stock Number 5120-00-541-4687). The tool may need some modification to allow it to reach the core. Caution: Care must be taken in releasing compressed gas. Wear gloves. Temperatures drop suddenly when compressed gas is released and freeze burns or frostbite can occur.c. After the core of the valve has been removed, turn the bottle upside down and allow to stand for five minutes. Propane is heavier than air and will flow downward. d. Once the bottle is empty, it is ready to be discarded as scrap metal. Caution: One full or partially full bottle mixed in with scrap metal can create problems for the scrap metal dealers and cause the installation to lose our market for scrap metal.FROM Woodalls Open Road Forum and individual posts: To legally dispose of a 1lb bottle in trash (Texas anyway) you must poke hole in the (punch out)just below threaded neck. This is what that spot is for,use a Punch & hammer, make hole and throw in any trash.I'm sure if you read the fine print on bottle this is their instructions for disposal.( I think Paw-Paw told me this one once. I like the Military method above better but have seen the spot on the cylinders he speaks of. Be very careful doing this. Be sure the cylinder is empty as in the army manual above and wear safety glasses. Do it out doors. -guru . |
| - guru - Saturday, 11/12/05 15:01:53 EST |
|
Forge Burner Orifices: The only atmospheric burners I have built used the Michael Porter idea of using MIG tips for the orifice. They have all worked well every time. These have tremondous advantages including a long chamfer to the bore and polished burr free edges. I have seen many drilled by DIY builders that had burrs inside and outside the hole. This results in an unpredictable, turbulent and wild jet of fuel. It also alows debris to collect on at the orifice and corrosion to build up. Those that are drilled perpendicular to a small tube are difficult to deburr but it CAN be done. Coarse burrs can be removed with a drill that fits snuggly in the tube and finer burrs can be removed with a bit of abrasive paper wrapped around a dowel and held in place via a cross slot in the dowel. Burrs outside the hole are just sloppy workmanship. |
| - guru - Saturday, 11/12/05 15:29:42 EST |
|
mig tips - they have a long narrow passage designed for elec. contact not for gas flow. I always drill mine out to 3/32 at least partway. Actually I drill the frong out which gives a small flare to stabilize the stream. This wkend I forged a 36" x 10" scroll out of 1" x 1/2" strap. It will be the backbone for a coatrack. I forged each end separately and then forge welded them in the middle. The burn chamber in my forge is 3"x4"x8". If you have a hot forge, you dont have to fit the work into the chamber. |
| adam - Saturday, 11/12/05 16:50:56 EST |
|
"frong" ??? I drill them out from the FRONT |
| adam - Saturday, 11/12/05 16:51:52 EST |
|
I have a tube leading into to the intake bell on my atmospheric forge burner. The tube runs to a needle valve teed in downstream of the regulator, so that I can bleed extra gas in to richen the mix as needed. Since the gas bypasses the orifice (the tube's just open on the end), it adds propane without pulling in additional air. You could probably hold an the end of an unlit propane torch just inside the bell and crack the valve to see if a richer mixture helps. I heard somewhere (I think the local propane supplier) that all adjustable regulators will go down to zero. The 30-60 PSI ones have stiffer springs than the 0-30 ones, and provide a somewhat less stable pressure below 30 PSI. But (assuming I heard right) they will still work in the lower range. |
| Mike B - Saturday, 11/12/05 18:13:41 EST |
|
Bradely powerhammers: Can anybody provide any info about Bradley powerhammers for the guys on the Britishblades forums. Here's a link to the thread, hope it's not too long. Thanks in advance, Bob. http://www.britishblades.com/forums/showthread.php?t=13826&highlight=bradley |
| Bob G - Saturday, 11/12/05 18:45:05 EST |
|
Regarding pressure gages on gas forges: In my opinion, with blacksmith styles of use, a pressure gage is mainly for getting back to a point that you were at before; in this case, repeatability is much more important than accuracy. I would not worry my head about it at all, myself. Regarding disposable propane cylinders: Personally, I cut the tops off of 'em and reuse 'em. They are a nice size and shape for a great many things. Just gotta make sure they're empty beforehand -- leaving a torch head on there overnight does it for me. Mike B, good idea with the open gas tube in the venturi intake -- may try that someday. Choke seems to do OK for me in general, though. |
| T. Gold - Saturday, 11/12/05 21:15:44 EST |
|
A while back I bought an anvil at a yard sale. It was a Peter Wright and is marked as such. It also has 0 5 15 on it. My question is that the flat surface edges of the anvil are somewhat battered. At what point would this make this useless.If you are facing it with the horn to the right this is the side that is more worn. I do not use it for much more than beating on things in my garage. |
| Hamilton Shaw - Saturday, 11/12/05 21:28:18 EST |
|
HI GURU. I'M INTERESTED IN SETTING UP A OXY-PROPANE TORCH FOR HEATING RIVETS, TENONS AND OUT-OF-FORGE WORK. ANY SUGGESTIONS ON BRAND NAMES AND MODELS? GAS SETTINGS? ETC.? THANKS FOR YOUR HELP. |
| - GOO - Saturday, 11/12/05 21:40:34 EST |
|
I want to know if it is possible to fix damage to the edges of an anvil. and if so what type of welding rod is necessary. Thank you Marc |
| Marc - Saturday, 11/12/05 22:44:00 EST |
|
I would like to know if it is possible to fix damamge to the edge of an anvil and if so what type or rod is necessary. Thankyou Marc |
| - Marc - Saturday, 11/12/05 22:46:09 EST |
|
Hamilton Shaw: The numbers shouldn't be 0 5 15 as the middle one cannot be larger than 3. Stone weight where first represents multiples of 112, second multiples of 28 and third remaining pounds. Put your anvil on a scale and see what the numbers for the weight would be. However, it is possible the stamper intended middle one to be 3 and simply picked up a 5 stamp. Once done, would be very hard to correct. |
| Ken Scharabok - Saturday, 11/12/05 23:27:32 EST |
|
I used my propane forge for the first time today. I lined the freon can with kaowool then used ITC-100 for interior coating (mixed per instructions). I let the ITC-100 dry overnight and then did a slow burn for 20 mins (twice) making sure steam was gone, then did a high burn for 30 mins (twice) then left overnite. I noticed this AM that the ITC-100 had a few cracks, do I need to patch with ITC-200 EZ then recoat with ITC-100? (The inside of the forge is heating up to a glowing orange/yellow.) |
| oktwodogs - Saturday, 11/12/05 23:33:01 EST |
|
GOO : Most people on this site feel You should stick with a major brand, Victor, Harris,or Smith so that You can get parts and service if You ever need it. Be sure to get propane compatible fuel regulator and hose [grade T hose]. |
| Dave Boyer - Sunday, 11/13/05 00:15:09 EST |
|
Mark : Many folks here guggest You don't weld on the anvil unless it is totally screwed up beyond use, and that grinding a radius on the edges is a good repair, and in fact probably would have prevented the damage in the first place. |
| Dave Boyer - Sunday, 11/13/05 00:19:23 EST |
|
Oft times I'd like a forged hook with a wood screw on the end. I believe the typical method for creating a wood screw was to forge a round taper, then use a triangle file to file in the screw threads. Has anyone tried this method before? I'd like to make some forged lag screws. |
| - Tom T - Sunday, 11/13/05 03:19:19 EST |
|
Tom, check out iForge #20. It is a drive hook that has been around since who knows when. I make a lot of them, and they never come out unless I want them too. I have stuff hanging all over my shop & shed on them. I like making mine out of square stock, but you can do them from round as well. I personally think trying to file threads into a tapered end like you are proposing would drive me crazy. FredlyFX http://fredlyfx.com |
| FredlyFX - Sunday, 11/13/05 03:40:55 EST |
|
I was hoping there was another method I hadn't thought of. I don't really want to do a bunch fileing, and I don't have a lathe. If the filing goes quick I won't mind, though. I've got plenty of drive hooks :) I want to make some square headed lag screws for mounting various hooks. I also have a couple of applications where I want to lag some forged ironwork to a log, and I don't thinkg spikes won't hold. Twisted square shafted spikes probably would work, though. |
| - Tom T - Sunday, 11/13/05 03:52:42 EST |
|
Screws were made with a screw plate if I remember correctly. But a plain ole drive point would be east faster and in my mind work just as well |
| Ralph - Sunday, 11/13/05 06:19:50 EST |
|
Tom T: I believe some were taped and then twisted to create the sprial effect. Another trick it to take a lag bolt, cut off the head and then forge the non-threaded shank into a hook. |
| Ken Scharabok - Sunday, 11/13/05 07:21:10 EST |
|
GOO I use the Allstates Mag Propane torch. It's a terrific tool and will easily out perform an acetylene torch for cutting. AFIK its the only torch system that is designed specifically for propane. Others are adapted from acetylene and dont perform as well |
| adam - Sunday, 11/13/05 08:09:42 EST |
|
I have tried twisted sq tapers for lag bolts and couldnt get it to work at all. If you do figure that out please let me know - I would like know too. Meantime regular coarse machine threads will grip pretty well in wood and if you have any doubts a leetel epoxy or wood glue will enhance the grip- I use something like 5 tpi |
| adam - Sunday, 11/13/05 08:14:12 EST |
|
In the days before about 1840, all wood screws were flat pointed. Holes would be pre-drilled with a gimlet so you didn't have to worry about the lack of point. Prior to the invention of the screw-cutting lathe about 1790 or so threads were either cut by hand or in a screwplate, which is like a multi-station die. The leadscrew on the first screw-cutting lathe, by the way, was hand cut! |
| Alan-L - Sunday, 11/13/05 09:25:06 EST |
|
oktwodogs. Kaowool coated with ITC is fragile and you and patching the forge is routine maintenance every two or three times you use it. Dont worry about cracks but when stuff flakes off and exposes the kaowool you need to patch it. The kaowool will rot if exposed to hot oxygen. I never bother to let mine dry overnight even when doing the initial coat. I just light the forge and that does it. Life's too short :) Disposable propane bottles. I do like TG - cut them open and make storage jars out of them. Very handy. Bottom half below the weld is just right for a watering can. |
| adam - Sunday, 11/13/05 10:05:32 EST |
|
Tom T. You are correct. The old fashioned way was to file the threads on WOOD screws. This is shown in the film, "The Gunsmith of Williamsburg". I worked part-time at the Museum of New Mexico in the late 60's, and I would take apart and clean flintlocks. Each wood screw was put in its own separate envelope, labeled and filed, because the screws were not fungible.* For example, "Butt plate, top. Butt plate, bottom". The twisting idea for making wood screws is a joke. *Miles, did you share the word "fungible" with me? I wonder if I can use it in this manner. Great word. |
| Frank Turley - Sunday, 11/13/05 11:02:12 EST |
|
Filed Screws: I've made a few hand-filed screws. Long ago before I had access to a lathe! The first and easiest was a cable lead on a winding drum of a grandfather clock. In this case the profile of the "thread was not critical. I have also welded a couple of postvise screws and recut, by hand, the square threads so they would work in the original screw-box. Those were dificult, but successful. One can take a regular hardware store hex head lag screw and forge a square head on it and that is a lot easier than making a screw. If there isn't enough material a lag screw thread screw eye can be unwound to provide a long shank. Yes, I thought of Paw Paw many times this week-end. I once sent him an off-the-head version of the flag story and he encouraged me to write it up more formally. I was too late, but I got a touching letter of thanks from Sherry. My offer to email copies is still open. |
| John Odom - Sunday, 11/13/05 11:05:13 EST |
|
Cracked ITC-100 You should just patch with some more ITC-100. Note that unless you have a brick or kiln shelf floor in the forge that the ITC-100 is not strong enough to support pieces of steel and will continue to crack. Some folks use a refractory cement over the ITC-100 and then more ITC. But this is difficult in little freon can forges. I use a piece of half thickness fire brick for the floor. |
| - guru - Sunday, 11/13/05 11:20:10 EST |
|
I live in north central missouri. I am in need of either building or buying a rim bender for making wagon wheels. I was wondering if you had any info on them. thanks mark |
| mark tucker - Sunday, 11/13/05 11:44:48 EST |
|
Frank-- Not guilty. Fungible is one of those words like heuristic and usufruct and lambent that I can never remmber the meaning of. |
| Miles Undercut - Sunday, 11/13/05 11:46:33 EST |
|
My name is Drew, Im 21, have been a welder for the Navy for 3 years. A nice piece of titanium quarter inch plate showed up in my shop, so as a side project I was going to make my self a hunting knife. I was wondering if titanium can be hardened/tempered? I was thinking no, because titanium lacks carbon, with allows for those processes in carbon steels. A simple answer, or yes/no to my email address is all I ask. Thank you for your time. Drew |
| Drew - Sunday, 11/13/05 12:28:03 EST |
|
Chipped Corners: Unless an anvil is useless as a tool you are better off NOT welding on them. A good anvil like an old Peter Wright has a hardened crucible steel face. Welding tool steel is not lightly recommended. Arc welding can cause cracks, hard and soft spots. It is much more likely to chip out in the future than the original base metal which if already chipped indicates it is very hard. Using hard facing rods can produce a hard repair but it can be too hard as well as have soft areas around it. If the chipping is fresh then the sharp edges should be gently dressed with a grinder. Cracks and places that look like they may chip off should be removed. The edge can be generaly straightened by leveling the chipping in a striaght line but this is not entirely necessary. A dip or two hurt nothing and can be worked around easily. Removing sharp edges that damage the work and mark hammers is what is most important. 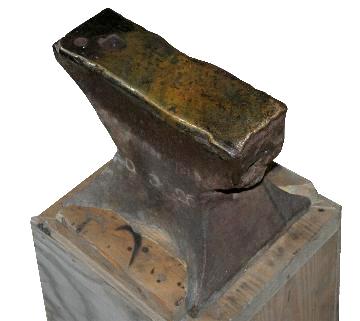 LEFT: Old William Parker, Pond Forge English anvil circa aprox. 1850. Missing horn, face swayed and pitted from rust. LEFT: Old William Parker, Pond Forge English anvil circa aprox. 1850. Missing horn, face swayed and pitted from rust. Edges and face dressed just enough to be safe and usable. This anvil is smoother than it looks in this photo. Although the missing horn makes this anvil slightly less usable the face is hard and with the edges dressed it is a quite usable tool. Mushrooming that chips is a hazzard that should be stopped before it ocurrs. Grind the edge back to the original line less a slight bit. Then radius the edge wathching for the little rainbows that a grinder creates on the edges of cracks. Remove all cracking at edges. |
| - guru - Sunday, 11/13/05 13:20:14 EST |
|
Drew, the simple answer is nope, it won't hold an edge. Lots of different alloys of titanium exist, and yes, the SEALs have special knives made of one alloy that is very tough, but won't hold an edge for more than one or two uses. |
| Alan-L - Sunday, 11/13/05 19:17:12 EST |
|
Dear Guru, I am a beginner at Blacksmithing. I am in the process of building a shop and have a question on the forge chimney. I have read that a 12 inch dia. stove pipe is recommended so I plan to use that. What do suggest for the pipe that exits thru the roof - double insulated stainless steel? I have looked for some on the internet and cant find 12 " dia. I would sure appreciate your help. THanks |
| David - Sunday, 11/13/05 20:12:45 EST |
|
I am an editor=reporter for NJBIZ, a business newspaper in New Jersey, researching a story about blacksmithing.Can someonme please tell me how many commercial blacksmith businesses there are in the U.S. and in New Jersey. I have several other w questions too detailed to ask here. To better inform our readers aboiut your profession, could someone please call me to answer those questions. I am at 609-443-1799. Or e-mail me at covaleski@earthlink.net to tell me how I can reach you. Respectfully yoirs, John Covaleskui, NJBIZ b newspaperJohn Newspaper |
| Newspaper reporter John - Sunday, 11/13/05 20:32:57 EST |
|
Mark Tucker. First, let's define our terms. The rim is the wooden part, composed of fellies. The tire is the iron or steel part that is on the outside. I think that tire benders are not made anymore, so I would suggest going to flea markets. I googled "Missouri Flea Markets" and came up with quite a list. Another route is to get farm auctioneers' sale bills sent to you. They often list what is to be auctioned off. Another way is to put an ad in the newspaper and local advertiser tabloid, and ask for a tire bender. Finally, there is eBay, but the shipping cost might be prohibitive. The benders are pretty esoteric. Some people might have them in the barn, but don't really know what they are. I had a small one at one time that had two cylindrical "drums" or rolls. The distance between the two was adjustable. My bender had a crank handle, so the tire could be fed between the rolls. If you can't find one right away, the thinner flat stock can be hammered cold into a large swage, feeding it little by little. The freight wagon stock, maybe 1/2" x 4" or so, will have to be worked hot. |
| Frank Turley - Sunday, 11/13/05 20:34:48 EST |
|
Roof Penetrations: These are often cover by both building and fire codes. The comercial type are what is known as double wall or triple insulated. They have three layers of pipe with 1" air spaces inbetween. The outer layer is vented with holes to allow cooling air to flow in the outer layer. To meet code they will probably have to be UL approved. For pipe we had someone (Frank I think) note an ingenious method of making big stove pipe. If you take two pieces of 6" pipe and assemble them at the longitudinal joints you get 12" pipe. A piece of 8" and 6" make 14" pipe and two 8's make 16" . . . The three sizes above with some 1" stand offs will make a double wall penetration and a low loss stack as well. Flanges would have to be made of galvanized sheet. Note that coal smoke is very hard on stove pipe. You want the heavy galvanized type, NEVER the shiney black stuff used for wood stoves. Depending on the forge and height of stack 10" will work very well. A tall stack without obstructions and not near tall buildings or trees that cause down drafts will work as well as a shorter larger diameter stack. This is kind of a fuzzy area so folks suggest the larger pipe for most cases. |
| - guru - Sunday, 11/13/05 22:17:01 EST |
|
Reporter John, e-mail coming your way. |
| - guru - Sunday, 11/13/05 22:17:48 EST |
|
thanks guru for rust tips. i will try again ! |
| machefer - Sunday, 11/13/05 23:24:44 EST |
|
Smoke stacks pipe... I was able to find 12 inch pipe at a local heating and plumbing supplier. I tried piecing together 2, 6 inch pipes because it's commonly available and looked like it should work but I found it a real bear to get them together. Talking to various suppliers on the phone when looking for the 12 inch, I found them reluctant to even sell it if I told them what I was doing with it. They of course stressed the need for a tripple A smoke evacuation system (or whatever it's called) which would have come to a lot of bucks. I chickened out and took the pipe out a window instead of through the roof. I replaced the glass with a piece of plywood and made brackets to mount the pipe with a big air space around it. That put the only through-wall junction right in front of my face, in plain sight and within reach but of course required a couple of 90's. Outside the window I made a support that mounts in the window cill to support the weight of the stack from underneath and another bracket to hold the pipe at the eve near the peak out a ways from the building. I only got a few feet above the peak and even with lots of trees I still get a good draft. I found building codes confusing but a lot of it seemed to deal with through-wall junctions that were out of sight of the appliance, inside the building and near or inside of walls so I just didn't do any of that. I still won't say it's "to code" but I don't think it will burn down the building. I have to wonder if there's any affordable way to put an open fire like a coal forge in a building and have it meet code. |
| Mike Ferrara - Monday, 11/14/05 00:49:53 EST |
|
Lag screw madness: What I'm trying for is a short, swiftly tapering thread, with a big 1-1.5" square head on it. The intent is for it to be used as a strike plate for a door knocker. I don't like the spike idea, because hammering on todays light duy door frames makes me quesy. Maybe I could hammer lighter, but then I'd miss and hit a window pane. |
| - Tom T - Monday, 11/14/05 01:26:20 EST |
|
There used to be some Canadian-made stove pipe called Securite, stainless, double-wall, packed with asbestos, that claimed a minimum 2-inch clearance to adjacent was okay. Asbestos being now perceived by authorities as evil, similar pipes with similar clearance are available packed with something else. This is important with a woodstove, which I have personally seen ignite via single wall pipe a piece of wood 18 inches away. A rip-roaring chimney fire would probably cut that at least in half-- if it did not melt the pipe altogether. With a coal forge, I think a lot of the heat is dissipated into the air above the hearth before it gets into the flue. Nonetheless, be aware that the double and triple wall with just air between the shells of pipe may be intended for masonry pass-throughs, or require big thimbles or sheet metal spacers with lots of clearance between the outermost pipe and nearest wood. |
| Miles Undercut - Monday, 11/14/05 01:33:54 EST |
|
Mike F: You may want to add a length of sheetmetal made into a tube where the pipe goes through the plywood. An air gap between the pipe and sheetmetal tube and between the sheetmetal tube and the plywood would cut down greatly on the radiated heat from the pipe, if it were aluminum it would work even better. The kindling point of dry wood is said to be less than 200 deg.F, but It doesn't seem so when You TRY to light a fire. |
| Dave Boyer - Monday, 11/14/05 02:25:37 EST |
|
What are peoples' opinions on hollow core anvils? Are they good/better than solid anvils? Or does the loss of weight decrease their value? |
| - Ross - Monday, 11/14/05 02:28:55 EST |
|
Tom T : I would cheat and weld or braze a section from a suitable wood screw on the back of a forged head. Nobody can see it after it is installed, and I never found a place to cash in "Degree of Dificulty" points. |
| Dave Boyer - Monday, 11/14/05 02:30:38 EST |
|
Ross: That was discused a week or two ago, If I remember it has to do with how far and how often You need to carry it. Aparently some farriers need the portability and are willing to sacrifice some weight. |
| Dave Boyer - Monday, 11/14/05 02:34:55 EST |
|
Oops, guess I should look before I leap :) thanks, I'll check the old conversations. |
| - Ross - Monday, 11/14/05 03:39:53 EST |
|
New to woodturning,old to blacksmithing.Need info on hardning high speed steel at the forge.Would like to make own woodturning tools.Fifty years in blacksmithing, mostly practical.Never used hss before.All the information available on line is fabulous. thank you kindly, Ray Tilton |
| Raymond Tilton - Monday, 11/14/05 07:34:49 EST |
|
heres a very handy online welding calculator at the Miller site (I use Hobart machines but I didnt tell them that :) ) This is the one for stick www.millerwelds.com/education/calculators/stick_amperage_calculator.php |
| adam - Monday, 11/14/05 07:35:50 EST |
|
Raymond Tilton, Why use HSS, Ray? That stuff is hard to forge, being red hard, and is darn near completely impossible to properly heat treat at home, due to the alloys in it. It is made for cutting tools used primarily on metals, where the frictiion generates a bit of heat at the cutting edge and dulls simpler steels. For wood turning however, it is overkill. Use a good high-carbon simple steel instead. W-1, O-1 or even 1084 high carbon steels are all easy enough to forge, fairly forgiving, and can be heat treated by simply hardening and drawing to specifications. For O-1 and 1084, you can quench at non-magnetic in warm light oil and then draw the temper to about a nice straw color to get a very good turning chisel. W-1 is the same, only quenched in water. A toaster oven makes a fine heat treating oven for drawing the temper, or you can use the oxide colors of the steel. With HSS, all that is out the window and you really need proper heat treating apparatus. |
| vicopper - Monday, 11/14/05 09:35:07 EST |
|
Duct size: Before I moved, I was using an 8" pipe, with a side draft hood. The pipe was a roof penetration, and did get hot. Too hot to touch. I now have a 12" pipe, side wall penetration, and a side draft hood. The 12" draws so much more air, that the pipe is never too hot to touch. So I definitely recommend the larger pipe. |
| Bob H - Monday, 11/14/05 09:39:42 EST |
|
Raymond Tilton, Vicopper beat me to it. I'll add a little more. I'm looking at a Cincinnati Tool Steel Selector chart, and the grade M2, a HSS, is recommended for wood cutters, but it doesn't specify what kind of cutter. I suspect it would be suitable for cutters in a manufacturing situation where they are run most of the working day. The trickiness of M2 is that it is forged at a bright lemon down to a bright red, no cherry ranges, and it is hardened at a sweating heat, above the forging heat! There, you are on the borderline of the metal crumbling. The Selector lists woodworking knives, but again it does not specify what sort of knife. Besides M2, A2 and D2 are recommended. A2 is readily available as drill rod. It's a chrome/moly steel, and I get my drill rod shipped from Travers Tool in Flushing, New York. If you can't find the forging and heat treatment specifications for the steels you will use, you can get back to us. |
| Frank Turley - Monday, 11/14/05 10:18:16 EST |
|
I second what VICoppper says about HSS. Its for people who cant heat treat and sharpen their own tools or for automatic setups. Carbon steel is much nicer to work with and gives a better edge. It is prone to detempering if overheated but thats easy to fix. The old machinists books discuss quenching and tempering of lathe tools |
| adam - Monday, 11/14/05 10:23:28 EST |
|
HSS tools: Raymond, To get the benifits of HSS the heat treat requires temperature control that you can only achive with a temperature controlled furnace. If you need HSS tools for wood turning you are best off to take another HSS tool and shape it by cold grinding. Old drill bits, reamers and such can be used. Otherwise you should take HSS tools to a commercial heat treater. For forging tools you may want to try S7. It is an air hardening steel in thin sections and is used by many blacksmiths. The A2 Frank listed is commonly used by custom wood turner tool makers to machine gouges and such from. It is easy to heat treat from the annealed condition it comes in. Machinery's Handbook has heat treating information on a variety of steels including several HSS grades. |
| - guru - Monday, 11/14/05 10:42:02 EST |
|
Freon Can forge welding. As Jock said, I went up one size in drill ( useing a brass tube,you only need to use your hand no power tools)and I reduced the opening, it's about 2 1/2 X 4 on both ends, and it will now weld, I have to be carefull not the let the pieces touch or they will stick together. All the holes were deburred, even the bell reducer's inner seams ( a dremel works very well for this). |
| daveb - Monday, 11/14/05 10:50:36 EST |
|
Window Penetration: It was common many years ago to do this in multi light windows. However the filler should always be a piece of sheet metal. They used to make commerical window penetrations that had a ventilated tube or ring around the pipe. The wood in a wood frame window CAN catch fire and as firefighters will tell you, "little fires quickly become BIG fires." |
| - guru - Monday, 11/14/05 10:54:04 EST |
|
Washington State Dept. of Ecology website sez: "Wood ignites at temperatures between 375 and 510 degrees Fahrenheit." Woodstoves can heat a pipe, even along the outside of one up near the ceiling, that hot and hotter pretty fast if you don't keep an eye on them. |
| Miles Undercut - Monday, 11/14/05 11:31:08 EST |
|
Hey oh mighty Guru; Somewhere in the moving process of me to Illinois and Grant to his new site I have lost Grant Sarver's phone number. Does someone have a current number for Grant. Babe just bought his newest creation( The Little Babe Hammer) and I wont say it broke But it is in a state of malfunction. I need his help. Dave |
| Dave Brandon - Monday, 11/14/05 11:42:13 EST |
|
I've almost finished a power hammer built to the LG 50lb basic design but I'm not sure what to do about the clutch. I have available a suitable clutch off a shaper but reading the posts here and elsewhere it seems that people are getting good control using just a pulley and idler. So what do you think clutch or pulley/idler and if pulley should i use flat belt or V belt. Thanks, Paul |
| - Paul - Monday, 11/14/05 11:48:49 EST |
|
Dave, mail on the way. |
| - guru - Monday, 11/14/05 12:14:52 EST |
|
Power Hamer Clutches: Paul, The most expensively engineered part of an LG is the clutch and it is the WRONG TYPE. Cone clutches are meant for stop start without continous slipping. To work properly they must be oiled copiously. A slip belt clutch was used on Fairbanks and Bradleys both of which are far supperior to LG's. These were both industrial duty hammers compared to the small shop duty of the LG. A proper slip belt system needs side plates on the pullies to prevent the belt from falling off when loose. The pullies still need crown as in a normal system. The best DIY friction clutch around is the spare tire and wheel system invented by Ray Clontz. See Big Green Power Hammer |
| - guru - Monday, 11/14/05 12:24:52 EST |
|
Adam- since Miller owns Hobart, I doubt very much they would care if you use the Miller calculations to set your Hobart Welders. |
| - Ries - Monday, 11/14/05 14:33:49 EST |
|
One thing that always puzzled me is folks reliance on "specific" pressures in their forges. Gauges are not known for reliability under smithing conditions. I tune my forge till it works right and pay no attention to what the gauge says save as a starting place for next session. If you think about it, I'm close to a mile above sea level and Atli is closer to sea level and barometric pressure affects how the forges preform. My 2 reil burner tube forge from the SOFA workshop ran all Saturday set at about 9 psi for general forge work---don't know or claim that that's a true number; just that it ran well there. I expect I will have to twiddle it a bit when it moves for the Festival of the Cranes Demo this weekend. I picked up a cheap acetylene regulator at the fleamarket to use on a new gas forge as it was faster and easier than getting a redhat propane regulator out here. Thomas |
| Thomas P - Monday, 11/14/05 14:54:34 EST |
|
I knew a wood turner who got into blacksmithing because he wanted to make special turning tools---they are designed to take carbide inserts like are used on metal lathes and so did not need to deal with high alloy difficult to work and heat treat steels. Thomas |
| Thomas P - Monday, 11/14/05 15:13:42 EST |
|
Thanks adam and Dave Boyer for the propane torch info. Any other info is greatly appreciated. Seems to be a lot of discussion about rusting agents. Here's my input, for what it's worth: I made a large trellise recently for a client and needed to use a rusting agent. I wanted to avoid muriatic acid if possible for many reasons. I heard about using Ammonium Chloride (smelling salts) and decided to try it. It was easy to find online at any chemical supplier. 1 teaspoon in a quart of water. I sprayed it on and within 12 hrs., I had a great even rust. The advantage to me is that this stuff is pretty harmless and easy to find online. Give it a try. Hope it's helpful. goo. |
| GOO - Monday, 11/14/05 15:27:33 EST |
|
Old World Anvils My new Old World double horn anvil arrived today. Beautiful ring and rebound. Looks really nice. Thank You quenchcrack for all your positive input about Old World Anvils. |
| burntforge - Monday, 11/14/05 15:52:33 EST |
|
I once found a piece of coal in the sand dunes on Cumberland Island which is the southern most island in GA just minutes from FL. What's the deal with that. That's not coal country is it? I heard from somewhere that the Appalachian Mts. used to be like the Rockies but they are much much older and the barrier islands off of GA were formed by the Appalachian Mountains eroding. Could that be where it came from? |
| Tyler Murch - Monday, 11/14/05 18:21:45 EST |
|
Tyler, more likely than not it's either from one of the mansions that used to occupy the island or from a shipwreck. Coal can float, you know! It can also roll along the ocean floor. It used to be and is sometimes still is called "sea-coal" in England, as it would wash up on the shores near Newcastle back in the middle ages. |
| Alan-L - Monday, 11/14/05 18:27:14 EST |
|
Sea Coal: Tyler, Ships have been carrying coal as fuel and cargo along those shores for about 150 years. A few have lost cargo, some sunk. Bituminous coal is only 30% heavier than water and lighter by 1/2 than most rock that sand is made up of. So it nearly floats and works to the surface of beaches. |
| - guru - Monday, 11/14/05 18:29:09 EST |
|
DUUUUHHH, never thought of that. |
| Tyler Murch - Monday, 11/14/05 18:42:42 EST |
|
Besides, if it was from erosion it would be dust. |
| Tyler Murch - Monday, 11/14/05 18:44:10 EST |
|
Raymond, I made a bowl turners hook tool for a customer a couple of years ago. I used A2 on the advice of quenchcrack from this site who is not only a metelurgist but a woodcarver also. It was fairly easy to work and to harden and holds an edge quite well. The customer was quite happy- he had not been able to find what he wanted from any of the suppliers he could locate. I suspect it would be a good choice for your gouges also as others have said. |
| SGensh - Monday, 11/14/05 20:33:00 EST |
|
Burntforge, you are welcome and I hope you enjoy the anvil. As mentioned earlier, it would be nice if Old World Anvils would recognize the endorsement and start advertising on Anvilfire. I am not so much endorsing Old World Anvils as much as I am the Czech steel casting industry. |
| quenchcrack - Monday, 11/14/05 20:34:37 EST |
|
Speaking of quenchcrack's wood carving, I remember seeing a carved anvil on this site (I think it was qc's). Where is that, I want to look at it again. |
| Tyler Murch - Monday, 11/14/05 21:56:01 EST |
|
quechcrack I was really amazed at this czech anvil. It has an amazing rebound and ring. For having the rockwell it has I was surprised at how the face resists denting. I have had other cast steel anvils with a great deal higher rockwell that dent very easily. I am impressed thus far. You were right about the Czech anvils. |
| burntforge - Monday, 11/14/05 22:44:07 EST |
|
Woodworking/Turning tools : Grinding from old files works well, just don't overheat. Forging from old files should work if You get the heat treat right. A2 will hold up better and isn't that much harder to grind/sharpen. D2 or D3 is a lot more wear resistant, but that means hard to grind and sharpen, possibly not worth the grief. Note that a lot of woodworking tools are marked HSS,but they sure don't perform like it, or at least not like properly heat treated M2. |
| Dave Boyer - Monday, 11/14/05 22:57:48 EST |
|
Tyler, You did not see my carved anvil, but I have a full scale one carved from the solid by the Texas sculptor, Lonnie Edwards. Right now, it is mounted on my shop ceiling beam, so that it looks like a plane "peeling off" in mid-air. It is covered with shop dust and ash, but is cleanable. When I got it as a sculpture, it was mounted on a flimsy 22 gage sheet metal stand, and it had a crude rebar S-scroll hanging on the horn. The title was "Know Your Medium". I have squirreled away the stand and scroll, in case it finds a new owner some day. I think Lonnie used about a 150 pound Hey-Bud for the pattern. |
| Frank Turley - Monday, 11/14/05 23:05:03 EST |
|
As a hobby, I play RPGs and would like to know approximately how long it normally takes to make a sword (to add a little extra plausibility to the game). The character is skilled; can anyone estimate how long it would take for him to build it assuming he did it alone. What if he had trained assistants? Rough approximations (days, weeks, months, etc.) are fine; I just want to be in the ballpark. Thanks, Kevin |
| Kevin - Tuesday, 11/15/05 06:41:39 EST |
|
Foxfire anvils: Just to close item, the Foxfire Museum said none of the anvils donated to them by Will Zoellner (see Foxfire 5 blacksmithing chapter) is an American Ross. They have an unmarked one, a Kohlswa, a Southern 7 (may be a Southern Crecent) and one on which they can only read something like Eside (which I suspect is LAKESIDE). When Mr. Zoellner said he had an American Ross, perhaps what he was just saying is he had a wrought iron anvil make in the U.S. (American wrought...). When I spoke with one of his grandson, he said his grandfather had a heavy German ascent. Kids doing interview likely misunderstood what he was saying. Anyway, I am about 99.99% convinced an American Ross anvil does not exist. The Foxfire Museum is located near Clayton, GA. If anyone plans on visiting in the future perhaps they can better document the anvils they have there. |
| Ken Scharabok - Tuesday, 11/15/05 06:44:34 EST |
|
Window penetrations Guru and Dave, replacing the wood with metel is probably a good idea and easy enough to do so...I guess I will. I will say though that, so far, even when welding, the pipe at that point has never been too hot to touch and the brackets and wood have never even felt warm. Of course, "never have" is not the same as "never will" and slaping a piece of sheet metal in there is only a few minutes work (cheap insurance). Thanks |
| Mike Ferrara - Tuesday, 11/15/05 07:09:43 EST |
|
Post vice maker... The first post vice I picked up has the rams horn mount with wedges and no marking anywhere that I can see. A while ago I picked up a second vice at a junk shop but never mounted it. I didn't bother looking for any markings but yesterday I finally decided to move it to where I wouldn't trip over it any more and noticed some markings. It has the diamond shaped mount with a u-bolt and the mount is marked "Colunbian hardware co, Cleveland Oh" and is also marked "made in USA" I was just wondering if that rang a bell with any one and how "new" the vice might actually be. |
| Mike Ferrara - Tuesday, 11/15/05 07:20:04 EST |
|
Columbian Hardware Co. maker of columbian vises and anvils. Richard Postman states, "My guess would be that the company started in the early 1890's. By 1907 they sated that they were the world's largest maker of vises and anvils. This was probably exageration. However, they made a great deal of blacksmiths vises and were one of the top machinist vice makers for nearly a century. The machinist vise line is now made by Wilton Tool Group. They manufactured anvils up until 1922 or 1923 then they started importing Söderfors anvils with their trademark until about 1927. I suspect they droped the blacksmiths vises about the same time they quit selling anvils. They made two series of blacksmiths vises. The early series looked like a standard English vice except that they did not have the fine details. The chamfers are low angled or do not exist and the nuts and brakets are as forged where the English nuts were hand finished in a lathe. The bench bracket was a three bolt afair with wedges. The later "X" series had the U-bolt mount. These appear in ads from 1918. In my 1930 Carey Machinery & Supply Co., catalog they show this vise with a "new" spring which is U shaped. The same catalog has a full line of Columbian vises. The inclusion of the Columbian blacksmiths vise was probably a holdover for old inventory. It is unknown exactly when they stopped making blacksmith vises. I would guess before WWII or when they stoped making anvils. In my 1955 Industrial Supply Company catalog they carry Eagle anvils, many other blacksmiths tools and a complete line of Columbian bench vises but no blacksmiths vises. So, best guess, between 1918 and 1927. |
| - guru - Tuesday, 11/15/05 09:31:17 EST |
|
Kevin; in medieval times having a blacksmith make a sword all by himself would be as common as having a heart surgeon today do an operation all by himself. A single person blacksmith shop is an oxymoron in historical times. Also why would a trained smith waste his time grinding and polishing and hilting a sword? Having the capital tied up in equipment that you did not use full time was not likely either---grinding was usually water powered and that means a lot of building and equipment with high maintenance costs. ("The Mills of Medieval England" discusses the high costs of running water powered equipment; or the Guru can speak of maintenance costs of working where the floods occur...) The typical work flow was that the smith with probably 2 strikers would forge the blade. It would be sent out to a different shop for grinding and they would send it to a third for hilting and a fourth for making the scabbard---*THAT'S* the reality. Often the hilters would be the "primary contractor" and sub out the rest of the work. Fiction hardly ever gets it right as the reality gets in the way of the story... Don't forget that when you buy the metal from the merchants who bought it from the smelters that you have to test each piece for quality and carbon content... As for time: pattern welded or not? Does the smith have to carburize his own steel or can he buy natural steels or pre-carburized metal? The basic forging---with help---is not too tedious ranging from a couple of hours to a couple of days depending. Grinding will take much longer than in modern times---though the blades being forged to shape will help some. Say a couple of days to a week depending on the equipment and the complexity of the bladeshape. Hilting will take some time as the pieces will have to be forged and then filed/ground/polished and then *FITTED* to the blade. I would expect it to be a couple of weeks if it's a fancy set up---more if engraving and the setting of jewels is required. Scabbardmaking will take a week or so *if* the material is to hand. There will always be special cases in both directions. and Where and When makes a big difference! Now assuming hed did it alone: 7 years apprenticeship to the smith, 7 years apprenticeship to the grinder/polisher, 7 years apprenticeship to the hilter and 7 years apprenticeship to the scabbard maker---so *if* he had access to all the equipment I would say he would start off with needing 28 years to maike a sword on his own... Thomas |
| Thomas P - Tuesday, 11/15/05 12:07:28 EST |
|
Best answer yet, Thomas! Can we add that to the swordmaking for genX FAQ? |
| Alan-L - Tuesday, 11/15/05 12:15:36 EST |
|
Seems like it's in the "weeks" category; thanks! I know that fiction is at best loosely based on reality, but that's part of it's charm. :) |
| Kevin - Tuesday, 11/15/05 12:54:08 EST |
|
Star Ocean? |
| - packrat - Tuesday, 11/15/05 13:39:46 EST |
|
What are ALL of the factors to take into consideration when pricing work? |
| Tyler Murch - Tuesday, 11/15/05 13:51:57 EST |
|
Tyler, The best advice in a nutshell: "If you really do put a small value upon your work, rest assured that the world will not raise your price." |
| vicopper - Tuesday, 11/15/05 15:05:35 EST |
|
Pricing Work: Tyler, Most of us eventualy end up with simple formula's and rules of thumb. In a busy shop this works but not in an artist's studio where ONE job may be the year's income. In business your first task is to determine your costs of doing business. You have lots of fixed costs, rent, utilities, truck and or equipment payments, insurance, advertising, YOUR minimum wage that all come every month whether you do any work or not. Calculate these for the year. You may want to fudge on the utilities as they can be higher than the baseline depending on obvious factors. How much you NEED is a key factor. Self employed one man operations are very inefficient in some respects and efficient in others. However, the BEST you can plan on is doing productive work 50% of the time. The rest (or more) is spent running errands, doing paperwork, selling the next job. . . In general if you need to make $50k a year you need to charge $100/hr for shop time. But the way the numbers work out if you only charge $90/hr your take home is half. . . Do the math, expenses never stop, work does, don't forget taxes. Then there is the cost of doing the job. Besides your labor or profit there is fuel, material and labor. Materials and fuel SHOULD only be 10% of the job or less. DON'T forget to include a cost for finishing. This can require as much labor as the forging therefore cost as much! The rules of thumb vary but right now hand forged railings are going for $250 to $375/ft. not including instalation. If you use those numbers to estimate a wrought iron bed then 5 ft wide is 10 running feet or $3,750 and 7 (king) is $5,250. Sound about right? It is except this rule of thumb breaks down on small distances. To be competitive today that $375/ft. rail is textured all over using a power hammer. To do it by hand you would have to double that price. A power hammer can pay for it self in one rail job or a couple smaller jobs. On small items you can work it two ways. One is to estimate every step (pickup material, measure and cut material, deburr material, forge, drill, clean, paint, pack. . .). Somethimes this works if you are very good at defining steps and estimating. The more practical method is to make and finish 10 or 12 of the same part start to finish then look at your time. Multiply the time by $100/hr. and add material costs and you have your price. Too high? Then you must get more efficient, work faster or take less pay. Many things are just not practical to do. There are lots of hobbiests and retireees making nice stuff that you cannot afford to do if you are in business. Don't try to compete with folks that are giving away their time. Once you have done some jobs you will know what it takes to make a decent profit. We all win some and lose some. The trick is to learn to avoid losing more than you win. Artistic work is trickier. When you design a really nice artistic piece there is an intrinsic value different than your hourly wage. Artists rarely get paid well but you SHOULD get at least double what the job would pay normaly for the art. You should also be careful with artistic designs. Non-artists (often your customers) put no value on art and see no fault in taking YOUR design to someone else. DO NOT leave unpaid for drawings with the customer. If you put a LOT of effort into a project and you have a laptop make a slide show and show it to the customer on your laptop. No one will expect you to leave your PC behind. |
| - guru - Tuesday, 11/15/05 15:14:58 EST |
|
At least one fab shop around here (and I suspect others do the same) doubles the price of the material when billing. And they keep the drop, too. This helps a lot with the inevitable demurrage. |
| Miles Undercut - Tuesday, 11/15/05 19:26:33 EST |
|
Pricing Work Tyler at one time I had a business. Everything Guru and everyone mentions above is true. What vicopper states is a golden rule to live by. Don't let people get use to low cheap prices as they will always expect your work for near nothing. A quick guage is to charge at keast four times your cost to make something. If an item cost you six dollars to make charge twenty four dollars to cover all your above mentioned costs. |
| burntforge - Tuesday, 11/15/05 20:29:57 EST |
|
Hello everyone, I've heard of different ingredients to mix with paste wax to finish blacksmithing works. What would be the advantage to adding these? I know that plain paste wax doesn't hold up to the outdoor weather well. Are there other advantages to these different concoctions? Thanks. Chad |
| Chad - Tuesday, 11/15/05 20:33:39 EST |
|
Hello Guru, Haven't checked in for a while. I have a question about welding white metal. This week I had the job of trying to weld a small gearbox, which had 3 of its 4 mounting holes broken off. I first thought it was aluminum but after putting a TIG torch to it I soon found out otherwise. I then tried some Aladdin 3-in-1 rod with the TIG and really didn't have alot of success with that. Then not one to give up easily I attempted the Aladdin rod with an acetylene torch and a small tip. It seemed to flow in but, most of it would simply peel off.I finally got the pieces to stay put pretty well and ended up using some of that molecular metal crap to fill in the gaps. I seemed to have the most luck with the TIG and a Eutectic #23 aluminum wire. The base metal when heated to a melting temp. would act like the whole piece was going to melt. Wouldn't that indicate a zinc-based metal? What exactly is the lowdown on "white metal"? Is it zinc, an aluminum alloy or something else altogether. Also I read on a website about a product called "Muggyweld". It has a video showing the welding of "pot metal" and it seems to work really well. Of course this is under ideal conditions and not on something in the real world. If this stuff would work, I'd ask the boss to buy some of it for the next time we had to weld some of this stuff. Thanx, Toni. |
| toni 1595 - Tuesday, 11/15/05 20:53:23 EST |
|
Have just aquired what appears to be an 1844 steel forged anvil made by Willaim Foster. Name and date are stamped on one side. On the other is "116". I am not familiar with anvils. Can anyone tell me the meaning of the above info? The anvil must weigh well over 100lbs and is 22" long by 10 " high |
| Bob - Tuesday, 11/15/05 22:33:05 EST |
|
Bob: William Foster was an English anvil manufacturer in or near Sheffield - perhaps one of the only ones to date their anvils. Anvil would have been made in 1844. It would have a built-up, wrought iron body with a steel plate. That is, the feet were forge welded to a central core, as were the horn and heel. The top plate was then forge welded on. I am flat out amazed at how well the joints are blended in on some of these old British anvils. Usually British anvils used the stone weight marking system. If it is 1 1 16, weight may be 154 or so pounds. Put it on your bathroom scale and see. First number represented multiples of 112 (1/20 long ton), second multiples of 28 and last remaining pounds. Received a letter from Richard Postman today. He said he has now documented 130 British anvil manufacturers. However, I suspect some of them may have produced stake anvils rather than blacksmithing anvils, per se. |
| Ken Scharabok - Tuesday, 11/15/05 23:28:30 EST |
|
Correction to above: 1 1 6 would be 146 pounds. |
| Ken Scharabok - Tuesday, 11/15/05 23:30:37 EST |
|
Toni: Is the 3in 1 rod an aluminum solder? Tig arc is really hot, and potmetal and aluminum solder shouldn't get to really high temps. Pot metal is "zink based" but may have other stuff in it as well and can vary a lot. The aluminum solder uses the nutral flame from the torch to exclude oxygen from the area being repaired, You need to wire brush it while in the flame. For pot metal the base metal is suposed to be starting to melt when the filler is aplied. |
| Dave Boyer - Tuesday, 11/15/05 23:32:04 EST |
|
Hey Thomas, That's good on the sword making. I read somewhere that a Japanese bladesmith with strikers hogged out and shaved (with a push-shave, a "sen") about five blades a month and of the five, he usually kept two. The reason given was that the throwaways were either physically flawed or that they did not "feel right" when swung. The keepers were sent to the polisher. |
| Frank Turley - Wednesday, 11/16/05 00:07:26 EST |
|
Hello, I just bought a large old leg/post vise from a man and want to know the process in which to clean it, remove the dirt, rust, and such. Also, I recently found a Hay Budden and a Peter Wright, the Hay budden just needs a little service, but the Peter Wright has a slight bow in the face from alot of use I think. What would I do to clean up the face of an anvil I bought, what kind of grinder do I use and do I need to treat the medal some how? Thanks |
| Kevin - Wednesday, 11/16/05 03:10:31 EST |
|
Pricing work... I'd like to add that what the market will bare is also a consideration. In actual costs it doesn't cost me much to shoe a horse but I charge as much as I think people will pay. |
| Mike Ferrara - Wednesday, 11/16/05 06:29:32 EST |
|
White Metal This could be aluminium or zinc. However, due to the low energy costs of pouring zinc and high strength this is more common especially for small die castings. However, it can also be sand cast. Aluminium is most often used for larger castings like transmission housings and lawnmower decks due to the lighter weight and lower material cost. The most common zinc casting alloys are ZA-24 and ZA-25. This are high strength zinc-aluminium alloys (about 10% Al) and commonly refered to as "pot metal". They can be welded with a torch if properly fluxed and with TIG if the temperature is kept down. However, I have had no luck welding it so I can not give detailed advice. Both zinc and aluminium conduct heat very rapidly so parts are often very near melting all over when welded. This makes torch welding very tricky. Special rods for welding zinc are usualy pure zinc. |
| - guru - Wednesday, 11/16/05 08:26:35 EST |
|
ALUMINUM WELDING: Some years back, a neighbor brought over a small Johnson outboard which he had been using in salt water. It had a hole in the side of the skeg casting the size of a Quarter which was caused by corrosion. I removed the skeg from the lower end, cleaned all the corrosion from the edges of the hole and took some flux-coated 1/8" aluminum arc welding electrode and an oxy-acetylene torch with a small blowpipe and laid beads around and around the hole until it was closed. Prior to that, I didn't know you could torch weld with that AL electrode, but then, I didn't know you couldn't, either. I DID know that it was nasty stuff to arc weld with. (Never did know what the exact alloy of that casting was.) |
| 3dogs - Wednesday, 11/16/05 09:43:29 EST |
|
What the Market will Bear: This works two ways. Often rich customers like to brag about how much money they spent. But there are also items that are imported that you cannot compete with. When the market price is set by similar products, even if poorly made, you will find it hard to sell a slightly better product at a higher price. If there is a difference in quality it must be a big difference. |
| - guru - Wednesday, 11/16/05 10:37:34 EST |
|
Kevin, On cleaning leg vises, I usually go outside and use a degreaser like Gunk or something similar. I use that and a wire brush, rags, and elbow grease. Get inside the box with degreaser and a bottle-type brush or a soaked twisted rag. Alternatively, if you can afford it and want to travel, you might get it steam cleaned. Another route to go; you might also give it a shot with a car wash, pressure sprayer. You could give it a finish at room temperature with Johnson's old fashioned floor wax, but that finish won't last very long when the vise is in use. On my antique vises which I don't use, but revere (not worship), I do not remove the original forging scale, if portions of it remain. Incredibly, the scale sometimes is intact, even though it's been boo coo years since the vise's manufacture. Nor do I necessarily remove rust on the antiques. I do degrease them and renew the screw box grease with a lithium lube. In shop use, your vise screw could be "lubed" with graphite, so there is less possibility of the abrasive grit forming. I work on anvil faces with the disc sander. It's been posted a number of times on anvilfire that the "saddle" depression on an anvil face is not of a big concern. You can work either side of it on the flats, and you might even use it on occasion to obtain a certain shape on your work. |
| Frank Turley - Wednesday, 11/16/05 10:44:29 EST |
|
William Foster anvil weight 1x112 + 1x28 + 16 = 156 note that marked weight can vary from "true" weight due to wear&tear and use of inaccurate scales at time of manufacture. I have an 1828 William Foster that's missing the heel and 90% of the face; but for $5 it was worth it just for the WI! Pure Zinc rod would be tough to weld on a zinc alloy as it has a higher melting temp---put the heat in the rod more than the piece! Frank; how long did the polisher take? And the tsuka maker? And the Tsuba maker and the saya maker and the... Thomas |
| Thomas P - Wednesday, 11/16/05 11:24:24 EST |
|
Cleaning up Anvils and Vises: Kevin, it depends on how rusted they are. If an item has any antique or collectors value taken a grinder to them will wreck most of the value. User tool or not they are all quite old. Generally on these type items you can remove loose by hand with a wire brush or sandpaper. Al long as you do not remove all the rust you are not hurting the value (on this type tool). Oil and scotch bright pads work as well. The faces of anvils can be hand ground but you should not attempt to make them flat. A little sag doesn't hurt anything. In fact you cannot make a flat object straight on a flat surface, you need some sag or curvature for straightening. A few chipped places on the corners do not hurt nearly as much as botched welding by a know-it-all or amature welder. Anvils faces are hardened tool steel, not common structural steel. Dress the sharp edges so they do not marr the work. Most often chipping is the result of an anvil that should have had the edges rounded before it was used. Often the chips can be dress out or nearly out by radiusing the edges of the anvil. Generaly you want 1/8 to 3/16" radius at the middle of the anvil and less near the heel where it does not get heavy work done on it. The top surface of an anvil should be fairly smooth but does not need to be perfect. If it has been abused by chisel cuts they will often heal from use or can be worked down with a hammer. After working them down the face can be ground with a belt sander just enough to remove most of the rust but not to flatten. The reason not to try to flatten old anvils is that the face is a plate about 1/2" thick forge welded to the anvil. Reducing the thickness of the face structurtaly damages the anvil. To take out 3/16 sway and some chipping you could reduce the face by half. This leaves it 1/4th as strong and you have removed the hardest surface exposing much softer metal. By judiciously straightening the sides of the anvil body and face and the top then radiusing the corners you can often clean up an old anvil without welding or hurting its future value. Many of these old tools are well over 100 years old and have been used by generations of blacksmiths, mechanics and others. They will continue to be fine tools for generations to come if not abused. We work in a very odd business where we are just temporary care takers of the tools we use. Wear and tear is natural but you can do a lot of work without abuseing an anvil. |
| - guru - Wednesday, 11/16/05 12:20:21 EST |
|
I have a vise made by Rock Island #574. The tag says Birtman Electric Company , Rockisland, Division, Rock Island, Ill.One jaw is gone . It is 4 !/2 inches wide. Does any one make replacement jaws for this vise? |
| Don Burke - Wednesday, 11/16/05 14:51:38 EST |
|
"Antique Tools" it's a bit different for smiths who's tools may commonly be over 100 year old and still be "used". Generally I don't consider a smithing tool "old" till it's pre ACW and I have a couple that I believe meet that designation that I still use; but won't lend out to others! I have an 1828 anvil I hope to one day re-face using traditional methods---I need to get a crew together cause handling 100# of WI at welding temp is not the easiest. I was thinking of improvising a drop hammer to do the welding of the face to a WI backer and then use a crew with sledges to weld the WI to WI base. Thomas |
| Thomas P - Wednesday, 11/16/05 14:58:33 EST |
|
Don, Sorry no. Making a replacement is not too difficult. Teeth in vise jaws are generally bad and tear up work so just a plain bar of steel with wo countersunk holes will do the trick. The tricky part is determining the exact centers of the holes and doing a precision job drilling and countersinking them. |
| - guru - Wednesday, 11/16/05 15:56:41 EST |
|
Hey guys, the body piercing industry is changing things up a bit, wanted to know your opinions, thoughts. Currently (and since the 70's) medical appliances and body jewelry is to conform to standards by using 316L or LVM steel. This grade was chosen due to it's anti-corrosive properties. Now the industry wants to change/add the use of ASTM 138 stating that it is better for biocompatibility. What do you guys think? |
| The Great Nippulini - Wednesday, 11/16/05 16:00:48 EST |
|
for the gas forge guru(s): are there any disadvantages in having the forge chamber continuous with the openings? on some designs, the openings (for stock and exhaust) are smaller in cross sectional area than the chamber. if properly insulated and treated, i dont see why one design would outperform another, as i have described. thanks in advance.. |
| - morph - Wednesday, 11/16/05 16:37:48 EST |
|
forge: you will lose a lot of heat thru big openings especially near welding heat. The forge shouldnt be tight - gas should flow freely but the light needs to be blocked so that its reflected back into the chamber. |
| adam - Wednesday, 11/16/05 16:43:46 EST |
|
Morph, Radiation is a pretty big component of heat loss for gas forges; so a forge that has the least cross sectional opening that still allow for proper exhaust and back pressure for the burners will be the most efficient. It's also easier on the user sticking your hands close to a body radiating at close to 2000 degF is not pleasent in the long term. Thomas |
| Thomas P - Wednesday, 11/16/05 16:46:46 EST |
|
Toni's gear box could be magnesium as well. I'd guess that would be at least as likely as zinc if it's off a vehicle. |
| Mike B - Wednesday, 11/16/05 16:49:44 EST |
|
Magnesium Pretty rare in gear boxes except maybe some military hardware. Attempts to weld it would have already sent it off in great white flames. |
| - guru - Wednesday, 11/16/05 17:50:36 EST |
|
Magnesium is really nasty stuff to try to weld; the melting point and the liquidus point are the same. Just the second you get it hot enough to fuse, it turns to water and runs all over the bench! |
| vicopper - Wednesday, 11/16/05 19:35:32 EST |
|
ASTM: TGN, Sounds like some non-technical suckers have gotten involved and don't know ASTM from ATM. ASTM is the American Society of Materials Testing. Most of their specs are performance tests. They do not specify the materials constituants, just the way they act. 316L is actually an SAE or AISI designation. When used alone it is a "common trade designation" but when called AISI 317L then is means something. The ASTM spec usualy applies to a whole family of metals. ASTM A240 applies to virtually every stainless and heat resistant metal from AISI 302 to XX-33. I cannot find ASTM A138 in my 5th Edition (1989) Metals and Alloys in the Unified Numbering System. So it is probably a new spec. If you want the details of the ASTM spec you will need to purchase it from ASTM. You will also need the dozen or so other publications it refers to such as the Compilation of ASTM Standard Definitions and the testing procediures referenced. Some make no difference but without knowing what they are you cannot read the base spec as you do not know what you can ignore. . . and after buying it you will find out that it is very non-specific. I much prefer compiled references like Metals and Alloys in the Unified Numbering System and ASM Metals Reference Book. However, all these things become rapidly dated (1989 is ancient history) and it is expensive to keep an up to date reference library. I could easily spend $1000 updating my handfull of references from the 1980's but they would be out of date in another 5-10 years. . . maybe if I get rich again. . . |
| - guru - Wednesday, 11/16/05 19:48:05 EST |
|
In this electronic age, who needs hardbound references? Go to ASTM.org. Hard to believe there are still folks who buy the Thomas Register hardbound every year too. No reference for ASTM 138 and only this for ASTM A138: A138- Withdrawn 1945: Specification for Riveted Steel and ... ... WITHDRAWN STANDARD: A138- Withdrawn 1945: Specification for Riveted Steel and Wrought-Iron Pipe. WITHDRAWN, NO REPLACEMENT 1. Scope. Index Terms. ... ASTM International : Withdrawn Standards ... Welded Steel Pipe A137- Withdrawn 1943: Specification for Lock-Bar Steel Pipe A138- Withdrawn 1945: Specification for Riveted Steel and Wrought-Iron Pipe A140 ... |
| - grant - Wednesday, 11/16/05 21:52:21 EST |
|
What is the best way to cut thick sheet metal (16-14 guage ). I use my torch on thicker stuff and shears on thinner. I was thinking about getting a pneumatic cutter, but they all seem to be topped out at 18 guage. I've been hammering out my sheet for projects out of round and square bar so far, then trimming with files and grinders, but I want to work on a bigger scale and can't find any info on how traditional smiths worked bigger stuff except with hammers and chisel's. I don't want to use electric saw's if I can help it, I'm a butcher with a hack saw and can't afford a plasma cutter, Thanks. |
| Thumper - Wednesday, 11/16/05 21:53:06 EST |
|
I'd like to learn about the care and feeding of a plasma cutter. Are there any good books or videos available? Favorite brand names or models? How quickly are the consumables consumed? Thanks |
| goodhors - Wednesday, 11/16/05 21:55:11 EST |
|
Thumper, For that stuff a Beverly Shear is hard to beat. |
| vicopper - Wednesday, 11/16/05 22:26:47 EST |
|
Vicopper, Where do I find one, Harbor Freight? Is it, pneumatic, electric or manual? |
| Thumper - Wednesday, 11/16/05 22:38:25 EST |
|
I have a Rock Island Vise which has a missing Jaw. It 4 1/2 inches wide. Tag on vise has Manufactured by Birtman Electric Co., Rock Island division. Where can I fin new jaws |
| - Don Burke - Wednesday, 11/16/05 22:49:09 EST |
|
Thumper, Harbor Freight sells a knock-off of a small Beverly shear. Search for "Throatless Shear". I have one, and it works fine after you tune it up and adjust things properly. They're a purely manual, simple bench-mounted shear that will cut either curves or straight cuts in sheet steel up to about 12 gauge. I definitely wouldn't try anything heavier than 12 gauge, though. A real brand-name Beverly is a better built piece of equipment, but about three times the price of the HF knock-off. I also have a couple of Makita uni-shears that will cut up to 14 gauge just fine. They're electric powered bypass type shears that use replaceable hardened steel cutters. They're a bit harder to control on intricate stuff than the Beverly-type. More expensive, too. |
| vicopper - Wednesday, 11/16/05 23:08:32 EST |
|
Don Burke, Your question was answered at 15:56 today by the Guru. Scroll up. |
| vicopper - Wednesday, 11/16/05 23:09:33 EST |
|
i need to find blue prints for a log splitter, i would like to build it without the use of hydraulics or compressed air. in a perfect world it would use only kentic wieght energy. if you know where i can find or buy plans that would be greatly appreciated. thank you oh wise guru johnny |
| johnny - Wednesday, 11/16/05 23:41:42 EST |
|
Vicopper, Thanks for the info, looked up the Beverly Shear on ebay. Nice but, since shears are the way to go, I also know where to get a 200+lb out of commission Little Giant bench shear which may be the ticket. I'm gonna post an "all call" for info on that, Thanks again! |
| Thumper - Wednesday, 11/16/05 23:43:14 EST |
|
Guru/Anybody, Do you know where I can get info on old "Little Giant" tool's? I've got a line on a 200lb+ bench shear I'm thinking of getting (pulling out of the mud), but want some spec's on capability. Thanx |
| Thumper - Wednesday, 11/16/05 23:48:49 EST |
|
Johnny: In the late seventies there was a splitter built that used a flywheel and rack and pinion. I think it was comercially built, but it fits Your description. The flywheel and pinion was brought up to speed and then lowered into the rack, which had a gap in the teeth at the end of the stroke. If I remember corectly. This could possibly be built from scrounged parts. If You find a big ball screw & nut in Your scroungings You could try that also. |
| Dave Boyer - Thursday, 11/17/05 00:03:01 EST |
|
|
|
|