If the guru's have time, I've been trying to find a good stainless alloy for springs. My shop foreman said 316, but he's an out of practice tinbasher. Anyone have some suggestions they'd be willing to share?
|
|
- SunDog
- Wednesday, 03/07/07 23:51:42 EST
|
Micro Forge is listed on the Gas Forges page on our FAQs page.
|
|
- guru
- Thursday, 03/08/07 00:21:33 EST
|
Stainless Springs: Non heat treated stainless spring wire is made of a variety of alloys including 304 and 316. The springiness is slightly more than steel without heat treatment and makes fine low performance springs.
|
|
- guru
- Thursday, 03/08/07 00:23:56 EST
|
Ian, good start.
|
|
- guru
- Thursday, 03/08/07 00:25:18 EST
|
Seems like a one-gallon empty (and clean) latex paint can would also work well for the micro-forge. The lid can then be used to seal it up.
|
|
Ken Scharabok (Poor Boy)
- Thursday, 03/08/07 02:01:07 EST
|
Hello, I have a Forge made by Champion blower and Forge Company attached to a bowl about 2.5 ft in dia on legs about 3 ft high for sale. What would such an item bring for a price? Any info that can be given would be appreciated. Thank You
|
|
Vincent.V
- Thursday, 03/08/07 06:00:36 EST
|
Vincent.V: Can't help you on value but it sounds like what you have is a rivet forge. It was designed to heat up rivets used in construction, such as building and shipyards. Makes a nice arts & crafts show forge, but really not much suited for general purpose blacksmithing due to shallowness of pan.
|
|
Ken Scharabok (Poor Boy)
- Thursday, 03/08/07 07:19:40 EST
|
Value of Forge: Vincent, while the forge may be small the blowers are in demand in any size. However, they are often worn out due to lack of lubrication and or rust. Since there are no parts available they require someone with a machine shop to rebuild. So, forges with good blowers may be worth a couple hundred dollars or more but rusted out forges with growling stiff to operate gears may only be worth $50 to $75. Sheet metal pans are worth less than cast iron pans, forges with fire pots (a heavy cast iron depressed center) are worth much more than flat bottom forges.
A test of a good blower that is well lubricated (the leak constantly so they are almost always without oil) is to turn the crank a few times then let go. Then see how many turns the crank makes. A good smooth blower will turn over 4 or 5 times and gently come to a stop. A worn rough blower will turn only once or twice and stop quickly. A good blower makes almost no noise and you should be able to hear the rush of the air over the gear box while a bad blower growls noisily and you can feel vibration in the crank handle. If you can feel bad gears in the crank handle then it will have a very short future and may not even be rebuildable.
On the other hand if you hold out long enough there is always some fool that will part with their money much too easily.
Location also makes a difference. In Pennsylvania and Ohio (assuming you are in the U.S.) there are so many of these things that folks can be picky about what they purchase. In California and some of the the low population states good old blacksmithing equipment is rare and people pay more. In Hawaii it would be solid gold.
On the other hand if you hold out long enough there is always some fool that will part with their money much too easily. This is especially true in this market (blacksmithing tools) where folks rarely know what they are buying or any of the above.
|
|
- guru
- Thursday, 03/08/07 08:52:18 EST
|
More on the Micro Forge:
Gotta love the MAPP, but go get a Bernz-O-Matic TS-8000 torch, otherwise you're going to lose heat efficiency with MAPP on a standard torch. Another nice thing about the TS-8000 is the piezo electric start, don't have to worry about arm hair loss (grin). My torch mounts are angled at 45 degrees up, so to prevent the torch head becoming a chimney for hot gasses after use. Personally I feel like any food can is too thin and small for most forging so I use spent propane bottles. I punch, then drill two holes under water and let the bottle clear out for a day or so. Then cut to shape and fill with Kaowool and ITC as noted. I use MAPP for the front main burner and a smaller propane torch for a reserve rear burner. When I don't need a full blast, I turn down (or off) the MAPP while the propane head keeps the forge on. Saves lots of money that way and gives me a welding heat at full blast (thanks to Jock for that recommendation). A 4" piece of 1-1/4 angle iron makes the porch with 1/4" rod welded upright to hold the door, which is made of 1/8" sheet cut to size. A length of rod is welded to the top of the door so I can slide it up and down as needed. Lately, I've been keeping my MAPP bottle in a pan of water. When the bottle starts to freeze up, I cup the water over it to keep the pressure up. Here's the pic again:
http://greatnippulini.com/NewForge1.JPG
|
|
- Nippulini
- Thursday, 03/08/07 09:34:03 EST
|
By the way, Vicopper.... a 10 pound can of beans? That's just plain scary!!
|
|
- Nippulini
- Thursday, 03/08/07 10:00:07 EST
|
The original "Bean-O-Matic Propane Forge" Called for a "large can of beans" but not a commercial kitchen size. Checking our pantry that is a 28oz. can is 3-3/8" by about 6", but there are large sizes that area about 4" by 8". That was the size in the now lost drawing of the "Bean O Matic" which was a true Micro Forge. It used one layer of Kaowool and a Bernz of Matic Propane torch. It was a cheap and dirty quicky.
|
|
- guru
- Thursday, 03/08/07 12:12:04 EST
|
About my Champion forge again, once you get it up to speed and let go of the handle it will propably turn another 6 or 7 times easily. And the Pan or bowl is made of solid cast iron in the afore mentioned dimensions. Please more info I live in Canada and I have had a few guys from the states wanting this thing. It also comes with a bag of pebbled coal. Please more info anyone.
|
|
Vincent.V
- Thursday, 03/08/07 12:21:04 EST
|
Firepots
I'm looking to build a better coal forge than the round rivet forge I have now. Most of the materials will be scrounged, but I want a decent firepot with clinker breaker. I'm leaning towards the Centaur Vulcan firepot with ashdump. Are there others I should consider? This and the chimney pipe should be my main expense. The table will probably be 2x4' 1/8" plate that I already have. The chimney will probably be 8" and tall, to be installed in my shop. I havent been nearly as happy with the various flat-bottomed forges I've used, even with some firebricks to add depth over the grate. Is the square design the best for soft coal and a wide range of projects? Would the round or another supplier be better?
Thanks
|
|
- Jacob
- Thursday, 03/08/07 13:19:16 EST
|
Jacob, The rectangular pots are a better fit to a rectangular forge. You might want to check Kayne and son (Blacksmiths Depot) and Blacksmith Supply to see what they have. If you are looking for a forge for the long haul you want the the thickest and heaviest pot you can get.
I would also look for 10" pipe as a minimum on a forge. 8" is marginal and will not carry all the smoke from a fresh fire or a large one.
|
|
- guru
- Thursday, 03/08/07 13:54:18 EST
|
Jacob: Request a brochure for the SOF&A/Zeller firepots from Bob Cruikshank, 1495 W. Possum Road, Springfield, OH 45506 (937-323-1300). They are about 5/8" thick. I used one for a couple of years and wanted to upgrade to the slightly larger size. I washed the old one, spray painted it and sold it for more than I paid.
|
|
Ken Scharabok (Poor Boy)
- Thursday, 03/08/07 14:04:24 EST
|
Jacob:
You didn't mention MAKING your own firepot, but this is definitely an option (I did it and it works and as long as you don't count the cost of man hours it is cheaper).
If you have access to a decent torch setup, a buzzbox, and a source of scrapped 3/4 or 1 inch plate and are interested let me know and I can give you some pointers on things to NOT do and some things that I found worked pretty well.
-Aaron @ the SCF
|
|
thesandycreekforge
- Thursday, 03/08/07 14:50:12 EST
|
Metal bandsaws? I suspect I have about worn out my Northern Tools 64 1/2" x 1/2" size blade bandsaw. Looking up upgrade as it goes from 1/3 HP to 1 HP for just a bit over twice the price. Question though. The 1 HP one comes with an oiler. Is it necessary to use it on small stock, such as less than 1"? I cut a lot of small pieces and don't particularly want to have to deoil them before use.
|
|
Ken Scharabok (Poor Boy)
- Thursday, 03/08/07 18:23:04 EST
|
Ken, are you talking about coolent? I had coolent on my Jet
horizontal and used it for a short time-found out it was just a PITA to use and didn.t really lengthen the blade life- Just use a good quality bimetal blade- If you will notice, the ELLIS brand saw-probably one of the best around , does not use coolent
|
|
- ptpiddler
- Thursday, 03/08/07 18:39:32 EST
|
Ken, I have run my jets with bi-metal blades for years without coolant. At the valve shop, where I was often cutting exotic alloys, and very thick sections for these saws, I did use coolant. The big difference is in production cutting. There you can match the blade, speed and download and get optium results only with the right coolant. This however is not really required for small sections of mild steel, if you don't crowd the blade, and don't mind a little slower cut and a little less blade life.
|
|
Ptree
- Thursday, 03/08/07 19:00:56 EST
|
Ken, If you want to try a little coolant to see if it makes a difference, I can see if the friendly folks at J & M have a sample.
|
|
Ptree
- Thursday, 03/08/07 19:02:40 EST
|
Small Band Saws: I get cleaner cuts and a lot longer blade life using some kind of lubricant on the blades (good bi-metal variable pitch blades). However, I run top speed on alloy, tool and stainless steels. The lubricant/coolant I use most often has been WD-40. I squirt some on the blade and the cut as it starts and as needed on deep cuts. An 8oz. can lasts weeks of daily cutting.
The bigger saws use bigger blades and have much better blade life. However, I prefer to run lubricant on them as well.
The advantage of a pumped coolant system is that it washes the chips out of the kerf AND off the blade. This not only gives longer blade life it also helps keep chips off the wheels and guides. The down side is that almost all coolant systems drip or coolant runs down the work and almost always makes a mess. Some machines need to be built over a drain pit. . .
I have the ORIGINAL 4x6" min-band saw that all the cloners copied. It was made by Ridge Tools in the late 60's and early 1970's. It sold for $1000 THEN and I paid $600 for it USED. It is a great little saw and still runs good. Everything that everyone that made cheaper models of it did made them an almost worthless machine. Sears made one that was ALMOST identical except they exchanged the cast iron table and the feed arm with heavy pressed steel. They were (are) impossible to keep adjusted and cutting. At one point in the 1980's the importers were selling junker copies for $249!
The point is that a decent SMALL saw cost $1000 in the 1970's. Apply THAT to your thoughts about pricing new saws. . .
|
|
- guru
- Thursday, 03/08/07 20:23:36 EST
|
Agreed, but I am not running a production shop either. The $350 NT one lasted for about two years of sometimes several hours a day of light cutting. However, it is making squeeking noices and breaking blades on a regular basis. Suspect flexing fatigue or worn down guides. Upgrading would take me from a 65 1/2" x 1/2" blade to a 93" x 3/4" one, and NT prices for them aren't much different.
HF is junk, but I have gotten good service out of NT items and their customer support is great.
|
|
Ken Scharabok (Poor Boy)
- Thursday, 03/08/07 21:02:11 EST
|
Ken, I have used up several of the Jet, etc 4" x 6'. I found that the squeking is usually the roller bearings in the guides. We bought new roller bearings from a industrial mil supply, and they fit perfect. I have also discovered that these little saws have a badly designed gearbox, and that sometimes they fill them with grease. As it is a worm gear drive it needs to be gear oil. i had one to get noisy and we opened it up and found serious wear . I cleaned it out, filled with gear oil with some added moly, and it ran for several more years. We used these in the lab, cutting up valves to see inside for failure etc. These got hard use from interns, and they gave VERY good service for a $249 saw. To make them live, first tune for straightness. Then back off the feed spring to give a down load from weight only. Make sure that stuff does not move in the vise. Do not over tighten the blade. The bands bow from the teeth to the heel and then the band slips around the thrust rioller and chews into the cast iron. Only buy one of these saws if it has adjustable guides.
Coolant is grand and is the right way to go in a production shop. To really get performance , one needs one of the water based semi synthetics now out. Expect to clean the gunk from the coolant off everything in the saw regularry. Expect it to go sour in the summer, and freeze in the winter if you don't heat the shop. It is absolutely the right thing to do. I don't use coolant on either of my saws, except I use some parafin when cutting SS.
|
|
ptree
- Thursday, 03/08/07 22:11:08 EST
|
Bandsaw: In industry I used both wet and dry saws. I am not convinced that a wet saw will save You money if cutting mild steel. Coolant has a cost, and the extra clean up takes time. The last place I worked used a lot of D2, one of the nastiest tool steels to work with. That was cut dry while EVERYTHING else was cut with coolant, GO FIGURE. I have an old [1983] Tawanise 4x6 saw the gearcase has leaked for 20+ years. I put die post oil in it, which is about like STP only brown. I think I would use 600W or STP [if they still make it] This doesn't leak out verry quickly.
|
|
Dave Boyer
- Thursday, 03/08/07 23:44:42 EST
|
Nippulini,
That was a #10 can, NOT a 10# can. #10 is the next size bigger than the standard #303 can that veggies come in. It is about the right size for two layers of Kaowool.
|
|
vicopper
- Friday, 03/09/07 01:25:04 EST
|
Could someone tell me how to put the "spring" in steel. I need to make a few small compression leaf springs (about 5 inches long, 1/4 thick). I'm trying to fix and old switchblade that has been in my family for years. If someone could tell me the best steel to use and the proper hardening process to make the steel into a good strong spring (compression style) would really be appreseated.
Thank you
|
|
- Jerry
- Friday, 03/09/07 06:25:35 EST
|
Springs: Jerry, First, you need to know it is a physical fact that all steel has the same springyness. However, the difference between soft and hard springs is how far they will travel (deflect) before they bend. The difference between a hard and a soft piece of steel is how far it will bend (or stretch) before breaking.
A relatively heavy low performance spring that will not break can be made out of mild or medium carbon steel. A light weight high performance spring is made of medium to high carbon alloy steel.
There are a lot of alloys used to make springs and a lot of heartaches making your own springs. There are a number of commonly used spring steels. SAE 5160, SAE 1095 (music wire) and 301 Stainless steel. In small sections the 5160 and 1095 are air hardening. The stainless is used as-is, not heat treated. However, it makes a lower performance spring than the others.
Steel is heat treated by annealing or thermal conditioning, hardening and then tempering.
Annealing is done by heating the steel to the hardening point then letting it cool very slowly. To cool slowly either a temperature control furnace is used OR insulation. The best insulations to use are wood ashes, quick lime, vermiculite and kaowool. When a part is very small and air hardening is a possibility it is heated on a larger piece and both are buried in the annealing medium.
To harden the steel is gently heated to the non-magnetic point, then cool quickly. Large parts and some steels are quenched in water, small parts and most spring steels are quenched in warm oil and very thin parts and special air hardening alloys are cooled with a gentle blast of air.
As hardened most medium to high carbon steels are brittle as glass and will break easily. They must be tempered to reduce the hardness and make they tough enough for their intended use. The softer the steel (the more it is tempered) the less likely it is to break. The tricky part is to find the right temper for the part.
Immediately after hardening, before the part reaches room temperatuyre the part should be tempered. This is done by gently and evenly heating the part to between 350°F and 650°F for spring steels (higher for 5160). In most cases 590-600°F is considered "spring temper". This is the temperature that bright clean steel turns a deep blue. But alloy steels often need to be tempered at higher temperatures just out of the temper color range (gray and above).
Like annealing, one way to get your small part to an even temperature is to use a larger block of steel heated to the correct temperature then set the small part on it and let it soak. Any larger piece of steel can be used and if clean its color can be used to determine the temperature by its "temper color". See our FAQs page, temper color chart.
Mistakes can be made at every stage. Over heating the steel at any stage is most common and can create conditions that will ruin the steel or cause cracking later. Parts with sharp corners or quick changes in cross section tend to crack when quenched. Parts insufficiently tempered will break easily. Often finding the proper heat treat for a given steel or part requires several trials where the test often results in broken parts.
Welcome to the world of blacksmithing.
|
|
- guru
- Friday, 03/09/07 08:51:50 EST
|
Cheap, Cheap Saws: Most I have seen were not adjustable and had little 3/4" cam rollers for guide wheels. Occasionally these were plastic. IF you could keep the blade in them they would not cut square OR straight, the cut curving one direction or another. If all you cut was small stock less than an inch you would not notice, but on anything large, even pipe or tubing the curve could be more than 1/4". THIS in turn wrecks the blade. The guide wheels on the original Ridgid saw were about 1-3/8" OD sealed ball bearings. Both guide wheel assemblies were adjustable in all directions. While this is desirable it also lets you get the saw so out of wack that it will not operate. I suspect the cloners, besides being cheap were also avoiding having to have someone that had the skill to setup the saw on assembly.
I had not seen any with grease in the gear box. However, I can see why. The Sears clone saw we bought came with oil but most of it was in the bottom of the packing box. Apparently it had been stored or shipped on its side at one point.
While the Sears saw we bought has lasted many years it has caused more aggrevation than you can imagine. The simple substitution of the cast base and feed arm made it very difficult to keep running true even though it had the same guide system as the Ridgid. In its 20 year life the Sears has had 4 motors due to repeated binding and stalling. Blade life has been miserable. We bought the same blades to use on it as I put on my Ridgid. Those on the Sears would wear on one side, cut crooked or break, while on mine I could run the blades until the teeth were nubs. . .
Just the frustration factor of cheap tools is enough to make it worth while to buy better tools.
|
|
- guru
- Friday, 03/09/07 09:21:58 EST
|
Okay, I was more stunned to the fact that anyone would be able to USE 10 pounds of beans, let alone the empty can! And if one WERE to eat 10 pounds of beans.... well, I'll just say you won't see me standing next to you in the shop any time soon, lest we want to create the first human powered gas forge.
|
|
- Nippulini
- Friday, 03/09/07 09:41:24 EST
|
Jerry-- you probably already know this, and I know, I know-- switchblades are for sale in every knife magazine, on the Internet, in every gas station in idaho, flea markets everywhere etc., BUT, facts are facts and: making one, selling one, and merely owning one is a violation of Federal law. Behold: (From http://caselaw.lp.findlaw.com/casecode/uscodes/15/chapters/29/toc.html ) United States Code
TITLE 15 - COMMERCE AND TRADE
CHAPTER 29 - MANUFACTURE, TRANSPORTATION, OR DISTRIBUTION OF SWITCHBLADE KNIVES
Section 1241. Definitions
Section 1242. Introduction, Manufacture For Introduction, Transportation Or Distribution In Interstate Commerce; Penalty
Section 1243. Manufacture, Sale, Or Possession Within Specific Jurisdictions; Penalty
Section 1244. Exceptions
Section 1245. Ballistic Knives Also God forbid you should ever actually use one for what it was designed for-- just having it on you is prima facie evidence of premeditation.
|
|
Miles Undercut
- Friday, 03/09/07 09:56:00 EST
|
Switchblades: There are exceptions for collectors and dealers but carrying one on you can be a serious problem. There are severe enough penalties that if cops want to frame someone they are used as a "throw away".
I was given a very nice Al-Mar knife by a forum member who believed that their spring action made them a life saving device since they could easily be opened one handed. However, I can easily open my Buck 505 one handed, even in a pocket. In fact, I can open it easier than the Al-Mar.
I did some research on the Al-Mar and it was short enough to be legal for open carry (not in a pocket) in SOME states. In Virginia where I lived it was legal, but in North Carolina where I often visit, travel and now live most of the time it was illegal for even cops and military who are exempted in most states. SO. . since I always carry a small knife if I was traveling it would be illegal, if I accidentally but it in my pocket where I had been carrying a knife for 45 years. . . it would be illegal. And knowing MY luck since I have never been arrested for anything, THAT would be the time I would be in the wrong place at the wrong time. . . So I made sure it had a happy home with a friend.
The switchblade laws have a curious past and probably should be rescinded. They were written at a time when the country thought gangs of anarchists were going to take over the country and there WERE a lot of violent street protests (see movie "Gangs of New York"). Reactionary laws were passed to ease public fears of the time and they are still on the books. So instead of knives, those bent on breaking the law carry legal guns. . .
In the end it matters not because as was proven at Kent State, Ruby Ridge and Waco the U.S. government's reaction to massive public unrest would be no different than the Chinese at Tiananmen Square. Tanks would roll. Pull your switchblade or sword on THAT.
|
|
- guru
- Friday, 03/09/07 11:39:01 EST
|
Thanks to all for advice. I went ahead and ordered the Northern Tool 1HP model. While certainly not a machine shop piece of equipment, it should do for my far more modest means.
|
|
Ken Scharabok (Poor Boy)
- Friday, 03/09/07 12:48:33 EST
|
Not sure if I would run full speed sawing stainless - that stuff has a nasty habit of work hardening - ive always has more success slow and steady! ( I will check with one of the machine operators for confirmation of this though!)
If you run coolant on your saws it is a constant PITA when someone chops a few bits of wood, then the pulp in the coolant is forever blocking it.
|
|
- John N
- Friday, 03/09/07 13:25:39 EST
|
Firepots
I have a 250 amp mig welder that would happily weld up a firepot, but I'm not set up to cut that much heavy plate with any efficiency. I recall reading an old post on here (possibly from Aaron?) saying that the home built firepot wasn't much better or cheaper in the end, and that it required a lot of time investment. Wouldn't mild steel burn through slightly faster than cast iron? The Blacksmiths Depot setup is much heavier and more expensive. I'll have to think on the cost difference.
I couldn't find any other details on the SOF&A model online. I'll see if I can get more info.
Centaur doesn't list a thickness. Is it also around 5/8"? Blacksmiths Depot's is 1" and almost twice as heavy.
|
|
- Jacob
- Friday, 03/09/07 13:30:56 EST
|
Ken, You will likely be much happier with the heavier saw. One thing about machines, no matter what size you have, you always have a job that needs one size larger!
Yes, Stainless should be cut slow. I'm not sure what the max speed is on my Ridgid but it is designed for cheap carbon steel blades. With the good HSS bi-metal blades it cuts stainless just fine at top speed. Since it is the worst thing I saw I can run the same speed on everything. . .
The reason for running dry on some high carbon tool steels is that the chips come off just hot enough to air harden and the coolant carries these little pieces of micro cutter along the blade, onto the wheels, guides and pump. The result is worse than bathing your machine with sand.
We had the same problem machining H13. When its chips harden they create terrible grit which in turn can under lathe carriages and in vise screws. . . eats them up. There ARE other costs to machining tool steels other than the slower speeds. Increased and accelerated machine wear is one.
|
|
- guru
- Friday, 03/09/07 13:55:27 EST
|
I just bought a smoker built from a zinc-coated (galvanized??) trash can. The heating element is about 1250 watts, and rests on lava rocks. The temperature at which the unit cooks is UNDER 300f degrees, usually closer to 225f. Am I going to have a problem with the release of any zinc gas under these conditions?
thanks in advance,
John M
|
|
John Mittelman
- Friday, 03/09/07 14:24:28 EST
|
Jacob: Yep that was me. My grand total came somewhere around 70 dollars. What made the prices similar was me figuring shop time at 15 dollars an hour, so with 5 or 6 hours invested, the total was a bit higher. since it really didn't cost me (monetarily anyway) shop time to build it, it was actually not TOO bad of a deal. Now that I've built one (and figured out my mistakes) the next one would probably only take half as long.
The thing about the fabricated pot was that all the interior corners and edges were straight and not rounded as in some cast pots. This seems to create a sort of odd situation where there is always coal at the very bottom of the pot in the corners that is not burning very hot at all. It also creates an odd clinker pattern where the clinker kind of conglomerates (sp?) on top of the cool burning coal/coaldust/ash and makes a funky funnel shaped mass.
As far as the mild steel burning through, I've been running it since late last summer/early last fall and haven't noticed any burning at all. In fact you can still see little ridge patterns on some of the weld beads. When in use, if i peek up from under the forge, the hottest I've ever seen it get is a cherry red. I think this might have something to do with the aforementioned cool spots in the bottom of the pot.
All in all it was an enjoyable project for me, and it was good exercise in cutting and welding heavy plate which is something i don't get to do to often.
"Your mileage might vary"
-Aaron @ the SCF
|
|
thesandycreekforge
- Friday, 03/09/07 14:26:13 EST
|
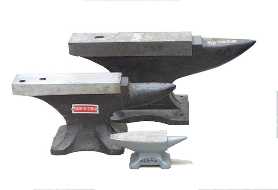
A friend of mine bought an anvil,
its 75 pounds and cost him 30 dollars,
he makes riveted chainmail, and does a bit of riveting with some armour, so thats what its use is going to be,
he sent me the markings, and was wonering if i could find out somethihng about the history, but, i cant, so i thought i would ask you,
its a
Standard Metal Company and below that it says
75 pounds,
he thinks that it is cast steel, but i would assume it is cast iron, and he says the face has been welded but is mostly chipped off,
help?
Cam
|
|
Cameron
- Friday, 03/09/07 15:41:03 EST
|
Zinc Smoker: John, no you should not. Zinc melts about 800°F and flares at about 1000°F (~540°C). It is the point where it flares (burns) that is a problem.
|
|
- guru
- Friday, 03/09/07 15:48:28 EST
|
Propane Forge
I was planning on building a propane forge in a metal paint bucket, like the one Larry Zoeller built (see http://www.zoellerforge.com/simplegasforge.html) but I ran into a problem.
The problem was I could not find any metal paint buckets. However, my welding teacher agreed to help me fab one. What I need to know now is how big I can make it? In Larry's design he says and he used 4 running feet of duarblanket (1" x 24") to wrap the inside, and says he cut out two circles for the end (is this included in the 4 feet?). I purchased 5 feet, and was having a hard time figuring out what diameter this should make. I would want one for general purpose forging; large enough to forge in, but not too big as to use up a lot of propane.
Any help would be appreciated.
Thanks
-Hollon
|
|
- Hollon
- Friday, 03/09/07 16:27:55 EST
|
my friends and i fight iwth aluminum weapons, stamped out of aircraft aluminum, and they flex 90 degrees so they wont break as easy,
my friend has an axe, and the store we buy these aluminum weapons from is closing, so, heres the quesion, can aluminum be forged? or is it better to just get someone to weld a axe shaped peice of aluminum to a aluminum tube, and fit it onto a stick?
thanks,
Cam
|
|
Cameron
- Friday, 03/09/07 16:44:34 EST
|
Hollon, Gas forges and their burners must be matched to each other. Too big a forge and the burner can't keep up. Too small a forge and all the combustion goes on outside.
PI * d = circumference. (elementary school math)
Use the diameter at about the centerline of the wool. Recalculate for the second layer but remember that the first layer is going to be thicker than 1" from the bunching. The thickness and density also varies greatly from batch to batch (within their tolerances) and can make a significant difference. If you are short a little cut a strip to fill in.
"Large enough to forge in" Forge what? Micro forges do great on lots of items from nails to doll house furniture and even small knife parts. The bigger the forge the more gas it will use (regardless of work done). Most folks find they need several gas forges to cover a range of work.
Other things more important to forge design is the floor which should be hard refractory brick (half thick) and if you are going to be using flux in the forge then the refractory blanket must ABSOLUTELY be covered with a coating like ITC-100. For health and safety it should be covered anyway. . .
Another issue is a hearth to rest work on (more brick) and doors (even more brick or fabrication).
One of the slickest ideas I saw on a forge was an "air-curtain". This was on a blown forge and excess air was piped to a narrow nozzle (vacuum cleaner nozzle) in front of the door. The air curtain prevented the dragon's breath from coming straight out of the forge so you could work near the forge and even put your face close to the opening. . .
If you don't have a paint bucket a paint store will have them FULL and empty. If you don't want to but one (they ARE very thin) you could measure one on the shelf. . .
|
|
- guru
- Friday, 03/09/07 16:46:40 EST
|
Yes, aluminium can be forged. To be springy enough to flex that much and spring back (you didn't say) they would have to be made of of a hard grade of "aircraft aluminium" and fairly thin.
Forge most non-ferrous metals is tricky as they melt before glowing red. Hot forgable Al is indistinguishable from cold. You also absolutely MUST use tongs. Al conducts heat as well as electricity. When one end is hot, the other end is almost as hot. Same applies to copper and brass.
|
|
- guru
- Friday, 03/09/07 16:51:56 EST
|
oddly, i'm having the same problem finding one hallon.
it's fairly simple math to find out how big your gonna be. 5 gallon bucket is roughly 11 inches across, Circumfrence is diamter x pi so roughly 36 inches. Depth is roughly 14 inches, so with 2 inches of durablanket in the back you've got 12 inches deep. so you need one bit that is 12x36 (aprox) the second bit will be smaller. roughly 27-ish inches long and still 12 inches wide. It's important to remember that the bigger it is the more heat you need to get stuff hot. Larry lists on his site that 350 cubic inches or so per burner for (i think) welding heat. with something the size of a bucket your looking at 460-ish cubic inches. I wouldn't go any bigger then that for a first forge, or with only a single burner. Getting to welding heat would be (as larry says) iffy.
I'm planning on building a version of this forge myself, I'll prolly wire it for 2 burners.
if your gonna fab the shell, you might thing about adding a door to the back side of it as a pass though, so you can heat the middle of longer stock.
I'm hoping this is good info, Its compleatly "book learnin" not functional experiance. I'm a noob at this but have been reading a lot. I'm sure someone can come along and correct any mistakes I've made. Good luck!
|
|
Frostfly
- Friday, 03/09/07 16:52:27 EST
|
I'm guessing I typed to slow as guru beat me to everything but the bucket dimetions, Looks like I got most of it right though
|
|
Frostfly
- Friday, 03/09/07 16:55:23 EST
|
Unless the law has changed, there is nothing in it that I saw re: collectors and dealers. There are exceptions, yes-- for cops, and for one-armed service personnel, as I recall. Period. They are a federal law violation, to make, sell, own. Don't like the law? Tough. Run for Congress and make that your mission, changing the law. Whether tbat law gets enforced is another story. However, what's the point? if you think an adversary is going to faint dead away when your shiv goes click, think again. It'll probably be so full of pocket lint that it will jam. You want protection, get a .44 spl. You want a knife for protection, get one designed to do the job-- a Benchmade Emerson SPEC. WAR MODEL CQC7 is a good one, or one of Bob Terzuola's tactical folders, or a Jay "Stick it in a rock and stand on it tough" Fisher. Be prepared to wait and when it's ready you should have perhaps $400 or $500 ready to pay for it. Switchblades by their very nature are weak, good mainly for stabbing people in the back, because they have to be loose in the joint to open. A one-handed folder or an assisted opening folder will open just as fast and is less likely to get a misdemeanor assault charge boosted up to a felony. If you want a REAL knife go on Ebay and get a Cattaraugus WW II USMC combat knife. Indestructible.
|
|
Miles Undercut
- Friday, 03/09/07 19:09:58 EST
|
Is 600 SS hardenable? I just made some damascus out of some 600 SS roller chain.
Thanks
|
|
- TMurch
- Friday, 03/09/07 19:10:49 EST
|
Cameron: I have not heard of Standard Metal Company and it is not listed in Anvils in America. Thus, you may have rediscovered an anvil brand. Sure would like to get photographs to send to Richard Postman.
I did a Google search on Standard Metal Company and turned up one which was at least at one time in Detroit, MI. However it is listed as a furniture manufacturer. Probably not the anvil manufacturer.
-------------------
By the way, last note I had from Mr. Postman said he is working on More on Anvils as he has time, but don't expect publication in the near future.
|
|
Ken Scharabok (Poor Boy)
- Friday, 03/09/07 19:14:28 EST
|
ok, I didn't know the thing about the burners. It is a 3/4" side arm burner. I knew the circumference formula, but what I meant was that I couldn't really figure out if I need to buy more, so I could put two circles of it in the back of the forge. Forge what? I said general blacksmithing, I guess I mean nothing rather heavy (kind of general but, you get the idea). I have the refractory brick, ITC-100, and more brick to seal (semi) the outside of the forge. As for the paint buckets (and I didn't specify this) I was meaning a 5 gallon one, I even went to a sherwin williams store and couldn't find one.
Also, thanks Frostyfly for the dimensions, and as for the door on the back, you could use just one hinge and some sort of latch mechanism right?
|
|
- Hollon
- Friday, 03/09/07 19:41:23 EST
|
600 Stainless: All I could find was in reference to chains and trolleys.
• carbon steel chain for temperatures up to 250°C
• Type 600 stainless-steel (for temperatures up to 400 degrees Celsius);
• Type 304 stainless-steel (for temperatures between 400 degrees Celsius and 600 degrees Celsius); and
• Type 316 stainless-steel (for temperatures above 600 degrees Celsius).
AISI Type 651 is equivalent to 19-9 stainless.
AISI Type 660 is equivalent to 25-15 stainless.
AISI Type 661 is equivalent to 20-20 stainless.
These are high strength high temperature SS alloys but none are hardenable. I suspect what you have is not either.
|
|
- guru
- Friday, 03/09/07 19:44:47 EST
|
"General blacksmithing" in a small shop means anything from nails to small anvils, horseshoes to long railings all from the same shop. All can be done in a "standard" sized coal forge (one with as large a bellows or blower as one man can operate conveniently).
Gas forges are limited by their enclosed volume, shape and openings. Their efficiency is strictly based on using the smallest for a given job. To replace a common coal forge in size capacity and fuel efficiency requires three or four forges of various sizes and shapes. So you have to be much more specific about what you expect to do.
It is common to start a piece in a gas forge and not be able to take another heat due to the forged or bent shape. It is also common to heat short heavy billets in a small forge and upset or draw them out on a power hammer to a size that will no longer fit in the same forge. In both cases you must either finish the pieces in one heat, OR use a torch or second forge. Most shops go to a rose bud torch for that late heat for bending or adjusting. But in large shops if there is a steady flow of work then there may be second larger forge.
A bladesmith that does nothing larger than big pig-sticker Bowies can get away with a fairly small (breadloaf) size forge for all his work. A bladesmith that makes laminated steel to make his knives from may need a large forge.
A decorative ironworker that sticks to small items can get away with that same breadloaf size forge but as soon as they start to make railings they may need much more.
|
|
- guru
- Friday, 03/09/07 20:10:35 EST
|
General smithing: at the week long event I took my forge to I was set up across from another smith. We both did general smithing but except for tentstakes---someone *always* forgets theirs. I don't think we made any of the same stuff. he was doing ornamental and I was forge welding trivits and making cooking tools---including a bit of patternwelding for one...
What is common to one smith may be a once in a bluemoon job to another.
Thomas
|
|
Thomas P
- Friday, 03/09/07 20:21:45 EST
|
Thanks. After etching it, it's apparent that not all of it is the same material, which is good. Perhaps the other steel in it is hardenable. I'll make something with it anyways.
|
|
- TMurch
- Friday, 03/09/07 20:47:22 EST
|
Just for kicks and giggles....
http://s83.photobucket.com/albums/j291/T-Murch/?action=view¤t=tt001-19.jpg
This is it. On the top is the chain with one welding pass, on the bottom is a finished piece forged out.
|
|
- TMurch
- Friday, 03/09/07 20:50:29 EST
|
sorry, the anvil is
standard iron company, marked
BB15
then 75 lbs
|
|
Cameron
- Friday, 03/09/07 21:11:11 EST
|
Ries:
I'm sure you know that I agree with everything you said, I might be even more extreme. Many people want to get the job before they buy the machine. Trouble is, without the experience in using the machine it's hard to know how how much time it's going to save you. Then too, if you bid a job based on getting the machine, you gotta get the machine, install it and learn how to use it. Me? I like to get a machine and then find work for it. Pencil pushers HATE that approach. I see guys buy $40K pickups and then can't seem to make the purchase of an ironworker "pencil out". It's all just a matter of deciding.
Friend of mine could'nt quite make the purchase of a CNC plasma cutter "pencil out" but he bought it anyway. Well, now he can't get along with out it. He had added up all the cutting he had been getting done on the outside. That did'nt cover it. What he wasn't allowing for was the cutting he wasn't getting done cause he couldn't wait 4-5 days and things that he used to saw now make sense plasma cutting. If he needs simple things like square base plates with 4 holes he just does them on the plasma. And now he can R&D stuff he never would have done before. "when you got a CNC plasma, every job looks like burn-out"!
|
|
- grant
- Friday, 03/09/07 23:05:20 EST
|
yes the sword spring back,
they are the aluminum weapons on http://varmouries.com/vweapons.html
there is a picture of the flex,
they always return true, as i have shown that test about 300 times to friends and random people that ask about it,
how must aluminum be welded?
|
|
Cameron
- Friday, 03/09/07 23:41:52 EST
|
I am constructing a Don Fogg style forge with a forced air burner. I was thinking it would be really slick if I could just flip one switch and it would light with a piezo spark or something. I allready have 120v gas sloinoid so incase it gets unpluged or something it will shut off the gas, but not if the flame just goes out. Has anyone tried this? Can I find or rig up a controller like this for under $20-$30? Or is the heat just too much for the cheap non IR thermocouples. Thanks.
|
|
- Leaf
- Friday, 03/09/07 23:46:41 EST
|
Forge Housing: There is a group here in Pa. that is making a batch of forges from condemed propane cilinders, they are 12" dia.
|
|
Dave Boyer
- Friday, 03/09/07 23:59:59 EST
|
Leaf: the flame sensor in an oil burner gun is an "electric eye" They are common where I live, YMMV.
|
|
Dave Boyer
- Saturday, 03/10/07 00:02:53 EST
|
i have been playing in my yard for a week or 2.i have an anvil (not quite the right size). for the moment i have only afew questions. a. how would i go about making a fuller? b.what is the best kind of iron and steel(high carbon, ect.)? c. how would i be able to tell what the metal is?
|
|
- jonathan
- Saturday, 03/10/07 00:10:08 EST
|
Cameron: The highest strength aluminum alloys 2xxx and 7xxx are the least weldable. 6061-T6 is strong and pretty tough and welds easily, but the heat affected zone of the weld is often only 1/2 as strong as the base metal unless re-heat treated after welding. TIG and MIG welding are the most common methods, there are stick welding rods for DC only, they are trickey as hell to use, but do work, I don't recommend them. The low temp torch brazing aloys might work for You depending on how much abuse You put the thing through. They work with a good propane torch on thinner stock, and with MAPP on a bit thicker stock.
|
|
Dave Boyer
- Saturday, 03/10/07 00:10:37 EST
|
DIY Forges:
I've made several o them,all would weld. Usually,I use either the large or the smal freon cylinder, available free from your local HVAC man. The small can gets one 3/4" sidearm burner, the large can gets two burners. The burners MUST be tuned perfectly to reach weldingheat.
I always use kiln shelf for the bottom of the forge, s it resists flux. I also always coat the Kaowool with ITC-100. Periodically, I recoat the inside with the ITC-100 to maintain eficiency. Also,I always use TWO layers of 1" Kaowool
For my largest forge, I used a 100# propane cylinder cut to 24" long. It is 14" diameter. That forge uses four burners, but any number canbe run selectively, and I reduce the volume with scrap fiebrick or Kaowool.
Thereis one key point on forge design that almost everyone misses. The steel is heated by the radiantheat from the forge, and NOT from the direct flame. Want more heat? SImply increase the radiant surface area. Smooth walls have less radiant area than rough walls. A forge filled with soft firebrick rubble has a tremendous amunt of radiant area, so line the walls and corners with rubble. You can glue it in place with ITC-100 if it makes you feel more confident. Using the rubble cuts reheat time by 30-50% over a bare forge.
y general purpose forge is a large freon can with two burners. I have done a complete bench from 1-1/2" square stock in it,with a bit of care and cunning. The back door is a must for this. Most of the time, it is closed with a scrap of Kaowool, but when it is needed, I just shove the work through, pushing the Kaowool out onto the floor. I make them so the whole front opens, with a 2-1/2" by 4" port in the door.
|
|
vicopper
- Saturday, 03/10/07 00:56:25 EST
|
3 leg anvil stands? I am making a steel anvil stand & like the three leg design. Using a 22.5 angle, with the back legs rotated at 45 to the centre line of the anvil seems to be a stable design.
Is the three legged design actually stable? For example, could my kids climb on it? Does anybody have one of these?
|
|
- andrew
- Saturday, 03/10/07 04:35:54 EST
|
Cameron: Standard Iron Company shows more promise. Google turned up a couple of hits. One was for a company founded in the very early 1900s to try to mine metals from a meteorite crater. Apparently unsuccessful. Another was for a site in WV which seemed to be associated with metal smelting. Doubt it though as it was in the mid-1800s so may have been wrought iron production. Most promising one was a listing in the PN Iron Furnace Sourcebook for a Standand Iron Company Works in Montgomery County. Apparently it was once a very active site for foundries and furnaces.
From discussions with Mr. Postman apparently it was not unusual for a foundry to made an attempt at casting anvils. Most were no namers of either cast iron (perhaps chilled) or semi-steel. Speculation is a lot of these ended up in scrap metal drives for WW-I or WW-II.
I believe there is a mention in Anvils in America at one time there were over 6,000 foundries in the U.S.
Would love to receive photographs. If possible send as an attachment to an e-mail.
|
|
Ken Scharabok (Poor Boy)
- Saturday, 03/10/07 07:05:47 EST
|
Andrew,
I have made a couple of the three leg anvil stands. Mine are very stable . On one I have a 289 lb Peter Wright and I have never had a problem with it. The other is the one I take with me when I do demos.....I from time to time use it to climb on as I set up and tear down for the weekend event. I tried to click on your name to send a pic but got nothing. If you want a pic send your e-mail addy to me by clicking on my screen name and I will foward a photo to you.
|
|
Harley
- Saturday, 03/10/07 08:24:46 EST
|
Aluminum Swords such as the ones made by Valentine Armoury are made exactly like my description in our Sword Making Article with the exception that they are using 3/16" aluminum because the thicker material that I suggested is not springy enough.
The important thing about these grades of aluminium if you want them to be springy is that they are made of factory bar or plate stock that is still in the factory temper condition. They are not forged or welded except out of the blade area. If they are welded it is done with TIG and matching filler. They are shaped by a minor amount of stock removal.
90° Bends: The ABA makes a great deal about the 90° bend and spring back test but there is no thickness to bend radius specification or ratio. Plate glass will bend 90° given a long enough piece. Railroad rail makes 90° bends on a regular basis. The proportionately thinner the piece is in the flex direction the farther it will go without taking a permanent bend.
If you take a short piece of that aluminum and try to bend it at a right angle it will break. In fact the harder aluminum in 3/16" will break at a 3/4" radius. It is as hard and much more brittle than mild steel thus makes a good spring. But it IS relatively brittle.
|
|
- guru
- Saturday, 03/10/07 09:00:47 EST
|
Anvil Stands: We have almost every conceivable type in our iForge article on anvil stands including some three legged stands.
When making ANYTHING 3 legged remember that the most stable is with the 3 points equally spaced (120°). Also note that to be as stable as a four cornered (or even a round) support a triangle drawn from each corner must enclose all the area of the comparison shape. It is easy to make a three cornered stand that is less stable than a similar square stand. The larger required triangle needed relative to square also results in more extended trip points at the corners.
The only advantage to three points is that it will set flat on an irregular surface. However, I've never had any trouble with my hollow square wooden stands on most floors and earthen surfaces.
|
|
- guru
- Saturday, 03/10/07 09:14:50 EST
|
Cast anvils, Steel faces: For over a century odd foundries have made cast iron anvils with a ledge sticking out around the top to make them LOOK like there is a separate steel plate. These were often machined or dressed to increase the effect. However, these are ALL cheap cast iron anvils.
These Chinese ASO's are a typical example:
 The anvils above were found in a popular farm supply store. The concrete floor they were sitting on had more rebound (was harder) than these anvils. The anvils above were found in a popular farm supply store. The concrete floor they were sitting on had more rebound (was harder) than these anvils.
|
|
- guru
- Saturday, 03/10/07 09:36:27 EST
|
Cameron,
I agree with the Guru that, if you want to be sure of getting a springy sword, stock removal's the way to go. If it were me, though, I'd try forging one.
Hot forging aluminum is fun. Judging the temperature is tricky, but the classic method is to use a pine splinter. Keep taking the piece out of the forge and rubbing the tip of the splinter against it. When the splinter leaves a line of black carbon on the piece, it's hot enough. Don't get it any hotter.
In thin sections like a sword, it probably makes more sense to cold forge aluminum. Start by heating to forging temperature and quenching to anneal. When the material starts to work harden, anneal again.
Alloys like 6061 aren't *that* hard to heat treat. You heat to a specified temperature (near melting) and quench in water. You then heat to a second temperature (around the 300 to 400 degree range) for a few hours.
I've heat treated 6061 by heating to forging heat (using the splinter trick) and quenching, then baking in the kitchen oven. It worked in the sense that the piece got quite noticably harder, though I don't know how close I got to the theoritical maximum strength.
A piece as long as a sword might be tricky to quench, but it could be done. The good part is that the piece leaves the quench dead soft, so it's easy to cold straighten before putting it in the oven.
You could also cold forge, at least as the last step, and use the piece in the work-hardened condition.
There's no guarantee you'd end up with a sword you were happy with, and you might end with one that would fail be breaking. So be careful. But it could be a fun and educational project, if you like doing that kind of thing.
|
|
Mike BR
- Saturday, 03/10/07 09:56:19 EST
|
Twisted Bars . com : We have a new sponsor. These folks make twisted bar, embossed bar and textured bar for use in decorative iron work. You can save yourself a lot of effort and a lot of wear and tear on you and your equipment by starting here. Small shops without power equipment can produce "forged all over" look work competitively. Great for small projects too!
|
|
- guru
- Saturday, 03/10/07 11:36:45 EST
|
Well, its no surprise to me that Grant is also of the "buy the tool first, and the jobs will come" philosophy, as he is probably the only person I know who is worse than me in his collection of enormous special purpose tools.
There is our mutual friend George, but he really doesnt count because even though he has a 10,000 sq foot building full of tools, including 5 power hammers and 3 forklifts, none of his stuff is hooked up, or is likely to be in our lifetime.
But Grant and I have in common the desire to get our hands on industrial equipment, knowing that with a little familiarity, we can make it do things the manufacturer never dreamed of. He has beaten me to the CNC mill, but I am scheming and dreaming, and making SWMBO get those high paying jobs to pay for one- and I will be using it to make pieces that will be forged.
Both Grant and I have done plenty of production runs of parts by hand, or with simple jigs- but there is always that Gee-Whizz factor when you get a big machine to do it for you.
Life is short, you gotta find your thrills where you can.
|
|
- Ries
- Saturday, 03/10/07 11:40:43 EST
|
The Twisted Bar company kind of underlines my approach.
You see, I am an old Marxist- at least, I believe one of his statements-
"The workers must control the means of production".
To me, that means you gotta own a tool to know what it can do.
I am sure the Twisted Bar company are great guys, and I wish them success- but I plunked down the price of new Toyota for the same machine they use, so I can do wacky stuff with it that nobody else has ever tried. And so far, I have been succeeding. Cant post pics here, but I have been doing some mindboggling twists lately on it. The germans who designed this equipment are pretty conservative, and what they envisioned is mass production- but it has amazing possibilities, and you wont see it until some wacky experimenter type like me or Grant gets our hands on the machines.
And one of these days, I will plunk down the money I should be spending on my kids college fund, and get one of those embossing heads for my hebo, and Grant has a 4th axis rotary table on his Haas CNC mill, so we can make custom patterns, and then, watch out. Anybody need 1000 feet of Smiley Face steel bar?
|
|
- Ries
- Saturday, 03/10/07 11:47:38 EST
|
I guessing vicopper meant by tuning getting the fuel/air ratio, right? This may seem an obvious question to some, but how do you do this?
Also, how long do most people make a fire poker, I know there are diferent lengths of them, lets just say what would the length of an average poker be?
|
|
- Hollon
- Saturday, 03/10/07 11:49:21 EST
|
Ries, sounds perfect for jail bars!
Thomas off to visit the kinfolk, back Monday evening.
|
|
Thomas P
- Saturday, 03/10/07 12:07:50 EST
|
Hollon, to adjust the fuel air mixture either takes adjustments built into the burner or adjustments ADDED to the burner. This is one reason I do not like atmospheric (venturi) burners. Although I have built many that worked the easy one to build have no adjustment. Blower type burners only require adjusting the fuel at the valve. It helps to have an air control to match the burner to the forge but to go from rich to lean only requires turning one valve.
On atmospheric burners you can put a choke in front of the intake but this only makes very subtle changes. If the burner is far out of wack the choke will completely choke the burner before making any difference. So you still need a properly built and matched to the forge burner. You can also move the nozzel in and out byt that too only makes subtle changes.
I have modified the design of the burner I show on our FAQs, Gas Forge article to use an all-thread tube for the center tube. This allows adding a disk choke and moving the injection tip in and out of the burner. Between the two adjustments you can change the burner somewhat.
Even changing the orifice size in an atmospheric burner does not make as big a change as you would think. Pushing more gas through sucks more air. Less gas means less air. Changing the velocity of the gas makes a bigger difference. In this case you need a smaller orifice and more pressure OR larger orifice and less pressure. The small high velocity jet will suck in more air per unit of gas and the low velocity jet will suck in less air.
You can spend a LOT of time fooling with atmospheric burners trying to figure them out when a simple fan and a valve will do.
|
|
- guru
- Saturday, 03/10/07 12:25:21 EST
|
Poker Lengths: Hollon, This is like the general blacksmithing question. . . Fire Pokers are generally the size of the height of the fireplace opening OR the width of a free standing fireplace. I have made them from 3/8" stock and 28" long to 1/2" stock and four feet long. I have seen larger and I THINK I made one 60" long for someone once. . .
Anyway, for your purposes it depends on the local market and what is a common fireplace. In cities they tend to be small but in country resort areas they are often HUGE. Those at places like Cracker Barrel Resturants are four feet long.
|
|
- guru
- Saturday, 03/10/07 12:33:08 EST
|
I have contacted phoenix hammers twice now using their contact form that is linked to the advertisers page. Never had a response. Have checked spam folders as well. They must pick and choose customers.
|
|
- Barney
- Saturday, 03/10/07 15:09:01 EST
|
Barney: I have the same problem with Centaur Forge.
|
|
Ken Scharabok (Poor Boy)
- Saturday, 03/10/07 16:27:25 EST
|
Barney, You never know. I get mail all the time that I set aside to respond to and never get to it. . I am always finding half finished unsent letters in my out box. I tested their form and it is working.
Note that they are no longer making the small hammers, just the large 150A. I think the price is about $12,000. Probably should be more.
|
|
- guru
- Saturday, 03/10/07 16:31:41 EST
|
No mail response. . . I also get at LEAST one mail a day from people that typo their e-mail address and it bounces. I got two today from a Donald Sturman in Oakland, CA. I made up a nice researched reply and it bounced as user not known. . .
I know many other folks that get contact form responses with bad e-mail addresses. Another dumb move is folks that want a hard copy catalog and do not provide a mailing address. . . Or want shipping costs and do the same. . . Where to? The US, Canada, England, New Zealand, South America, Togo?
|
|
- guru
- Saturday, 03/10/07 17:10:45 EST
|
On pokers, I sell them on eBay. Size of stock and length, as noted above, is very dependent on intended use. I wouldn't go with less than 3/8", nor larger than 1/2", unless for a very special purpose. 3/8", 7/16" and 1/2" round and square seem to work the best. Sizes can range from that needed for a wood burning kitchen stove, to an indoor wood burning stove, to an outdoor, wood-burning furnace or to one designed for a campfire or fire ring.
If square stock, a twist in the middle enhances the appearance. Then you have essentially a somewhat limited range of options for a point and hook and options for the other end only limited by your imagination and capabilities.
I don't recommend this for anyone without high-speed downloading, since it is a VERY large file, but there is an article on ole' Poor Boy here (click on the March 07 issue): http://www.ourcoop.com/cooperator/default.asp. One of the pictures is of a ram's head fireplace poker of my design.
(Only real beef I have with fireplace sets is they tend to make the shovel the same length as the poker. To me it needs to be short enough to be easily managed - same thing for a coal forge. Still trying to decide the length and type of shovel needed for a propane forge.)
------------
Off topic, but... As the result of the article cited above I received a call from one of the organizers of Mule Days in Columbia, TN on April 12-15, 2007. Doesn't sound like a big thing, but it is one of the largest events of its kind in the U.S. and attendance is usually over 250,000 for the long weekend. They are looking for blacksmiths to demonstrate and/or sell in their primitive crafts area. For this area (versus the arts & crafts or flea market ones) items should be essentially produced from scratch. If someone were to try to both demonstate and sell I wouldn't recommend it unless a dedicated person was available to handle the sales table. Taking order for subsequent delivery is fine with them. Vendor camping available on site but have no idea on security for anything not secured by lock and stout container. If interested just do a Google search on Mule Days, Columbia, TN.
----------------
Going back to the topic of bandsaws, I may end up keeping the one I have now to use as an upright bandsaw. It has served well to cut off the excess end of a hammer handle and put in the wedge slot, and I have used it a fair bit to cut standard lumber. I have a radial arm saw but received word, yet again, of a friend having to have a hand reattached from one. As I have noted in the past, I consider the radial arm saw the most dangerous piece of equipment in the shop. Other saws can take out a nick or gouge. It likes BIG chunks.
|
|
Ken Scharabok (Poor Boy)
- Saturday, 03/10/07 18:15:06 EST
|
anyone know of any good resorces for making a blown propane forge online?
|
|
Frostfly
- Saturday, 03/10/07 19:21:39 EST
|
Frosty, Goto FAQs, G, Gas Forges, bottom - Stupid Gas Burner. This burner will fit forges from breadbox size to about 4 cubic feet (IF you have a bulk gas tank). With a bigger blower than shown it will fire a 20 cubic foot forge.
Knife makers put similar versions on little vertical freon bottle forges.
Now, If you want to get fancy you can put an electric solenoid valve on this unit that is NC (Normally Closed). This will shut off the gas if there is a loss of power to the fan. I have used the same burner with auto ignition, start up timers and a solenoid valve to make a temperature controlled forge. This gets a tad expensive.
|
|
- guru
- Saturday, 03/10/07 20:11:24 EST
|
Ah! not sure why i didn't look there first. Is there much diffrence in the construction of a forge for a blown burner vs an atmospheric burner?
|
|
Frostfly
- Saturday, 03/10/07 20:41:26 EST
|
Hey,
does anyone know how to quench and temper sucker rod? from oil pumps
theyre circular, but have a squared off portion that is exactly 1 inch, and i made a hardy cutoff from it, and was just wondering, should i heat to non magnetic, quench the frist 1 inch or so in water, then grind it quick, and watch the colours run? what colur should it be at when i full quench?
cam
|
|
Cameron
- Saturday, 03/10/07 21:56:57 EST
|
One more question on the forge. Someone suggested that I make the back part of the forge hinge since I was going to fab it, so to get the kaowool to stick to the door, could you just "glue" it on there with ITC-100?
|
|
- Hollon
- Saturday, 03/10/07 23:10:01 EST
|
Cammeron, Sucker rod varies from wrought iron (a very long time ago) to a medium carbon alloy steel. Junkyard steel rules apply (anvilfire FAQs).
|
|
- guru
- Sunday, 03/11/07 00:01:58 EST
|
Forge Construction: To use ITC-100 for glue to metal the metal needs to be primed with ITC-213. The Kaowool used on the doors of NC-Tool Forges is held on with sheet metal screws from the sides. These simply act a pins or fingers sticking into the ceramic blanket. A ledge can also held do the same. Half thick or insulating bricks make good forge doors.
The half thick bricks can slide in an angle iron track. Regular bricks or insulating bricks stacked in front of the rear door can be used to create different opening shapes.
I prefer hard refractory bricks for the floor of my forges as they hold up better than anything and being a standard size are economical to replace. I support them with bar grating to allow heat and steam to escape.
My big forge is currently a stacked brick forge but it is inconvenient when expansion and contraction, or use move the bricks and create leaks. My future "big forge" will be a light weight arched Kaowool roof that can be easily lifted off the work or set on brick risers to adjust its height.
If you need to wire Kaowool to a forge roof use inconel wire. If you bury it in the kaowool and then coat with ITC-100 it will hold up fairly well.
|
|
- guru
- Sunday, 03/11/07 00:20:23 EST
|
Venturi VS Forced Air
I have heard many times that venturi burners use less gas and are cheaper to run than forced air, and my personal experiance seems to even bear that out. My question is why is that? Seems like the same air gas ratio mixed properly should produce the same amount of BTUs no matter how it is produced. Is it just that people spend more time tuning the venturi so it will actualy run and the blower ones will work no matter how badly tuned they are? What is the deal?
DOORS, I just started facing my makeshift hard fire brick forge doors on the hot side with the kaowool board, seems to make it run a bit hotter. I don't know if it is inconel, but the elements out of an old space heater will work for holding up sagging kaowool. in a forge it would probably degrade if it wasn't coated I supose, but so does the kaowool
|
|
- Leaf
- Sunday, 03/11/07 00:53:16 EST
|
Heater Elements and Blower burners:
Heater Elements are made of "nichrome" wire. This is an alloy of nickle and chrome (80/20) melting point 2550°F. There is also a grade C with 15% iron. Nichrome A holds up pretty well but it DOES oxidize and degrade. You can coat it with ITC-213 and reduce the oxidation but the melting point is the melting point.
The only reason atmospheric burners SEEM more efficient is that they do not create as much heat as blower burners. A single small blower burner will create as much heat as a whole bank of atmospheric burners. The trick is that if you want to :tune" one down a lot the blower pipe must be smaller so that the fuel/air mixture is faster than the flame front velocity. If you have a big pipe coming off the blower you have to run it hard enough to prevent flash back.
The blower burner has a MUCH greater range of operation and adjustability but you cannot adjust the gross capacity below a certain point. But it would be the same if you built an atmospheric burner with a 2" mixing tube and 3" intake. . . . Many bladesmiths build blower burners using the smallest blowers they can find and 1" pipe for what would normally be a 2 burner atmospheric forge.
Atmospheric burners also are very expensive compared to blower burners, especially on large forges. All those plumbing fittings, valves and mig tips are not free and then you start running copper tubing to each one. I have built at least a dozen two burner setups using all new hardware and the costs are significant. It is also difficult to find all the parts and pieces in ONE place. Add half a tank of gasoline for the shopping trip. This is not even counting the labor modifying parts, making parts, machining parts.
Most folks will say that the $100 each T-rex burners are a fair price to pay. But what if you are building a forge that need 4 or 6 of the little 1" or 3/4" burners? A forge that size will run nicely on a single blower burner.
I've built both and will continue to build both. But I build atmospheric burners mostly because I am constantly looking for better ways to make them.
One thing I have found building the "classic" cheap gas tube or tank forges is that they have significant usability issues. A good gas forge needs a front and back hearth for supporting and parking work, and doors that stay where you put them. Doors need to slide and be counterbalanced to stay put. The use of an air curtain in front of the door to divert dragon's breath is one of the best ideas I have seen in a long time. Commercial forges do not include these features because they add size and cost. If you are going to build a forge for your own shop it should not be a miserable less convenient forge but should have all the bells and whistles.
|
|
- guru
- Sunday, 03/11/07 09:54:45 EST
|
Cutting stock/steel:
Hi All,
I am looking for a way to cut steel without a shower of sparks and heating the 'ell out of the piece that was just cut.
I currently use a compound mitre (woodworking type with 10" cutoff wheel) saw. I know this is abuse of the tool, but I never used it for woodworking anyway so at least I am getting some use out of the tool.
So, the functionality of a compound mitre saw without the fireworks, that is what I am looking for. Do I have to spend $1500 on a good horizontal bandsaw? It does not look like these do compound mitre though...
What do you guys use?
Mike
|
|
Mike Berube
- Sunday, 03/11/07 12:00:29 EST
|
Mike, I have seen good band saws that the cutting system rotated (single mitre) but not both. The primary reason is that steel is heavy long stock and is usually on a rack or conveyor system leading into the saw.
They DO make cold cut saws that the head rotates and you can add a angle vise to get compound angle cutting. But the angles greatly reduce the capacity of the saw.
Plasma cutting and laser cutting heat the work less than abrasive cutoff saws. Then there is water-jet but these have a problem with impingment on angular surfaces.
I suspect that what you need is to cut the same compound angle repeatedly. I would rig up a special fixture to hold work at the proper angle in whatever saw I was going to use. Of course you probably need two to make a matching corner.
|
|
- guru
- Sunday, 03/11/07 12:48:48 EST
|
Old school, get a nice work out, use a hacksaw.
|
|
- Nippulini
- Sunday, 03/11/07 13:09:33 EST
|
Thanks guru that makes sense. I remember now being able to dial my 1" atmospheric way down before I replaced the orifice with a smaller one, seems to get hotter with the smaller orifice than with one closer to michel portier's specs, but I am not really following his plans ether. Yes, buying one would probably be cost effective if I counted my time fiddling around, but then if I wanted to be cost efective, I would buy components and weld them together instead of forging anything.
Have you played around with the burner nozzels? At the pottery supply I was looking at there nozzels and some of them have a large hole in the center and smaller holes around the outside. They had a cast iron one that threaded onto 1" pipe that I allmost bought, but it was $50. So I am experimenting with making mine out of ceramic.
Nichrome I belive actualy lasts much longer in an oxidising environment and breaks down rapidly in a reduction atmosphere, or at least needs to be oxidised now and then to keep some sort of protective oxide coating. Also a very common pottery supply item.
|
|
- Leaf
- Sunday, 03/11/07 13:49:41 EST
|
Metal cutting
If you want a chop saw that cuts soft metal without the sparks use a carbide blade made for metal, and switch back to the abrasive if your not sure about the hardness of the metal (cutting rebar or leafsprings for example). They make them for skil saws too, a welder I know said they cut heavy plate like it was plywood.
|
|
- Leaf
- Sunday, 03/11/07 13:57:31 EST
|
Hacksaw... :-) I am neither accurate nor can I make repeatable cuts with a hacksaw. It is cheap though...
I guess I could live without compound mitre capability. Generally I am just doing 90degree cutoff, with occasional mitre and VERY occasional compound.
Guru, I've read all you have said recently about cheap horizontal bandsaws and I agree with about cheap tools. They are not worth the money (witness I just sprung for a Nimba anvil for my first anvil, which I LOVE by the way). However the machines that look like they are built to take it, are more machine than I have room for or care to deal with (I am not interested in dealing with cutting oil pumps, nor the maintenance of a hydraulic pull down system for the saw). Given that I only do metal working as a hobby (3 dozen cuts would be a lot in a weekend for me), maybe a simple (these days means cheap) tool would work for me.
Could you please have a look at this saw at the Grizzly site? It has a cast table, ball bearing guides, cast iron guide brackets and one of the 2 side bearings is on an eccentric shaft for adjustability. Also it mitres to 60 degrees! Check out pages 32,33 for pictures of the guides.
http://images.grizzly.com/grizzlycom/manuals/g0622_m.pdf
Let me know what deficiencies you see please. I've never used one before (well once when I was a kid in a machine shop) so I don't necessarily know what I am looking for. I own one of their woodworking bandsaws and it is pretty decent (though that was a $700 17" saw, a higher end model than what I am looking at for the metal saw).
If this saw were to be servicable (as in not breaking a blade once/day and making straight cuts), I might buy one. What I don't want to do is spend $300 (with shipping) on something that I want to just throw away.
Thanks,
Mike
|
|
Mike Berube
- Sunday, 03/11/07 14:06:17 EST
|
Leaf,
Yeah, I've just started seeing those. I haven't seen a 10" one yet. If I could find a 10" blade that just might be my answer. Have you seen a 10" blade? Or do you know of places that I could look? I have not seen many places that carry these.
Mike
|
|
Mike Berube
- Sunday, 03/11/07 14:09:55 EST
|
Metal cutting
I have a cheap POS harbor frieght 4x6, it works but I will never be able to get square cuts, then again it was $140 and I wouldn't be too worried taking it out in the field ether (and maybe leaving it there to rust). I have heard the grizzly specificaly recomended by reputable blacksmiths, maybe they are a good deal for the money. Probably just depends on how square you want your cuts.
They make 10" carbide blades, I have been thinking of getting one for my old cast iron makita since it isn't so great for much else. Any welding supply should be able to hook you up.
Found this too: http://www.cnczone.com/forums/archive/index.php/t-27345.html
|
|
- Leaf
- Sunday, 03/11/07 14:54:57 EST
|
Grizzly Saw: As I go through the manual it LOOKS exactly like my old Ridgid.
Then they show the cheap plastic wheels. These look like throw aways from a child's toy. The leg sheet metal is MUCH lighter as evidences by the embossing that was necessary for stiffness. . .
What are those crummy plastic blade guide covers about?
The blade guide wheels LOOK OK. They are not as large as my old saw but those particular (the old bearings) are getting hard to get. Manufacturers use what they can get.
The vise parts are heavier than my Ridgid. A surprise.
The sheet metal table for vertical use looks pretty flimsy. My saw cam with a little 2" by 3" table that I replaced with a 4" by 5". The old (very used) one was cut up pretty bad around the blade slit and I just happened to have a larger piece of 1/8" plate. I made a larger wood table that attached to THAT. Used it once and never found it that useful. As a vertical saw it does not cut curves well. Nor is it supposed to.
The coarser 6-10 variable pitch blades listed IF available in HSS bi-metal are THE way to go unless you are cutting sheet metal (not recommended).
If you need the ear-muffs recommended to operate the saw then there is something VERY VERY wrong.
All in all it looks pretty good. But the devil is in the details. Are the gear box and wheel bearings of sufficient size? Is the (cheapest they could find) motor going to hold up?
|
|
- guru
- Sunday, 03/11/07 15:14:55 EST
|
Leaf,
Thanks for the link, that was very interesting. I will have to look more into the dry cut chop saws.
Thanks,
Mike
|
|
Mike Berube
- Sunday, 03/11/07 15:54:55 EST
|
Guru
Thanks for taking the time to peruse the manual. Yup the stand/legs are junk. I don't think I'd use it vertical much if at all. When I looked, all the variable pitch blades are bi-metal. The fixed pitch are HSS.
I may call them and ask them about the noise. You are right, if one needs muffs there is something wrong.
I am sure the bearings are NOT of sufficient size to stand up to long term use.
How fast do these things cut? After following the link that Leaf provided, I looked up some dry cut chop saws. Saw a video of a Milwaukee 14" dry cut (carbide blade 1500RPM) saw cut through what looked like 2x2 angle iron (3/16" ?) in about 5 seconds. Very impressive. $435 This would probably be a much better investment, as Milwaukee makes good stuff.
Mike
|
|
Mike Berube
- Sunday, 03/11/07 16:09:12 EST
|
I haven't done the math but I think most 10" chop saws are around 3000 RPMs, seems like the surface feet per minute would be close enough to a 14" at 1500RPM. Of course with the 10" you would be limited to 3" material, you should buy one and report back so I can decide if I want to buy one ;-)
For cutting bar stock the 4x6 is just fine, it is when you want to cut structurals and pipe with square cuts quickly that the chop saw (or a real band saw) is beter. I use my 4x6 verticle to cut thicker sheet metal all the time, works great for that with a finer blade. Of course as guru points out about the details my HF POS had the motor actualy catch on fire and the flimsy stand is long gone along with the verticle table... other that that it is great!
|
|
- Leaf
- Sunday, 03/11/07 18:36:46 EST
|
Leaf,
My 10" chop saw turns at 5500RPM.
Just did the math.
10" @ 5500RPM = 4582 SFPM
14" @ 1500RPM = 5497 SFPM
So you are right, a 10" in my chop saw would be at a comparable surface speed (though slower, which would mean even less sparking).
I still haven't found a 10" one yet. Found 7-1/4, 8, 14...
Mike
|
|
Mike Berube
- Sunday, 03/11/07 18:44:52 EST
|
Dry cut blades
These ones are only rated for 5200 RPMs and that speed is probably really pushing it too. My makita is 4100RPMs so I might just buy one, I think maybe it was my skil saw that was 3200RPMs, you would think they would be faster. The 14" might be able to run at higher SPM because they can cool off more or something. Probably should save your miter saw for wood and maybe buy an old used saw that is slower, they are only like $50-$80 for the non-compound miter around here.
http://www.amazon.com/MK-Morse-CSM1052TSC-Circular-10-Inch/dp/B000E8FP3K
|
|
- Leaf
- Sunday, 03/11/07 19:38:20 EST
|
MIKE: Milwaukee cold saw $400
http://www.tools-plus.com/milwaukee-6190-20.html
|
|
- Leaf
- Sunday, 03/11/07 19:55:13 EST
|
I'm doing some family history research and have discovered an ancestor in the 17th century who was described both as a smith and a hammerman. I can't find any info on what a hammerman did and how it was different from being a blacksmith (if it is). Can anyone help please?
|
|
elaine ferguson
- Sunday, 03/11/07 20:23:39 EST
|
10" chopsaw blades. Find someone with a 12" and let them know you will buy the blade from them when it is down to 10".
|
|
Ken Scharabok (Poor Boy)
- Sunday, 03/11/07 20:34:21 EST
|
would it be all right to have 2 elbows in a 6" stovepipe chimney
thanks
Jd
|
|
- johnny
- Sunday, 03/11/07 22:32:03 EST
|
Carbide blade chopsaws: There are some on the market, they turn 1200 - 1500 RPM instead of about 4000 RPM like an abrasive saw. They are a little more expensive than a 4x6 bandsaw. An 8" blade metal cutting "skillsaw" type tool turns about 3600 RPM compaired to 4500 - 5500 RPM for a woodcutting saw. A worm drive saw turns the slowest of the woodcutting saws, that makes them the best choice for a metal cutting blade, there are 7 1/4" metal cutting blades for them that work.
|
|
Dave Boyer
- Sunday, 03/11/07 22:33:05 EST
|
Mike B. I think Your sfpm is a bit off on the 10" 5500 RPM blade.
|
|
Dave Boyer
- Sunday, 03/11/07 22:47:30 EST
|
Thanks to all for the enjoyable and informative comentary on the micro forge. To the Guru. I'm sorry I over looked the article on the gas forge page. However, if I had seen it I wouldn't have gotten to read all of these replies.
I read through the complete article this time. I understand the difference between insulating bricks and fire bricks. Would a fire brick work as a substitute on the "Daniel Boone" forge or is it to brittle? I also have some ceramic plates that were used to line a pottery kiln at one point and were replaced when these were broken during cleaning. They are about .75" thick and of a similar density to fire brick though the material is not as grainy. Would these be a better bet if I cut and layer them?
|
|
Will
- Sunday, 03/11/07 23:18:47 EST
|
Fire brick for micro forge. Sure it would work great IF you could carve it out. Refractory bricks are VERY hard and very durable. It takes diamond tools to cut it. It would also heat up a lot more slowly since the dense refractory IS NOT an insulation, it conducts heat well. Insulating bricks are soft and friable and do not conduct heat well. These can literally be carved with a dull table spoon.
Yes you could build a small rectangular micro forge with kiln shelf. But the problems are the same as refractory brick.
|
|
- guru
- Sunday, 03/11/07 23:30:51 EST
|
johnny-- I have had several woodstoves working and drawing perfectly fine for the past 30-some years sending smoke at much higher temps than a coal forge will produce inside the pipe, with two bends in them. (Straight up, bend, then straight out through the wall-- my motto is never punch a hole in a roof that you don't want to leak-- and then another bend to go straight up. The main thing about stove pipes is, you want an asbestos (or whatever they are packing them with these days, old OSHA inspection forms perhaps) double-wall pipe going through any combustible wall with a spacer holding that at least two inches away from the wood. Do not think the triple-wall/air space sheet metal thimbles they sell in some hardware stores are safe for wood stoves going through wood-framed walls. They are not.
|
|
Miles Undercut
- Monday, 03/12/07 00:16:59 EST
|
Hammer man: Elain, These are usually the men that operated power trip hammers. At that time these were big slow water powered machines called "helve hammers". They were used primarily in the production of wrought iron and the forging of heavy machine parts and anvils.
A smith that worked with a crew of laborers (including hammer men) was generally in charge but also worked in the process. Much work was done partially under the trip hammer while held with large jib crane supported tongs and then taken out from under the hammer and worked by hand with sledge hammers. There were men to operate the crane, to man handle the tongs, to hold tools and to wield sledges. It was hot dangerous crowded work and the smith coordinated it all as well as swinging a hammer or sledge as needed.
This is a lot different than being a "common" blacksmith. It was the first industrial blacksmithing. This method of working went on from the 1300's to the 1800's and even later in some places. The invention of the steam trip hammer in 1839 rapidly put the old wooden helved trip hammers out of business but the methods of work stayed much the same until recent times.
|
|
- guru
- Monday, 03/12/07 00:25:54 EST
|
Stovepipe: On what? 6" is much too small for a coal forge, 8" is marginal and 10" or larger is recommended.
|
|
- guru
- Monday, 03/12/07 00:27:49 EST
|
Leaf, Dave Boyer, SFPM
Dave, you say my SFPM is a LITTLE bit off on the 10" at 5500RPM? You have a flair for understatement. :-) I somehow forgot to multiply by pi. Thanks for the catch!!
Leaf, 10" @ 5500RPM is 14,398 SFPM. Compared to 5497 for 14". Even at 4100RPM that sucker will explode. Sorry for the misinformation. Equivalent SFPM on 10" would be at 2099RPM.
Leaf, thanks for the link to the Milwaukee 14" dry cut, that is the best price I've seen.
Mike
|
|
Mike Berube
- Monday, 03/12/07 05:52:42 EST
|
Ken 10" Chopsaw blades...
If that was a joke, then I got a good chuckle out of it, thanks.:-)
If not, we were talking about carbide tipped steel cutting saw blades...not real useful once the outer 1" has worn off ;-)
Mike
|
|
Mike Berube
- Monday, 03/12/07 05:58:17 EST
|
Mike: You are correct. I was referring to the standard chop saw blade.
|
|
Ken Scharabok (Poor Boy)
- Monday, 03/12/07 08:10:45 EST
|
Metric Question: There are traditional units that I do not know the metric equivalent. Such as the FPM (Surface Feet per Minute) used for cutting tools and CFM (cubic feet per minute). Do both of these strictly use meters and cubic meters or do they use smaller units?
When and how smaller than full metric units are used is a little confusing to those that are not part of the 100% metric world. From working here and some reading I know that machinists and mechanical engineers primarily use millimeters unless things are quite large then they jump straight to meters and that in the construction trades they use centimeters for most dimensions of houses and buildings except for area.
In English we use inches in engineering until they are two cumbersome and square feet for most area (similar to mm and m3 in metric) then jump to feet for large things. But machinery is never dimensioned in feet. Feet may be used to convey overall size but not for dimensioning purpose.
So what are the normal metric units used by mechanics and engineers for FPM and CFM?
|
|
- guru
- Monday, 03/12/07 10:25:19 EST
|
METRIC QUESTION:
FOR LIQUID :CUBIC METER PER MINUT OR HOUER FOR BIG QUANTITYS
LITTER PER MINUTE OR HOURE FOR SMALL QUANTITIES
LIKE HYDROULIC FLOW
FOR SPEED OF BELTS OR CUTTING SPEED: METER PER SECOMD OR MINUTES OR HOURE DIPENDS ON THE USE
HGOFI
|
|
hofi
- Monday, 03/12/07 12:02:57 EST
|
My favorite metic unit is Kg/cm^2, which seems to be common for tire inflations. Manages not only to use Kilograms as a unit of force, but to mix them with centimeters.
|
|
Mike BR
- Monday, 03/12/07 16:45:17 EST
|
Mike, for measuring most gas pressures Pascals or Kilo Pascals (k/Pa) are used. You can often see the unit used along with PSI on pressure gauges. 1 PSI = 6.895 k/Pa or 6895 Pa.
|
|
- guru
- Monday, 03/12/07 16:57:44 EST
|
I assumed that when the man said a 6" stove pipe, that what he meant was a 6" pipe affixed to a stove.
|
|
Miles Undercut
- Monday, 03/12/07 17:16:02 EST
|
Maybe. Its hard to tell when folks don't say.
Modern gas furnaces are so efficient that the exhaust is cool water vapor and the pipes are small light weight aluminium. Condensed water is more of a problem than the CO2 being vented.
I've had trouble with wood stoves that had short stacks but most have enough heat that draft is not a problem. However, a forge is more like a free standing fireplace and either needs a huge hood and a proportionately huge stack OR a side draft "hood" and medium sized stack.
|
|
- guru
- Monday, 03/12/07 19:03:20 EST
|
I have seen Kg/cm2 on so many pressure gages on imported machines that I almost "know" what they mean. I can work with Bar, and use PSI,inchs of Hg, and Millitorr. The rest take a lot of thought.
|
|
ptree
- Monday, 03/12/07 19:58:23 EST
|
*It's been nearly 20 years since I lit my last fire at Vulcan's Forge in MA. I've started selling off my tools (kinda sad), and could use some advice as to value on a few things (ebay is not helpful) - Gage Wiley 5' slotted cone mandrel, Canedy Otto Royal H blower, 160# Peter Wright anvil, Wally Yater swage block and an old no name swage block, 14" square. All are in v. good condition.
Thank you!
Marty
|
|
Marty
- Monday, 03/12/07 21:15:06 EST
|
Marty, Sorry to hear but it better now than later.
The cone mandrel should go for $500 to $1000 (its big).
Canedy Otto about $150.
The PW if in top condition about $500.
The Wally Yater sold as a pair. One would sell for about $500. The no-name depending on features about $350-$400.
The above are top prices that will take time to get. If you are in a hurry they will go for 30% less.
|
|
- guru
- Monday, 03/12/07 21:38:12 EST
|
for a hardy cut off made of mild steel, how should i quench and temper it?
thanks
|
|
Cameron
- Monday, 03/12/07 21:39:05 EST
|
Cameron
No worries in trying to make hard. Make it sharp and cut orange metal and brighter on it and it will hot up fine with a little edge dusting here and there.
Really no way to make it harder other than using that soap quench solution. Not really worth the money. Can buy two new hardies for the the price.
|
|
- Hit & Miss
- Monday, 03/12/07 22:11:24 EST
|
it will HOLD up fine
|
|
- Hit & Miss
- Monday, 03/12/07 22:12:30 EST
|
ries -
i would really like to see some of the twisting you are doing. maybe you could send me some pics. not sure if its cool if i post my email, but its mydogely@yahoo.com. thanks for the advice on that iroqois ironworker (didn't take it,but made me think longer)
jamie
|
|
- jamie
- Monday, 03/12/07 22:23:33 EST
|
Machine Twists:

Hebo twisting a basket twist from 1/2" square bars. This is done cold automatically via programmed presets. The twist is made tight, then opened too far, then twisted closed some. All in a few seconds. Photos from MetalFAB 2006. Click for details.

Examples of many-bar basket twists made on a Hebo.

A Carell scrolling/twisting machine making easy work of 3/4" square bar.
These examples are tame as twisters go. I have seen twists in 2" square made cold in a shop built machine. The fellow was planning a 4" capacity machine. Then there are the fancy twists using four pieces of angle iron to make a cross shape then four rounds put into each angle and twisted as a bundle. This makes a gorgeous twist that looks like heavy incising of a bar which was then twisted. Mike Boone did a long railing using this technique.
Power to this cold saves a LOT on fuel and subsequent clean up of scale. So besides productivity there are other advantages to this type machinery.
|
|
- guru
- Tuesday, 03/13/07 00:19:25 EST
|
Note that the scrolling above is the second stage of two stages requiring a die change. The Carell T-20 Multi Ornamental Ironworker sells for about $14,000 US. It is not nearly as automated as the Hebo.
For simple twisting many smiths have adapted pipe threading machines. It is important to note that the bar gets shorter as it twists and the end clamp must be able to slide as the bar twists.
I have my eye on a big gear box a friend of mine has that has about a 3.5" (~89mm) output shaft. . . It should be able to twist up to at least 1.25" (32mm) with a small motor. The thing about high torque machines is that if you want it to use low HP it will need to be a slow machine. If you want it to be fast like a production machine then you will need high HP. For small shop purposes I like keeping machines under 2HP (I use a lot of 1.5HP motors).
|
|
- guru
- Tuesday, 03/13/07 10:46:11 EST
|
Hammerman:
At the Library of Congress website there is a two part movie
"Welding the big ring"
|
|
- Hudson
- Tuesday, 03/13/07 04:10:51 EST
|
Guru, Horizontal Bandsaw (again),
Hi Guru (and anyone else who cares to share their opinion),
In looking at that bandsaw on the Grizzly site I have noticed that the bow, or saw frame, is cast aluminum, not cast iron. Do you think this is a big deal? I have a concern that the cast aluminum will not be able to adequately resist the load of pulling the blade through the cut piece and hence make the whole thing chatter producing a bad cut.
What are your thoughts?
Mike
|
|
Mike Berube
- Tuesday, 03/13/07 09:49:26 EST
|
I live close to the Grizzly world headquarters, so I nip by there once in a while- its the only place within a two hour drive that has ANY machinists supplies, so in a pinch, I buy their stuff.
And I have to say I am not very impressed by their smaller tools.
The saw you are linking to has been recently "cheapened"- evidently the old one was creeping up in price enough that they had to go thru and cut corners to get it down to $225.
I do have a friend, a local blacksmith who is quite good, and does full time work, teaches classes in his shop, and has helpers- and he swears by the swivel head, $500 Grizzly band saw- he says 4 years now, no problems.
Me, I prefer Jet- I have had better luck with them over the years, right out of the box. I have had several over the years of the Jet 4x6 saws, and they are usually pretty well built.
I know Ellen bought a Jet 4x6, and her motor burned up within a month, but Jet sent her a new one, and as far as I know she has had no problems since.
A lot of people assume that since these saws look alike, they all come from the same factory- this is not true. Some are Taiwanese, as my Jet is, and says so right on it. Some are from mainland China. There are over 24 Meehanite approved foundries on Taiwan alone, along with at least that many cheaper ones- and most of these saws come from small family owned factories that make a few hundred a month. Not one big mega factory. So each family buys different components and has different quality standards.
Jet, for instance, has the word "JET" cast right in the frame in inch high letters- so they cant very well use the same pattern for Harbor Freight Saws.
All of these small bandsaws, however, are cheap, relatively disposable tools- for two or three hundred bucks, what can you expect?
A good, made in america bandsaw starts around 2 grand for an Ellis. Next step up would be around 3 grand for a Canadian made Hyd-Mech, or an Italian swivel head like a KMB. A real industrial saw will easily run 5 to 10 grand.
So when you buy these ultra cheap chinese or taiwanese tools, you cannot expect the best.
Nonetheless, in terms of quality, Jet, Grizzly, and MSC/Enco seem to have the best reputations, and the best customer service and parts departments.
I am on my 4th Jet 4x6 saw, over about 30 years, and they hold up pretty well, and cut pretty straight, especially for the money. We do a lot of freehand horizontal cutting on em, and never use a table- we all just cut on the little 2" square blade guard that comes with- sometimes a couple of hundred times a day, in stainless, when all three of us are working- and the saw just keeps on humming.
Bi-metal blades are the only way to go on these things- makes a world of difference, and cost about 20 bucks each, but last 3 times as long. I use a 10-14 variable pitch for general shop use.
|
|
- ries
- Tuesday, 03/13/07 10:24:05 EST
|
Cheap Saws: My experience is with the original RIDGID brand saw which was all cast iron and the machine that everyone else has cheapened with the expected results of cheap machinery. Just changing the base from cast iron to heavy pressed and fabricated plate as Sears did made the saw unstable.
There ARE zinc die cast and aluminium frame band saws they are usually very extensively ribbed and not cheap to manufacture AND they are mostly high speed wood working saws that have low blade tensions and force.
However, to simply change materials, replacing cast iron with aluminium is an engineering disaster. Besides stiffness the other thing these saws rely upon is the weight of the cast iron to feed the saw. When materials are changed the whole design must change. These saws are being made by using others castings as masters for making the patterns. They are not remade thicker or ribs added. They are just cast out of cheap, easy to melt scrap aluminum. Where good iron takes a big foundry, aluminum castings can be made in a back yard foundry. . .
As Ries pointed out, this is a cottage industry in many countries. They are not designers or engineers. They are copiests. They change components without engineering evaluation and use the cheapest available parts. Often they produce machines that did not work when they were put into the box. AND, nobody ever sends them back or makes warantee complaints so they keep on making them cheaper and cheaper.
As I pointed out earlier, my ORIGINAL 4x6 saw that LOOKS just like the ones being made now cost nearly $1000 in the 1970's and would cost at LEAST $1,500 or more today. I paid $600 for it used. Its a great tool but still a small saw. When you pay 1/4 for something shipping from the other side of the globe you get what you paid for.
|
|
- guru
- Tuesday, 03/13/07 12:01:17 EST
|
Dear Guru,
I am doing a speech on the myths and missconceptions of blacksmithing. But I am having alittle trouble finding stuff to put in it other then a blacksmith is not a farriar(sp?). Do you know of any missconceptions that I could use in my speech? Thank you.
Sincerely,
John Scancella
|
|
John scancella
- Tuesday, 03/13/07 13:16:02 EST
|
John, Thats tough, you got #1.
1) Blacksmiths are not Horseshoers
2) Blacksmiths FORGE, not cast iron.
3) Wrought iron is a material AND a type of metal work.
4) Blacksmiths DO NOT have fire proof hands.
5) "Tempering" does NOT make steel hard.
6) Working at the forge does not warm you up in the winter (only your face and shoulders may be warmed by the fire).
7) Putting a copper penny in a forge DOES NOT prevent welds form sticking (but it IS a good excuse).
8) Japanese steel is NOT folded thousands of times. It is only folded enough times (multiplying by 2 or 3 each time) to make thousands of layers.
9) Not all blacksmiths are fat, have a beard and wear Carharts 24-7 (some wear other brands!).
10) Yes, women CAN be blacksmiths.
11) Case hardening is NOT sufficient to make mild steel into a tool that should be made of tool steel.
12) Super Quench does not make mild steel into tool steel.
13) Anvils are not a weapon for smashing Road Runners.
A common saying from blacksmithing that means more to blacksmiths than to others, "Too many irons in the fire".
|
|
- guru
- Tuesday, 03/13/07 13:53:51 EST
|
Guru. few quick questions regarding your "stupid blown burner" design.
I've got the parts using 2 inch pipe, How long should the main pipe be (or does it matter much)?
I couldn't find a 2 to 1 1/2 reducer could I heat the end up with a torch and hammer it down to size?
How does the gas supply fit into the burner? Just screwed in no injection system is how the diagram looks.
You list 150-300 CFM blower, Is that overkill for a smaller forge(aprox 450 cubic inches)? Could I get away with a smaller one?
I've gotten as far as I can with it, but skills aren't up to the task of interperting the rest of the design. More questions then I meant to ask, but I'd rather ask an expert then make the big mistakes (like blow myself up).
thanks!
|
|
frostfly
- Tuesday, 03/13/07 13:46:25 EST
|
Stupid Burner Design: Frostfly, yes the fuel just dumps in through the reducer in the side of the burner. You can also swap the blower and the fuel positions. I HAVE taped and threaded a small pipe to the INSIDE of the gas fitting to extend it to the middle of the other pipe OR if installed from the end put a nozzle with holes on the end but it does not seem to make much difference. But these are not necessary and not everyone has pipe taps and machine tools.
The straight section of pipe is needed for mixing and should be 10 to 12" long. I would use a coupling and reduce the end of a replaceable piece threaded into it.
For a small forge a little 100 to 120 CFM blower will work but should have a speed control or an air choke to reduce the air. Scaling down for a small forge you should also reduce the pipe size to 1-1/2 or 1-1/4" NPT. If the fuel/air flow is too slow it will ignite back in the burner.
|
|
- guru
- Tuesday, 03/13/07 14:02:52 EST
|
Jock and friends,
What are the physics behind belt sanders? In other words, what causes the belt to center on the crowned wheel? Does it have something to do with the distortion of the belt as centrifugal forces act apon it? This question is driving me around the bend.
Larry
|
|
lsundstrom
- Tuesday, 03/13/07 14:31:35 EST
|
Centering of belts: Larry, flat belts naturally climb to the top of a crowned pulley. The larger the diameter the more they climb. I am not sure why. Band saws work the same way. Flat pulleys are a real problem. . .
Tracking adjustment is necessary on belt sanders due to the tension on the frame causing the pulleys to be misaligned and the low crown on small pulleys. Heat and unequal stretch are also a problem on sanding belts. Needless to say, the more rigid the frame the least problems you will have.
|
|
- guru
- Tuesday, 03/13/07 14:47:09 EST
|
Guru,
Thank you so much for your detailed and informative answer. It has been a great help.
|
|
elaine ferguson
- Tuesday, 03/13/07 16:31:22 EST
|
Guru, Ries, Cheap Saws...
Guru, thanks for confirming my fears about the aluminum. I preach all the time about the down side of cheap tools, yet here I am trying to convince myself to do the same. I guess the 4x6 Grizzly or it's Jet "equivalent" are as much saw as I am interested in owning. The bigger/more-complex saws are more than I want (I think). So I WANT to believe the Grizzly is good enough. But I am glad I talked with you guys about this, I believe you have helped me avoid a purchase mistake.
Ries, you have owned the Jet 4x6 saws, is the frame or bow cast iron? The Grizzly looks like a direct ripoff of the Jet with the Jet having a much better stand. If the frame of the Jet is also cast iron the 2 differences (plus brand equity) may account for the $100 difference in price.
If the 4x6 Jet is holding up an average of 7.5 years in a professional shop environment (with 3 users) then that will probably be good enough for my uses.
How is the cutting speed? How long would it take to cut say 1/4"x2" barstock (mild steel)? Or say 1-1/4x11ga square tube?
Thanks,
Mike
|
|
Mike Berube
- Tuesday, 03/13/07 16:41:39 EST
|
I was wondering if you's be able to give me some tips on the hammering process of making the blade. I have some self taught experience on hammering iron rods into arrow heads but I was thinking about making a knife for practical usage, and trust me I have a lot of experience with swords, kives, ect... So I was wondering if you point me in the right direction? After all you are the guru.
|
|
Ephraim
- Tuesday, 03/13/07 18:03:32 EST
|
Mike Berube,
I have had several of the JET's at work, and have one at home and a clone from another Taiwan company (Acura, I think). Both cut well out of the box. Both have cast iron bows and frame, but the legs on all of these little saws vary from marginal to awful. I took the clone I have and made an adapter for it to fit a little turntable I have. It is now bolted to the turntable, and the bottom of the turntable is bolted to a little slab in my dirt floor shop. I can now swing the saw relative to the runout table and use a welded on C-clamp to hold the saw in place. I do still have to loosen the fence with wrenchs and then adjust and tighten, but it makes cutting miters much easier than before.
I use ONLY bimetal blades for the thicker sections. I do use "porta-band"(HSS) type blades for thin tube ETC. It comes in a 28 tooth, where the bi-metal only goes down to about 18T in this size blade. I have the blades made up at my mill supply of choice, Hagemeyer, and the blades cost about$20.
A 10 to 14T variable, in plain steel cuts pretty fast. I would guess that the 1/2" x 2" that I cut this weekend was about 1 minute in the cut. I, however was deburring the previous cut part as the saw was cutting the next. I have two of these saws and often have both in the cut and the de-burr sander going all at once. The saws often get ahead of me, but I don't pay them by the hour.
Another trick, is to make a longer stop bar. And once out of warrenty, I drill the cast base from the side and put a real, hex head bolt to hold the stop bar. Then I can switch out for long or short and don't have to fight a socket head hex set screw full of saw dust.
|
|
ptree
- Tuesday, 03/13/07 18:12:24 EST
|
Ephraim, There are two things to know about blade forging,
1) You need to pre-band the bar so that as the edge thins and becomes wider the blade straightens. This is for single edged blades. Round bar is better to start with than square of flat bar.
2) A "rocker" faced hammer (square with curve in one direction, moves the steel toward the edge rather than side to side. This reduces the need for the curvature above and is more efficient forging. A Hofi style hammer is rocker faced.
Then there are the considerations for forging high carbon steel.
1) Do not overheat the steel (a high red to low orange is hot enough). Then do not forge below a red heat. This is a narrow working range but it is necessary.
2) Do not try to forge too thin. As you forge carbon is lost from the surface of the steel and this decarburized surface must be removed by grinding to make a quality blade. The saying is "Forge thick, grind thin".
There are many books on this subject and they ae the place to learn many of the details of the process.
|
|
- guru
- Tuesday, 03/13/07 18:21:38 EST
|
I *think* I understand why crowned pulleys work. Draw your "belt" on a table and roll a Dixie cup along it. The cup will turn toward the small end, so that the big end tracks toward the center the "belt" (and then straight off the other edge, but don't worry about that now). Trace the path the cup takes.
Mount the Dixie cup on bearings and a shaft, and roll the table top across it (yes, this works better as a mental exercise). In theory, the cup will follow the same path as it did before, with the big end moving from the edge of the "belt" toward the center.
Tape a second cup to the first, so that they are joined big end to big end. Now place the "belt" so it rests on one of the cups and push it along. The big end of the cup will roll toward the center of the "belt." When it gets there, the belt will flop onto the other cup, and the big end of that one will try to roll toward the center. In theory, the "belt" will either flop back and forth between the cups or end up balanced on the ridge.
A real belt on a crowned pulley should be more stable. But when it gets off to one side or the other, the tapered side of the pulley will try to roll back under it, just like a Dixie cup would.
|
|
Mike BR
- Tuesday, 03/13/07 18:31:51 EST
|
As Ptree says, the entire SAW on the Jet is cast iron, but the BASE is stamped sheet metal.
I usually just mig weld a pair of pieces of flat bar across the base, a few inches up, and it stiffens em right up.
They cut quite quickly- since we do a lot of stainless, we leave ours on the slowest speed, and they still cut thru 1/4" x 2" flat bar in 20 seconds or so. A big chunk, like 2" round stainless solid, which I had to cut some of recently, can take a bit longer, 5 minutes or so. But little stuff is quick- I sometimes weld the ends together of a bunch of pieces, and cut them all at once.
I also quickly found a longer piece of 1/2" round, to make the length stop as long as needed. And I have a pair of adjustable height stock stands for either side of the saw, so you can cut anywhere on a 20 foot length easily.
|
|
- ries
- Tuesday, 03/13/07 18:53:43 EST
|
Mike BR
I actually followed that and I think you are on to something. Thanks for the enlightenment.
Mike
|
|
Mike Berube
- Tuesday, 03/13/07 18:57:21 EST
|
ptree
Thanks for the info. Just to be sure, the Jets you use are the 4x6, ~$340?
Deburring...how bad is the burring? One of the reasons I want to get away from the abrasive chop saw is the huge razor sharp burr you are left with.
Thanks,
Mike
|
|
Mike Berube
- Tuesday, 03/13/07 19:01:04 EST
|
Small Saws in Big Shops: One thing you must remember about small saws in big shops is that they also have BIG saws, and Plasma cutting tables and. . . for big work. The little saws get used a LOT because they are convenient for small work but they are miserable cutting anywhere near their full capacity.
|
|
- guru
- Tuesday, 03/13/07 19:01:56 EST
|
ries,
Thanks that is very helpful.
Mike
|
|
Mike Berube
- Tuesday, 03/13/07 19:03:19 EST
|
Band Saws:
I have had an Asian copy for 15 years, it came from a place called Post Tool. Its got no name on it, but is cast iron with thin sheet metal legs. It needed some work to track true, but I've repaired bandsaws enought to be familiar with the problems and fixed them.
I am not a production shop, be I have done alot of cutting on it, both steel and bronze. Bi metal blades are one of the keys to a good cut.
The one modification I did was to replace the fence bolt with a quick release lever from a mountain bike seat and scribe some lines on the table for 90 degrees, and 45 degrees. Using those wrenchs under the table were a pain.
Good Luck
Bart Trickel
|
|
blackbart
- Tuesday, 03/13/07 19:26:07 EST
|
Guru States: 12) Super Quench does not make mild steel into tool steel.
My above post may have confused a novice. I DID NOT state that super quench would give mild steel a tool steel performance. Maybe if lucky only a 34-44 rockwell. Tool steel 56-68 rockwell. Mild steel used for hot forging tool applications will work fine with some visual wear.
|
|
- Hit & Miss
- Tuesday, 03/13/07 19:43:45 EST
|
At the risk of being an Alpha Nerd, let me offer a comment about superquench and mild steel. The effect of superhardening is limited to a very thin skin on the surface of the metal. This hardening is likely due to the extreme rate of heat removal at the surface of the work piece. However, deeper into the piece, heat is flowing at a much slower rate and the high hardness is not developed. The use of Superquench should be limited to parts that are not intended for long term or critical applications.
|
|
quenchcrack
- Tuesday, 03/13/07 20:02:43 EST
|
Actually you don't have to prebend the blade preform. You can straighten it as you forge it out by setting it *hot* on the anvil with the arch of the blade up and tap it back down. This can be done even when the edge is quite thin in the forging process.
May I commend to your attention "The Complete Bladesmith" by James Hrisoulas.
Thomas
|
|
Thomas P
- Tuesday, 03/13/07 20:42:12 EST
|
Mild Steel for Hot work: I've used mild steel tools for hot work but they are very short lived. AND they only work on other mild steel. They work best on the power hammer for blunt edge hot cuts, fullers and various round faced tools. While you can use a blunt cut off tool you cannot punch proportionately deep holes or use sharp edged tools. Mild steel works for quick and dirty short lived tools only of a certain class.
Much of today's so called "mild" steel is not so mild. You can find bar and rebar that are up to 40 point carbon sold as "structural" and "mild steel". This is simply bad identification and organization. But the result IS that you can quench much mild steel and will be be glass hard and break, just, like, glass. When unknown steels are treated as low carbon when they are not you get a lot of confusing results that do not mean anything if you continue to insist that the steel is low carbon. This is simply ignorance and lack of logic.
In these cases you get tools that act more like 18th century crucible or shear steel than mild steel tools. I've had cases where steel was not what it was supposed to be and set it aside for other uses. . .
The result of such poor quality control in the the steel industry is that we are now in a similar situation as smiths in the 18th and early 19th century. ALL steel becomes mystery metal no different than "junk yard steel". If its chemistry is not certified then it may need to be treated as an unknown with lots of trial and error.
This is not the case at every supplier but it is at many. It is part of our seriously declining industrial base.
|
|
- guru
- Tuesday, 03/13/07 21:14:15 EST
|
Guru, Small Saws in Big Shops:
Very good point and well taken.
Thanks,
Mike
|
|
Mike Berube
- Tuesday, 03/13/07 22:01:23 EST
|
Then what would be a good material easily found at a junk yard to make nto a hardy cutoff?
Thanks,
Cam
|
|
Cameron
- Tuesday, 03/13/07 22:11:38 EST
|
Cameron,
I've made a few hardys out of old axles, and they hold up fairly well. You must realize that axles are not made of hot-work steel, and hardys made of them will keep losing their temper, because you're putting hot work on them all the time. You should harden and temper the blade anyway, however, to give it some stiffness. I usually temper tools like that to a pale blue. As you go through life, you will keep dressing hardys and other tools no matter what they are made of. I treat the old axles like medium carbon steel.
|
|
Frank Turley
- Tuesday, 03/13/07 22:34:51 EST
|
Guru,
Thanks again for the info on the micro forge and against your better judgement I have begun construction using the kiln tiles. After I got the right blade for my angle grinder things went more quickly. I have the box cut and fitted and now I'm working on the rest of the rig.
I have been asked to repair a "favorite" axe. It apparently has a crack in the wall of the eye. I know that if it was abused enough for the steel to fail there it probably has more things wrong with it. I have not yet seen the tool. I know that if the crack goes all of the way through the wall it's pointless to repair it as it would likely fail again. Am I right in thinking that welding the crack with a mig will prevent over heating and preserve the strength of the cutting edge? Should I even bother with the repair or are broken axe heads a lost cause?
Thanks, Will
|
|
Will
- Tuesday, 03/13/07 22:41:29 EST
|
Cameron:
Springs off a big piece of machinery would work well. My hardy hole is 1 and 1/8 inch and last time at the junk yard I found three big coil springs that were 1 and 1/4 inch square . A little bit of experimental hardening/tempering is necessary, so I bought all three that were there. Not sure what they were off of, but they were near a scrapped field cultivator and scrapped tractor frame, so I am guessing agricultural.
-Aaron @ the SCF
|
|
TheSandyCreekForge
- Tuesday, 03/13/07 22:45:56 EST
|
Cameron: Look for axles, leaf springs, torsion bars and stabilizer bars from large cars or trucks. These are not tool steel, but they are readily available and should have enough carbon and alloys to work.
|
|
- Dave Boyer
- Tuesday, 03/13/07 22:48:11 EST
|
In reference to Cameron's question: What about old jack hammer bits or old crow bars? I made an adz from a length of crow bar and after I had oil quenched it the edge is so hard I have yet to resharpen it. I don't know how this would hold up under hot work though. I haven't needed to make such a tool.
|
|
Will
- Tuesday, 03/13/07 23:04:08 EST
|
Cameron
Any steel from a medium carbon 1040 to a high carbon 1095 would work great for a hardie. It is cheap and readily available. 4140 tool steel is easily afforded and found as well.
You could chop saw up those large wood splitting replacement wedges found in hardware and wood stove stores. Just weld on a hardie shank of your size. I think Ken the Poor Boy Tool Man makes his that way.
|
|
- Hit & Miss
- Tuesday, 03/13/07 23:19:16 EST
|
Now for a hard tool you need at least 40 points of carbon. The last two digits in the steels I listed above represent the carbon point is the steel.
The low carbon steels like cold rolled is 1018. There isn't enough carbon in it to make it hard. This is a really dumbed down way to explain it. If you want to talk to a metal guru who is a professional metalurgist then quenchcrack can tell you stuff untill you look like a deer starring at headlights.
|
|
- Hit & Miss
- Tuesday, 03/13/07 23:25:42 EST
|
The wood splitting wedges are the steel wedges that are welded on the splitting ram to replace the worn out one. I am not referring to a cast, aluminum or plastic hand driven wedge. I thought I better mention that before anyone gets mid-evil on me.BOG
|
|
- Hit & Miss
- Tuesday, 03/13/07 23:29:33 EST
|
There is what looks like a lovely old Johnson HZ bandsaw for sale on Albuquerque Craig's List right now for $500.
|
|
Miles Undercut
- Tuesday, 03/13/07 23:51:49 EST
|
Leaf Springs and crow bars: Oddly enough I knew someone that made wrecking bars and pry bars and they were all 5160. Many springs are said to be 5160 but even if they are not they are that high in carbon or more.
|
|
- guru
- Wednesday, 03/14/07 00:14:36 EST
|
Cracked Axe Head: Axes are typically not very hard as they are designed to be readily sharpenable with a file. The only part that should be THAT hard is about 1" along the edge. The rest is usually dead soft. So welding by any method that does not get the edge hotter than about a light blue temper (preferably no temper color) would work fine. After welding the area should be heated red with a torch and allowed to cool slow to remove stresses from the welding.
|
|
- guru
- Wednesday, 03/14/07 00:18:58 EST
|
Cracked axe,
Be careful that the axe is not cast construction. Alot of cheaper axes and 'historical replica'axes are cast, not forged.
A casting can be welded, But if its a cast construction, Its inferior anyway and will probably crack again.
|
|
- Sven
- Wednesday, 03/14/07 06:58:44 EST
|
Various method of making hot cut hardy chisels:
- Find an old large handled hot cut. Cut off about 3" of the point. Welding on a shank. With what remains of the body weld on a suitable sized plate and you have a handled flatter.
- Jack hammer bits. You only get one with a natural collar. On rest find a piece of thick wall tubing with the ID close to the shaft size. Cut off about 3/8" of the tubing and use it to weld on a collar.
- Left springs. Cut off 2-3" and weld it upright to a piece of flat stock. Then weld on a shaft. By different grinding you can make it into about a 3/8" bottom fuller, regular V or a slant to cut one side straight and the other angled. If you are careful how you do the edge grinding you can retain the original hardness (a little often is better than a lot at once).
- Steel wood splitting wedges (often found at a flea market for $5 or so). You can get three to four out of one. Cut off 3-4" on the point and weld on a shaft. Now grind the bottom of the wedge flat and weld on a piece of 3/4" round shod for a handle. Heat and powerhammer out another wedge shape and cut off. Repeat. When you are down to the one on the handle you can use thick wall square tubing to go over the 3/4" round.
For a 1 1/8" shaft I typical weld on 1" tubing and then tack weld on the side a piece of 1/8" x 1" x 1" piece of angle iron.
As Guru noted a couple of weeks ago I really don't do anything people can't do for themselves (and probably really should). However, I have access to the stock and equipment needed and folks are willing to pay me to do it for them.
|
|
Ken Scharabok (Poor Boy)
- Wednesday, 03/14/07 07:24:26 EST
|
Thanks Mike BR and Jock for your thoughts on crowned pulleys. A good piece of teaching BR. I would add that the belt distorts due to centrifugal force so that it lays flat on both sides of the "dixie cups". It has more contact with the side of the belt that is leaving the center ridge. The directional forces then battle it out until equilibrium centers the belt.
Next question: Does there need a spring in the system.??????
Larry
|
|
- lsundstrom
- Wednesday, 03/14/07 08:17:41 EST
|
Miles, Craigs List
Thanks for the pointing that out. That is a real nice saw and seems to be a great deal. It is more saw than I can use, I need something that can be wheeled around the shop. I am really cramped for space and need to shuffle around for the task at hand (or I need to get rid of a bunch of tools...NAH, can't do that :-) )
Thanks,
Mike
|
|
Mike Berube
- Wednesday, 03/14/07 08:32:38 EST
|
No centrifugal force. . . Belts self center at very very low speeds such as hand turning through a single rotation.
Belt tensioning is another matter. Many machines just have hard screw adjustments. Springs allow flexibility for grinding between platens OR on concave platens letting the belt conform to the shape of the work. Standard straight loop grinders with flat platens normally have screw tensioning and no springs.
The modern specialty grinder sanders often have both screw adjustments as well as spring tensioners.
|
|
- guru
- Wednesday, 03/14/07 08:33:29 EST
|
hillybilly joe dungenseige, tom thomascook4@yahoo.com
We know who your internet provider is and can trace your connection to your desk if we have to. Do not post here any more.
Trivalent Group Inc.
3145 Prairie Street SW
Suite 101
Grandville, MI 49418
|
|
- guru
- Wednesday, 03/14/07 11:36:54 EST
|
About 4 or so years ago I was the moderator of a forum. One party posted really offensive ones. In reading routing I noticed it was initiated from a college where I knew one of the professors. He referred me to their IM shop. They tracked it down to a dorn room, but guy swore someone else must have used his school provided PC. The old SODDI defense - some other dude did it. Offensive post did stop.
|
|
Ken Scharabok (Poor Boy)
- Wednesday, 03/14/07 17:02:21 EST
|
Brazeal Brothers:
If anyone out there has contact info on the Brazeal Brothers I would sure appreciate if you'd pass it on. Our ABANA affiliate would like to see if we could get them down to South Louisiana for our conference but I have no info on them. Any help is appreciated
|
|
David Bernard
- Wednesday, 03/14/07 18:04:53 EST
|
I was in the Grizzly main store this morning, in Bellingham, and I looked at that little saw- and it is nowhere near as robust looking as my current Jet. It seems about 3/4 scale, compared to some of the other ones out there. So I would skip it.
They did have an interesting swivel head bandsaw, though, made in Taiwan, not china, with a 1" blade, 3 phase only, 1 1/2hp, that looked pretty darn nice.
The thing about Grizzly, is that as you walk down the aisles, its obvious that they are buying from a dozen different factories at least- so they have 3 or 4 different suppliers for horizontal bandsaws alone- the look, fit and finish, fasteners, electrical switches, handwheels, and so on, are radically different from model to model. Same with their mills, drills, and lathes- which means some of them might actually be pretty decent, while others are stictly "from hunger" as my jewish mother-in-law used to say- meaning not very good.
The $500 swivel head Grizzly is night and day better than the $225 fixed head 4x6 saw- even though they take the same size blade.
|
|
- ries
- Wednesday, 03/14/07 20:26:15 EST
|
I might add that the swivel head bandsaw I was interested in, the 3 phase model, is $1600. And at that price, about half of what anybody else gets for an equivalent, import machine.
|
|
- ries
- Wednesday, 03/14/07 20:28:04 EST
|
I have been trying to find a very simple way of tempering flat gun springs. Seems I remember in a Foxfire book about tempering in cold lead. Any info would help. Thanks for your time and consideration!!
Gail
|
|
Gail Duff
- Wednesday, 03/14/07 22:55:15 EST
|
Gail, Quenching in lead is a hardening technique. The order of the process is:
1) Anneal or thermal pack.
2) Harden by heating to nonmagnetic and quench according to steel type (air, oil or water).
3) Temper immediately after hardening. Plain carbon steel such as SAE 1095 is heated to a dark blue or about 600°F.
Depending on the type of steel you may not normalize or anneal prior to hardening. For most plain carbon steels it is recommended. Thermal packing is similar to annealing and may be repeated to assure an even fine grain structure. Tempering may also be repeated (double tempering) to assure an even thorough temper.
Springs are tempered to the softest possible for the application. Small thin sections of oil or water quench steels MAY air quench. It is best to temper before the part becomes room temperature or cooler. So quench small parts in warm oil or water and be prepared to temper immediately. If you are going to go by temper color then be prepared to polish off the hardening scale while the part is still hot (below 250°F and above 100°F).
I prefer to temper small parts on a large block of steel heated to the tempering temperature. Laying a small part on the large block will give an even temper and temper color.
|
|
- guru
- Wednesday, 03/14/07 23:11:20 EST
|
Tempering in lead - using molten lead for tempering was also done - I was doing some work at a file company in Ohio (Not Nicholson) in the late 1980's that still tempered their better files in lead. They were phasing it out at that point due to environmental concerns regarding lead exposure to their employees. DO NOT HEAT TREAT IN MOLTEN LEAD! The health risks far outweigh any benefits gained from good heat transfer and even temperatures.
|
|
- Gavainh
- Wednesday, 03/14/07 23:25:39 EST
|
Ries,
Thanks for the first hand look, I really appreciate it. Grizzly is fuuny that way, some of their machines are an obvious bargain. I own one of their 17" bandsaws (wood). Compared to the Delta at the time...
Grizzly:
- 17" throat
- 17" table
- 1.5HP motor (needed for resaw)
- 1 piece solid cast iron frame
- $670
Delta:
- 14" throat
- 10" table
- (3/4 or 1)HP motor
- 2 piece bolt together cast iron frame
- $850
So, that was contributing to my not discounting that 4x6. Your first hand appraisal has sealed its fate. It will not find its way into my shop. I now need to decide between swivel head and "swivel vise". Looks like I give up vertical with swivel head, is that true?
Mike
|
|
Mike Berube
- Thursday, 03/15/07 05:52:19 EST
|
Hammer size vs. stock size
Hi All,
I know hammer weight is very much a personal thing, but is there a rule of thumb that you use where you say "for this size stock I use xxx pound hammer, at this size I move up to yyy lbs"??
I'd be very interested in your experience.
Thanks,
Mike
|
|
Mike Berube
- Thursday, 03/15/07 05:54:51 EST
|
Hammer size/Weight and Stock Size: Mike, It depends on too many variables. Such as,
1) How you are going to forge it. By hand or power and how big the power hammer. A one off made under a power hammer can be made from oversize stock and drawn out or undersized stock and upset (under a large long stroke hammer).
2) Style of the hammer (if only one by hand). Are you making a long German style, short Czech style, standard American or not a forging hammer. If you are going into limited production then even in a forging shop you want the right size stock.
3) Stock availability. Sad to say but these days you often do not have a choice of size or the size increments are very large (our declining Industrial bas). You often do not have a choice of cross section either. Good tool steel is also getting very expensive. However, hammers are often made from medium carbon steels not the expensive "letter" grade type steels.
4) Finally, hammer size for the specific style. As mentioned the German and Swedish forging hammers are quite slender, the American style slightly fatter and the French and Czech styles quite short and fat. Then you have the REAL long patterns such as the blade smithing or Japanese hammers.
5) The actual weight may also effect the pattern itself. While large manufacturers and anyone with a good size power hammer can make perfectly proportional hammers a smith making them by hand may add or subtract some length to adjust weight. Punching or slitting the hole can make a difference of half a pound (1" dia. by 2.25" = .5 lb steel).
6) Hammer eye sizes are proportional to the hammer weight in perfectly made hammers. But manufactures use incremental drifts rather than perfectly sized so that they can stock less handles. Individual smiths may have fewer punches and drifts or just ONE that they use for hammers. Hammer eyes vary from true elliptical to round to square. The Hofi hammer has a huge slit and drifted hole that is filled with a synthetic rubber when the handle is installed.
I could do the calculations and make a chart for all the styles and weights providing the nearest stock size. However, if I used 1/8" stock increments which were commonly available 25 years ago and all you could find is 1/2" increment stock it would do you no good.
The most practical method to make a given weight is to take a piece of stock close to what you want, then cut it to the length that will give you the weight you want (plus the amount lost making the eye) and then forge it from there.
The method used by many smiths is to start with a bar the size they like (or have) then forge the peen on the end of the bar, partially cut off the hammer to isolate the stock but leaving a good handle, punch and drift the eye then finish cutting off the part. A lot of guessing and judgment is required.
My personal hammer is 3 or 3.5 pounds or 1400 to 1600 grams (I can no longer remember). It is a standard American cross peen hammer which is heavy at the front. It measures 1.75 x 1.625 in cross section, is 5" long and has a 1.25 x .88 eye.
A German 1000 gram (2.2 lb.) hammer is 35mm square (~1.38) by 133mm (~5.25") long. The eye is 1.25" x .75".
SO, 1.5" or 1.75" (~38 to 45mm) square stock will make a general sized forging hammer. For a lighter hammer or a pattern with an upset that can be done by hand like a Swedish pattern 1.375" (35mm) square stock will do.
Starting from round stock also works well. Sometimes it is more commonly available and making it square or rectangular is not too difficult. Diameter to equal a square in cross section is 1.1284 times the side of the square. For forging purposes I would use 1.2 to one to compensated for spreading but this is not too much of a problem if foring under large flat dies.
|
|
- guru
- Thursday, 03/15/07 09:20:12 EST
|
I think you misread Mike's question Jock. I understand it to be what size hammer to use on what size stock.
|
|
JimG
- Thursday, 03/15/07 10:11:33 EST
|
Swivel Saw vs. Swivel Vise: There is no comparison in convenience. The swivel base saw lets you cut angular ends while keeping your stock flow in the same line. This is a huge advantage unless you have infinite floor space and do not mind rearranging your stock stands. In fact I move my small saw relative to the stock stands rather than moving the stands. You rarely have the space for 12 or 20 foot long bars in line with your saw except in one line which is usually parallel to your stock rack.
I do not know if the small swivel base saws tilt all the way up but I see no reason one shouldn't unless it is a balance problem. Balance is another reason the really cheap 4x6" saws scare me. The bases are so light and flimsy that tipping over could be a serious problem. I've had my Ridgid flip up while I was wheeling it around (yeah, should be chained down) and it really gave me a jerk. However, the weight of the base and stand helped balance the force otherwise it would have jerked out of my hands.
|
|
- guru
- Thursday, 03/15/07 10:20:40 EST
|
Is there a particular way to use the "search" for the archives? I am unable to find a thread from a couple of months ago. It concerned lubricant\coolant for drilling. Thanks
|
|
ML
- Thursday, 03/15/07 10:39:59 EST
|
Jim, I certainly did. . . But my reply made a good post to think about. It would make the basis for a calculator program as well.
Hammer Size; Mike, most smiths work up to a certain size hammer and then use the same hammer for almost everything. I use my 3-3.5 lb. hammer for almost everything. Depending on your forging skills and strength 3/4" square (19mm) is about the maximum size you can efficiently work by hand. For those of us that do not forge every day 5/8" (16mm) is the maximum and 1/2" and smaller is normal. For fire tools I personally prefer working 7/16" square and 1/2" round.
Over your convenient maximum you go to short or long handled sledges. I have a 6 pound (~2750g) sledge with the handle cut off short like a hand hammer. While it is too much to use for any great length of time or with good control it WILL move some metal. But for heavy work you usually move up to a striker with an 8 or 10 pound sledge. Otherwise you stick to your normal hammer.
I use lighter hammers for many tasks but not for forging. I use ball piens for riveting after taking the first heavy upsetting blow with my forging hammer. I use light and heavy hammers for sheet metal work and repousse'. I use my forging hammer for large letter punches (1/4" up) and a lighter ball pien for small letter punches.
Sledge hammers often get used for backing up work or a slow counter blow. This is done on heavy sheet metal and when upsetting heads on tennon joints.
Most smiths have a considerable collection of hammers types and sizes and then do 99% of their work with one hammer.
|
|
- guru
- Thursday, 03/15/07 10:44:47 EST
|
Guru, Hammers:
Yes, your second response was what I was after. Sorry for the poorly formed question. Your first response was interesting though :-).
This question came from when I was forging my first pair of tongs (over the last 2 weekends) from 5/8" round according to the first iForge demo by Bill Epps. I currently use a 2.5lb cross pien. When I got to the part of drawing out the reins (sp?) I felt like I didn't have enough hammer (anything I have that is larger is not well suited to forging). Hitting harder did not seem to help. I have now come to the conlcusion that the anvil stand that I made is not sturdy enough and WILL need the extra bracing that I intended (did not want to overbuild and thought I'd wait and see if the extra bracing was needed). Seems like the stand is flexing when I hit hard with the 2.5lb hammer.
But this still left the nagging question, how big a hammer should I be using to forge 5/8 round? Should I have a heavier hammer if I am going to forge bigger stuff? How big stock can I forge by hand (practically)?
For example it took me 2 hours (and many heats) to draw the 5/8" round from 9" to 16" rectangle taper for the 1 tong reign (it took 1-1/4 hours for the second reign...I am just learning). Still I thought this was way too long and that is what got me thinking. Also, I noticed that above a certain strength hammer blow, that the rebound from the anvil diminished greatly (I am using a 120lb Nimba). I am pretty sure it is the anvil stand.
Let me know your thoughts please,
Mike
|
|
Mike Berube
- Thursday, 03/15/07 11:08:28 EST
|
Guru,
I know you answered these questions above:
But this still left the nagging question, how big a hammer should I be using to forge 5/8 round? Should I have a heavier hammer if I am going to forge bigger stuff? How big stock can I forge by hand (practically)?
I was just relating my thought process. Don't want you to think I am not reading your responses. I really appreciate your input.
Mike
|
|
Mike Berube
- Thursday, 03/15/07 11:11:42 EST
|
ML, our search is not very good due to subjects repeating often and the topics being the same. I have a prototype search routine that I use that is not ready for the public. . . Had a couple folks work on it to no avail.
I am putting together a FAQ from results I found. Best discussion was in 2003.
Drill Coolants and Lubricants.
|
|
- guru
- Thursday, 03/15/07 11:27:35 EST
|
Mike, don't use a bigger hammer than you can comfortably swing without hurting your self.
You should beable to forge 5/8 round with your 2.5lb hammer. Make sure your stock is good and hot, into the yellow heat range won't hurt. Pick a nicely rounded over edge of the anvil and forge with the hammer face half on, and half over the edge (not sure I'm explaining this right, someone better with words can jump in anytime)and give it a quarter turn back and forth every blow. Something that fustrates me when watching so many beginners draw out metal is the wasted energy that goes into moving the metal sideways instead of long ways. F=MxA when forging heavier stock swing your hammer faster. But don't give up, although it may seem slow right now drawing out tong reins is good practice, plus you end up with something at the end of it.
|
|
JimG
- Thursday, 03/15/07 11:39:36 EST
|
GURU: Thanks for the info
|
|
ML
- Thursday, 03/15/07 11:49:51 EST
|
HI JimG,
I should point out that I was using a fuller to help control which way the metal was moving. Do you still suggest the 1/2 on/off technique in addition to using the fuller?
So, to be clear, I would "corrugate" the surface of the stock with the fuller then beat down the bumps. Is this correct?
Mike
|
|
Mike Berube
- Thursday, 03/15/07 11:51:54 EST
|
Oh, and I was heating to a very bright orange (maybe orange-yellow)
Mike
|
|
Mike Berube
- Thursday, 03/15/07 11:53:02 EST
|
Mike, this is just from my own Doctorate Of Personal Experience but I would advocate the half on half off technique instead of the fuller. Were you using a top fuller, or a bottom one? Either way you are loosing some energy into the fuller rather than into the work. The way I do it isn't really corrogating it. The half blows leave a fairly smooth surface that just need minimal cleaning up.
|
|
JimG
- Thursday, 03/15/07 12:02:22 EST
|
JimG,
I had a fuller in the hardy hole (I guess that's a bottom fuller).
For what it's worth, it is a home made fuller. 3/8" bar stock standing up with 3/8" round welded on top.
Mike
|
|
Mike Berube
- Thursday, 03/15/07 12:04:44 EST
|
Tempering gun springs:
Gail, I assume you're doing flat springs such as are used in flintlocks? I've done some of that. I also do not recommend the hot lead method. Your best bet is to harden in the forge fire, taking care to normalize several times (heat up slowly to just above non-magnetic and allow to cool in air, which refines the grain structure and relieves forging stresses) before the final hardening. You don't say what steel you're using, but for most spring steels used in gunlocks a warm light oil is usual. The warm oil transfers heat faster than cold oil, believe it or not. Warm the oil to around 130 degrees F. The spring should be cleaned to bright steel with no scratches or sharp edges before hardening. Immediately after hardening, clean the spring back to shiny steel using fine sandpaper, say 400 grit or above.
Temper with a handheld propane torch equipped with a flame spreader. This softens the flame, making it easier to get uniform temerature over the whole spring. SLOWLY brush the flame over the spring, which you should be lying on a piece of soft firebrick or held carefully in small tongs. Watch the colors appear on the shiny steel, turning it in the light to be certain you can see them. If you are careful, you can bring the whole spring to a uniform dark blue color, nearly gray. If you're holding it with tongs, change your grip point from time to time to ensure you temper every spot.
If the spring is too soft, i.e. it doesn't have enough "snap" after tempering, you will have to re-harden and re-temper.
Modern investment-cast springs are often made from 4140 alloy steel, older springs can be anything from 1095 to 5160. I prefer using 5160 for replacement springs, as it's a fairly forgiving steel for seat-of-the-pants heat treatment. 1095 does not forgive any mistakes.
|
|
Alan-L
- Thursday, 03/15/07 12:14:02 EST
|
 Forging Anvil Corners: This brings me back to what I keep telling folks about repairing anvils and the need for ROUND corners. This photo is of the 500 pound Euroanvil at Oak Hill Ironworks. On the far edge they have ground a 1/4" (1/2 round) or slightly larger radius next to the side shelf. The rest of the anvil is only dressed a little more than the factory edge. Forging Anvil Corners: This brings me back to what I keep telling folks about repairing anvils and the need for ROUND corners. This photo is of the 500 pound Euroanvil at Oak Hill Ironworks. On the far edge they have ground a 1/4" (1/2 round) or slightly larger radius next to the side shelf. The rest of the anvil is only dressed a little more than the factory edge.
In many cases folks carry this radius around the fillet at the shelf and along one edge. This makes a very nice place to forge work that needs to be supported in a smooth corner. Often the far side radius is tapered all along the edge of the anvil so that the smith can pick the radius he needs.
Holding the work up at an angle and striking at this corner makes the most sturdy fuller you will find. Standard fullers are usually for dressing work to a specific radius.
Dressing chipped corners rather than welding them up is a good way to make the anvil more useful AND avoid damaging it with welding. Also note that while many smiths use the horn for a hardy this is not a good practice on old wrought iron anvils as the horn is welded on with a large butt weld that is often very weak and occasionally break.
Photo from review : Forging Solutions, Hand Hammer Vol.1
|
|
- guru
- Thursday, 03/15/07 13:25:41 EST
|
Hello everyone I work at a third person natural history museum, Called Shaker village of pleasent hill in kentuky. And I'm constantly plagued with questions both innocent and asinine, Now the kids i can handle but when the grownups "And not all of them mind you just the ones that ask dumb questions to try and trick me". a little bout me ,age 23, years blacksmithing 3 1/2, certified Arch, mig and tig welder, know next to nothing about metallurgy but enough to seem competent. I just recently upgraded my forge and it still needs work and tools, I have a small library of books concerning blacksmithing to bladesmithing to goldsmithing and I still dont know enough, I dont think I ever will. But it seems that I know more than some people that say they been make'n knives fur tweny ears... now I know that certain references will contradict each other but this particular guy unlike most other bladesmiths that visit was hell bent on proving that I didnt know what I was doing. First question How do you anneal metal, right as I was talikin to some kids, so I told him I heat the metal to a dull to Bright cherry and set it in the ash from the coal or set up against somthin and let it air cool. second question well how do you hardin the edge of the blade, now dont take me the wrong way I take advice when givin and I know the limits of my own knowledge, but this guy was just plain rude; I told him it depends on what tool you make and what its for, so I told him the temper can be from 400 F to 900 F I usually make thin to thick blades and some wood working tools so most are hardend in the 490 to 650 range, thank krom I knew a little more than he did he was gettin on my nerves, once I started using numbers he left. just a little story for you guys, But heres my Q another bladesmith came along and told me he uses chainsaw blades for knives all in all okay I guess but dosent chrome air harden ??
|
|
Aaron B,H
- Thursday, 03/15/07 15:22:54 EST
|
I'm sorry about the Q being there at the end I have a serious Adhd Thing and have to write what I'm thinking when I'm thinking it or I cant remeber what I was thinking..
|
|
Aaron B,H
- Thursday, 03/15/07 15:56:51 EST
|
My new 7" x 12" bandsaw arrived this AM (Northern Tool #14573). While admitting I likely don't know the difference between a mediocure and a good one, I am very pleased with it. 99% ready to use out of the crate. Didn't realize it came with a quick adjusting vise. Nice feature is a set of wire brushes to clean off blade after cut. Stock length rest rod is 5/8" and held down by an honest to God bolt, not a hex screw. Only cut one small piece of stock with it. Cut same stock yesterday with 4" x 6" and took maybe 30 seconds. This one went through it in about 5.
Question though: Tag on it reads: For shipping purposes only the tension on the blade has been reduced. Before attempting to cut any material you must readjust the blade to the proper tension. A new label indicates the tension strength. For proper tension the indicator mark on the tension plate should line up with the center of the blue area. A break-in period is strongly advised for maximum blade life. Run the blade at a feed pressure reduced by one-third for the first 50 square inches of cutting. If you are cutting material with strong work hardening characteristics, apply enough extra feed pressure to take a good chip.
Now the label reads: Band Dynametric Tension. On left is High Tension. On right Low Tension. Between is a blue box right beside a yellow box.
Machine arrived with indicator already set in the middle of the blue box - which the tag said it needed to be adjusted after arrival. Assuming that is normal operating setting, how do I know how to back off that 1/3rd feed tension pressure? If you use width of colored boxes setting now would be say 75% of width on the high side. Would backing off 1/3rd mean to adjust it to where the indicater was in between the blue and yellow boxes or slightly in the yellow?
One aspect I don't like is the saw is too mobile on the wheels. It looks like there is a bracket on the front bottom for possibly bolting on a piece of wood to give it floor contact. Or, since the saw stays in place, I could simply take off the wheels or set it on blocks.
|
|
Ken Scharabok (Poor Boy)
- Thursday, 03/15/07 16:11:38 EST
|
Aaron B.H: At some historical site the blacksmith is expected to stay in the period. Say your's is 1850. You have to pretend to not know anything beyond that period.
|
|
Ken Scharabok (Poor Boy)
- Thursday, 03/15/07 16:13:54 EST
|
Ken, When the instructions are in pigeon English translated for Chinese that MIGHT have been incorrectly translated from some other language to start with. . . .
The fact that the blade tension was higher than the factory recommended just means that the assembler could not read English or didn't care.
I have always had to adjust bandsaw tensions by-guess-and-by -golly. I tighten until the blade makes a satisfying low "thonggg..." sound and let 'er rip. My blade life on good top of the lines blades has always been good, running until the teeth are gone.
I would adjust it to the correct operating tension (blue) and forget it. Although some folks recommend blade "break-in" I think it is a line of BS from blade welders. If you give it a good long "break in" then the warrantee will be out on the weld. If you don't observe the "break in" then it was your fault. In either case you are out of a blade.
When I stopped buying cheap blades from an outfit with an old worn out, out of calibration, low tech blade welder my blade weld problems went away. The fellow selling the good Lenox blades said the special welder for the bi-metal blades required by Lenox to be a dealer cost $25,000. Pricy welder. But I NEVER had one of their blades break. The cheaper blades I HAD been getting from a local place never got a chance to wear out and some failed within seconds. . .
Set it to blue and enjoy it.
Yep, you need to block it up. Too big a saw to be running away from you. Most I have seen on four wheels had the locking type casters.
|
|
- guru
- Thursday, 03/15/07 17:04:26 EST
|
Demo Hecklers: Aaron, When people are that rude I would hand them the hot end of a bar of steel. . . Of course I am big enough and ugly enough that if I give a guy a "I don't like you, go away or I'll squash you" look then they would go away. . .
As Ken said if you are supposed to stay in period then you can play dumb. Tell him your blade quench is the morning urine from a red haired virgin. Your steel is the best imported English shear steel. Your hammer was made by a decendent of Th0r or Cain.
But you DO have some terminology issues. In one place you said temper at 400 F and then in the next sentence harden at a similar temperature. . . Might be typos but please think about it. If you are staying in period you stick to color ranges. Good descriptive colors like peacock blue and ocean sunset.
But the best thing to do is ignore the SOB.
Chainsaw "blades" (the chain) are a mixture of different steels depending on the part. Pins, links and cutters are all different alloys, none air hardening. Another popular chain for knives is motorcycle from your favorite Harley, Triumph, Indian. . . Both are forge welded into a billet, layered and rewelded. Makes a random pattern "Damascus". The steels can be almost any kind of medium carbon steel that make so-so blades and the random pattern is rather artless and requires no talent to create. Real pattern welded steel is high art. These are folk art. Guys also like knives, jewelry and what not made from their Toyota Land Cruiser parts. Bearing race steel is popular. The guys that REALLY care and make roller-chain Damascus or most any highly decorative laminated steel blades forge weld a good edge piece on the blade. These can be a plain piece of steel OR a fine layered laminated steel. In either case the edge is edge steel and the body of the blade is decorative.
Not too many years ago some guy was going on and on about the ABS. The ABS this and the ABS that. . I had no CLUE what he was talking about and ask what did an "antilock braking system" have to do with anything? He was talking about the American Bladesmith Society. If you put ABS into Google The American Bureau of Shipping and American Bamboo Society comes up pages before the American Bladesmith Society. He thought I was dumb as dirt and I thought he was an ass. . .
|
|
- guru
- Thursday, 03/15/07 17:39:00 EST
|
Aaron; whats wrong with making blades from an air hardening steel? They usually have fairly tight limits on forging temp and annealing is hard to do without a programable furnace; but you can make a good blade out of many such steels.
BTW if it's cooling in air after heating to critical it's normalizing. Anealing requires it to cool slower than in just air so the pieces needs to be totally covered by insulation while it's cooling.
One thing I have found helpfull is to have a show-off piece that I can haul out and say well I made this---lets see some of your work! A lot of people assume that watching Conan's father do it in a movie or playing computer games makes them an expert. You run through a lot of them quickly if you offer them the hammer...
Thomas
|
|
Thomas P
- Thursday, 03/15/07 17:45:37 EST
|
Post Script: having a "fancy piece" can help when you are working on a simple project and people assume you can't do more---handing them a bandsaw blade and strapping billet wired together and then a 1000+ layer item made from it's twin will sometimes work wonders.
Others the only thing you can do is to accidently splash them from your quench tank and hope they move on.
Remember: "never get into an argument with an idiot because passers-by may have trouble figuring out which one is the idiot!"
Thomas
|
|
Thomas P
- Thursday, 03/15/07 17:51:35 EST
|
when would be a good time to buy a powerhammer
i have been forging for about 3 months and i have a guy helping me and guiding me. he owns praire forge and has a powerhammer for me if i want it i have it on reserve should i wait for a few months or just buy it moneys not an issue
|
|
jake
- Thursday, 03/15/07 18:33:23 EST
|
I use google for searching the anvilfire forums like this:
inurl:anvilfire.com
where you replace with what ever it is you're after.
I have seen many sites actually use google for internal site searching directly & think this is a good way to go. After all, their core business is search & so they probably know how to do it. Of course I don't know if $$$ are required for them to provided this service.
|
|
andrew
- Thursday, 03/15/07 19:02:05 EST
|
in that last post, I had a term in less-than greater-than braces which was filtered out.... It should read
inurl:anvilfire.com term
where term is replaced by whatever it is you're looking for.
|
|
andrew
- Thursday, 03/15/07 19:03:57 EST
|
actually, if you use
site:www.anvilfire.com term
and replace term with your search terms, you get better results. Learn something new each day....
|
|
andrew
- Thursday, 03/15/07 19:05:55 EST
|
Thank you for information on adjusting the blade.
Have played with the saw some this afternoon. I can see where it will require some changes in my basic procedures. Yep, one with a swival vise rather than swivel saw. Was simple on the 4x6. Now requires loosening and tightening a couple of bolts to change angle - and metrics at that. PITA.
I rather pride myself on how little scrap I generate. Excluding the ends of freon bottles and such, in the past ten or so months I have mostly filled a single 5-gallon bucket with scrap. I suspect if I were to pour it out and sort through the pieces I'd probably find some I can find a use for. And that's from perhaps a half ton of assorted steel stock. Bigger saw will make it harder to utilize the odds and ends from cutting stock.
I've consigned the 4x6 to the local ag auction later this month, but might chance my mind and find a corner for it. In cleaning it up for the auction I think I found my blade breaking problem with misaligned rollers. Thank you to whoever (ptree?) who suggested that might be the problem.
And, wow, does it cut faster than the 4x6. There you started a cut and went off to do something else until you heard a drop in the catch pan. This one is through say 1/2" x 1/2" in maybe ten seconds.
Saw was made in Taiwan. I've had very good service from their products.
|
|
Ken Scharabok (Poor Boy)
- Thursday, 03/15/07 19:33:43 EST
|
Jake in general you buy a powerhammer when your monetary situation makes it attractive.
Are you sure this is what you plan to do for a goodly ammount of time?
Do you have a place/wiring for it?
Do you do stuff that it would help?
Most people suggest that a person lean the basics by hand before moving to power as it gives you the grasp of how metal can be moved when hot.
Thomas
|
|
Thomas P
- Thursday, 03/15/07 19:45:12 EST
|
4x6 Saws: Ken my 4x6 would fall through a half in square in seconds. . . Your old saw must have been REALLY bad. Years ago I had a small job making 300 some 1.25" round pins and we sawed them all up in a couple hours on the 4x6. I had just tuned up the saw and we cut all the pieces to within +.010 to .015" of finished length and faced them off in the lathe in one light finishing pass. So the cuts had to be very near perfectly square. We cut, faced and chamfered all the pins in one relaxing day in my primitive shop.
Your new saw should cut a 1/2" bar in the time it takes you to gently let the saw onto the work an let go, OR in the time it takes to say ZZIP. Put in a coarser blade and speed it up!
|
|
- guru
- Thursday, 03/15/07 20:15:09 EST
|
Need to Buy a Power Hammer: Thomas has good points.
If you are serious about going into blacksmithing and know you can market your wares OR have them pre-sold then a power hammer will pay for itself in a short time. BUT, and this is a BIG BUT, few smiths make a living at what they do. While a power hammer is a great tool to have it is NOT the first tool for a hobby shop. You NEED the following:
- Full size Oxy-acetylene welding outfit with cart, cylinders, protective gear. I recommend Victor or Smith.
- Good 225 to 275 Amp buzz box arc welder. AC-DC is better. I recommend Miller or Lincoln.
- Heavy duty 7.5" angle grinder. I like the DeWalt Wildcat high speed.
- 4.5" angle grinder. Pick your poision. Even the "name" brands are throw aways but they are great little tools.
- A REAL drill press.
I prefer old antique 20" geared head flat belt floor models.
Any floor model designed for metalworking with a 1 HP motor is what you want.
You will also need a full drill index from 1/16" or 1mm to 1/2" (13mm) or greater by small increments.
A good drill press vise helps but you can also make your own furniture.
- Bench grinder for sharpening tools.
You need the above plus your smithing tools before you need a power hammer.
IF, as you say money is no object then the actual value and condition of the hammer is very important. While mechanical hammers like Little Giants are no longer made there are many air power hammers on the market that make Little Giants look like the old farmer's plow sharpeners they are. I would recommend that you go to the Power Hammer School and learn what a really GOOD power hammer can do for you before buying one. See our advertisers list.
|
|
- guru
- Thursday, 03/15/07 20:42:16 EST
|
In the list above I left out cutoff saw. Either a small bandsaw type or an abrasive chop saw. I hate chop saws but many recommend them because they are cheap compared to a decent saw.
|
|
- guru
- Thursday, 03/15/07 20:48:11 EST
|
DONA Z. MEILACH 1927 - 2007:
A good friend to the blacksmithing community passed away on January 6th of this year. She was also my friend and inspiration in blacksmithing and I hate the fact that I missed her passing.
Dona published 86 books in her lifetime. Six, I think were about ironwork. Her first,
Decorative and Sculptural Ironwork was written in 1977.
I wore out my copy which opened up the wider world of artistic metal work to me.
When I launched anvilfire.com in 1998 the first book review I wrote for anvilfire was of that 1977 book. I did not know at the time that it had been out of print for almost 20 years. . . .
When I found out it was out of print I took a chance and looked her up on the Internet phone directory. I was astounded to find her listed at her Carlsbad California address. So I took another chance and called her. I was amazed, SHE answered the phone and we chatted for about an hour about the need to get Decorative and Sculptural Ironwork reprinted. That was the beginning of a friendship that led to our publishing numerous calls for materials and numerous reviews of her books.
Dona will be greatly missed. Her books have inspired three generations of blacksmiths and hopefully will inspire more. Her latest books have educated the public as to what was available from smiths world wide and have probably sold hundreds of millions of dollars worth of work for us as a community. She was our friend and blacksmiths ambassador to the world.
|
|
- guru
- Thursday, 03/15/07 21:11:37 EST
|
Jake, While the others made good points, I suggest You speak to the guy who owns the power hammer about weather it will continue to be available to You, or if He will sell it soon regardless. If it is a good machine in good condition, You can afford it and have a place to put it, it might make sense to buy this one now rather than drive half way across the country to get one later, or wait a long time for one close by. You DO NEED the equiptment Jock mentioned, My policy is to grab equiptment when it is available at the right price and in good condition. If You don't overpay for the power hammer You stand a good chance of recovering Your money if You don't stay with smithing.
|
|
Dave Boyer
- Thursday, 03/15/07 21:57:33 EST
|
Guru,
Thanks for the advice on repairing the axe head. The tool was completely broken in two but I attempted the weld and with a little effort I made the weld. The head slotted back onto the old handle and is plenty strong enough to cut wood.
Thanks again,
Will
|
|
Will
- Thursday, 03/15/07 22:31:00 EST
|
Mike Berube,
I'm one of the guru's helpers who has been hand hammering hot steel for 44 years. I don't understand some of what has been written earlier. I have an arsenal of hammers of various weights. My most used hammer is a 2.5# Channellock cross peen. I forged my own 4# hand hammer from an 18 wheeler truck axle. I use it when I want to move heavier stock. I would use it when drawing a 5/8" rein. I don't have a rule of thumb, however, about when to use it.
I wouldn't use the half-face blows over the anvil edge radius. You get a shoulder or "step" every time you hit. It is true you're drawing metal lenghwise to a degree, but then there is all the cleanup to be done on the anvil face to get rid of the shoulders.
Many smiths draw on the base or center of the horn, holding the work parallel to the anvil step, the horn acting like a gigantic fuller. By doing so, you'll get more draw than side spread. There will be some cleanup, but much less than if you were shouldering on the anvil edge. Furthermore, the hammer face is rockered, so to a degree, it matches the fullering effect that you're getting from the horn on the bottom.
Let's think about the hammer face for a moment, and say that the face is 1 5/8" D or 1 5/8" square. When you hit 5/8" round stock, more contact is made by the hammer head lengthwise, naturally, than side to side, simply because the 5/8" stock is narrower than the hammer face. For that reason, you will get slightly more draw that side spread.
Hitting the steel more rapidly is not where it's at. You hit harder, not faster. In fact, using a heavier than usual hammer, you must pace yourself to save your body, and part of that is in slowing the hammer rhythm and lifting the hammer higher, well above the head. The rhythm slows, but each blow is more telling.
I've had many smithing students. When they are learning to use the sledge, I will sometimes say, "Hit harder." Instead, 50% of them will hit faster, lifting the hammer the same height. We then need to stop, and I will show them how to lift the hammer higher and how to slow the rhythm a bit. "I said harder, not faster!!" That's me, yelling.
Relaxation is so important. The hammer is held loosely enough, so that it rocks a little within the grip. The hammer is "thrown" at the work. We all know how to throw a ball or skip a rock across the water. You can watch someone throwing a ball, and you can see immediately whether they're using only their arm or whether the whole body is being used in "whiplike" fashion, bringing the energy up from the ground. Same way with hammering.
If it's mild steel and you want to move metal, use a bright lemon heat. Many U.S. smiths do not. They come out of the fire at orange or red heats, thereby making it hard on themselves. The heat can even border on a light welding heat. In fact, the British call a bright lemon a "near welding heat." Beginners don't like to use the lemon heat because they're gun shy. They're afraid they'll burn the metal by overheating. The other reason is that the metal is a little harder to see when it comes out of the fire...and there is a heavier scale than the darker heats have. GET OVER IT! Use the lemon heat, and reheat when you've forged the work down to a cherry red.
|
|
Frank Turley
- Thursday, 03/15/07 23:11:58 EST
|
|
|
[
CSI - anvilfire MEMBERS Group |
Getting Started in Blacksmithing ]
|

 "Hebo at MetalFab 2006 twisting")
 "Hebo at MetalFab 2006 twists")
 "Carell at MetalFab 2006 scrolling")
 "Drawing a point : Hand hammer Techniques")