| WELCOME to the anvilfire Guru's Den - V. 3.0 |
|
THIS is a forum for questions and answers about blacksmithing and general metalworking. Ask the Guru any reasonable question and he or one of his helpers will answer your question, find someone that can, OR research the question for you. This is an archive of posts from December 9 - 15, 2001 on the Guru's Den |
|
|
|
Can you tint or color any type of steel(mild,high carbon etc.) a hue other then blue or black, like a green or red? |
| Adam Ophaug - Sunday, 12/09/01 07:14:18 GMT |
|
Hi everybody, After publishing an add in the newspaper I came opon two anvils, that I would appriciate any advice of their quality : The first is, one horn anvil who had 'KO HLSWA SWEDEN' writen on one side and 'E73 B27 70' writen on the other side. I guess 70 means 70 kilo's. The owner asked for 400 $. The other one is a two horn anvil of 100 kilo which the owner claims to be from austria and that 'RESITA 1800' is writen on it. he wants 470$ for it. They are both in good condition (maybe even new). I will also appriciate any advice about choosing the rignt type of vise, and how to verify that they are in good condition. Thanks Amit. |
| amit - Sunday, 12/09/01 07:29:01 GMT |
|
I have recently bought a 50kg anvil from a junk shop.It seems that it was left the way it came out from the foundy as I had to mill both the top and bottom surfaces flat.I bought it for approx $180 which is very cheap considering the options I had.Making a new one from steel plate was going to be at least 3times as expensive,not to mention the work involved.Anyway,my question is,how do I get to harden the surface as wHen I hit it with a hammer it makes a very muffled noise,it does not make that high pitched ringing noise which normally anvils do.I do not wish to harden the whole thing as then it might be too brittle and risk breaking it.I am new to all this so excuse me if I might have asked a silly question. |
| Donald Briffa - Sunday, 12/09/01 12:15:09 GMT |
|
amit. Sounds good to me, if they are in fairly good condition. Donald Briffa. I saw one anvil, as you may be describing, about 25 years ago. It had casting pits of the face which were filled with some sort of black asphaltum or tar in order to disguise the mistakes. When hot iron contacted the face, a bunch of goo came out of the pits. I don't want to mention any names, but the initials of the British manufacturer are "Brooks". Har de har. They were advertised as being made of cast steel, but because of the lack of a good ring, I reckon they are closer to a cast iron. If it is a Brooks, it has a really thick heel. I'm highly suspect of the quality. |
| Frank Turley - Sunday, 12/09/01 14:15:41 GMT |
|
Hi agian, Continuing my question from above : tommorow I will be seeing the two anvils. I have heard that one can know about the quality of the anvil by the ring produced when hitting the anvil with a hammer. Can anybody explain me what am I supposed to hear ? Thanks Amit |
| amit - Sunday, 12/09/01 15:33:59 GMT |
|
Steel Colors: Adam, Temper colors range from gold to purple but are not suitable protection from rust and corrosion although they may be lacquered to provide some protection. These are achieved by starting with an absolutely clean, preferably polished steel surface in a non-alloy steel. The part is heated evenely to 400 to 650 degrees. The temperature determines the color. This takes very fine temperature control. If you miss the desired color you have to refinish and start over. Otherwise no. That is what paint is for. |
| - guru - Sunday, 12/09/01 16:31:58 GMT |
|
Anvils: Amit, the Swedish KOLHSWA will ring like a bell when struck. See our anvil series on our 21st Century parge for information about testing and quality of anvils. Many anvils shipped to the US are marked in pounds including many KOLHSWA's. A 70kg anvil will weigh 154 pounds. Not a bad size. However a 70 pound anvil is a little light and the price would be too high. Used anvils range in price from $2.50/pound to as little as $1/pound for good anvils. The 100kg anvil would weigh 220 pounds. If the person selling them (in the US) has more than one anvil they will probably know the weight in pounds. Once you have determined the anvils are good steel then LOOK at them closely. It is common for KOLHSWA anvils to chip along the edges and around the hardy hole (generaly from mistreatment). Severe chipping lowers the price. Then look even closer if the corners are perfect. It is common to weld up chipped corners. I would prefer the chips to a repair job and this lowers the price even more. I've had several KOLHSWA anvils and have a big 300 pound one now. I like them other than the fact that the edges tend to chip. I've never chipped one but all the ones I've had were chipped from other users. In most cases you can dress out mild chipping with a grinder or work around them (or both). |
| - guru - Sunday, 12/09/01 16:47:54 GMT |
|
Rough Casting: Donald, I'm sorry to say they saw you coming. . . ALL good anvils are sold finished and hardened. However, there are MANY cheap cast iron castings made for door stops and porch decorations, and that is all they are. There are even well finished imported cast iron "anvils" that are also doorstops. . (actualy they are anvil shaped lumps of cast metal of dubious quality). Anything over scrap price (10c/pound)is too much for these. Brooks (Vaughn - Brooks of England) makes a decent cheaper anvil. However, the folks making cheap castings often use an actual anvil for a pattern (including the logo). The heavy heal of the Brooks is ideal for a cheap casting. This is what Frank probably came across. Cast iron cannot be hardened or made to be hardened more than it is as cast. It is also brittle and chips. A heavy blow or two on the horn or heal of a cast iron door stop will likely break them off.
See the following archive for a photos of some cheap imported anvils. |
| - guru - Sunday, 12/09/01 17:05:43 GMT |
|
Anvil Prices: Ocassionaly folks still come across good anvils (in the US) for 50 cents a pound. The typical price from an individual is still floating around $1/pound as they have for some 50 years. . . From dealers and other blacksmiths at blacksmith meets, good anvils sell for $2 to $3/pound unless they are very exceptional OR collectors items (over 300 years old) then they might sell for more. Poorer condition but good quality old anvils may sell for less even from dealers. It pays to purchase anvils where there are other smiths to advise you and I have never seen a junker being sold over-priced at a blacksmith's meet. The demand for good clean Hay-Buddens and Peter Wrights often puts their price above new anvils. However, large anvils tend to go for less because of the high total if using $/pound prices. More common Mouse Hole anvils are also rising in price. Old antique hornless and stumpy colonial anvils that you couldn't give away ten years ago now demand high prices from collectors due to Richard Postman's Anvils in America educating folks to what these funny lookiing old anvils actually are. New cast steel anvils are selling for anywhere from $2.50/pound to as high as $6.25/pound. The higher priced ones having a better finish and known quality control. New Peddinghaus (the only forged steel anvil currently made) sell for 4.42 to 7.50/pound. At auction anvils may sell for reasonable OR outrageous prices. On eBay anvils have sold for way more than new prices. However, several dealers I know have had no luck selling at these inflated prices on eBay. Almost every anvil I have been asked to look at on eBay was misrepresented in some way (one-of-a-kind, perfect condition, high quality). The last one I looked at was a door stop that was already bid at over $1/pound. Currently there are two kinds of junkers on the market. Rough cast-iron anvils domesticaly cast for flea market and antique dealers. These are generaly cast from leftover (trashy iron) at small foundries and are unmachined. Then there are the imported cast iron "anvils" being sold by catalog tool sales companies and farm suppliers. These are generaly machined but are not very pretty shaped (even for a door stop - see link above). However, we did see a load of anvils off a frieghter in Maryland that appeared to have used a 350# Hay-Budden as a pattern. No matter what they look like, they are door stops and will never be anything else unless melted down and cast into something useful. Sadly, unwary folks buy these at prices at which that they could have bought a REAL anvil. With the growing popularity of blacksmithing I'm afraid that this is going to become more and more common as the unscrupulous find a growing market for their junk. . . |
| - guru - Sunday, 12/09/01 18:14:47 GMT |
|
Donald-- since you now own it, why not just use it and, despite the muffled ring (horrors!), see what happens? It is, after all, just something to pound on. Ring and bounce are nice, but it all comes down to what you make with it. You might be delighted. |
| Miles Undercut - Sunday, 12/09/01 20:46:57 GMT |
|
In regards to the answer to the steel colors question I posted. How do you keep the temper colors on the steel after removing it from the fire? Do you simply quench after and buff the piece? |
| Adam Ophaug - Sunday, 12/09/01 23:18:34 GMT |
|
i am a new student of blacksmithing. Would you tell me a fair price for an anvil? I have plans for a forge made from a brake drum, but heating the metal won't be too much fun if I have nothing to shape it on. |
| S.Wisecup - Sunday, 12/09/01 23:21:21 GMT |
|
i just found a little gaint made die(like tap and die)and i was wonderind where i could find info on it and its cost.thanks alot |
| - Chris E. - Monday, 12/10/01 01:33:06 GMT |
|
S. Wisecup, Read about three messages up to the guru's message about anvil prices. |
| Paw+Paw+Wilson - Monday, 12/10/01 02:05:45 GMT |
|
Adam:The temper colors are oxides just a few molecules thick and rather fragile. The spacing of the molecules reflects only specific wavelengths of light.It becomes a bit deeper when held at exactly the proper temperature for a while.. Cool slowly and the less you do the better it will look...till rust overtaketh. Chris: there was and still are an assortment of companies named Little Giant. They make all sorts of different things and believe they are the only company of that name. Donald: Miles has a good point. The smiths of antiquity would have been pleased silly to have an ASO like that. Works of splendor were made with less. We are just spoiled. If you find you are spending a lot of time forging..then an adult anvil will thrill your soul for years to come..you'll really appreciate it. |
| Pete F - Monday, 12/10/01 05:00:35 GMT |
|
Temper Colors: Adam, Pete pretty much covered it. When tempering for color you do nothing to the work except oil or lacquer it after it air cools. If you read my instructions it says to finish (sand, polish) BEFORE coloring. You do not even touch it least the oil and salt in your finger prints produce permanent marks (unless you are applying oil). Little Giant: Pete got that one right too. Currently there is a pump manufacturer called Little Giant at the top of the web directories. I have catalogs from the late 1800's that have various Little Giant tools including tap sets. Since there were hundreds of types and styles on top of numerous companies you would have to be very specific (photos, patent dates, logos, any box information) to make a positive ID. Antique tools of this type is not realy my "thing" but there are collectors that also collect old catalogs in order to identify such items. Begineers Tools: S.W., See our anvil series on the 21st Century page and the various tool articles on the iForge page AND our plans page. We have a brake drum forge plan there as well as an article about my old forge made of car wheels under "My First Forge" (also linked from the Getting Started article. |
| - guru - Monday, 12/10/01 06:09:04 GMT |
|
little gaint hand die.........WELLS BROTHERS COMPANY GREENSFIELD.MASS.U.S.A. Looks real old.Got it from my wifes grandads tool shop. if thats any help... Thanks alot |
| - Chris E. - Monday, 12/10/01 12:28:09 GMT |
|
I am writing a dissertation on images of the forge in 19th-century poetry, and would like to find out the following: 1 a very basic description of the forging process as carried out by local blacksmiths 2 any changes to forging as a result of the industrial revolution and whether local blacksmiths continued to exist through the nineteenth century 3 any contemporary texts (eg a blacksmith's manual). I don't need vast amounts of detail as (obviously) my dissertation's primarily about literature, but I do need accurate information I can credit to a source! Any help would be very much appreciated. Thanks, Judith Evans Emmanuel COllege, Cambridge UK |
| Judith Evans - Monday, 12/10/01 13:42:29 GMT |
|
Hello, I am interested in the cable demascus used by the Vikings. Specifically I am trying to find the ratio of the softer core brass to the harder outer brass when making the cable. I have looked on the web, in local libraries, and talked with other people who make blades and have yet to be able to find this ratio. If you know this ratio or where I can find it, please let me know. I am planning on using this ratio for making a silver, cable demascus, Viking sword for my girlfriend. It is going to be made from sterling (99.9 fine) and common silver and tempered. If you have any tips on this also please let me know. Thank you in advance. Feilan |
| Feilan - Monday, 12/10/01 15:18:09 GMT |
|
Judith; look at "Practical Blacksmithing" by Richardson it is a collection of articles from a blacksmithing journal of the 1880's and 1890's. Diderot's Encyclopedia and "Mechanicks Exercises" (Moxon) are a bit early for your time and of course smithing ewas very different out on the frontier in America than in the guild systems of Europe---was there a particular location you had in mind? Anvils: if you are starting out on a low budget don't get hooked into thinking you have to have a London Pattern anvil, most of the world forges on stuff that basically looks like a chunk of steel, pattern welded viking swords were made on small anvils that today would be considered too small to work on for a shop. Yes the horn and hardy are handy and size does make the job easier (unless you have to carry it outside when you work!); but you can get started with just a hunk of steel. I currently own about 3/4 ton of anvils yet I still use a square block of steel for Y1K demos and a broken off knuckle of a RR car coupler for "neo-tribal" to show folks they *can* forge without a bunch of money tied up in tools---much better to get a decent postvise and use a improvised anvil than to have a good anvil and no postvise. Also "damaged" anvils can be quite cheap; bought one that was over 100# with a very good face---just it had the heel broken off at the hardy (faceplate must have been multi plate as the edge is real clean where it was broken) the face is better than my 93# travel anvil I paid twice as much for 20 years ago. It's a great anvil and cost under 50 cents a pound. Add in a postvise to hold hardy tools and it's still under 75 cents a pound... Thomas so many deals so little time to forge |
| - Thomas Powers - Monday, 12/10/01 16:02:06 GMT |
|
Judith: The industrial revolution brought huge benefits but for the crafts, it was a catastrophe of the first magnitude. The legions of weavers, coopers, cabinet makers and blackmsiths, coppersmiths, silversmiths, goldsmiths and so on :- craftsmen who earned a good, reliable living and who commanded positions of respect in society are all gone. There remain only a few oddballs like us - tolerated by society as harmless lunatics. While it's true that in the last 30 years, smithing and other crafts have undergone a minor renaissance, they remain marginal in importance. If, 200 years ago, all the smiths had suddenly vanished, it would have brought the economy to an abrupt stop - today they would hardly be missed. |
| adam - Monday, 12/10/01 16:17:57 GMT |
|
Historical Basics Judith, Blacksmithing has changed little in its 3,000 year existance. The primary change has been that charcoal (made from wood) was used for fuel for most of that time and mineral coal has only been in general use for about 200 years (150 in the Americas). However, there were some earlier uses of coal and in many parts of the world smiths still use charcoal. The second major change has been the replacement of "wrought iron" by steel. Wrought iron is nearly pure iron with some fine slag inclusions that give it a wood grain like structure. Wrought was made from the beginning of the iron age until very recently. Steel is iron with a small amount of carbon. The carbon makes steel hardenable. Since the invention of the Bessemer process in the mid 1800's, steel has been replacing wrought iron. The Bessemer process converts brittle cast-iron into maleable lower carbon steel cheaply and in bulk. The modern blacksmith generaly works with the commanly available low carbon steel instead of the rare and expensive wrought iron. However, wrought is more maleable (softer) than mild steel and there is considerable demand for old wroght by modern blacksmiths. As iron and steel became cheaper the smiths tools (such as anvils) grew heavier and heavier. However, there has been little change since the early 19th Century. Smithing Basics: Air is blown into the charcoal or coal fire using a bellows or blower. This increases the temperature of the fire and makes it a small concentrated fire. Wrought iron or steel is heated in the fire to an orange or yellow heat to make it plastic. The hot metal is then hammered to shape on an anvil. Besides forming to shape the blacksmith can also "forge weld" or "fire weld" pieces of iron and steel together. In this process the metal is heated slightly hotter than the forging temperature and the pieces brought together on the anvil and hammered together. Smiths also use chisles to split the hot metal and punches and chisles to apply textures or decorate it. In the most modern shops gas furnaces are used to heat the metal. Power hammers (forging machines) have been available for small shop use since the late 1800's and are now found in the shops of many hobby smiths. The old wood and leather bellows is still around but is often replaced by electric blowers. Many modern blacksmith shops look more like machine shops than the romantic "smithy". But the process of forging is the same. Blacksmithing in North America and much of the industrialized world almost died out in the 1960's. Factories produced most of the products that smiths made in the past and the passing of the horse drawn vehical also left the wheel wright and farrier's (horse shoers) without work. In North America the typical smithy was "frontier" business or what some call a "general" blacksmith shop. In these shops horses were shod, wagons repaired and every other type of smithing carried out. But the bulk of the work was related to the horse. Almost all these shops died out with the coming of the automobile. Those that did not were the ones that converted to service the new "iron horses" or those that produced architectural work or specialty tools. In the 1970's smithing as an art form made a come-back in North America and this interest has spread througout the world and is alive and well today. Today the average smithy produces architectural work or decorative items. However, there are still a few small shops that produce large quantities of industrial commercial items such as pry bars, hammers, tongs and tools for other smiths. Due to the boom in riding horses there are more farriers than ever. However, most carry there tools to the horse rather than the horse traveling to the shop. There are even a number of carriage builders and wheel wrights in business. But the bulk of "forged" items come from factories both modern and ancient using huge power hammers or forging presses that make items in a single blow. |
| - guru - Monday, 12/10/01 16:39:07 GMT |
|
Viking Damascus: Feilan, The Vikings did not have cable, therefore no cable Damascus. That is a modern (20th Century) invention. Cable and viking swords are not made of brass or bronze. They are both made of steel. The process of laminating non-ferrous metals (copper, brass silver) into decorative patterns is a Japanese process called Mokume Gane'. It was never used by Vikings and is a relatively modern process. A search of our archives will find posts on that subject as well as links. Although silver will harden slightly by heat treatment it does not harden and temper like steel. Mokume Gane' is used for decorative items, art and sculpture. There are many books on these subjects available from Centaur Forge and Norm Larson. See our Getting Started article for references as well as the resources listed at the bottom of our FAQs listed on our 21st Century page. You have a long path ahead of you. I recommend that you purchase a nice gift for your girlfriend. I doubt that she will wait for you to complete your metalsmithing studies. |
| - guru - Monday, 12/10/01 17:29:21 GMT |
|
Broken Anvils: Thomas is quite right. It is fairly common to come across anvils with missing horns or heals broken at the hardy hole. The most used part is still hardened steel with a LOT of mass under it. I have an old colonial with a missing horn that I gave $5 for. See the photo I posted on the Hammer-In. That hornless anvil in the background is in good shape otherwise. To supplement the lack of a horn Josh ground a heavy radius on the edge where the horn previously was. For most purposes a round edge is as good as a horn. I suspect that most folks would miss a hardy hole more than the horn. Josh used this anvil and one made from a cylindrical A36 "drop" at last year's Spring Fling to prove a point. You don't need a "traditional" shaped anvils to do good work. The fact is that from an historical perspective it is only quite recently that anvils had horns. There are large numbers of colonial era anvils that were made without horns. These were suplemented by stake anvils OR in cases where much decorative work was being done the stake anvil was the only anvil. Thomas is also right about vises. If I had to give up my anvils or my vises I'd say take the anvils. . . I guess I have a vice about vises. |
| - guru - Monday, 12/10/01 17:52:11 GMT |
|
History of: Judith, There are answers here and on the Hammer-In both. |
| - guru - Monday, 12/10/01 19:58:21 GMT |
|
Re: Finishes thank you, guru, for the reply re how to preserve the patina on my copper beads. i'm so new to this that i don't even know what a good water clear lacquer is, but i'll track one down. and thanks for the heads up on the reaction of the copper and wax. --allene |
| allene - Tuesday, 12/11/01 01:11:04 GMT |
|
Judith: The verities of blacksmithing, tied as they are to the hardest of physical realites have left a profound mark on the language..or marks. But more than that , they have offered a pragmatic interpretation of the nature of the physical world that shapes our conceptualization. A rudimentary knowledge of the medium will not suffice to achieve your stated goal. You must know the iron and how she behaves...you must know the hammer. The word must tie profoundly with the methodology. You wouldn't want us to think all English majors are lightweights! |
| Pete F - Tuesday, 12/11/01 01:51:36 GMT |
|
Pete, Chuckle! Just a tad on the pedantic side, wouldn't you say? (grin) |
| Paw Paw Wilson - Tuesday, 12/11/01 03:05:54 GMT |
|
Ahhhh the language. . . "Too many irons in the fire" comes from blacksmithing and only after burning up several hard worked pieces (by trying to work too many pieces at once) does one truely realize the gravity of the statement. "To strike while the iron is hot" is another blacksmithing term used as an English idiom. Its importance is only realized when you understand why it is said that, "The smith that strikes cold iron will go to hell." Although not anthromorphic in shape the anvil has
English styled anvils (London pattern) have a "heal" the thin square end of the face opposite the horn. European anvils have almost always had double "bicks" one round in section the other square. A cultural difference? The horn of the anvil started as a small conical protuberance but has developed into a large part of the anvil looking very much like the horn of a rhinoceros. The seeking of ever larger anvils with larger horns among smiths may have phalic symbolism. "Mine is bigger than yours". . . "The difference between men and boys is the cost (size) of their toys". Then there is the typical confusion of the English language as it applies to blacksmithing. A forge is normaly the place that holds the fire but it can also be the shop where forging takes place. Then, "to forge" makes it a verb indicating the act of hammering metal or to copy a work or document. "Wrought iron" is a specific material but is also used to describe any decorative metal work, wrought (the verb), cast or fabricated. Then you can be "wrought" with an emotion. . . To the ancient smith the ring of the anvil drove away evil spirits and to the modern smith it represents the ring of the cash register. Then there is always Road Runner and Wiley Coyote trying to drop fantastic shaped anvils on the swift little bird. . . modern symbolism? Be sure to check out our collection of myths and legends on our story page. |
| - guru - Tuesday, 12/11/01 04:13:30 GMT |
|
I have some old Chinese origin brass pieces that I would like to get repaired by brasing. I have been told that brass is particularly difficult to braze and old brass where the alloy content is not known is particularly difficult, even chancey. Is brasing old brass difficult and/or chancey, and if it is do you know someone that specializes in this work that I could send the parts to? If you could reply directly to my email I would appreciate it,as I am not sure I can get to your forum, if you have one. Any help would be appreciated. Thank you, Cullen Wilder |
| - Cullen Wilder - Tuesday, 12/11/01 03:37:58 GMT |
|
Cullen-- This is why God in Her infinite wisdom gave us epoxy. Or JB Weld, same difference. Brazing old brass or new brass is not particularly difficult, but why take a chance? |
| Miles Undercut - Tuesday, 12/11/01 04:30:13 GMT |
|
Cullen, Brass is fairly easy to braze but it IS a tad tricky. Brazing brass is actually "welding" brass and as with all metals that conduct heat well the process means bringing more of the part near the melting point than you may want. Identifying the alloy is more difficult. Is it brass or bronze? This is required for metalurgical reasons. Then matching the alloy exactly (or nearly) is required only to get a good color match. If the piece is polished then color may make a big difference. However, if it has a patina then color is not so important. Where the risk is involved, is melting parts that you do not want to melt and then the expense of repairing those parts. Classic old Chinese castings are quite intricate and the original patterns were carved in clay. Restoring carvings by welding and carving the metal directly can be done but it is costly. I've repaired old brass items and lost my shirt every time. I wouldn't do it again without the understanding that the customer understands the costs and is willing and able to pay them. |
| - guru - Tuesday, 12/11/01 04:36:06 GMT |
|
Lacquer "Water clear" is the standard clear gloss lacquer. Flat lacquers have texturing agents added that reduce the clarity. Lacquer comes in two types. Modern automotive finishes are acrylic lacquers. Old style lacquer is a nitro-cellulose based product. The old style is harder and polishes better than the new acrylics. However, it is supseptable to aging in sunlight. Acrylic lacquers are generaly available from automotive paint suppliers and will be labeled "For Professional use only". The solvent (thinner) contains benzene among other things and must be used with plenty of ventilation. It is also highly flamable. Nitro-cellulose lacquer is available from musical instrument makers supply houses and wood working suppliers. I use Stewart-McDonald Guitar Makers Supply. The same warnings apply. Both materials should be applied by spraying but they can also be dipped. They generaly dry too fast to brush. |
| - guru - Tuesday, 12/11/01 05:00:29 GMT |
|
Judith Evans-- Shire Publications Ltd., Cromwell House, Church Street, Princes Risborough, Aylesbury, Bucks, HP17 9AJ, UK, puts out a series of scores of small booklets on the crafts, including the village blacksmith and chainmaking, fascinatingly illustrated, well-written with lengthy lists of pertinent museums. History of the British Iron and Steel Industry from c. 450 B.C. to A.D. 1775, by H.R. Schubert, London, Routledge & Kegan Paul, 1957, 445 pp., is solid gold, will get you orientated with lots of stuff on smithing. The Blacksmith's Source Book an annotated bibilography by James Fleming, Southern Illinois University Press, Carbondal and Edwardsville, 1980, 204 pp. is comprehensive listing of books on the subject, including several on the history of British ironwork and smiths. Your own British Artist Blacksmiths' Association has a website and a kind and helpful webmaster. Post your query there on the notices page and you'll be inundated. Tools and Weapons by W.M. Flinders Petrie, London, British School of Archaeology in Egypt, University College, Gower Street, W.C., 1917 will show you vividly there's nothing much new under the sun when it comes to smiting implements of work and death. (Petrie's treasures will a small museum at the University. Not much iron, but worth a visit.) Don't forget the British Museum, which has tons of armor and blades, and an illuminating display depicting how hammering ore begat iron wayyyy back in the age of the stone anvils. |
| Goods Inward - Tuesday, 12/11/01 05:02:57 GMT |
|
Judith Evans-- another book worth looking at if you want a how-to on forging (and it has not changed much since those Romans whose handiwork Petrie shows, or since Moxon's time) is The Blacksmith's Craft, published by Britain's Council for Small Industries in Rural Areas and Macmillan in 1952, 104 pp. If you tire of writing about smiting and poetry, with just this little book, a hammer and an anvil and some coal you can-- with some practice-- make a living making poetry in iron. |
| Goods Inward - Tuesday, 12/11/01 05:25:38 GMT |
|
Where can I find a blacksmithing apprenticeship in New England? I have approximately two years experience and I want to pursue my ironwork a lot further. Thanks |
| Ben Gibson - Tuesday, 12/11/01 13:26:47 GMT |
|
Ben. Where-abouts in New England? There is an organization in New Hampshire called New England Blacksmiths that could be of help. http://www.neb.abana-chapter.com/ |
| Gronk - Tuesday, 12/11/01 13:59:29 GMT |
|
Judith, "Under the shedding sprussnut tree...". Longfellow's renowned poem comes to mind. The title, "The Village Blacksmith", has been used usurped as the titles of two 20th century books, both probably out of print. They may be useful for your dissertation, however. One, by the illustrator, Aldren Watson, shows 19th century smithing methods. The other, a British book by David Webber, is a wonderful treatise, chock full of lore and tales re blacksmithery. Webber's book may open some doors for you, especially with regard to literature. It doesn't tell you how to make a damn thing. What a relief! |
| Frank Turley - Tuesday, 12/11/01 14:46:32 GMT |
|
Goodmorning Guru, finally finished building my first gasser. The design is a steel shell lined with refractory cement. forge chamber is 4" high x 8" wide by 12" deep, closed back. The upper corners are beveled so the chamber resembles a half octagon shaped cave 12" deep. I'm useing two Ron Reil type venturi burners that are mounted in the beveled corners so they point into the chamber at about 45�. They are offset so the don't face each other. I have the front opening covered with a brick that has three 1" holes. The problem is that i'm not building up any heat. After 20+ minutes a piece of 1/4"round steel placed thruogh one of the 1" holes is barely cherry red. a piece of 1/2" round isn't even still black. I'm getting good blue flame with a good steady "roar" from both burners with flame even extending from the holes. Whats wrong? should I be covering the front opening? not sure of the gas pressure (need gauge) but I'm running from a 100# tank through a regulator made for LP & rated for 0-30 psi. 1/4" lines. I understand the problem of diagnosnics on something you can't see so I've included as much info as I can think of that would be relevant. I appreciate any and all input. Thanks, Scott "Dodge" Scheer |
| - Dodge - Tuesday, 12/11/01 15:39:45 GMT |
|
Forge problem: Dodge, I suspect your home built burners may not be up to snuff OR that they are not sized correctly for the forge. Try closing off one burner. If you have too much flame outside the forge then all the gas is burning outside, not IN. The balance between forge volume and burner capacity is a very delicate balance on atmospheric burners. That is why I recommend blower type burners. They almost always work or can be adjusted to work. Meanwhile your venturi/atmospheric burners must be nearly perfect to work. Get a pressure gauge for that regulator. Even though these are not very accurate at low pressures (get a 0-30psi) they DO give you a reference point. Pressure needs varies wildly with this burner type depending on the orifice size. Somewhere between 4 and 12 psi. Without a gauge you don't have a clue. Go back and read Ron's design instructions carefully. Somewhere he specifies forge volume to burner size. He also give orifice sizes. Having too much burner is as bad as having too little on this type forge. |
| - guru - Tuesday, 12/11/01 16:12:51 GMT |
|
Apprenticeships: Ben, There really is no such thing in modern America. Read my comments on apprenticeships from the archives of the last few months. |
| - guru - Tuesday, 12/11/01 16:17:00 GMT |
|
Gas Forge: The volume of your chamber is about 380 cu in. The RR burners are each good for about 340 cu in of burn so you have a lot of burner capacity for your forge size. I am guessing from your description that there is no rear opening in your gasser. If the only exhaust your forge has is the 3 1" holes in the "front door" then you have too little venting and the burners are being choked off. The rule of thumb is that the exhaust should be more then 7x the area of the burner cross section - so if you have 2 burners made of 3/4" pipe thats approx 0.5 sq inches each - 1 sq inch total - which in turn requires 7 sq inches of exhaust. (do be sure to check my math) By my estimate you have less than a third of that. Too much venting is not good either because it just allows the heat to escape. Another thing to bear in mind is that the refractory cement (you didnt say how thick it is) takes a lot longer than kaowool to come up to temperature . In a gas forge, the work is mainly heated by radiation from the glowing refractory walls. For most work you want these walls to be glowing orange or orangey yellow. When I start up my forge, I crank it up to 30 psi and run it pedal to the metal until the inside is the right color. When it's running right you should see the "dragon's breath" a couple of inches of orangey flame escaping from the front opening. You also didnt mention what jet size you are using. Most people use a #58 or #59 jet - I live at high altitude and use a #64 jet. Of course, a smaller jet means a higher operating pressure to get the same BTU |
| adam - Tuesday, 12/11/01 17:06:43 GMT |
|
Hi THERE ALL... A short note for Frank Turley: I was reading on a site about the iron fest, that you were at some time ago. It had a picture of Richard Rumpf on his portable porch Is there any way to contact Richard Rumpf to find out more about his portable porch and how it evolved to its usefulness as a deminstration tool? If you could help me I would be very thankful. Carl |
| Carl - Tuesday, 12/11/01 18:29:03 GMT |
|
hi, how do you make a medieval blacksmiths forge? |
| tom - Tuesday, 12/11/01 18:35:18 GMT |
|
Hello, My husband was given an anvil with no horn. By chance, would you happen to know what kind of anvil this would be? Also, he is looking for an anvil with a horn in the NYS area that is roughly 200lbs. Do you have any ideas, where we might find one. Thanks for your help! |
| Rebecca Thompson - Tuesday, 12/11/01 20:21:13 GMT |
|
Blacksmithing References in English, or Fiery Phraseology: One of my favorites: "going at it hammer and tongs." |
| Christine - Tuesday, 12/11/01 20:54:08 GMT |
|
Medieval Blacksmiths Forge: Tom, First you start with a medieval blacksmith. . . It depends on the country, location and the prosperity of the smith. Many smiths worked at a hole in the ground like a small campfire. In most cases a small single action OR a pair of single action bellows were used (wood and leather). The Viking forge and I suspect many others, blew the air through a hole in a "shield stone". The nozzel(s) on the bellows did not touch the stone but were pointed at the center of the hole. The nozzels were often stiff dry rawhide or carved wood and could not withstand high temperatures. When there was other industry such as pottery the forge may have had a tapered ceramic tube or several tubes fit together to provide an air pipe that fed into the side of the firepit (latter a firpot) near the bottom. The forge was still a hole in the ground. In cities and towns the forge may have been a raised platform of wood and masonry. In a permanent forge the bellows may have been larger but the style would be the same. Air would pass through a passage in bricks or a clay tube as above. The sophistication of a permanent forge varied but even a modern forge in not much more than a hole in the ground on a raised platform. . . In closed buildings a large masonry "hood" or chimney collected the smoke. These were often as large as the forge and the opening much larger than a common chimney. Another common style primitive forge still in use today by bladesmiths is a "trough" style forge. In these there are two brick walls that confine the fire in a narrow space (about 6 to 8" - 150 to 200mm). Air is blown in from the bottom. The fire can be stacked shallow or deep depending on the work. The fuel in forges was almost universaly charcoal. |
| - guru - Tuesday, 12/11/01 21:28:07 GMT |
|
Hornless Anvil Rebecca, There are several possibilities. 1) It is a sawmakers anvil. These are a low retangular block that most people would not recognize as an anvil. 2) It is an antique colonial era anvil. See photo below. 3) It is broken See photo (December 2001) on our V.Hammer-In. The anvil in the left background is broken. 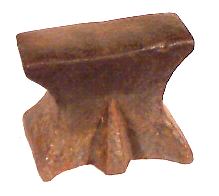 Antique Hornless anvil ca. 1750. |
| - guru - Tuesday, 12/11/01 21:38:57 GMT |
|
i have been looking at books in the blacksmithing field and was wondering if you have any favorites or books you would recomend for the general blacksmith. |
| - rich - Tuesday, 12/11/01 21:46:39 GMT |
|
what is that antique hornless anvil made from? is it all soft iron? From the color in the picture it looks like it was made from spam |
| adam - Tuesday, 12/11/01 21:52:39 GMT |
|
Adam, The body was wrought iron, with a tool steel face plate that was forge welded to the body. Wrought iron, because of the slag inclusions was highly rust resistant. |
| Paw+Paw+Wilson - Tuesday, 12/11/01 21:55:39 GMT |
|
Medieval Forges; masonry, side blown, single action bellows (double action late renaissance) charcoal as fuel up until the later middle ages and even then it was used in many places due to availability unto this very day. FOr building a good medieval bellows look in "Divers Arts" by Theophilus, written circa 1120 A.D. and easily available in english translation through Dover. Also look at pictures of medieval forges (some are in armour books as they are shown in use for armour forging) IIRC there is a picture of one in "Cathedral Forge and Waterwheel" by Gies and Gies. Note Medieval forges are not portable; the smithy was a very stable place (I've visited ones that have been in the same location for 500 years) For emergency repairs during travel or battle where access to a local stithy is not possible a smith can use a campfire or hole in the ground smithy as are used to this day in parts of the world; I've used a trench forge myself for a specialized project. *where* *when* and *what* *MUST* be specified: the middle ages were about 1000 years and covered a wide range of locations and activities---a peat burning forge of the isles makin fish hooks in the early middle ages would not look at all like a Nuremburg armour's forge from the late middle ages---and it may not look like a Nuremburg locksmith's forge of the same year! The devil is in the details! Thomas |
| - Thomas Powers - Tuesday, 12/11/01 21:59:43 GMT |
|
Antique Anvil: Adam, Paw-Paw is right, it is wrought with a steel face. This particular anvil was heavily rusted except for the face and is in usable condition as-is. This is an exceptionaly fine example of a colonial era fifth foot anvil and may date from as early as the late 1600's. It is well proportioned and has very graceful lines. An anvil like this will currently sell for more than a large new anvil. |
| - guru - Tuesday, 12/11/01 22:55:22 GMT |
|
Books: Rich, Start with the recomendations in our Getting Started article then our book review page. Sources are also listed there. |
| - guru - Tuesday, 12/11/01 22:58:42 GMT |
|
Medieval Forge (portable): Ah, Thomas, but there are some who believe there WERE portable forges at the time. Anvilfire NEWS V.10, p.11 - Viking Forge (portable) Surely this is not unique. The smith of the Mastermyr Find was traveling with tools and scrap iron. The missing items, his sled and anything tied to it OR that floated, would have told the rest of the story. . . The problem with portable forges of the era is that unless it was recorded in art or literature we know nothing about them. A mud and wattle fire box carried on a cart would not have survived. Decay and recycling have left our picture of what WAS very narrow. The physical record shows nothing of the tools of the ancient Greeks but the durability of glazed pottery has shed enough light on the subject that we know there was little difference in the tools of 500 BC and 1000 AD. One carving in stone shows the beautifuly shaped hammer and chisel of the stonecutter. The chisel, octogon or hex in section flares from the middle to the striking end and before the taper of the point. Crisp corners and smooth lines indicating great skill in forging. The hammer, blocky and short handled, no different than stone cutters hammers of today. No change in 2,500 years. . . |
| - guru - Tuesday, 12/11/01 23:33:10 GMT |
|
Dear Carl, This is a trick question from Mad Magazine, right? I don't have a clue as to what a Rumpf is, nor do I know about portable porches. If there is such a thing as a portable porch, I hope it comes with a rocking chair. |
| Frank Turley - Tuesday, 12/11/01 23:41:30 GMT |
|
Hi Jock! It's been a little while but I have a question for you. I've contracted a lost wax sculpture and would like to build a kiln (burn-out oven). If we can make our own forges, a kiln couldn't be that much more difficult...right? Regards from eerily warm MN. Brian, Odin Forge |
| Brian Rognholt - Wednesday, 12/12/01 00:26:06 GMT |
|
hi this is DaQo'tah and I wish to learn how to forge knives in my home-made coal forge... I have a few questions, so here we go.. I wish to start out and learn everything on some steel that I get free from work,,,now I thought it was just right to use, cut already to 10inch by 1 once round bars,,,but a guy says its foolish to make a knife out of what he calls "Mild steel"....what is this stuff, and is it pointless to try to learn knifemakeing on it? 2nd question,,,I have a book by some guy that writes of BLADE mag, and he is so happy wit h the way he heat treats the blades of his knives. He gets a nice color effect that I guess shows that the knife is strong at the edge but soft at the back,,,how does he do this? also,,I wish to understand the parts of a knife,,,but I just dont get the "bolster" idea...whats a Bloster for? more questions to come... |
| DaQo'tah - Wednesday, 12/12/01 01:21:44 GMT |
|
Judith. Correction. In my post to you, I sais the author was David Webber, and I meant Ronald Webber. |
| Frank Turley - Wednesday, 12/12/01 01:30:41 GMT |
|
I am interested in bladessmithing but i don`t know how to get started. |
| - Robert T. Siskin - Wednesday, 12/12/01 03:11:49 GMT |
|
Brian, I used to work in a foundry many years ago where the burn out was 1/2 a 55 gal drum lined with blanket,with a piece of sheet metal for a top. You didn't mention what kind if investment you are going to use. If its ceramic shell you'll need more heat. The burner that we used was NG like the mongo style on Reils site. If its the old fashioned plaster type you just want get the wax out. Bronze casting is fun! I kinda miss it. Lately customers have been asking for modeled details on some fire screens and beds etc. I've been using pewter. Its weird to pour hot metal into rubber molds. Wait 2 mins, pop it out and pour another. |
| - Pete-Raven - Wednesday, 12/12/01 04:26:35 GMT |
|
Dodge: Cast refractory material requires a couple DAYS of short burns to completely dry out. Until fully dry, forges run "cool". |
| grandpa - Wednesday, 12/12/01 04:45:58 GMT |
|
Burn out Kiln: Brian, As Pete mentioned it is pretty easy. It can be either atmospheric or a blower burner. The temperature is much lower than a forge and may be critical if you are calcining plaster molds. I'm not sure of the exact temperature but its around 1,000°F. Set the burner so that the flame is nearly parallel to the side of the kiln and at the bottom. You don't want the flame to impinge on the mold. Its good practice to use high enough temperature to burn out any wax (not just melt) that may be trapped. The calcining temperature is plenty hot enough to do that. Then pour the metal while the mold is still hot. This assures a dry mold and better metal flow. I would melt out and retrieve as much wax as possible and then burn out the rest. As always, PRACTICE the necessary moves to be sure you have the right tools and laydown space. Its a real disaster to find out you do not have anywhere to set down the hot crucible to transfer to a pouring staff or that you don't have some kind of ingot mold for the extra metal. . . OR a way to flip over and support the hot plaster mold. |
| - guru - Wednesday, 12/12/01 04:56:36 GMT |
|
Bladesmithing: DaQo'tah and Robert. There are MANY books on bladesmithing, I suggest you start there. Centaur Forge and Norm Larson have hundreds. The hardenability of steel is directly related to how much carbon it contains. Wrought iron with no carbon is not hardenable by heat treating. Mild steel only has 0.1% carbon. It is slightly hardenable but not sufficiently so to hold a good edge. Medium carbon steels in the range of 0.4% to 0.6% are hardenable and suitable for large blades like swords. Fine hard blades are most often made of steel in the range of 0.75% to 1% carbon. High carbon tool steels are just a little over 1% carbon and the hardest of the standard steels. Over that steel becomes too brittle and around 2% carbon and up it becomes "cast iron". Selective tempering is used to soften hardened parts to make them tougher. The harder steel is the more brittle it is. The softer the less likely to break. Every item made of steel is a compromise between hard and brittle or soft and tough. See our Heat Treating FAQ for more information. There are two schools of knifemaking. Forging and stock removal. In stock removal the blade is shaped by sawing, grinding and filing. In forging the steel is heated and forged between hammer and anvil. However, in forging there is also a lot of grinding to finish the blade (depending on your smithing skills). So you need grinders for both methods. Mild steel is a good place to learn forging. Tool and spring steel used for making blades is more expensive and more difficult to work. It doesn't hurt to practice forging on mild steel so collect those scraps. They will also be good for other things. If you are going to forge blades you need to start with general blacksmithing references. See our Getting Started article for books and sources and our book reviews for details. |
| - guru - Wednesday, 12/12/01 05:40:27 GMT |
|
Dodge: In addition to what the guru said... Do you have enough exhaust opening? If you are getting a blue flame at the burner, you may be running too lean a mixture. Also the orientation of the burners may contribute to the problem. DaQuotha; The questions you are asking are answered by any basic text on the subject...do a little reading before you ask so you won't embarass yourself. Read the "getting started" section and the other helpful sections here at Anvilfire. Also, the knifemakers sights deal in detail with what you are asking ( see the links section) . Iron is a recalcitrant medium that requires that you be stubbornly self reliant...the info you seek is easy pickings if you look. You'll not be able to make a decent blade 'till you know basic blacksmithing and more. Dive in there and get your mind dirty. |
| Pete F - Wednesday, 12/12/01 07:02:37 GMT |
|
Do you or anyone else have any good Venturi effect burner plans or know where to get them? |
| Adam O - Wednesday, 12/12/01 09:34:26 GMT |
|
Guru, Thank you for your help. Regarding the anvil with no horn, we also noticed that the anvil has a punched pritchell hole (about 5/8). Is it possible that this could be a mouse hole anvil? If so, do you know the rough value (it is in good condition). Does the pritchell hole rule out the antique colonial anvil? Do you know which is worht more, the colonial anvil or the mouse hole? Best regards, Rebecca |
| Rebecca - Wednesday, 12/12/01 13:46:37 GMT |
|
Pete-Raven, Would you contact me via e-mail please? |
| Paw Paw Wilson - Wednesday, 12/12/01 13:57:18 GMT |
|
was wondering if anyone knew how to take a drill press chuck apart?..I have a 5/8" chuck with two of the holders? higher than the third one....would like to put them the same..as this causes the drill bits to be off center....Thanks |
| Mikey - Wednesday, 12/12/01 14:00:00 GMT |
|
Mikey, First things first. Take the chuck off of the drill press, and soak it in B-Laster, WD-40, or Kerosene. It may settle back to where it belongs when it's freed up. Usually rust is the cause of this problem. I had one that had that problem. I soaked it free, tapped the long grips with a hammer till they went back where they belonged. Has worked fine ever since. |
| Paw Paw Wilson - Wednesday, 12/12/01 14:11:09 GMT |
|
Guru, I'm going to quibble a bit here; mild steel is a good material to learn forging but not necessarily bladesmithing. Working high carbon alloy is *not* the same as working mild and if you get trained on mild you may carry "bad" habits over to forging High C---working too hot, working too cold the dreaded quench tank or even just laying the piece on a cold anvil can result in problems. High carbon steel is essentially free in coil springs and leaf springs and if blades are the way you want to go I'd suggest taking a nice large coil spring and getting it torched along the axis giving you a bunch of carbon steel "rings" to straighten and forge (remembering to hot cut off the torched areas). I was at a demo once watching a fellow make a tool to do something for his project. I could tell he seldom worked high carbon steels, forged too cold, too hot and quenched the piece in water---when he handed the tool around I found a large crack in it and pointed it out to him---he said it was ok and the tool broke on the second blow... OTOH I tend to "baby" mild steel treating it like high carbon that makes it take more time and effort to forge...and then there is wrought iron... (Dakota most of us frequent several smithing forums) Thomas |
| - Thomas Powers - Wednesday, 12/12/01 14:26:10 GMT |
|
Do you know any sources for purchasing used, oxy/acetylene cylinders that are in good condition. Source would have to be within driving distance of Santa Fe, NM (400 mile radius) or have reasonable shipping cost. |
| Earl Backenstow - Wednesday, 12/12/01 14:31:34 GMT |
|
Hey Adam, Thanks for the spam anvil idea -- now I know what to bring to the next guild potluck! hmmm, now how to support the horn . . . |
| Escher - Wednesday, 12/12/01 15:24:49 GMT |
|
Escher, Small diameter wooden dowel embedded in the center. |
| Paw+Paw+Wilson - Wednesday, 12/12/01 15:59:10 GMT |
|
Thanks for the burn-out answers. I have problems paying >$1K for a LOWER temp unit than one I made. The investment is indeed a ceramic (up to 2000 degrees). Wax and other miscellany are being shipped from Shor International. Site looks nice Jock! Keep it up. Brian. Rain/snow mix in MN |
| Brian ROgnholt - Wednesday, 12/12/01 16:00:07 GMT |
|
Earl: Try Ed Grothus at the "Black Hole" in Los Alamso 662 5053 |
| adam - Wednesday, 12/12/01 16:12:50 GMT |
|
Venturi Burners Adam 0, Check the Ron Reil burner page. It is linked from our burner plans page. (See plans). |
| - guru - Wednesday, 12/12/01 16:20:49 GMT |
|
Thanks All, For the input on my "cold gas forge" problem. About orafice size; I have the gas tube machined to accept wire feed welder tips. I started with a .035" (approx #64) I switched to a .045 which is somewhere between a #58 - #56. about the exhaust opening; I moved the brick with holes out and leaned it against the opening to create more exhaust area. Also increased pressure. (note to self: buy a gauge!!)One or all of these things seemed to help. This time I was able to get a piece of 1/2" round red to orange hot. also walls of forge were turning orangey hot. Someone mentioned that the blue flame at the burner might mean a lean mixture. What color should it be? I was under the impression that the flame was suppose to be blue. I do believe the refractory (which btw is 2.75"-3.00"thick) has some drying out to do still as there is steam coming out between the shell and base during and after the burn period. Going to use the suggested several short burns. Thanks again for everyones help. Dodge- |
| - Dodge - Wednesday, 12/12/01 17:02:47 GMT |
|
Drill Chuck Disassembly and Repair: Mikey, it is decievingly simple. On Jacobs chucks and clones of Jacobs chucks (patented in 1916 so their patent ran out long ago) with solid steel parts (no pressed metal), 1) Support the body of the working end on a tube OR with the jaws withdrawn on a flat surface. 2) Press off the outer shell using a tube that rests on the edge of the shell. It comes off from back to front. I've found that I usualy have socket wrench sockets that will do for either job. The shell is pressed onto a split (hardened and broken) nut that engages the jaws. Once the shell is off the nut can be removed and the jaws fall out (or can be pursuaded out). Dirt chips and rust (as Paw-paw mentioned) are the biggest problem. However, I have repaired many chucks by filing off swaged metal (from hammering or droping) around the nose of the chuck. It is best to file flat across the front shortening the body a little. Sometimes the back where the shell rotates gets damaged and also needs to be cleaned up. On quality chucks (all standard Jacobs but not their Homecraft series) it is difficult to get the jaws out of sequence producing different heights. This usualy indicates a broken thread on the nut or a jaw. Repair parts are available in a kit but are close to the price of a new chuck. To reassemble: 1) Install the jaws fully extended and then the pieces of the split nut. The threads in the split nut are tapered, the small end fitting toward the chuck nose. The jaws will fit the nut in only one order and it may require a couple attempts. Some thin grease will help hold all the parts in place. Note that SOME Jacobs chucks have match marks or numbered jaws, look for them. Test the action by holding the nut together and rotating it untill the jaws are fully retracted. 2) Set the chuck body and jaws on its back and set the sleeve in place. Using a tube that fits around the nose of the chuck and rests on the gear teth press the sleeve on. It should press smoothly until bottoming out. For pressing a drill chuck I have used a large vise as well as arbor presses. They normaly come apart and go back together quite smoothly. Never try to dissasemble and repair a drill chuck while on the machine. NOTE 1: Ball bearing chucks have a bearing race and balls to contend with. The method is the same. Just don't lose the balls. . You can also disassemble and repair chucks that have arbors stuck in them. It simply requires that you work around the arbor. NOTE 2: To remove damaged tapered arbors you may need to drill a hole in the back of the chuck. Many have a small (1/8") hole to prevent traping air but this is too small to drive off a stuck arbor. With the jaws open OR removed you can drill out the thin section of the chuck so that a punch (3/8" - 10mm) or so be used. The chuck body is soft enough to drill easily. NOTE 3: Jacobs Homecraft and other chucks with pressed metal parts are not repairable. The outer shells have a rolled lip that holds them together. Old Jacobs chucks found on lathes and drill presses tend to have hard lives. Dissasembling, cleaning and reassembling can make a world of difference. One of the biggest problems is that the proper chuck keys are not available or are worn out. New Jacobs chuck keys are available for ALL size Jacobs chucks. DO NOT use other brands. OEM keys are cheap and fit right. Keys, repair kits, arbors and new chucks are available from McMaster-Carr and many machinery dealers. |
| - guru - Wednesday, 12/12/01 17:03:48 GMT |
|
Guru; during the early medieval period *carts* were pretty much a local item; the lack of good roads meant that most stuff was actually carried on the backs of animals when travelling overland. The pit forge/fire setup makes more sense. (the "rattle" of travel overland would be hard on a clay forge too). (we'll leave artistic interpretation as an exercise for the reader). You're quite correct in that the archeological record can lie like a dog---look at textiles! Areas with acid soils, like NE, have almost no cellouse fiber remains only animal fiber even though tools, tales, pictures, etc all point to lots of linen and hemp and nettle cloth being out there! Thomas perhaps the rest of the story was he expected to build a simple forge when he got there; takes almost no time and a lot easier than carrying around a heavy box/basket! |
| - Thomas Powers - Wednesday, 12/12/01 17:15:50 GMT |
|
Got my Christmas present from Sheri early this year. New air compressor. Campbell Hausfeld, 80 gallon, 7 HP, 135 PSI, 16.8 CFM at 90 PSI. Referring back to an earlier conversation this month, here's one of the safety warnings in the manual. (Yes, I do read the manuals. Well, sometimes. Grin) Quote DANGER Breathable Air Warning This compressor/pump is NOT equipped and should NOT be used "as is" to supply breathing quality air. For any application of air for human consumption, you must fit the air compressor/pump with suitable in-line safety and alarm equipment. This additional equipment is necessary to properly filter and purify the air to meet minimal specifications for Grade D breathing as described in Compressed Gas Association Commodity Specification g 7.1 - 1966, OSHA 29 CFR 1910. 134, and or Canadian Standards Association (CSA). End of Quote As I said then, the guru was right. |
| Paw Paw Wilson - Wednesday, 12/12/01 18:35:36 GMT |
|
at what temprature would you heat 304L stainless steel that is a quarter inch thick and roughly two inches wide and aboutfive feet long for making a sword ( i need to temper it) |
| Remus Caesar - Wednesday, 12/12/01 18:52:41 GMT |
|
The rest of the story (Mastermyr): Yes, there are lot of possibilities. The most obvious is that most villages and many farms would have a smithy with at least a forge (pit or otherwise) and a bellows. Then again, he may have been carrying his bellows too but it stayed with the sled or floated away under the ice. Like the sled it may have been retrievable where the heavy box of tools and iron was not. The smith or merchant may have survived or not. Since no remains were found nearby there is a good chance he survived but lost his cache of tools and iron under the frigid water. It is a wonderful mystery as well as a bit of history. |
| - guru - Wednesday, 12/12/01 19:06:17 GMT |
|
Well, I think he stayed down there. "M�stermyr" means "the master�s bog". Medieval smithing: I tried for a while to carry a firebox together with the bellows and anvil, but tired of it. As long as you have a tuyere you only need three stones to make a good forge. |
| - Olle Andersson - Wednesday, 12/12/01 19:59:01 GMT |
|
PawPaw The other safety warning: DO NOT use pressurized air to "dust off" clothes, skin, etc. Pressurized air has the ability to drive the particles of dirt, dust, steel filings, etc INTO the skin. Lots of folks either forget, or fail to remember, reading that warning. Enjoy your new toy. |
| - Conner - Wednesday, 12/12/01 20:35:23 GMT |
|
304L Remus, You don't, temper it that is. 304 SS is non-hardenable (other than slightly by work hardening). The "L" is for lead, to make it more machinable. For maximum corrosion resistance you heat it to an orange and then quench it (thus annealing or softening it). |
| - guru - Wednesday, 12/12/01 20:52:12 GMT |
|
I'm a grizzled ole dog, experienced in blacksmithing and dog sledding. I volunteer at our (Dallas) restored village. I came upon an item I can not identify. It may be a jewlers anvil. It is metal, 6 1/4 inches tall, stands on a 2 1/2 inch base and has a 2 by 3/4 inch working service at the top that is shaped like a shoemakers metal stand. On one side it reads K65-1181-1GT SAE ST. FORGE NAE CO. On the other side it read NAE 627 Any idea what it is? |
| Fred L. Christen - Wednesday, 12/12/01 20:53:39 GMT |
|
Odd Item: Fred, It is hard to tell without seeing it. However, the proportions sort of sound like a stake anvil or sheet metal stake. These come in a bewildering number of shapes and sizes and are used by silversmiths, jewlers and sheet metal workers doing raising and formed work like vessels, musical intruments or armor. Most have smooth rounded surfaces and a square shank to fit in a holder or bench plate. "Silversmiths" stakes are highly polished to prevent marking the soft metal but all stakes should have a smooth surface. |
| - guru - Wednesday, 12/12/01 21:49:36 GMT |
|
PawPaw thanks for info on drill chuck, its working now!!.. |
| Mikey - Wednesday, 12/12/01 22:32:03 GMT |
|
Thanks also to Guru ! I just got in and read your imput....I've had this old drill press since the early 70's and its a taiwan Special , but is still in great shape.. Hope one day to invest in a bigger one...USA of course...until then, I will have to use this one.....its got a 5/8" chuck |
| Mikey - Wednesday, 12/12/01 22:40:42 GMT |
|
Mikey, No problem, glad it worked for you. |
| Paw Paw Wilson - Wednesday, 12/12/01 23:51:42 GMT |
|
Guru, I bought an old electric powered blower the other day. I am trying to restore it. The alumina impeller hub is connected directly to the motor shaft. Of course, the dissimilar metals have reacted and the hub does not want to be removed from the shaft. I would appreciate any suggestions as to how to remove it. Thanks Garry |
| Garry - Wednesday, 12/12/01 23:53:39 GMT |
|
Gary, gentle heat. The coefficient of expansion of aluminium is greater than steel it should loosen right up. When heating to remove parts from shafts you need to heat quickly so that the shaft doesn't expand too. With aluminium you have to be careful not to melt it. It might also be another white metal, zinc, which has an even lower metlting point. OBTW - "alumina" is aluminium oxide ceramic like the cups used on TIG torches. It is not aluminium. Its a word you cannot shorten. |
| - guru - Thursday, 12/13/01 00:19:24 GMT |
|
Guru, Can't shorten "aluminium"? What about "aluminum" (at least on our side of the Atlantic). (GR). |
| Mike B - Thursday, 12/13/01 01:12:44 GMT |
|
Yep, but you can't drop the "UM" for an "ah" . . . :-) Along with our stuborness about not adopting the metric system, even though we are officialy a metric nation, we also still used Columbium rather than Niobium until relatively recently. It would make things simplier if we went ahead and adopted the latin Natrium for Sodium and Kalium for Potasium along with Wolfram for Tungsten. It certainly would make the symbols easier to understand. Eventualy we will, that is the amazing thing about the adapatibility of the English language (even though we speak slightly different dialects on opposite sides of the big pond). But alumina is a near diamond hard high temperature resistant ceramic that bears little resemblance to the soft metalic form. |
| - guru - Thursday, 12/13/01 02:31:12 GMT |
|
HOW DO I REGISTER FOR CHAT LINE? JOHNNY ARGUS |
| John Argus - Thursday, 12/13/01 03:05:28 GMT |
|
Go to the Slack-Tub Pub (the chat), toward the bottom of the page is a button labled "Registration Form". Fill it in, send it, and in a few hours I will set it up. Previously we had an automatic on-line system but too many folks were using bogus e-mail addresses and we had some other abuses. So we made the system manual. A lot of work for me but it keeps the system running better. |
| - guru - Thursday, 12/13/01 03:46:26 GMT |
|
Thomas Powers: Please e-mail me at home. I have assembled photos and dwg.s from the Viking exhibit, but your old e-mail address isn't working. Thanks. Visit your National Parks: www.nps.gov Go viking: www.wam.umd.edu/~eowyn/Longship/ |
| Bruce Blackistone (Atli) - Thursday, 12/13/01 04:03:51 GMT |
|
Guru, Thank you for the information on removing the blower shaft. I was going to write 'aluminium' as we spell it here in Australia, however I tried to remember how it is spelt in the US. I should have written 'aluminum' and not 'alumina'. |
| Garry - Thursday, 12/13/01 04:31:02 GMT |
|
I am getting back into smithing after about a twenty-five year hiatus. Thirty or so years ago I actually got a college degree in Metalsmithing. I now live in the U.S. Virgin Islands and am starting to put together the tools I need to get going again. Yesterday I was practically given an old and very used though not abused looking anvil. This thing only has the markings 89 KG, 1906, and the single number 9 on it. No other markings that I can find. The thing appears to me to be made from two pieces joined at the waist, judging from the way that the whole face/table/bick appears to be "stacked" on top of the waist/foot. The face is swayed nearly a quarter inch and the heel is dropped about an eighth. I'd like to use the thing, but I really prefer a flat surface to a saddle! Does the Guru or anyone else have any idea of the origins of this anvil? One thing, I note that the weight is given in kilos, and this territory formerly belonged to Denmark, if that gives a clue. Any help would be appreciated, since I don't want to screw this up by doing the wrong thing to it. Thanks for everything, including all that I've learned already just looking over old posts. Great service! Rich |
| Rich Waugh - Thursday, 12/13/01 05:41:23 GMT |
|
I do have a photo of the anvil mentioned above, but I don't know if it can be posted here. Can it? |
| Rich Waugh - Thursday, 12/13/01 05:45:56 GMT |
|
Rich, If you will email a scan of the photo to me, I will attempt to identify it for you. |
| Paw+Paw+Wilson - Thursday, 12/13/01 05:56:55 GMT |
|
Anvil update: I stopped at the tech school to look at the anvil a friend is cutting out of a 200 pound block of (probably) mild steel. I had to buy her a special tip for the big scarey cutter the school has but so far this project is well under 40 bucks. She's going to knock off for the holidays which gives me time to post questions. Her instructor recommends a hardened steel plate be welded to the face. Previous posts about this have resulted in not very encouraging responses. If I decide to have this done is there anything I can tell this gal that would make the task easier and result in a better anvil? Thanks! |
| - Khym - Thursday, 12/13/01 07:41:29 GMT |
|
Judith: here are two "books" http://www.angelfire.com/ca/pokerbacken/bookmark.html#T25 Not much has changed in a LOOONG time with smithing, look at Mastermyr find (1000 years +) and you will see that most of those tools loking basically the same and are to be bought today (beter steel and so but...). what RELLY has changed it is powertools and acces to stel/iron in quantity. Ofcource small things like files with better teeth, standards for screw treads (and standards in general) makes things somewhat simpler to smiths today (books describing forging and how/why..), hope to help |
| OErjan - Thursday, 12/13/01 09:21:21 GMT |
|
Khym: if you weld the steel plate with a heavy "V" (something like this �>� )on the mild steel part. And then preheat the (about 1.5-2" thick and 1/2" wider than anvil face) body to leave room for triming)face it should work then mill flat and heatreat (aneal harden and temper) then polish. if you put a layer of stainless on the face and heattreat you may get away with a marginal pre/post heat (I did but it may have been luck) |
| OErjan - Thursday, 12/13/01 15:02:22 GMT |
|
Rich Waugh, A little off the subject, but one of my recent "Turley grads" is a volunteer at the restored, old sugar plantation shop, St. Georges Village Botanical Gardens. He lives in St. Croix. If you e-mail me, I can give you contact info. |
| Frank Turley - Thursday, 12/13/01 15:04:25 GMT |
|
I have been offered(free)a Hobart welder model GF250 5517. This is a 250 amp welder 80% duty cycle with a 3kw 115ac generator,powered by a Ford 170 engine, new around '72. I have seen it running and working (about 8 years ago), however,it has been sitting outside(Atl,GA)since. Assuming the engine is servicable, what is your opinion about investing some time and money into this. I have ordered the owners manual from Hobart/Miller but parts may be difficult to get. OBTW To everyone that answers, contributes; the archives, the site. Thank you! This beginning blacksmith's learning curve has been greatly improved. |
| Tony - Thursday, 12/13/01 15:12:20 GMT |
|
Frank Turley- Thanks for the offer, but I've introduced myself to Dr. Jack already, and spent a few minutes at the anvil with him. Extremely nice fellow and very eager to learn. Spoke tremendous [raise of your school, too! I believe I met you once a couple of decades ago too, when I was working with Dusty Johnson, a farrier in Longmont Colorado. He was a magician too, as I recall. Not sure, as my memory isn't that good that far back! Thanks for the offer, though. I appreciate all the assistance I can get. |
| Rich Waugh - Thursday, 12/13/01 15:29:08 GMT |
|
Old Welder: Tony, Hobart is generaly good about parts and service. However, IF they are available you could easily end up with a lot invested and not much in results. There are too many variables to say. The engine is the least of your worries. That can probably be fixed. The critical part on these machines is the multi selector switch. This changes ranges, has a voltage adjustment and generaly does too many things. . . If that switch is failed or corroded to the point of inoperability then the machine has very limited use. I have seen several old welders with this problem. Look closely at it and then check the price and availability. I have a small portable welder-power supply that I recently traded for (nearly free). Sadly the name plate is that of a company that I can no longer find. The machine works but the multi selector switch is stuck in one position and the legend plate (or decal) is missing. The switch is typical, several concentric shafts (which are frozen together) and the knobs were broken off long ago by someone trying to get them to work. The auxilliary power outputs do not work but I believe they must be "selected" with the inoperable switch. I am hoping someone like Hobart or Onan actualy made the welder switch and I will be able to find parts. However. . if not, then the machine is what it is. An unadjustable emergency portable welder. Which if you have no other, is a great thing. But I would really like to have it fully functional as it would make a great emergency power generator if everything was working. American Cryogenics of Atlanta was probably a welding gas producer OR a welding supplier and has been taken over by another company. If you know anything about this company please let me know. The guru needs help on these things too! |
| - guru - Thursday, 12/13/01 17:01:11 GMT |
|
Thanks Guru. I'll check the multi selector switch, get it running and try it out, we'll see. I will ask around (suppliers, gas dealers, etc) and bring it up at the Alex Bealer meeting this weekend. I'm sure someone will have heard of American Cryogenics of Atlanta. I will let you know (on this forum?) |
| Tony - Thursday, 12/13/01 17:45:19 GMT |
|
Fab Anvil Khym, First I recommend that not too much be cut off that slab to make it an anvil. The current weight is good but converting it to a classic American pattern may reduce it by half (unless the pieces cut off are welded back on). Look at how efficiently these two antique anvils use material (the anvil in the background is a 350# Hay-Budden). These small anvils are VERY solid for their 125-150 pound mass. Shops with the hornless variety often had stake anvils which are almost all horn for doing bending and scroll work. 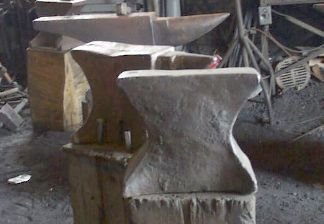 Two antique anvils, Greenwood Collection The face on old anvils is forge welded on producing a continous weld. Edge welding a plate onto an anvil results in a "dead" anvil due to the space (all unwelded joints are a space) between the face plate and the body. Heavy V'ing helps but still leaves a dead spot. Then there is always the problem of heat treating. The plate (if tool steel) needs to start anealed, be preheated before welding and then heat treated later. A good piece of tool steel the right size can be a considerable expense. A piece of large leaf spring will work if the anvil has a narrow face. It can all be done but is a lot of work for what you get. You can also "hard face" the top with welding rod. Current recomendations are to build up with an E70 series rod like E7024 and then a cover of an E100 series rod such as E10024. Although some use "hard facing" rods it is not recommended as they produce too hard and brittle a surface. This also is a lot of work and expense (energy costs on top of the rods). AND there is a LOT of grinding to clean up the surface. That is why I now recommend starting with a piece of medium carbon steel such as 4150 or 1050. Add on a horn of mild steel if needed. Flame harden the face. On the other hand, this is your friends project and she will probably do what works best for her with whatever is available. That is the fun part of this type of project. Making something out of almost nothing. Everyone wants a "modern" looking anvil with its exaggerated shape. . . |
| - guru - Thursday, 12/13/01 17:53:03 GMT |
|
American Cryogenics: Tony, you can e-mail me. I have looked them up in Thomas Register and on the web. There are several companies by that name in other parts of the country but they all deal in cryogenic services or other fields. Thank you for asking around! |
| - guru - Thursday, 12/13/01 17:58:09 GMT |
|
i am a member of the Ocmulgee guild. i do art work and saw a ceramic figurine of ad old backsmith making horse shoes with a barefoot boy watching, if anyone knows where i can get any thing like this i would be forever grateful. thanks, boxanklebabe at cs.com |
| bessie c joyce - Thursday, 12/13/01 18:04:38 GMT |
|
Hello, Ive been trying to get into weaponsmithing and armoring (Still trying to find land to build a froge on,MT but having no luck) But all the book I've found dont tell me witch is better Coal or gas? Ive been leaning to coal cuse its the old way but how to use it or what temp what do I make the forge ouyt of and so on. Plz whats your thinking of the 2 types? thank you sir. |
| Russ - Thursday, 12/13/01 19:19:34 GMT |
|
I need some advice. I am crafting a pair of weapons. I dont know the exact term for it... or even if it has one. Its close to the size of a standard wakizashi but the blade will be a bit wider. Maybe about 3 1/2 in wider. The blade length will be about 18 inches and the handle wll be about 5 inches long. It will be functional, not decoritive. My question is, what is a good choice of materials and metal to make it out of, blade, guard, handle, and hilt? I believe I havent forgotten anything.... |
| Keith - Thursday, 12/13/01 20:47:31 GMT |
|
Fuels: Russ, in general coal (if its good coal) is best, expecialy for forge welding. However, gas is much cleaner and more convienient. Many smiths have both and switch depending on what they are doing. Gas forges can run on propane, butane or natural gas. If you have NG service it is usualy the most economical. However, propane is portable and can be used to replace acetylene for most purposes, another convienience. Gas forges are limited by their size and you don't want an over sized one "just in case", because a big forge uses more gas even if doing small work. Coal forges have the convienience of heating up faster and being more accomodating to various sized work. They are a little easier to forge weld with but that is somewhat dependant on what you are used to. Coal forges also have the advantage of being anything from a hole in the ground to permanent mansonry units. The down side is that good coal is hard to get in many locations so you are forced to buy it in bluk and store it. If you are not sure about your local coal quality, order some from one of our advertisers. The major suppliers all sell first class coal by the bag. You also have the option of burning charcoal (the real stuff, not briquettes) in a coal forge. Then there are oil forges that burn heating oil od deisel fuel. These have some of the convienience of a gas forge and the better welding atmosphere of the coal forge. However, I do not know of any commercial models and they need a chimney like coal due to the fumes. Choices, choices. . . decisions, decisions. . . |
| - guru - Thursday, 12/13/01 21:28:27 GMT |
|
There�s no such thing as a "standard" wakizashi, but if 3 1/2 inches isn�t a typo you�re making a cleaver. |
| - Olle Andersson - Thursday, 12/13/01 21:30:24 GMT |
|
Blades: Keith, I don't have a clue what you are talking about (wakizashi). But good steel is good steel. There are many choices. A high carbon steel like 1095 gives you great flexibility in the heat treating and the best all around edge. Spring steels with carbon content of 60 to 75 points are more forgiving and make a tougher blade. But if you want high class exotic you go with a pattern welded blade steel. Furniture material is an artistic decision. Steel is the most functional. Gold the most ostentatious. Stainless steel is as functional as steel, doesn't rust and due to its higher labor needs is more expensive than silver. Brass is cheap, easy to work and looks pretty. Handle material is also an artistic decision. Wire wrapped hardwood is the most functional of the traditional materials but may not apply to your style. Some sort of legal irory is the most ostentatious and goes well with gold. Linen micarta is one of the most functional of handle materials and is borderline exotic because it is so rarely used (wish I could find my old limited edition Buck folder with linen micarta slabs). . . But all this is moot depending on your definition of "funtional". The purpose of a sword is to kill. Unless you are planning on murder then what "function" is it intended for? If play, (movie, games, competition) then the "function" is to bounce off other swords. In that case the material is different as well as the heat treating. These are usualy specified by the group or weapons master overseeing the games (along with how dull the edge it to be). In most cases nothing higher than a medium carbon steel of 40 points is used and often unhardenable 304 stainless is used because it stays bright. The other term I love is "battle ready". What battle? Any army today attacked by a bunch of nuts wielding swords might just laugh themselves to death before they remember to mow the nuts down with automatic wepons fire. . . Hmmm, sounds like a scene from an Indiana Jones movie. |
| - guru - Thursday, 12/13/01 22:18:58 GMT |
|
I plan to weld some 1/4" steel round stock that appears to have a thin chromium plate. I'm not too concerned about the integrity of the weld but I'm concerned about chromium vapors. I plan to wear a welding filter mask. Are chromium vapors a special hazard or will normal common sense precautions suffice? |
| bob - Thursday, 12/13/01 22:46:34 GMT |
|
Bob - Why not just grind or sand off the plate first? If you don't vaporize the stuff, it's pretty inert and shouldn't cause any real health probs. Vaporize it though, and you could have trouble..not just for you, but others around you. Just a thought. |
| Rich Waugh - Thursday, 12/13/01 23:08:02 GMT |
|
bob:chrome plate - filter masks are designed to catch particulates - I dont think this will do much for chromium vapors. You are probably supposed to use one those masks that pumps in breathing air from a clean source. If it were me, I would either grind it off or set a strong fan next to me while working so that the fumes are blown clear of my breathing air. |
| adam - Friday, 12/14/01 00:26:18 GMT |
|
Guru, I've been given the chance to buy a Wisconsin Style Mayer Bros. Trip Hammer. I'm not sure whether its 25# or 50#, it's missing its motor and its belt, and there has been some repair work which I'm not sure as to it's reliability.. but the hammer is local and I would be buying it through a friend. I've never used nor worked with a commercial hammer and this one needs some work. My questions: what's the best way to learn about powerhammers and their operation so that I might give this one some cleanup and repair, and, do you think this hammer is worth buying? I haven't mentioned a price because I haven't been given one.. what do you think is a good price range? I ask all this because I know you have extensive experience with hammers. I appreciate any help you can give me. Thankyou. - Loren Patterson |
| Loren P - Friday, 12/14/01 02:16:46 GMT |
|
Have a 306 pound anvil , want to out the value ? |
| Rusty - Friday, 12/14/01 06:10:49 GMT |
|
Chrome Weld: Using good ventilation I weld plated tool steel wrenches and sockets to make special tools using stainless rod (it has chrome in it too). The stainless blends with the chrome and you get a relatively seamless rust resistant part. |
| - guru - Friday, 12/14/01 07:06:28 GMT |
|
Anvil Value Rusty, If its cast iron its not worth the fuel for your truck to haul it off (unless you need a 300 pound doorstop). If its a mint Hay-Budden $500 to $1,000 dependening on how soon you need to sell or how long you can wait. If its an antique (anvils are not antiques until they are over 200 years old) the value might be more or less than the mint Hay-Budden. Without knowing the condition, make or age of the anvil it is impossible to tell. E-mail me some good photos and I can give you a better idea. You also need to clean the sides and look closely for markings. Most anvils have the weight marked on them as a minimum but many have the brand and place of manufacture. |
| - guru - Friday, 12/14/01 07:20:42 GMT |
|
I am getting back into smithing after about a twenty-five year hiatus. Thirty or so years ago I actually got a college degree in Metalsmithing. I now live in the U.S. Virgin Islands and am starting to put together the tools I need to get going again. Yesterday I was practically given an old and very used though not abused looking anvil. This thing only has the markings 89 KG, 1906, and the single number 9 on it. No other markings that I can find. The thing appears to me to be made from two pieces joined at the waist, judging from the way that the whole face/table/bick appears to be "stacked" on top of the waist/foot. The face is swayed nearly a quarter inch and the heel is dropped about an eighth. I'd like to use the thing, but I really prefer a flat surface to a saddle! Does the Guru or anyone else have any idea of the origins of this anvil? One thing, I note that the weight is given in kilos, and this territory formerly belonged to Denmark, if that gives a clue. Any help would be appreciated, since I don't want to screw this up by doing the wrong thing to it. Thanks for everything, including all that I've learned already just looking over old posts. Great service! Rich |
| Rich Waugh - Friday, 12/14/01 07:33:00 GMT |
|
LG Price/Value: Loren, Little Giants vary greatly in condition as many have been run to death without lubrication and maintained by people that figure a hammer needs a bigger hammer to fix it. . On the other hand there are also quite a few that have been used little and are in good condition. Look at it closely. Check for missing parts, obvious repairs, things that LOOK broken. Grab the ram and shake it. If it moves in and out or side to side the hammer has a lot of wear or or is out of adjustment or both. On larger hammers use a pry bar to lift up on the ram and check the crank pin and bearings for play. Old Little Giants sell for as little as $400 for hulks that need complete rebuilding to a high of $4,000 for perfect working machines (rebuilt, single phase motor. . ). There are two sources of information about Little Giants besides what little we have on the Power hammer Page. "The Little Giant Book" by Kern, and the Dave Manzer video tape on tuning up Little Giants. Any LG owner should have both. We sell the video and Centaur Forge sells the book. |
| - guru - Friday, 12/14/01 08:01:43 GMT |
|
thanks for the info earlier. By the term 'functional', it means that I wish it to be durable and not just some dull-edged decorate piece of metal. A friend and I made a wager to see who could make the better sword, so I came here for advice. (For clarity's sake, no.. I'm not a blood-thristy murderer....) Thanks. (Also.. a wakizashi is a type of short oriental blade.... I guess you could call it a 'mini-katana'... even though it really isnt one.) |
| - Keith - Friday, 12/14/01 13:47:38 GMT |
|
old welder: give it a good sniff. If it has not had a big fire inside in the electronics, good chance it's okay-- ten years ago or so I spotted an old monster (c. 1972)Miller DialArc over in a corner of the junkyard. Got it for $100. It had a short deep inside where something had touched one of the brass rods that carry the shunt. Miller's fabulous tech support and parts people did not bat an eye, none of this "Take it to the dealer," or "Take it to a shop," or "Forget it, it's too old." Just pure generous help. They supplied schematics, and the few new parts needed. The machine has earned me many thousands of dollars in return for the salvage effort. If the Hobart is free, what can you lose? Yrs. in well-smitten smiting, Miles Undercut, actibg provost, Cracked Anvil Center for Analysis |
| miles undercut - Friday, 12/14/01 15:54:43 GMT |
|
Japanese Sword Types, FYI. Not pretending to be a blade expert, I got out my "bible" of Japanese swords, "Nippon-To: Art Swords of Japan", Japan Society,Inc., ISBN # 0-913304-05-0. Herewith, I give lengths of four sword types, but it is much more involved than that. Other considerations are: age, shape & curvature, how carried on girdle, thickness, tang style, tang signature, forge welding & hardening patterns, etc. On page 59 under "Glossary", we have: Tachi, a curved blade longer than 60cm (ca. 24" up to 50+") worn cutting edge downward; Katana, a curved blade longer than 60cm (ca. 24" up to 36+") worn cutting edge upward; Wakizashi, a blade between 30cm and 60cm (between ca. 12" and ca. 24"), worn along with the Katana from about 1400A.D. to 1868A.D.; Tanto, a dagger of short blade less than 30cm (ca. 12" in length}. |
| Frank Turley - Friday, 12/14/01 15:57:56 GMT |
|
Just a tad more on that old welder: even if it works, you'll still maybe need leads, which come high for No. 1 or No. 2 and you'll need clamps, for the ground and the stinger. Maybe new sockets and plugs, too-- often the cause of a feeble jolt. Ditto perhaps an engine overhaul: puny RPMs means puny juice. There's no free lunch. p.s. Cracked sends his Christmas greetings from deep within the forge, where he continues, he says to labor with Chastity, Yummi and Swarf on the "riveting machine." His thought for the holiday season and the coming new year: get the money in front. Yrs. in well-smitten smiting, etc. |
| miles undercut - Friday, 12/14/01 16:28:50 GMT |
|
Swords: Keith, Then you are making a reproduction, work of art or a collectors piece. In any case it is designed to be pretty and hang on the wall looking very dangerous. As Olle pointed out the width is out of proportion for the style. "Quality" is often as much the proportion, balance and design as well as the materials. If you are not an accomplished designer then it is best to stick to the standards set by the thousands of years of form follows function and many decerning eyes of truely great makers. There are many books on arms and armor that have nothing but the finest (museum quality) examples. If I were trying to make "the best" I would start there. Do not go by the current crop of "reproduction" or fantasy swords on the market. Most are awful things, designed for young men hopped up on testosterone that have no clue about good design or quality. I saw some the other day that the hammon line (one mark of a quality Japanese katana) was faked by wire brushing the edge of the stainless blade. Just the fact that the wire brush cut the steel the way it did was and indication that the blade was soft and designed as a cheap movie prop or wall hanger. It had nothing to do with the highly technical heat treating and careful polishing that produces a true hammon line. Taking a standard design and then adding your own touches can go a long way. Many modern techniques produce better products than the originals. Silver soldering guards so that they are tight and strengthen the blade is a great modern improvement. Bedding grips in epoxy also assures a durable product. And no matter what myths you have heard, modern steels far surpass any that were available to the ancient makers. But your definition of "functional" is still questionable. Durable? Under what circumstances? The most "durable" blade that is going to hang on the wall is one made of stainless or that is plated (chrome - silver) to prevent tarnish or rust. The most durable blade for mock battle and sword play is one with very dull rounded edges. Thin sharp edges chip and cut into each other. After a few edge to edge blows they are a ragged mess. Do not believe what Hollywood has led you to believe. THEY use dull rounded soft blades for ALL the action. Sharp edges are only shown in close ups and posed situations, NEVER in fights. Someone was trying to argue that the "sound" the "ring" of the blade was an indication of its hardness. All THAT is faked in movies too! Check out the DVD versions of movies like Highlander End Game where they have information about making the movie. In the unedited scenes the blades go clunk and thwack. No ring, no crescendo, no sparks. . . very dull and unexciting. But that is the reality of "functional" blades. |
| - guru - Friday, 12/14/01 17:11:31 GMT |
|
Hello, I have just built a coal forge and was wondering if there is an optimum height that the hood should be placed above the forge? Thanks |
| Dan - Friday, 12/14/01 17:37:47 GMT |
|
Dan, Wherever it draws the smoke the best! Every building will be slightly different, so there can't really be a "optimum" height. Also, side draft hoods draw MUCH better than hoods above the forge. I believe that there are plans on the i-Forge page for them. Happy Smithing!! |
| - Mike Roth - Friday, 12/14/01 17:54:05 GMT |
|
Hoods: Dan, The closer the better. The further away a hood if from the fire the more cold air that is sucked in from around the hood. The more cold air there is in the flue the less efficeint it is. Side draft "hoods" that are actualy next to the fire (immediately above the forge edge) work well because they are close to the fire and have a small opening. The smaller the opening the less cold air and the better the system works. Over head hoods work poorly unless they have huge stacks. The bigger the hood the bigger the stack. Forges that are enclosed by the "hood" like truck forges and have a relatively small opening also work well. One type of coal forge hood uses telescoping flue pipes and the hood is counter balanced on cables. The hood can be raised and lowered as needed. However, you must be careful NOT to lower the hood onto a dieing fire and leave it. This will produce an uncontrolled natural draft through the blower and fire. I have a big cast iron forge that the fire pot and middle of the forge was completely burned out this way (by the previous owner). Check out the drawings of side draft hoods on our plans page. These set on the edge of the forge next to the fire. The advantage to them (besides the fact they work well) is that three sides of the fire is open as well as overhead. |
| - guru - Friday, 12/14/01 18:04:15 GMT |
|
I just wanted to share my joy: The miners that supply my only coal-source must have hit a new seam. The last half-ton wasn�t the usual rock-hard antracite. It�s still rather hard coal, but it cokes, and it burns like gunpowder. I�ve even had to throttle back on the blower. Yipee! |
| - Olle Andersson - Friday, 12/14/01 18:23:23 GMT |
|
Keith; if you are trying to make a "better" sword 3.5" is not the way to go if "better" includes being able to actually fight with it. Historically there were few blades made that way, the falchion and the cinquida (sp) come to mind. Your blade sounds a bit like something in Anime (sp) if so it's *not* a good design---just one easy to draw.... Thomas |
| - Thomas Powers - Friday, 12/14/01 19:06:30 GMT |
|
I see. Let's see if I can explain myself better this time around. When I mean 'functional', I don't mean deadly or something use to sever limbs. What I am going for will not be used for any kind of combat, mock battles, etc. either. Functional in this sense would mean that it wouldn't break under a little bit of pressure or it would rust, etc. It also would be sharp. Like a sword should be. Not dull. I know that a weapon's value is not relied upon its edge, but moreso on how well it was crafted. I know that decorative would be sharp to the human touch, but the fact that it is not good 'quality' as I can make possible seems almost like a waste of time to me. I have known some swords that would chip when dropped. They may have just been made poorly, I don't know. Just a little accident ruined it, and taht isnt very appealing. I hope that helps a bit, I always seem to have a problem explaining myself. To try and make a blade like I want, it wouldn't be possible to do it alone. I am very new to this idea, and I only know a little. A good buddy of mine has a decent amount of experince in this 'trade', I guess you could say, and he will help me. However, he will only teach me and correct me, he will not make it for me. I must design and gather materials for myself. He has plenty of scrap metal for me to learn the basics before I start everything, so I doubt I will end up failing too horribly. So, if I create something that could be used way back then, then I have something to be proud of. I realize that they make take a good deal of time to even get close to some of your skills, but I am a very patient man. If needed, I will see if I can give an explanation of what I am going for or scan the design in my next post. It seems that have actually mislead you a bit. My apoligies. |
| - Keith - Friday, 12/14/01 20:23:21 GMT |
|
And I just noticed something else. I wrote, "When I mean 'functional', I don't mean deadly or something use to sever limbs. What I am going for will not be used for any kind of combat, mock battles, etc. either. Functional in this sense would mean that it wouldn't break under a little bit of pressure or it would rust, etc. It also would be sharp. Like a sword should be." Thats kinda contradictory, it would seem, a hammer can be deadly if used properly. I cant really explain myself. Sort a like I wouldnt use it for any type of fighting, but it wouldnt break if was used to do so. I am probably confusing everyone, and I am new to this. Maybe I should just rethink the whole idea of making a blade. |
| - Keith - Friday, 12/14/01 20:28:28 GMT |
|
Good Coal. . Olle, BUY MORE WHILE YOU CAN! It IS amazing the differences in coal. Most don't believe it until they get some "good stuff". |
| - guru - Friday, 12/14/01 20:43:53 GMT |
|
Keith, Well, it seems that you know what you want. I may have gone overboard. But we get a LOT of kids here with a gleam in their eye that first say "I've never made anything in my life" and the next is "I want to make a sword". . . and probably want it explained in 25 words or less. Making a "good" blade of any type takes knowledge of metals and heat treating as well as attention to details in everything from design to polishing. In fancier work it is also a multi-disciplined art. Most museum pieces were made by several specialists. The smith and heat treater, the grinder, the engraver. And a specialist, probably the designer may have fitted all the pieces together. For one person to do it all takes a lot of skill and study. |
| - guru - Friday, 12/14/01 20:53:22 GMT |
|
keith what you seem to want is a sword capable of use in the classic sense. I have made this type of sword for kung Fu draw cut compations. if that is what you want I would sigest that you start with a provein design (drawing your proportions from a clasic sword) and only increase those in the area of the tang. As to the steel go with 5160 this aloy is desinged to do most of the things a good sword should do when you have finshed the blade (shaped and polished) bring it to a heat treater and have them do the hardining and tempering. ask them to bring the blade to a RC 50-55 or so depending on the design. as the guru said epoxy the handle and a tight fitting/soldered gard are a must.use only new steel (untempered) or you will have to heat flaten and normalise the materal. MP |
| MP - Friday, 12/14/01 21:09:55 GMT |
|
Let me make a point, if I may. I have a friend who collects "de-milled" weapons. Hand guns, rifles, etc. He has a couple of dozen hanging on the wall of his den. Most useless dam* thing I can imagine. I have had guns hanging on my wall in the past. None of them were "de-milled", every one worked, and most were fully loaded. I feel the same way about swords or knives. If you're going to hang it on the wall, hang one up there that you could use in an emregency if you absolutely had to. "wall hangers" as the guru calls them, are a waste of time and space. |
| Paw Paw Wilson - Friday, 12/14/01 22:46:27 GMT |
|
Another question gentlemen. I just came into posession of a large cast iron forge, complete with tuyere, clinker breaker and blower. The blower is electric and marked Buffalo Forge, but is built to be sparate from the forge. I haven't been able to find any markings on the forge itself. The forge table is about four feet long by three feet wide, solid cast iron, has a bolt in pot with clinker breaker. There is a dip in the rim on each side in line with the pot. One end has a cast in trough that appears to be a quench tray. The under side has four cast in threaded sockets that accept about an inch and a quarter pipe that serve as legs. I was told that this unit came from Claiborne Horse Farm here at Paris. The man that told me worked as farrier there for over twenty years. Any idea if this is a Buffalo forge and if so could you put a date to it? Thanks guys. |
| Larry - Saturday, 12/15/01 00:21:21 GMT |
|
On the IForge site, Bill Epps does a demo making a Tomahawk where he uses a drift punch to form the socket for the handle. I've e-mailed both Centaur Forge and Kayne and son trying to find the drift and matching handles, but neither one has responded. Do you know of another supplier where I can get what I need? Thanks. |
| Bob Harasim - Saturday, 12/15/01 00:36:25 GMT |
|
Does anyone know of any metal finishing process other that blueing or parkerizing for tool steel? Thanks |
| Tony - Saturday, 12/15/01 00:53:41 GMT |
|
My friend just gave me his pry bar to throw in the forge this weekend and straighten back out. It's a "Gorilla Bar" from Home Depot. Now, I'm thinkin', "Can I harden and temper this sucker if it's bent so 'easily'?". Should I try to color temp. this thing or just quench it at a low heat and hope my friend wears safety glasses the next time he uses it? |
| Rodriguez - Saturday, 12/15/01 01:26:04 GMT |
|
Larry, It's probably a Buffalo, but the date would be darn near impossible to determine. I have one about the same size, but this one has a side draft hood and hand crank blower. Bob, Check with Jere Kirkpatrick, http://www.saber.net/~jere |
| Paw+Paw+Wilson - Saturday, 12/15/01 01:28:51 GMT |
|
I'm looking for a hammer expert. I believe this is the place. I recently aquired a very strange hammer. Perhaps someone here can help me identify it. Looking down from the top it looks somewhat like a bowtie. From the side it is arched dropping about a quarter of an inch at each end. Face to face the head is about four and a half inches long. The faces are one and five eights square, very slightly crowned almost flat and show signs of being applied. The handle is six inches long and one and a half in diameter, although badly spilt was knife made and seems original. It is decorated on all four sides with an asterisk shaped punch. I do have digital pictures if someone would please have a look. |
| Chris Turley - Saturday, 12/15/01 02:34:23 GMT |
|
On the IForge site, Bill Epps does a demo where he makes a tomahawk. He uses a drift punch to size the hole for the handle. I've e-mailed both Centaur Forge and Kayne and Son looking for the drift and matching handles but neither has replied. Do you know of any other supplier that might have these? Thanks. |
| Bob Harasim - Saturday, 12/15/01 02:39:40 GMT |
|
Bob, Check with Jere Kirkpatrick of Valley Forge and Welding. http://www.saber.net/~jere/ Or you might check with Bill Epps, he could make you one. |
| Paw+Paw+Wilson - Saturday, 12/15/01 03:00:10 GMT |
|
Swords, Keith: Start by reading everything you can. Hit the library and hit the books! Don't forget the inter-library loan (ILL). Your local librarian has access to many other local and university libraries. Check out the reviews in the "Bookshelf" here at Anvilfire, especially Hrisoulis and Goddard, then follow up with other books by the authors. One of the best, hyperbole free, books on Japanese blades I have found is "The Craft of the Japanese Sword" by Leon and Hiroko Kapp, and Yoshindo Yoshihara (1987, 1990; LoC 86-45725; ISBN 0-87011-798-X), which will give you an appreciation of the complexity of the blade and the skill of the swordsmith. I cover some of this (once over, lightly) in my sword article in the Anvilfire "Armoury" section. After over 30 years of Medieval reenactment, the more I've used swords, the more I like my axe! AND with my axe I can cut kindling for a fire, joint an ox for a meal, and trim planks for repairing my ship! Blacksmithing Feature on NPR: Saturday and Sunday (I guess it repeats) the weekend edition of "All Things Considered" will have a feature on a Baltimore blacksmith shop in business for over (as I recall) 100 years. The local (D.C.) station broadcasts at 5:00 p.m., so I'll catch it one day or the other. Miles- Anyone you know? Visit your National Parks: www.nps.gov* * Please note. Due to a court order involving the Indian trust funds, the Department of the Interior, and all of it's bureaus, is presently off the net. You can't get in, we can't get out (at least from work). It's a long story, but you can probably read it in the papers. Go viking: www.wam.umd.edu/~eowyn/Longship/ (cASE sENSITIVE) |
| Bruce Blackistone (Atli) - Saturday, 12/15/01 04:17:03 GMT |
|
Swords-Further Note: Swordforum.com has a "Beginners" section that could prove useful. You should still hit the library, though. Ask 10 blacksmiths, get 10 answers. Ask 10 swordsmiths get 20 answers, two flames and a non sequitur. Good luck. Atli (yes, my daughter has two axes, but she wants a bigger one) Vathason |
| Bruce Blackistone (Atli) - Saturday, 12/15/01 04:51:55 GMT |
|
Bruce-- ununderstand your query: anyone I know re what? That 100-year smith in Balmer? Nope. Only Balmer smith I know lives in Colorado now. |
| miles undercut - Saturday, 12/15/01 04:57:47 GMT |
|
Old CI Forge Larry, It is probably a Buffalo forge. A few of these had the name stenciled on them originaly OR they figured that having it all over the blower was enough. Date of manufacture could be anywhere from 1890 to 1950 or so. |
| - guru - Saturday, 12/15/01 05:51:14 GMT |
|
Handles and eye drifts Bob, There are some folks around that make the drifts but I can never remember who. There is no real standard for these type handles (nor regular hammer handles that I know of). As a smith this is the kind of tool you normally make for yourself. The middle is the eye hole size and shape and the two ends taper to about half size. |
| - guru - Saturday, 12/15/01 05:56:49 GMT |
|
Odd Hammer Chris, Sounds like some type of raising hammer. Try koka metalsmiths Bill's online catalog has a large selection of that type hammer. Also check the Kayne and Son hammer page. If its not on either then e-mail me the photos. |
| - guru - Saturday, 12/15/01 06:10:59 GMT |
|
Pry bar Rodriguez, I have known smiths that made these things and most were made of 5160, forged and let air cool. 5160 is a bear to forge and is hard at a red heat. It rarely needs (or gets) heat treating for these type tools. On the other hand it could have accidently been made of annealed steel or (cheaper) lower carbon steel and needed overall heat treating. . . But not knowing the steel can make it tricky and you are talking about a LONG piece of steel. . . :( The safest thing to do in these litigious times is to just straighten the thing cold and tell your friend to get a bigger bar if he is going to do whatever he did to it again. . . I've bought used "Rail Road" bars that had more bends than a snake and just adjusted them in a hydraulic press until they looked like new. I couldn't figure out how they got that way until I watched a friend of mine turn a 1-1/2" hex jack hammer bit into a pretzel with his track hoe while trying to move something almost as heavy as the machine. There is abuse, then there is unbelievable abuse. . . |
| - guru - Saturday, 12/15/01 06:27:21 GMT |
|
Chris Turley - The hammer you just described sounds to me like a miner's "single jack" hammer. The short handle, arched top head and large faces suggest that to me. The top of the hammer was curved at approximately the radius of a man's forearm plus the length of the hammer to allow swinging it right next to the top of a stope (horizontal shaft) in a mine, star-drilling hard rock. On a side note, the term "balling the jack" comes from the same action...the jack, or drill, would become balled or mushroomed, after much hard pounding. One jobof old mine company smiths was to refurbish those drills by re-pointing and cleaning up the "balled" heads. |
| Rich Waugh - Saturday, 12/15/01 17:35:03 GMT |
|
Chris, Sorry, I missed your question, and Rich thank you for catching it. I think Rich has answered you, Chris. But if you'll send the pic to me, I'll double check. As it happens, I've spent time on a single and a double jack both. (wry grin) No, I wasn't making little ones out of big ones, I was working in a hard rock tunnel for my father-in-law to be. |
| Paw+Paw+Wilson - Saturday, 12/15/01 18:00:33 GMT |
|
I have a old lathe about 1920 vin.It needs new babbet in the head stock.Here is what Im going to do.Take the caps off,hoist spindle off,measure dia. of spindle,turn dummy spindle exactly same size and center drill end,carve out old babbet from caps and head stock, install shaft using tail stock for location on one end(Im going to come up with something for the other end im not sure what),shim caps .010"bolt em down,dam up the ends(whith what im not sure),melt down old Babbet and throw in X-tra,preheat every thing,and pour down oil holes ,shave off xtra .??? am I even close? Please advise.This is a nice old machine I have had in my shop for years.Its time to put it to use or find it a good home.(it really belongs in a musemem)Or trade it for a newer bench top lathe.Any ideas?Thank you. |
| Dirty Dan - Saturday, 12/15/01 19:12:05 GMT |
|
Dan, I'll let the guru handle the advise about HOW to repair it, but for God's sake, don't get rid of it! NOTHING you can buy today for any reasonable price at all will even come CLOSE to what you've already got. |
| Paw+Paw+Wilson - Saturday, 12/15/01 19:20:46 GMT |
|
Chris's Odd Hammer: Here it is. Click for larger image.  |
| - guru - Saturday, 12/15/01 19:23:19 GMT |
|
Old lathe: Dan, A friend of mine did the exact same thing on a huge 5 foot lathe. First consideration is, are they babbit bearings? My 1915 Southbend has split bronze bearings. My Dad's 1930 Southbend toolroom lathe has narrow cast iron lands that the hard shaft runs on. Both of these require careful dressing of bearings and or caps and shimming to within 0.0005" or less. Some ideas. On Many old lathes the head stock can be unbolted and slid up the ways. Sometimes they are pined in place so look for that hidden pin. IF the ways are in good condition and long enough you can then use your steady rest (back where the head stock normaly sits) to support the shaft back end. Adjust the dummy shaft with the center supporting the far end by using a dial indicator on the carriage to make it parallel to the ways on both the horizontal and vertical axis. If you use heavy bungy cords to hold the shaft against the center it will save a lot of aggravation. Don't forget to make a shim stack for the bearing caps before pouring the babbit. You might also want to pour the babbit a little undersize and hand scrape to fit. IF it has babbit, originaly the babbit was probably line reamed. AND. . . don't forget that tail stocks are adjustable right to left and also need to be shimmed UP when the base gets worn. That old center might be a good reference point but then it COULD be out of adjustment. . Big project but definitely worth while. I like these old machines. When in working condition they are MUCH better than most of the new machiines. And they have much more class. |
| - guru - Saturday, 12/15/01 19:54:13 GMT |
|
Guru///..Thank you for the fast reply.Yes to babbet bearings(at least it looks like babbet to me) I like the idea of unbolt an scooch and use s-rest.Indicator is a must do.Bungy cord another good thing.This lathe is aprox.12"x40" Lodge and Shipley.Regarding shim stack, .010 ok? How far undersize would you make shaft? |
| Dirty Dan - Saturday, 12/15/01 21:00:36 GMT |
|
Chris, Old fashioned, hand made, single jack. Rich nailed it! (sorry, grin) Looks like the asterisks form a crude Big Dipper and North Star, long the symbol of Alaska. |
| Paw+Paw+Wilson - Saturday, 12/15/01 21:12:24 GMT |
|
RE: Welding wire: flux core or not? I've been smithing for about 2 years now with a Forgemaster Blacksmith's model propane forge. Using coal in my neighborhood could be a problem. Anyway I find forge welding darn near impossible on the propane forge, and the flux (borax) quickly ruins the firebrick bottom in the forge. So I use a Millermatic 130 (120VAC) wire feed welder with great success so far - I love the thing and given my stuff usually involves smaller items, I have yet to "need" something with higher voltages or service duty. So far I have only used flux core wire, but I see many others use C02 shield gas with non-flux wire. What are the ups-and-downs of flux cored versus shield gas for smaller ornimental forged pieces? Yes the residue over the weld needs to be chipped or wirebrushed off, but are there other reasons for shield gas over flux core wire? Oh yeah, since my welds are usually only 20-30 seconds in length, I can generally avoid breathing the flux vapors. I find a fan running behind me helps direct the fumes away too. Gary |
| Gary - Saturday, 12/15/01 21:31:33 GMT |
|
Undersizing Dan, there are two ways to do babbit bearings as I am sure you are aware. On-size with a matching arbor OR the original shaft. Undersize to scrape, machine or ream. Babbit is relatively easy to hand scrape. 0.010-0.015" is not much to take off BUT the more you hand scrape the more likely it is to lose your hand alignment. Not only are you scraping to fit but also to align in this case. So the less the better. What you want is to take off just enough to provide a very smooth, perfect fit. If you are not very patient I would go for the poured to size. I've only hand scraped bearings once. They were huge hydro turbine bearings 8" diameter and two feet long. The fit was not critical but the shaft had a terrible taper worn in it and it could not be removed and remachined economicaly. We step machined the taper and then hand scraped using a trial and error fit. The conditions to test fit were terible and no blueing could be done. The bearing shells weighed maybe 300-400 pounds each and had to be bolted together down in a hole and lowered onto the fit. We just kept scraping high spots indicated by scratches or compression marks until it fully seated. It was not a great job but it worked. We removed some 20-30 pounds of babbit by hand using hand made scrapers and burnishers (see our iForge article on scrapers). I'm sure there is a book somewhere covering the right way to do it. We just did what I knew how to do from years of carving, sculpture and autobody work making flat smooth surfaces. The shim stack doesn't need to be much. 0.010" is probably plenty since what you are looking for is fine adjustment. Remove a 0.0025 and replace with a 0.0020. . . That type of thing. When you take it apart you may find shims already. Is the thrust bearing cast as part of the rear bearing or seperate? On my Southbend is is part of the rear bearing. On other lathes it may be a ball thrust bearing. I shortened and replaced the plain bearing on my Southbend with a ball thrust bearing because the plain bearing would get very hot when axial pressure was applied for operations like friction driving. Lodge and Shiply made GREAT machines. Prided themselves in making the BEST and were in head to head competition with the American Pacemaker. My Dad worked for them in the early 1950's redesigning the carriage for tapered gibs. |
| - guru - Saturday, 12/15/01 22:10:35 GMT |
|
Thanks again. Last things first. I have spent time running American lathes and they are a fine product-a brute of a lathe. I will take your advice and go 5 under on the dummy shaft and will scape to fit--ouch. I'm not really comfortable scraping but I will take the high spots off as necessary. (the babbit will shrink a bit, right?) I believe the thrust bearing is part of the rear bearing and is not separate, so this might lead to more complications. I will work it out when I get there. I realize that this thrust bearing is very important as this machine will do drilling operations that my humble J-head bridgeport will never do. Question: Should I preheat the dummy shaft also and put something on it so it doesn't stick. Also, how hot should I get the head stock area. My dad's 12th edition machinery handbook has information of pouring temperature of babbit but not the stuff you're pouring it into. Hope to hear from you, Dirty Dan Slag City Wisconsin |
| Dirty Dan - Saturday, 12/15/01 23:04:26 GMT |
|
Thanks for the info on the cast iron forge, Guru and Paw Paw. I suspect it was a complete unit. Might have to brush a little rust and see if there are anymore markings. Gary As for the flux core vs. solid wire mig question, I vote you get a gas conversion kit. Solid core wire and inert gas shielding seems to lay a prettier and cleaner weld. No flux to crack and brush, also much smoother surface on the finished weld. Add to this better penetration and wider bead. My son just bought a 120 volt Hobart with flux core and we are going to get the kit very soon. Another thing to keep in mind is the ground polarity. I recently found that the polarity is reversed when changing from flux core to solid. Told a friend who has a flux core machine, but could never get a good weld. He reversed the ground and now he says it welds great. We live and learn. |
| Larry - Saturday, 12/15/01 23:28:44 GMT |
|
|
|
|