| |
 |
|
|
|
-GURU
ANVILFIRE
|
|
Tonights demo is the second in our new format. The subject Collaring was suggested by Ralph Douglas this afternoon and is another in our series of basics.
The "room" has been tweeked a little. Refresh should work better. It will refresh every 40 seconds and immediately after you post. Please DO NOT use "POST" to refesh the demo.
|
|
|

Figure 1 |
To make seamless collars, measure the length to collar then add one thickness of the collar material to the length.
Forge both ends of the collar to a gentle taper as shown. Forge the first bend then clamp and bend to fit.
|
|
|
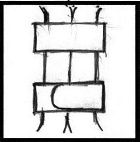
Figure 2 |
There is a "front" and "back" to this but the joint is almost invisible. It is not so sensitive to length as a butt joint and is less suseptable to opening under high stress.
|
|
|
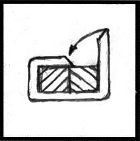
Figure 5 |
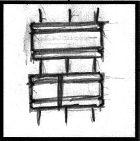
Figure 6 |
|
|
-GURU
ANVILFIRE
|
|
Normal butt joint collars can be improved by cutting the ends at a 45° angle.
These require a trial fit and have a little of the overlapping advantage but can be used better with decorative or incised collars.
|
|
|
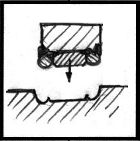
Figure 7 |
Dies for hand or power use can be easily made using a built up "master" as shown. Rounds, squares on edge. . . Weld these up and sink them into a heated piece of steel. For low production mild steel works. For making 500 or more up to thousands it would be best to use some type of tool steel.
|
|
|
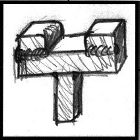
Figure 8 |
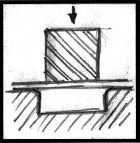
Figure 9 |
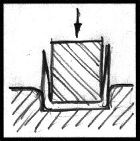
Figure 10 |
|
-GURU
ANVILFIRE
|
|
To prebend collars for a big job simple hot bending dies can be made as above. They can be forged or welded. I like to tack weld then together for a test in the event they are too tight or too loose
|
|
|
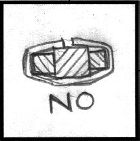
Figure 11 |
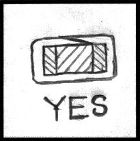
Figure 12 |
|
|
-GURU
ANVILFIRE
|
|
The above is common sense but something to think about when designing a piece. The side parts are scrolls on a pickett. The scrolls are normally smaller material than the pickett. It needs to be either the same width material OR is can be flattened and widened where it meets the pickett in a gentle taper. This is an expense (in time, effort) so it need to be considered. Occasionaly rectangular stock can be obtained that works but double check on the availability.
|
|
|
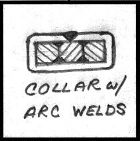
Figure 13 |
A not so traditional method that I have used is dressed welds under the collar and arc welding and dressing the collar. In this case I leave a 1/16" (2mm) gap at the butt joint. If welded when clamped tight it gets a LOT tighter when it shrinks.
|
|
|
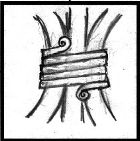
Figure 3 |
Another method of collaring is "wrapped" collars. They can be done with square or round bar. The ends can be tapered to blend in OR made into a decorative element. This one is 3/16 square stock with little scrolls on the ends.
|
|
-GURU
ANVILFIRE
|
|
Wrapped collars are made by guessing at the length, forging the ends then heating with a torch as your wrap. Done right, they are VERY tight. I clamp the starting end with Vise-Grips and work from there.
|
|
|
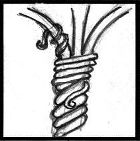
Figure 4 |
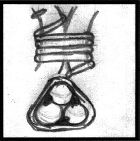
Figure 14 |
|
|
-GURU
ANVILFIRE
|
|
I usualy use round wrapping with round work and square with square. On round wrapping in something with a "vine" motif I put extra little curls on the ends and sometimes let the ends hang like vine tendrils.
|
|
-GURU
ANVILFIRE
|
|
On round stock I arc weld the joint and then use a wrapped collar to hide the weld and strengthen the piece. Rounds always have a place for welds when bundled unlike square stock.
|
|
-GURU
ANVILFIRE
|
|
Questions? or Suggestions?
|
|
cadn24
|
|
What thickness of steel do you usually use for the flat collars?
|
|
Jim C.
|
|
Fig. 10 easy to get scarfs reversed.
|
|
-GURU
ANVILFIRE
|
|
Thickness depends on the size work. 1/8" and 3/16" is common for "normal size work.
Jim, the surfaces should be flat tapers and the top/bottom don't matter. When installed hot they just merge right into each other.
|