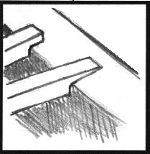
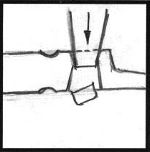
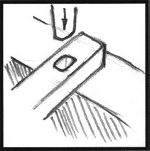
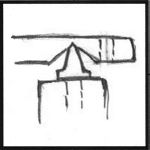
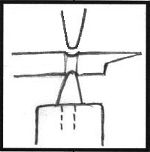
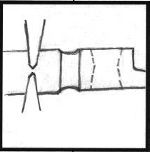
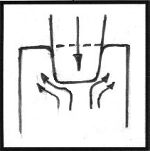
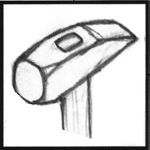
Claw and Plain Hammers

Demonstration by Jock Dempsey
April 18, 2001
 
-GURU
Tonight's demo is about making hammers. Hammers are made of tool steel 75 to 85 point is best but a lot of smith like S-7.

When making claw hammers I forge the claw first but don't split it. You want to split it later so you don't burn the sharp edges.

Forging claw hammers out of mild steel makes a good demonstration. Folks recognize what you are making and it goes pretty fast. But it helps to have a helper when doing it.
NHBlacksmith
great- I've been THINKING about making a hammer...Jock you must have read my mind.:)

Figure 1
I make a small claw hammer from 1" (25mm) square bar.

I start the claw by setting down about 1 to 1-1/2 times the material to about 1/2 the thickness. Then lift the bar and draw the claw out but not too sharp. There should be a good radius in the corner (old worn anvils work well here).

Figure 2
Fuller slightly between where the eye goes and the head.

Figure 3
After rough shaping the claw we punch the handle hole. Start from the top and punch about 2/3's way through with a tapered eye punch.

See iForge Punching Demo for details

-GURU
There is no standard to handles OR the eye punches to make the eye. Modern ones are oval shaped but early ones were rectangular. I like a rectangle with round corners. See our demo on punches for details.

Figure 4
Flip the part over and punch through at the dark (cooler place). On this type hole you may need to take a second heat. The fullering has defined where the eye goes so it is easy to line up.

Figure 5
The "biscuit" will punch through just before the punch reaches the old hole. Do not drive the punch too far. We want most of the taper to be from the top of the hole.

Figure 6
Cut the hammer off using a hot cut from each side until you reach the middle. Working all around with a thin cutter will produce a fairly flat cut with just enough "crown" for a hammer.

Figure 7
Now that there are no more big heats you want to shape the tip end of the claw split it using a large hot cut or a cold chisel.

Figure 8
Then using the remaining heat put a smooth curve into the claw. There are two styles. The standard hook and the straight claw which has a gentle curve. I prefer a straight claw but most carpenters hammers have the standard hook.

Figure 9
The head of the hammer gets the corners knocked off OR you can forge it round. Many early hammers did not have the fullering and that is the type I demonstrate for the "public"

When the hammer is finshed grind the face to a gentle crown and round the corners. Clean up the face and point of claw.

Figure 10
When making smithing hammers I prefer to make them on the end of a full bar like we did the claw hammer. The difference is that the pein will be forged in the middle of the bar. If a second hammer is made then it is made in reverse.

Figure 11
Agian we punch the hole. Punches for deep work should have the corners rounded and polished. The metal actualy flows around the corner and a smooth corner has less resistance.

Figure 12
After punching through if I don't have a drift to fit I often use the punch to dress the sides of the eye. Don't leave the punch in the hole too long or you will overheat it to the point of burning the handle and softening the punch.

Figure 13
After punching the hole I form the pien over the corner of the anvil. This can be single sided or double sided, straight, cross or diagonal.

Figure 14
Cut off using hot cut or hardy.

Figure 15
The face should have the corners knocked off (to suit) and the face crowned by grinding. Piens should also have the corners dressed to be more useful.

Figure 16
Hammer tongs are useful for the final work and heat treating. There was a set of these on ebay today.

The ends do not need to fit the eye hole tightly but you should fit them so they grip square for the size stock being worked.
-GURU
Comments, Questions?
DUNCHADH
Very nice will try one out as soon as I fix a forge.
RALPH
Thanks Jock! Good demo!
JIM C.
Guru, Do make a split in the stock before punching the eye hole?
-GURU
Jim, Not when making hammers.
MILT
I've found some old hammers with sloppy handle holes, oblong, round sided ---handles must stay loose ---- why is that? On purpose or just a quick sloppy job? Thanks.
-GURU
Just bad craftsmanship or being in a hurry.
MILT
Thanks for the demo & info.


iForge is an Andrew Hooper Production
HTML Copyright © 2000 Jock Dempsey, www.anvilfire.com
Webmaster email: webmaster@anvilfire.com

Page Counter     Back to iForge

GSC