The difference between a Junk Yard or hobby DIY built machine and a real professional machine are some of the detail touches.
Paint is often overlooked on a DIY machine or poorly done.
In our case one of the fine details is the built in switch box.
This is recessed between two of the pass through ribs and the tool hanger bars protecting it from damage.
The box is also larger than typical switch boxes making it much easier to wire the heavy duty manual switches used.
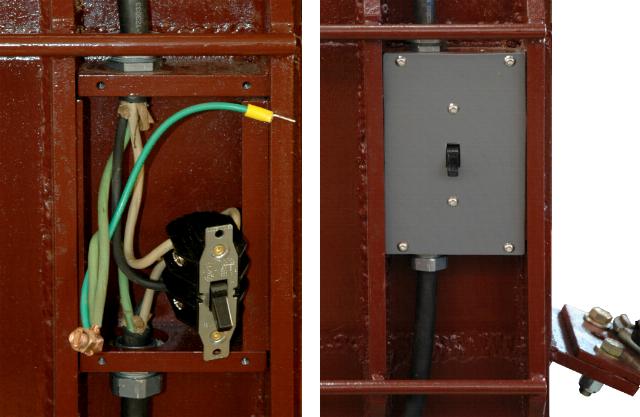
Typical switch boxes are very tight.
This one allowed plenty of room for a split bolt to bind the ground wires (shown before taping).
The ground (green wire at top) is anchored under a screw in the top plate of the box.
To insulate the split bolt joining the grounds it was wrapped with a small amount of self vulcanizing rubber tape then regular electrical tape.
Stainless button head screws and compression fittings make a neat job of it.
The same #10-32 screws also hold the ram guide retainer plates and the frame fill covers.
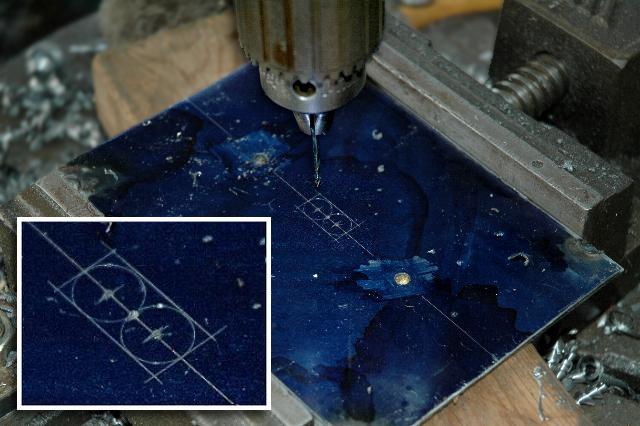
The cover for this box required that it be hand made to fit.
The switch was measured, the cover carefully laid out using layout bluing and a scriber.
Holes were pilot drilled with a small drill to assure the larger drill hit is mark.
The rectangular switch hole was finished with a file.
Parts like these can be quickly and economically made from a scale CAD drawing and cut by water jet or LASER.
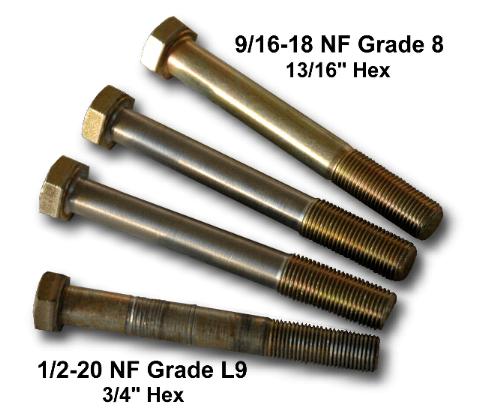
Late in the job we had a stripped spring tensioning bolt hole in the ram.
It was decided to thread the hole one size larger which in this case was the rarely found 9/16" thread.
In order for the bolt to work properly it needed to thread into the ram deeper than its threads would allow.
So the shanks of the 9/16" bolts were turned down to 1/2", the original bolt size.
Bolts with the shanks reduced to the thread root diameter is a common practice on highly stressed bolts as it removes the stress concentration at the end of the threads.
So we get a stronger bolt and the ability to thread it into a deep hole.
Four bolts were modified and both rams redrilled and taped. Details, details. . .
MORE BOLT FAILURES:
Summer 2017: After a couple years of ocassional use the upper right spring bolts started loosening and then the X1b's stripped out.
We are not sure why the right side and not both.
There were two repair options. Use the longer X2 rocker parts with two bolts OR drill out the ram for a special stud.
We have opted for a the easier method, using a special stud with a 5/8-11 thread in the ram turned down to 1/2" to fit the rocker and spring.
If this fails it is easy enough to repair.
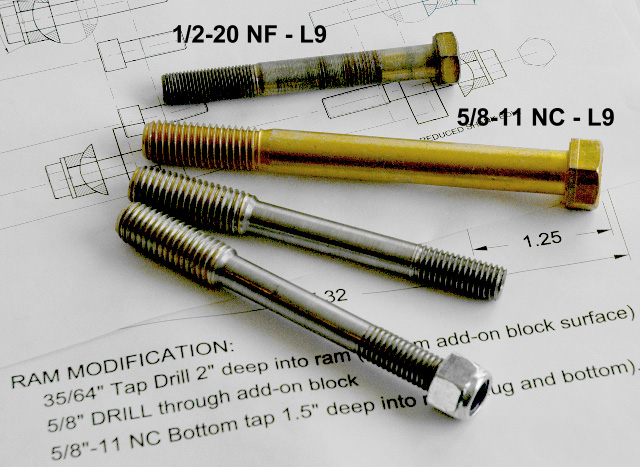
This modification required removing the rams AGAIN and drilling and taping larger holes again. . .
This time we've gone to coarse threads on both ends. November 2018.
I had designed the X2 rams with with a long rocker design that takes two bolts on each side of the spring but now I am thinking that we need a heavier spring AND heavier bolts.
I think I had looked and sourcing the spring was a problem. . . will have to get back to it.
This has been the only failure on the hammers despite being used to forge 2" square table legs, thin bird wings using the crown dies and doing cold texturing (hard on the hammer).


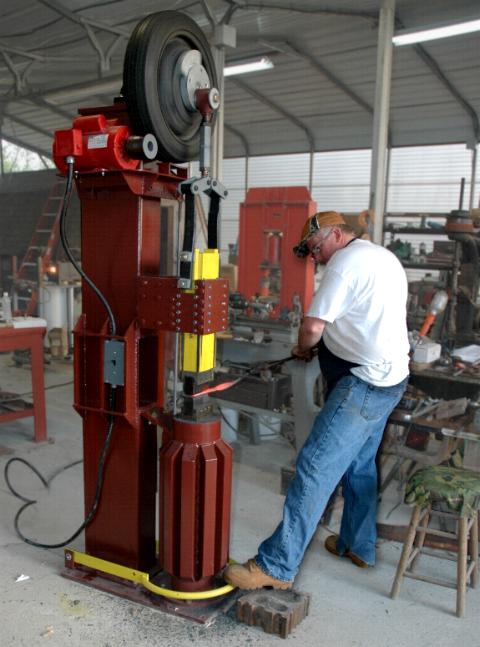
In our case one of the fine details is the built in switch box. This is recessed between two of the pass through ribs and the tool hanger bars protecting it from damage. The box is also larger than typical switch boxes making it much easier to wire the heavy duty manual switches used.

Typical switch boxes are very tight. This one allowed plenty of room for a split bolt to bind the ground wires (shown before taping). The ground (green wire at top) is anchored under a screw in the top plate of the box. To insulate the split bolt joining the grounds it was wrapped with a small amount of self vulcanizing rubber tape then regular electrical tape.
Stainless button head screws and compression fittings make a neat job of it. The same #10-32 screws also hold the ram guide retainer plates and the frame fill covers.
The cover for this box required that it be hand made to fit. The switch was measured, the cover carefully laid out using layout bluing and a scriber. Holes were pilot drilled with a small drill to assure the larger drill hit is mark. The rectangular switch hole was finished with a file.
Parts like these can be quickly and economically made from a scale CAD drawing and cut by water jet or LASER.
Bolts with the shanks reduced to the thread root diameter is a common practice on highly stressed bolts as it removes the stress concentration at the end of the threads. So we get a stronger bolt and the ability to thread it into a deep hole.
Four bolts were modified and both rams redrilled and taped. Details, details. . .
MORE BOLT FAILURES: Summer 2017: After a couple years of ocassional use the upper right spring bolts started loosening and then the X1b's stripped out. We are not sure why the right side and not both.
There were two repair options. Use the longer X2 rocker parts with two bolts OR drill out the ram for a special stud. We have opted for a the easier method, using a special stud with a 5/8-11 thread in the ram turned down to 1/2" to fit the rocker and spring. If this fails it is easy enough to repair.
This modification required removing the rams AGAIN and drilling and taping larger holes again. . . This time we've gone to coarse threads on both ends. November 2018.
I had designed the X2 rams with with a long rocker design that takes two bolts on each side of the spring but now I am thinking that we need a heavier spring AND heavier bolts. I think I had looked and sourcing the spring was a problem. . . will have to get back to it.
This has been the only failure on the hammers despite being used to forge 2" square table legs, thin bird wings using the crown dies and doing cold texturing (hard on the hammer).